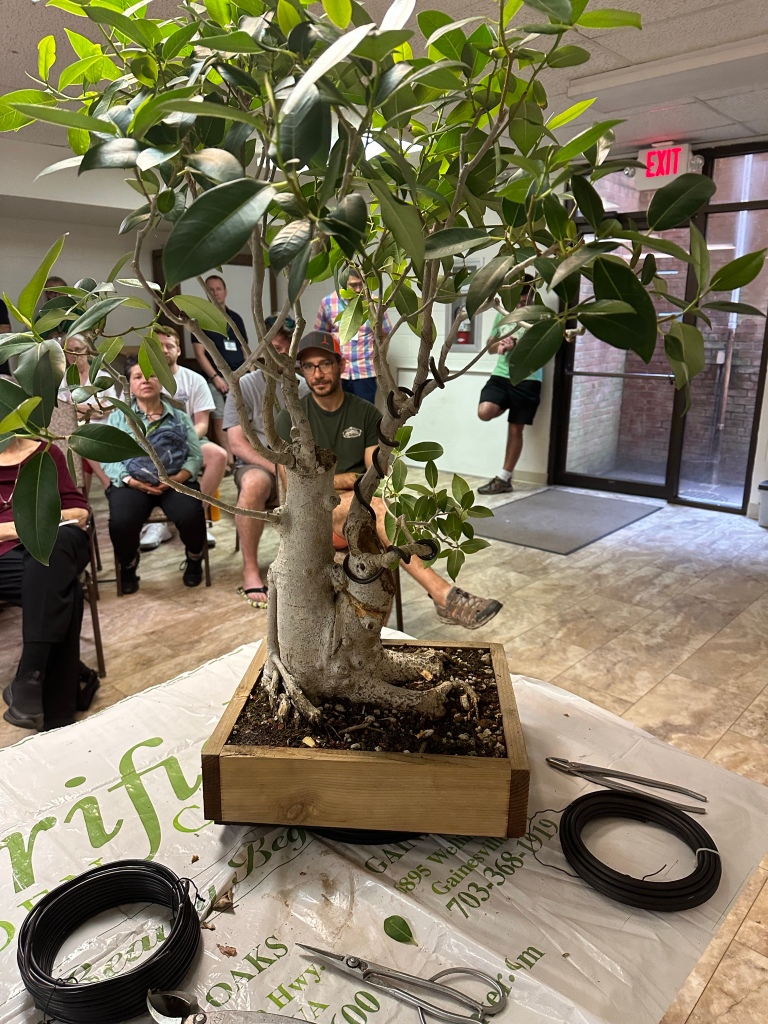
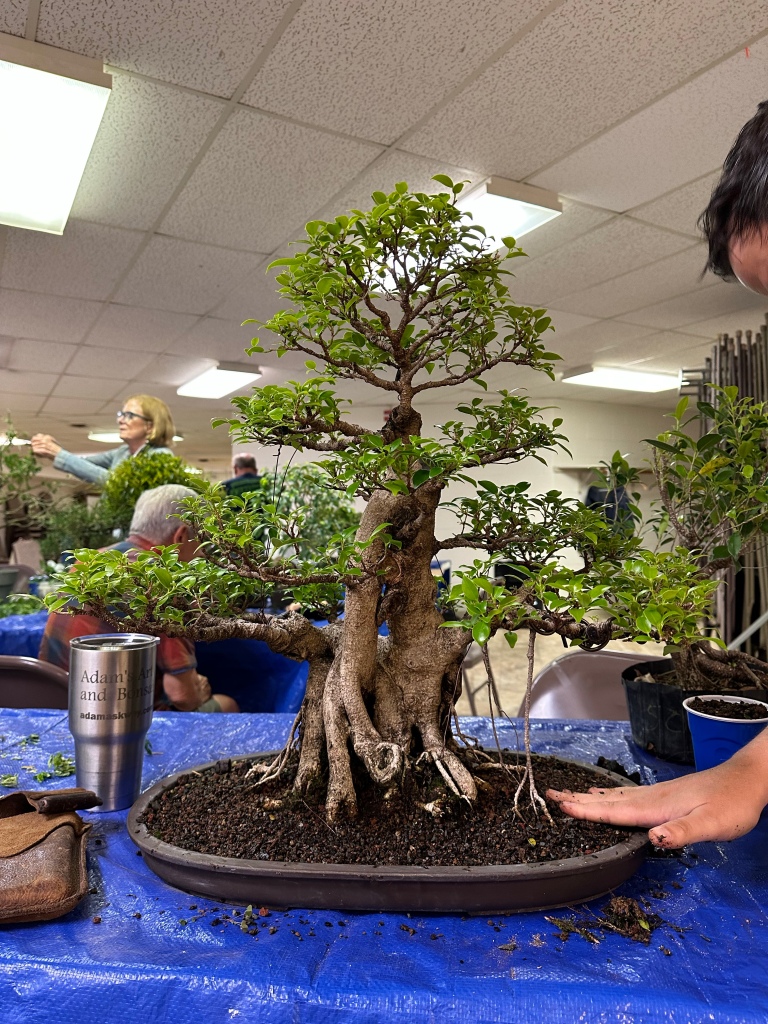
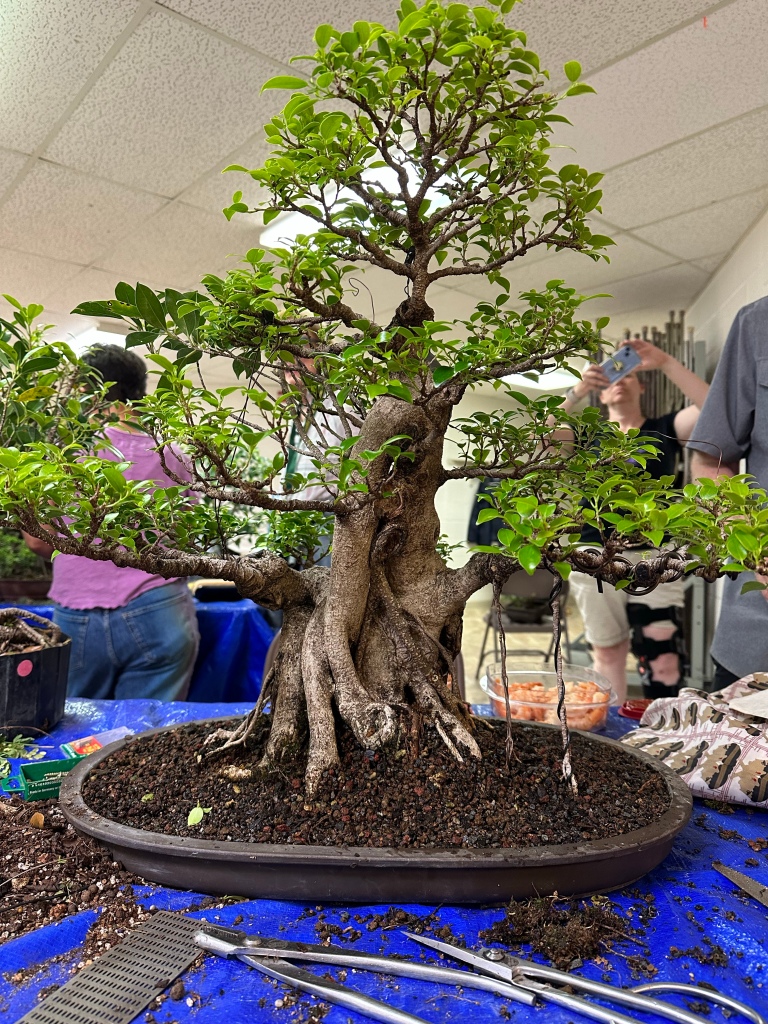
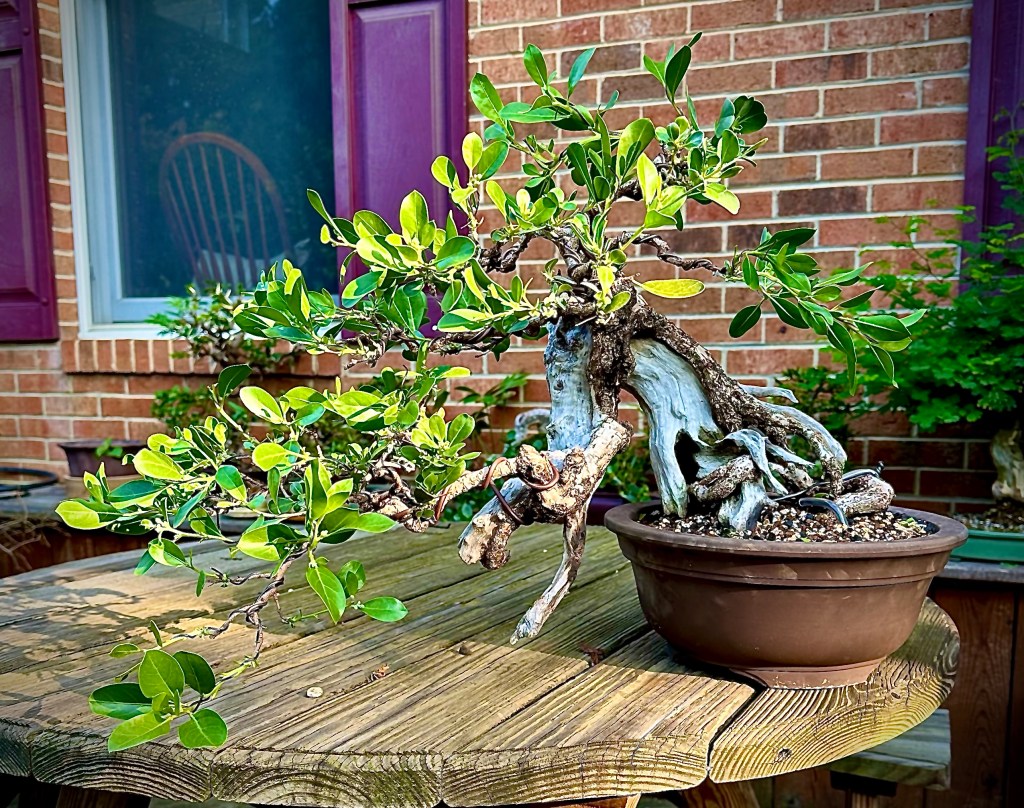
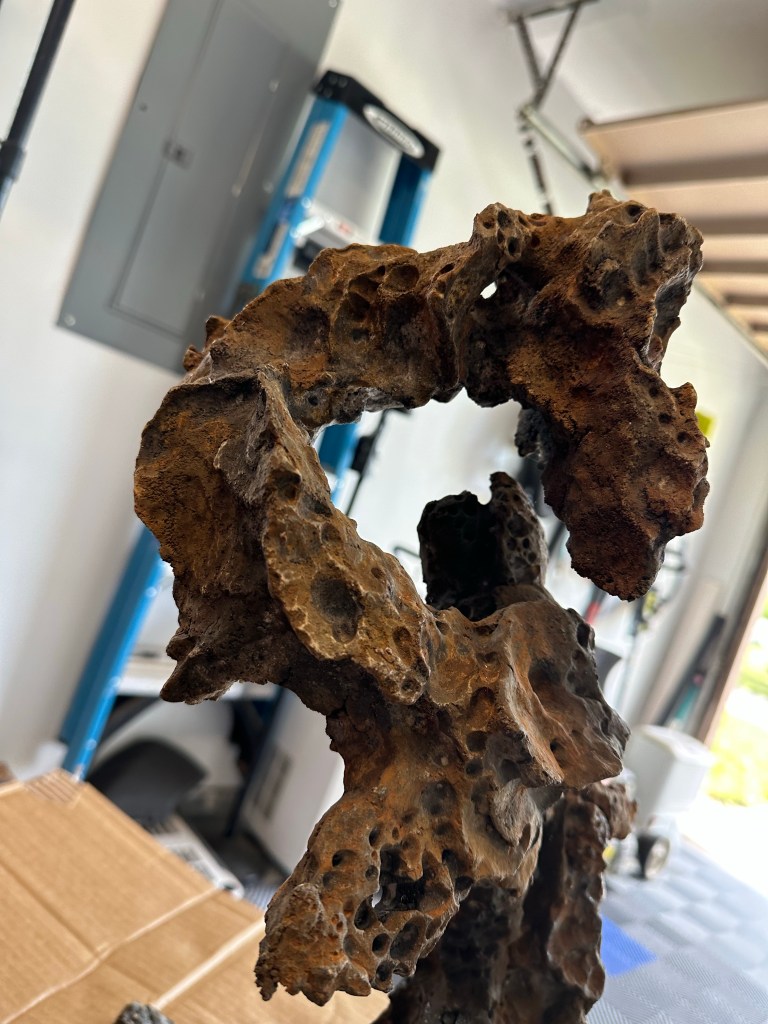
Reading view

Janice’s Buttonwood

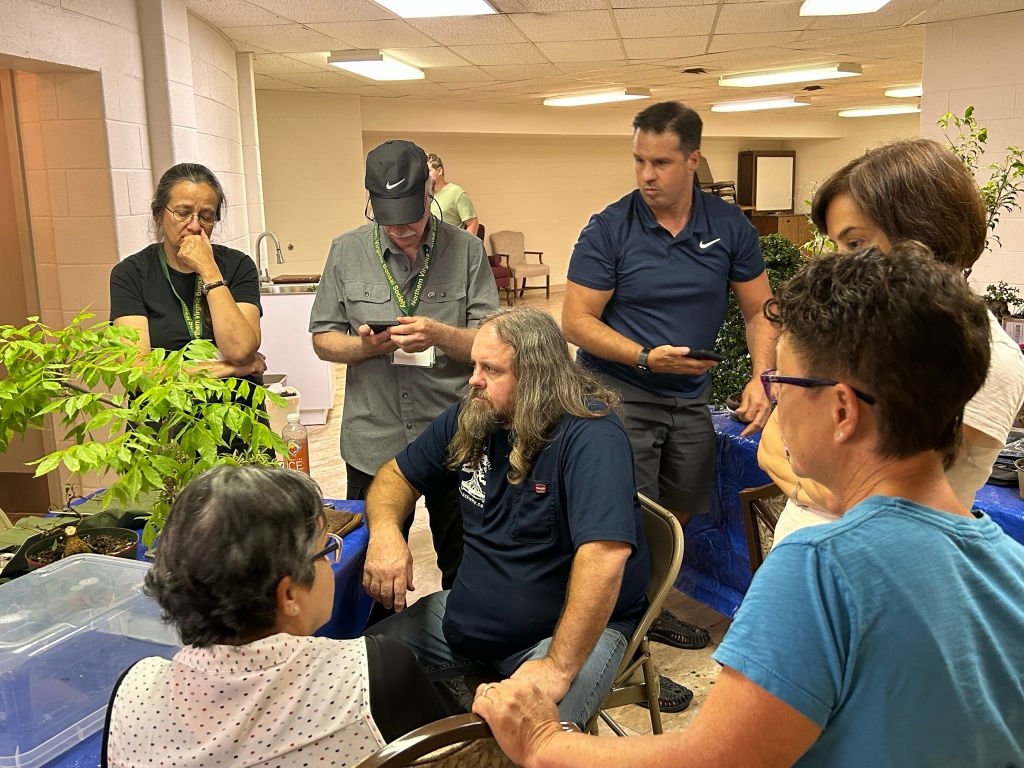
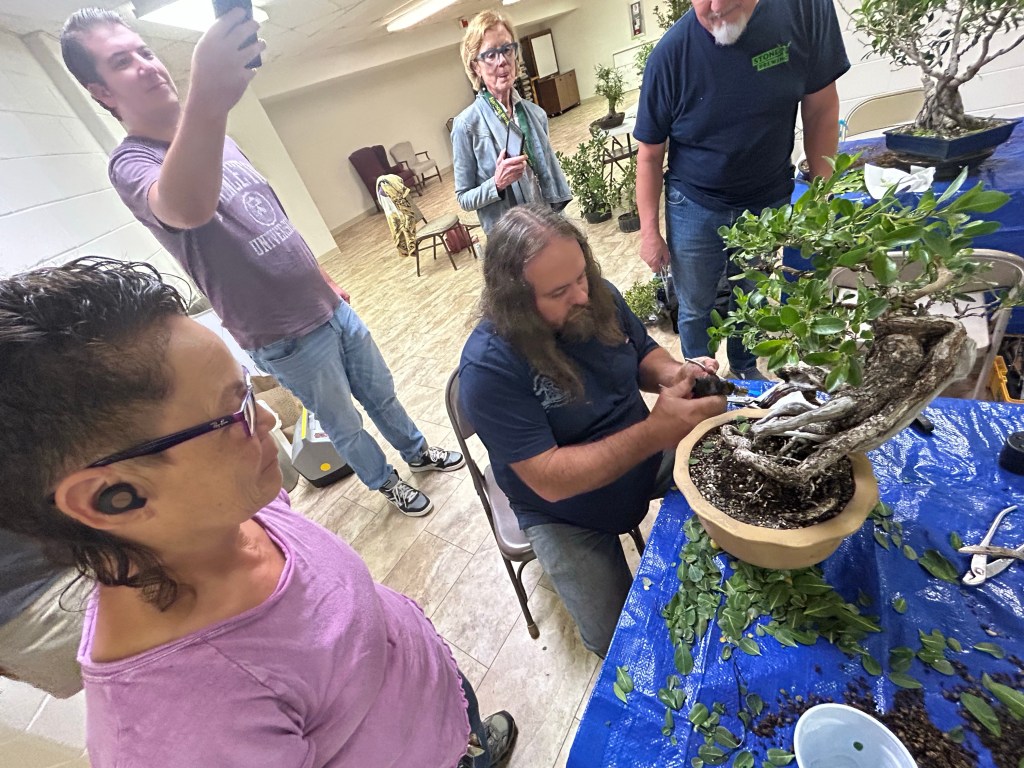
This is Janice’s buttonwood. You’ve seen it before in the post Who doesn’t have a buttonwood in Florida from a few years ago. Since then, it was shown in the 2021 Bonsai Societies of Florida annual convention, and its just gotten better. Janice found a new pot for it at this year’s BSF convention (2022) and that’ll be the main work today.

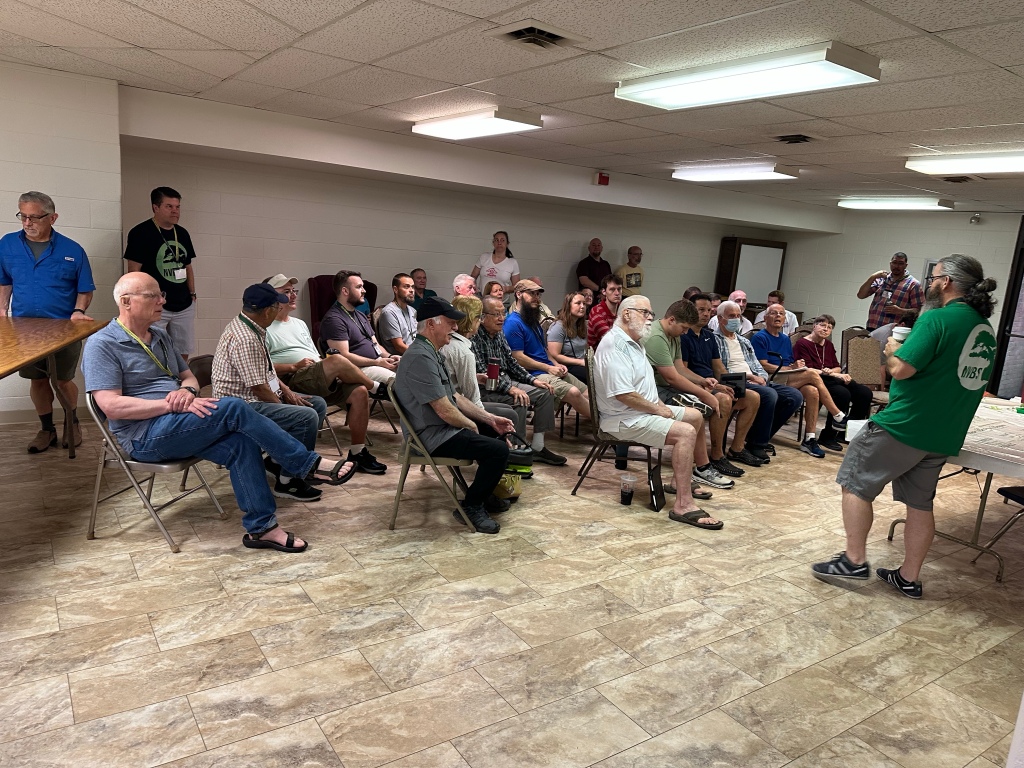
Here it is now, in The Nook.

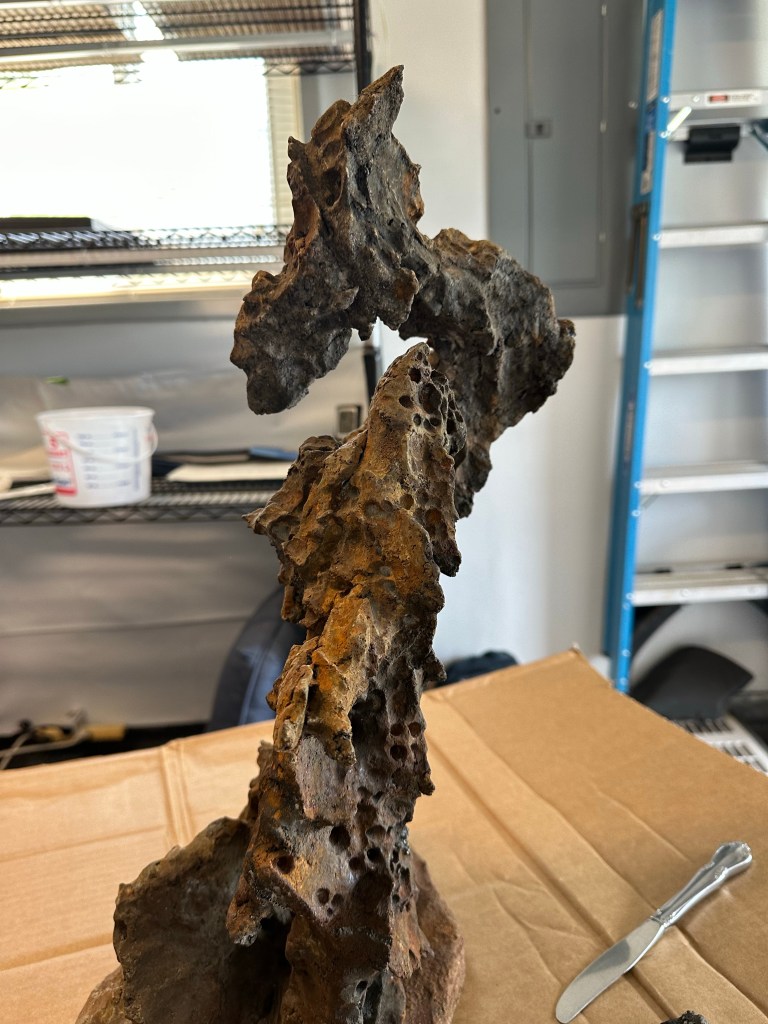
To begin the story, here are some progression pics.

Here it was in 2018.

Here it was in 2019 (at the end of this blogpost)

At the 2021 BSF Convention.

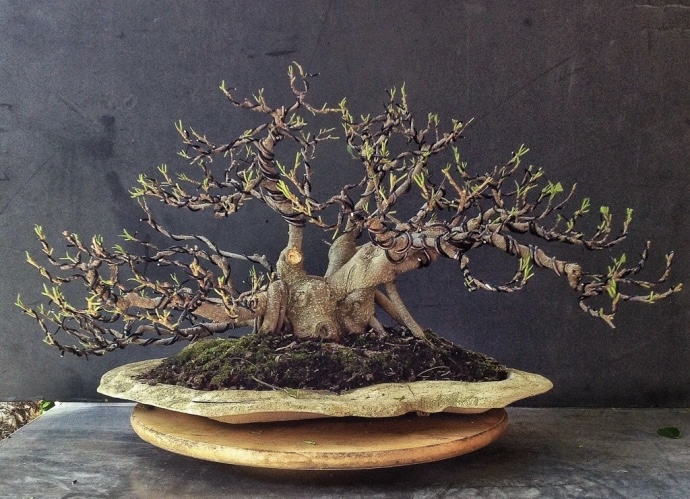
And, finally, back to today.

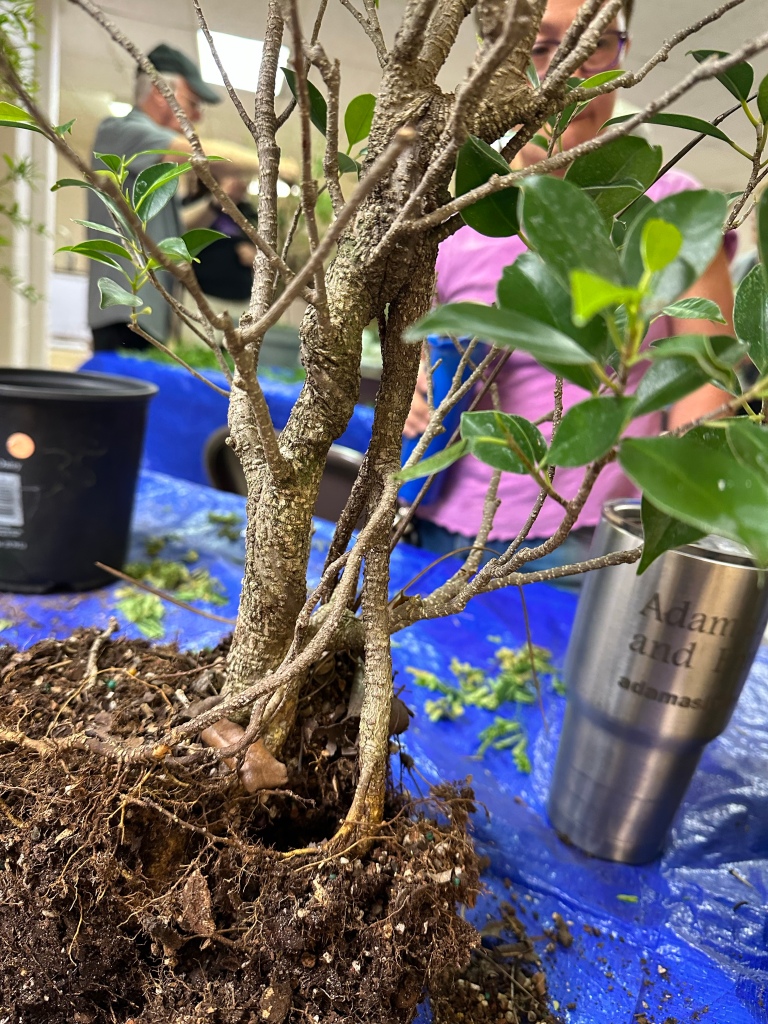
The tree was originally scheduled for the 2020 exhibit but, you know what happened that year. As a result, we didn’t repot it in 2020 or 2021, and this year I’ve been working on letting it gather sugars so I can do some work on it. Hence the big leaves.

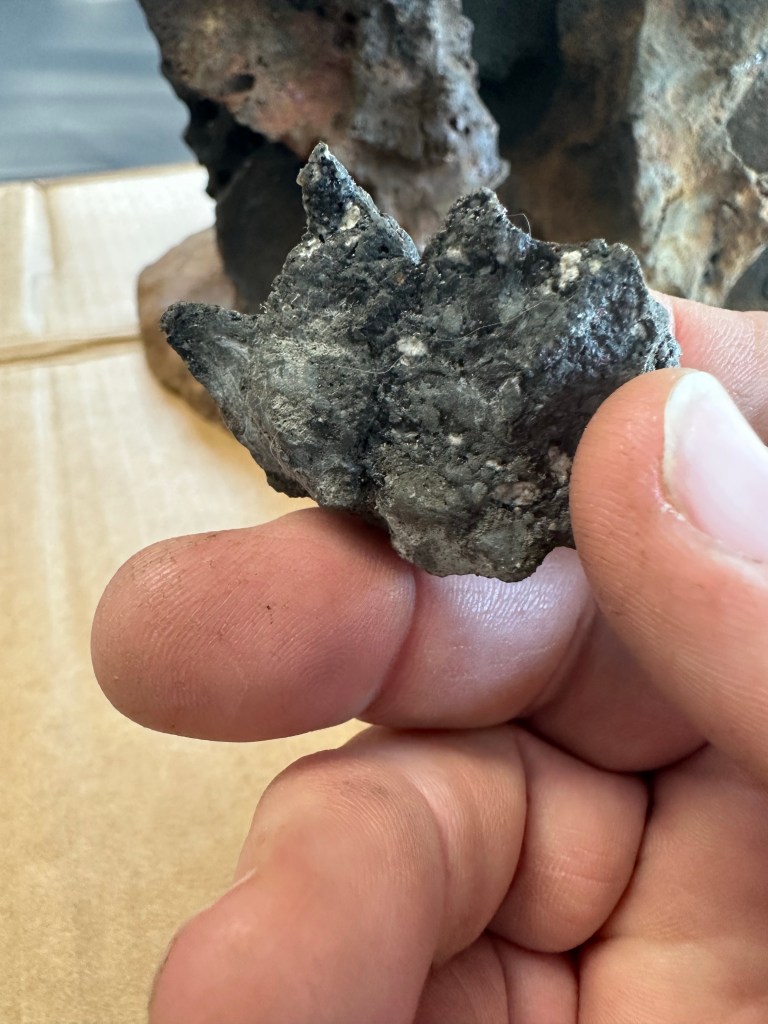
It had a mild chili thrip infestation at the end of last year as well, and we treated it with imidacloprid, a systemic insecticide.

But the tree is strong now, and ready for some work.

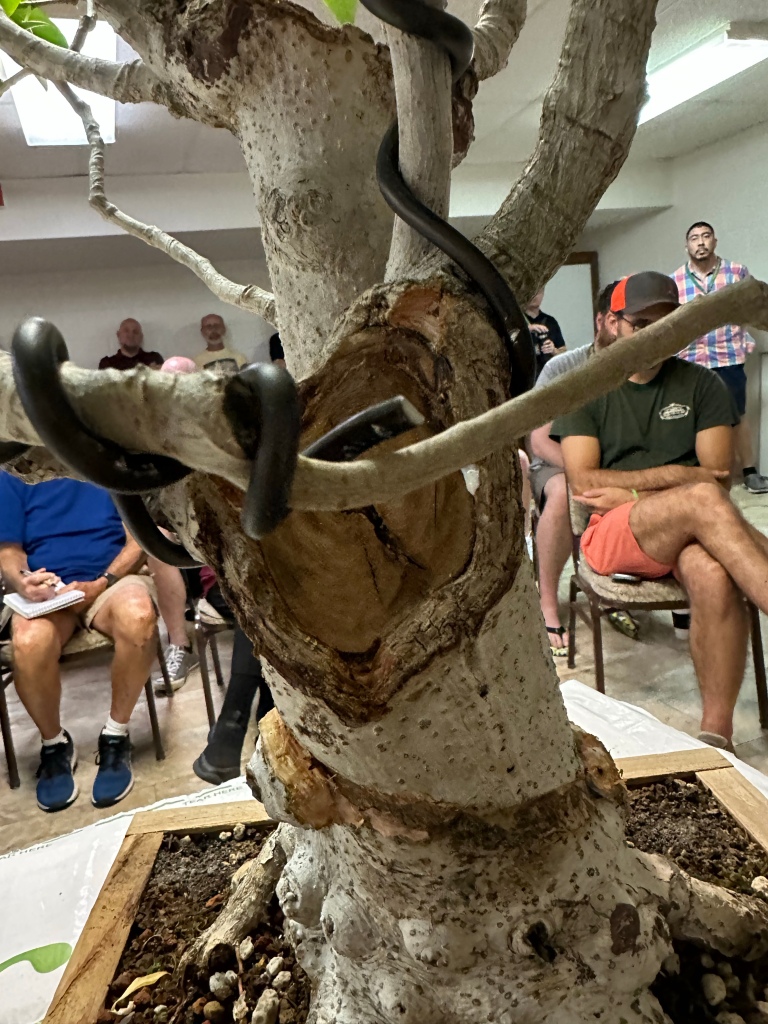
I’ll also be cleaning and applying lime sulfur to the deadwood, which is, as you’ll see, sometimes easier when the tree is in the middle of a repot.

First step, defoliation. I know, oooooooohhhhh, controversial. It astounds me that so many professionals not only poo poo defoliation as a valid technique, but try to vilify those who use it. One of my catchphrases I use all the time is “horticulture is a science, but the practice of horticulture is an art”. That’s why two people can use two seemingly different techniques and still achieve success. Most of bonsai technique has more to do with the timing and seasonality of the technique and less to do with doing it. Here’s an example: there aren’t any arborists that suggest that removing a pine trees candles is ever a good idea. Yet, if one does it at the right time, the way we bonsai practitioners do, the tree responds with increased vigor and better growth.

There are prerequisites to de-candling a pine tree, one of them being the tree should be in good health, but the science of horticulture says “don’t do it”. Yet we do. Why? Because, the practice and timing of the technique works. As it does with defoliation.

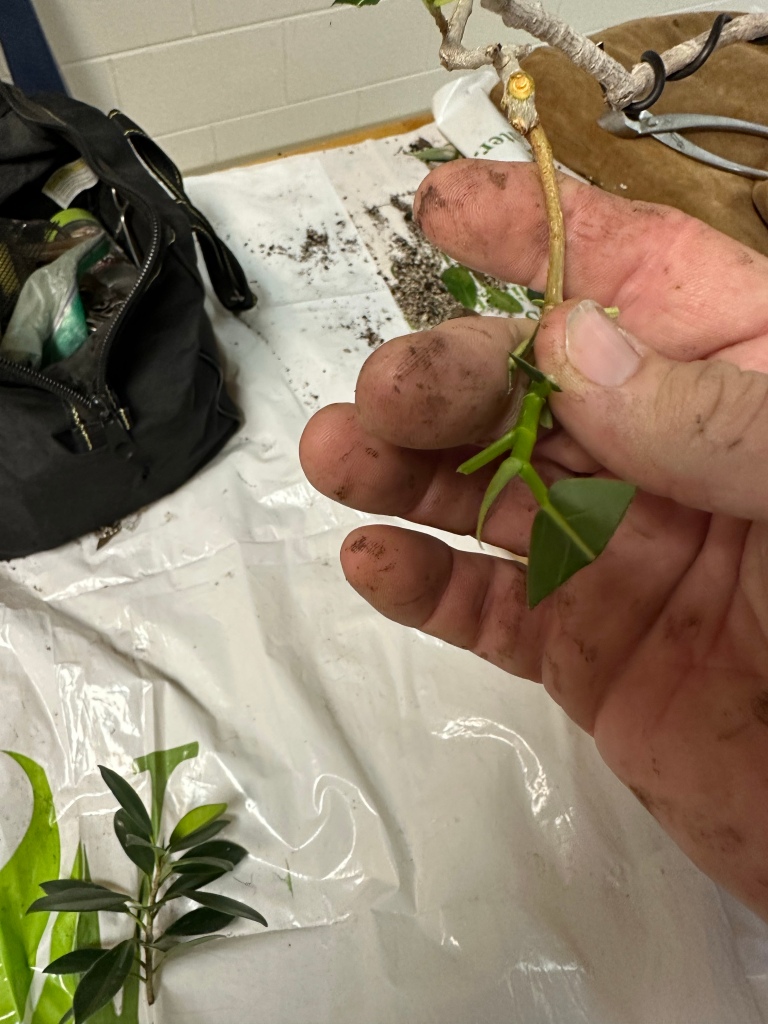
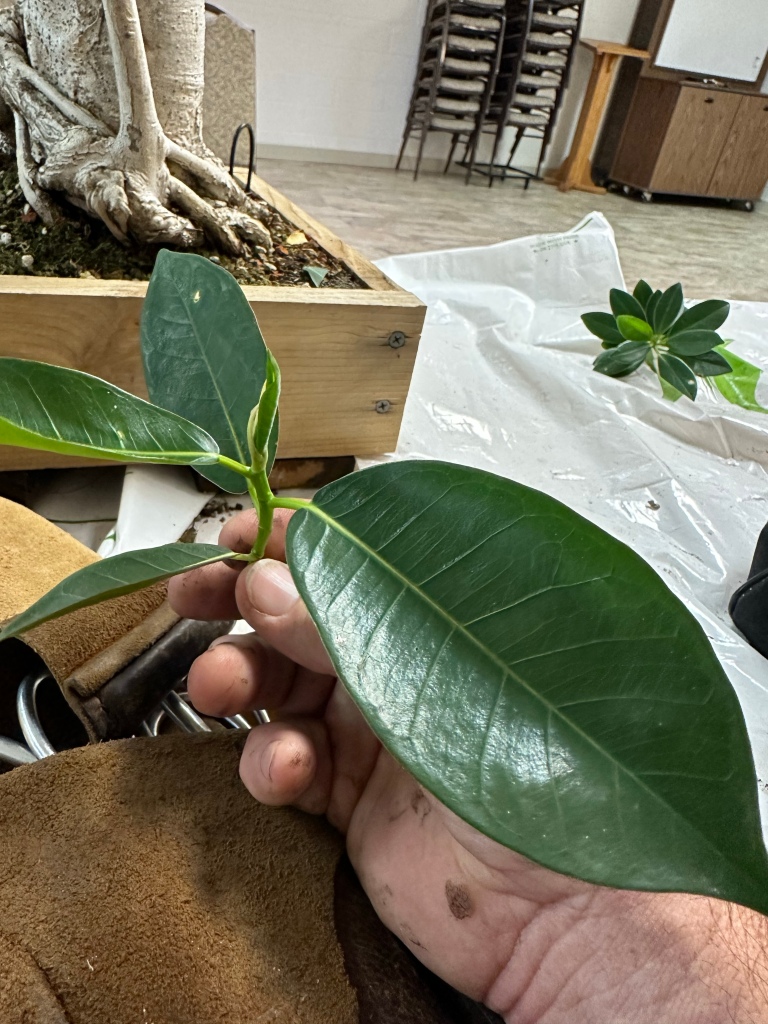
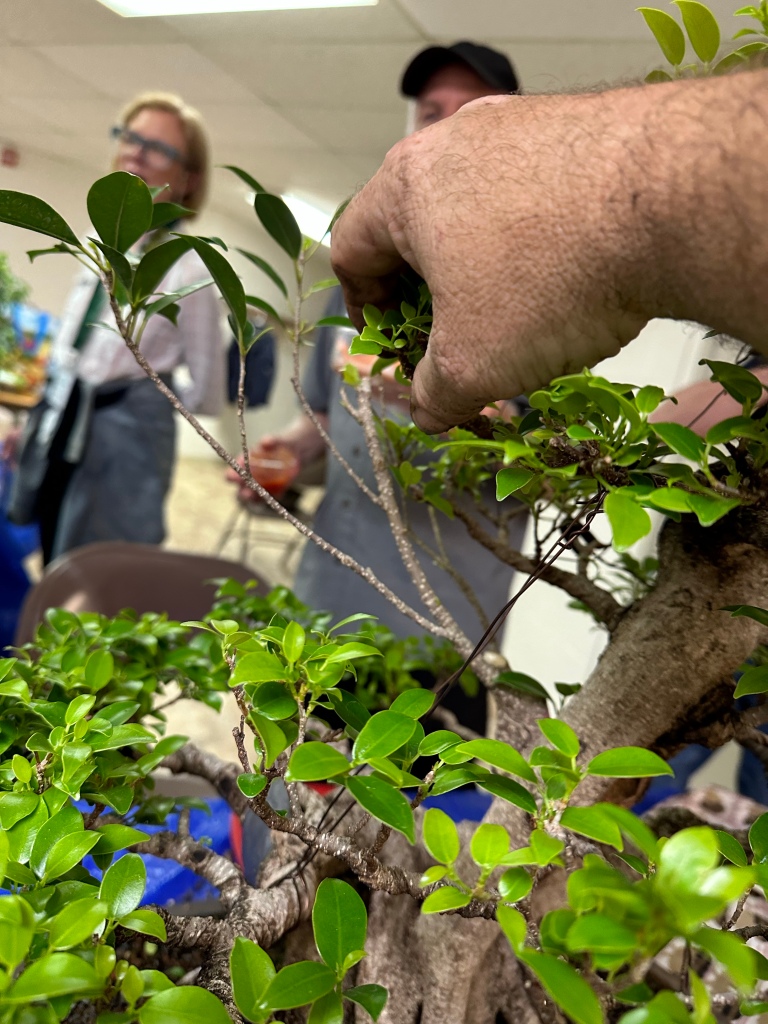
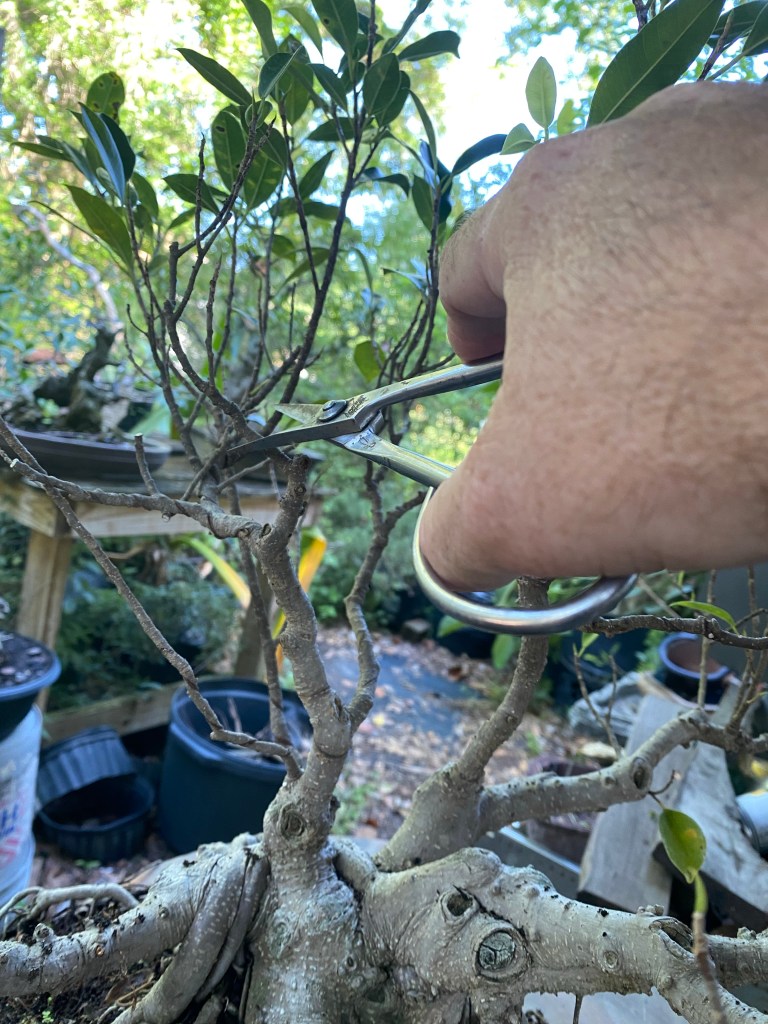
Anyway, here’s my quick method for defoliating a buttonwood. They tend to grow like little rosettes, as below.

Take the branch…

…..move your hand to the end of the branch, holding the leaves…

…..take a sharp pair of scissors….

…..SNIP…..now, depending on whether you want to keep the grow tip intact, to continue the elongation of the branch, or you want to encourage backbudding, is what determines how close you snip the leaves off. I left the grow tip intact in this case, as you can see below.

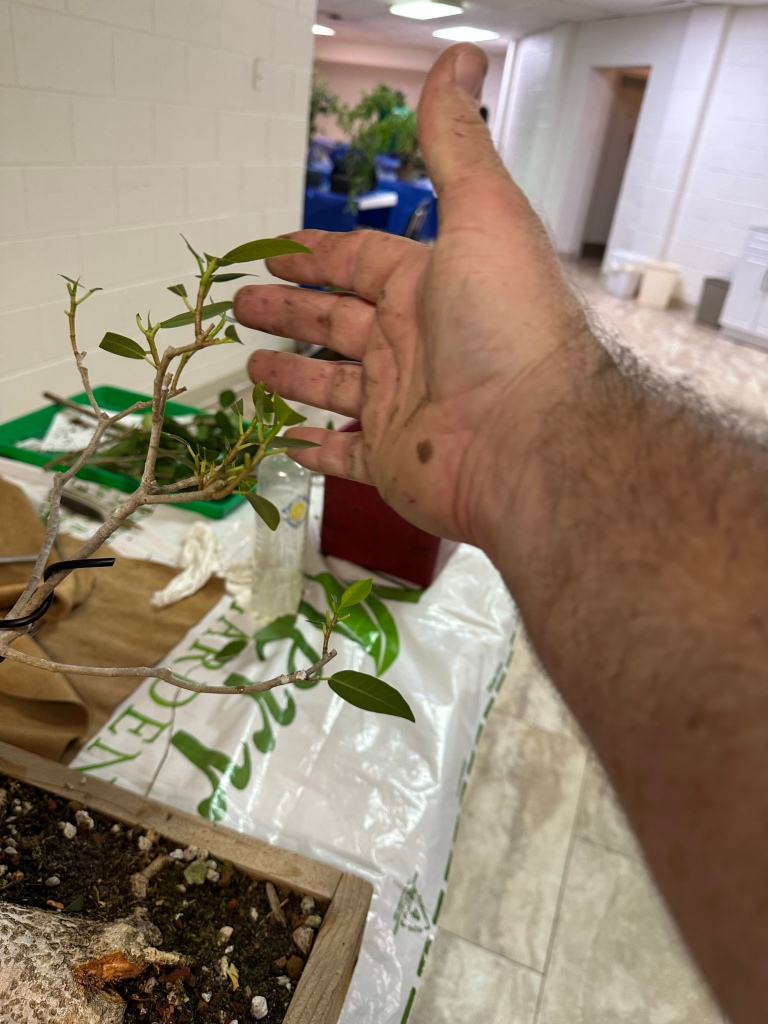
On some, I’ll keep the tip, on others, I cut it.

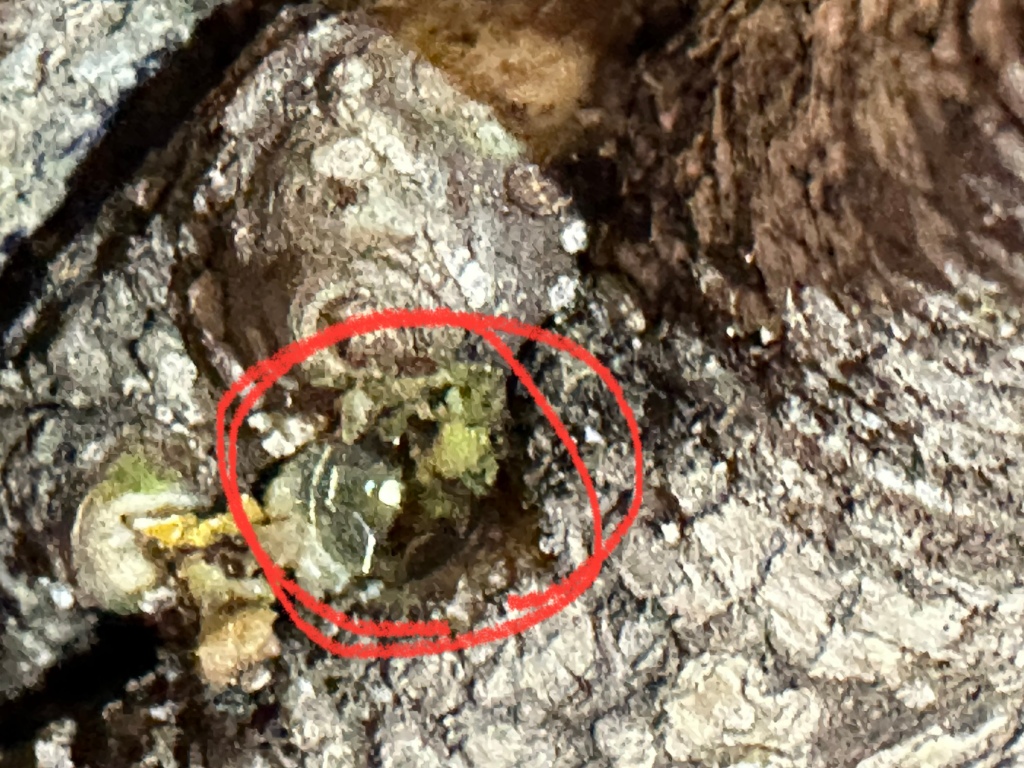
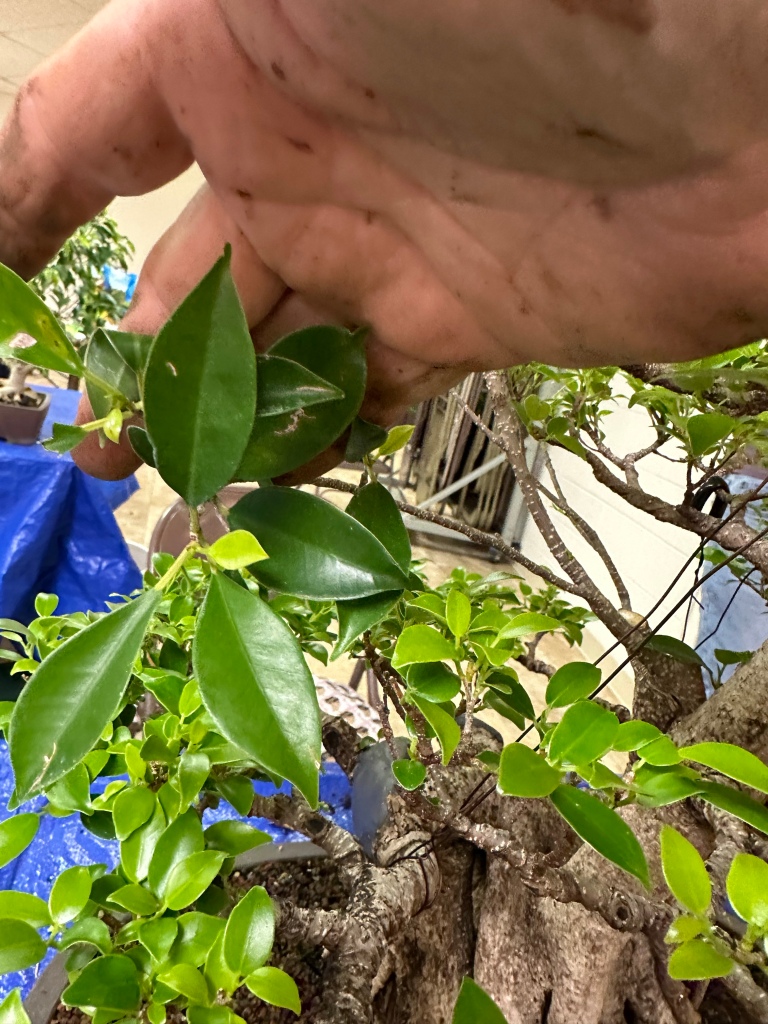
Here’s something you don’t see everyday, flowers on a buttonwood. Yes they flower, everything flowers, but it’s only when you let it grow and it’s healthy do you see it.

You may notice some black sooty mold on some of the leaves.

Whenever you see it, always check for aphids or scale.

In this case, its not this tree that’s infested, it’s from a tree that was above it on the bench.

Snip, snip…

Snip, snip….

No, I didn’t count how many leaves. Ain’t nobody got time for that.

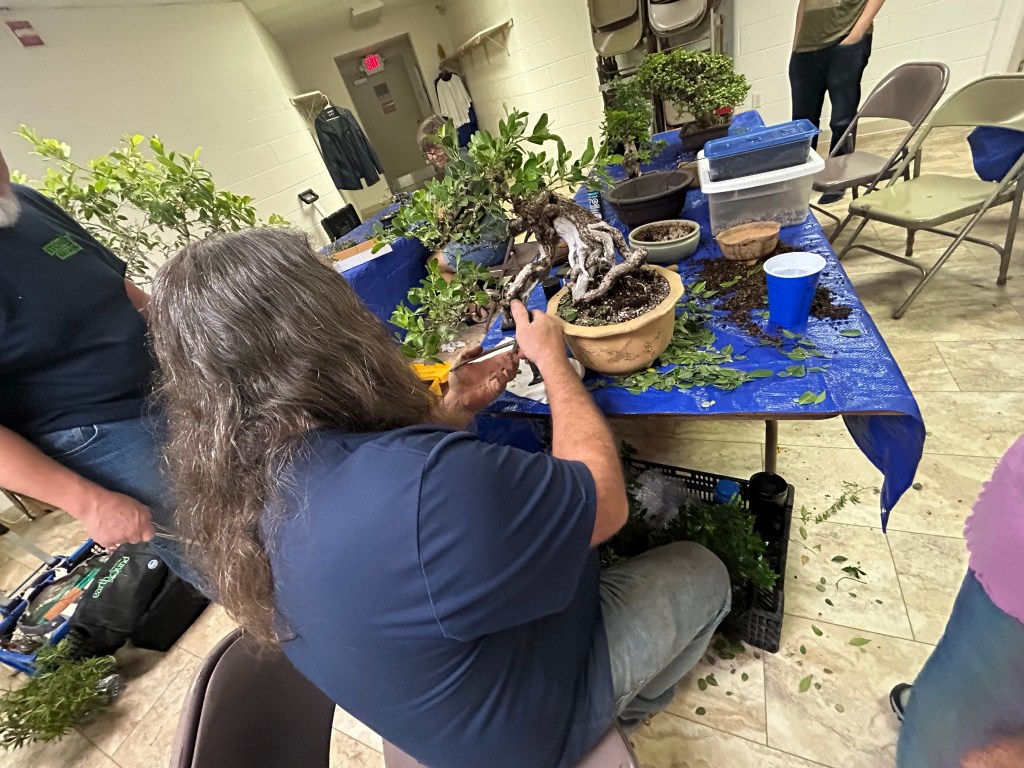
Now it’s time to repot. I would normally repot a buttonwood, in Florida, every year. It’s been my observation that the tree can weather the winter weather better if you repot yearly.

But this tree had been selected for the 2020 BSF Convention exhibit. Unfortunately, that was the year of Covid lockdowns, so the convention was cancelled, and I lost several months due to my own health problems, so that year was skipped. And the tree was shown the next year, 2021. So I skipped that year too. Sometimes getting a tree ready for exhibition can really stress a tree out.

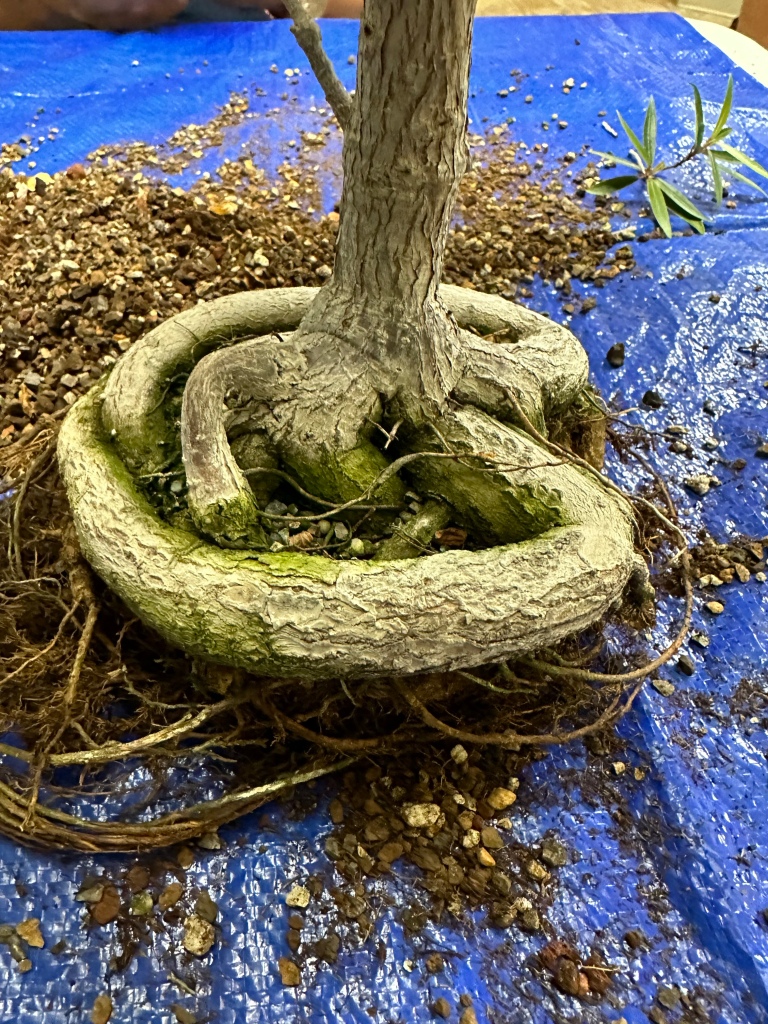
This year is the year though. And I’m not looking forward to it. It’s potted in a container with sides that bow outward (they call it a “bag pot”). It’s a pretty design, but the roots will fill up that space, making removal a bit difficult.

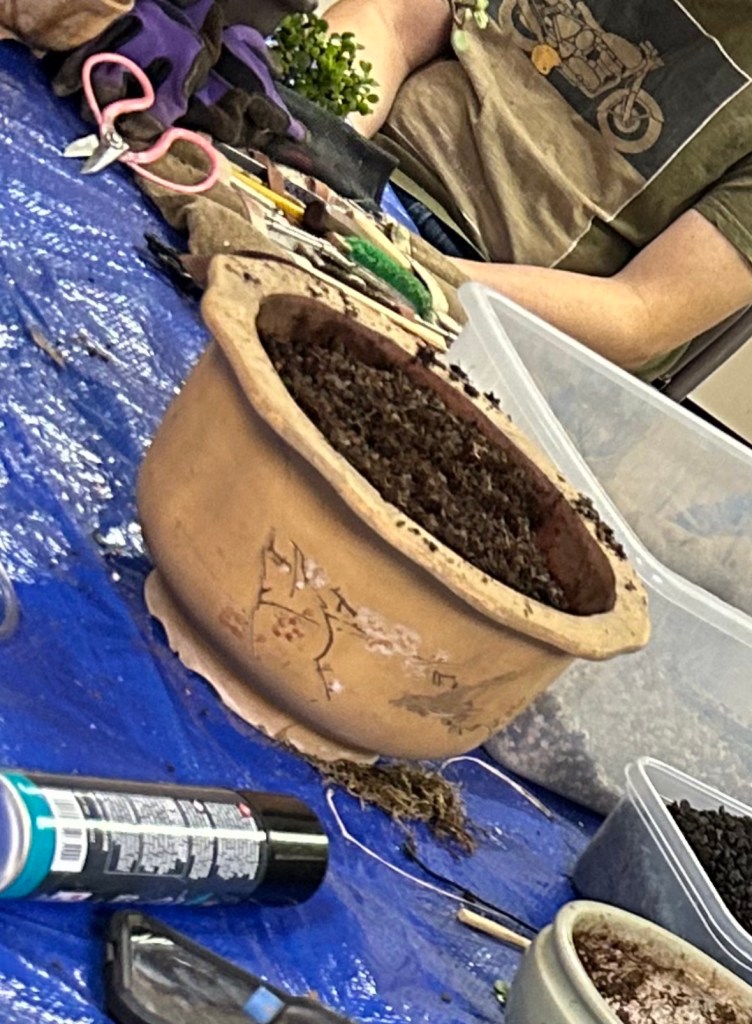
But, no worries, I have my “1980’s era” repotting tool, the ubiquitous black handled, serrated, steak knife.

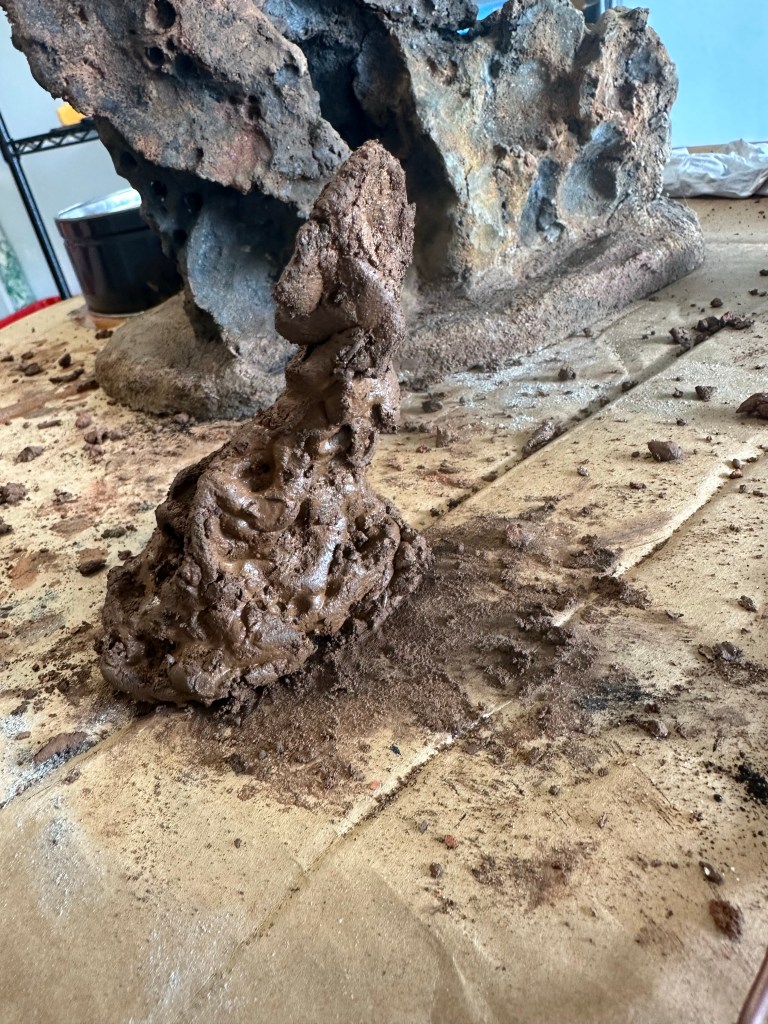
Before I begin sawing the tree out, I’m going to save the moss. Janice loves moss, so I’ll put it back on the soil surface when I’m done.

I got a little.

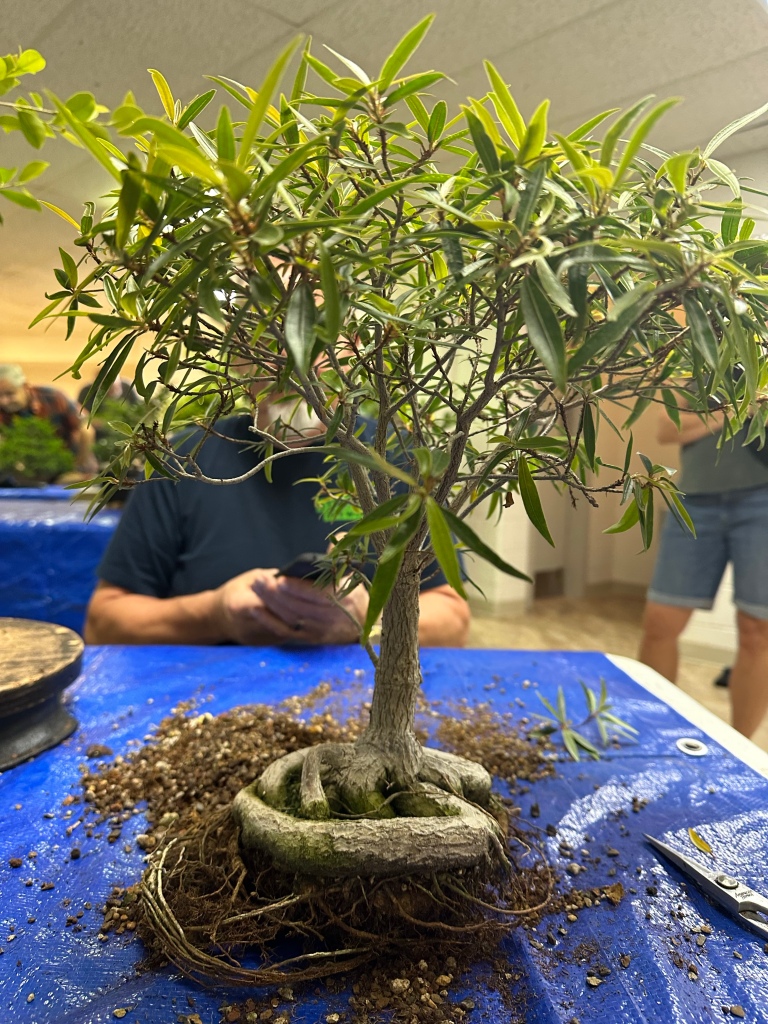
Now, let’s see how difficult it’ll be getting the tree out.

Simply saw around the perimeter, and pry the tree up every few inches.

It’s actually going kinda easy.

Ta-Da!

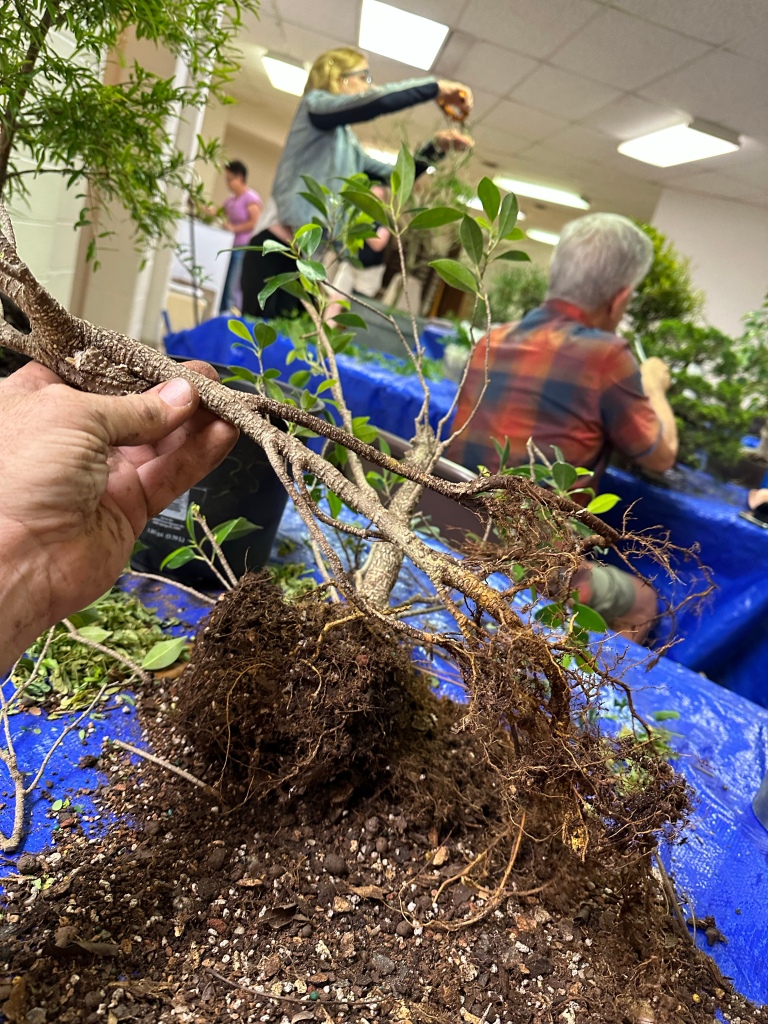
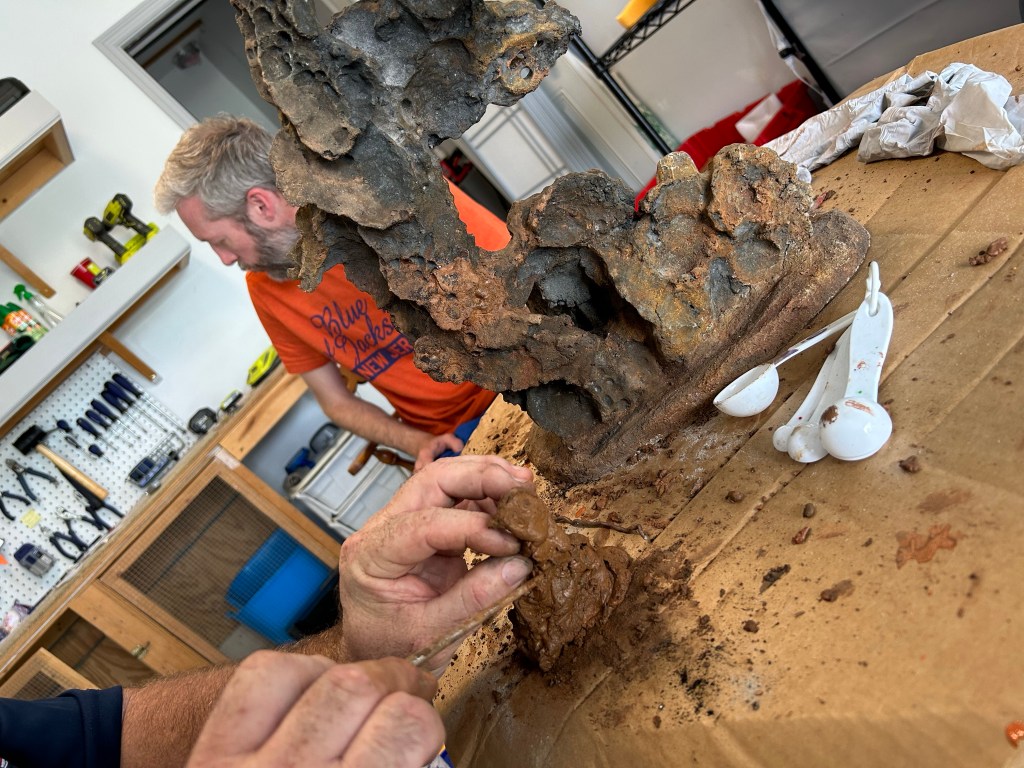
Now we gently rake out the roots. For a buttonwood I prefer a single tined rake or just a chopstick. The American Bonsai Tools repotting tool works well here.

It definitely needed a repot.

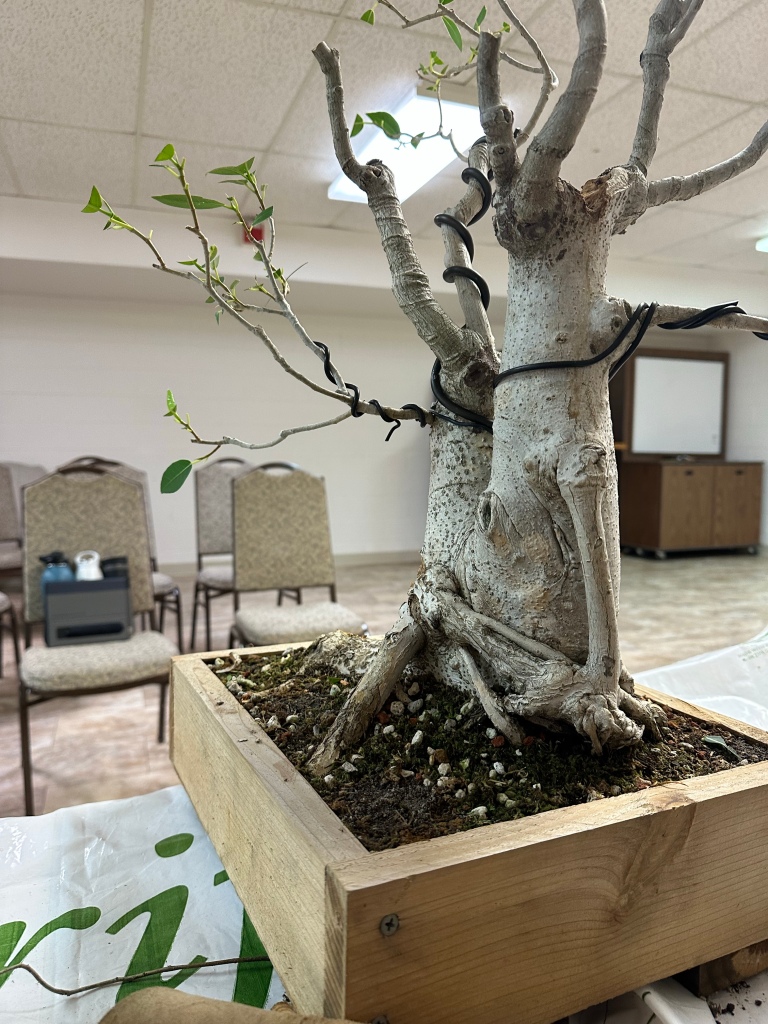
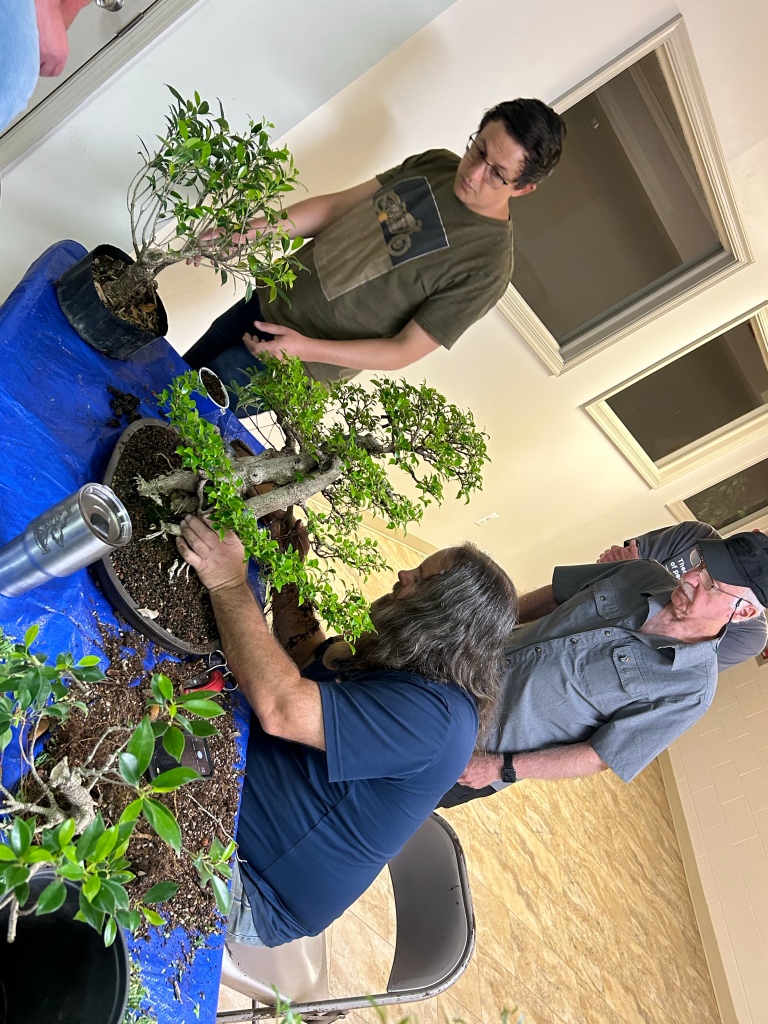
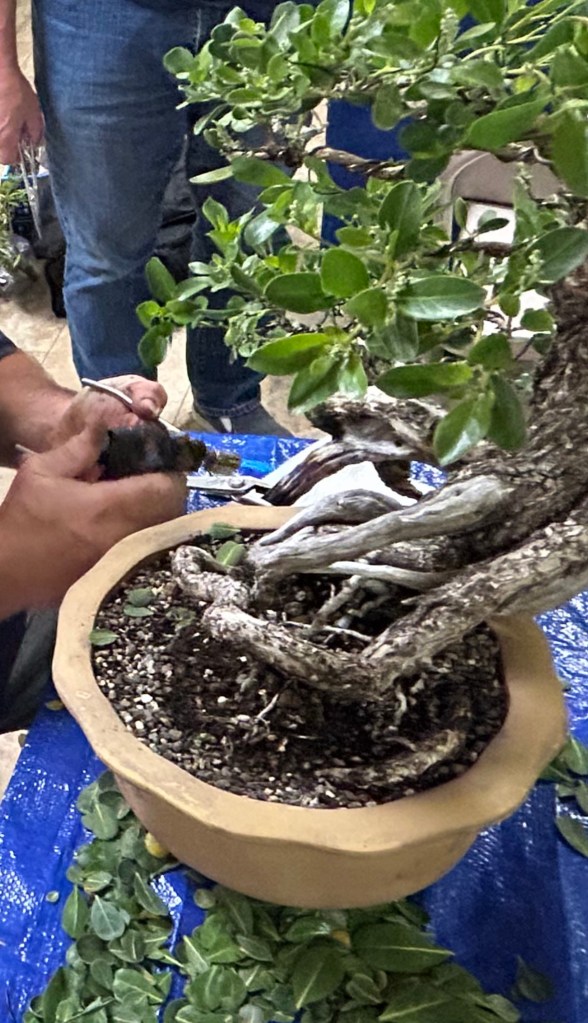
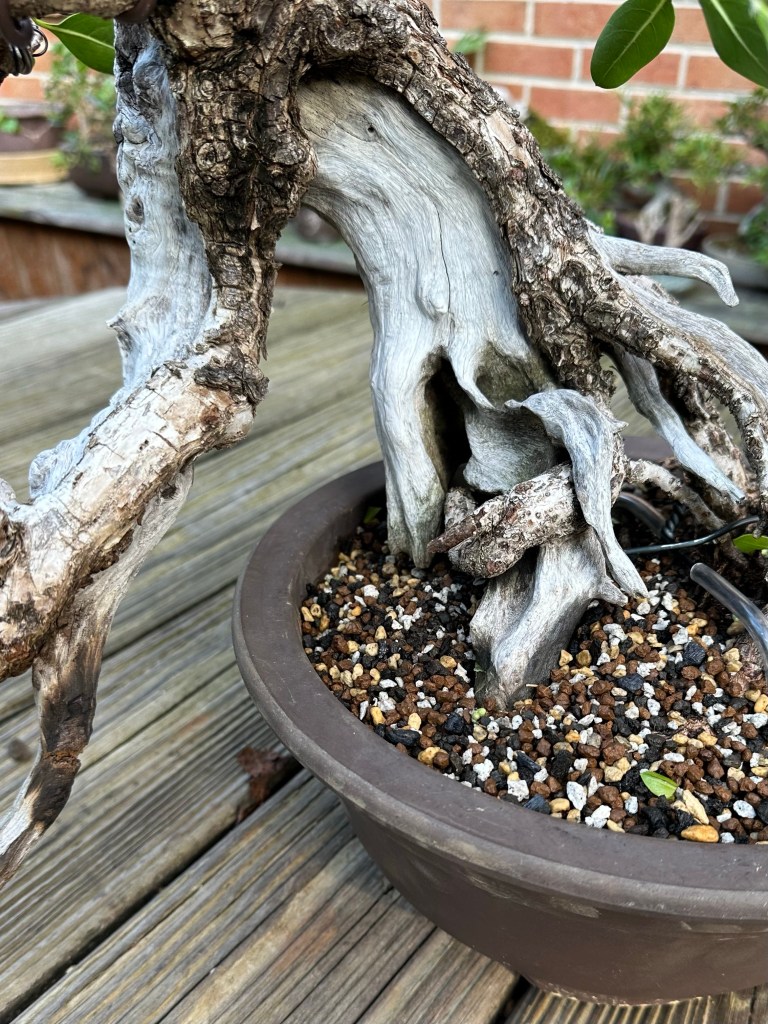
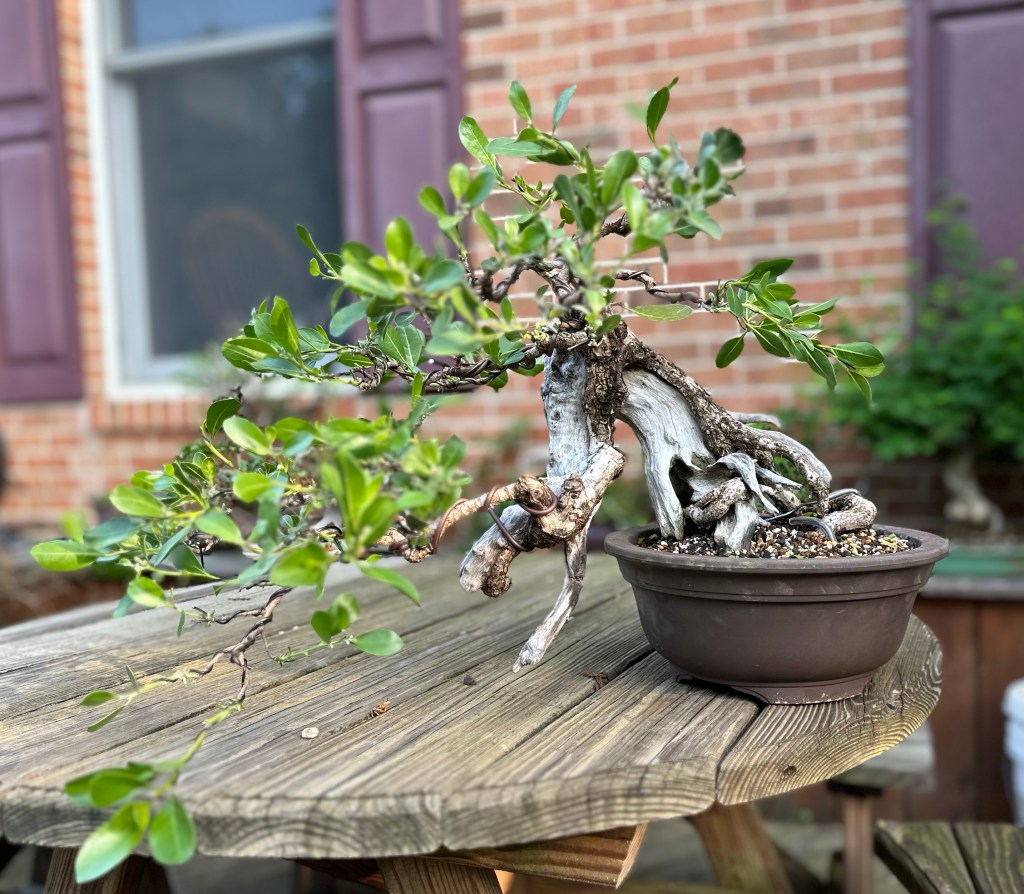
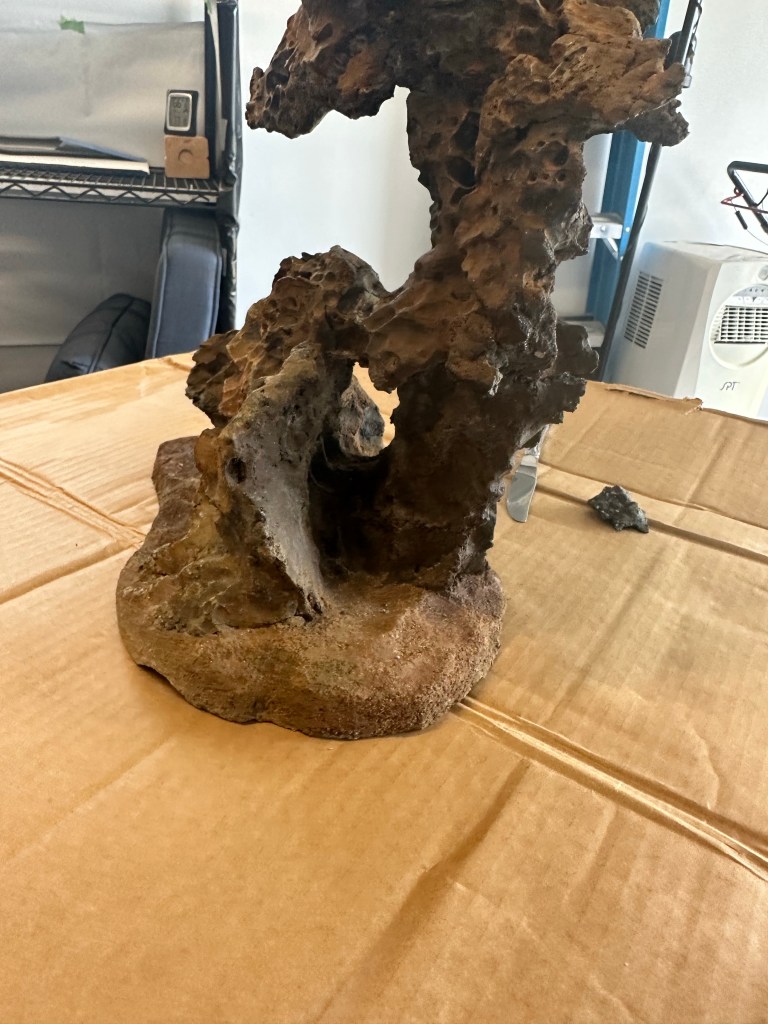
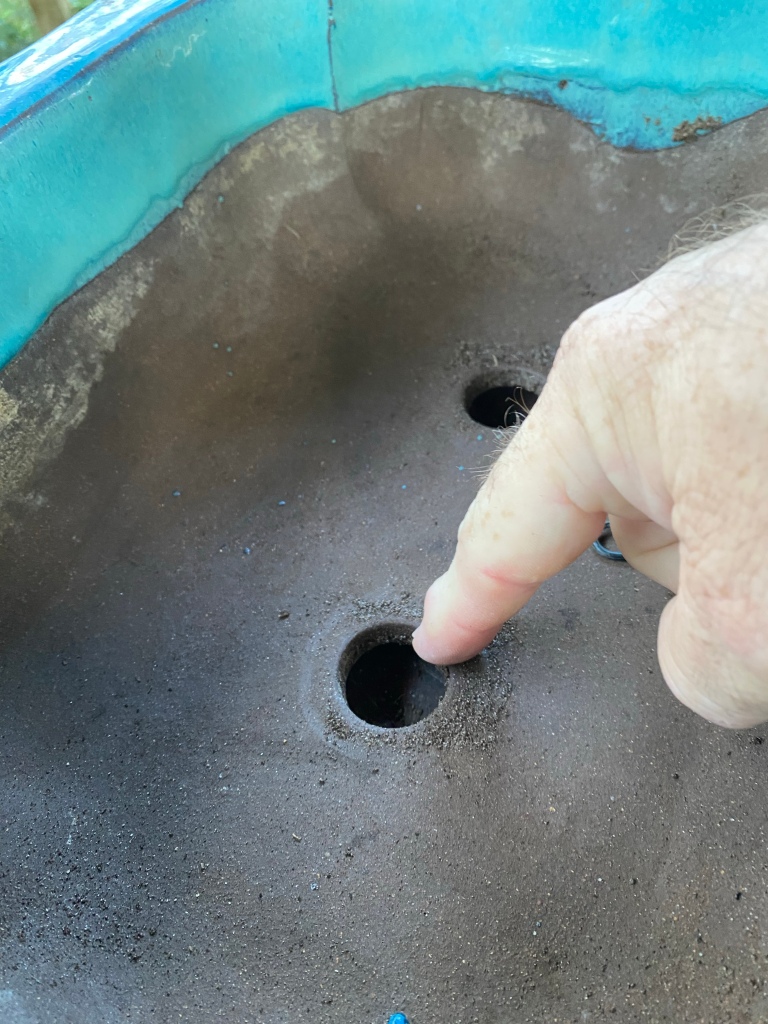
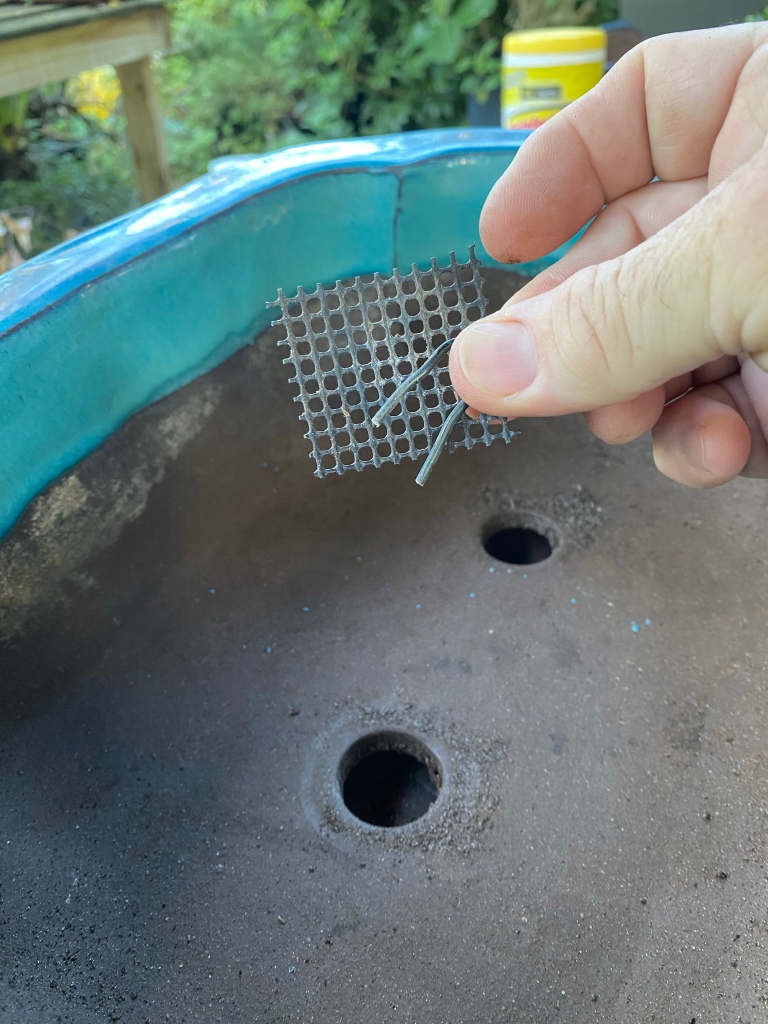
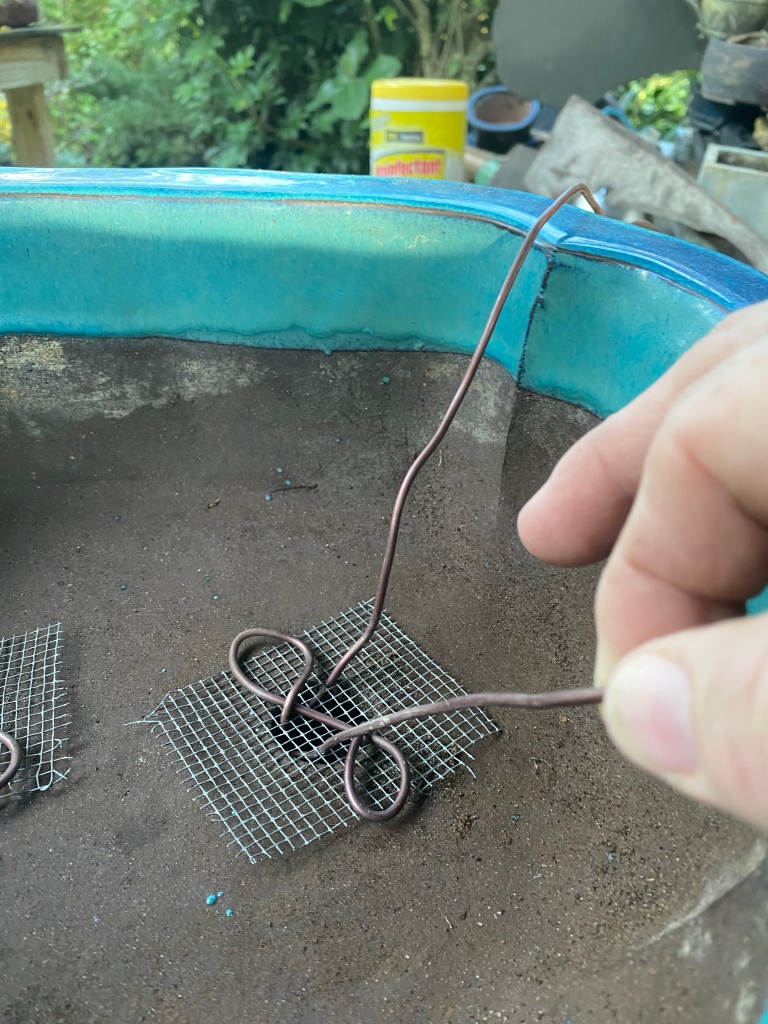
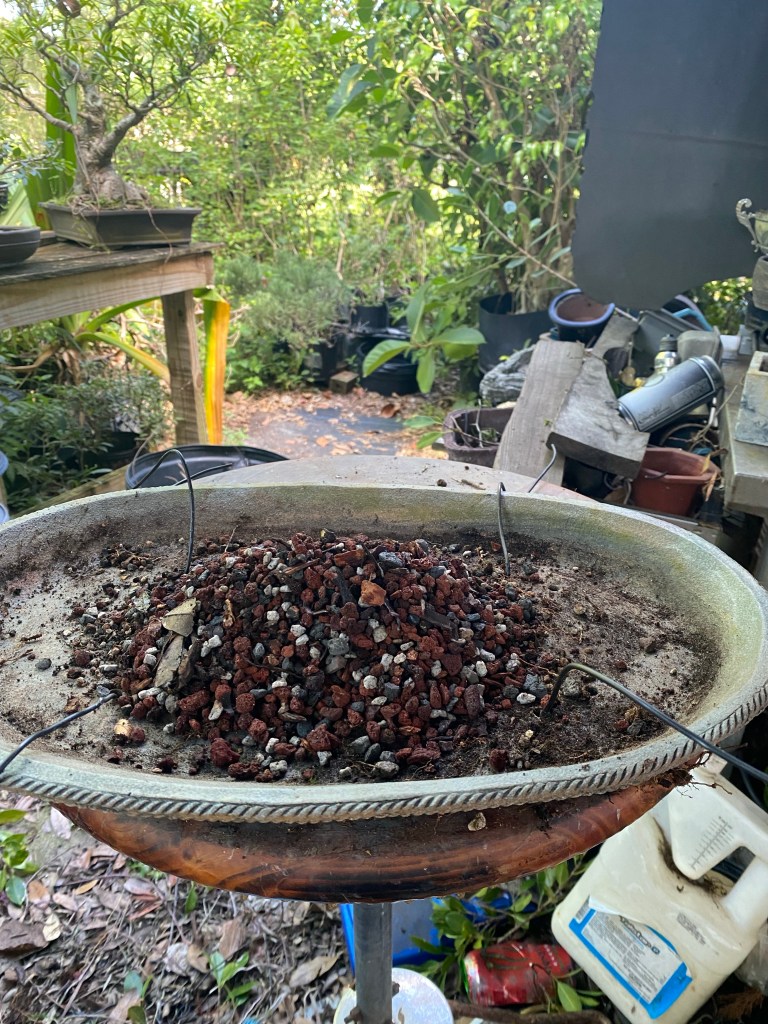
Before we finish, let’s look at, and get ready, the new container Janice chose.

It was created by Doug Marcum, from Hippie Dad Bonsai.

I think it’ll be perfect for the style tree, and, most importantly, Janice loves it too. It is her tree, ultimately.

The details are amazing.

He even has bent over nails made from clay, to make it look like a wooden box thrown together.

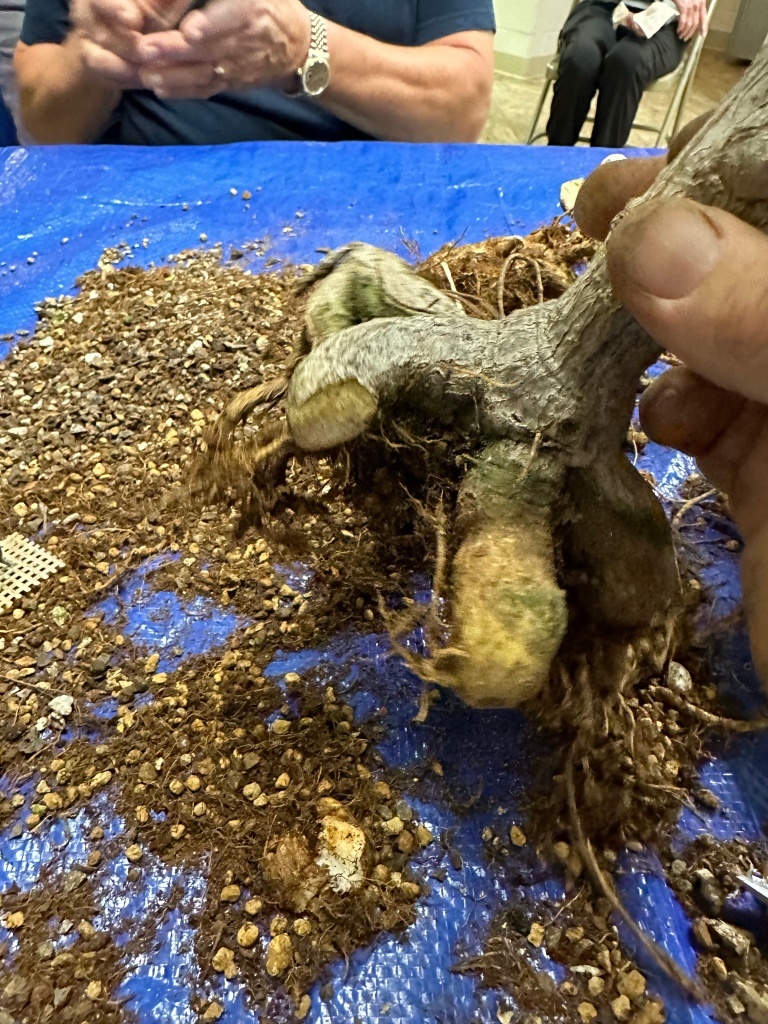
I rake out the roots and trim some back, and check to see if it fits in the new pot (you can see the process better in the post Jorge’s Buttonwood, from a few articles back).

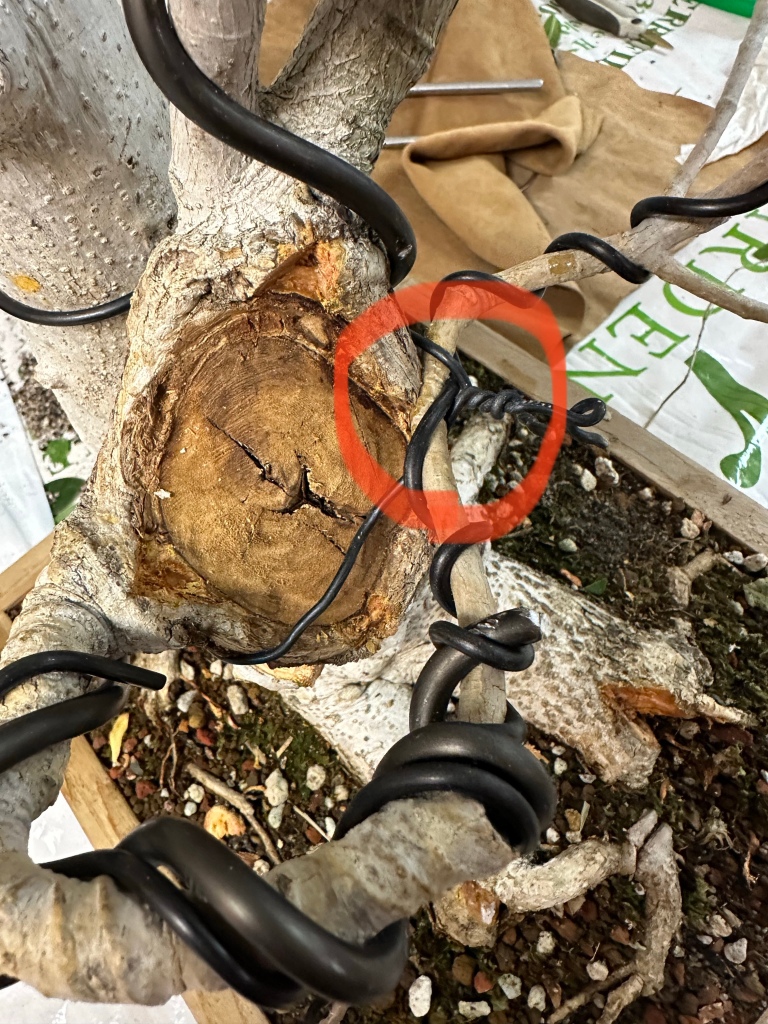
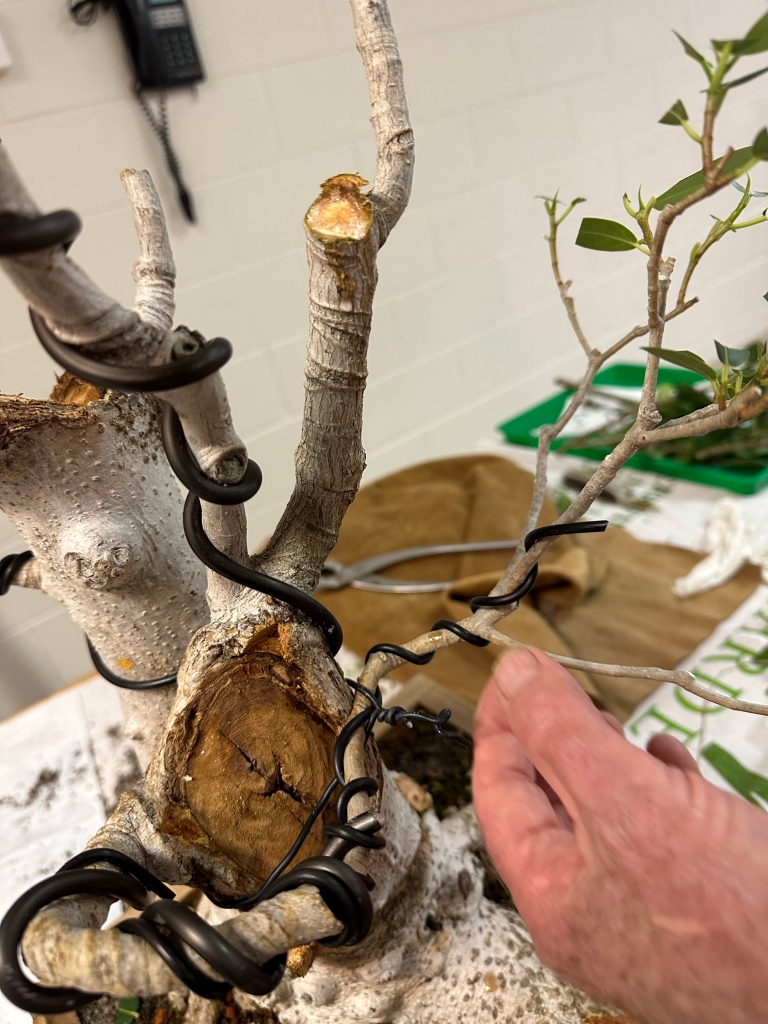
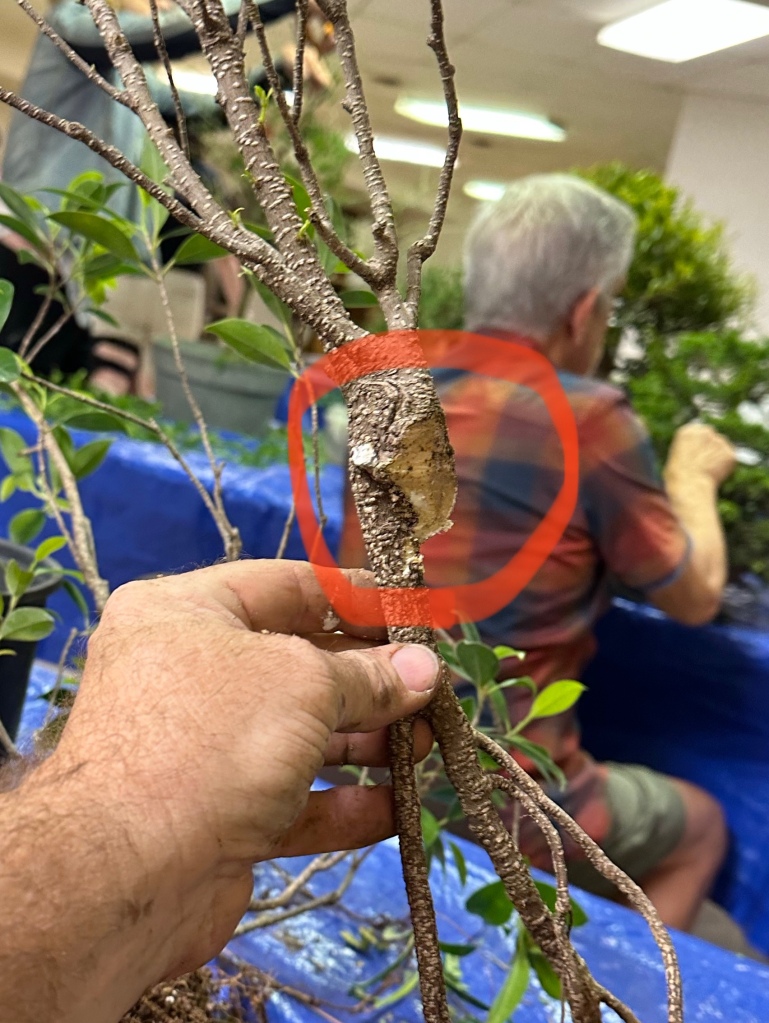
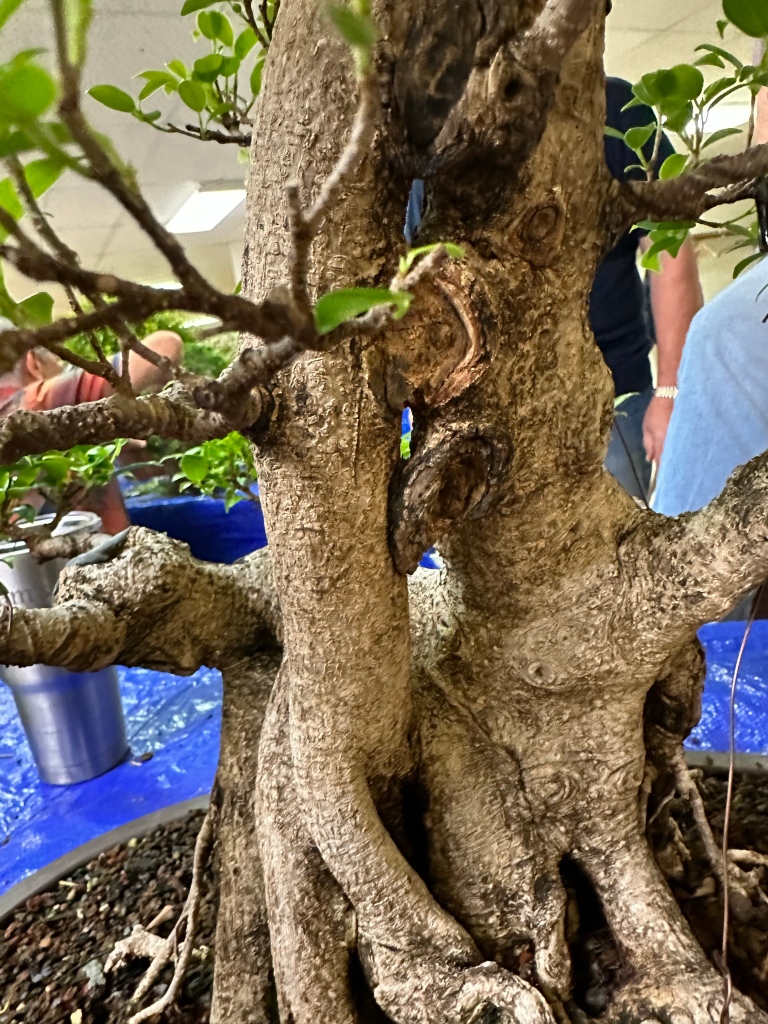
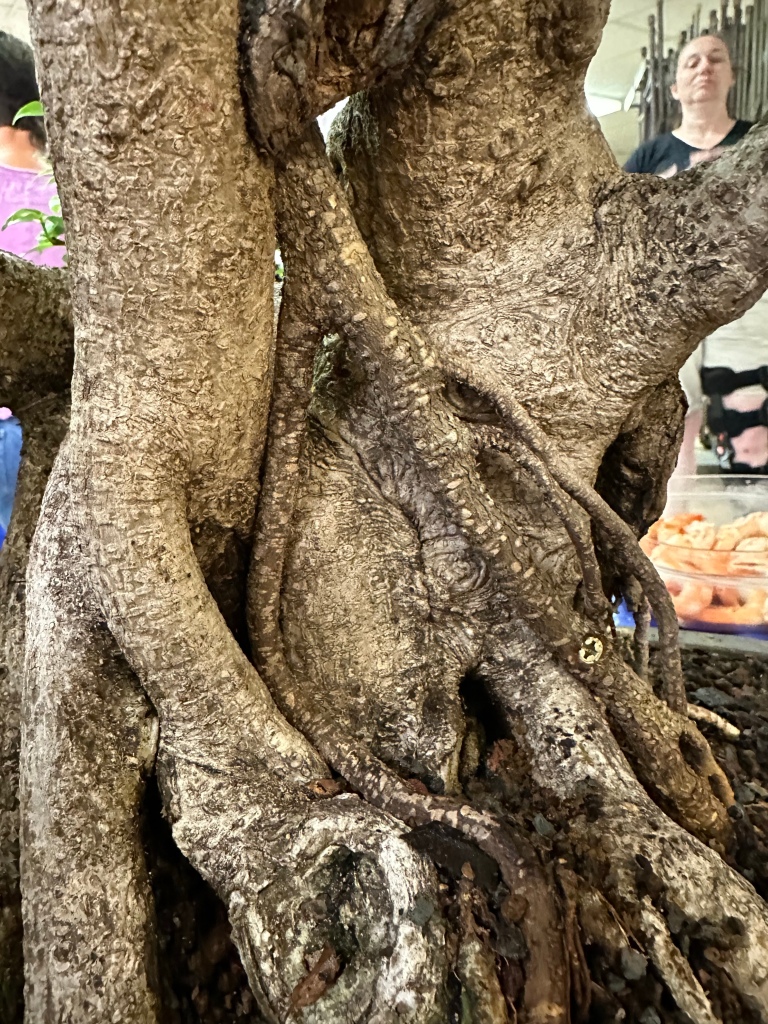
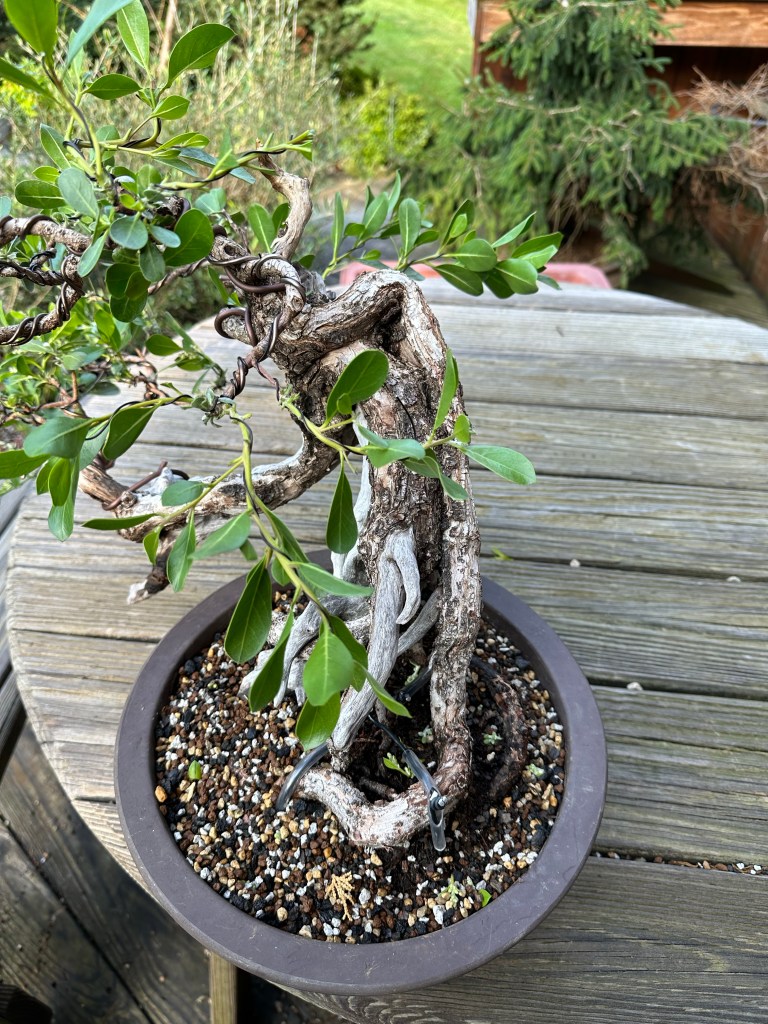
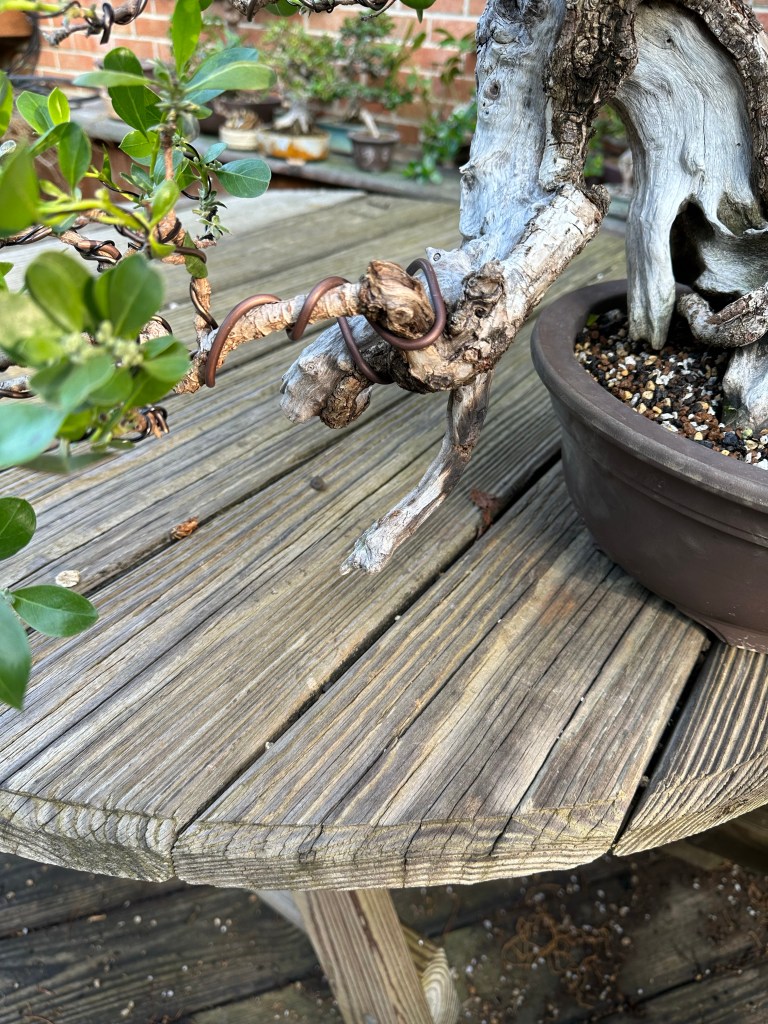
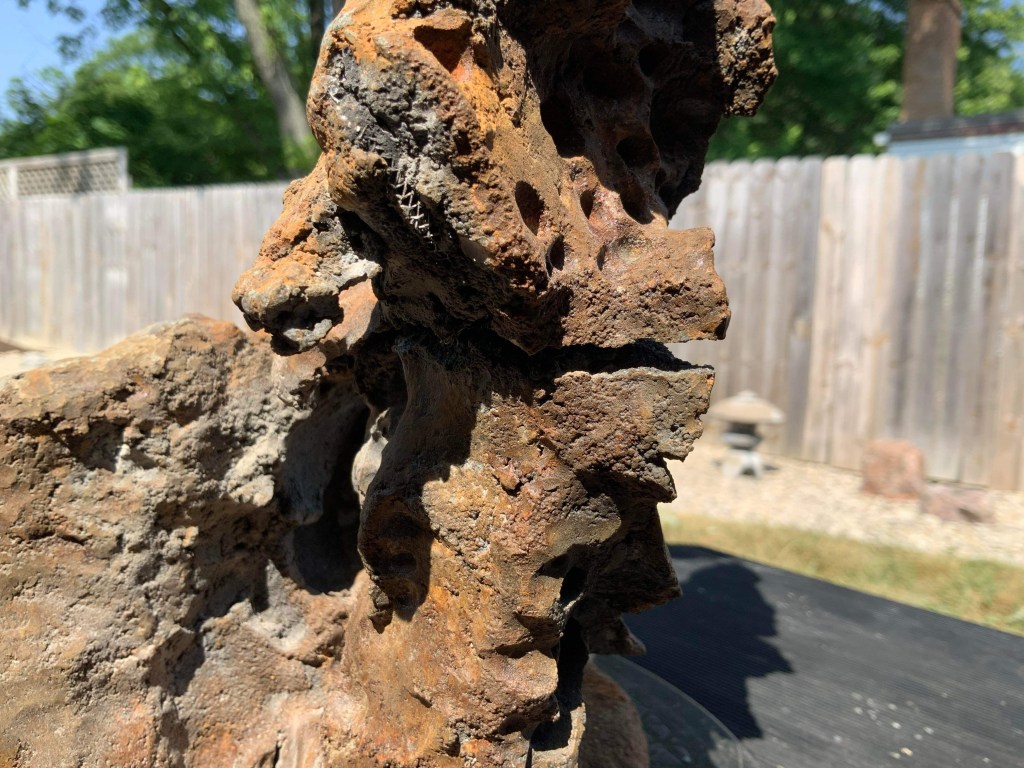
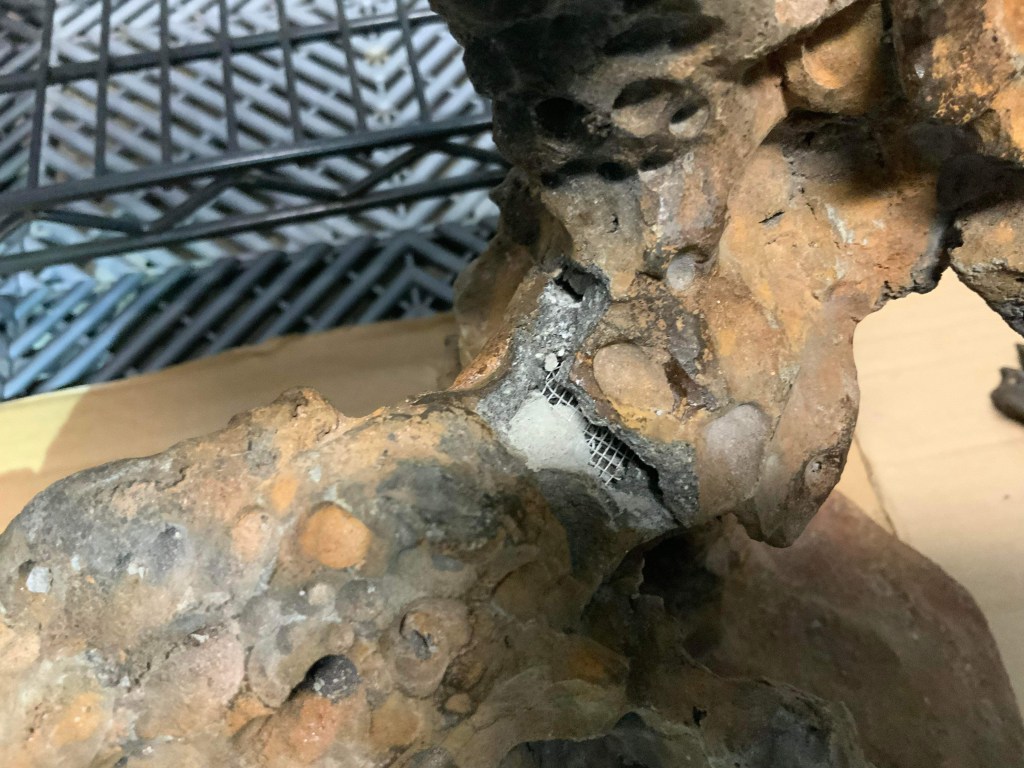
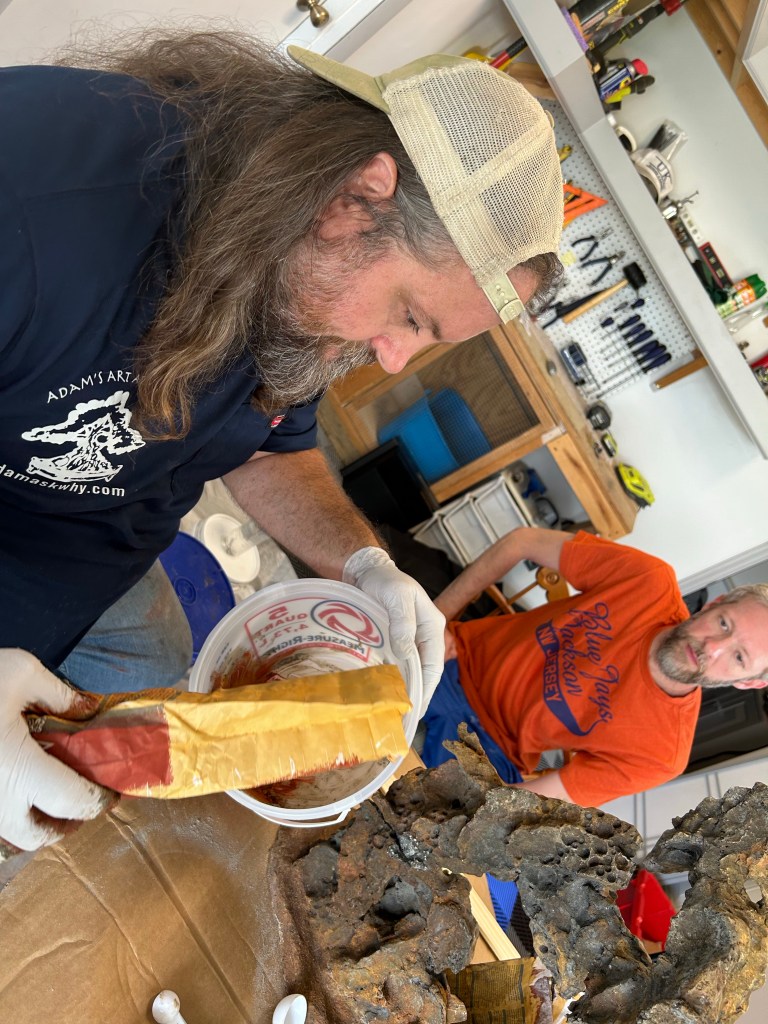
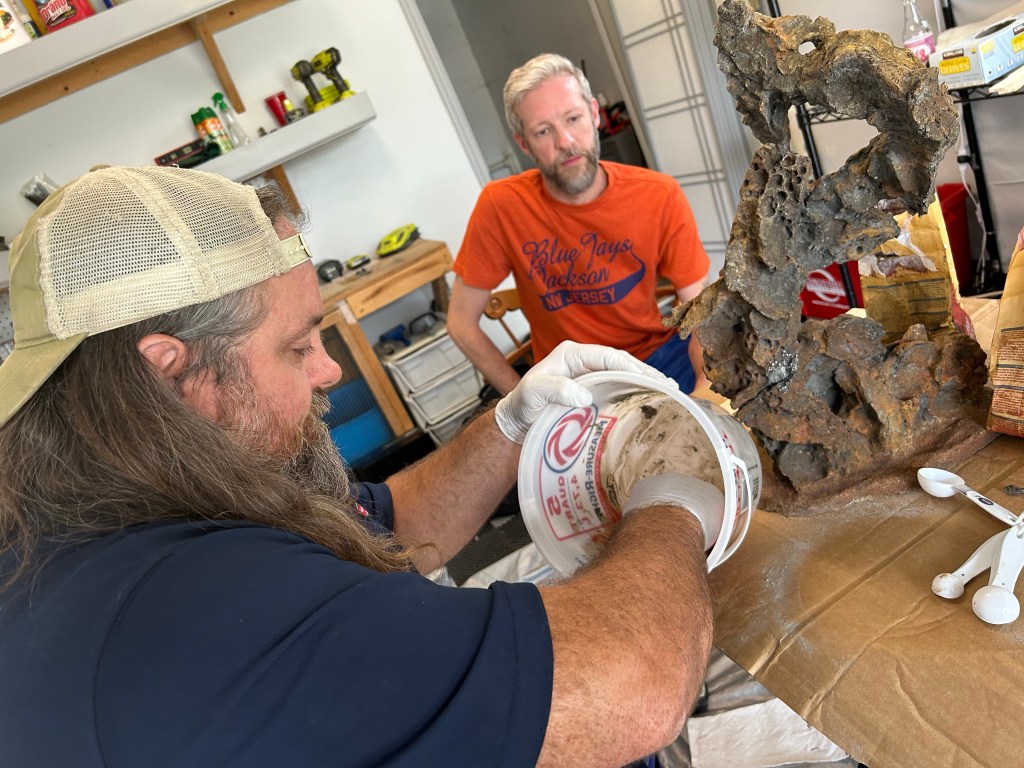
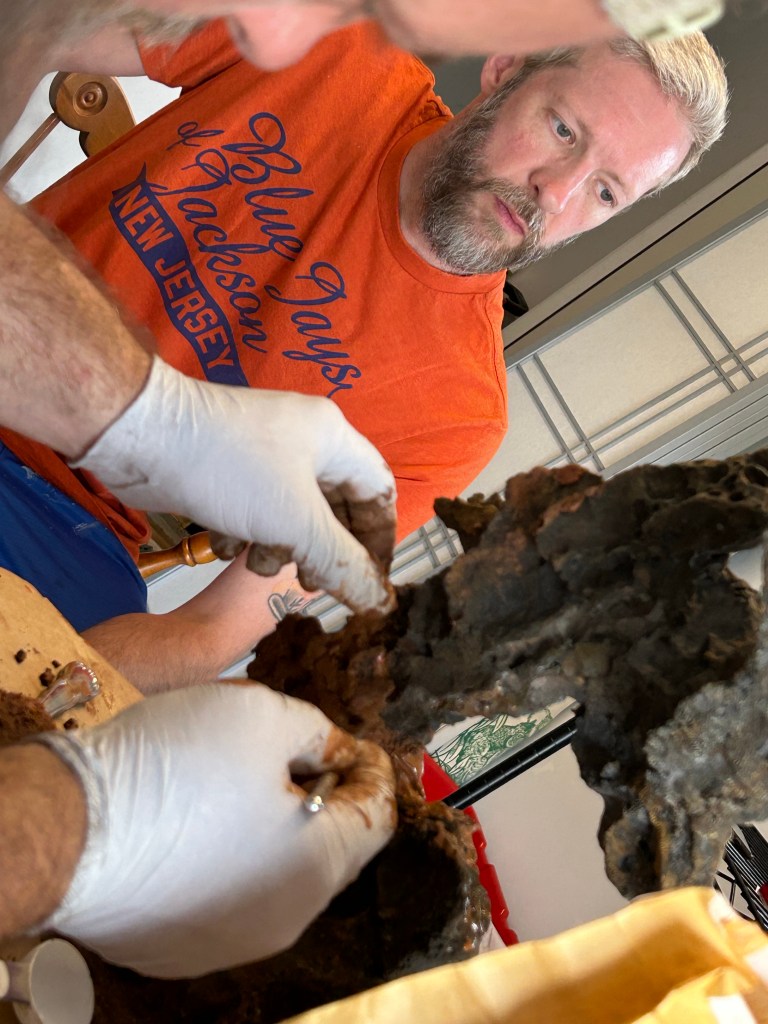
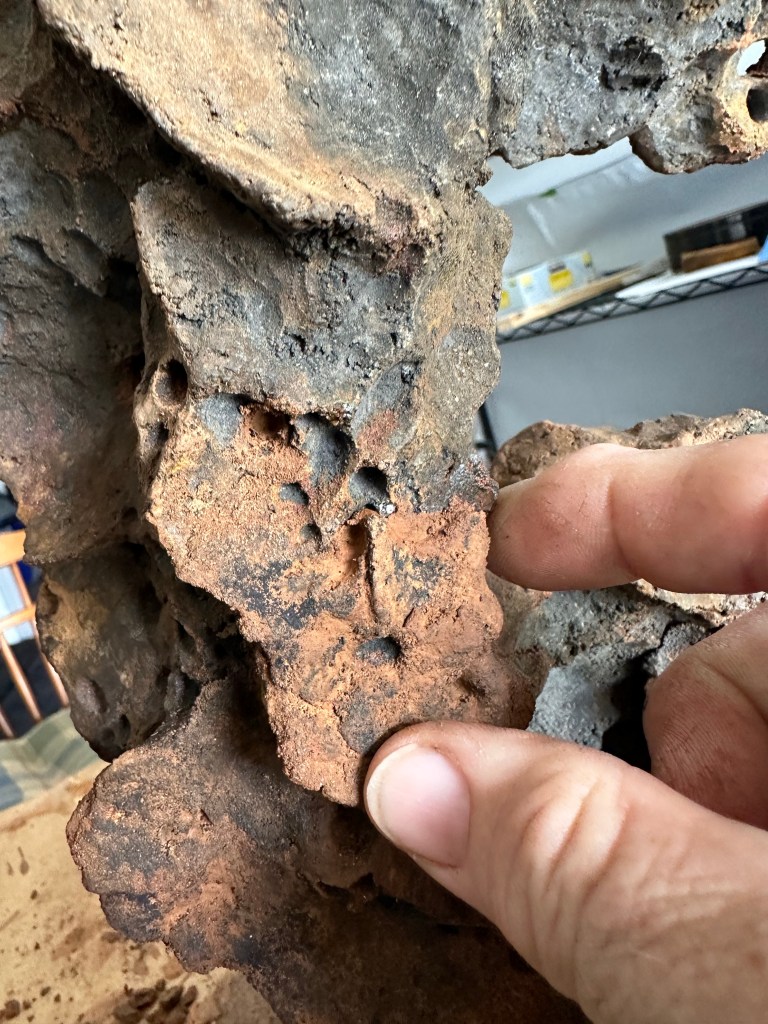
Before I put it into the new pot, I’m going to use a wire brush to clean the deadwood (“Wire brush?” You ask, because it works. You’ll have to say that part out loud to get the joke). It’s also easier to clean the deadwood while it’s out of the pot, better to get at all the surfaces if you can turn the tree upside down.

Scrub scrub scrub.

Brush it down to bare wood, really removing all the dirt, grime, and old lime sulfur.

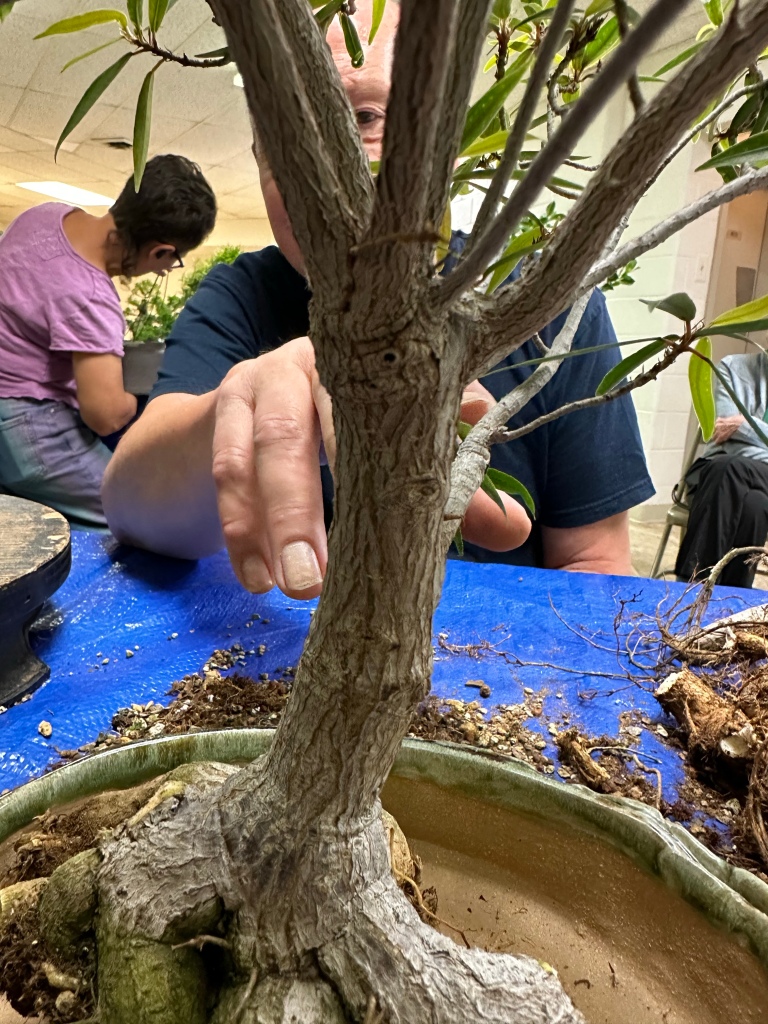
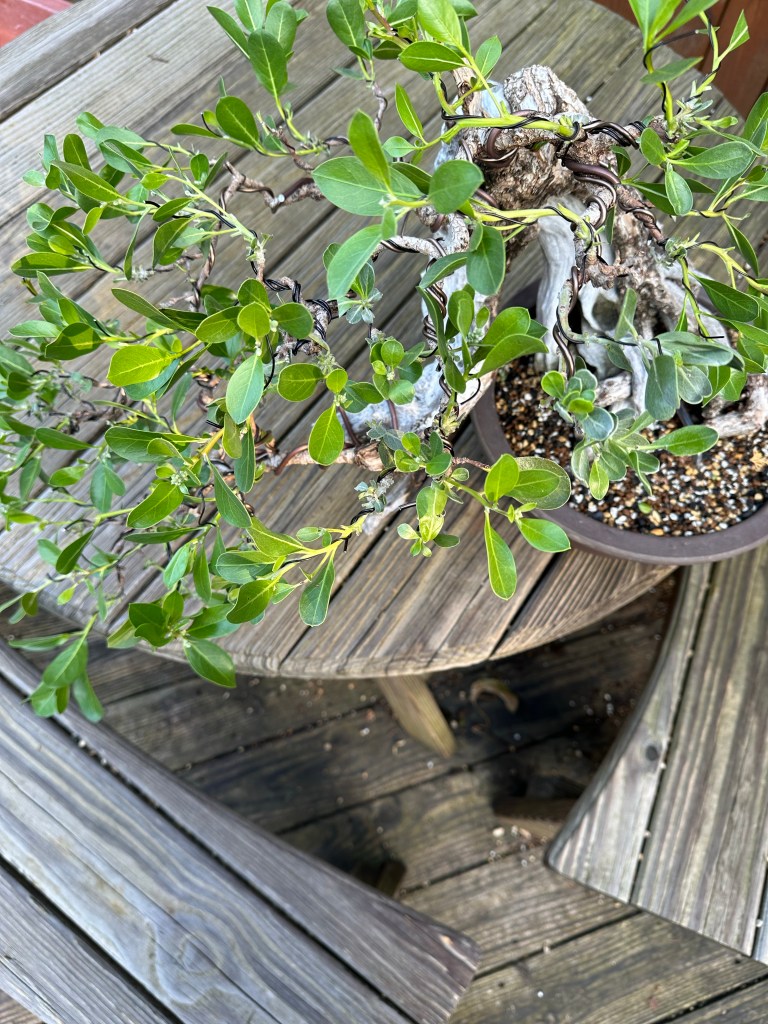
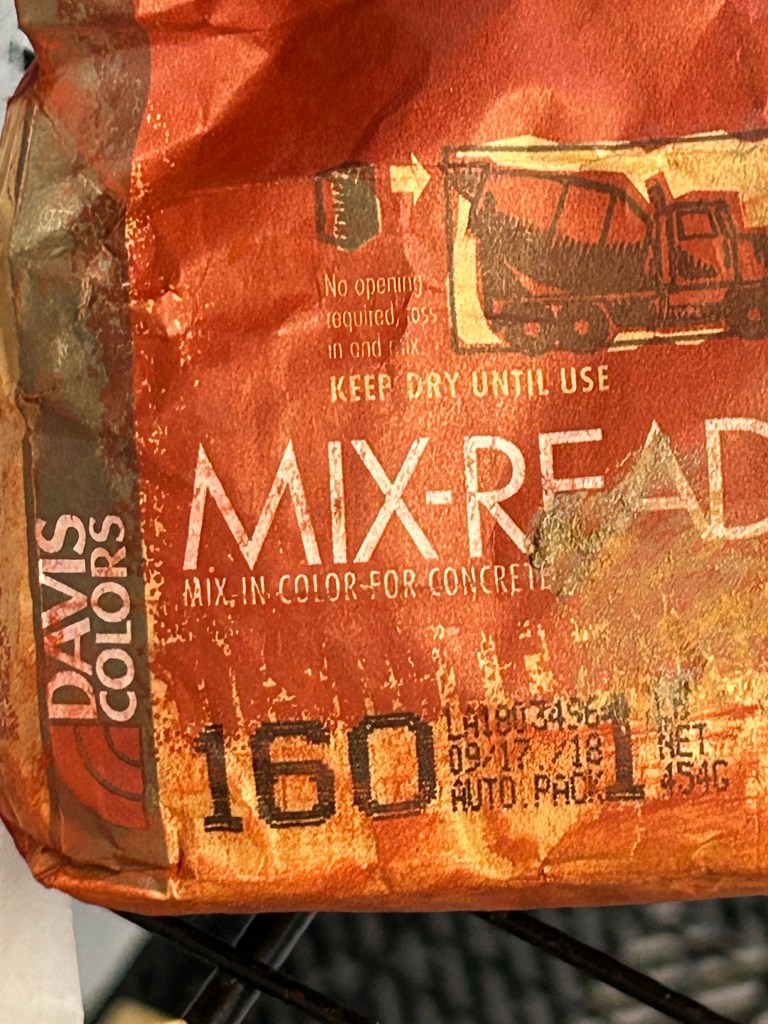
Then put it into the pot. I fertilized, then placed some imidacloprid to keep the chili thrips at bay, and then added that saved moss.

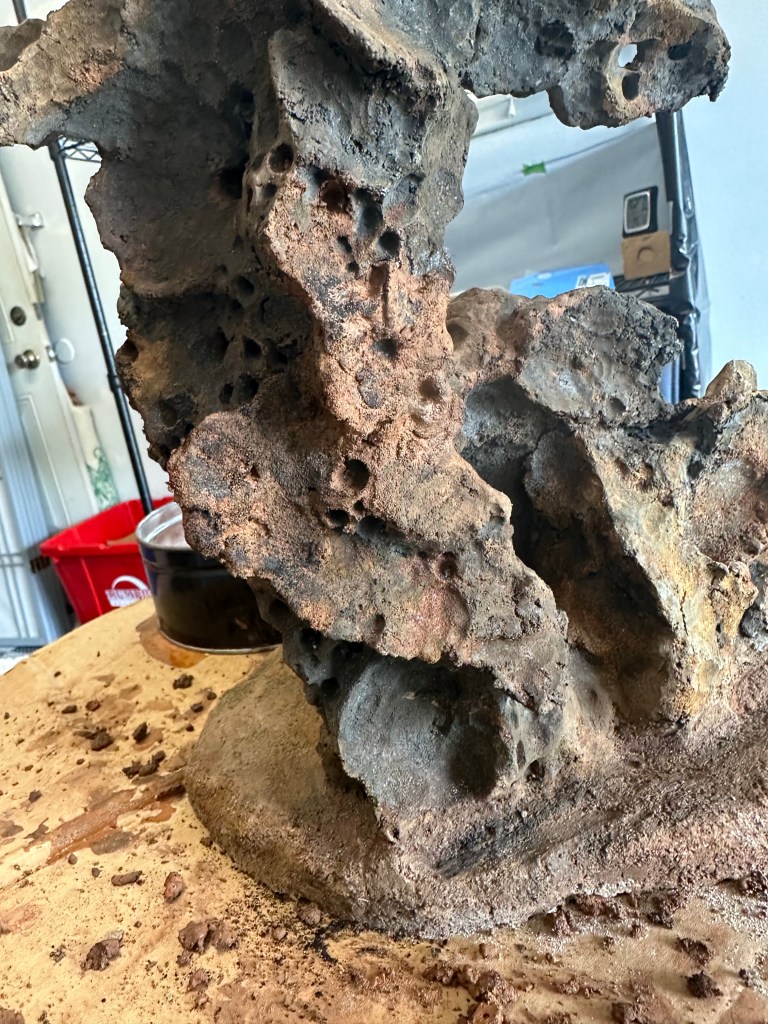
Then, since I’m going to lime sulfur it, I water and make sure to get the deadwood wet.

Lime sulfur needs to go on wet wood to help it penetrate deeper.

I’ve had this bottle for a while. I don’t think it’s available from the Hi-Yield company anymore, but you can get a similar sized bottle for very little money from veterinary supply companies (here’s a link, and no, I don’t do any affiliate marketing links, so I’m not getting paid to promote it: Click here you’ll notice that a big bottle, in this case 16oz, costs about the same as a 4oz bottle from bonsai sources. And it’s the same chemical, that’s your tip of the day. You’re welcome)

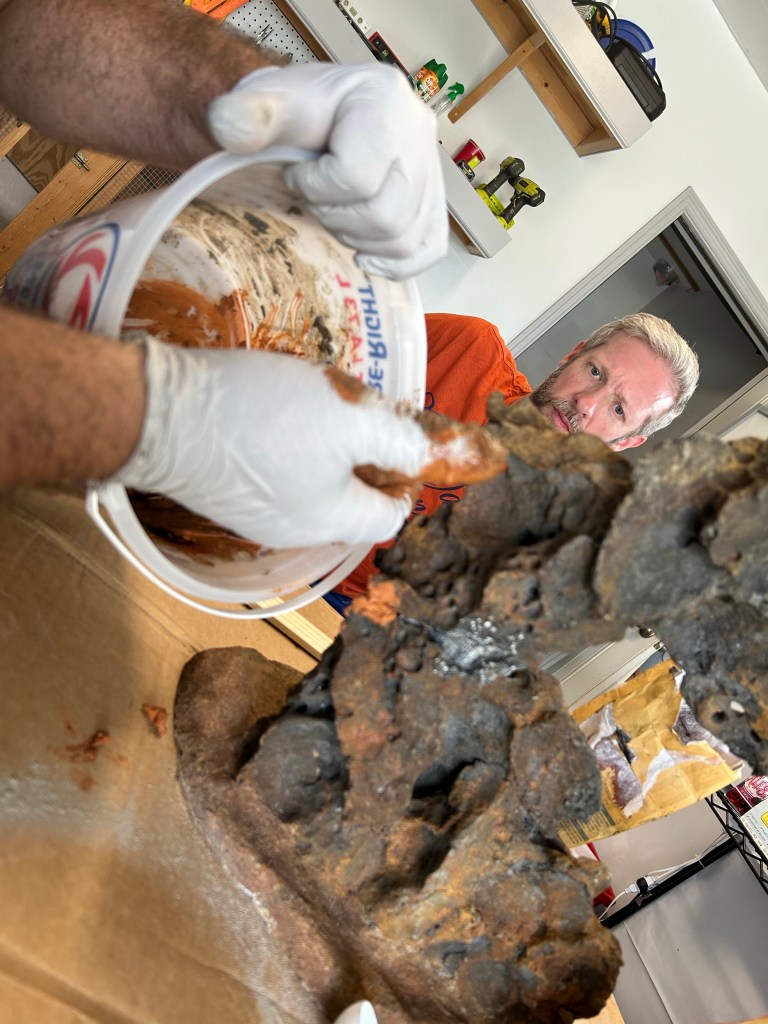
Get yourself a glass or ceramic, non reactive vessel, a cheap paintbrush, and paint it on.

Yes, it goes on orange, but, don’t worry, it bleaches white.

It won’t hurt the soil but it could damage the glaze on the pot, so I cover them both with a towel or newspaper.

Then I paint. Since it will flow down, being as it’s a liquid and we live in the gravity well known as “the earth” I usually start at the top and work my way down.

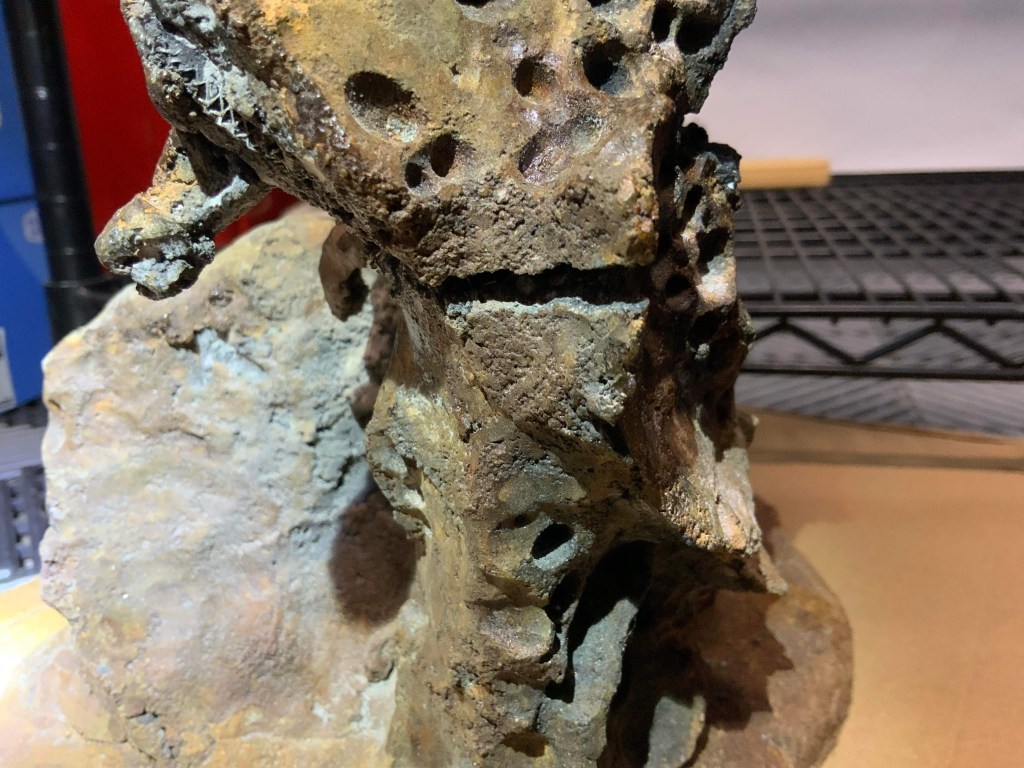
This is the cool part, I coat the whole surface of the deadwood, full strength btw, and it’ll look like this:

And about a half hour later, it bleaches white, quite nicely.

Now, before I finish with some wiring, I’ll speak to those that don’t like the bleached white look. First, it’s important to use lime sulfur. It is technically a fungicide, and it slows the decay. If you don’t like the white, you can add a darkening pigment, like India ink or acrylic paint, but, in a few months, the color will fade anyway, so there’s no real need to add the color unless you are showing the tree soon. Me, I don’t mind it. I think it works artistically, and Janice likes the bleached look too. But you do you, it’s your tree.

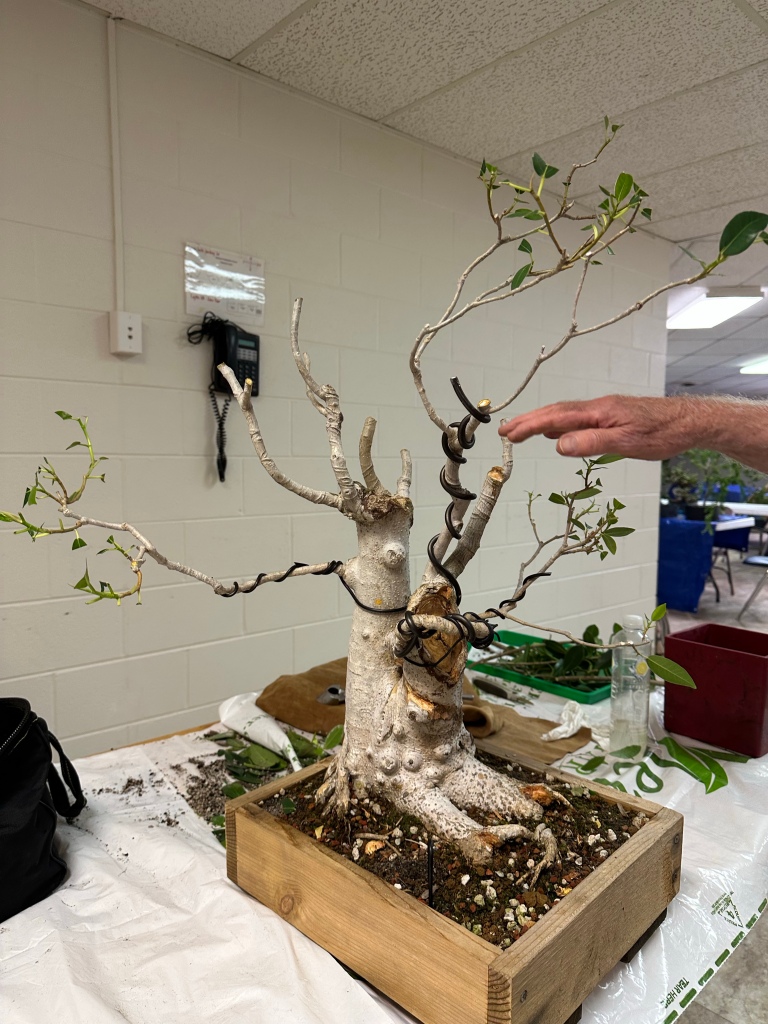
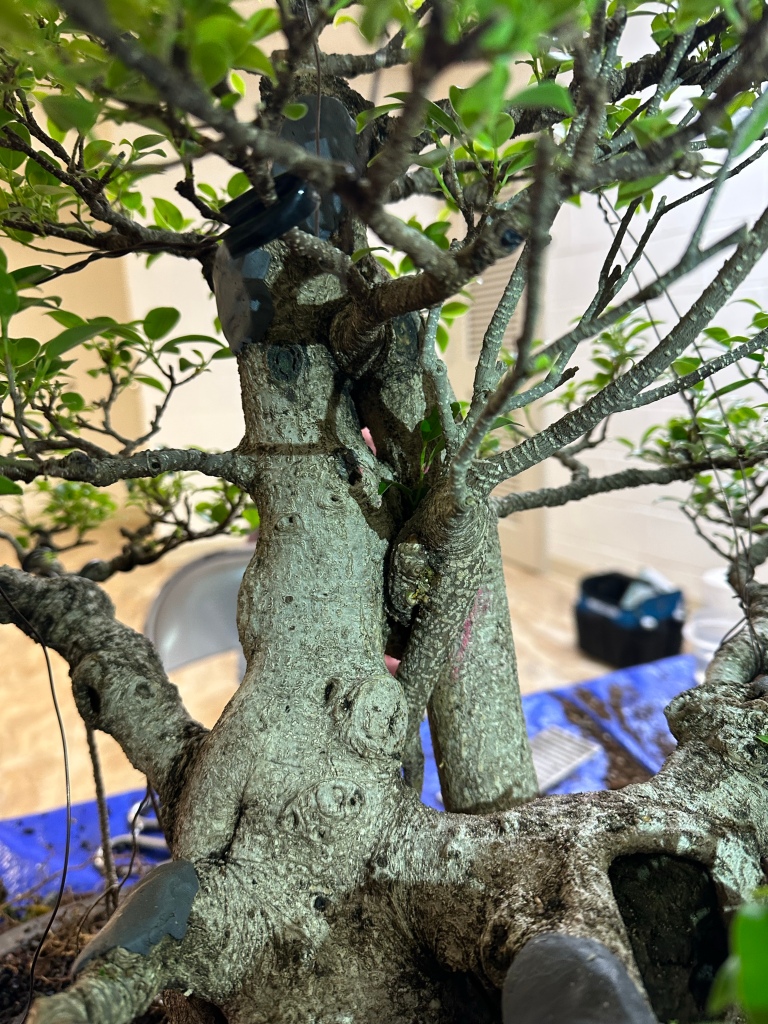
Now for a little wire and some minor pruning….

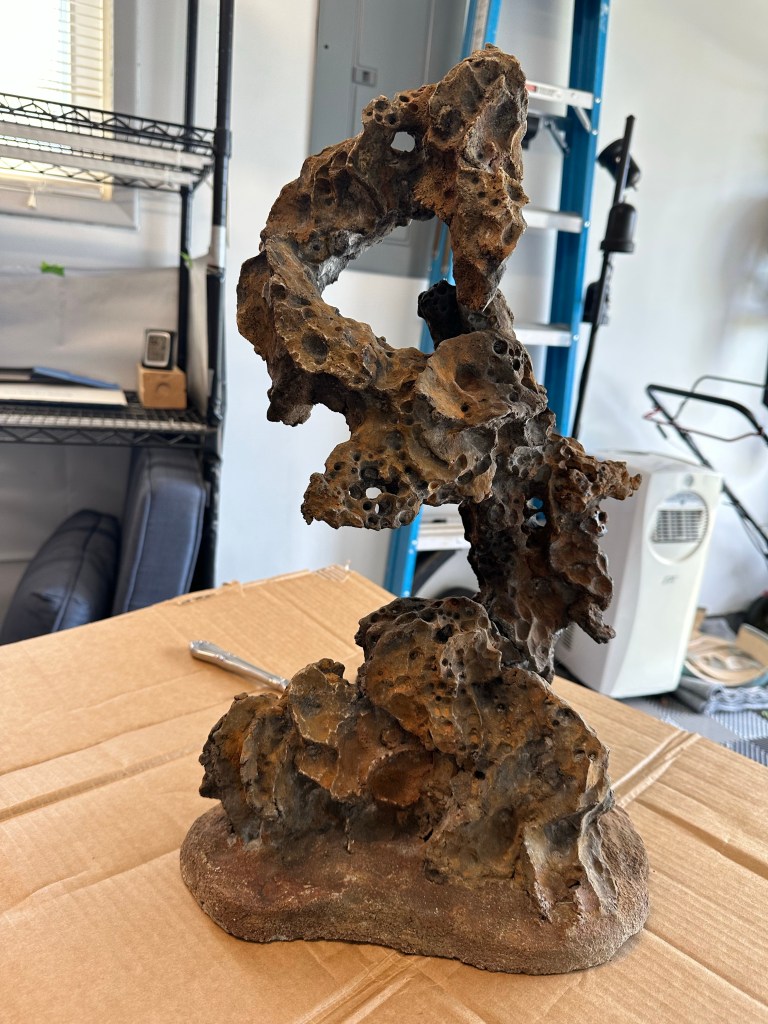
And Bob’s yer uncle.

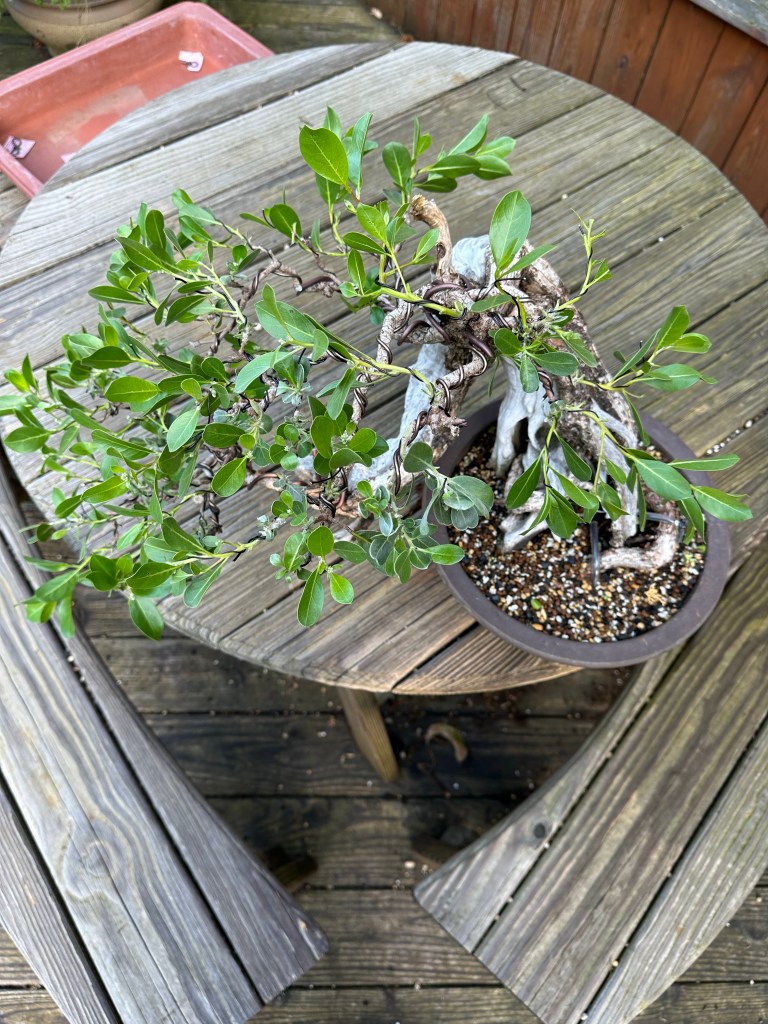
The tree is really developing well. The branches are thickening, and developing strong ramification.

I am liking it more and more.

  •  

Micro Blog (micro aggression)

Here’s a pet peeve. And I’ll start with “there are many ways to skin a cat” but there are ways, and better ways. See the hole above? A drain hole in a bonsai pot. We cover these with screen so the bonsai soil we use (use what you like and what works for you) doesn’t fall out the bottom.

I’m repotting a client’s tree. I find this as the drain hole screen. It’s good material, actual bonsai screen, but would it hurt you to cut it a little bigger? It’s not even a penny’a worth to add an extra half inch to it.

And the wire holding it? It doesn’t even bend around the floor wall of the pot.

What’s that gonna hold?

I’ve been using galvanized steel. It’s strong, lasts for years, and drains well.

And I don’t skimp.

And the wire I use to hold it in: it’s heavy gauge, and bent so as to hold the screen in place.

The loops hold the screen and there’s enough underneath to hold it to the pot. (Ignore the calcium buildup, it’s from south Florida, where the water is hard as a politicians heart.

See that? It ain’t moving.

And while I’m at it, tie down wire should be heavy too. At least 2mm, this is 2.5.

I can pick the tree up by the trunk, with no worries that the tree will be damaged (could, but not usually….well, sometimes. Do as I say, not as I do…).

Here’s the tree. Portulacaria afra. It’s not going anywhere.

  •  

Rehabbing a neglected banyan ficus

It’s been too long since I’ve attended to this poor tree. And the blog. Sorry to the tree and to my readers. I’ve been busy with client’s trees, planning the Bonsai Societies of Florida 2023 Convention (check it out Here ) and some real challenges in my life.

The tree is a Ficus microcarpa.

You last saw it in this blogpost What is the banyan style?, which was published way back in April 17, 2014. Here’s how it looked then:

Yeah. I know, what happened? Right? I’m supposed to be a professional and all that. Neglect, unchecked growth, a couple of hurricanes and freeze warnings. Accidental uh…drought. Insects, disease, cats, children. Basically it’s survived some biblical trials and tribulations.

Speaking of disease…

I see these spots early in the spring…a lot recently. I had my nursery inspector do some checking and, though I thought it could be a fungus or a bacteria like pseudomonas, he said it’s evidence of a gall wasp. Now, as the name suggests, it’s usually an evident infestation by there being a gall on the leaf, but I haven’t seen them in my ficus. Maybe because of the systemic treatments I use (more on that later) killing the larvae. I don’t know.

The work today in rehabbing this tree will include a repot, a hard cut back, fertilizer, insecticide, and weed prevention.

Let’s get to work.

First, cut back…

I’m bringing it down quite a bit.

Chop chop goes the scissors!

This branch below will be the one branch I don’t cut back. You’ll see why (again) later on in the program.

Normally, I would cut this type of fig back so hard, as this is a standard Ficus microcarpa, and you can get significant dieback on it, sometimes losing whole branches. To contrast this, the Tiger bark microcarpa doesn’t do that so badly, it back buds almost anywhere. But the plain old Ficus microcarpa does. Keep that in mind. Know your tree and work accordingly.

If the branch you’re chopping is a darker brown, it’s more likely to backbud, as that’s newer growth.

Here’s the one branch I didn’t cut back. I wired it and left the grow tip.

Now to repot. I’ll be combing out the roots to get rid of all the wrapping ones. And I’m being aggressive so I can get all the weeds out.

Weeds like these. This is a corm or bulb from a weed called “cat’s claw”. A climbing vine that holds onto things with tendrils and modified appendages that are a lot like, just as the name says, a cat’s claws.

Here you can see the “claw”.

This one is called “Florida spurge”. It’s underground roots can get as big as carrots. You have to be carful to pull out those roots as it will just grow back from the bulb. If you have them it’s a good indication you may have nematodes.

Here’s the leaves of the spurge.

That done, time to cut the roots.

They were circling the pot (it’s in a different pot than the one I used years ago).

The pot it was in.

A good pot. But is it deep enough for what I need for good regrowth?

I had had thoughts of putting it into this container. It’s kind of what the trade calls an “Anderson Flat”.

It’s bigger and deeper than the ceramic one.

But using it might give me too much growth. Is there such a thing? Yeah. I need controlled growth with short internodes (remember the dieback, the branch will dieback to the next node lower on the branch). So I’m going with its current pot.

Here’s an axiom “The wetter the roots stay, the slower the growth”. You’ll hear me talk of wetter and drier soil mixes and, in this case, the more shallow a pot, the wetter the tree will stay.

To repot, first, make a mound of soil, and put the tree onto it and wiggle it down. This fills in the air gaps and gives the roots something to grow into.

It bugs me when I see people spreading an even layer around a pot. Don’t worry about the edges. That’s what chopsticks are for, getting the soil in between the roots on the margins.

The wiggle technique:

All chopsticked in.

Some systemic insecticide next, in this case, imidacloprid. It’ll keep the thrips away. And those gall wasps.

I like to mix it into the roots well, or else you get a gooey mess.

Now, a generous portion of fertilizer. This is half synthetic time release, and half organic (I’m using Miracle Gro Skake ‘n Feed today).

And weed preventer. This is OH2 but you can find a product called “Preen” in all the stores. It’s a convenient product that inhibits seed germination, not an herbicide, so you have to get out all of the sprouted weeds first. And there will be ones you miss, so revisit it in a week or two to get those.

Do you know the difference between a weed and a plant? You want a plant, you don’t want a weed. There are places where Ficus microcarpa is a weed.

And that’s it. Let it grow.

I did rewire a back branch. It was growing up, as they are wanting to do, so I rewired the opposite direction and put it back in the place I wanted it to be. Here’s a tidbit: if you keep a branch wired too long, when you remove the wire, sometimes it pops back into its old position. The tree wants to grow up, especially newer, and smaller branches, so the tree is actually pushing against the wire, and when you unwire it, it pushes the branch up again. You can see this in bigger trees where two branches are growing against each other, and tree trimmers know this and are very cautious when they see it. As they try to chainsaw the branches, the pressure could be so great the branch will violently snap. They call it a widow maker. It happens with twin trunks the most. Imagine you’re sawing away and then “BANG” the tree splits apart at the seam.

With that, the fig has a long way to go, but by the end of the season, I’ll have secondary and tertiary branches to work with. I’ll update if I remember.

And “Bob’s yer uncle”.

Let’s see if I can get it back to its former glory.

  •  

Ground Layered Fig Dip

Well now, did the story start with scotch? Or end with scotch? It’s kind of hazy looking back now. But I’ll try….wait, I remember…it started with bourbon!

It actually began in 2019, but you didn’t see the tree until 2021, 2 years ago (or, two years from the post, in case you are reading this in the year 3023. It’s now 2023, taking place in the month of July. If you don’t use the word July, it’s the seventh month of the solar year, named for Julias Caesar, the first Roman emperor (or dictator) after abolishing the Roman republic. the Terran summer solstice in the northern hemisphere occurred on June 21, 2023, and this debauchery occurred 28 days later. Terra or Earth, is the third planet from our sun, called Sol, in the Solar System, in the Milky Way Galaxy. Hopefully that’s enough for the far future readers to understand how we told time back in the ancient 21st century days of legend.)

Today , or rather, late July (don’t make me go through that again). We have a ficus microcarpa, what one might call “ginseng”. But that’s just a marketing term. Ginseng are not figs, figs aren’t ginseng. You make Newtons out of figs, and Monsters out of ginseng. The cookie and beverage, that is.

The article this tree first made its debut in was this one, What can you do with a ginseng ficus, Northern edition, a rather wittily written post I might add. Go ahead, peruse it, I’ll wait. I have scotch.

Ok, now that you’re up to speed, let’s get to the work….

I’m in Toledo, or Maumee, to be precise. It’s pronounced just like “mommy” by the locals. I feel a song should be sung. 🎶I wanna go back to my Maumee🎶.

I’m with my two good friends, John and Julie. They take care of me when I’m there.

The tree is potted in an aluminum serving container. There were a few who said that we’d be poisoning the tree with the metal tray.

Looking below…

….I’d say, naaah! in fact, it looks good for a ficus in the north. Damn, I mean, it’s almost Canada fer crissakes. They don’t say “Holy Toledo!” for nothing.

Anyway, we did a lot of work that day. But not much on this ficus. We didn’t have a pot, you see. So we decided to get all “Muckety Mucked” up.

24 year…25 year….26 year, or, as the bottle suggests, one little piggy, two little piggies, and three little piggies.

We finished the 24 year. Made a dent in the 25 and 26. Wait, is this a bonsai blog or a drinking blog?!

It’s both. Sometimes.

And to the dead soldiers, we salute you!

The next morning, hangovers and bright lights notwithstanding, we had to get up early to go to Michigan (I know, that sounds like the first line in the “Great American Novel” we writers all would love to write. Maybe…..).

We had to get a decent pot, so we visited the Flower Market (Which has changed its name to Green Witch Gardens)

It’s a damn cool place to visit. Not only do they have bonsai, but there are cats…

…that’s cats, plural.

And pottery from amazing American artists.

The trees!

Julie hiding behind a tree.

Familiar weeds. These are what are called wandering dudes now. I feed them to the tortoises. Speaking of which….

Tortoises!

Only the best bonsai nurseries have tortoises.

We got some pots.

Then went back to Toledo.

And we got back to work.

For being in a shallow aluminum pan, it’s grown some good roots.

The “pot” has even held up well. We could use it again.

Looks solid.

Raking out the roots….

Here’s the new pot we got for the ficus.

Sweet, ain’t it?

Tree is ready

Can I mention again how good the roots are?

We had split some of the larger ones (go back and read the first post).

Hey, it even fits in the new pot.

Damn those are sexy roots. Must be the soil. The vaunted, rare and near mythic “All-American Red, White, and Blue, Adamaskwhy SuperMix™” .

Just to prove we did other work, here’s some examples. A willow leaf.

A tigerbark.

An azalea.

A willow leaf root cutting.

And another.

I must say, I can’t believe what an amazing two days that was.

But I had a hard day while I was writing this piece. Something that should not be happening is. And I posted to Facebook; I quoted JRR Tolkien, the part where Frodo asks of Gandalf:

“I wish it need not have happened in my time,” said Frodo.
“So do I,” said Gandalf, “and so do all who live to see such times. But that is not for them to decide. All we have to decide is what to do with the time that is given us.”
J.R.R. Tolkien, The Fellowship of the Ring

And John replied “and what you do happens one word at a time, one leaf at a time, one sunrise at a time.”

Here’s the tree all those years ago. We ground layered it (hence the post title).

One tree at a time. Even if it takes years to bring it to its potential.

One leaf at a time.

One branch.

One root sometimes.

The two years ago..

And now.

Bonsai is a journey. And getting there is sometimes the only reason to go somewhere. You can buy a tree, but making a tree, especially this one, that started so humbly, is way more fun.

John has done well with it. I’m honored to have helped him, and thanks to both John and Julie for letting this strange bonsai guy (me) into their home.

  •  

Welcome to Tropical Northern….Virginia???

I promise, I wasn’t hanging out with any rich men in Northern Virginia. It was all cool bonsai peoples. See?

Not a single politician (I don’t consider Roberto a politician, and he was in Peru anyway).

I was at the beginning of my summer tour, making a triumphant return to the Northern Virginia Bonsai Society. I brought a lot of trees for the workshops.

They gave me a tree, what I believe is a Ficus macrophylla (or the Moreton Bay fig, a ficus from Australia) as the demo tree. . This particular specimen has been passed around in the club a few times, with no one really doing much with it. Maybe a trunk chop or two. I liked it and the challenge.

I kinda like an underdog, so I tried my best, using my tropical tree bonsai superpowers to bring out the most I could from the tree.

We start with an approach graft.

Cut it back in places, let it grow in others.

The graft….

The growth….

The cut back.

And below, my hand in an anticipatory gesture of the “Let it grow!” number, along with choreography and three part harmony.

This was the demo. Along with the work, I told the chicken sexter story (I’ll have to tell you, the readers, that story sometime), I explained what different plant growth growth hormones do (see this post: I use some fancy words to justify my defoliation habit, go figure ). I talk about my childhood trauma and how I use it in the styling and care of tropical trees in the sunshine state (not really, my trauma is manifested in less healthy ways, as it should be).

I told the story of my youth in bonsai, trying to find as much about bonsai as I could, and happening upon a website from a guy that not only grew tropical bonsai in the Great White North (coincidentally, in Massachusetts, about four miles from where I grew up), but developed spectacular tropical bonsai, better than most bonsai artists from Florida. His name is Suthin Sukosolvisit. One of the only true Masters in American Bonsai.

Anyway, I had some fun making a fool of myself on stage and hopefully imparting some knowledge.

I’d love to have the tree for myself. Maybe there will be some altruistic NVBS member who bids on it and sends it down to the FLA as a gift.

After the demo, and some lunch, we had a workshop. My wife took the pics with me in them. I think she’s biased, but she likes them.

In my element, surrounded by trees and students.

The trees got smaller as my ego got bigger.

Love a good trunk chop. It’s like the smell of napalm in the morning.

Here’s a link for the ficus trunk chop, above https://www.instagram.com/reel/CuwgSarMCtD/?igshid=MzRlODBiNWFlZA==

And below, a willow leaf that needed some courage….

Like a pretzel. We just needed some cheese.

Doh!

Where did the pretzel go?

Yea, of course it’s a reel. Here’s the link from Instagram: https://www.instagram.com/reel/CuyRox2g05X/?igshid=MzRlODBiNWFlZA==

And just the video. For those that don’t like Led Zepplin.

My wife channeling her inner Jack Kirby with the wacky camera angle.

Now, we get to a cool tree. It’s a tree originally from Ed Trout, one of the last true gentlemen of bonsai. Ed had sold it to a man named Jonah Hill.

I know. Adam lavigne helping Jonah Hill work on a bonsai tree. The joke writes itself.

Study the pic just above. You’ll notice a hole in the middle of the trunk.

Below, I have a tree that no one wanted. So we are going to graft that into the hole.

I cut off a piece of the tree, a piece with a good aerial root. The red circle is where I cut it and the graft will occur.

This, below….

….needs to fit into here. that’s the front of the tree, to keep you correctly oriented.

There’s Jonah, at the top of the pic. I’m about to stick the graft through the hole. Yup. Through it. That’s Jack behind me.

This is the back of the tree. The leaf end of the graft will act as a new back branch.

We use a brass screw (use a non reactive metal) to attach the graft.

Here’s the front of the tree. I arrange the roots, artistically, so that they compliment the tree. Notice the screw in the bottom left. And my wife giving me the “Look”

To get the graft to grow faster, I remove all the leaves except the last few, and I leave the grow tip.

There is still a hole, but as the graft grows, it’ll fill it up. That’s LeAnn, on the left, who was my host, giving me the same look my wife gave me. Both of them want me to work on her buttonwood. don’t worry ladies, it’s next.

Some more pics to give you some detail.

Jonah has done well reducing the leaf size.

Just about done. We tied some aerial in place (bottom left).

And, finito!

For the next tree, and the next post, we get to meet LeAnn’s buttonwood. An amazing tree, also from Florida (like Jonah’s tigerbark), and originally from none other than Mary Madison, the Buttonwood Queen.

Excited?

  •  

LeAnn’s buttonwood

That’s Washington DC. I think. Lots of converging lines and paths layered on top of each other. I posted a similar insane street map last time I was up in the area and I visited the Bonsai and Penjing Exhibit at the National Arboretum .

I was too busy working this tour to get to see the Collection. That’s ok by me. I like working. To be human is to work. To find meaning in that work is the sole purpose of this life on this earth.

Anyway, there’s room for philosophy later on in the mid and last section of this essay, so, as promised in the last post, here is LeAnn’s buttonwood.

She said it was collected (as most in the USA are) by the Buttonwood Queen herself, Mary Madison.

LeAnn is the lady in lavender (purple? Lilac? Not periwinkle, or plum, for sure) hovering behind me.

She waited very patiently while I worked through all the other workshop attendees trees and finally got to her tree.

It desperately needed a repot. I teach my students in Florida that buttonwoods need a repot every year. Up north, like here in Virginia, it’s not so important. Unless you use a horticultural heating pad, that is. (Wait, is Virginia “Up North”? I’m not sure. Where’s the Mason-Dixon Line?)

Ok now…..WHAT? (not the North/South thing, even I’m not getting into that). What’s a horticultural heating pad?!

Here’s a few secrets for my northern tropical bonsai growers. First: get grow lights. We are in a golden age of indoor growing of plants. Yes, due to the legalization of cannabis, mostly, but we gain from it because all kinds of grow lights, from full spectrum LEDS to metal halide, are available almost anywhere for cheap. So get yourself one. But…BUT..secondly: heating pads!!! Horticultural heating pads are the game changer for those that need to bring in their tropical trees for the winter (one should always put your trees outside for spring and summer, there’s no replacement for the sun and rain. None). Most tropical trees growth habits are dependent on temperature. But not just ambient air temps. It’s the temperature at the root zone, in the soil, during the evening, that makes tropicals grow.

Which is why we here in the Sunshine State don’t repot buttonwoods until nighttime temps are above 65°F for at least 6 weeks after the repot.

In sweet Virginy, this particular operation is taking place in the middle of July, and LeAnn has the rest of July and most of August to grow more roots. So no worries there for her. But I knew of a guy in Cincinnati that repotted his buttonwoods in January. He had a greenhouse and heating pads. That’s where I got the idea.

Anyway, we got the buttonwood out of this pot:

And into this pot:

We wired it, tried to bend some deadwood with the torch and steam technique (only partly successful) and, now, just to make you wait, how about a bumble bee and a moth on a coneflower?

Awwwww, ain’t that cute?! LeAnn has an amazing garden and an even amazing collection of trees.

Here’s one of the more developed bullhorn acacias I’ve seen.

And a twin trunk willow leaf on a rock (a rock from Hawaii I believe, where LeAnn hails from).

And now, the buttonwood.

It’s an impressive specimen.

You can kinda see the burnt section where I tried to bend a straight piece of deadwood (middle of the below pic. It was ramrod straight).

View from above.

The constant reader is asking, “Why are there still leaves on it?”

Well, we are in The North, and the sun isn’t quite so strong as in La Florida, so, even though we are in full summer, I’m not comfortable totally defoliating a buttonwood up here.

And the main thing I don’t want to do is to kill this special tree. We really beat up the roots when the repot happened, and foliage is what grows new roots, so I left the foliage. Simple calculus, as they say in the movies.

And the tree was collected by Mary. Here’s the last pic I got of her before she passed away (that’s her daughter Terri, behind her).

Mary was such a force in bonsai, it’s hard to believe she’s gone. I truly miss her. There won’t ever be a woman in bonsai like her again.

And it was an honor working her tree with LeAnn. Thank you!

One last tip, and I learned it from Mary. Since we beat up the roots so much, I advised LeAnn to set the pot in a tray of water. One deep enough to cover the drainage hole. This will help the tree to grow new roots. Contrary to what I’ve said before about air being important for root growth on other trees.

A buttonwood lives in the coastal saturated zone, where mangroves grow, by the ocean, and are used to water. In fact, to make a cutting root, the easiest way is the old fashioned “Put the cutting in water” method. Oftentimes (don’t tell anyone) when we collect buttonwood, it’s really just a big cutting, with no roots at all, and we place the tree into the pot, and, as LeAnn is doing, place that pot into a tub of water.

One can, as many often do in bonsai, point out the unscientific practices of bonsai people. I do it often. But I have a saying I use religiously, and it applies to bonsai practice distinctly:

“Horticulture is a science, but the practice of horticulture is an Art”

I’ll leave you with that to mull over. Quote it to your best friend and your most divisive foe. It’ll separate the wheat from the chaff, real quick.

  •  

Rock ‘N Roll

Now that’s a chunk of a block of a rock or something. Actually, it’s concrete, a manmade rock. But it’s “done broke” as they say…

It looks like a reptiles beak, below.

The story begins with a text, including some pics and videos, from Cincinnati.

The text was from Brendan. Say “Hi!” Brendan:

That’s him, my wife and me.

He got this “stone” from Poland, believe it or not. From a guy named Jacek Motyl. He makes rocks. Amazing rocks. Click on his name.

Anyway, Brendan ordered this stone and Jacek shipped it to him. In transit, it got “done broke”.

I’m not blaming the packing job. Jacek packed the rock well. I’m not blaming the Polish post office. Nor the USA postal service.

Let’s blame providence. The rock breaking gave me an opportunity to try something I’ve never done before. Sorry Brendan. Yes, this is my first attempt. I shall try my best sir.

The type of rock is technically called “tateishi”, or standing stone, used in a root over rock style called, in many modern spellings, “ishisuki”. When I was growing up in bonsai, we spelled it “ishitsuki”. Yeah, ishitsuki, I shit you not….but the modern spelling helps us to pronounce it correctly. The “T” and the “S” make a singular sound in Japanese. Kinda like an “tssss” sound.

Anyway, that’s my joke about root over rock style. It’s better in person, with the hand gestures and all.

Watch the video below to see how bad the break is.

Not to give away secrets, but the shape was created by taking screen or hardware cloth and making the basic shape.

Then the screen is built up with cement. And colored, shaped, sculpted, aged, etc.

Pretty cool right?

My job is to fix the break and match the colors and texture. So I first had Brendan try to find Ciment Fondue. I had remembered reading about the stuff reading in the old books and magazines when I first started in bonsai (books and magazines are these amazing learning tools that one held in one’s hands, printed on paper. You would flip pages and read and the knowledge was amazing. I could tell you about encyclopedias but you’d zone out quickly).

Brendan couldn’t find Ciment fondue. Searching on google, I found it. What is it?

CIMENT FONDU® is a hydraulic binder with an alumina content of approximately 40%. Composed mainly of calcium aluminate.

It’s a brand name, only available in Europe, so I told him to find something similar. And he did.

Refractory mortar.

Why something similar? So it expands and contracts in similar ways to heat and cold cycles as the original sculpture. And refractory cement is waterproof. An important thing up north, as water freezes in the cold, and can explode our rock. That might sound spectacular. But that’s not conducive to stable bonsai plantings.

There’s something soothing playing with cement.

Measure out a portion….

Add color (we had red, tan, called buff, and black. I eyeballed it).

And a trick, don’t mix it fully. You want variations.

Add water.

And move fast.

Brendan was watching me closely.

I smeared it, chopsticked it, blotted it. It’s a feeling thing.

I made sure to push the material into the cracks to ensure the repair of the rock, and not just make an aesthetic facade.

And with the leftover cement, I played around a little.

Yeah, I know what it looks like.

After the repair dried, I think it looks good.

I matched the texture and color. But most importantly, it’s solid.

I wouldn’t drop it, but it’s one piece again.

Below, is where I cemented that chunk back into place:

The “beak” is gone.

Now it’s up to Brendan what to do with it.

  •