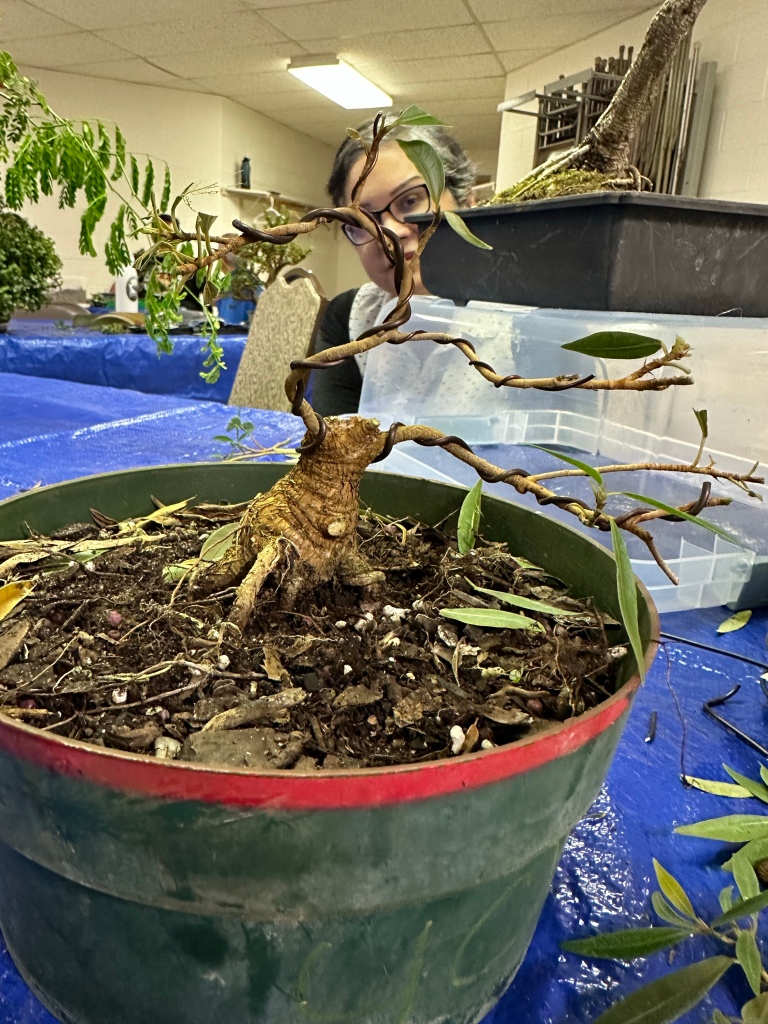
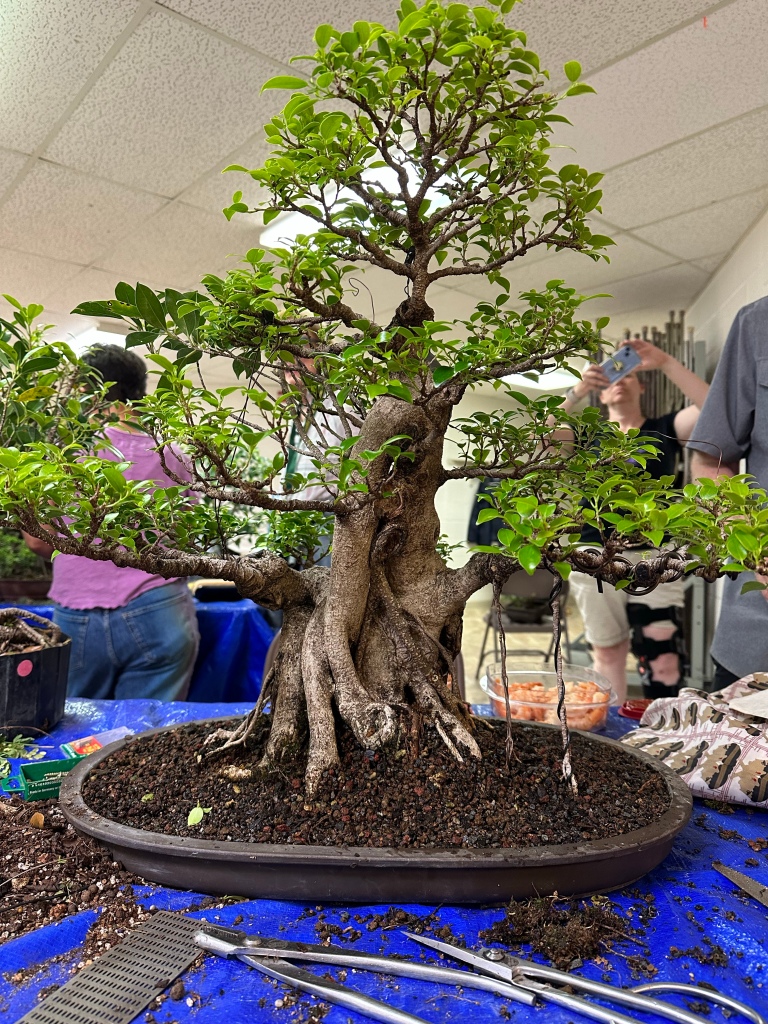
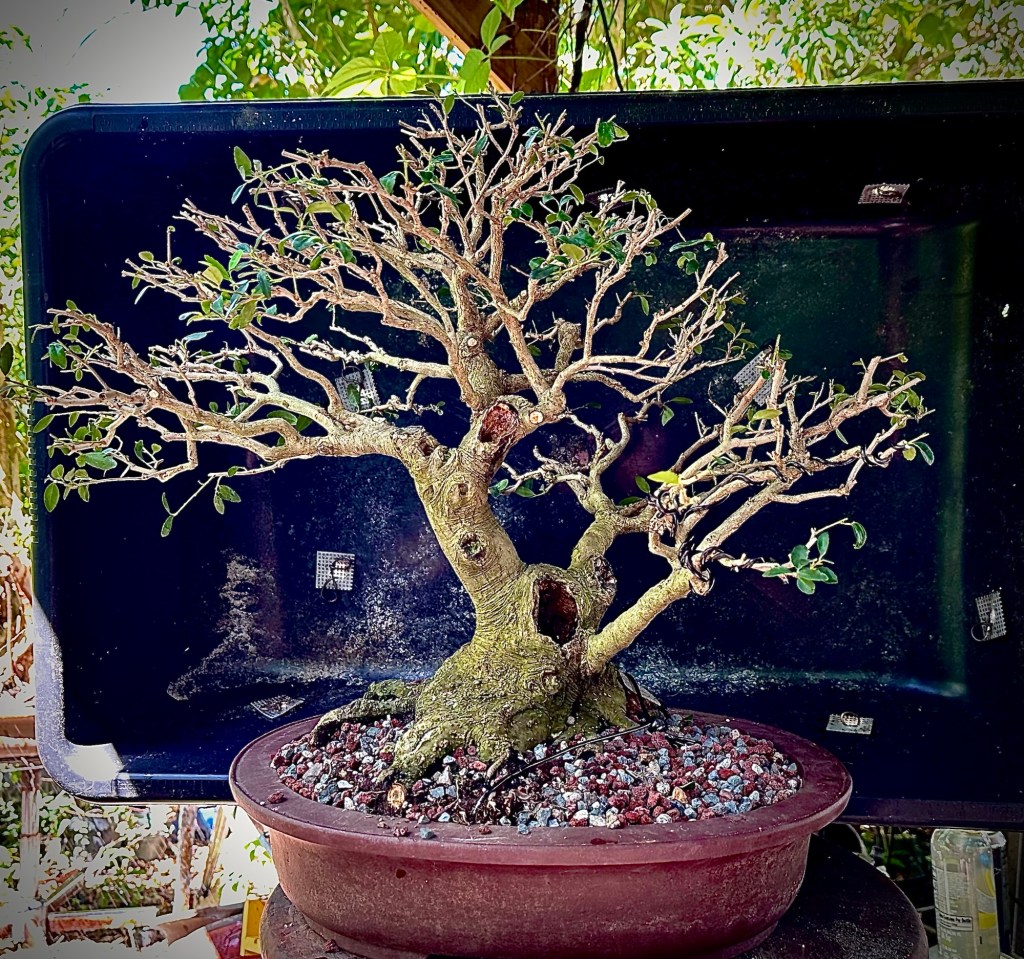
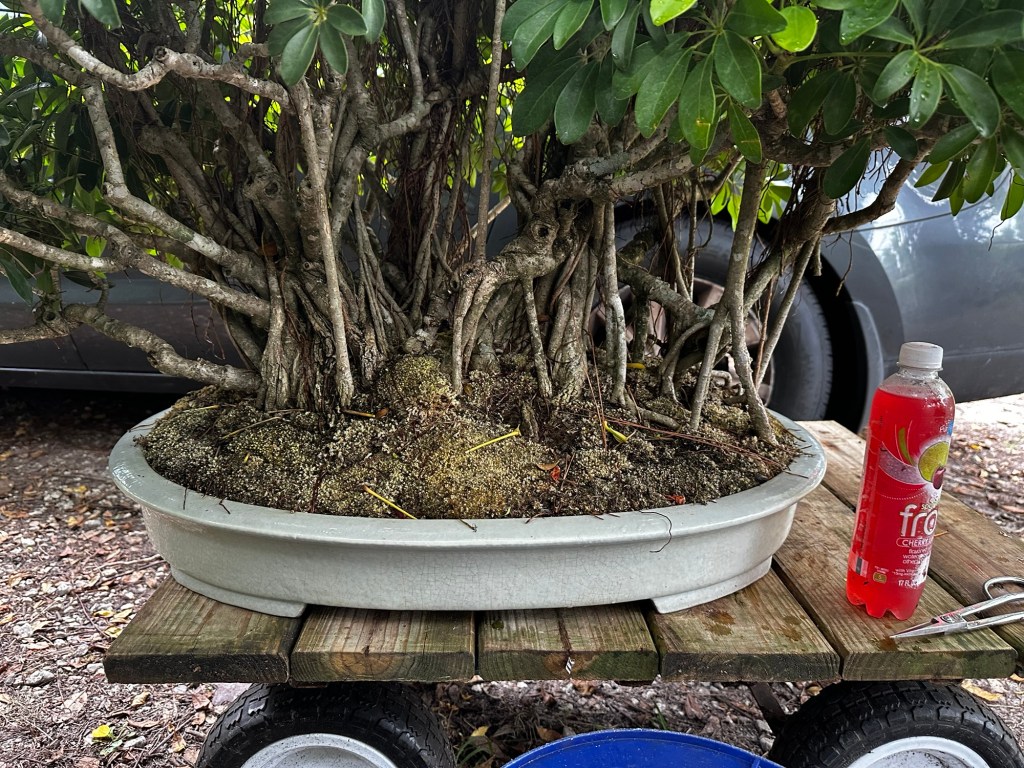
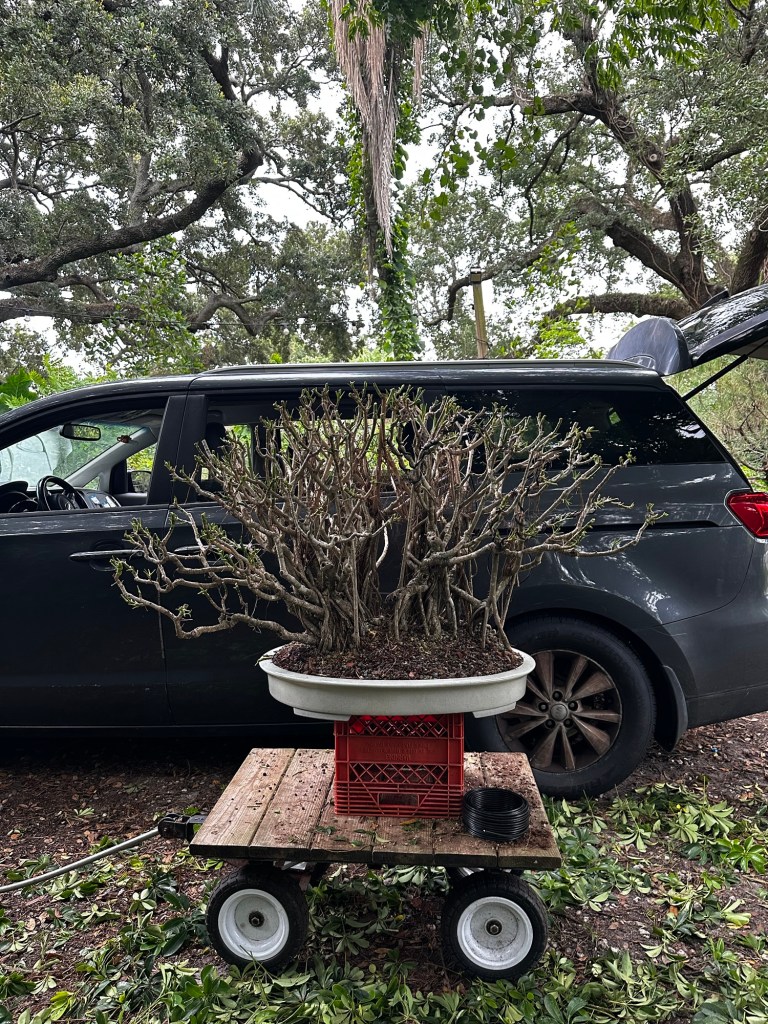
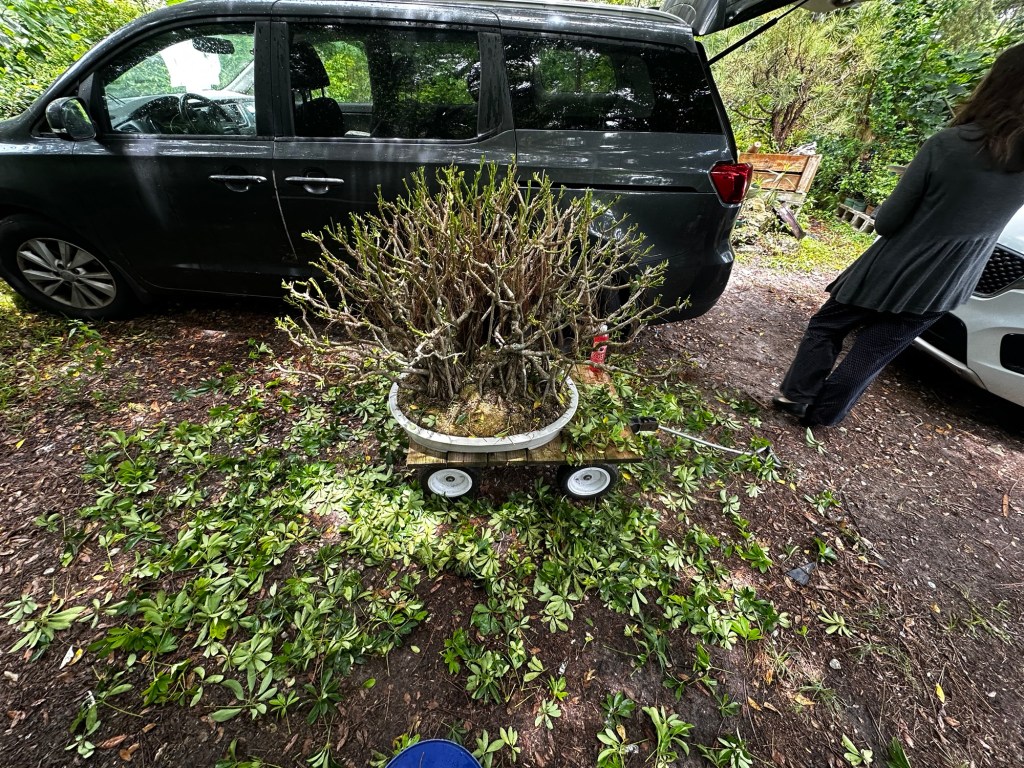
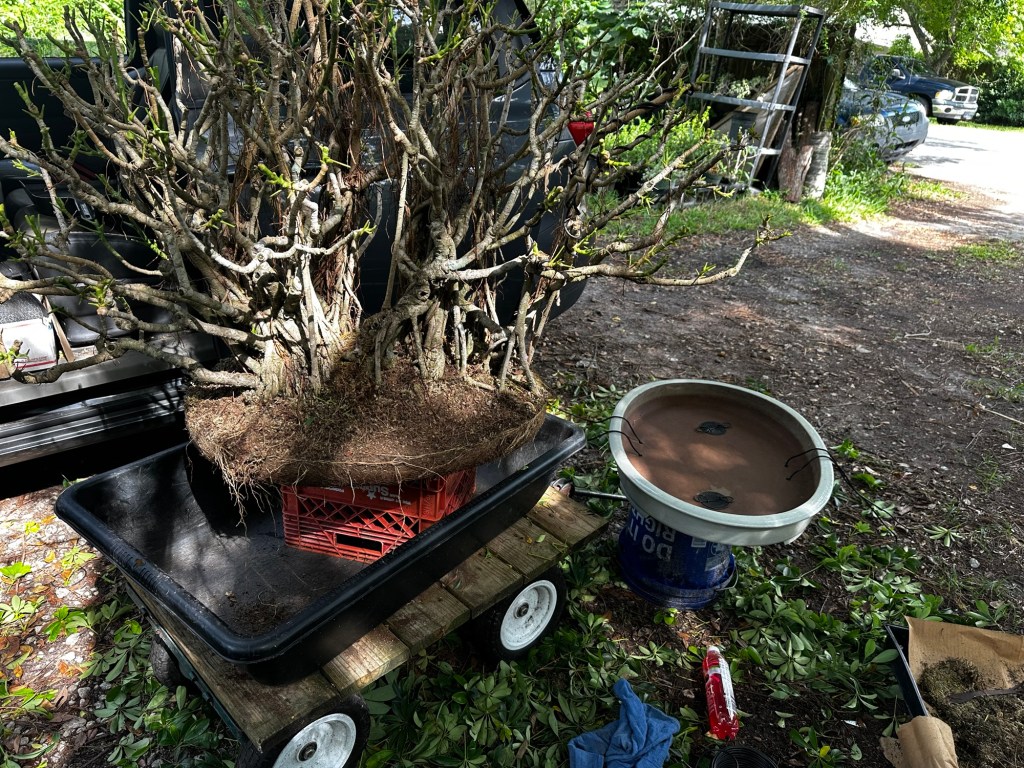
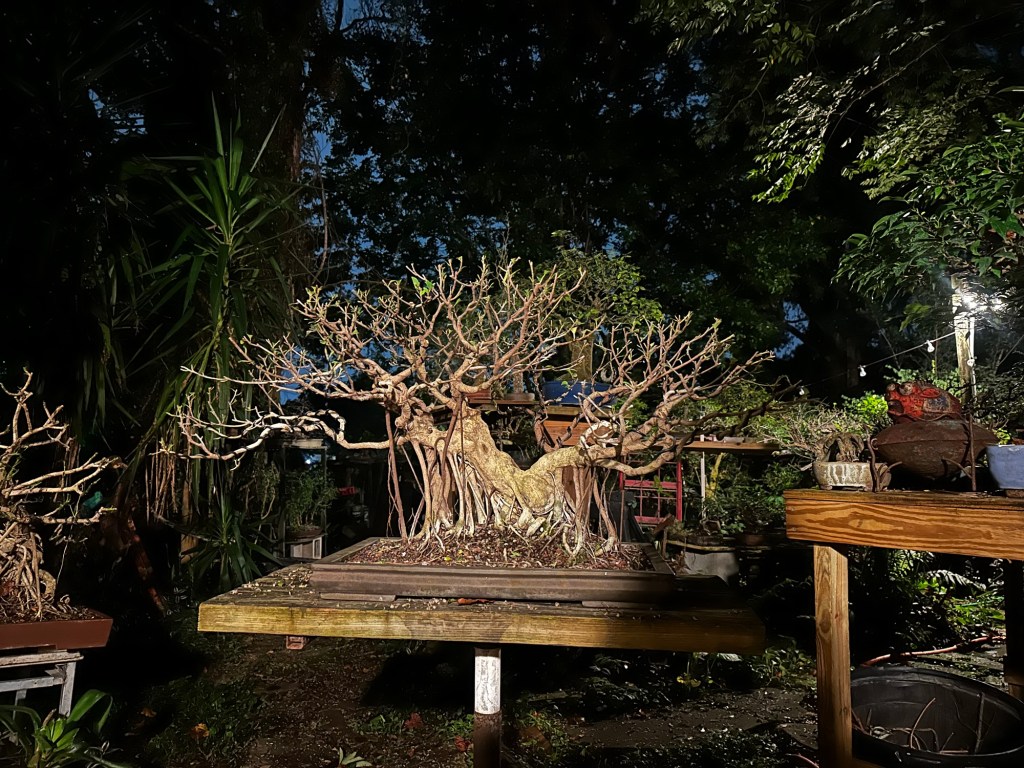
It’s a pink pixie bougainvillea kinda day today, from the Hippie Dad Bonsai garden.
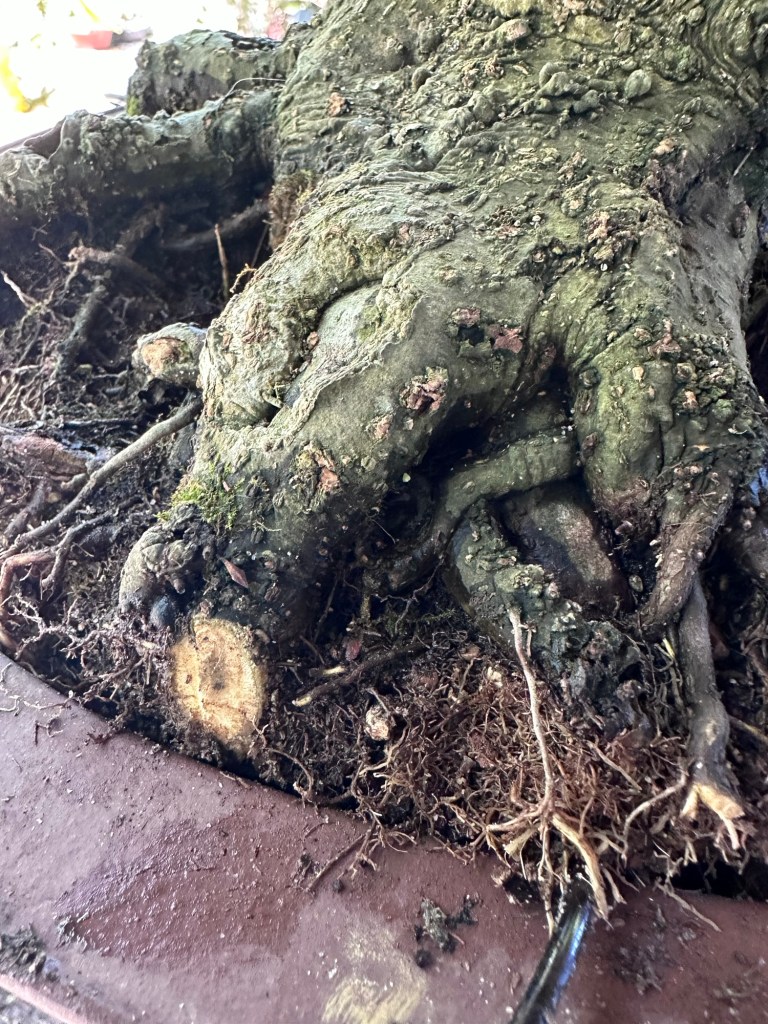
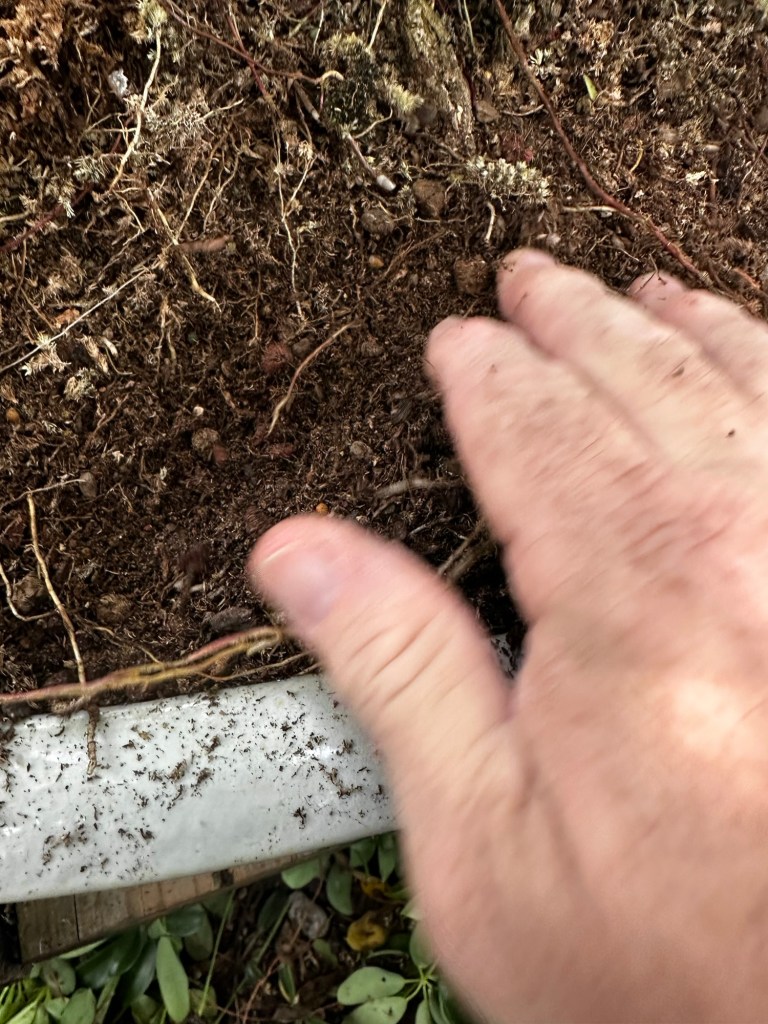
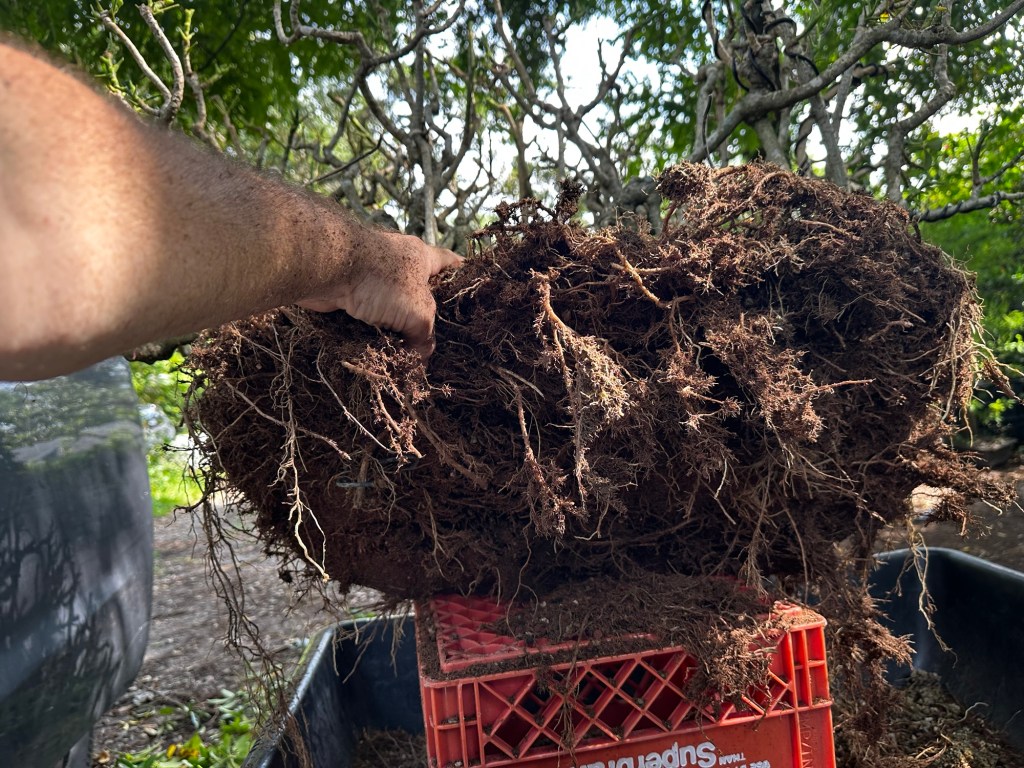
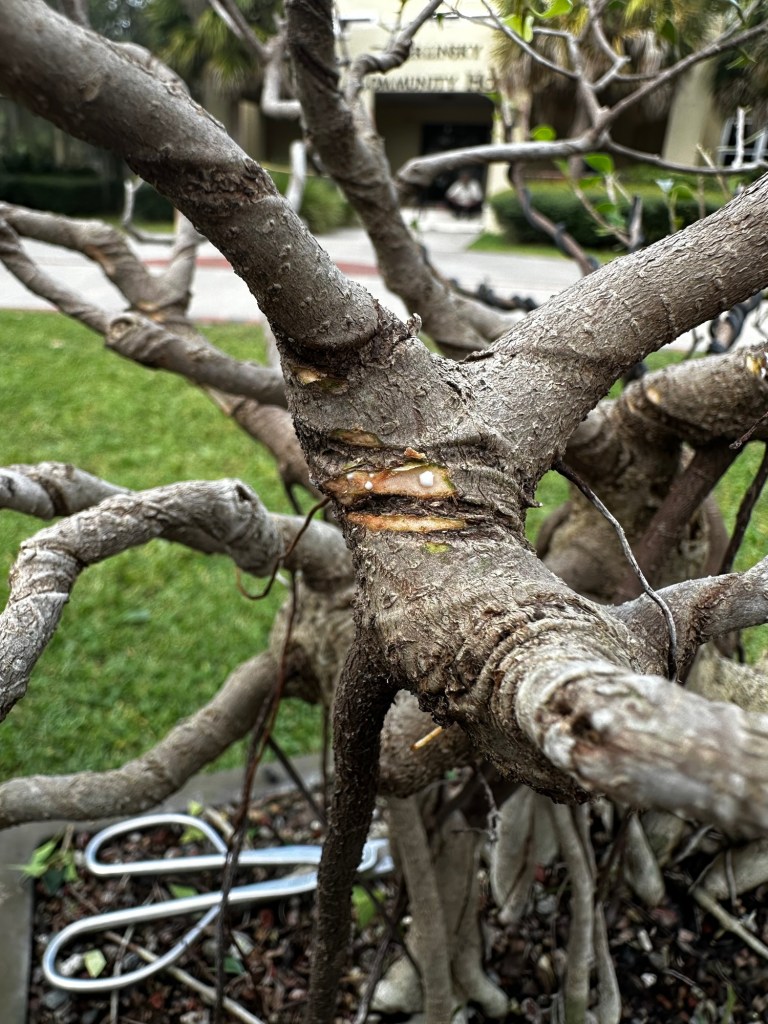
A big one too. If I remember correctly, it was a tree which was literally in the trash at a landscape nursery, and Doug (the esteemed Hippie Dad) dumpster dived it. From the looks of it when we potted it in this pot a few months ago, it might have been a big cutting at one point. The roots were so non-existent that I had to drill a screw into the trunk to secure the tree in the pot.
Here’s the screw.
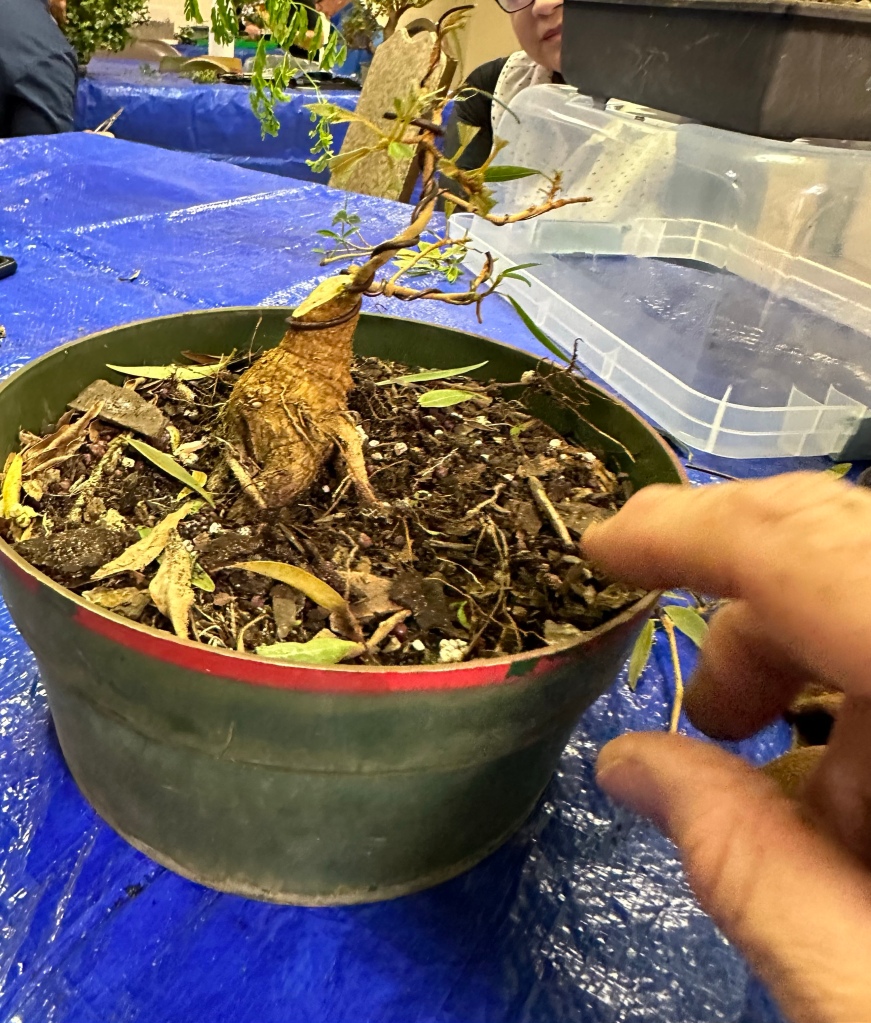
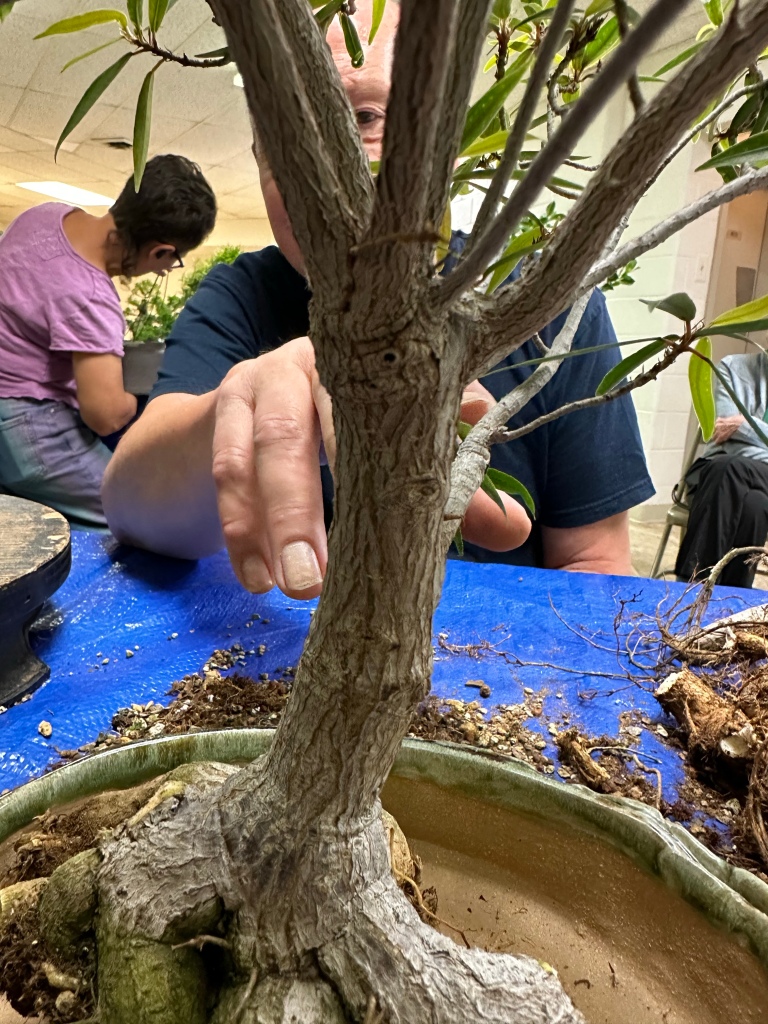
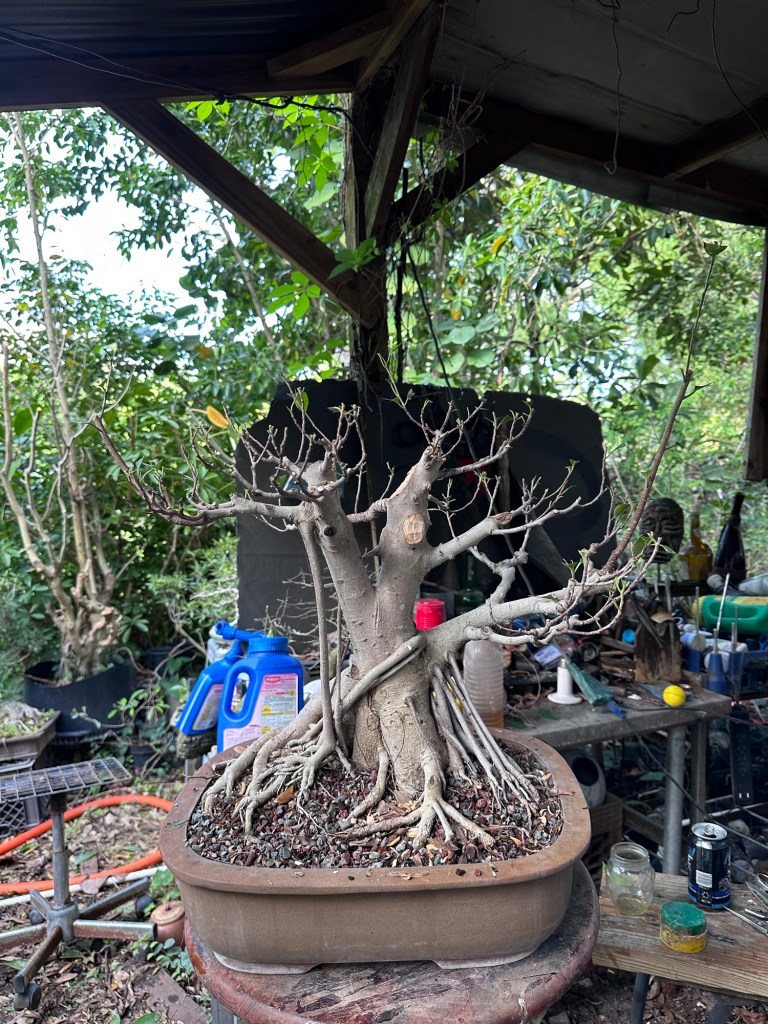
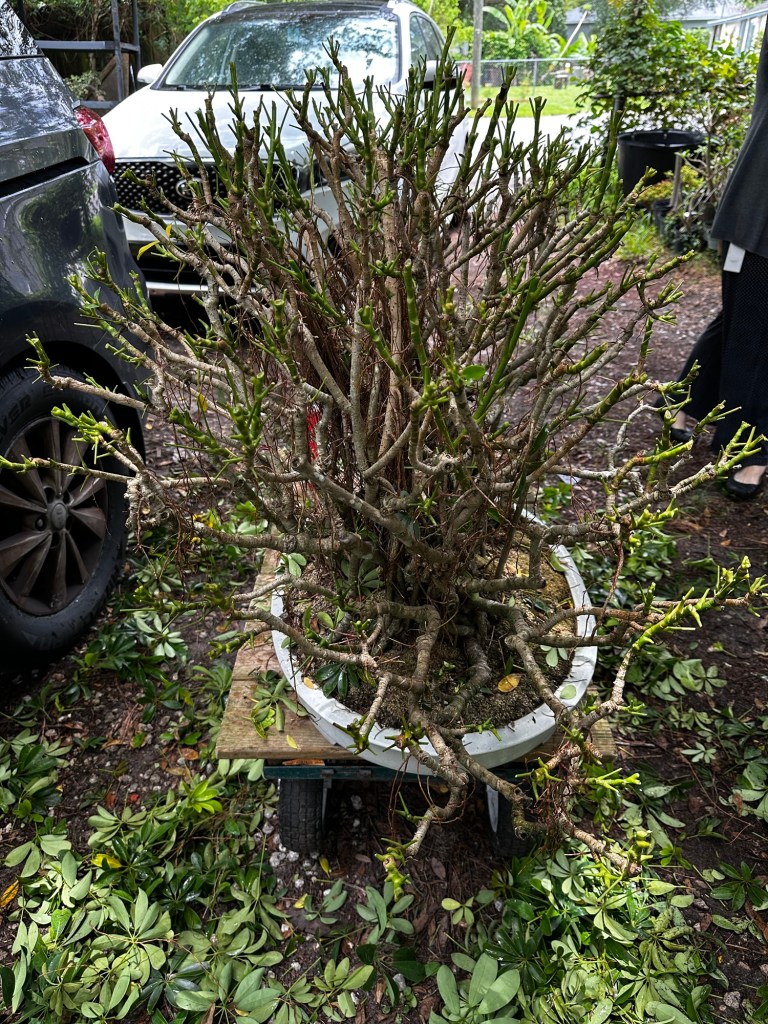
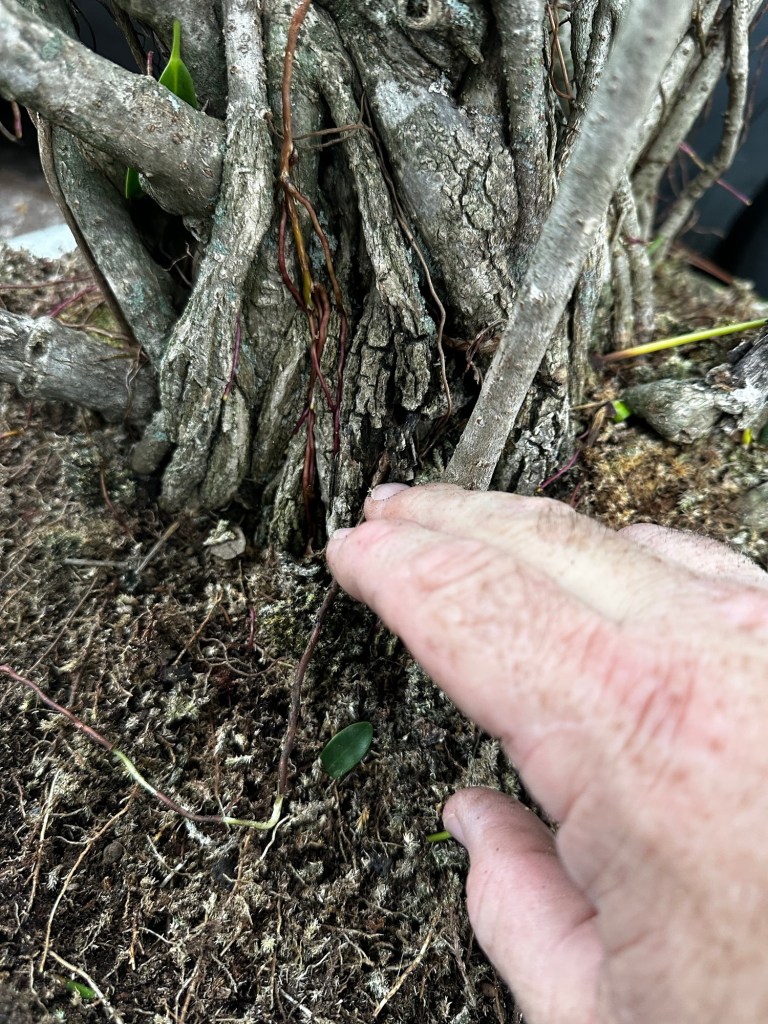
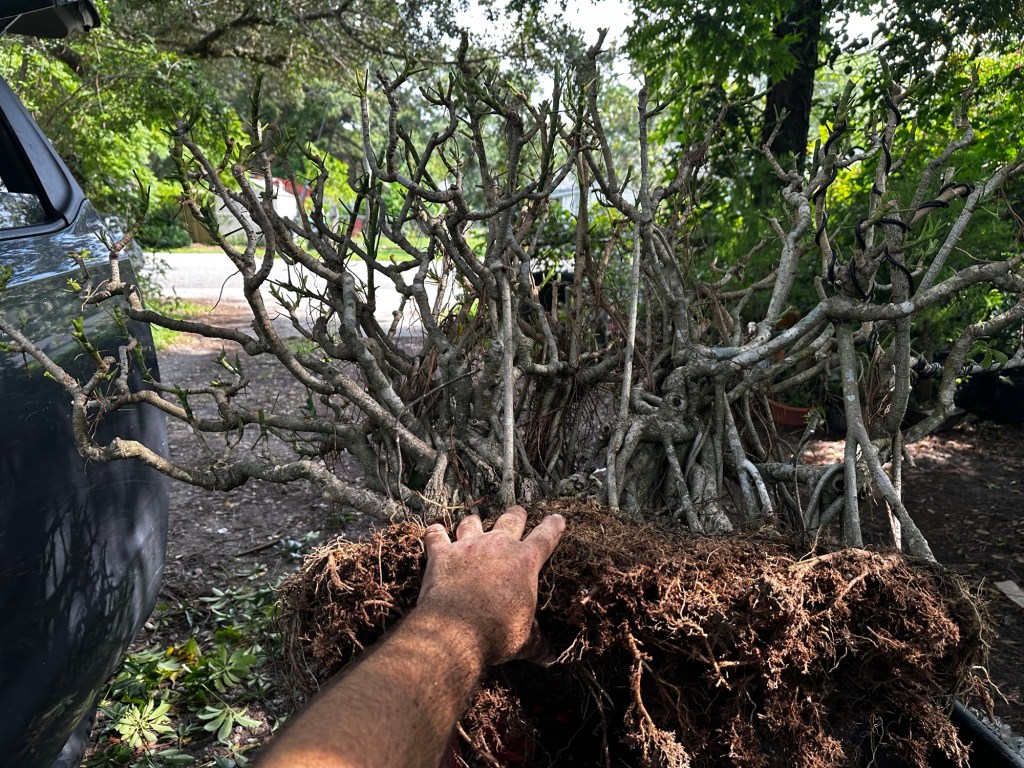
Now, looking at the tree, there is a flaw, but not a fatal flaw. The middle looks fatter than…
…..the base. That’s, like I said, a flaw. But not that bad of a flaw.
We can fix it.
Those aerial-type roots will thicken in time, making the base wider.
But, for the moment, we can do something.
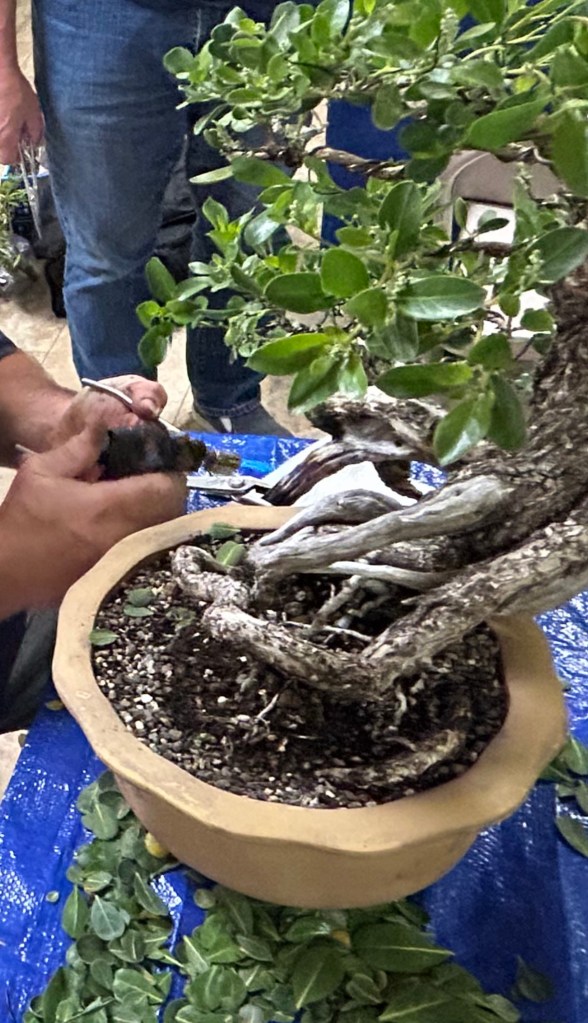
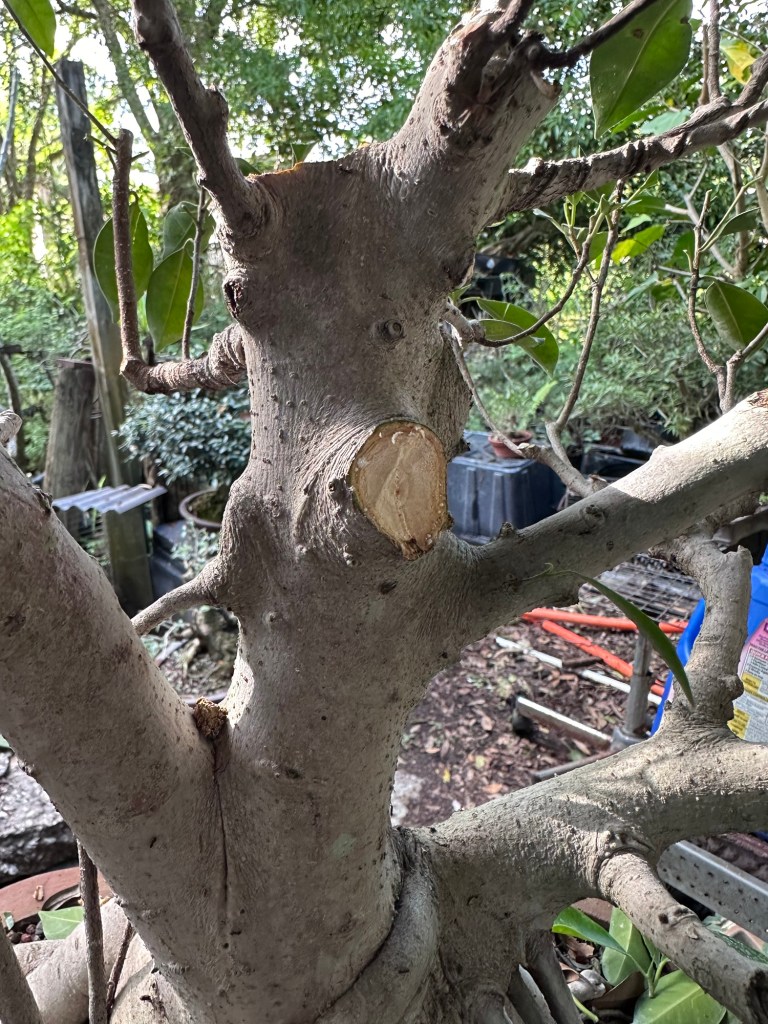
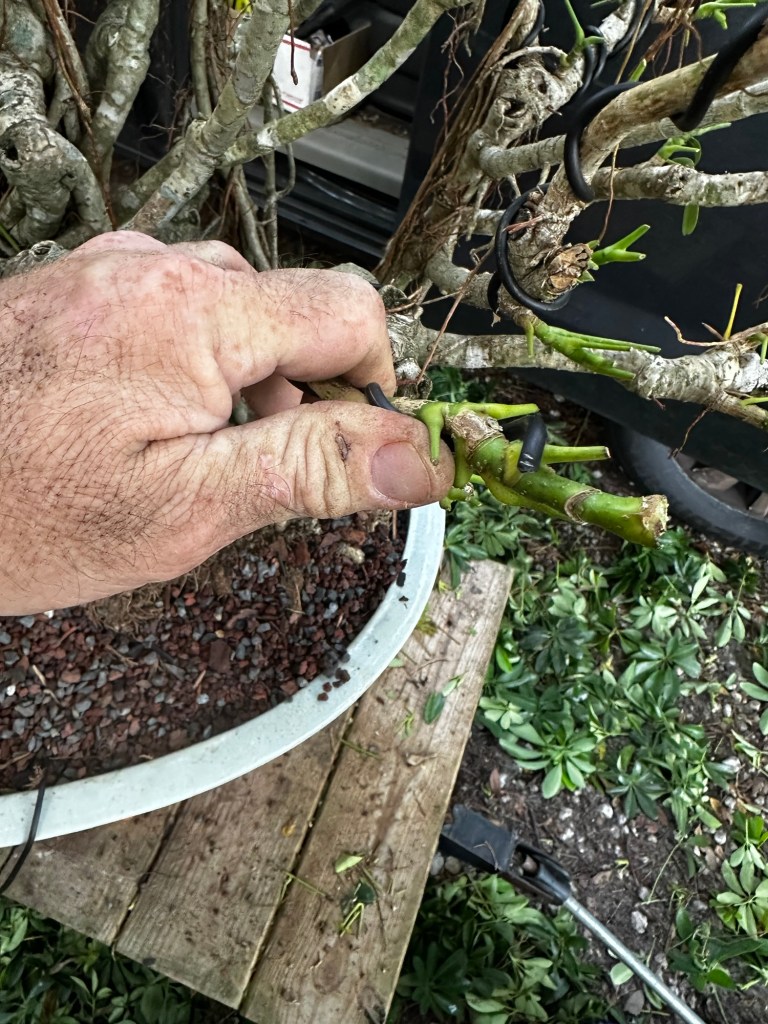
See this here wound?
It’s not going to heal, so we might as well do something to make you look at it. Cuz’ chicks dig scars, right?
The stragedy (which is a strategy to help mitigate a tragedy)
Is to carve it out, and reduce some of that visual weight on top. Carving technically removes material, so we are removing some of the obverse taper. But a piece of deadwood, after it’s been bleached with lime sulphur, will look lighter and smaller than it is. That’s just artistic principle. That’s why a person who believes they have a large nose will apply makeup to lighten it.
Notice the difference?
This is the second time I’ve worked on the tree, and it’s time to choose branches. Next step is wiring.
First we defoliate.
Apply wire.
And now let it grow.
Fertilizer, lime sulfur soon (sulfur=sulphur. Depends which side of the pond you live on. Do you speak the Queen’s English or colonial American English? Which is a funny story. Is it aluminum or aluminium? What color do you colour your daisies? After the American revolution, the American founders made it a point to differentiate American English dialect from British English dialect. So words changed spelling and pronunciation in the USA. The irony, though, is that the American accent, according to those that study it, is closer to the accent of the British in the colonial era than the modern English accent. That’s why English language songs tend to be sung, even by British singers, in an American accent. And the funniest thing to me is that the word we use for the sport where you run around kicking a ball into goals (which the world calls “football”), “soccer” is actually from England. It’s an abbreviation and shortening of the term “Association football”. “Association” got transformed into soccer: a-socc-iation- soccer. Weird, huh? It’s the same way where Elizabeth goes to Betty or William goes to Billy. Called “hypocorism” . )
anywho, I read too much. Back to the tree.
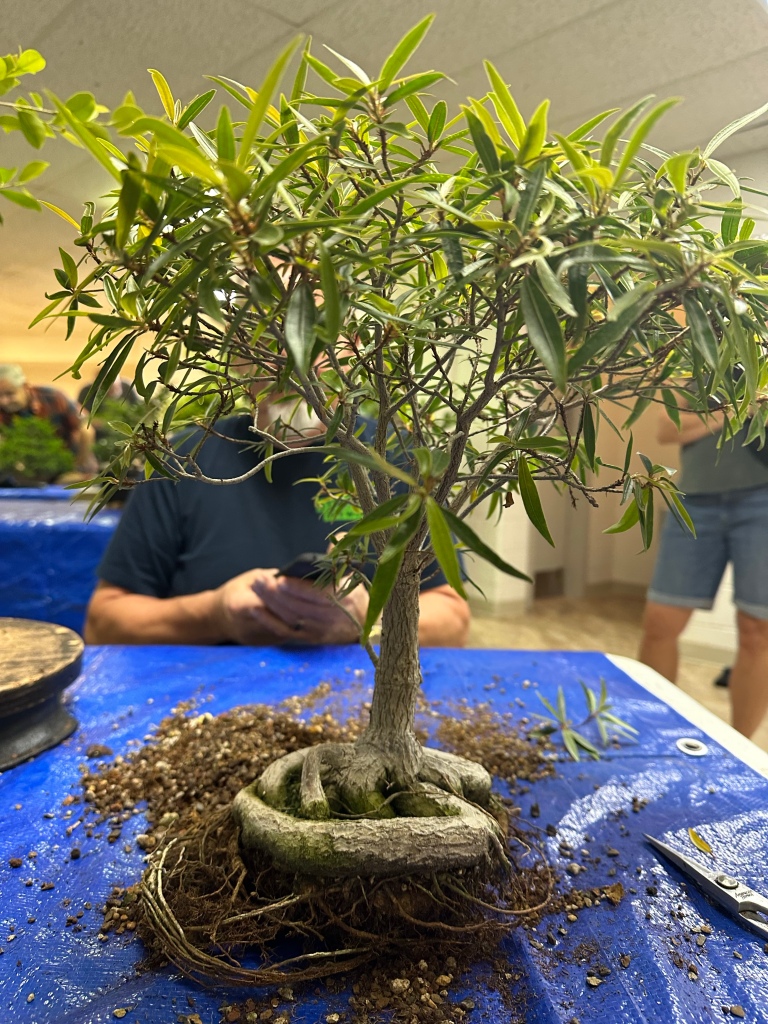
I think it’ll be epic. It’s certainly a big pink pixie.
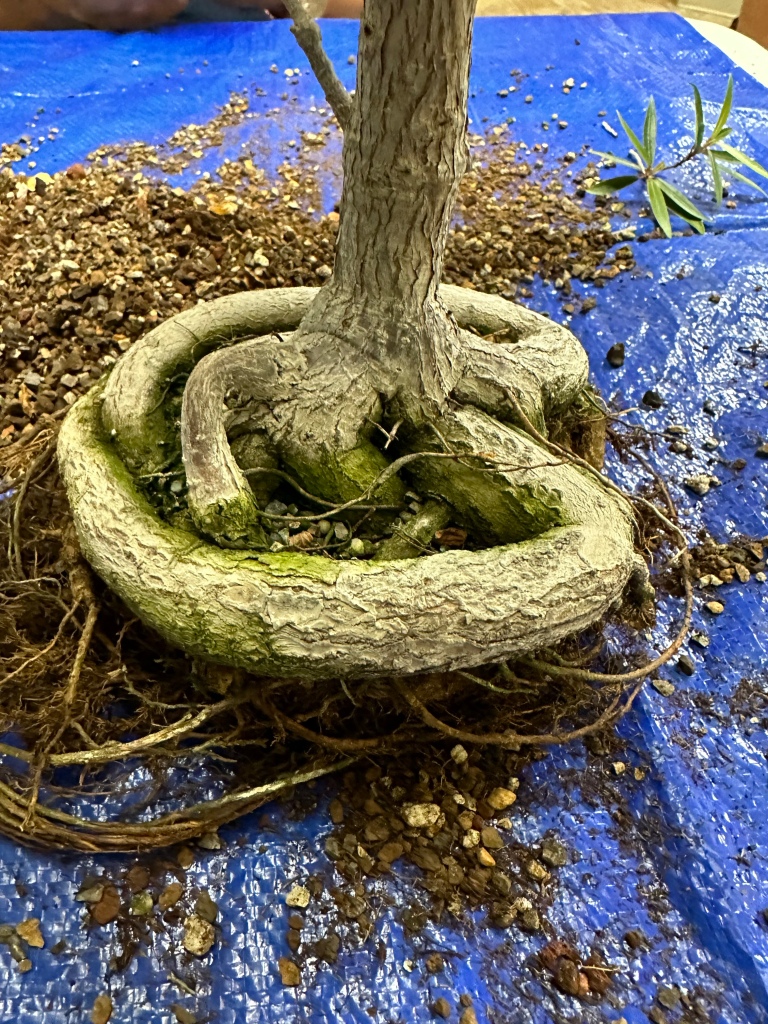
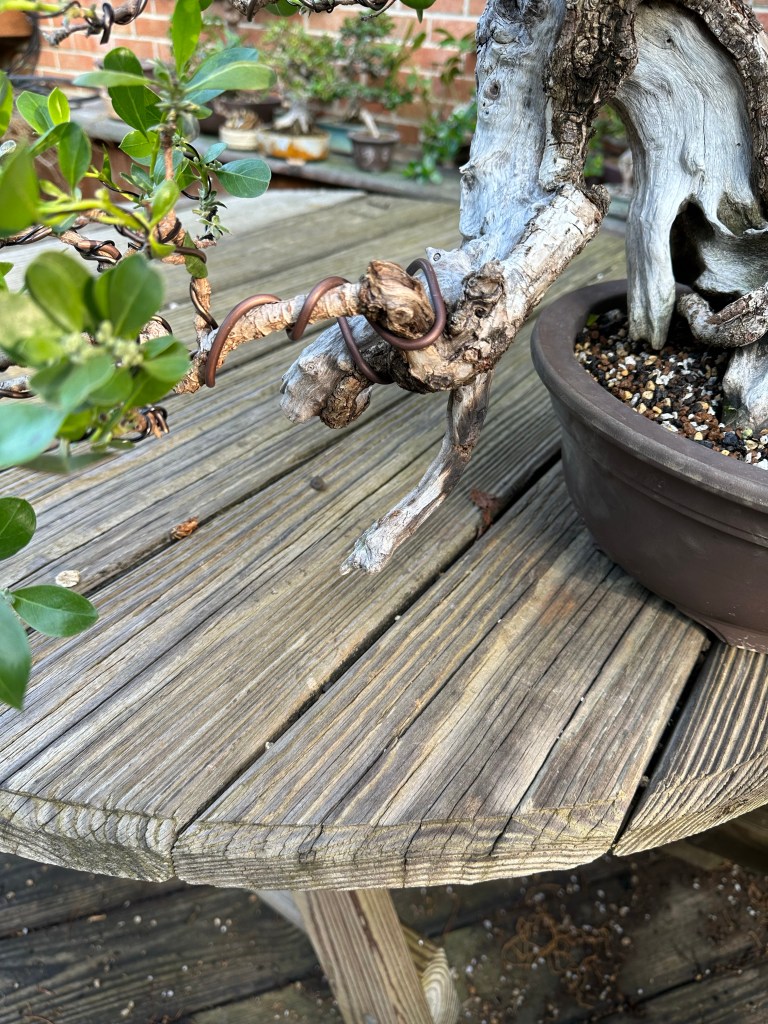
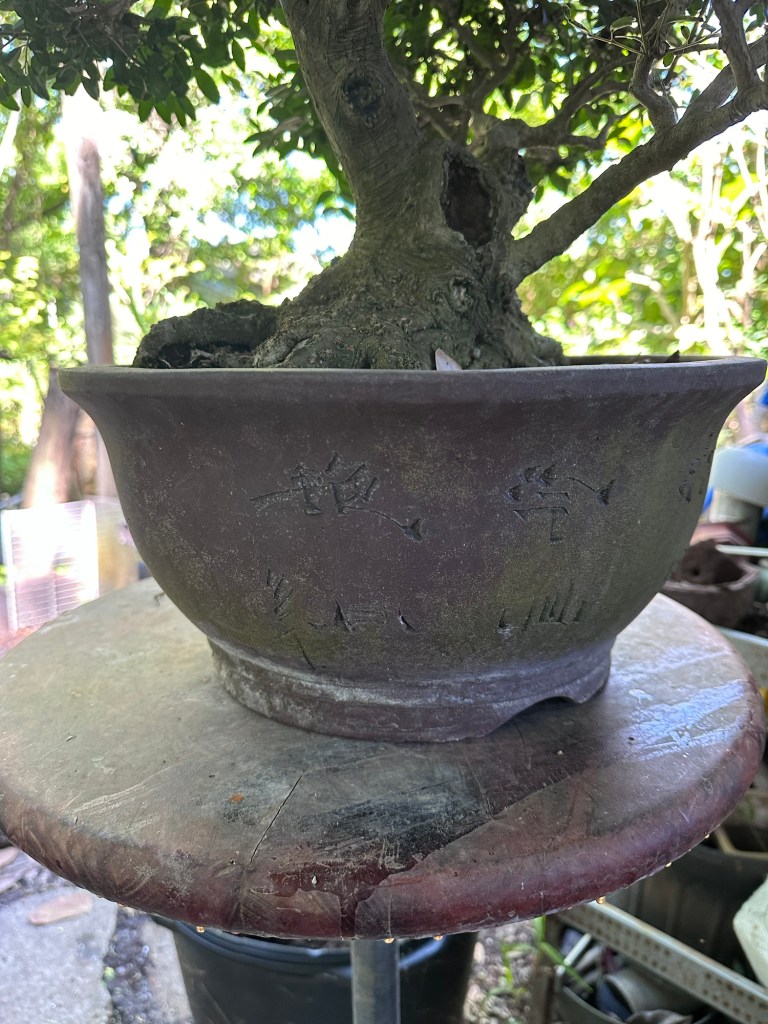
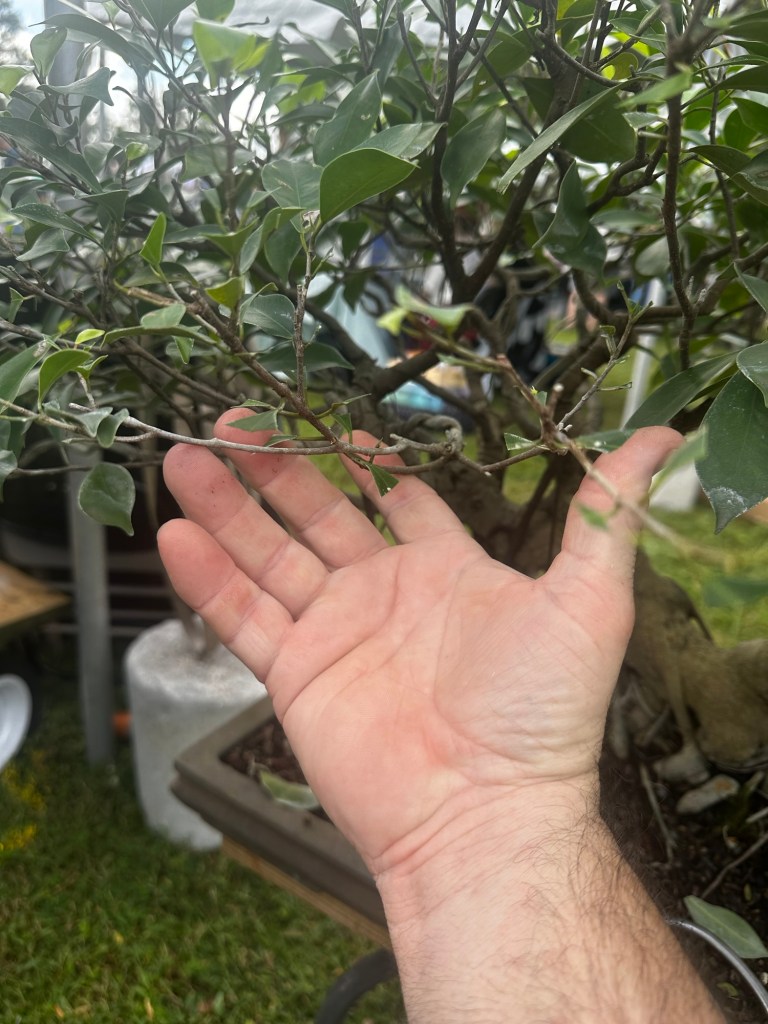
This is Janice’s buttonwood. You’ve seen it before in the post Who doesn’t have a buttonwood in Florida from a few years ago. Since then, it was shown in the 2021 Bonsai Societies of Florida annual convention, and its just gotten better. Janice found a new pot for it at this year’s BSF convention (2022) and that’ll be the main work today.
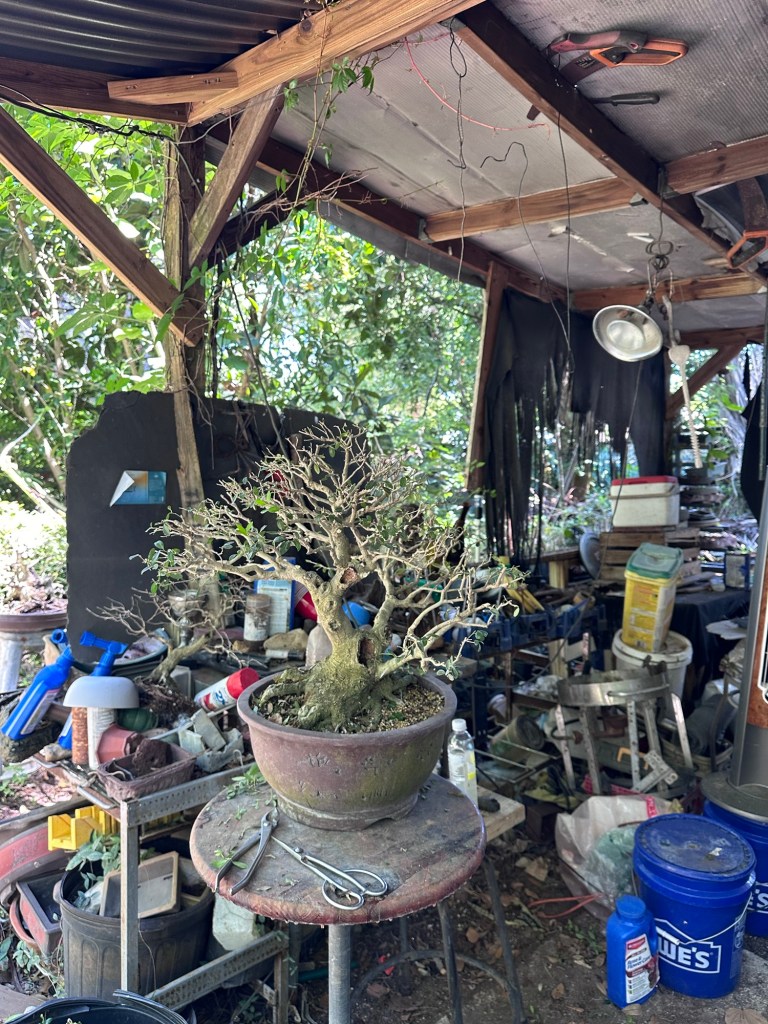
Here it is now, in The Nook.
To begin the story, here are some progression pics.
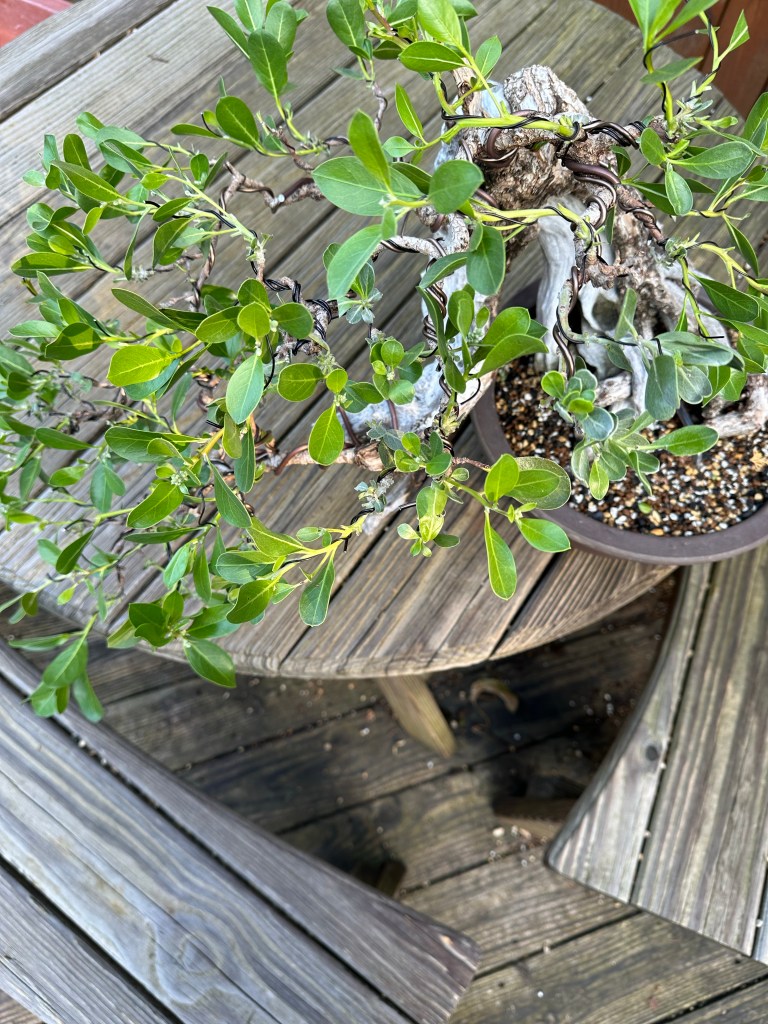
The tree was originally scheduled for the 2020 exhibit but, you know what happened that year. As a result, we didn’t repot it in 2020 or 2021, and this year I’ve been working on letting it gather sugars so I can do some work on it. Hence the big leaves.
It had a mild chili thrip infestation at the end of last year as well, and we treated it with imidacloprid, a systemic insecticide.
But the tree is strong now, and ready for some work.
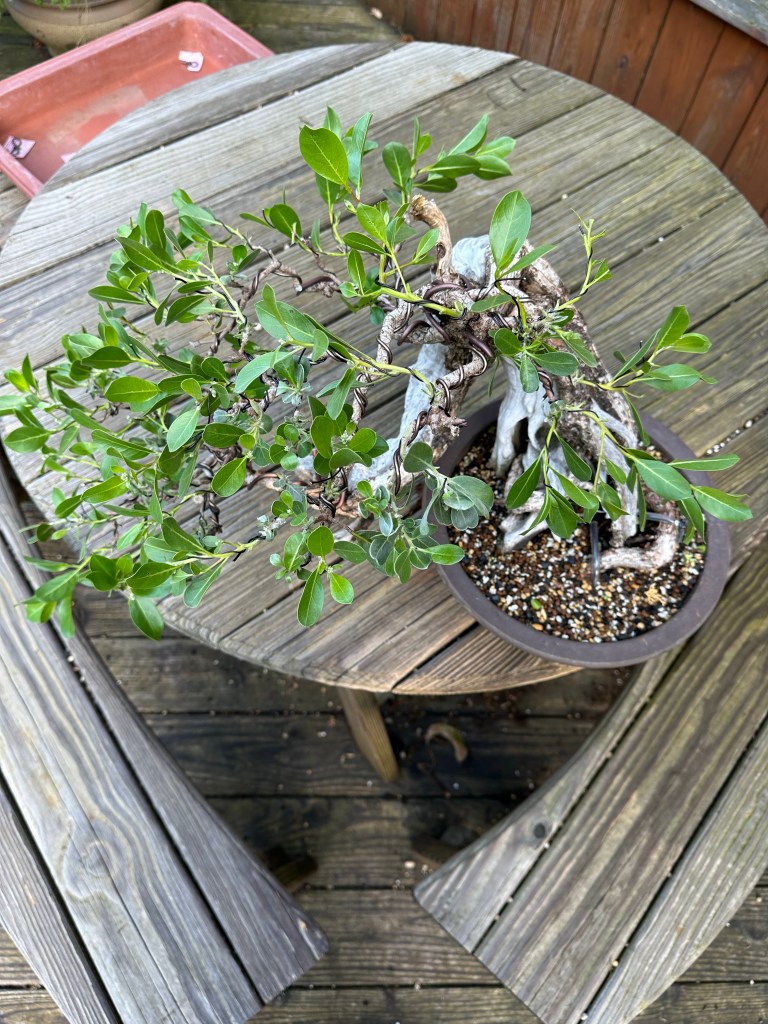
I’ll also be cleaning and applying lime sulfur to the deadwood, which is, as you’ll see, sometimes easier when the tree is in the middle of a repot.
First step, defoliation. I know, oooooooohhhhh, controversial. It astounds me that so many professionals not only poo poo defoliation as a valid technique, but try to vilify those who use it. One of my catchphrases I use all the time is “horticulture is a science, but the practice of horticulture is an art”. That’s why two people can use two seemingly different techniques and still achieve success. Most of bonsai technique has more to do with the timing and seasonality of the technique and less to do with doing it. Here’s an example: there aren’t any arborists that suggest that removing a pine trees candles is ever a good idea. Yet, if one does it at the right time, the way we bonsai practitioners do, the tree responds with increased vigor and better growth.
There are prerequisites to de-candling a pine tree, one of them being the tree should be in good health, but the science of horticulture says “don’t do it”. Yet we do. Why? Because, the practice and timing of the technique works. As it does with defoliation.
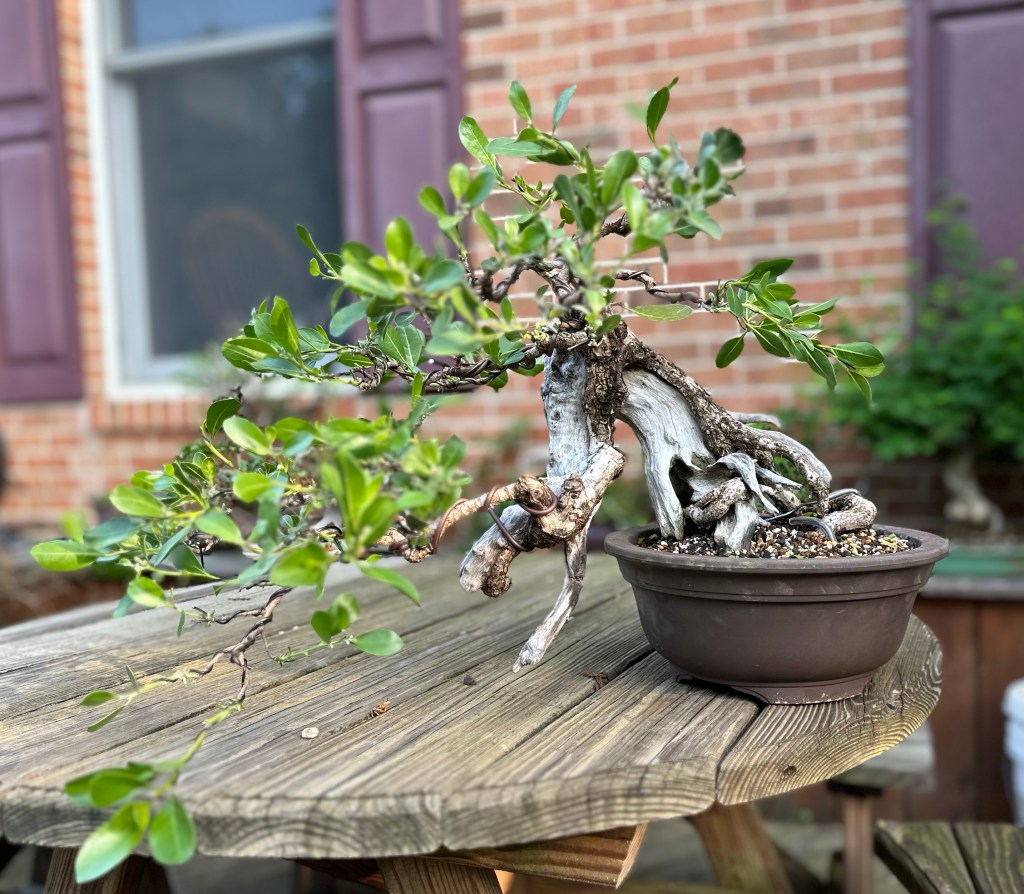
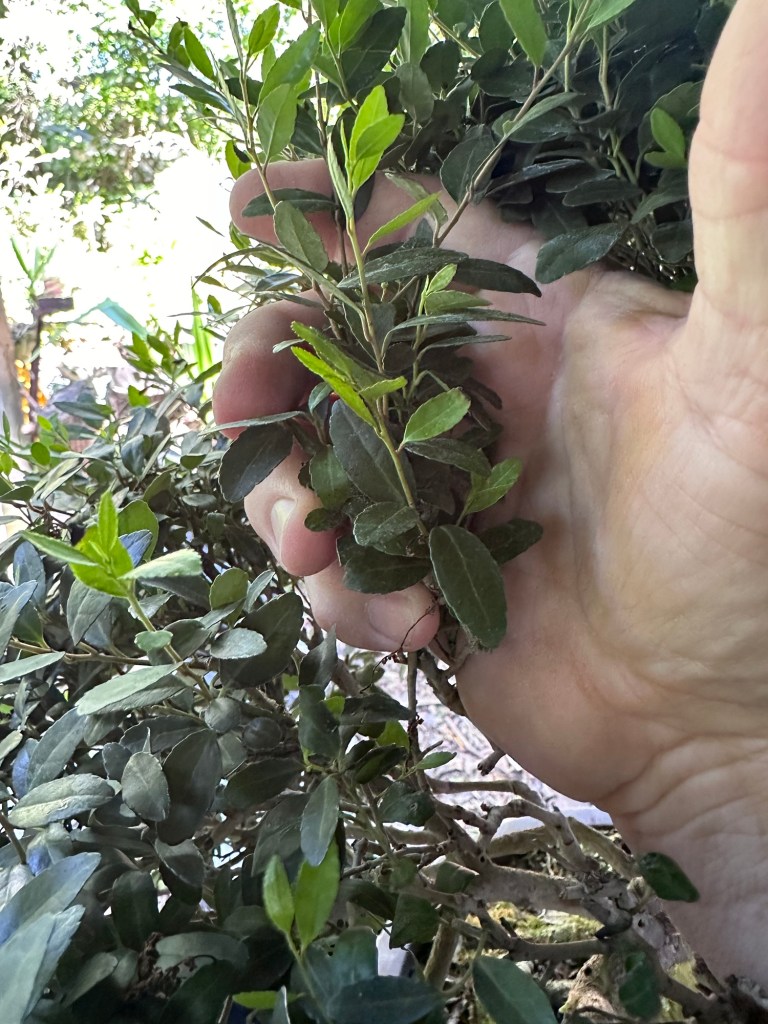
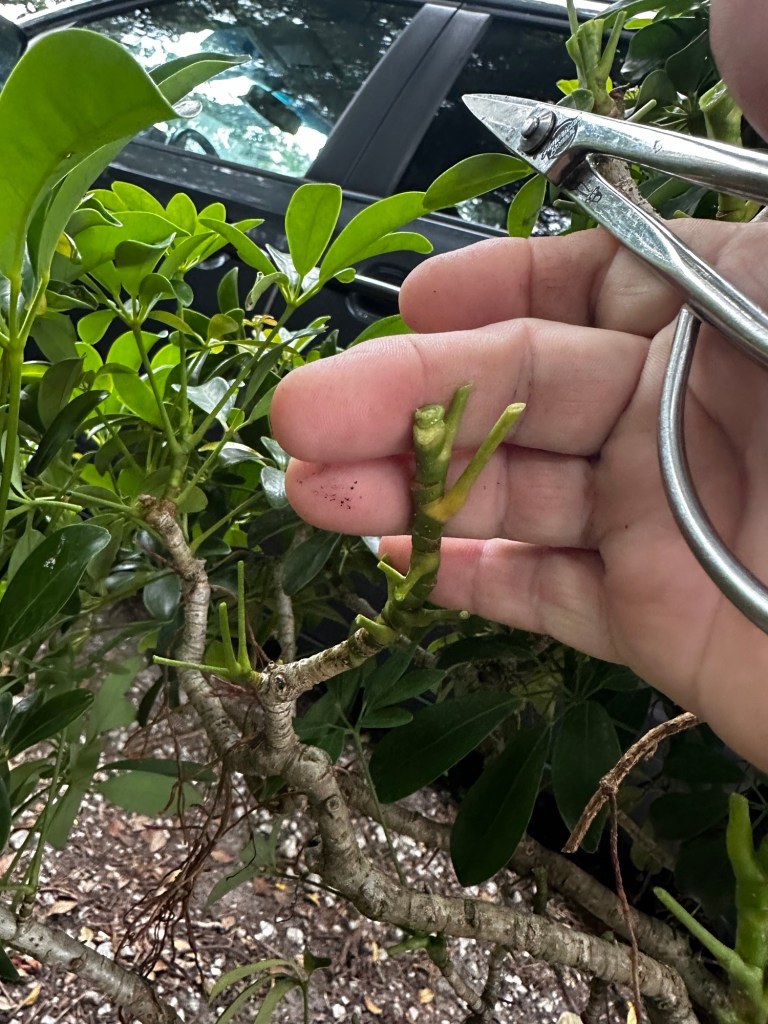
Anyway, here’s my quick method for defoliating a buttonwood. They tend to grow like little rosettes, as below.
Take the branch…
…..move your hand to the end of the branch, holding the leaves…
…..take a sharp pair of scissors….
…..SNIP…..now, depending on whether you want to keep the grow tip intact, to continue the elongation of the branch, or you want to encourage backbudding, is what determines how close you snip the leaves off. I left the grow tip intact in this case, as you can see below.
On some, I’ll keep the tip, on others, I cut it.
Here’s something you don’t see everyday, flowers on a buttonwood. Yes they flower, everything flowers, but it’s only when you let it grow and it’s healthy do you see it.
You may notice some black sooty mold on some of the leaves.
Whenever you see it, always check for aphids or scale.
In this case, its not this tree that’s infested, it’s from a tree that was above it on the bench.
Snip, snip…
Snip, snip….
No, I didn’t count how many leaves. Ain’t nobody got time for that.
Now it’s time to repot. I would normally repot a buttonwood, in Florida, every year. It’s been my observation that the tree can weather the winter weather better if you repot yearly.
But this tree had been selected for the 2020 BSF Convention exhibit. Unfortunately, that was the year of Covid lockdowns, so the convention was cancelled, and I lost several months due to my own health problems, so that year was skipped. And the tree was shown the next year, 2021. So I skipped that year too. Sometimes getting a tree ready for exhibition can really stress a tree out.
This year is the year though. And I’m not looking forward to it. It’s potted in a container with sides that bow outward (they call it a “bag pot”). It’s a pretty design, but the roots will fill up that space, making removal a bit difficult.
But, no worries, I have my “1980’s era” repotting tool, the ubiquitous black handled, serrated, steak knife.
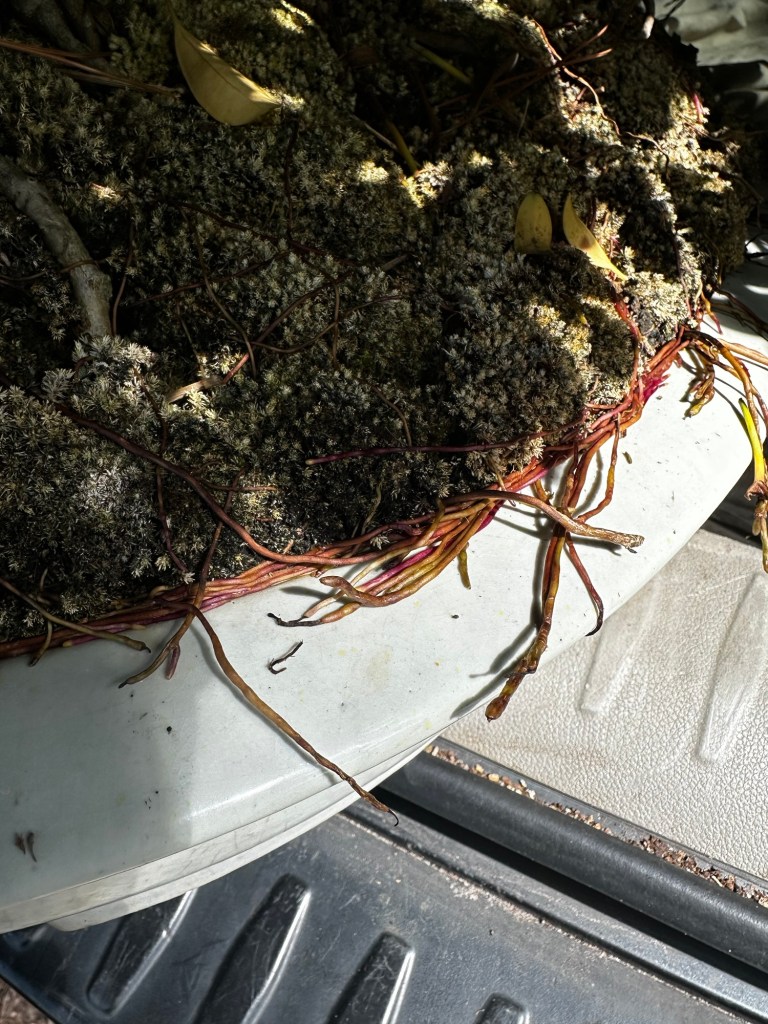
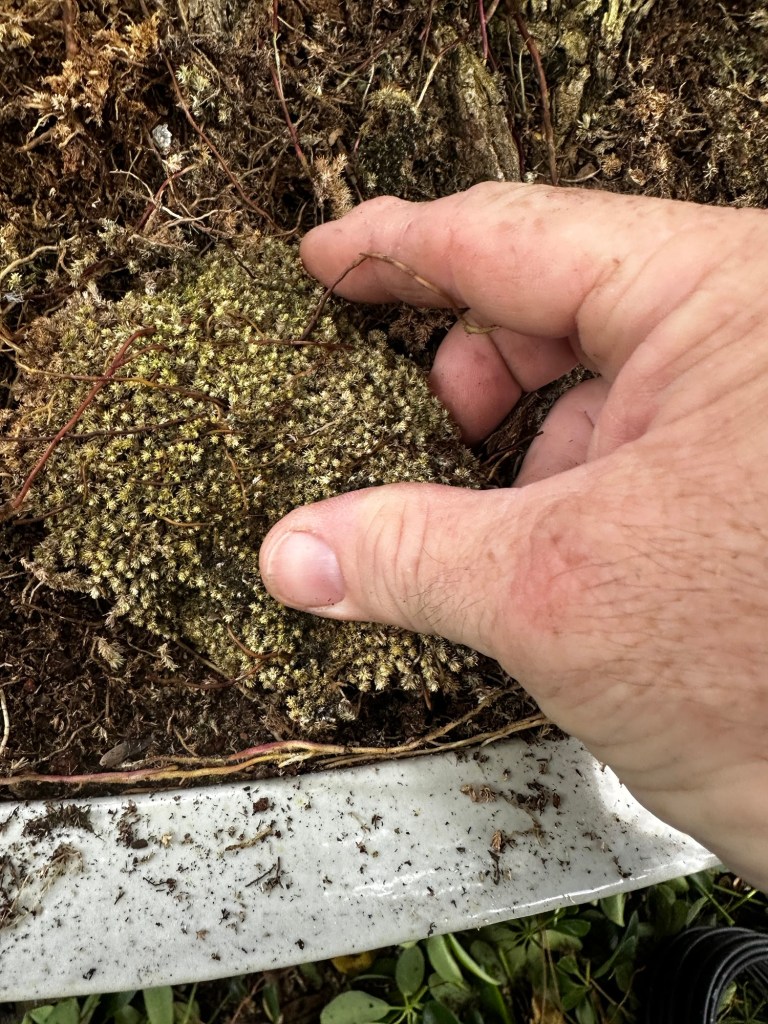
Before I begin sawing the tree out, I’m going to save the moss. Janice loves moss, so I’ll put it back on the soil surface when I’m done.
I got a little.
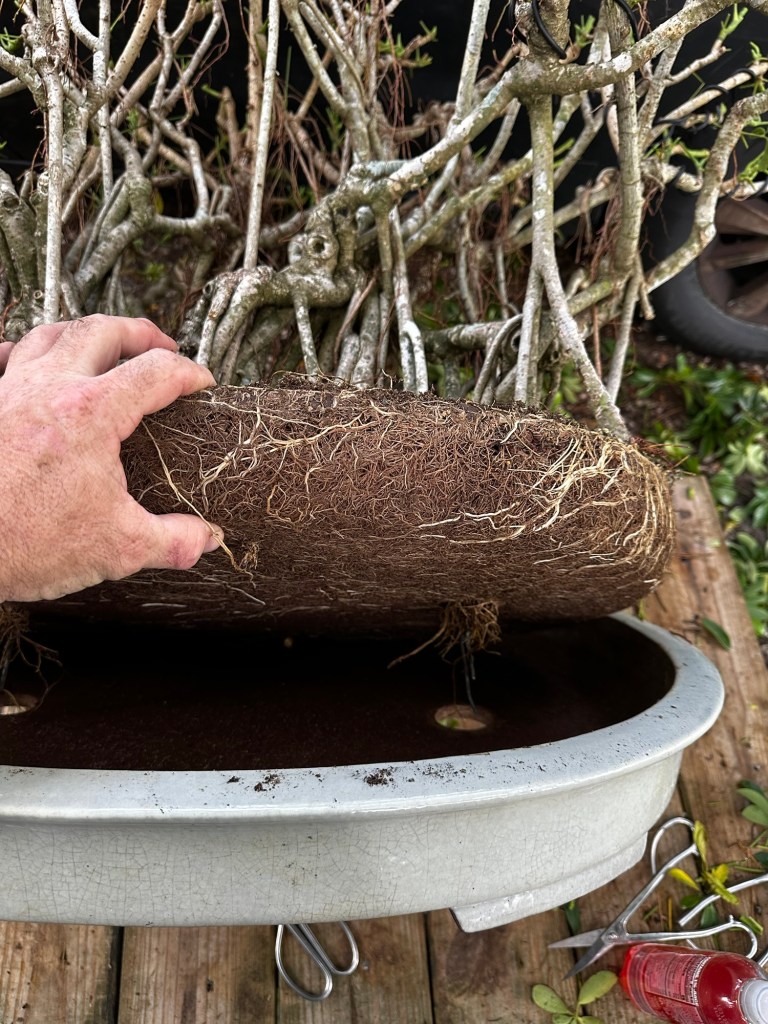
Now, let’s see how difficult it’ll be getting the tree out.
Simply saw around the perimeter, and pry the tree up every few inches.
It’s actually going kinda easy.
Ta-Da!
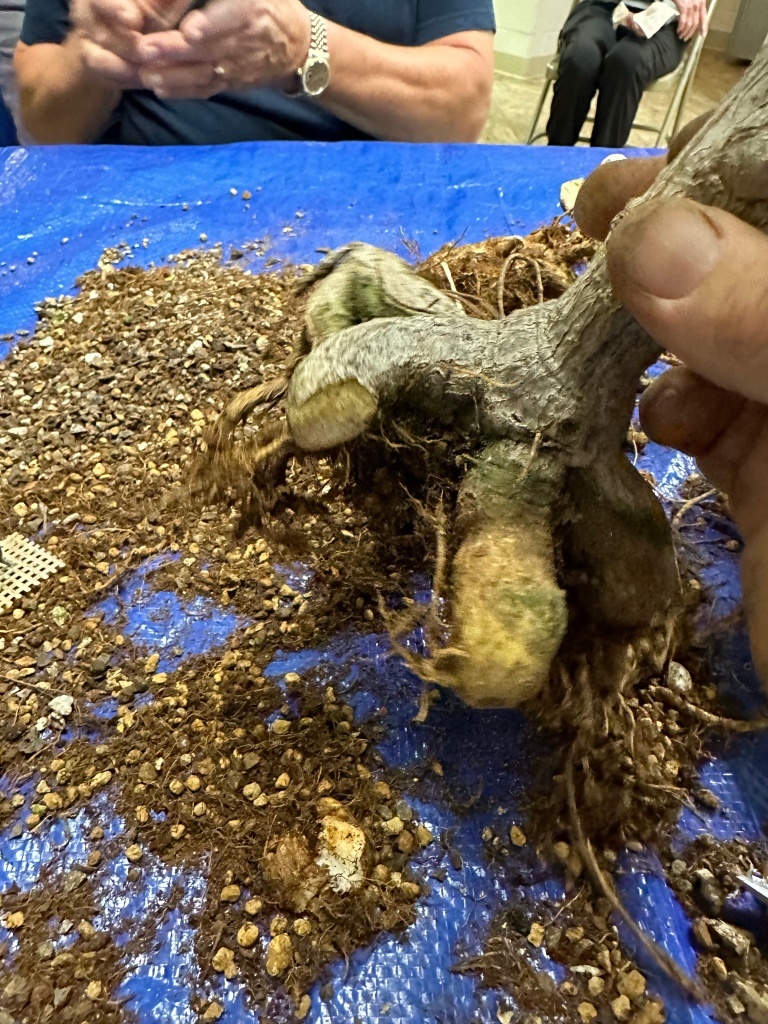
Now we gently rake out the roots. For a buttonwood I prefer a single tined rake or just a chopstick. The American Bonsai Tools repotting tool works well here.
It definitely needed a repot.
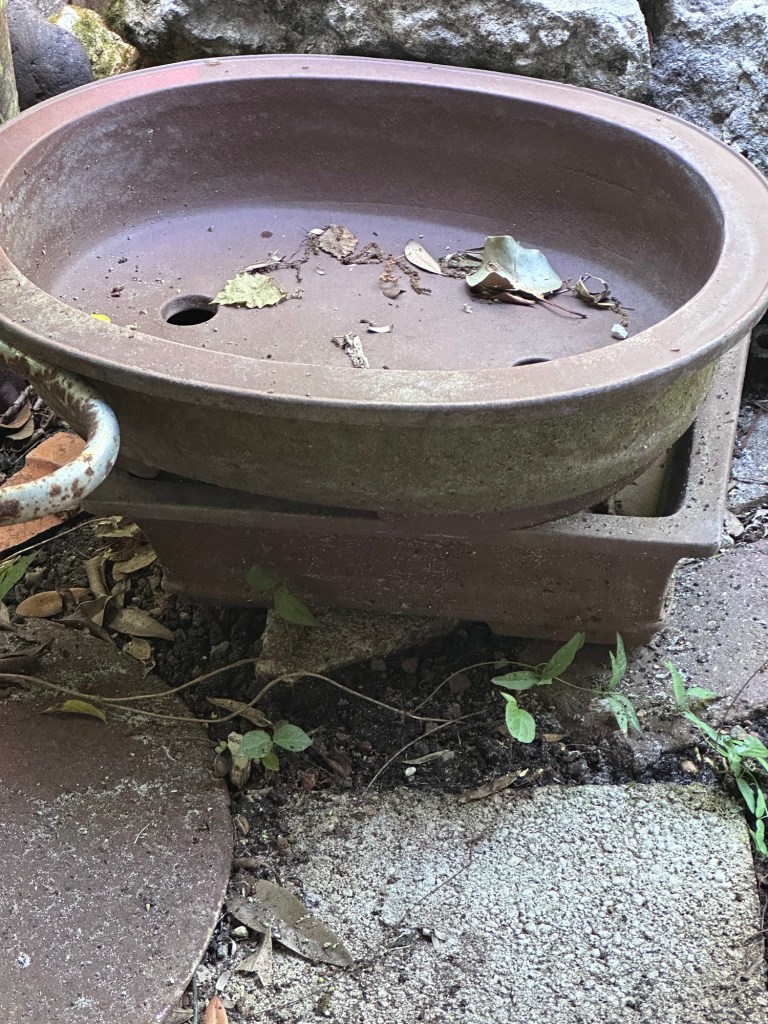
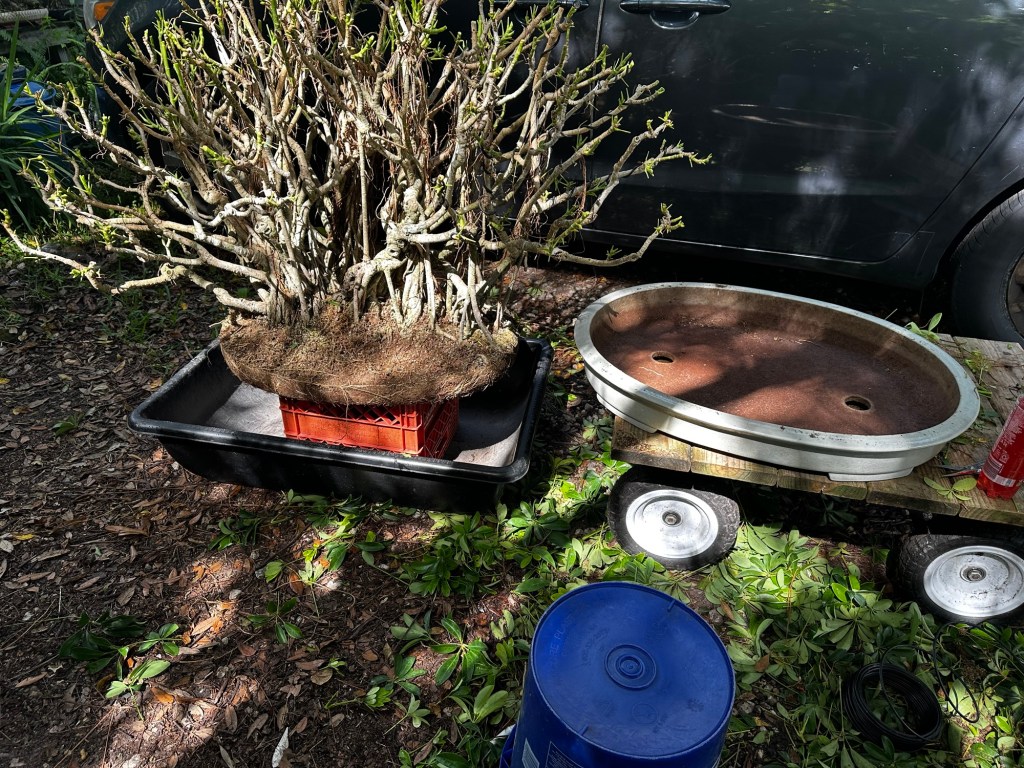
Before we finish, let’s look at, and get ready, the new container Janice chose.
It was created by Doug Marcum, from Hippie Dad Bonsai.
I think it’ll be perfect for the style tree, and, most importantly, Janice loves it too. It is her tree, ultimately.
The details are amazing.
He even has bent over nails made from clay, to make it look like a wooden box thrown together.
I rake out the roots and trim some back, and check to see if it fits in the new pot (you can see the process better in the post Jorge’s Buttonwood, from a few articles back).
Before I put it into the new pot, I’m going to use a wire brush to clean the deadwood (“Wire brush?” You ask, because it works. You’ll have to say that part out loud to get the joke). It’s also easier to clean the deadwood while it’s out of the pot, better to get at all the surfaces if you can turn the tree upside down.
Scrub scrub scrub.
Brush it down to bare wood, really removing all the dirt, grime, and old lime sulfur.
Then put it into the pot. I fertilized, then placed some imidacloprid to keep the chili thrips at bay, and then added that saved moss.
Then, since I’m going to lime sulfur it, I water and make sure to get the deadwood wet.
Lime sulfur needs to go on wet wood to help it penetrate deeper.
I’ve had this bottle for a while. I don’t think it’s available from the Hi-Yield company anymore, but you can get a similar sized bottle for very little money from veterinary supply companies (here’s a link, and no, I don’t do any affiliate marketing links, so I’m not getting paid to promote it: Click here you’ll notice that a big bottle, in this case 16oz, costs about the same as a 4oz bottle from bonsai sources. And it’s the same chemical, that’s your tip of the day. You’re welcome)
Get yourself a glass or ceramic, non reactive vessel, a cheap paintbrush, and paint it on.
Yes, it goes on orange, but, don’t worry, it bleaches white.
It won’t hurt the soil but it could damage the glaze on the pot, so I cover them both with a towel or newspaper.
Then I paint. Since it will flow down, being as it’s a liquid and we live in the gravity well known as “the earth” I usually start at the top and work my way down.
This is the cool part, I coat the whole surface of the deadwood, full strength btw, and it’ll look like this:
And about a half hour later, it bleaches white, quite nicely.
Now, before I finish with some wiring, I’ll speak to those that don’t like the bleached white look. First, it’s important to use lime sulfur. It is technically a fungicide, and it slows the decay. If you don’t like the white, you can add a darkening pigment, like India ink or acrylic paint, but, in a few months, the color will fade anyway, so there’s no real need to add the color unless you are showing the tree soon. Me, I don’t mind it. I think it works artistically, and Janice likes the bleached look too. But you do you, it’s your tree.
Now for a little wire and some minor pruning….
And Bob’s yer uncle.
The tree is really developing well. The branches are thickening, and developing strong ramification.
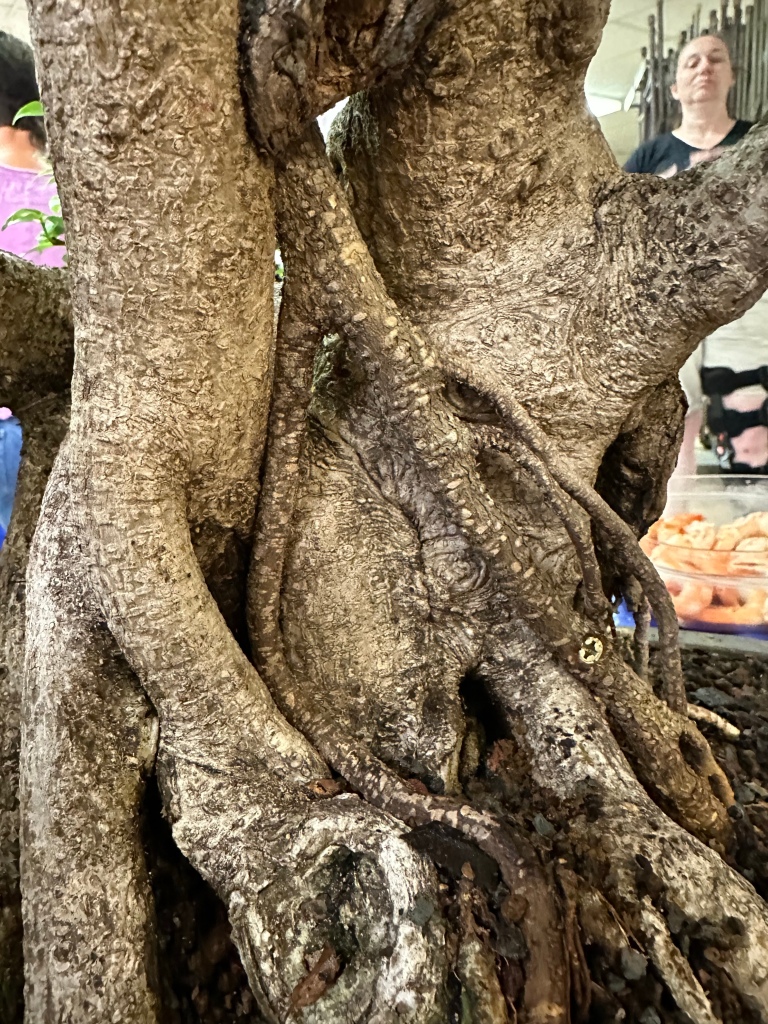
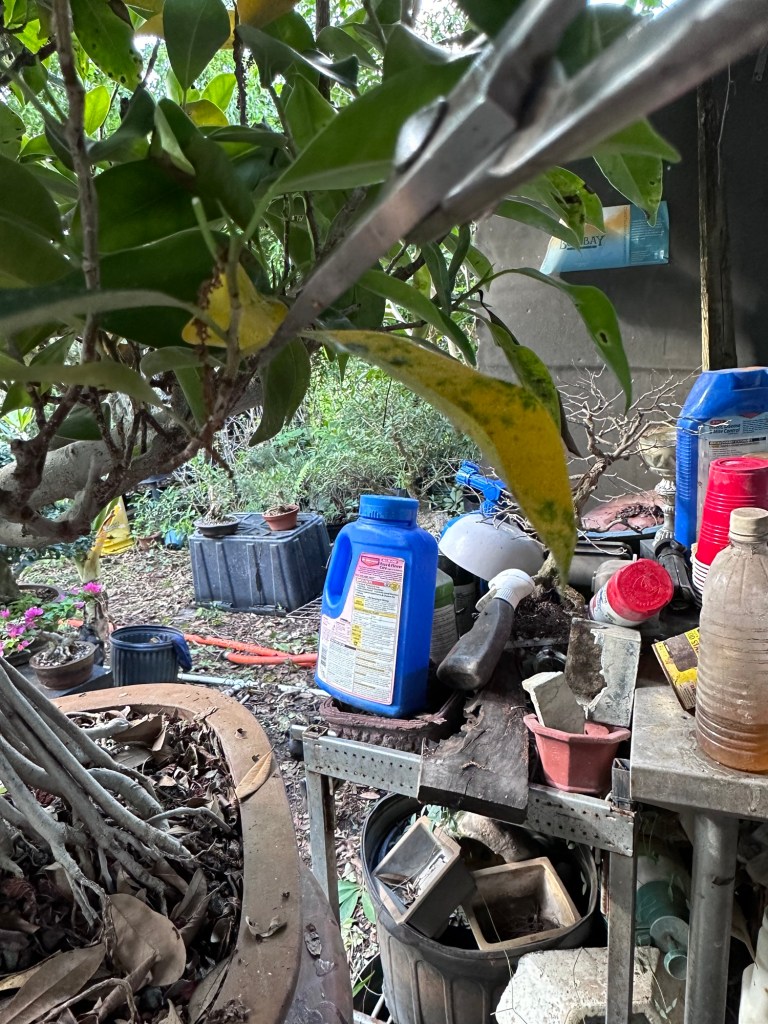
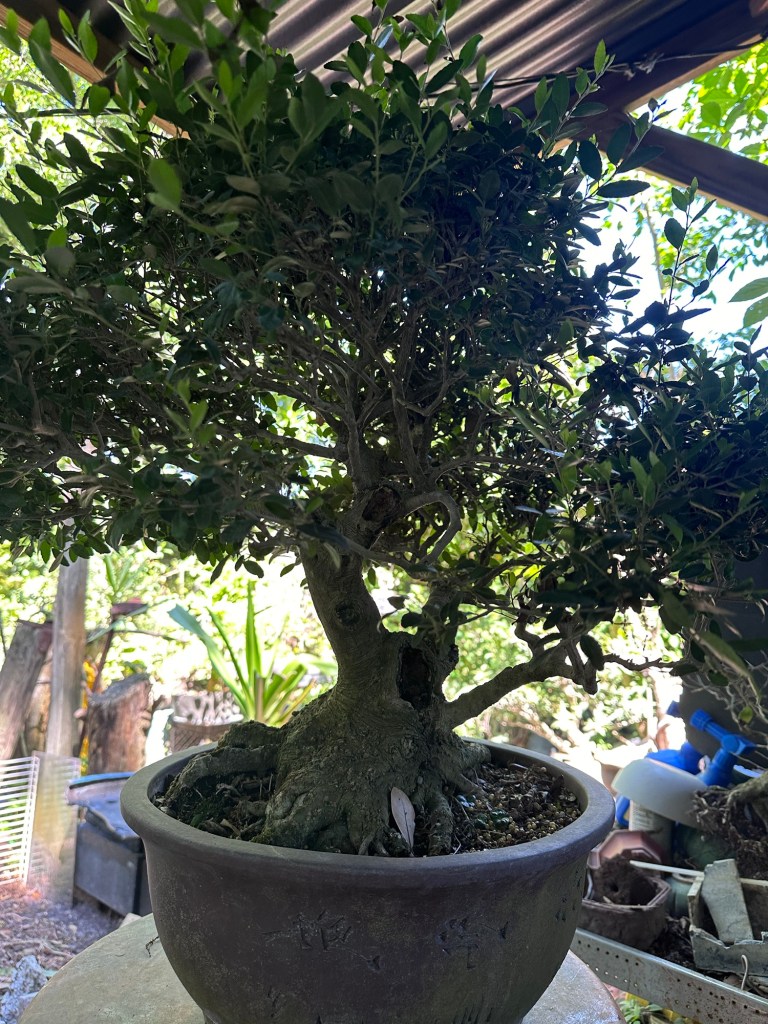
Today, we have a ficus microcarpa (for those who have searched through the posts, in the far past I’ve called this species ficus retusa, incorrectly. Instead of going back and fixing them all, just keep in mind that Ficus retusa is a totally different species of fig, and take it for the ever changing nomenclature that is being updated. My apologies for any confusion). It belongs to Kathrin. I had done a demo for the Shofu Bonsai Society of Sarasota many years ago, and she won it in the raffle. You’ve seen it before, in the link below.
I had meant to update this tree several times in the past few months, but didn’t get to it. Here it was in October 2021.
I’ll wait as you step into the Way-Back Machine and travel back in time.
And, still in the past, the work we did at Kathrin’s garage, in my Sarasota Studygroup in October.
Then we went, the next day, into Wil’s garage.
First, we get rid of the Corona bottle cap I was using to hold a graft in place.
It worked pretty well, and played into my gallows-type humor at the time.
The graft took well on the main trunk.
But up top, we had trouble getting that branch to stick.
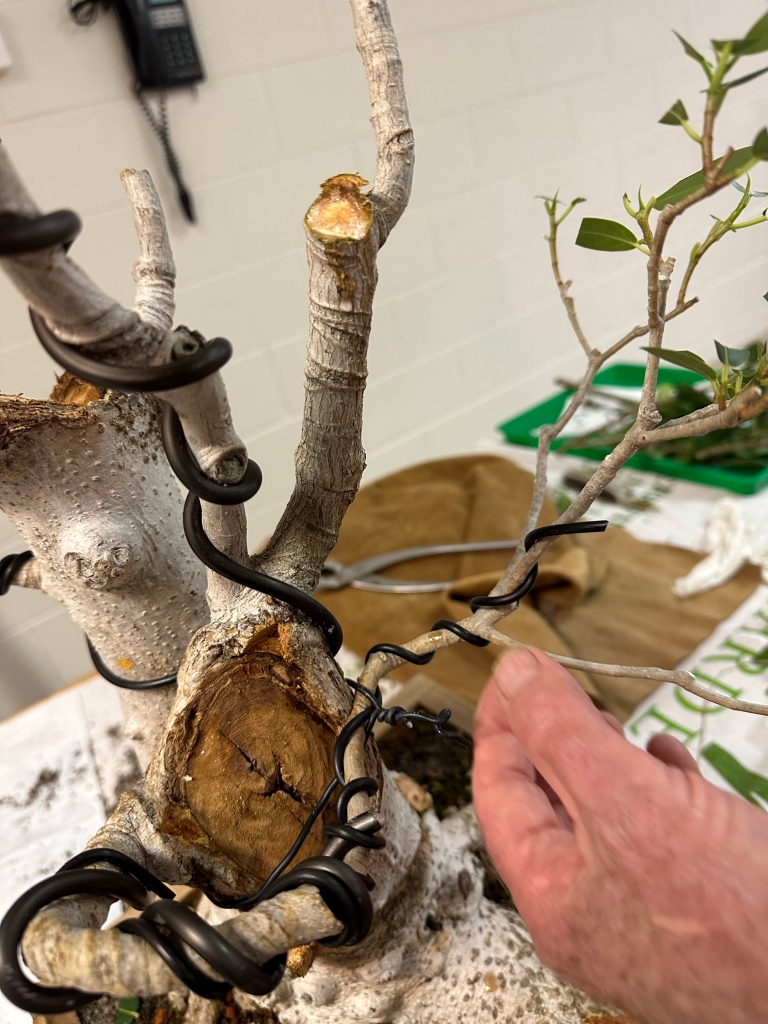
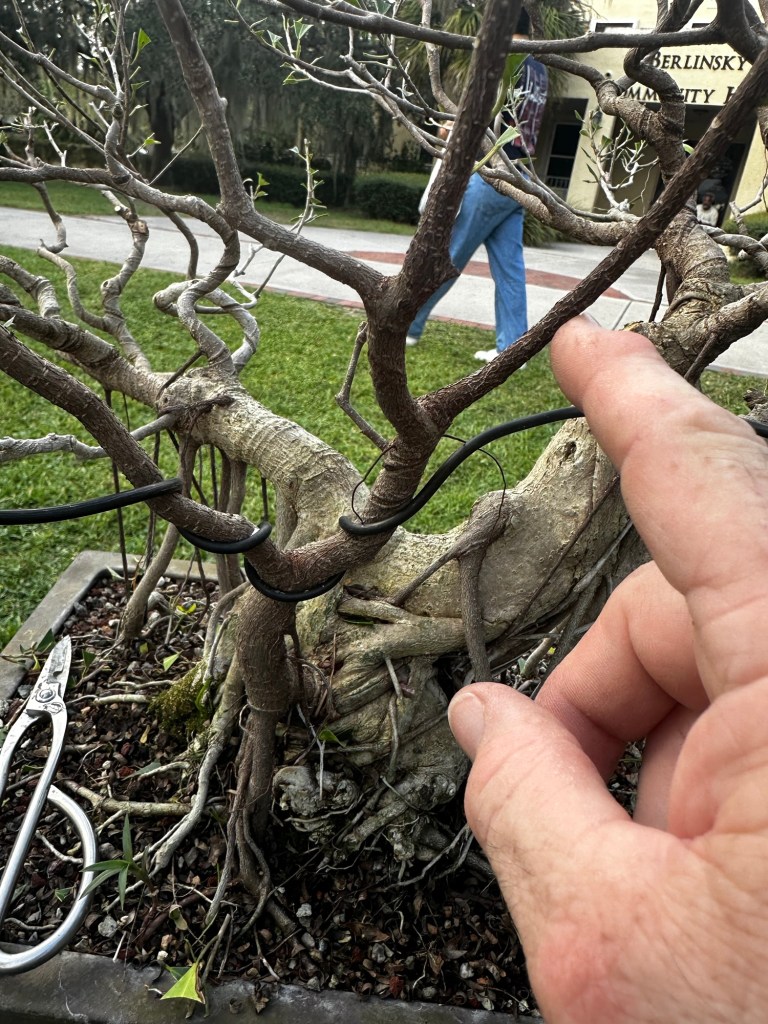
Take notice of the hole that was created from the branch, where the black wire is.
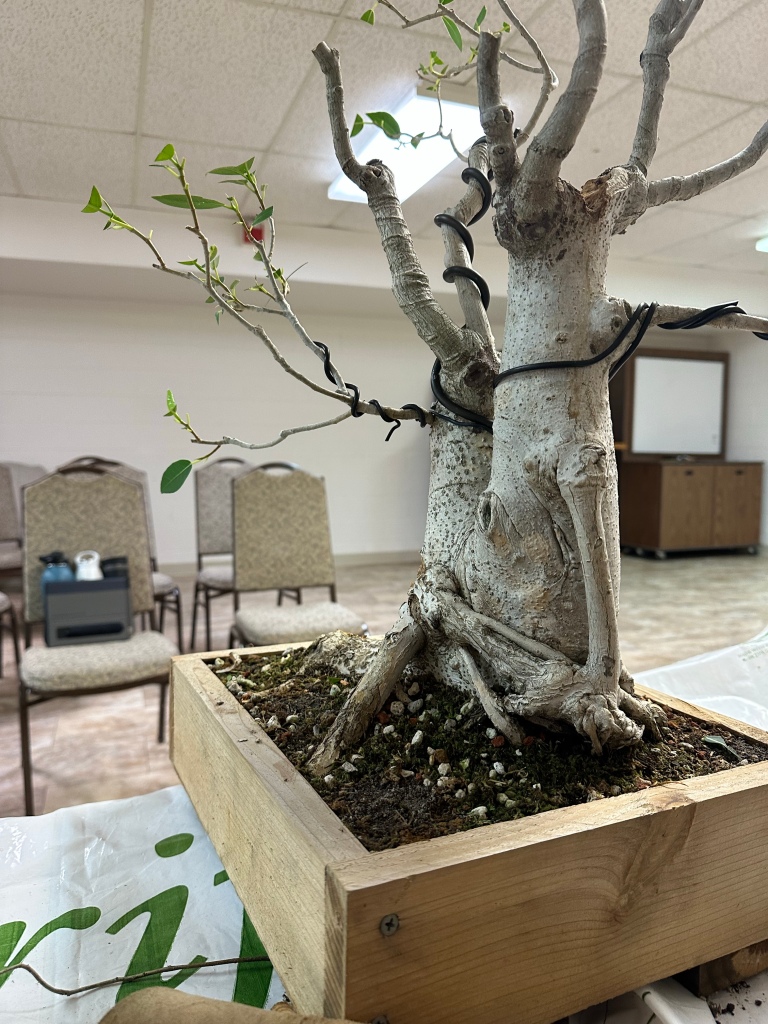
Now, back to today. Late July/early August, 2022.
I’ve had it here in Orlando for a few months. The idea was for me to bring it back the next month, but life got in the way. A few too many client’s trees to work on and a brief hospital stay made the tree sit on my bench and just grow. But sometimes that’s a good thing. It gives us something to work with. and it seems to like my yard.
The water at my nursery is good compared to Sarasota (it has to do with how we get our water in Orlando. This Post about cleaning calcium off a pot explains it a bit more)
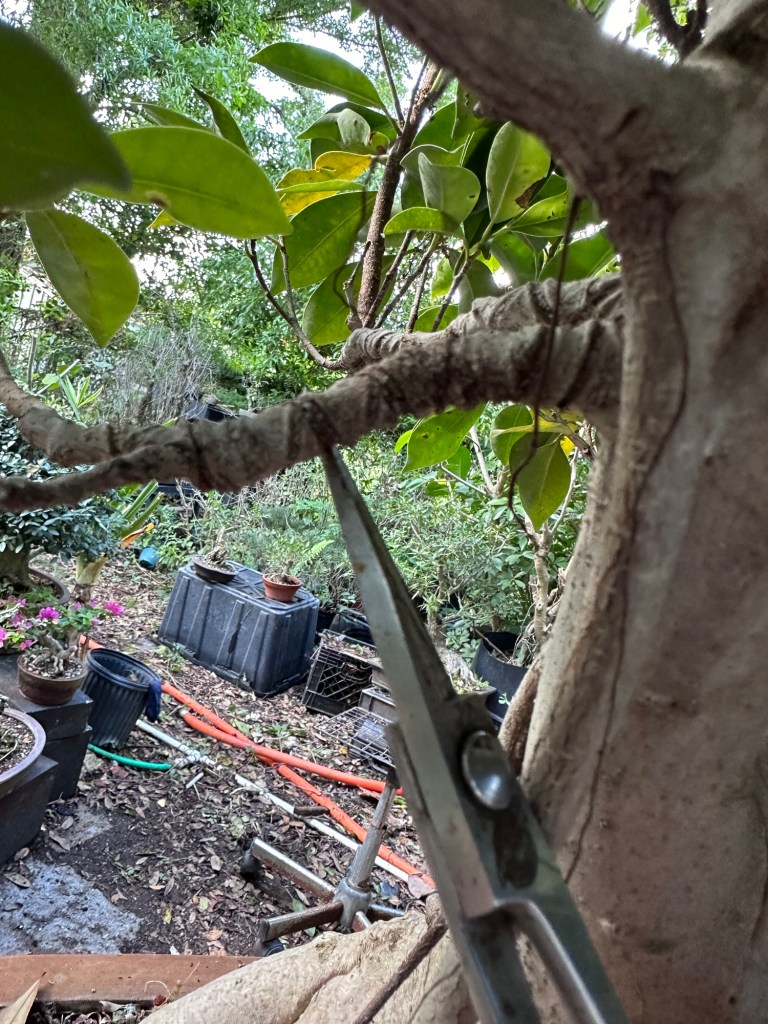
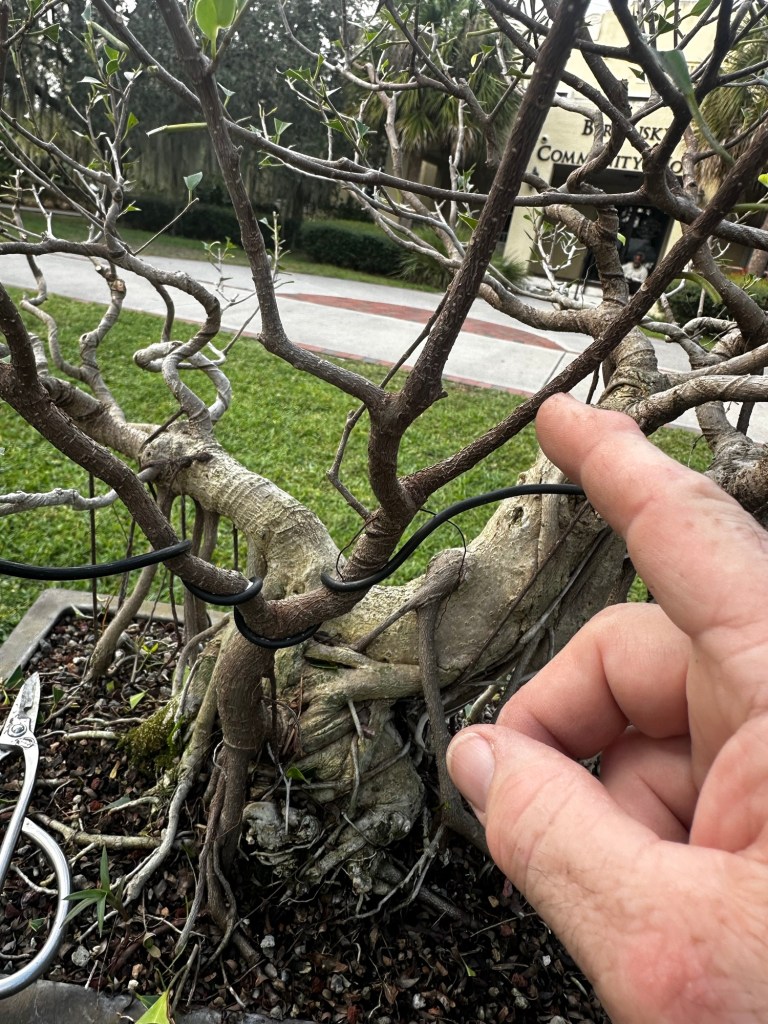
If you compare the below pics with the older ones, you can really see how much the branches have thickened, and how we tied that one branch that refused to graft in place.
It’s finally taken, so now it’s time to remove the wire.
You can definitely see where the two trees are grafted on, but that’s ok, it’ll smooth itself out in time.
And somehow that one aerial root we pinned into the hole got pushed out.
Anyway, enough backstory, let’s get to work.
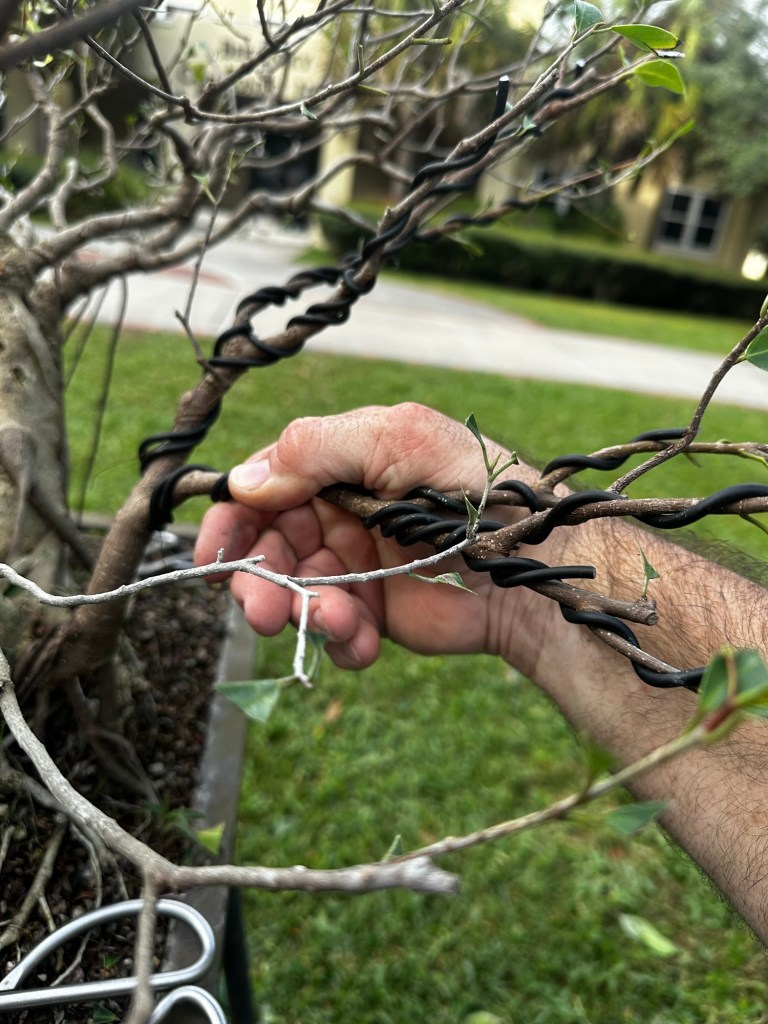
Remove the wire.
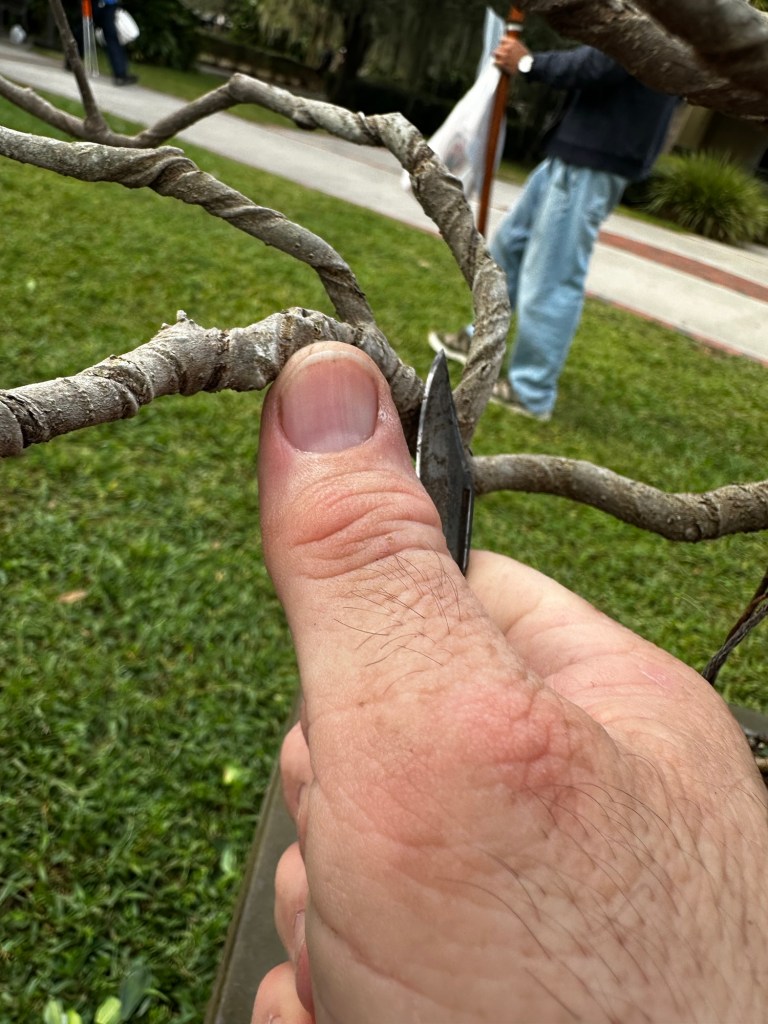
Not too badly scarred. And those wire scars on the branches are easily dealt with. You can literally shave them down and they disappear quickly.
That hole I pointed out above is just about filled in. That’s the advantage of unrestricted growth.
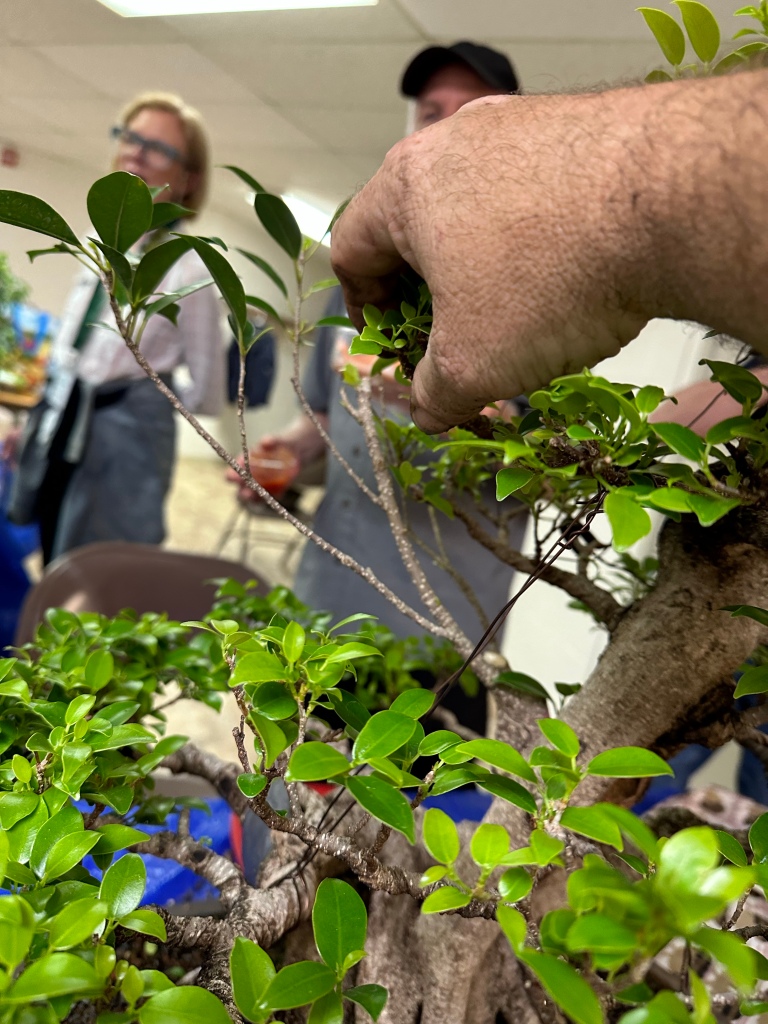
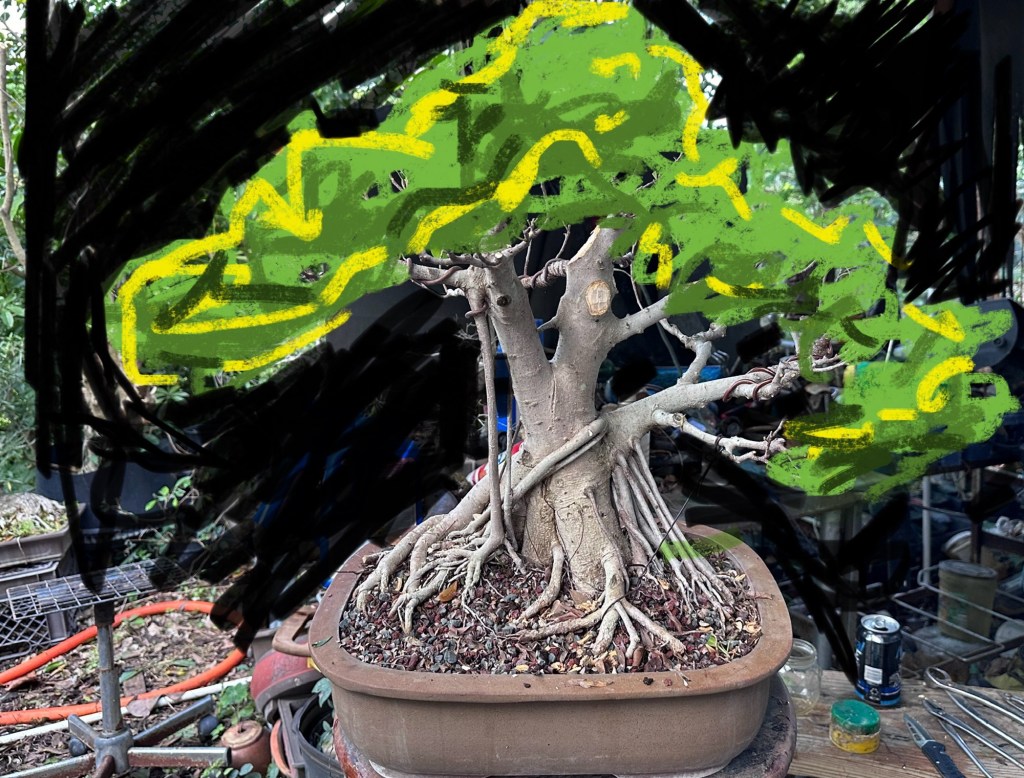
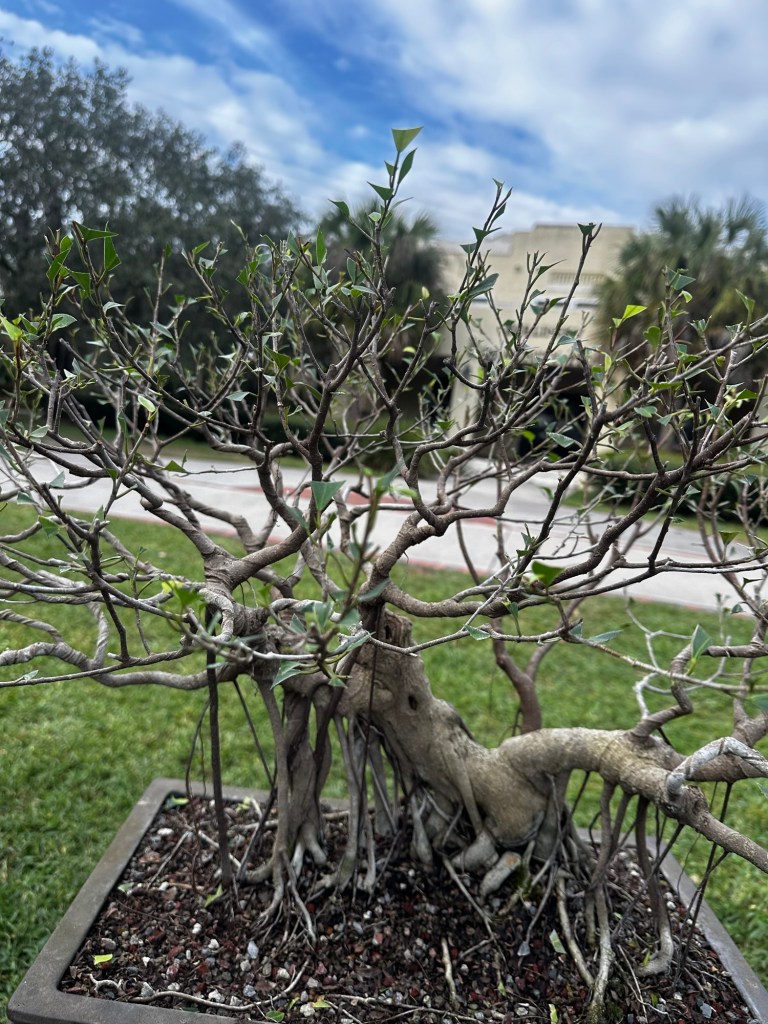
Now to defoliate.
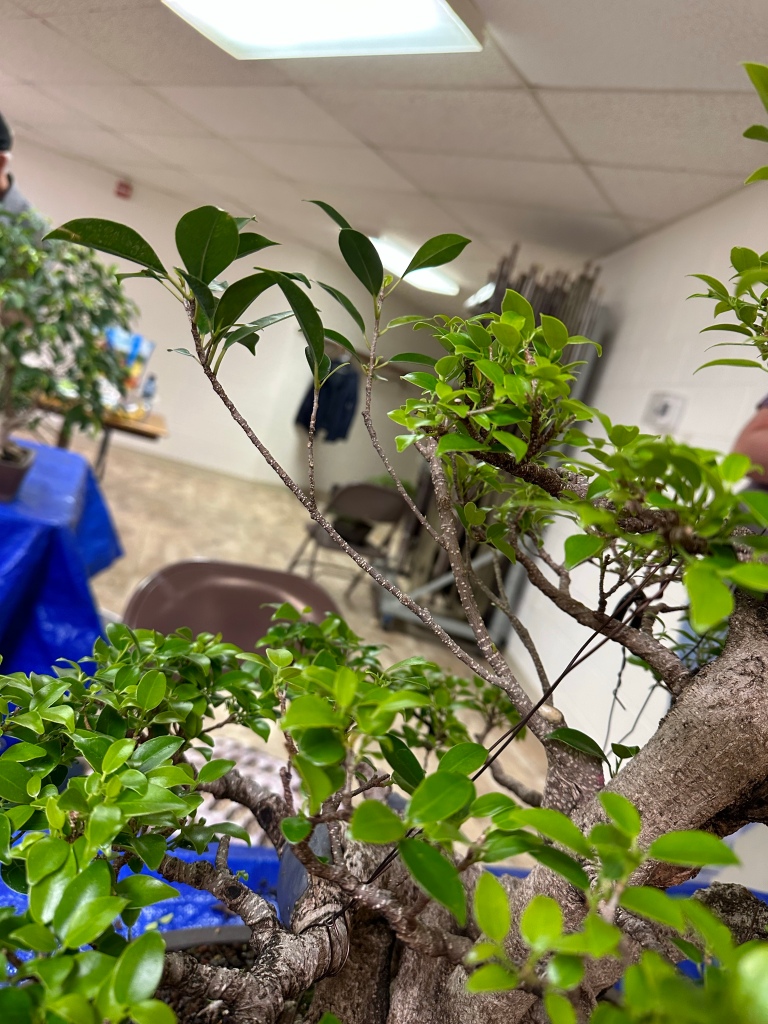
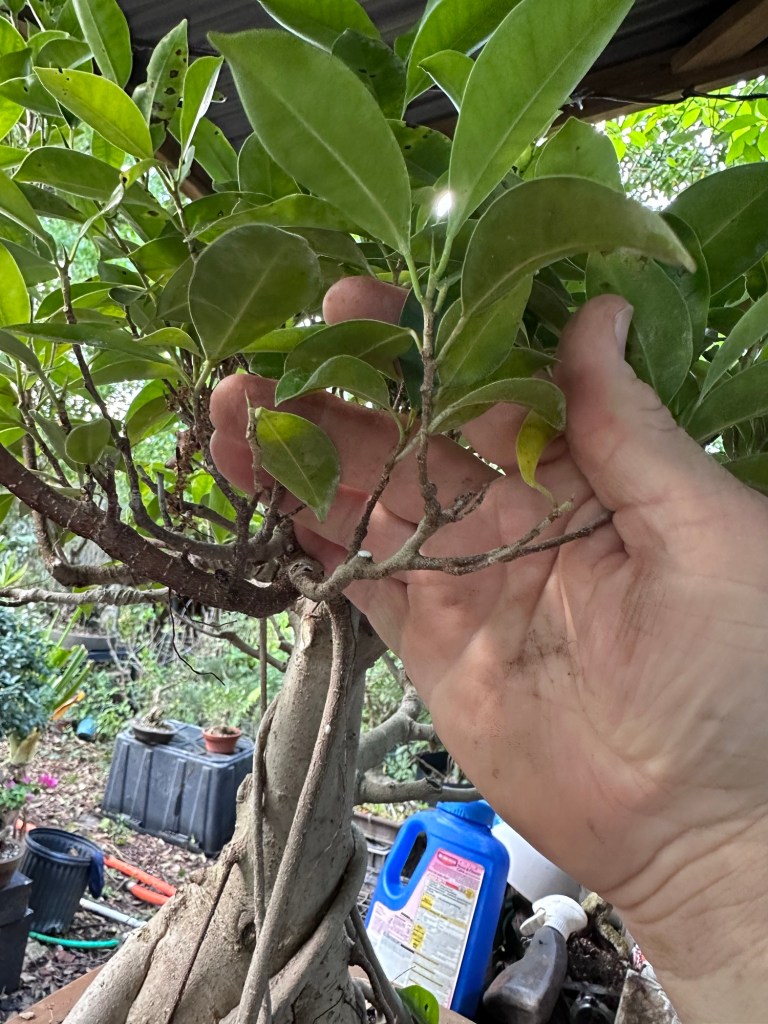
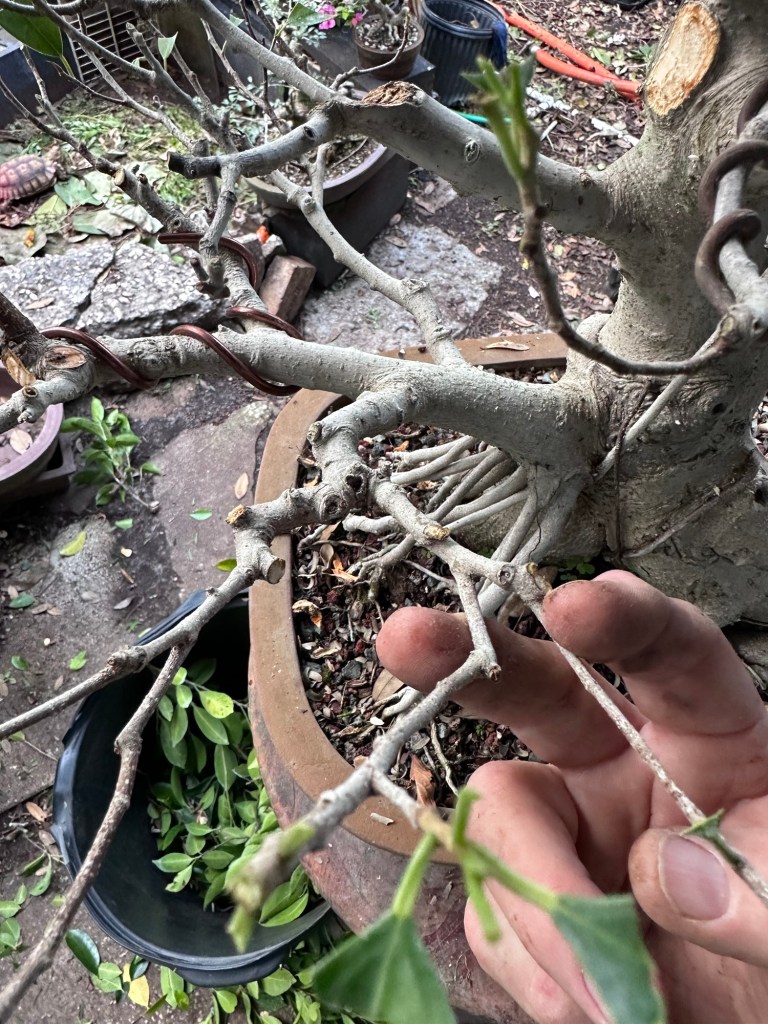
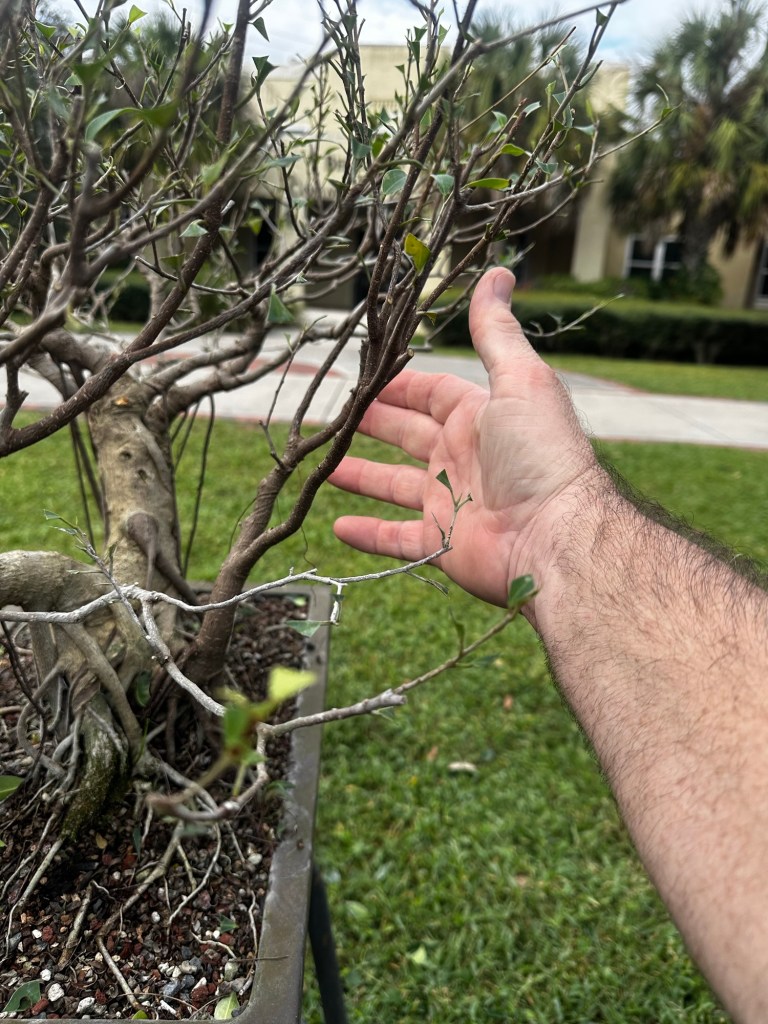
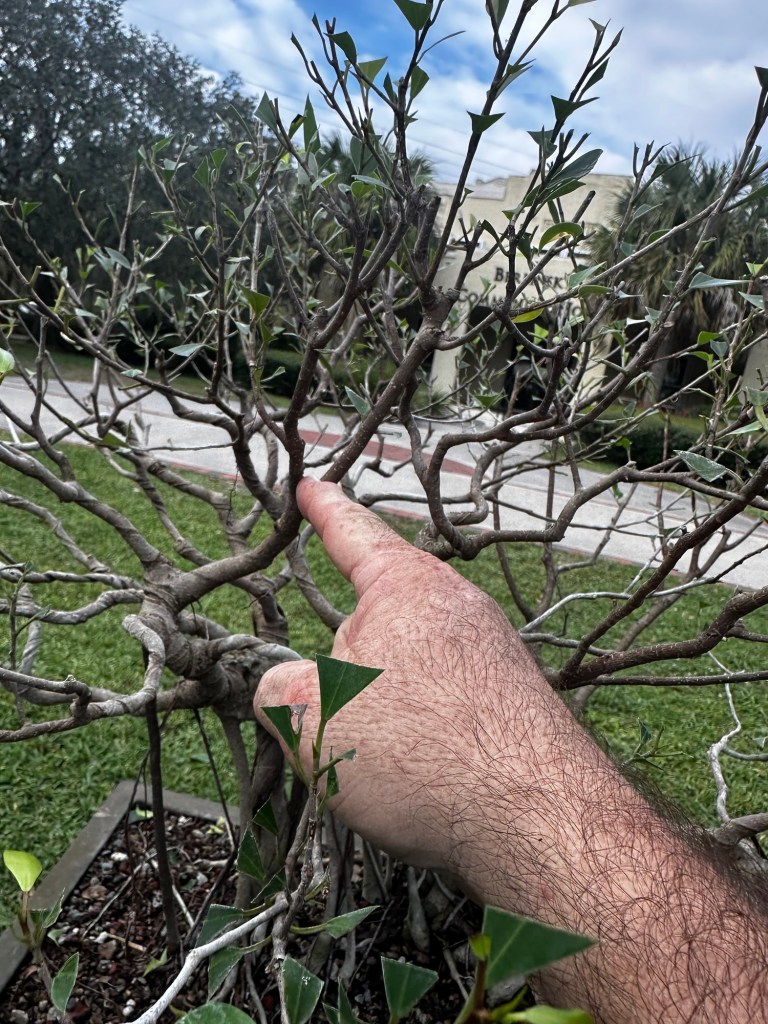
There we go, we can see what we have to work with. Which is a lot.
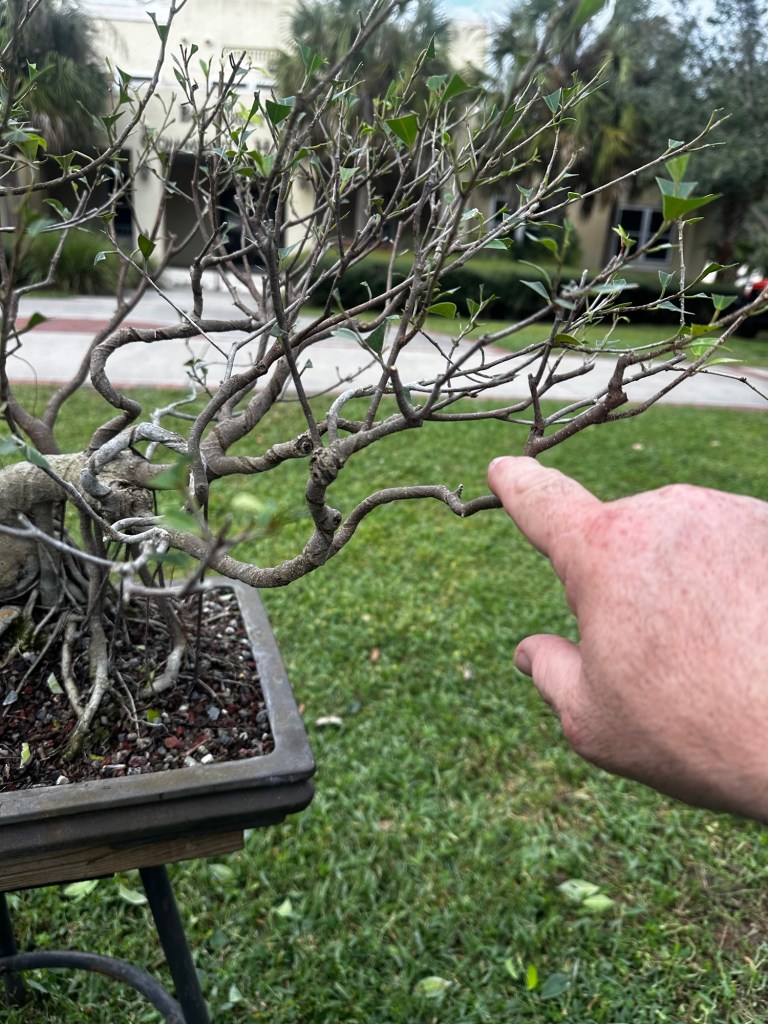
We got lucky with the longer branches just happening to grow just where we need them.
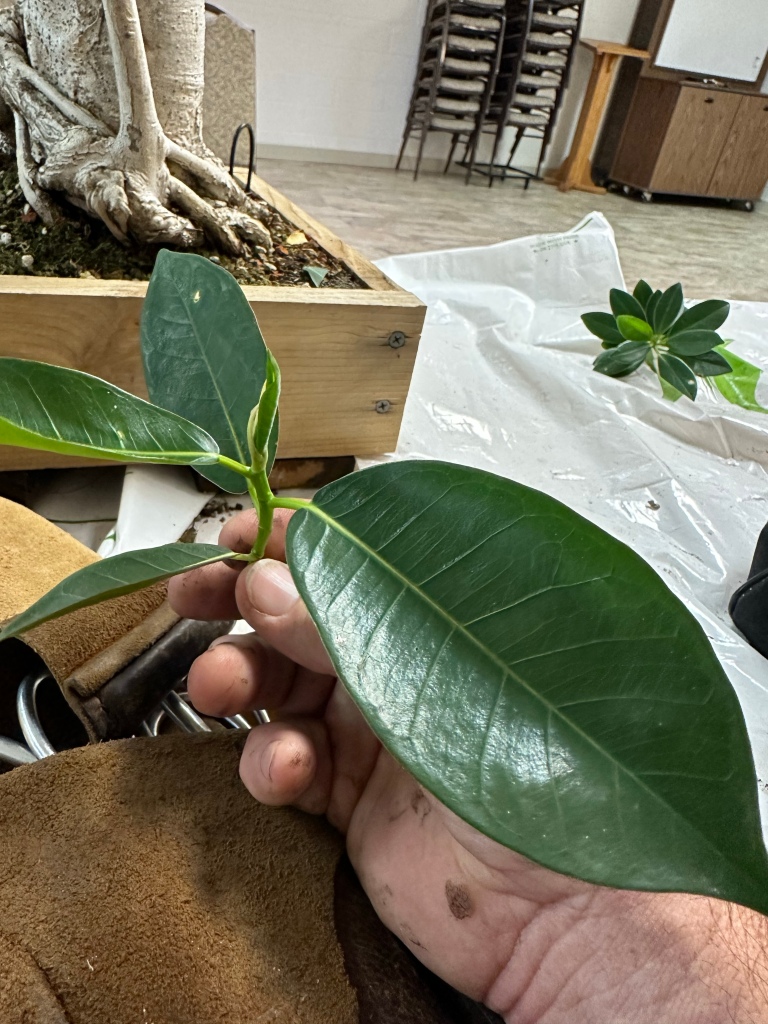
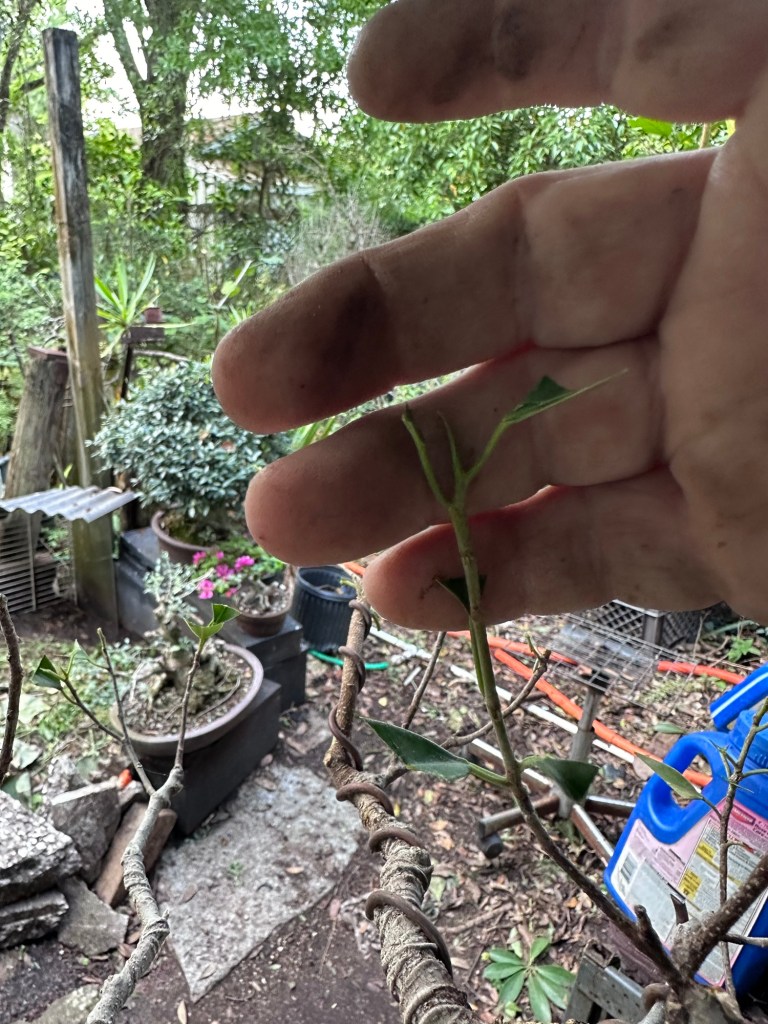
This one is perfect for grafting; strong growth and fresh bark.
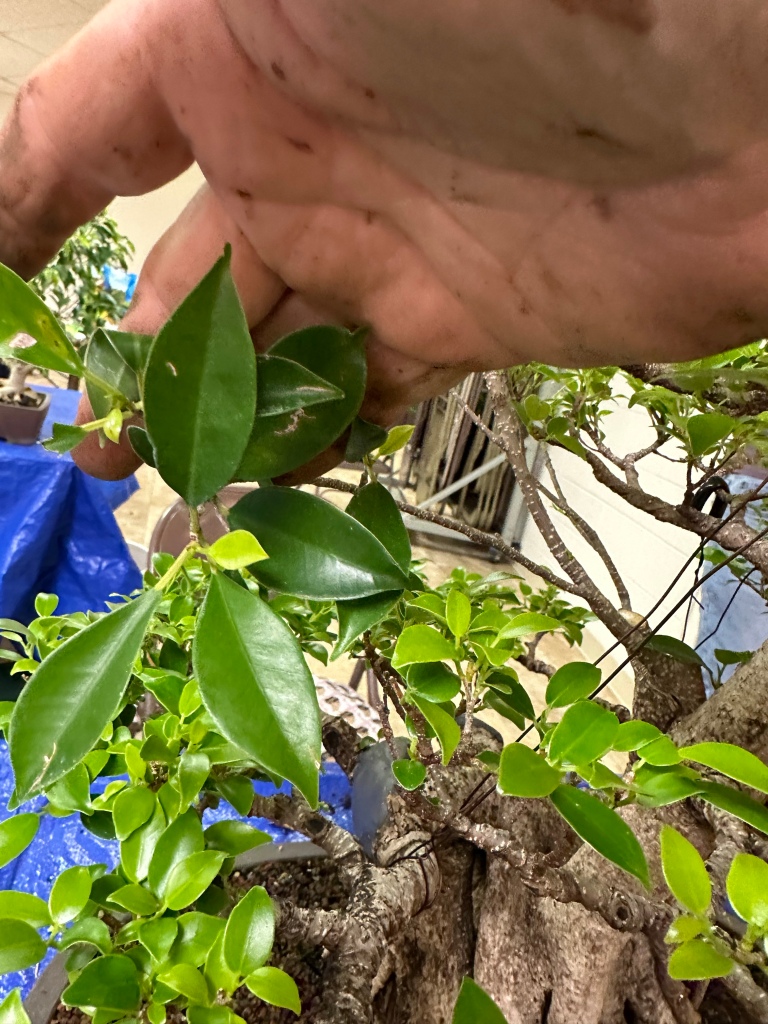
It’s gonna go about here, to fill in that empty spot. Now, to explain why we need grafting on a ficus like this: this is the plain Jane, regular old Ficus microcarpa, not one of the many cultivars. Which means that it doesn’t back bud as readily as one would like. In fact, it’s more prone to die back to the next node, or grow point.
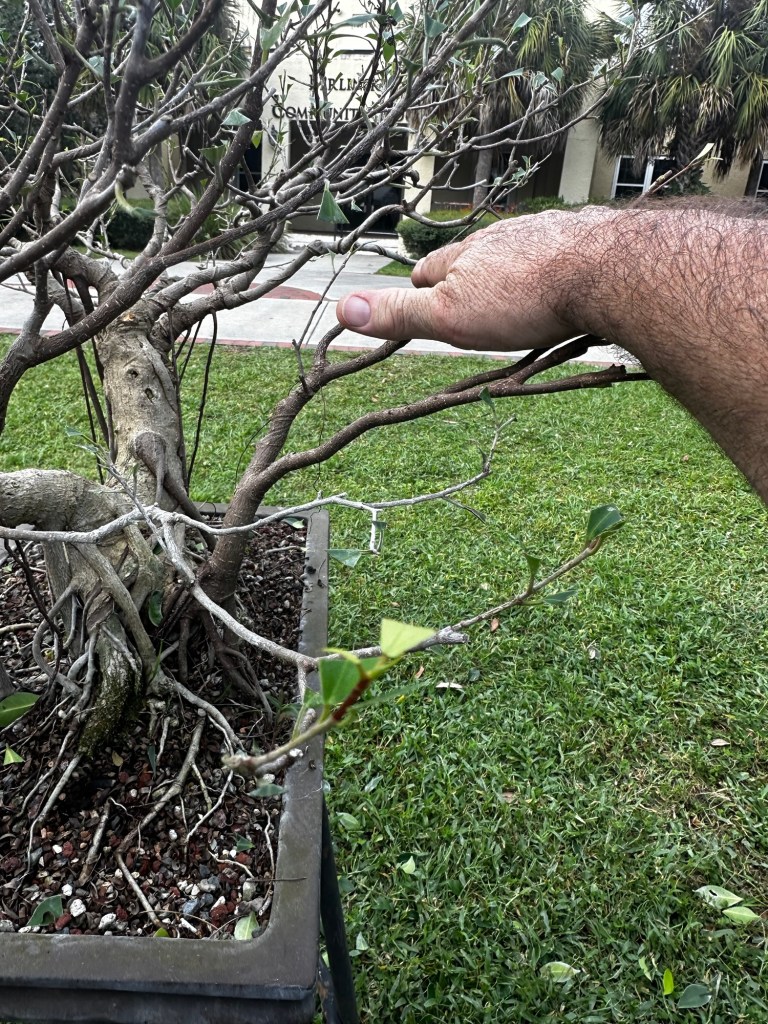
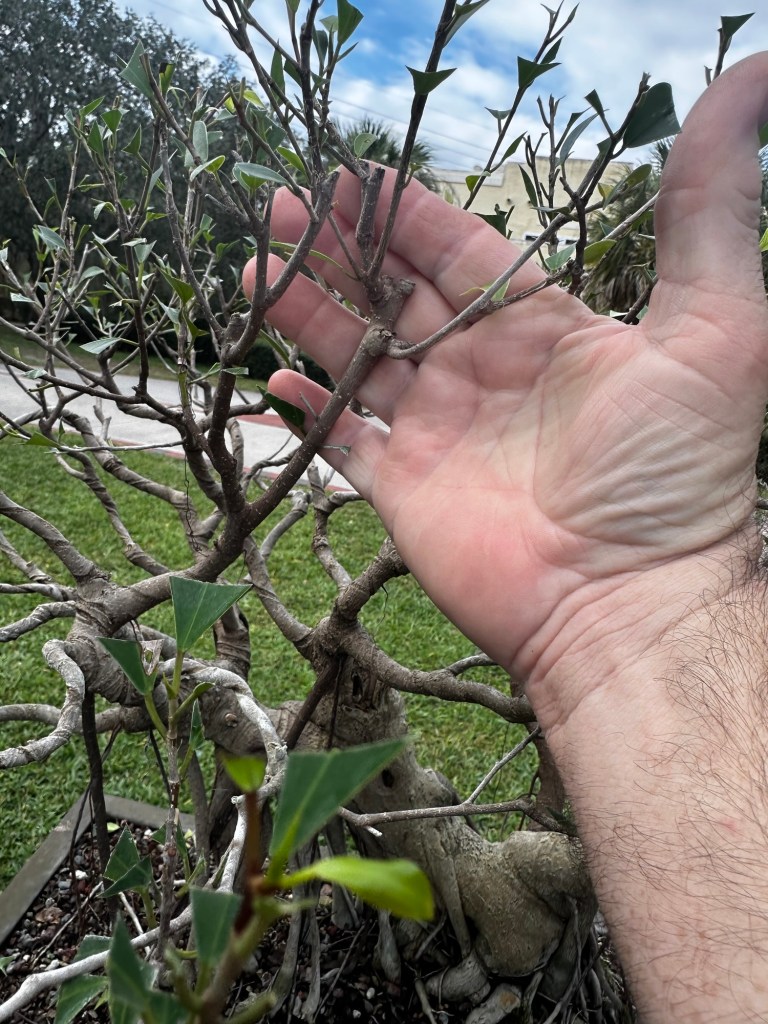
The branch just above my pointer finger has been grafted on, and the next one above it as well.
After grafting, here’s the new pot. I debated for about ten minutes whether I should repot or do the top work first. Top work won out. The debate was whether the repot would be to strenuous on the grafts. But I figure I can be gentle.
Grafting time.
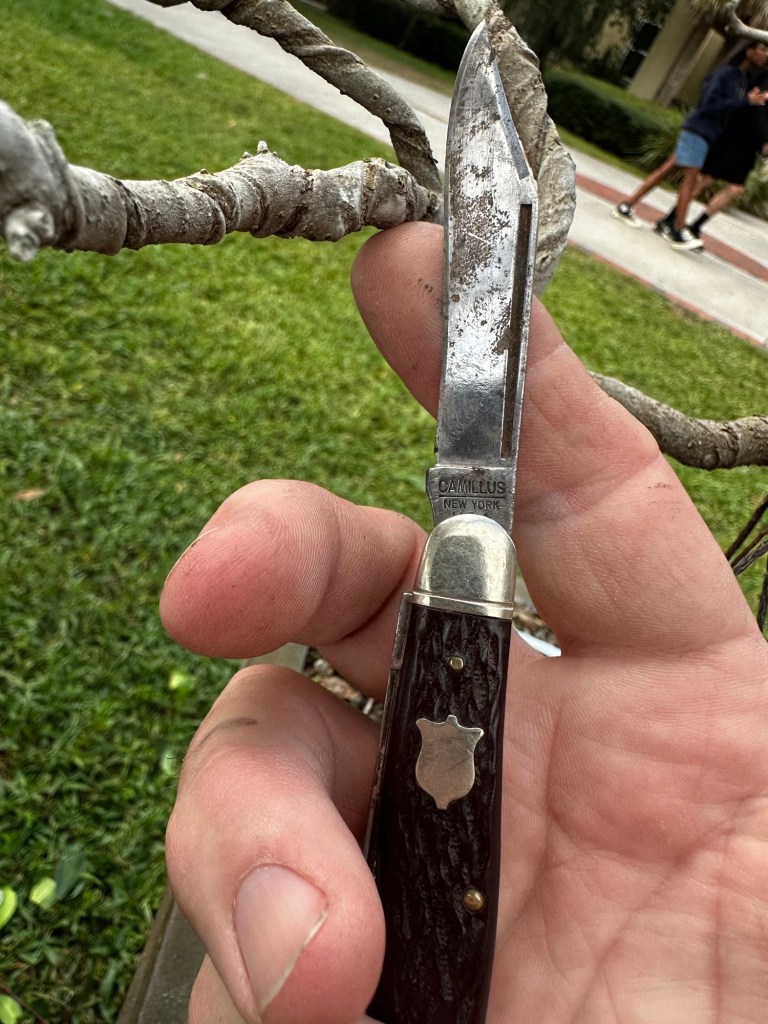
A freshly sharpened knife.
And…..here we go!
Grafting is easier than you might think. Simply cut a gouge into the the bark.
Doesn’t even need to be that big.
See?
Grab some type of grafting tape. In this case I’m using “self-amalgamating electrical tape”. I’ve come to use this because it only sticks to itself (self-amalgamating) and doesn’t damage the trees bark when you take it off. The point of the tape is to keep water out. In the past they’ve used beeswax, floral tape, vet wrap, even just cut paste.
Cut a piece..
Remove the backer piece…
Scrape the branch you are grafting, place it, and stretch the tape (it’s rubber), and wrap it tightly. I then like to use wire to hold it down as well.
And make sure the wire is tight. That holds the two pieces together. As the cuts heal, they want to pull away, so I’ve found that wire holds it in place nicely (like we did above on that recalcitrant branch).
On the side that’s holding the graft, two loops hold it down better than one.
Now for one more graft. Same process: cut a wedge…
Scrape the bark on the branch…
Apply the tape, add the wire…
Crank it down.
I was going to wire this tree out but I think I’ll just prune for movement and taper. Making sure to leave an active node so we diminish dieback.
All done with that.
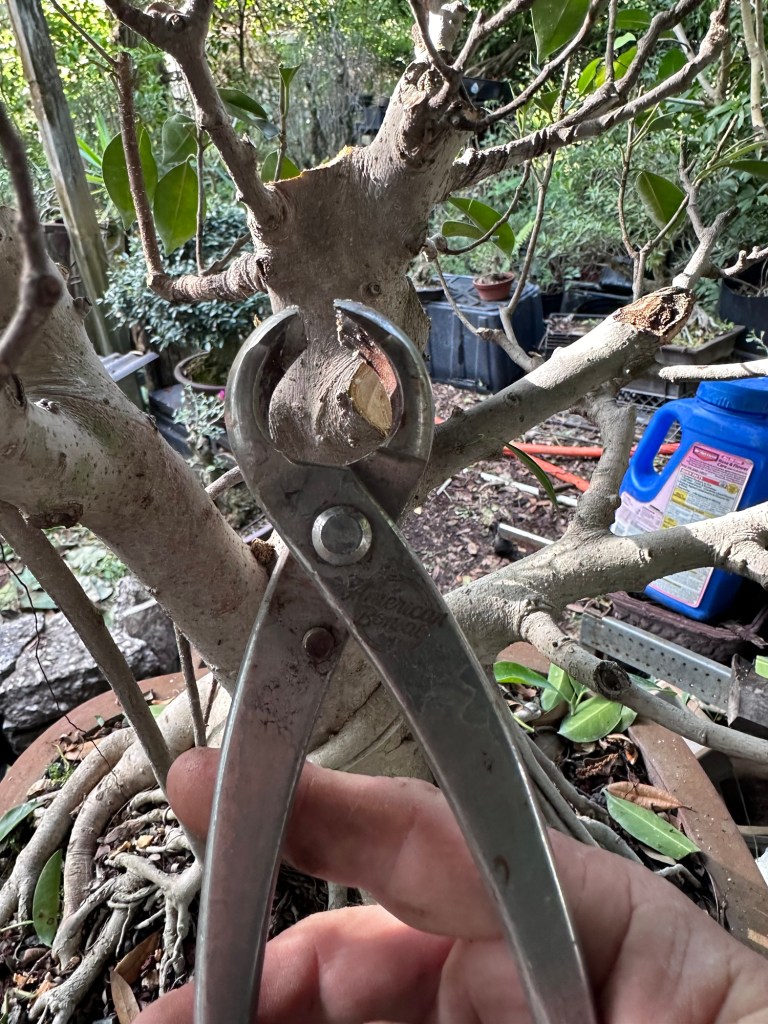
One last thing before I repot, I’m going to smooth out this scar.
I start with a knob cutter…
Then clean it with my knife.
It’ll take a bit to heal, but it should heal.
Now it’s time to repot.
It definitely needs it.
Rake it out.
Unwinding the roots. This one went around the pot twice.
Cut back the long ones…
Rearrange the new ones
And now it’s time for the pot.
The pot is, believe it or not, a high quality Italian bonsai pot. High fired and of good clay.
Of course I tie it down.
Using the wire to hold some roots in place.
And fill it back in with good, well draining soil.
In the above pic, I’m pointing at a root I’ll split like I did in that original post (did you read it? Why not?)
Then some fertilizer.
And weed preventer.
And water it all in.
It’s hard to believe this tree started out with maybe four branches and a top. Especially it being a regular Ficus microcarpa, which isn’t know for much ramification.
But you can do it. You just need to follow the basics: cut it back, wire, let it grow, fertilize, unwire, cut it back, let it grow. Just keep doing that and you slowly build the tree.
It just takes time and work. Stay tuned for updates.
In La Florida, we have people we like to call “snowbirds”. They’re a breed that lives in Florida for most of the year (primarily in the cooler months, hence the “snow” part) and then travel up north (the “bird” part, like an annual migration) in the hot months. Now, I’m from up north originally, and I don’t understand the concept as I can remember summers in Massachusetts being stiflingly hot and many homes don’t have air conditioning like Florida homes do, and the evenings can stay hot all night long. Here, the temps tend to drop because we, though we are tropical, have this thing called “radiational cooling”, like in a desert, meaning the heat radiates off to space at night. We can sometimes drop by 30°f. That’s like going from 35°c to 18°c, or 95°f to 65°f, especially if we have an afternoon thunderstorm.
Anyway, Wellesley is one of these snowbirds. She lives in Ft. Myers FL and goes to New Hampshire for the summer. As such, she’s left several trees in my care, two ficus and two buttonwoods (you’ve seen one of her ficus in these two posts first appearance and second appearance ). They prefer the warmth and grow best in the heat, especially the buttonwoods. This is one of them today’s victim:
I’m just starting to cut the leaves off. Aha! Defoliation. What, why, how dare I!
Well, my friends, why? We do it for reasons.
Or we should. Let’s describe what happens when we do defoliate. and we will get to the why and how as we go along.
Firstly, most people think we do it to get smaller leaves. That’s a true story. But that shouldn’t be the only theme in the story. Like I said, there are reasons, and leaf reduction is one. But not the most important reason.
Let me list some reasons:
Leaf reduction. Branch elongation. Branch ramification. Reduction of transpiration stress. Removal of diseased, damaged, or old/inefficient leaves.
Let’s work backwards and jump around hither and tither, as I like to do.
If a leaf has been damaged by insects, or disease, or is just old and inefficient, remove that leaf. There’s a point, from any of the three above reasons, where that bit of foliage (leaf, frond, needle, scale) will take more energy than it gives back to the tree. I.e., pine trees, in development, get their older or damaged needles plucked for this reason.
Remember that a plant is basically a solar panel, taking the sun’s energy and converting it to energy. In this case, carbohydrates and sugars.
For this reason, I don’t agree that cutting a leaf in half is beneficial to a trees growth, like below.
Now, doing this can help in the reduction of transpiration stress, but that’s kind of just turning off the growth hormones until the weather breaks. The tree still has green, and it won’t grow until we remove enough of that leaf to trigger an abscisic acid response, which causes new growth at the dormant bud.
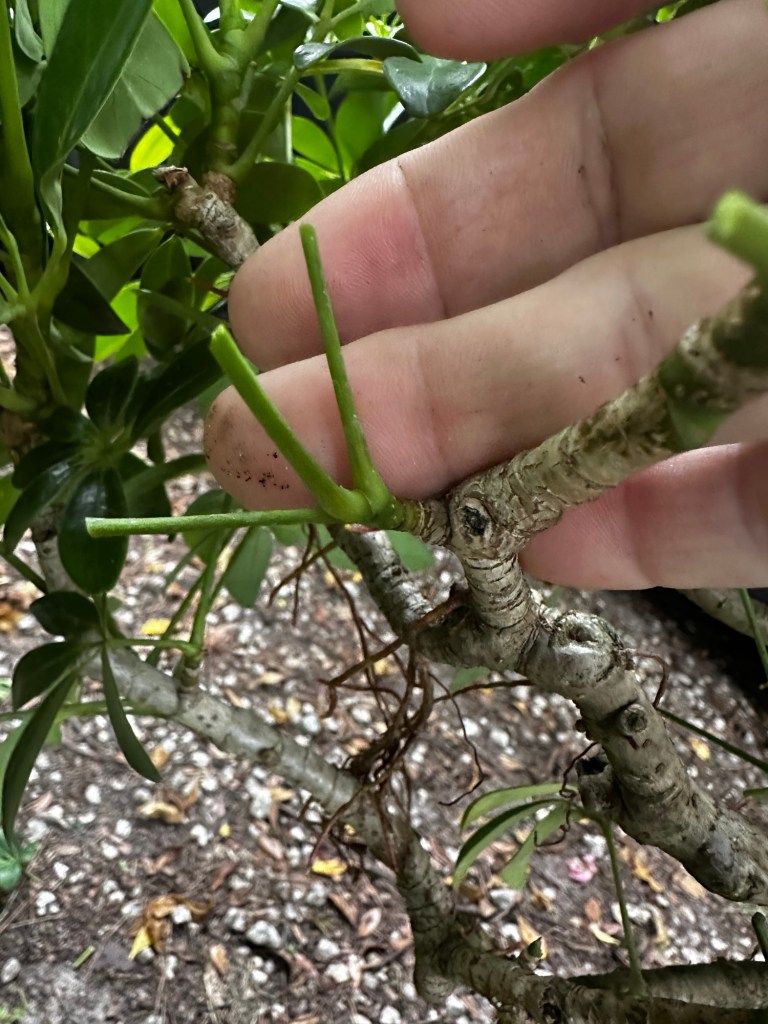
On a buttonwood, I remove at least 95% of the leaf, but I reserve the two glands on the base of the leaf, just before the petiole (I discuss this in the post Jorge’s buttonwood, if you’re curious).
Branch ramification. At the junction between the petiole and the branch, we have a dormant bud that, when activated by cytokinin, will grow a new bud, and not just a new leaf but a new branch.
Hence, if we defoliate and cut the grow tip at the end of the branch, we get more branches, and we call that ramification (there are two hormones in play here: auxin and cytokinin. Auxin causes a branch to elongate, cytokinin causes dormant buds to activate. In this scenario, the auxin is the dominant hormone, and suppresses the cytokinin. Auxin collects at the grow tips. Therefore, if we defoliate but leave the tip intact at the branch end, we get branch elongation. But if we cut the tip, we remove the auxin, which makes the cytokinin dominant, causing backbudding. It’s like a computer program). Kinda like on a pine tree when we pluck needles and cut candles.
Now, today I’m repotting. Defoliation in this case helps the tree with transpiration stress (it will do all those other things we are talking about too). Transpiration is when a tree pulls water up from the roots, into the leaves, and evaporates. It does this so that photosynthesis can occur (photosynthesis takes the carbon dioxide from the air, water from the roots, and using the sunlight as the energy source, breaks the carbon dioxide and the di-hydrogen monoxide (water), and makes carbohydrate. Carbon and hydrogen. This process creates oxygen, or O2. Wow!).
Anyway, the defoliation and root reduction during a repot helps to balance that transpiration. There are times when you should not defoliate when you repot, which I will cover in an upcoming Brazilian Raintree post, so you’ll have to wait for that one.
Now, back to our tree. I’m repotting (which is a specific potting technique I discuss in this post) to get a more artistic planting position. But I know (from experience) that this tree will recover faster with a defoliation.
Here’s the pot.
An American made pot.
From Forest Inn Pottery. It’s a good pot.
The style this tree is mimicking is how a buttonwood grows naturally in the Florida Keys, twisted, gnarly.
All these bends and switchbacks are natural.
It’s hard to mimicking that in a styled tree.
Below, this was wired into place; not as dramatic.
So the idea here to pot it to show off all those features.
And, of course, I fertilize, add some prophylactic systemic insecticide for chili thrips, and add some sphagnum to the soil top, and then pre-emergent weed preventer.
This brings us to the last reason we defoliate: smaller leaves. The worst reason. It is true that we get smaller leaves when we defoliate. The reason is that a plant needs only a certain square inches of leaf surface to be efficient and to have a balance between energy needs and transpiration stress. So if we cut off all the leaves, those hormones will go crazy making new ones, and they’ll make 2-3 times the amount their tree had before. But once it reaches that harmony, the leaves stop growing larger. That’s your smaller leaf right there.
But, if we build our branches, and defoliate, prune, and cull unwanted branches, like we should be doing, and we do it seasonally and properly to the trees developmental stages (both yearly and throughout the year) we will have more branches, and, therefore, more leaves, and they will be smaller by default.
Two things to add. First, the why’s, when’s, and how’s of defoliation are different for each tree. That’s why I kept mentioning pines. And secondly, and I’ll put it in bold to make it more bold: ONLY DO THESE TECHNIQUES ON HEALTHY, GROWING TREES.
That quote, in all its incarnations, has been attributed to artists, writers, poets, philosophers, actors.
Like this Ficus microcarpa, the quote comes in many varieties. This tre was once called “nitida”. Kinda like a tiger bark but without the bark.
Get out the saw, add a little wire. Do you know what the purpose of wire is? It’s two-fold. The first is obvious, to hold the branch while we bend it. The second is to protect the branch from breaking, as we bend it. Kinda like when we are under stress, sometimes a blanket or a hug takes the stress off of us and makes the change easier.
But……
……it can only protect where it touches. Let your friends into your life.
….that’s what life is, spending moments and remembering those moments when, perhaps a shared joke, or a drink, or meal, make the loneliness that is the true reality of man, go away for a little while. And it’s those moments one should cherish.
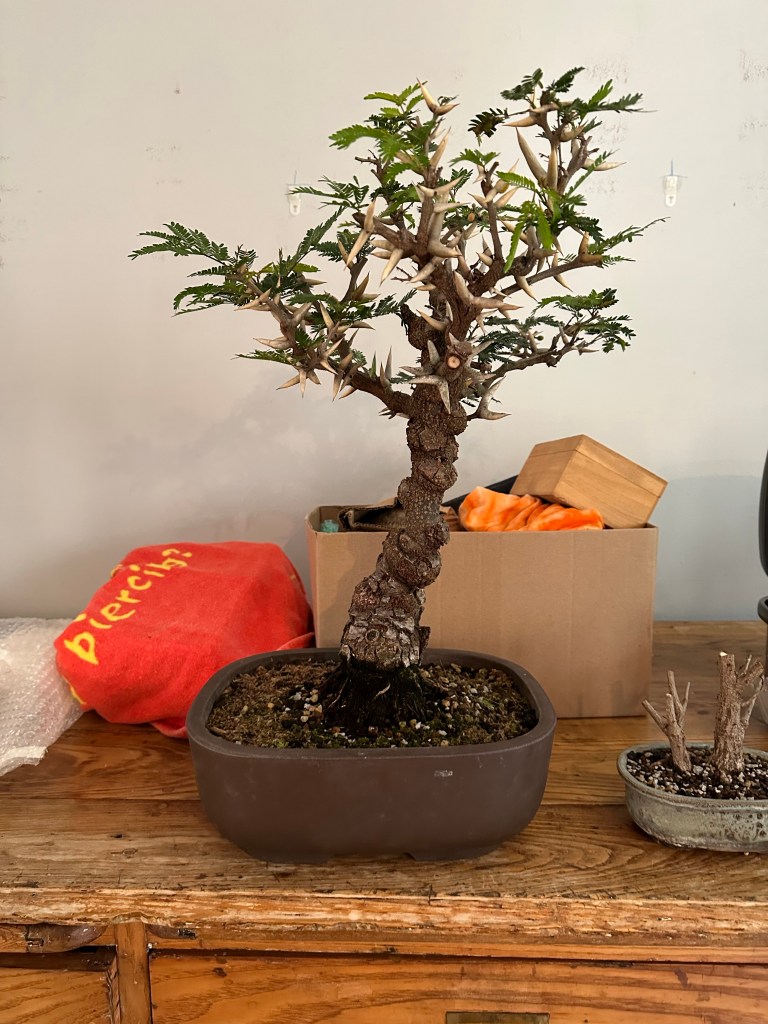
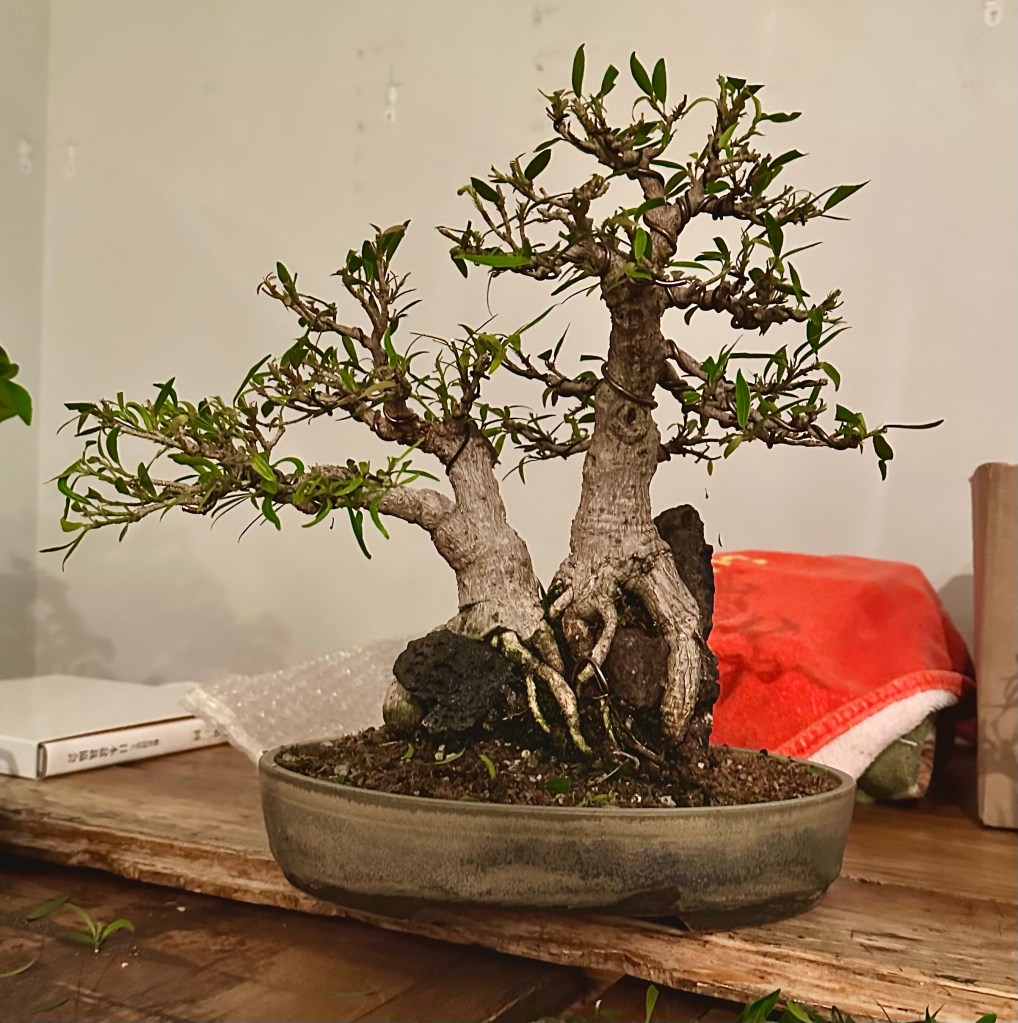
Brazilian raintrees were brought into this country (the USA) by a man named Jim Moody. I never met him, I don’t believe, but I was good friends with his grandson, Allen Carver. He left us recently. I never got to say goodbye. But every time I work on a Raintree, I think of him.
Gnarly.
This one came from Jim, to Michael Cartrett, to Javier Cortez, it was an air layer off a big tree that grew in Mike’s yard. And it went to another friend who went his own way, Jose Perez. He had to sell it after a divorce, and now it’s Doug’s. I get to work on it from time to time.
The story of trees are often as compelling as the trees themselves.
I’m glad I get a part in the story. A small part.
Tuning a guitar. Trying to get the spaces between the strings just right. So that the song sounds good. That’s Jack, a good friend I don’t get to spend too much time with.
Life is not the counting of numbers, it’s the space between those numbers.
How much can you fit into an hour, a minute, a second? How much should you? Can the appreciation on that infinitely divisible moment of time between the seconds in your life be enough, or do you need to fill up those moments with importance?
How many beats per minute does your heart count? Are we promised only so many beats per lifetime? Is it written in our genetic code? Or do we just time of the calculation and stop counting? How many leaves on this buttonwood? Does it matter?
It’s like the space between the branches. The air around the tree. This gives meaning to the tree.
And some things you just gotta see in person. Go to a bonsai exhibit, or all you’re seeing is the blast of pixels in an image against your retina. We “see” with all our senses.
The best story will never be written because it’s your story and you’re making it up as you go along with your life.
The story has truth and lies. And even the most honest of us have all these things we tell ourselves to help us get through the day. But we believe them.
Kurt Vonnegut said “We are what we pretend to be, so we must be careful about what we pretend to be.” in the novel Mother Night, in 1962. Harsh and cruel. You should read it.
Another buttonwood. Let’s help it along. It needs stress and pressure to forge it into what it wants to be.
It needs that blanket so the branches don’t snap and break, as we bend it. This time there’s wire and a secondary wrapping of self amalgamating, rubber, electrical wrap.
How about this pot? Made by an auto mechanic that builds transmissions. Lynn Baker, goes by the name Herr Lynn. A local potter from the west coast of Florida.
I think it adds to the story.
But the story is false. This buttonwood may have started out on a beach in Florida, but it’s nature wants it to grow straight. Like the branches in the first pic
That’s why it’s species as designated as “erectus”. Like the hominid Homo erectus, an ape that walks upright, Conocarpus erectus will grow straight, but if it’s in the environment like the southern Florida coast, with the hurricanes, the sun, the surf, alligators and crocodiles, and the land developers and tourists, all causing stress and beating down and torturing the tree, it will be transformed into the twisted trees we so love.
We have to tell a story, a true one, but not true in this case, of all the struggles a buttonwood can go through and live.
To get back to our initial pondering in the title of this article, it was Picasso who was first quoted saying that art is a lie, in 1923. Here’s the full quote, translated from Spanish:
“We all know that art is not truth. Art is a lie that makes us realize truth, at least the truth that is given us to understand. The artist must know the manner whereby to convince others of the truthfulness of his lies. If he only shows in his work that he has searched, and re-searched, for the way to put over his lies, he would never accomplish any thing.”
As I go through my day, working on trees or just making soup, there’s an ever present question on my mind. That question is: “Why?” Especially of late, but that’s a rabbit hole I won’t go down today.
It’s a tough question to answer,”Why?”. Most people mistake my online moniker “Adamaskwhy” as meaning that you can ask me “why?” and I’ll tend to answer. And that’s ok. I usually know the answer, or if I don’t, I can find it (and if I can’t find it I just might make something up).
But the real meaning behind “Adamaskwhy” stems from my propensity to ask my teachers, when I was a young and inquisitive lad, “Why?”.
For example, my teacher might expound “When drafting an exclamatory sentence, one should use simple, declaratory prose.” and I might ask, innocently, “Why?”. Now, the best teachers knew the answer. The competent ones knew where to find the answer. The average would just quote what they’ve been taught. The worst would say “just because”.
Obviously, from the preceding paragraph, I didn’t take the lesson of short declarative sentences to heart. Mainly because, sometimes, obfuscation and evasion is the quickest path to The Truth. But, more importantly, I don’t want my style to sound like The Old Man and the Sea (“….here is a bonsai. It curves to the left, then to the right.” I’m more of a “.. The blue sky paints the cream glazed pot with streaks of azure. The sun silhouettes the canopy like an umbrella, shading the mossy soil. The old, sun-browned man, wizened eyes staring at the green foliage, raises his shears and snips at a dry branch…..”).
Needless to say, many of my past teachers did not appreciate the question “Why?”. Truth be told, many teachers can’t answer the question. They feel that, just because they are the teacher, their teaching is inviolate, sacred, and not to be questioned. And the more narrow the focus of the lesson, the more pedantic and authoritarian the teacher becomes. As an example, let’s say the lesson is on bonsai soil, (just to bring bonsai into this essay, since this is a bonsai blog after all), the reasoning style usually used by bonsai professionals is Reasoning from Authority. They’ll say “so and so uses such and such, and they are so and so, therefore it’s correct. Or, depending on the particular pedant flailing his hands around whilst lecturing, the verbiage becomes a word salad of technical jargon with one needing a degree in soil mechanics to understand just what they are saying.
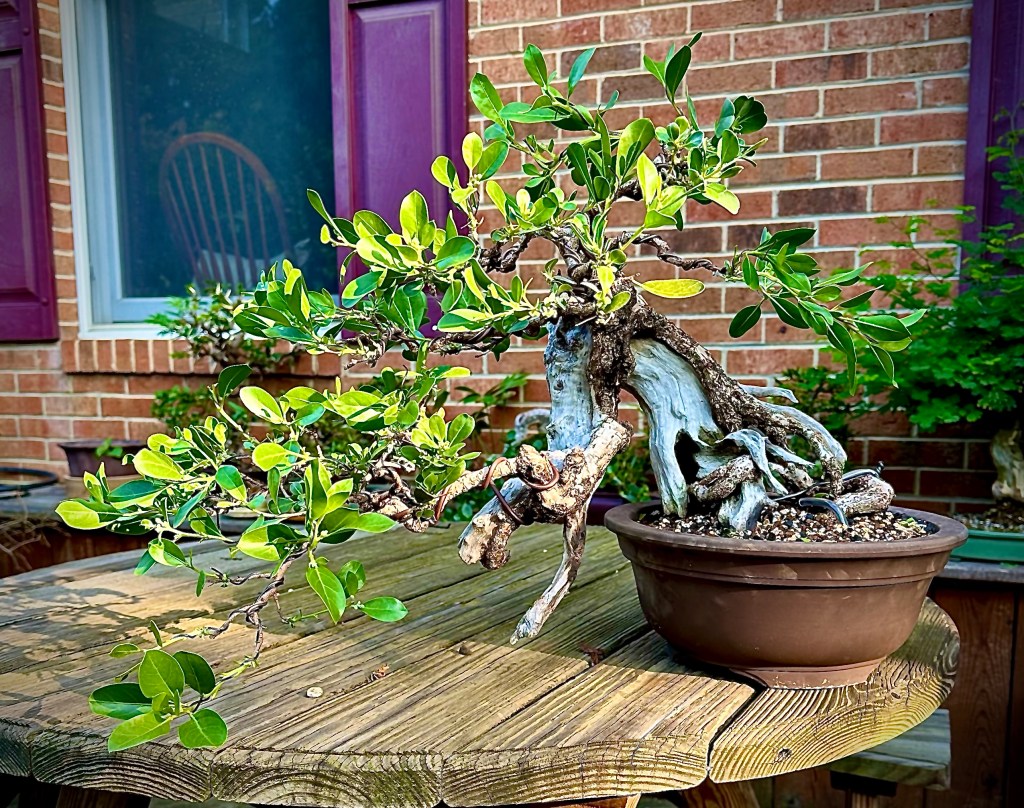
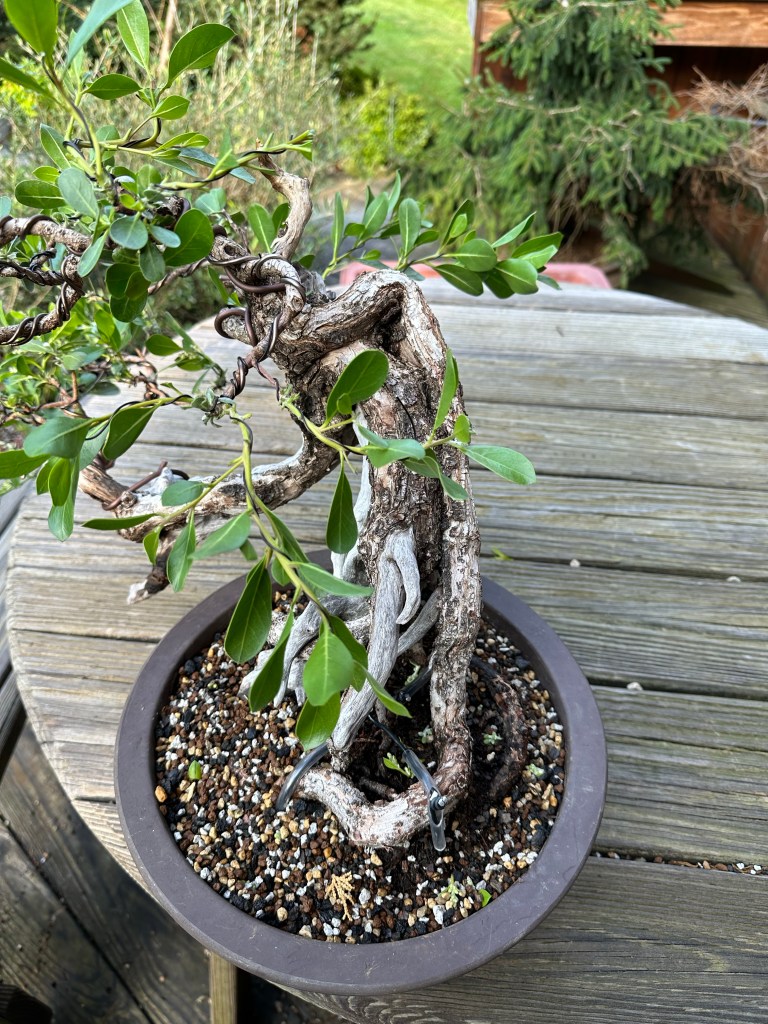
Anywho, why (heh) am I “why-ing” now? Well, dear reader, I recently posted a video in the social media webosphere concerning a certain willow leaf ficus, and what I did to the poor thing. This one to be precise:
Now, with such a raw piece of stock, I could’ve done all kinds of things to it. The scene: Ikebana Club international, Orlando Florida. This is my fourth visit to this Ikebana club. My visit usually consists of me bringing starter trees (in todays case, willow leaf ficus) a few different choices of containers, soil, wire etc., and potting, styling those trees, or re-potting members trees from past sessions. Irene, who’s been to all of them, decided to get two willow leaf this time. The first one we wired up and made into an informal-upright. The second one….well, you can see below what happened to it….
As you might have noticed, we chopped it. And Irene was right there with me on the decision to do it. It was actually her idea. It’s a drastic technique, for sure, somewhat controversial, as dramatic as my teenage boys trying to get through a Fortnight Battle, and, in my case, it makes me look badass for how casual I can do it, with just a pair of scissors.
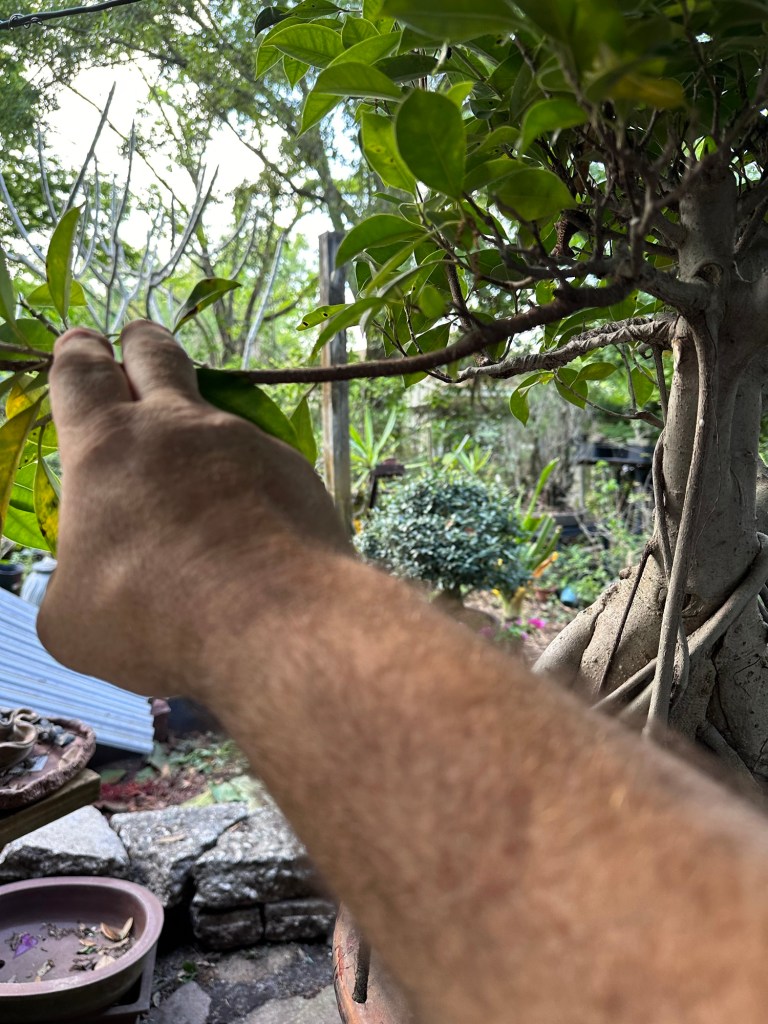
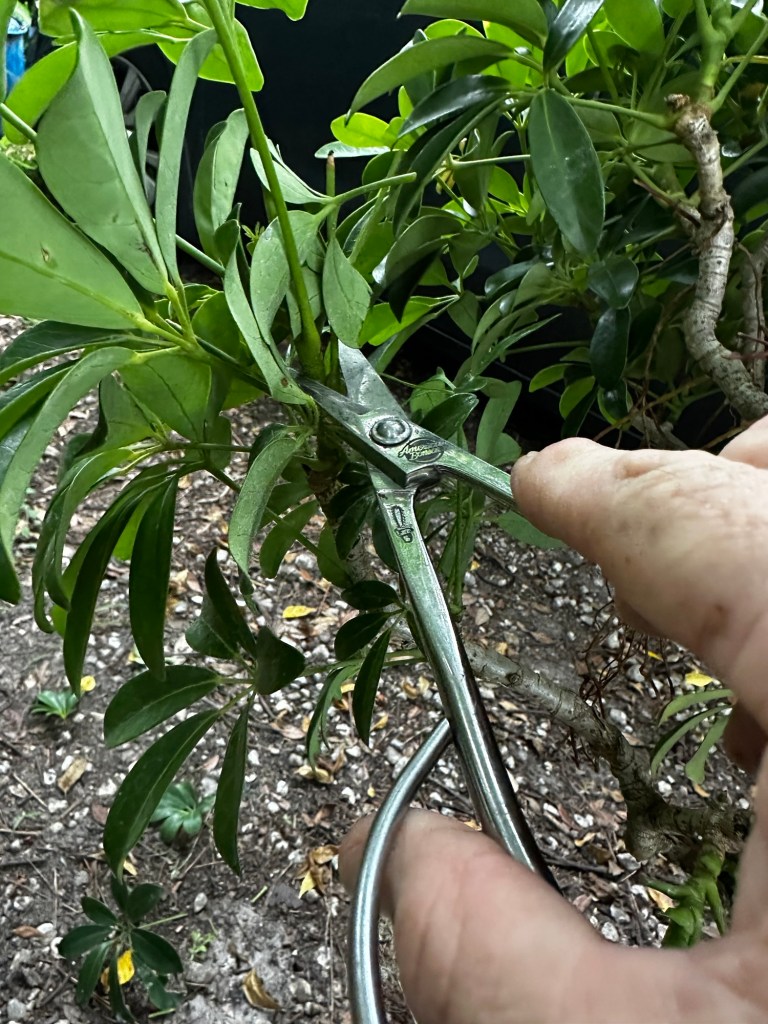
You see, many people may misunderstand the decision to do a trunk chop. Let’s go through another willow leaf (below) and the decision tree (no pun intended) used to decide when and if to trunk-chop a tree.
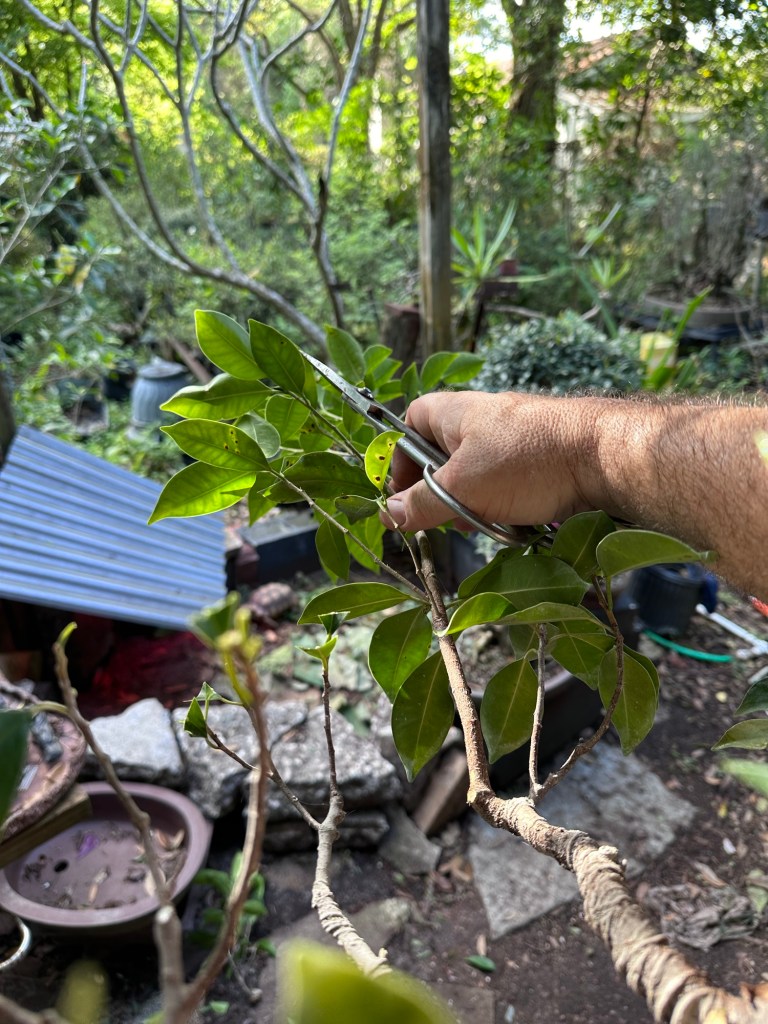
Below: Hand for scale. Ficus salicaria, the willow leaf fig. It belongs to Mike, who’s visiting from the Naples area. The tree is a stock tree from Wigert’s Nursery in North Ft Myers. It has a fair sized base (nebari) and a good sized trunk. But it has little taper, the branches are way high, and it kinda looks like a slingshot. Just need a rubber band and a good rock, and we can go squirrel hunting.
Ok now, you ready? As one should, let’s begin at the beginning. You can probably guess the ending to this post, a trunk chop, but the question, the one in the title, is “Why?” Why a trunk chop?
The beginning begins with the first interrogative “What?” What is Bonsai?
Bonsai is the Art of taking a relatively small, and relatively young tree and, using various techniques and principles of art, trying to make it look like a big and old tree.
One of those principles is the one we call “Taper”. The concept of taper means that, starting at the bottom, we should start with a wide base and, as we go up the trunk, it should taper, or get skinnier, coming to a point at the top.
The tree below has some taper. It could be used to describe (style) a tree as seen from a distance. Throughout most of the history of bonsai, most trees were styled from a distant view perspective. Think of observing a tree on a mountain. But, as tastes and visions change, so has the idea of perspective. In the real world, trees have a trunk-width to tree-height of 1(trunk width) to 12-14 (trunk height). If you read the old books, it was taught that the ideal ratio was about 1-8 or 10. Today they teach 1-6. But there are extreme examples of 1-4 or even 1-1 (the so called “sumo style”). Now, I have been known to style a sumo style in the past, and, if a tree could support it, I still do. But let’s get back to Mike’s tree.
Here’s the slingshot I was talking about.
It’s not generally a good design choice to keep that. Why? Well, horticulturally, a tree in nature tends not to grow that way. Or, if it does, when a good wind storm comes along, the tree will break at the “V”. It’s physics. Artistically, a v acts as a visual stop for the viewer. Bonsai being an art, that wide V will stop your eye as it moves up and down the tree. Your eye is drawn to open spaces and you’ll be looking at what’s behind the tree and not at the tree. Your eye moving around the piece of art, as designed by the artist, is called “composition”. I could get really into it, and talk about line, form, focal point, and negative space, but I think you get the idea.
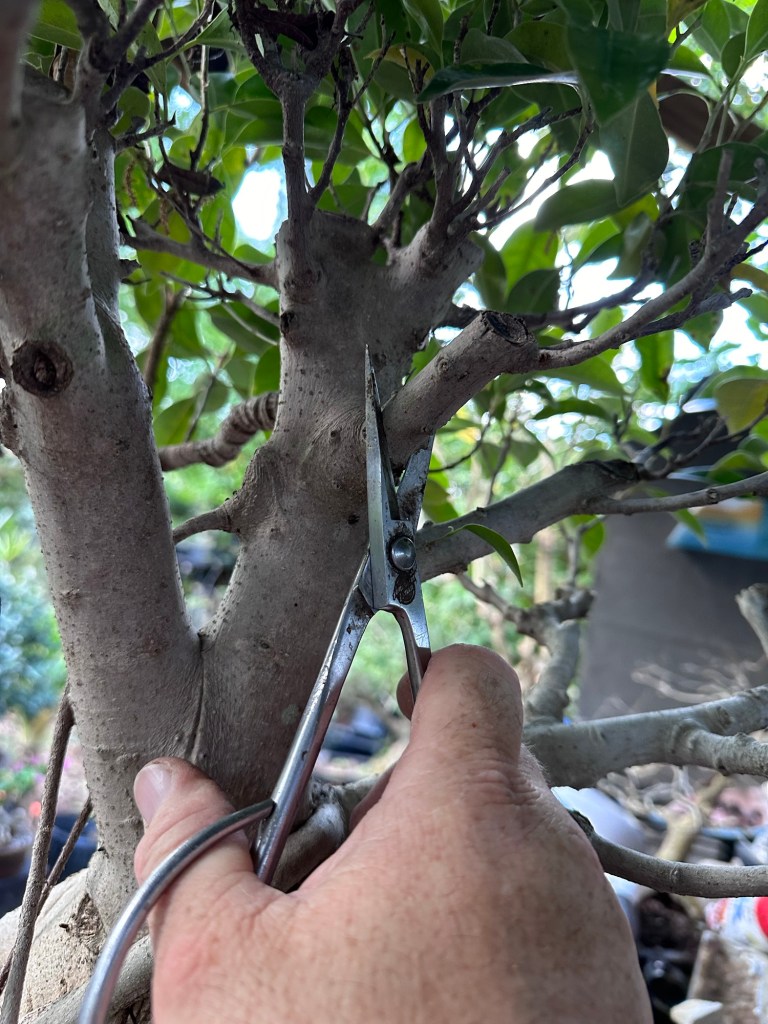
For Mike’s tree, I could remove the bigger branch, like below.
And I’d still have good taper.
I could remove the smaller branch and have a more natural taper. That’s Doug hiding between the “V” btw.
Proportion (how the limbs are arraigned as you move up a tree) would satisfy a natural looking design.
The thickness of the trunk should decrease, in shorter lengths, as you go up the tree (main trunk is longer than the next level, the middle part by about 1/2-1/3, the third part, even shorter and thinner, until you get to the top, which should be your fine twigs. This makes the tree appear as though it’s taller).
I could not cut anything and use that first branch as, well, the first branch, and wire it down. We could make a good natural style.
To give an example of keeping most of the tree, let’s go on a tangent. Here’s a tree from a club member, George
We cut out the middle and wired that slingshot.
And it’ll make a good tree, in time, as well.
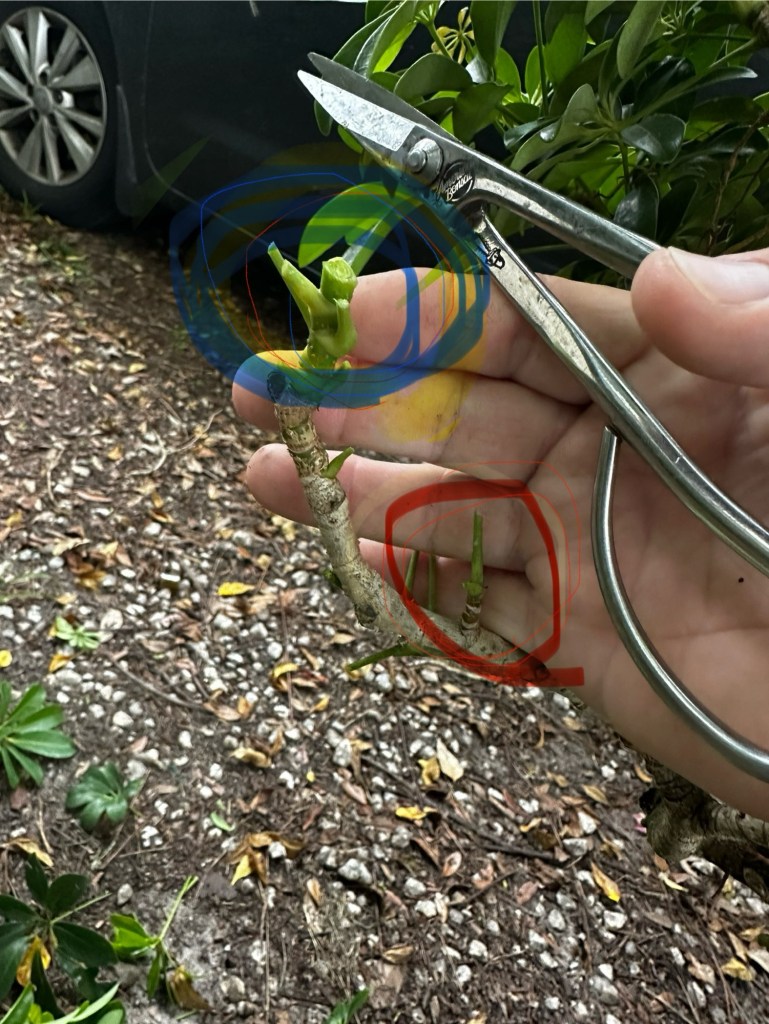
Getting back to Mike’s tree, we could start over, and chop the whole thing and make an exaggerated tree with quick taper.
You can guess what we did.
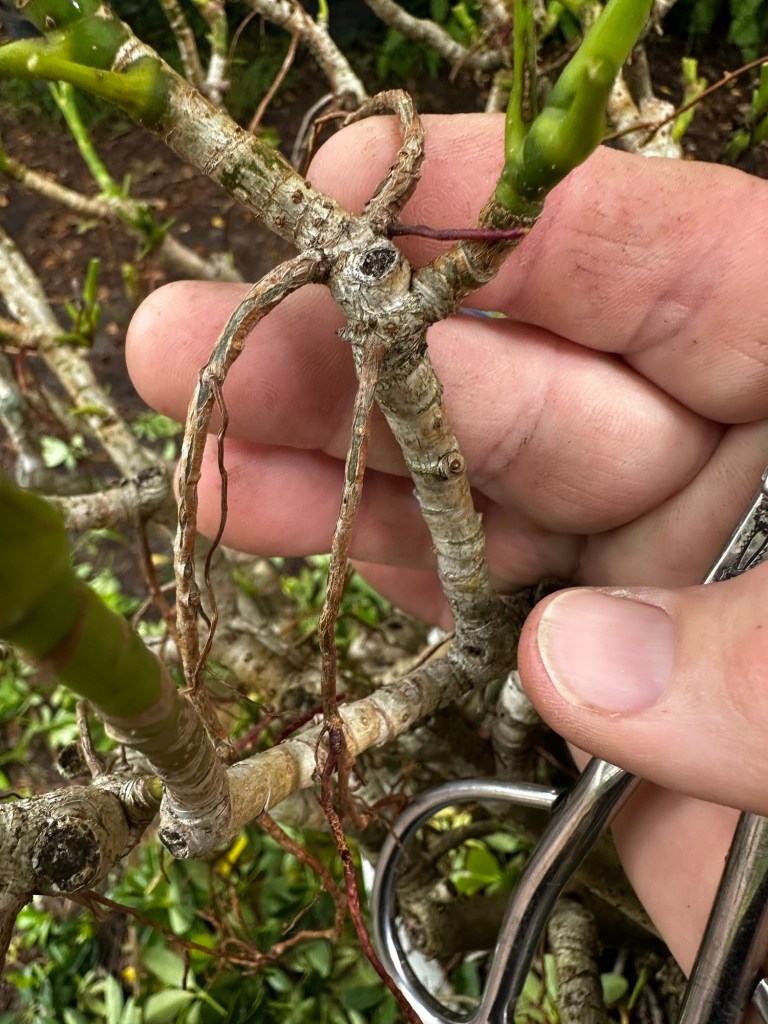
We didn’t cut here
Or here.
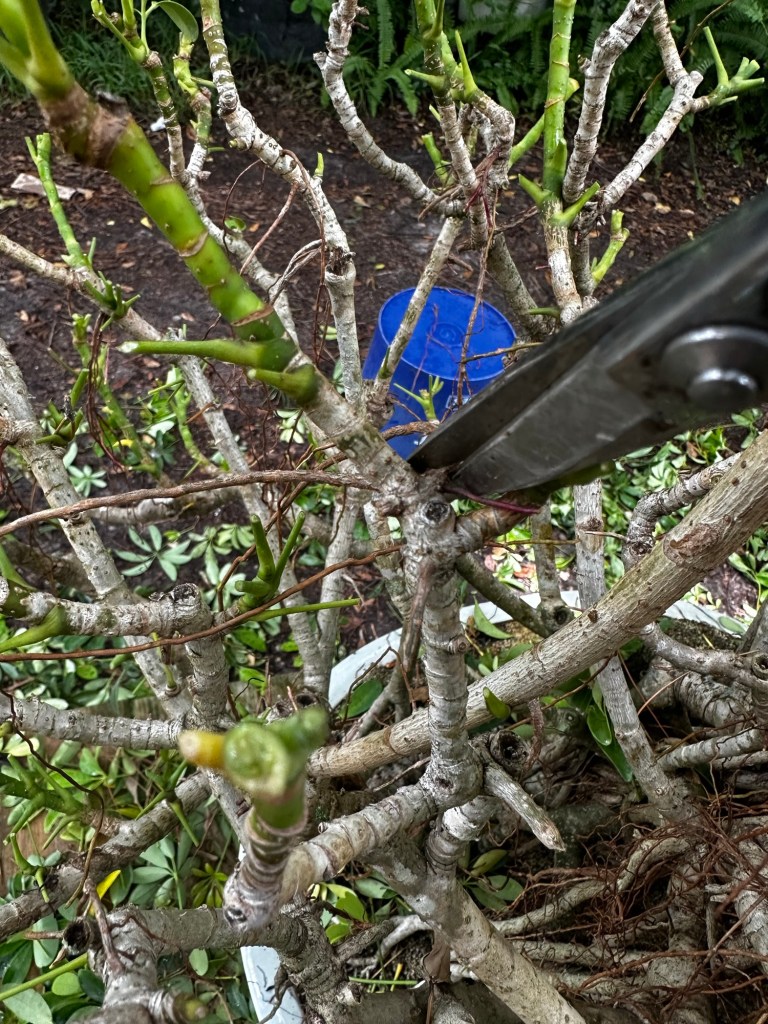
We cut even lower. Doug had to close his eyes, the horror was so extreme.
The reason why? Proportion. The first third is where the chop is. The tree now needs to grow up to have believable taper. Ultimately, we wanted (and it was a collaboration with Mike, I don’t go willy nilly chopping another person’s tree without a full discussion of what can be done with everything. Even on my trees I keep asking myself “why?”. Why cut here, why wire there, etc. )
And the real answer to the question “Why?” is that Mike wanted a smaller tree. And, with a willow leaf, we can chop it and regrow the top in short time.
Something like this is the final vision.
Here’s Mike. He took a pic, for posterity,
Here’s another of Mike’s trees we worked on that day. A Ficus Microcarpa.
It had been chopped already, and we just had to move the branches a bit.
Styling a tree is all about asking questions. “What happens if I do this?” “Will this improve or destroy the tree?” And ultimately, “Why am I doing this?”
Those questions are answered by experience, experimentation, and by people who’ve done whatever you want to do to the tree. And feel free to ask those who’ve come before. Just make sure you ask “Why?”
To finish out this essay, let me quote this (my wife is a third Dan backbeat in taekwondo, for background) it’s from a part of the taekwondo Black Belt Oath: “…….I am a student yesterday, I am a student today, I am a student always……”
Here’s a pet peeve. And I’ll start with “there are many ways to skin a cat” but there are ways, and better ways. See the hole above? A drain hole in a bonsai pot. We cover these with screen so the bonsai soil we use (use what you like and what works for you) doesn’t fall out the bottom.
I’m repotting a client’s tree. I find this as the drain hole screen. It’s good material, actual bonsai screen, but would it hurt you to cut it a little bigger? It’s not even a penny’a worth to add an extra half inch to it.
And the wire holding it? It doesn’t even bend around the floor wall of the pot.
What’s that gonna hold?
I’ve been using galvanized steel. It’s strong, lasts for years, and drains well.
And I don’t skimp.
And the wire I use to hold it in: it’s heavy gauge, and bent so as to hold the screen in place.
The loops hold the screen and there’s enough underneath to hold it to the pot. (Ignore the calcium buildup, it’s from south Florida, where the water is hard as a politicians heart.
See that? It ain’t moving.
And while I’m at it, tie down wire should be heavy too. At least 2mm, this is 2.5.
I can pick the tree up by the trunk, with no worries that the tree will be damaged (could, but not usually….well, sometimes. Do as I say, not as I do…).
Here’s the tree. Portulacaria afra. It’s not going anywhere.
A few months ago, I got an email from Oscar Jonker, from Bonsai Empire , asking me to give an honest review of his newest online class. I’ve collaborated with Oscar in the past, providing some media, hosting livestreams, etc, so I said “sure”. Little did I know that the class was so in-depth and full of information that it would take me days to finish!
So, my friends, here is The Review…..well, after the mandatory legal statement: according to the US FTC, I have to disclose whether I’ve received any compensation from Oscar or Bonsai Empire. I have not. This is not a paid review, simply a service provided to my friend and to let the Bonsai World know about a valuable resource. I was provided access to the class though, which you see by the above pic, costs a mere $59.99.
Some of you might wonder why I, as a possible competitor, might want to promote Bonsai empire (always ask why!). Easy answer, I don’t see myself as a competitor nor do I think any Art is a competition. Down that road is where we find division and strife. My business model has me providing in-person bonsai instruction. I have done online classes and courses, and you can find those easily, but my blog (Da’ Blog) is free to anyone. Besides, the business of bonsai is not a zero-sum game. It’s not a pie to be cut up and the only way your piece gets bigger is to take from someone else’s piece. By supporting and promoting bonsai, the pie gets bigger.
Ok, with all that said, THE REVIEW!
The course is laid out with 21 video lectures, starring Bjorn Bjorholm and Michael Hagedorn, two of my favorite bonsai artists from the USA. Both trained in Japan, both with amazing content (I subscribe to Michael’s blog). And both very knowledgable.
The video quality is top notch, as expected from a Bonsai Empire production. The knowledge imparted is in plain English, and presented in a humble way. You don’t need to know what a “moyogi momji with a melting nebari in a nanban pot with an understated namako glaze” is. Very accessible. By the way, who would put a moyogi in a nanban?
One refreshing thing, Bjorn isn’t averse to trunk chopping:
The information: both artists describe what they are doing and, most importantly, why. The chop above is for taper and movement. And after care is discussed, the how and why and when. There’s one spot where Michael explains that if you do this, at this time, you’ll see this result. But if it’s at another time of the year, you’ll see this.
It’s also set out in terms of the trees various stages of development.
I followed the courses on my iPhone, and the video transitions from the different views was flawless.
You can watch like this:
With the video in the text.
Or with just the video (here in portrait mode).
Or in landscape, full screen mode (turning your phone horizontally).
There is also a closed captioned mode, for when you’re with company and don’t want the sound to bug those near you.
Above, Michael is tackling a huge beech.
The course covers both deciduous and coniferous trees. And styles.
The pruning strategies between the two are covered, and contrasted.
If there are any drawbacks, I might have added some still photos that one could zoom in upon. You can zoom in on the video, but you have to pause it, and it’s not a full zoom (where you can see the dirt under the fingernails). I’m not sure how you could structure the addition of still shots, that’s above my skill level, but it would be cool.
You can also ask questions and comment, and they are answered pretty well.
At the end, you get a certificate of completion, which you can print out for framing
All in all, I’d say this course (after taking the previous courses, of course) would be a good addition to your digital library (did I mention you have lifetime access to the courses you’ve taken? Meaning you can go back and review what you’ve watched any time).
Well done Bjorn, Michael, and Oscar, and all the people at Bonsai Empire.
If you’re inclined to increase your bonsai knowledge (and I recommend you learn from as many artists as you can) take a look at Bonsai Empire’s courses (the full curriculum can be found here )
It’s been too long since I’ve attended to this poor tree. And the blog. Sorry to the tree and to my readers. I’ve been busy with client’s trees, planning the Bonsai Societies of Florida 2023 Convention (check it out Here ) and some real challenges in my life.
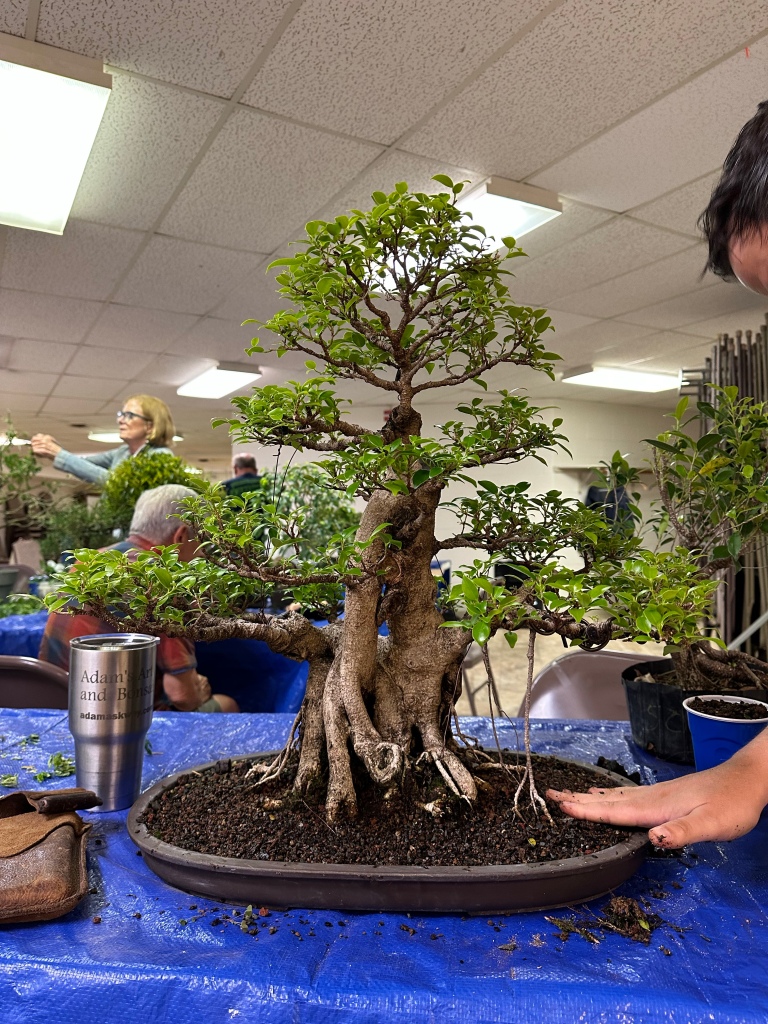
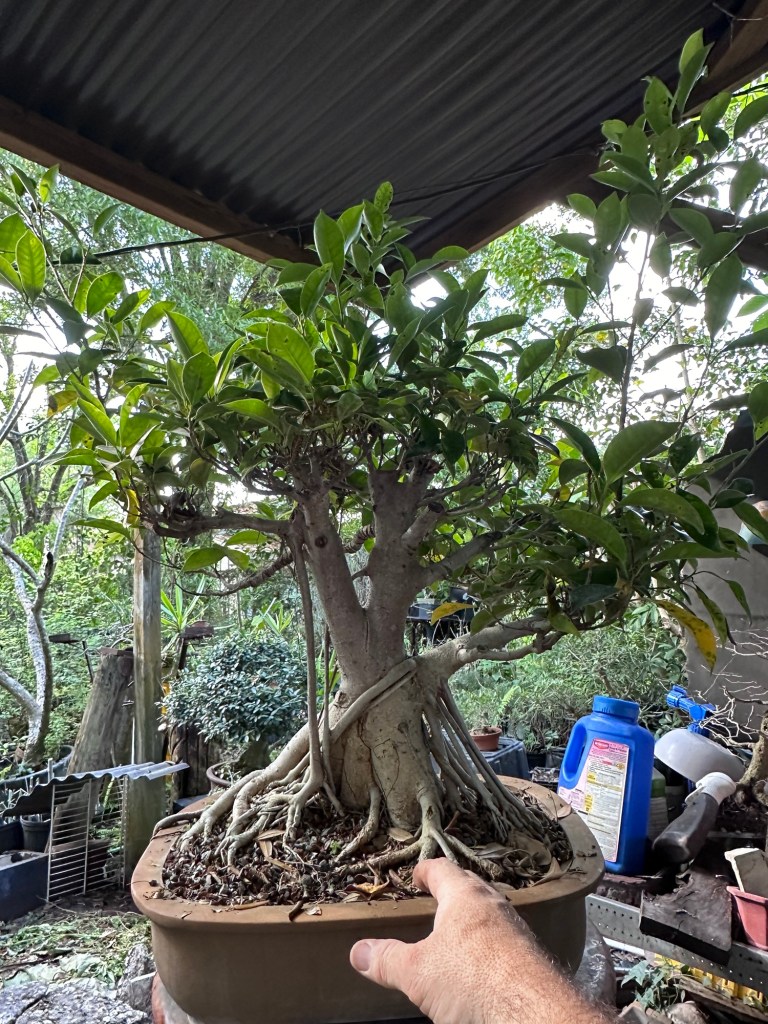
The tree is a Ficus microcarpa.
You last saw it in this blogpost What is the banyan style?, which was published way back in April 17, 2014. Here’s how it looked then:
Yeah. I know, what happened? Right? I’m supposed to be a professional and all that. Neglect, unchecked growth, a couple of hurricanes and freeze warnings. Accidental uh…drought. Insects, disease, cats, children. Basically it’s survived some biblical trials and tribulations.
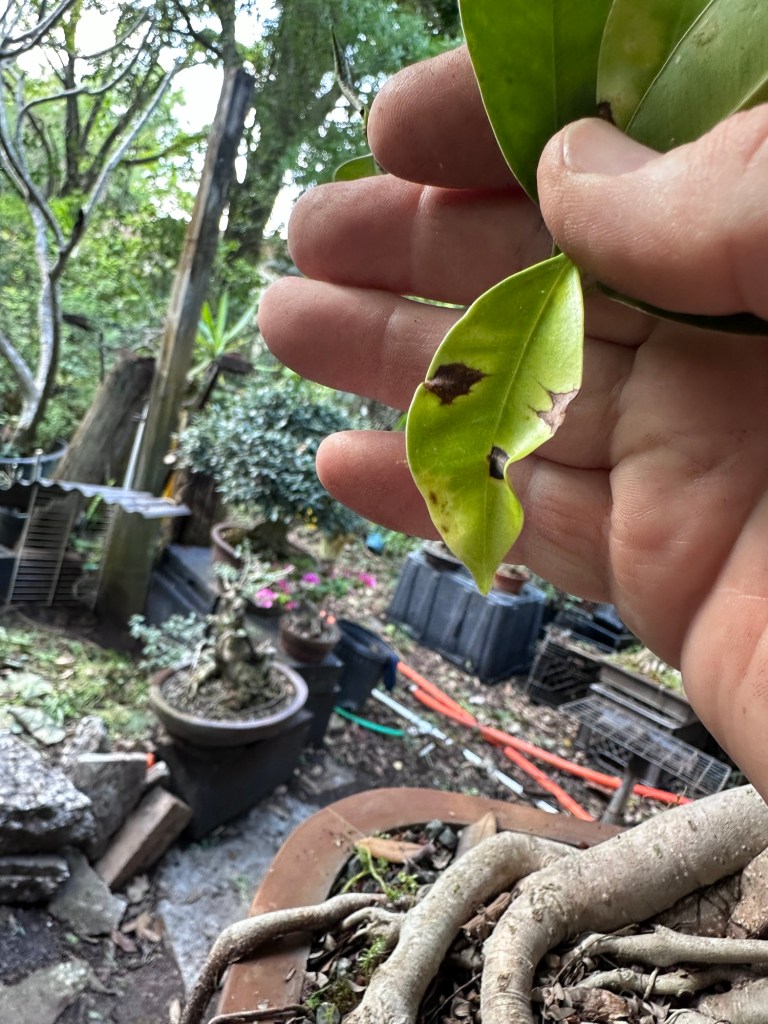
Speaking of disease…
I see these spots early in the spring…a lot recently. I had my nursery inspector do some checking and, though I thought it could be a fungus or a bacteria like pseudomonas, he said it’s evidence of a gall wasp. Now, as the name suggests, it’s usually an evident infestation by there being a gall on the leaf, but I haven’t seen them in my ficus. Maybe because of the systemic treatments I use (more on that later) killing the larvae. I don’t know.
The work today in rehabbing this tree will include a repot, a hard cut back, fertilizer, insecticide, and weed prevention.
Let’s get to work.
First, cut back…
I’m bringing it down quite a bit.
Chop chop goes the scissors!
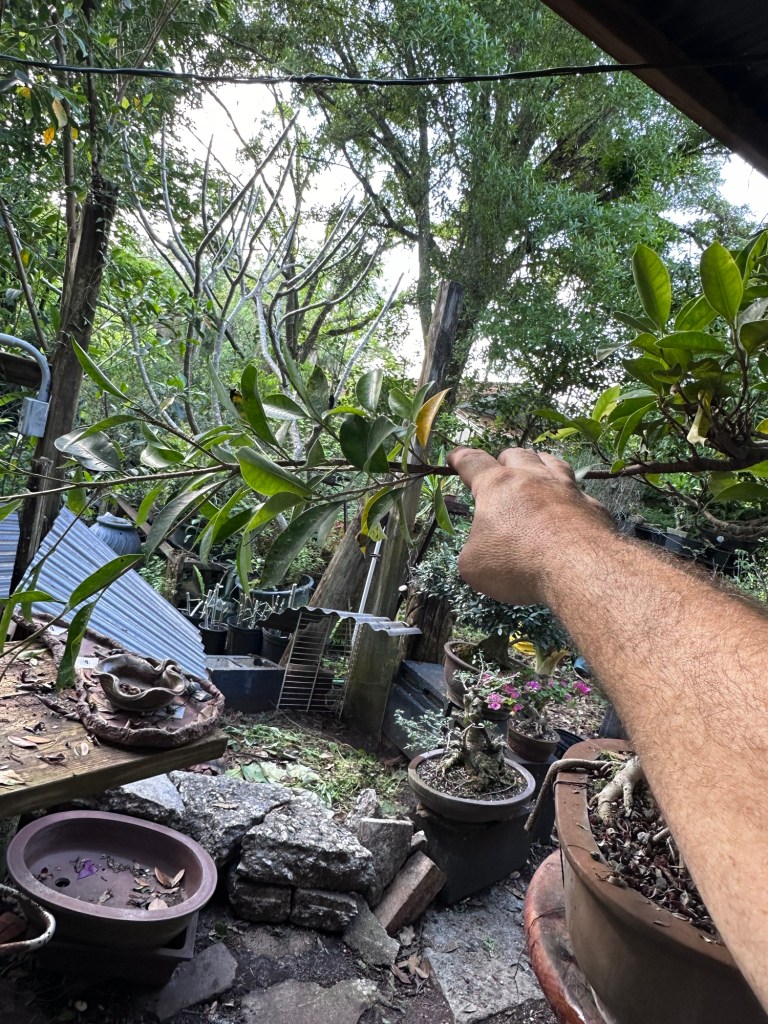
This branch below will be the one branch I don’t cut back. You’ll see why (again) later on in the program.
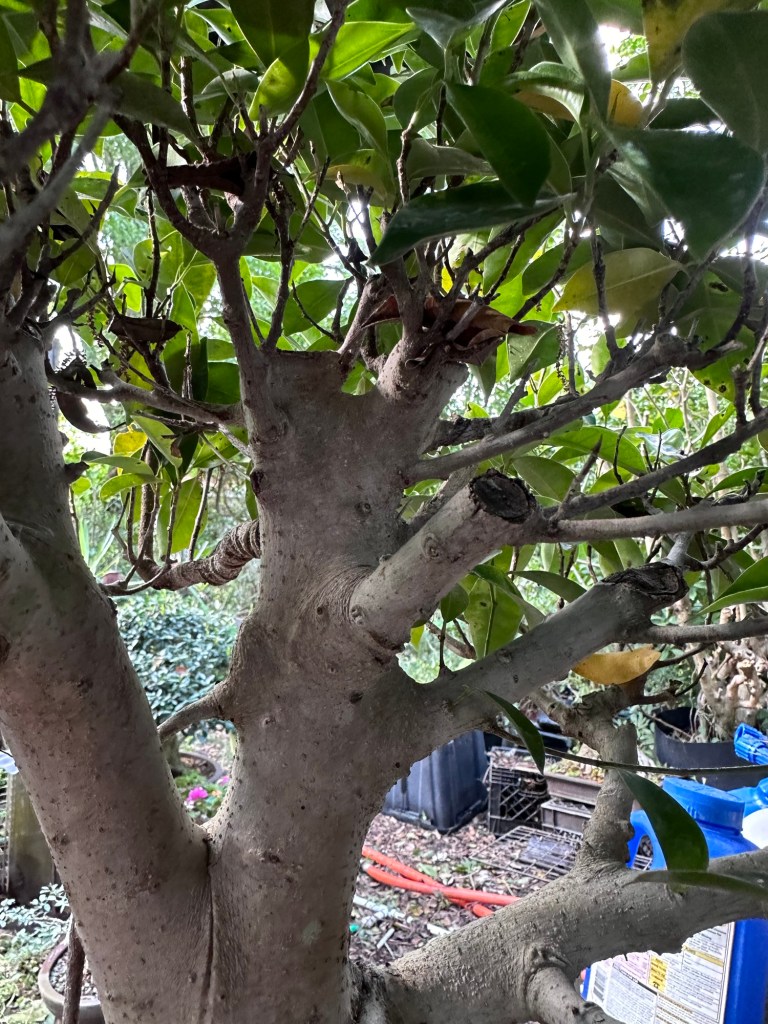
Normally, I would cut this type of fig back so hard, as this is a standard Ficus microcarpa, and you can get significant dieback on it, sometimes losing whole branches. To contrast this, the Tiger bark microcarpa doesn’t do that so badly, it back buds almost anywhere. But the plain old Ficus microcarpa does. Keep that in mind. Know your tree and work accordingly.
If the branch you’re chopping is a darker brown, it’s more likely to backbud, as that’s newer growth.
Here’s the one branch I didn’t cut back. I wired it and left the grow tip.
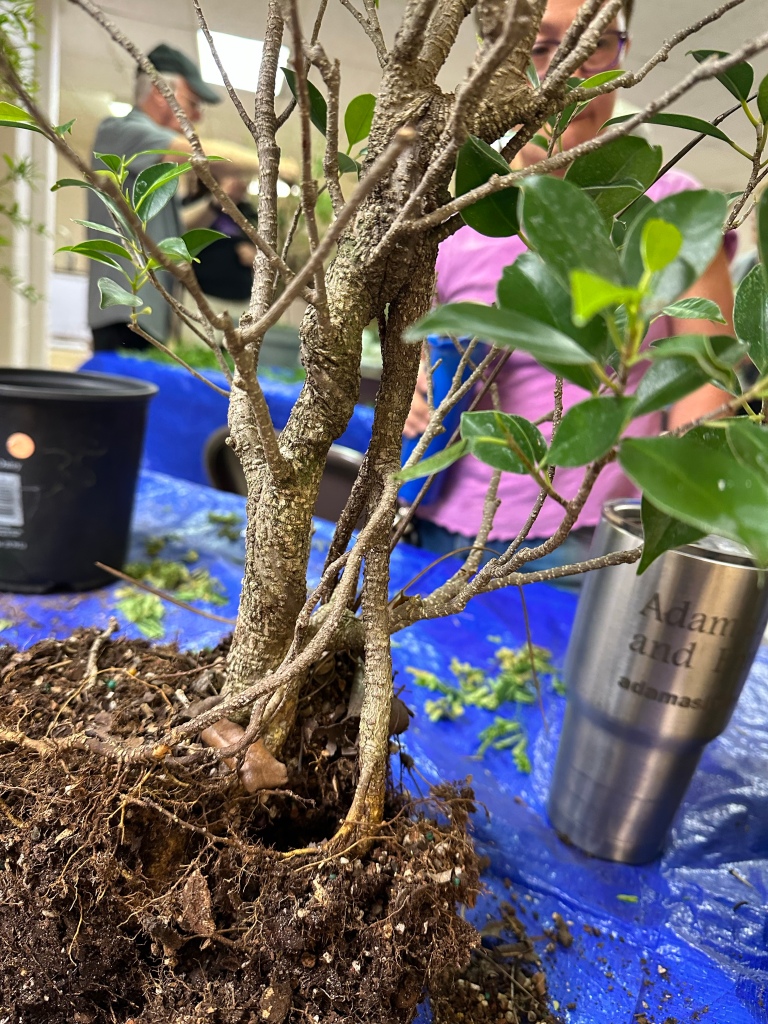
Now to repot. I’ll be combing out the roots to get rid of all the wrapping ones. And I’m being aggressive so I can get all the weeds out.
Weeds like these. This is a corm or bulb from a weed called “cat’s claw”. A climbing vine that holds onto things with tendrils and modified appendages that are a lot like, just as the name says, a cat’s claws.
Here you can see the “claw”.
This one is called “Florida spurge”. It’s underground roots can get as big as carrots. You have to be carful to pull out those roots as it will just grow back from the bulb. If you have them it’s a good indication you may have nematodes.
Here’s the leaves of the spurge.
That done, time to cut the roots.
They were circling the pot (it’s in a different pot than the one I used years ago).
The pot it was in.
A good pot. But is it deep enough for what I need for good regrowth?
I had had thoughts of putting it into this container. It’s kind of what the trade calls an “Anderson Flat”.
It’s bigger and deeper than the ceramic one.
But using it might give me too much growth. Is there such a thing? Yeah. I need controlled growth with short internodes (remember the dieback, the branch will dieback to the next node lower on the branch). So I’m going with its current pot.
Here’s an axiom “The wetter the roots stay, the slower the growth”. You’ll hear me talk of wetter and drier soil mixes and, in this case, the more shallow a pot, the wetter the tree will stay.
To repot, first, make a mound of soil, and put the tree onto it and wiggle it down. This fills in the air gaps and gives the roots something to grow into.
It bugs me when I see people spreading an even layer around a pot. Don’t worry about the edges. That’s what chopsticks are for, getting the soil in between the roots on the margins.
The wiggle technique:
All chopsticked in.
Some systemic insecticide next, in this case, imidacloprid. It’ll keep the thrips away. And those gall wasps.
I like to mix it into the roots well, or else you get a gooey mess.
Now, a generous portion of fertilizer. This is half synthetic time release, and half organic (I’m using Miracle Gro Skake ‘n Feed today).
And weed preventer. This is OH2 but you can find a product called “Preen” in all the stores. It’s a convenient product that inhibits seed germination, not an herbicide, so you have to get out all of the sprouted weeds first. And there will be ones you miss, so revisit it in a week or two to get those.
Do you know the difference between a weed and a plant? You want a plant, you don’t want a weed. There are places where Ficus microcarpa is a weed.
And that’s it. Let it grow.
I did rewire a back branch. It was growing up, as they are wanting to do, so I rewired the opposite direction and put it back in the place I wanted it to be. Here’s a tidbit: if you keep a branch wired too long, when you remove the wire, sometimes it pops back into its old position. The tree wants to grow up, especially newer, and smaller branches, so the tree is actually pushing against the wire, and when you unwire it, it pushes the branch up again. You can see this in bigger trees where two branches are growing against each other, and tree trimmers know this and are very cautious when they see it. As they try to chainsaw the branches, the pressure could be so great the branch will violently snap. They call it a widow maker. It happens with twin trunks the most. Imagine you’re sawing away and then “BANG” the tree splits apart at the seam.
With that, the fig has a long way to go, but by the end of the season, I’ll have secondary and tertiary branches to work with. I’ll update if I remember.
And “Bob’s yer uncle”.
Let’s see if I can get it back to its former glory.
Today, I got to diagnose what’s wrong with a 2012 Jeep Compass, take my daughter to PT, and go and take a dog outside to poop.
In between the PT and the Dog poop, I practiced a little Back Bumper Bonsai, just like the old days. Here’s the tree, a willow leaf fig (Ficus salicaria, ofttimes erroneously called Ficus nerifolia, or F. salicifolia, or whatever it was called when you grew up in bonsai).
Here’s the facility my daughter is getting tortured at.
Here’s the dog. Ugly thing, ain’t it? Lily. Stupid dog. It has no tail, so when it poops, you have to wipe its ass. Not me, no way, no how, not ever. My sister does though.
And here’s the Back Bumper bonsai studio.
A Kia minivan. For those that remember the old days, I graduated the PT Loser to the junkyard years ago.
The willow leaf has a, uh, structural problem with the pot.
It done broke.
So today, I’m going to repot it, cut it back, defoliate, and wire. In that general order I guess.
Here are some pots to choose from.
Not the big one of course.
Or that old Japanese one either.
The one below is from my student, Peter Penico. It could work.
But it’s going the wrong way. Nice pot though.
The one I’m going with is this one from Cesar Labrador, a Florida artist living in the Tampa/St. Pete area.
You’ll see his work on the Bonsai Pot Facebook auctions every once in a while.
Sweet details and shape.
It’s perfect. Let’s see about the tree now.
I think I’ll actually defoliate first.
I’ll be using the “chicken plucking” technique today.
Grab the leaf, and pull forward. The leaf will break at the petiole and you’re done.
Pretty quick and easy. Doesn’t work on all species of trees though.
Next is to remove the old pot.
Gently massage the old soil out.
Tie the tree into the new pot, add soil.
And now for the magic. Wiring!
Here’s the before.
And…..here’s my daughters Jeep and what’s wrong with it (see what I did there? I’m going to make you wait for the after. Wait, don’t scroll down yet…..dammit!). Well, if you’re still here, she has a blown head gasket. The design of the cooling system allows for the coolant to get low and you don’t know it because the overflow reservoir stays full. So, in typical Chrysler fashion, the car overheated and blew up the gasket.
She liked the color of the Jeep. But it’s a bit too much of a job for me to fix, so its for sale, as is. If you’re interested. Call me….
Ok, now for the after.
I think the pot goes well with the exposed root style of the tree.
Here I am, back in Cincinnati, it’s July, 2023, two years since my last visit, and I find that a tree I had worked and, most assuredly, had killed, was still alive.
Wow…
I’m not a northern conifer guy, generally (but I do work them for clients) so the only thing I can say to what it is, is that it’s some type of spruce (but it could just as easily be a fir or a hemlock). Spruces don’t grow down in Florida. They are what we call a “Christmas tree”.
As I inspect the tree, I find a few issues. Much of the US Midwest had a weird winter. It was cold near Christmas time, but didn’t get cold the rest of the winter, until one day the temps dropped 40° Fahrenheit in a matter of hours. Many bonsai were damaged. I think it stressed this tree in particular.
It killed off one branch (above) and some of the new buds were damaged. As you can see below.
But it’s still alive and growing. Which delighted me when I got to my clients house.
Ok, that’s in the Now. Let’s go back in time and look at the tree two years ago and you can judge me for the initial insults I rained down upon the poor tree back then.
Lots of branches, good color.
Crappy soil.
So what did I do?
I repotted it.
My client, Tom, asked me to, so I, against better judgement, did.
This was in mid June, Cincinnati, Ohio, coming into the hottest time of the year for the locale, I knew just a little of its history, but nothing about the species, and the worst insult? I’m a tropical guy (well, mostly. I am here now, aren’t I?).
Tom, who had a stroke a few years ago, doesn’t get to work his trees so much. And he’d had the tree for many years, just sitting in that pot. He’d look out the window at it from his living room.
He asked me to do something with it, so I did.
First, the repot.
The soil I had on wasn’t the best. Mostly expanded shale, or Haydite, as was the brand name back in the day.
Then I styled it.
Two years ago….
You are probably asking why I didn’t do a write up on it then? Well, to be honest, who wants to show a tree you’ve worked on that you know won’t live? I don’t like that idea, showing techniques and styling and trying to be a teacher when you know it’s not best for the tree.
But I got lucky, and sometimes, as they say, it’s better to be lucky than good.
Here’s the tree after the restyle.
I left more on it this time, given that it was stressed.
Wiring the top in a typical “conifer comb over” many bonsai artists practice.
The only tips or tricks I can give you on this particular variety and species of tree (considering I’m near ignorant as to what it specifically is) is to not cut it back too much, water and fertilize as one would with the spruce genus, and pay attention to severe, sudden drops in temps near springtime bud formation.
I didn’t fertilize this time, except with a miracle product called “Micromax”, which is full of those micronutrients usually missing in most fertilizer compositions (macro nutrients are the NPK of regular ferts: nitrogen, phosphorus, and potassium, micros would be things like molybdenum or boron or even things like chlorine or copper that you might think are detrimental to a plant).
And that’s how I left it for this year. Hopefully I’ll see it again in my future travels. I don’t get to see many trees after I work on them in my tours. So a return this year was sweet.
Thank you Tom, and thank you Ruthie. You are both the real deal.
This ficus has been in this remarkable container for..ahem..four or five years, without a repot. I’m sad to say it needs a bigger pot. Sad because I love the pot and the tree combo.
Today, I’m hanging out, selling my wares and shooting the shit (as I’m known to do) at the Brevard Zoo. No, I’m not joining the swamp ape exhibit as the first living specimen ….
…the Bonsai Society of Brevard has an annual show at the zoo, uh…every year (I guess that’s what “annual” means), and I’m here (or there. Sometime the tenses get mixed up in my wandering and rambling prose style. I think it adds flavor and character. Some people say it drives them crazy. I say to those people that their insanity was there already, and I just exacerbated it, allowing it to blossom into the full blown psychotic episode that they’ve been waiting for their whole lives. You see, some people need an excuse but we of lesser gods, we know you don’t…..).
Above, we have the local fauna, Floridanus nativitus, below, are some imported beasts, Giraffa camelopardalis.
And my wife, or, as we call her on Da’ Blog, “She Who Must Be Obeyed”; she’s from Indiana.
Now, since you know where I am, and what I’m doing, and I’ve gotten in enough trouble with the wife, let’s get back to the tree.
The job is to remove the tree from the pot.
For those “in the know”, it’s really really really (really) advised against potting a ficus in a pot that has an inwardly curving lip.
Ficus (I’m going to pronounce that the British way, “Fick-us”, as I’m feeling all fancy right now), make roots. Lotsa roots.
I have to bring in a highly specialized (and imported) root cutter (and sod cutter too, I guess, if you read the handle. But I just don’t see myself on my knees, my face in the grass, cutting out pieces of sod).
But first, the inevitable cutback and defoliation.
You don’t need to see that part, just scroll back to the hundreds of articles I’ve written and in which I’ve described the process.
I will, however, note that this tree is the species standard Ficus microcarpa. And that means I leave a little green on the tips so there won’t be dieback.
Now to the hard part, removing the tree from the pot. First, cut the tie down wires, on the bottom and top.
Then we start cutting around the pots perimeter.
As shown below.
Not too hard with that tool. I usually use a steak knife (which was stolen from The Sizzler Steakhouse and Buffet) but it’s at home in The Book. The gentleman I’m speaking with is Doug, The Hippie Dad.
Now to birth the tree. Another video. Yes, I’m using my scissors. They worked. I use my scissors for many things I’m not supposed to use them for.
Looks like a tortoise mouth, right? And again, that was Doug. Thanks for the muscles.
The pot was made by Daniel Holderer. He called it “Cradle for Life”.
I’ll find something else to put in in. It’s been a good container for this tree.
Now to rake out the roots.
It’s just a little root bound.
I brought three pots with me to choose from. Two of those antique Japanese pots with the weird green clay, and a beautiful oval from my friend Cesar Labrador.
The oval one’s too small…
….the rectangle one’s about right, but the style is too formal for my “Tropical Broom Style” ficus….
….ahhh, this one is just right!
Some screen, tie down wire….
Soil….
And we are done.
Looks good back on the bench at the nursery.
Tropical Broom Style. I made that up years ago but I think it’s appropriate for this ficus. And everything was made up in the beginning anyway. Whoa! Wait! Mind blown! Right? You mean you can just make up things?
Well now, did the story start with scotch? Or end with scotch? It’s kind of hazy looking back now. But I’ll try….wait, I remember…it started with bourbon!
It actually began in 2019, but you didn’t see the tree until 2021, 2 years ago (or, two years from the post, in case you are reading this in the year 3023. It’s now 2023, taking place in the month of July. If you don’t use the word July, it’s the seventh month of the solar year, named for Julias Caesar, the first Roman emperor (or dictator) after abolishing the Roman republic. the Terran summer solstice in the northern hemisphere occurred on June 21, 2023, and this debauchery occurred 28 days later. Terra or Earth, is the third planet from our sun, called Sol, in the Solar System, in the Milky Way Galaxy. Hopefully that’s enough for the far future readers to understand how we told time back in the ancient 21st century days of legend.)
Today , or rather, late July (don’t make me go through that again). We have a ficus microcarpa, what one might call “ginseng”. But that’s just a marketing term. Ginseng are not figs, figs aren’t ginseng. You make Newtons out of figs, and Monsters out of ginseng. The cookie and beverage, that is.
Ok, now that you’re up to speed, let’s get to the work….
I’m in Toledo, or Maumee, to be precise. It’s pronounced just like “mommy” by the locals. I feel a song should be sung. I wanna go back to my Maumee.
I’m with my two good friends, John and Julie. They take care of me when I’m there.
The tree is potted in an aluminum serving container. There were a few who said that we’d be poisoning the tree with the metal tray.
Looking below…
….I’d say, naaah! in fact, it looks good for a ficus in the north. Damn, I mean, it’s almost Canada fer crissakes. They don’t say “Holy Toledo!” for nothing.
Anyway, we did a lot of work that day. But not much on this ficus. We didn’t have a pot, you see. So we decided to get all “Muckety Mucked” up.
24 year…25 year….26 year, or, as the bottle suggests, one little piggy, two little piggies, and three little piggies.
We finished the 24 year. Made a dent in the 25 and 26. Wait, is this a bonsai blog or a drinking blog?!
It’s both. Sometimes.
And to the dead soldiers, we salute you!
The next morning, hangovers and bright lights notwithstanding, we had to get up early to go to Michigan (I know, that sounds like the first line in the “Great American Novel” we writers all would love to write. Maybe…..).
We had to get a decent pot, so we visited the Flower Market (Which has changed its name to Green Witch Gardens)
It’s a damn cool place to visit. Not only do they have bonsai, but there are cats…
…that’s cats, plural.
And pottery from amazing American artists.
The trees!
Julie hiding behind a tree.
Familiar weeds. These are what are called wandering dudes now. I feed them to the tortoises. Speaking of which….
Tortoises!
Only the best bonsai nurseries have tortoises.
We got some pots.
Then went back to Toledo.
And we got back to work.
For being in a shallow aluminum pan, it’s grown some good roots.
The “pot” has even held up well. We could use it again.
Looks solid.
Raking out the roots….
Here’s the new pot we got for the ficus.
Sweet, ain’t it?
Tree is ready
Can I mention again how good the roots are?
We had split some of the larger ones (go back and read the first post).
Hey, it even fits in the new pot.
Damn those are sexy roots. Must be the soil. The vaunted, rare and near mythic “All-American Red, White, and Blue, Adamaskwhy SuperMix” .
Just to prove we did other work, here’s some examples. A willow leaf.
A tigerbark.
An azalea.
A willow leaf root cutting.
And another.
I must say, I can’t believe what an amazing two days that was.
But I had a hard day while I was writing this piece. Something that should not be happening is. And I posted to Facebook; I quoted JRR Tolkien, the part where Frodo asks of Gandalf:
“I wish it need not have happened in my time,” said Frodo. “So do I,” said Gandalf, “and so do all who live to see such times. But that is not for them to decide. All we have to decide is what to do with the time that is given us.” J.R.R. Tolkien, The Fellowship of the Ring
And John replied “and what you do happens one word at a time, one leaf at a time, one sunrise at a time.”
Here’s the tree all those years ago. We ground layered it (hence the post title).
One tree at a time. Even if it takes years to bring it to its potential.
One leaf at a time.
One branch.
One root sometimes.
The two years ago..
And now.
Bonsai is a journey. And getting there is sometimes the only reason to go somewhere. You can buy a tree, but making a tree, especially this one, that started so humbly, is way more fun.
John has done well with it. I’m honored to have helped him, and thanks to both John and Julie for letting this strange bonsai guy (me) into their home.
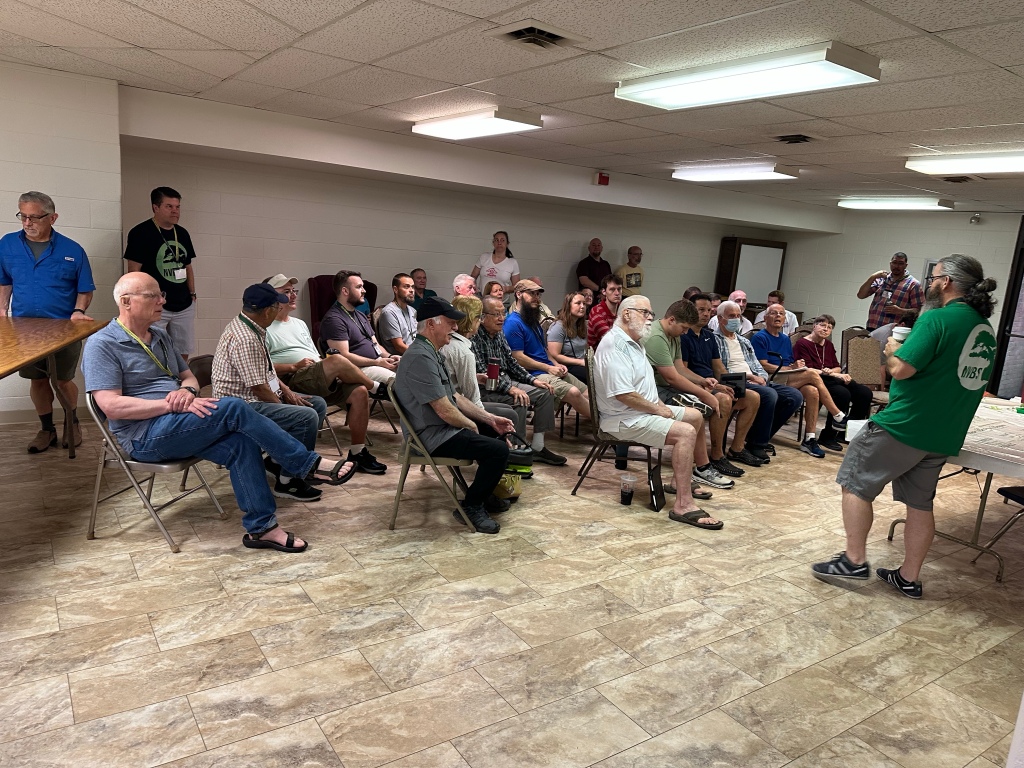
I promise, I wasn’t hanging out with any rich men in Northern Virginia. It was all cool bonsai peoples. See?
Not a single politician (I don’t consider Roberto a politician, and he was in Peru anyway).
I was at the beginning of my summer tour, making a triumphant return to the Northern Virginia Bonsai Society. I brought a lot of trees for the workshops.
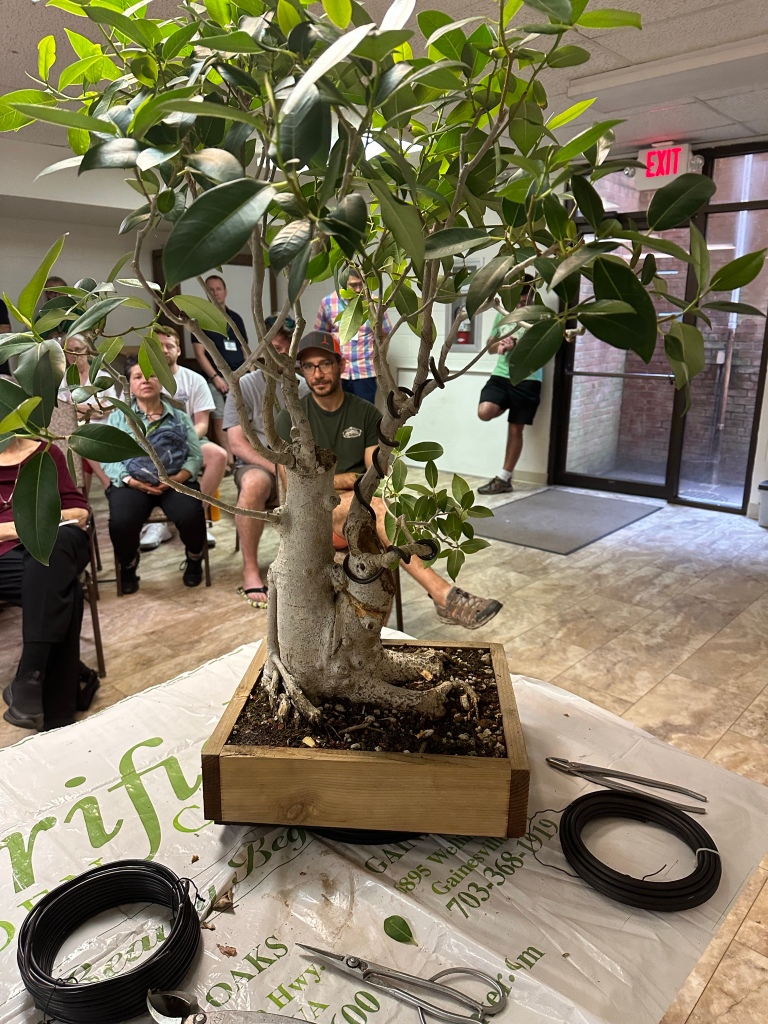
They gave me a tree, what I believe is a Ficus macrophylla (or the Moreton Bay fig, a ficus from Australia) as the demo tree. . This particular specimen has been passed around in the club a few times, with no one really doing much with it. Maybe a trunk chop or two. I liked it and the challenge.
I kinda like an underdog, so I tried my best, using my tropical tree bonsai superpowers to bring out the most I could from the tree.
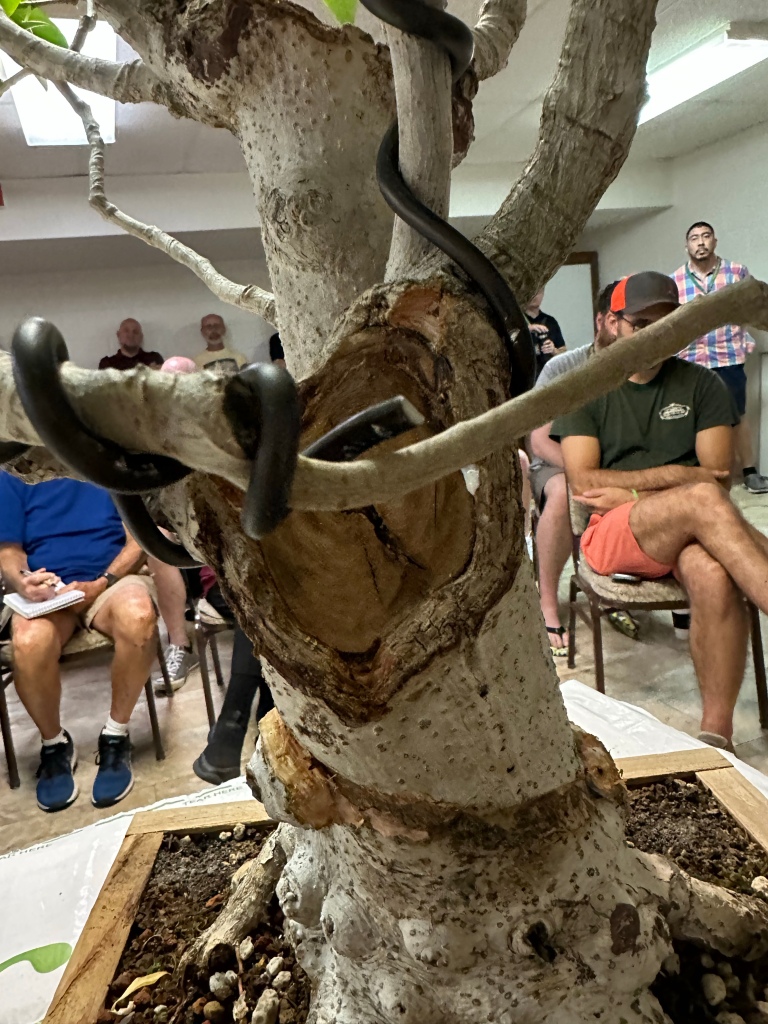
We start with an approach graft.
Cut it back in places, let it grow in others.
The graft….
The growth….
The cut back.
And below, my hand in an anticipatory gesture of the “Let it grow!” number, along with choreography and three part harmony.
This was the demo. Along with the work, I told the chicken sexter story (I’ll have to tell you, the readers, that story sometime), I explained what different plant growth growth hormones do (see this post: I use some fancy words to justify my defoliation habit, go figure ). I talk about my childhood trauma and how I use it in the styling and care of tropical trees in the sunshine state (not really, my trauma is manifested in less healthy ways, as it should be).
I told the story of my youth in bonsai, trying to find as much about bonsai as I could, and happening upon a website from a guy that not only grew tropical bonsai in the Great White North (coincidentally, in Massachusetts, about four miles from where I grew up), but developed spectacular tropical bonsai, better than most bonsai artists from Florida. His name is Suthin Sukosolvisit. One of the only true Masters in American Bonsai.
Anyway, I had some fun making a fool of myself on stage and hopefully imparting some knowledge.
I’d love to have the tree for myself. Maybe there will be some altruistic NVBS member who bids on it and sends it down to the FLA as a gift.
After the demo, and some lunch, we had a workshop. My wife took the pics with me in them. I think she’s biased, but she likes them.
In my element, surrounded by trees and students.
The trees got smaller as my ego got bigger.
Love a good trunk chop. It’s like the smell of napalm in the morning.
And just the video. For those that don’t like Led Zepplin.
My wife channeling her inner Jack Kirby with the wacky camera angle.
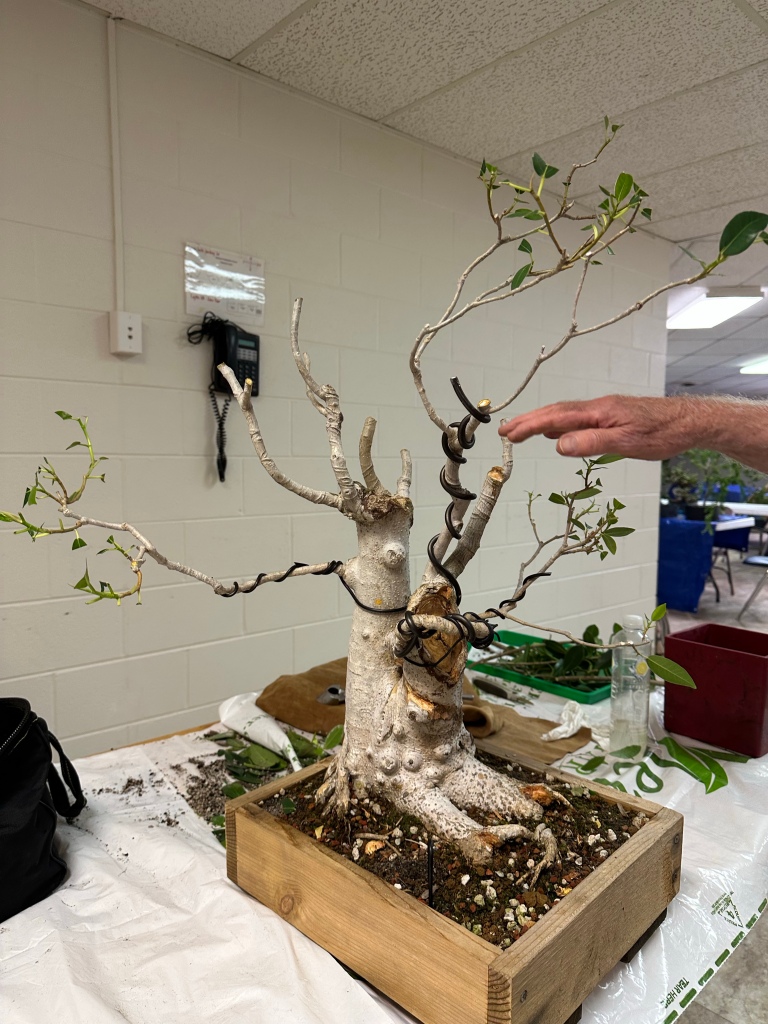
Now, we get to a cool tree. It’s a tree originally from Ed Trout, one of the last true gentlemen of bonsai. Ed had sold it to a man named Jonah Hill.
I know. Adam lavigne helping Jonah Hill work on a bonsai tree. The joke writes itself.
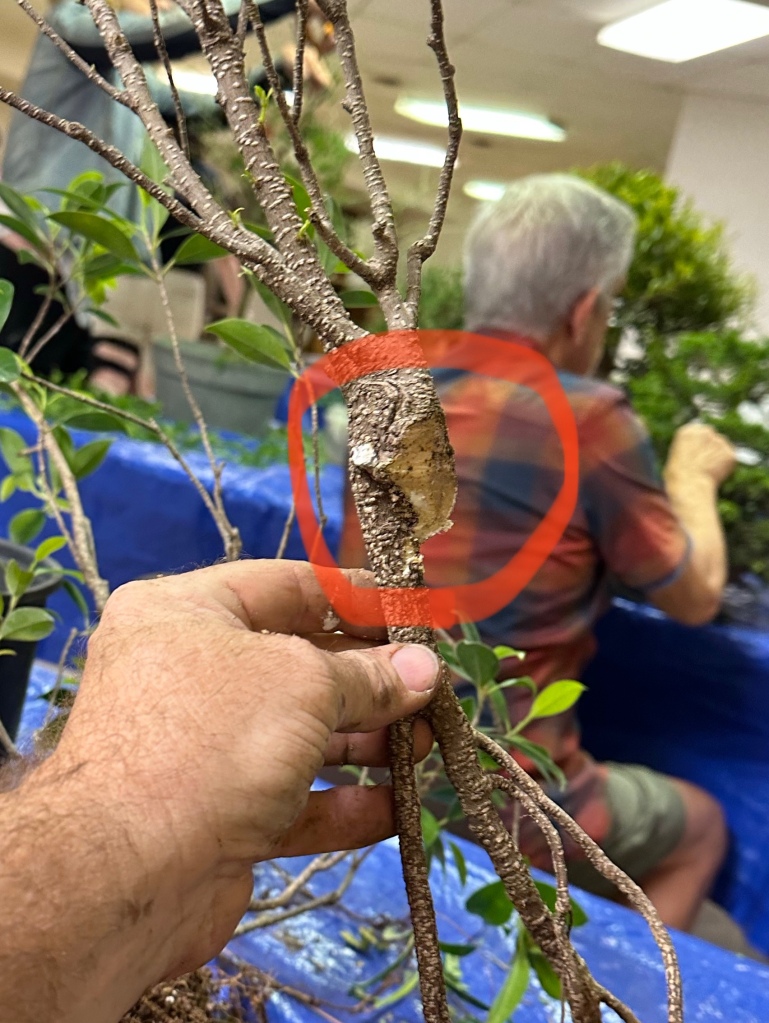
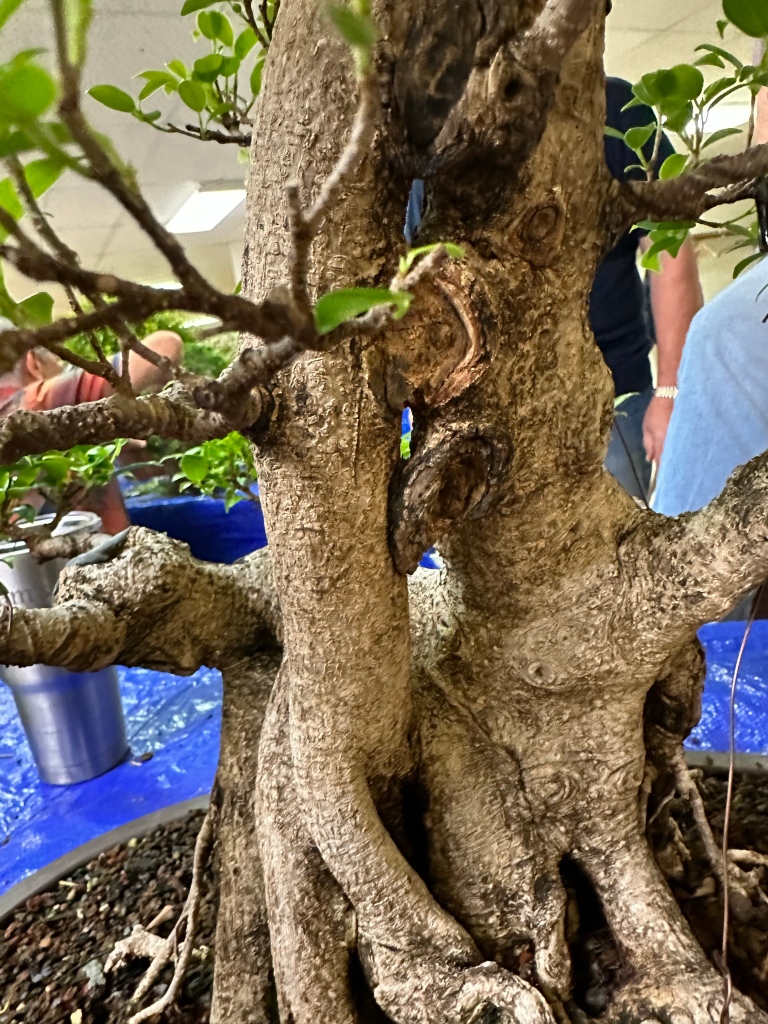
Study the pic just above. You’ll notice a hole in the middle of the trunk.
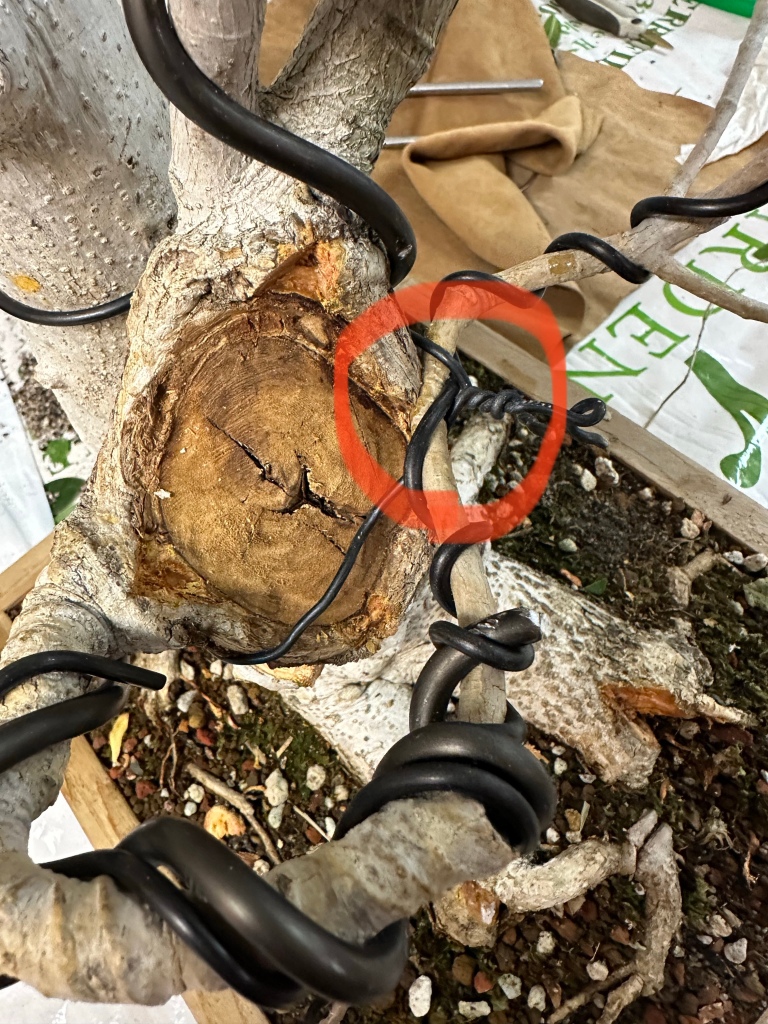
Below, I have a tree that no one wanted. So we are going to graft that into the hole.
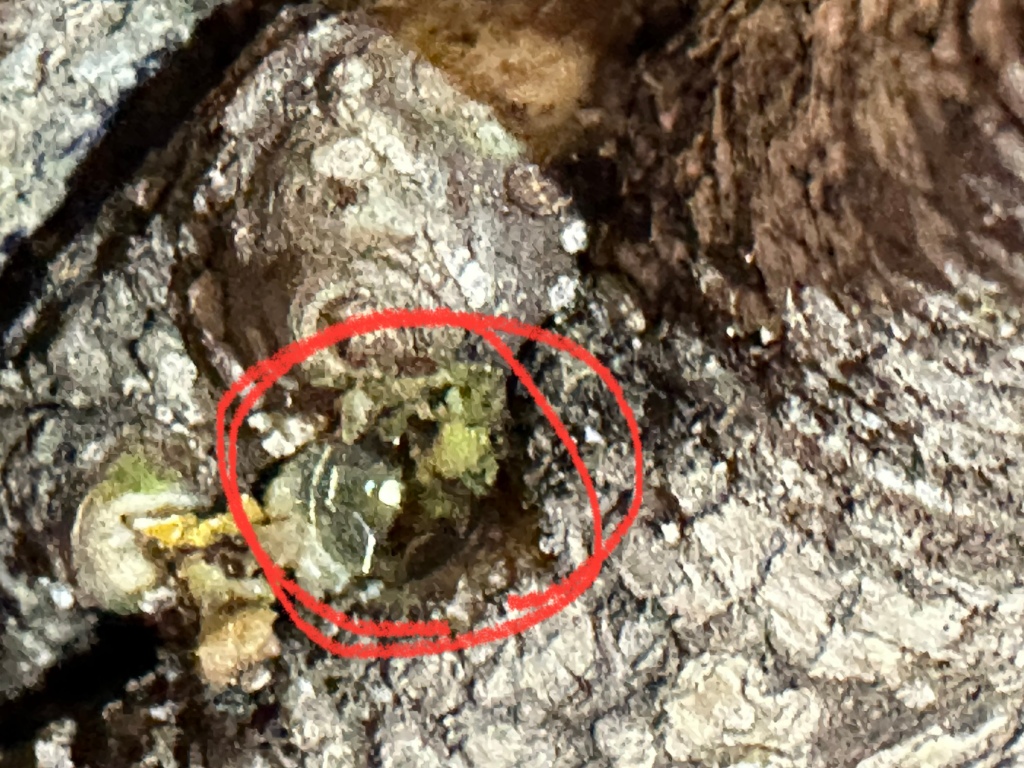
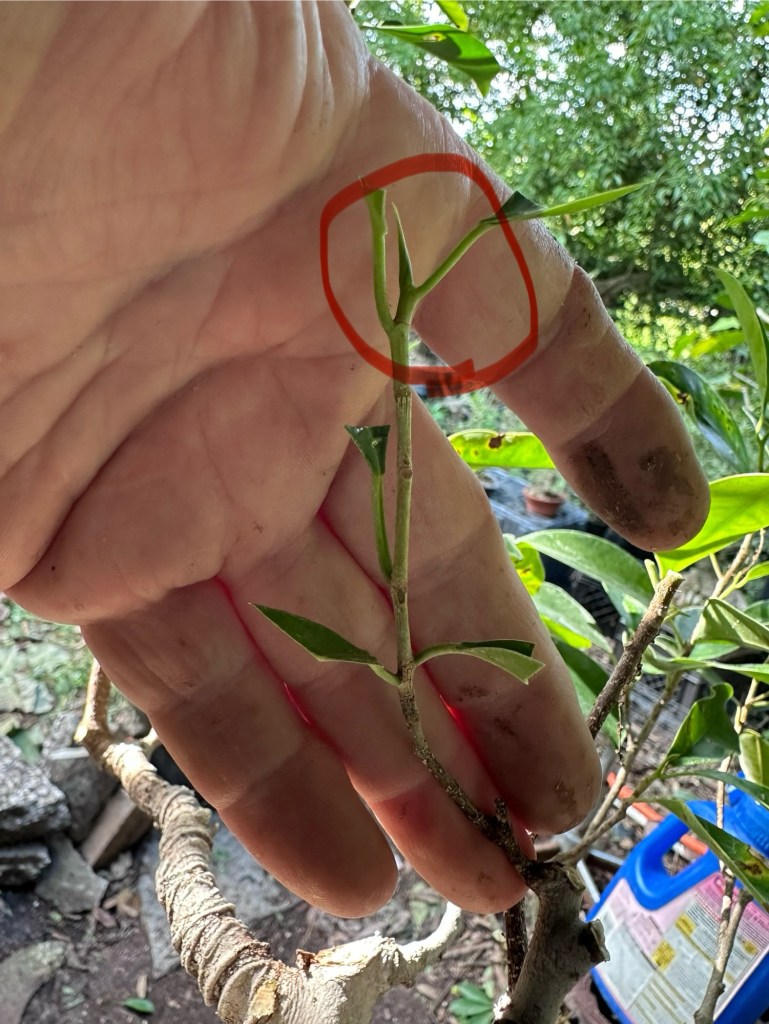
I cut off a piece of the tree, a piece with a good aerial root. The red circle is where I cut it and the graft will occur.
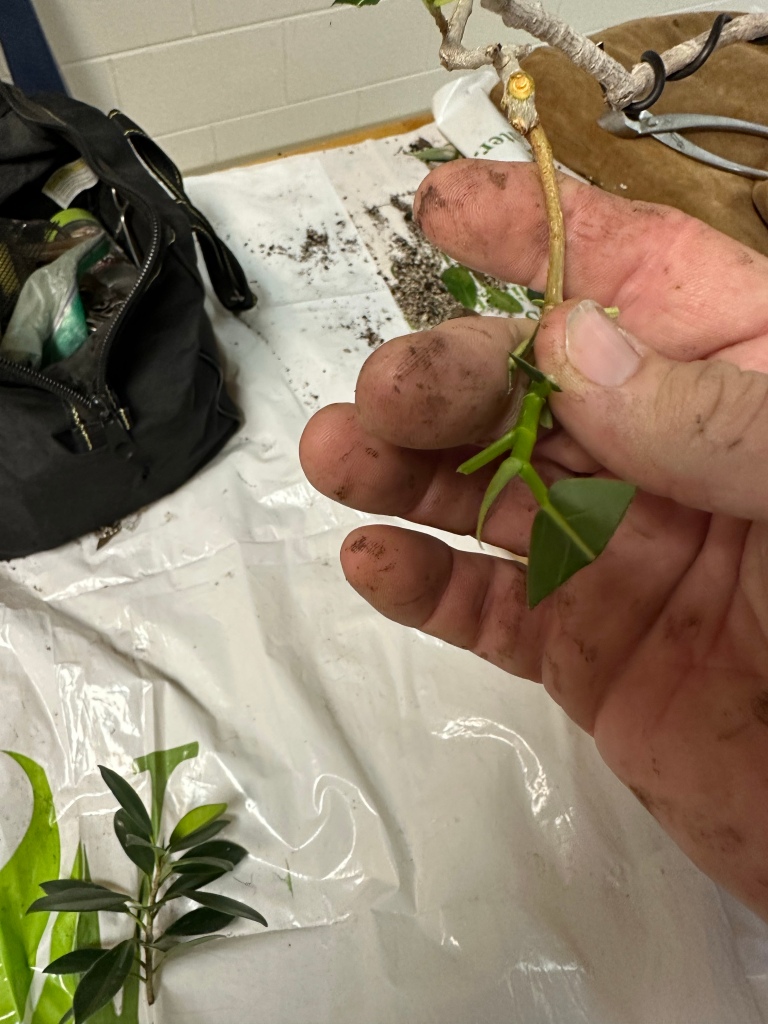
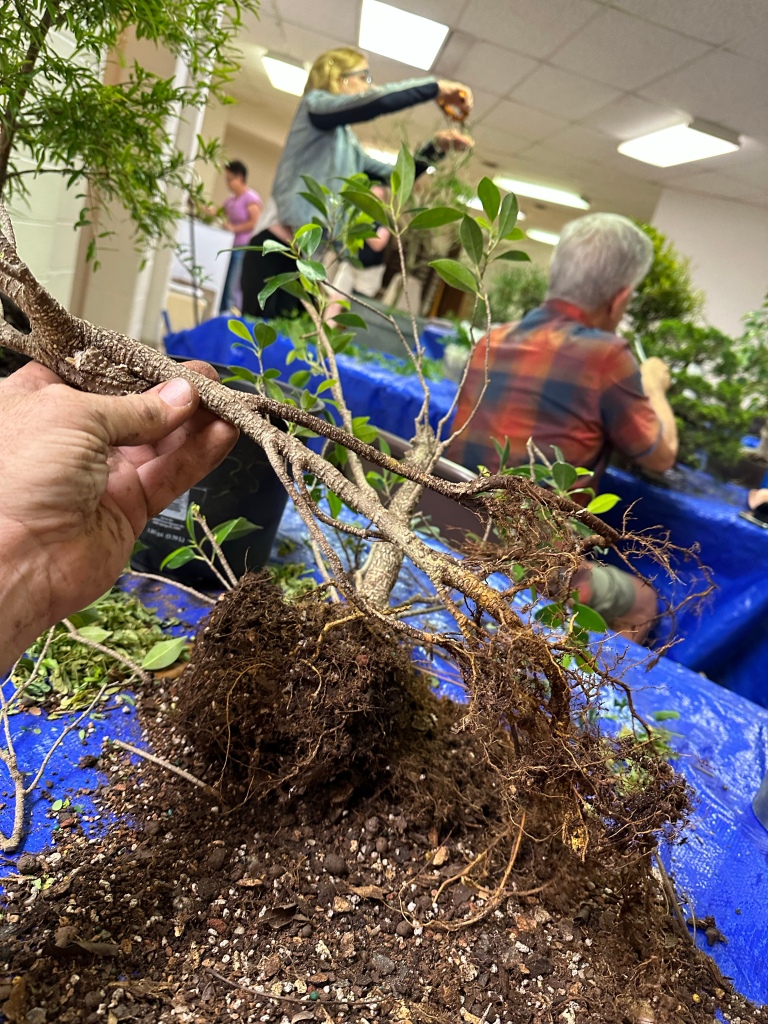
This, below….
….needs to fit into here. that’s the front of the tree, to keep you correctly oriented.
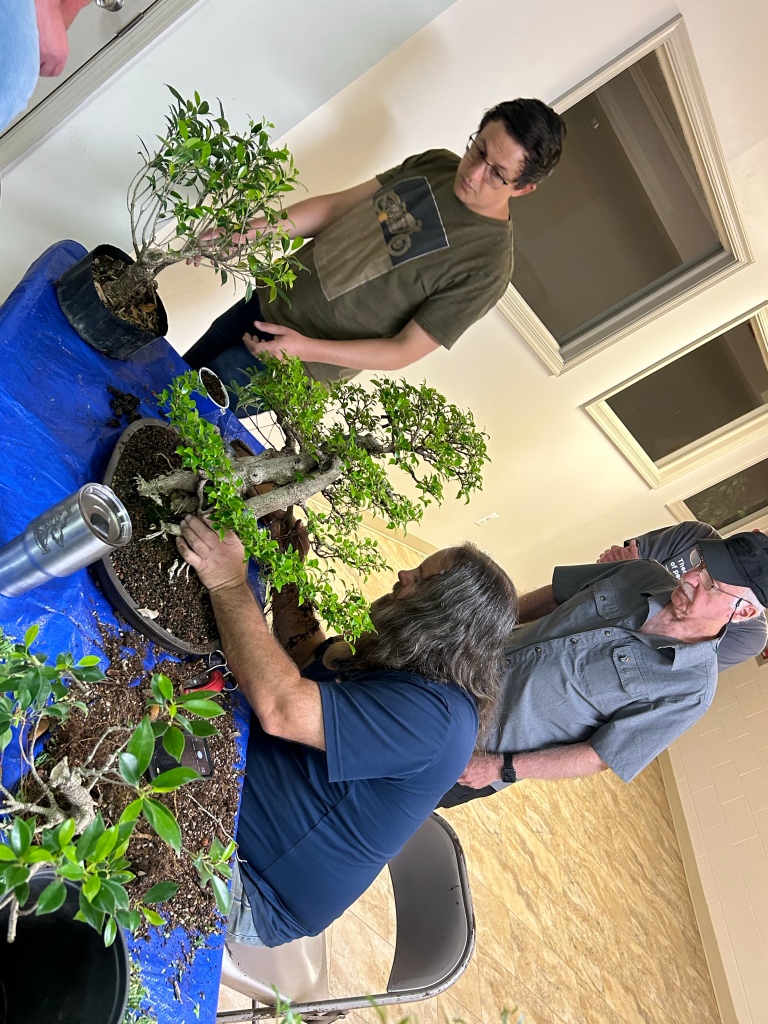
There’s Jonah, at the top of the pic. I’m about to stick the graft through the hole. Yup. Through it. That’s Jack behind me.
This is the back of the tree. The leaf end of the graft will act as a new back branch.
We use a brass screw (use a non reactive metal) to attach the graft.
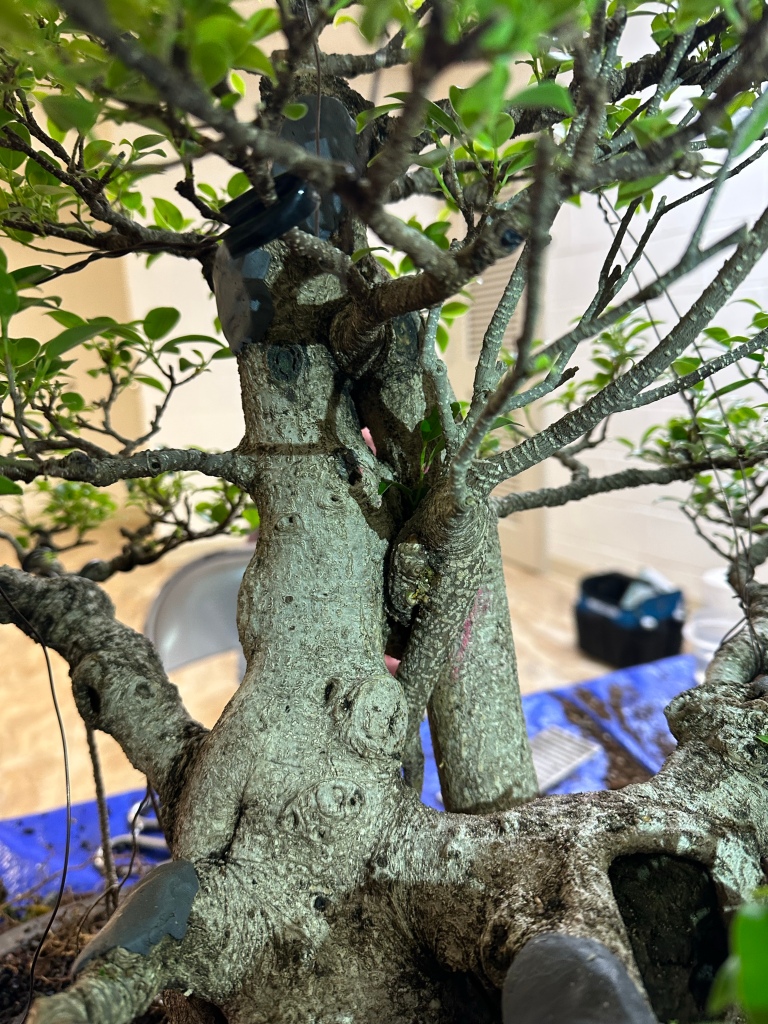
Here’s the front of the tree. I arrange the roots, artistically, so that they compliment the tree. Notice the screw in the bottom left. And my wife giving me the “Look”
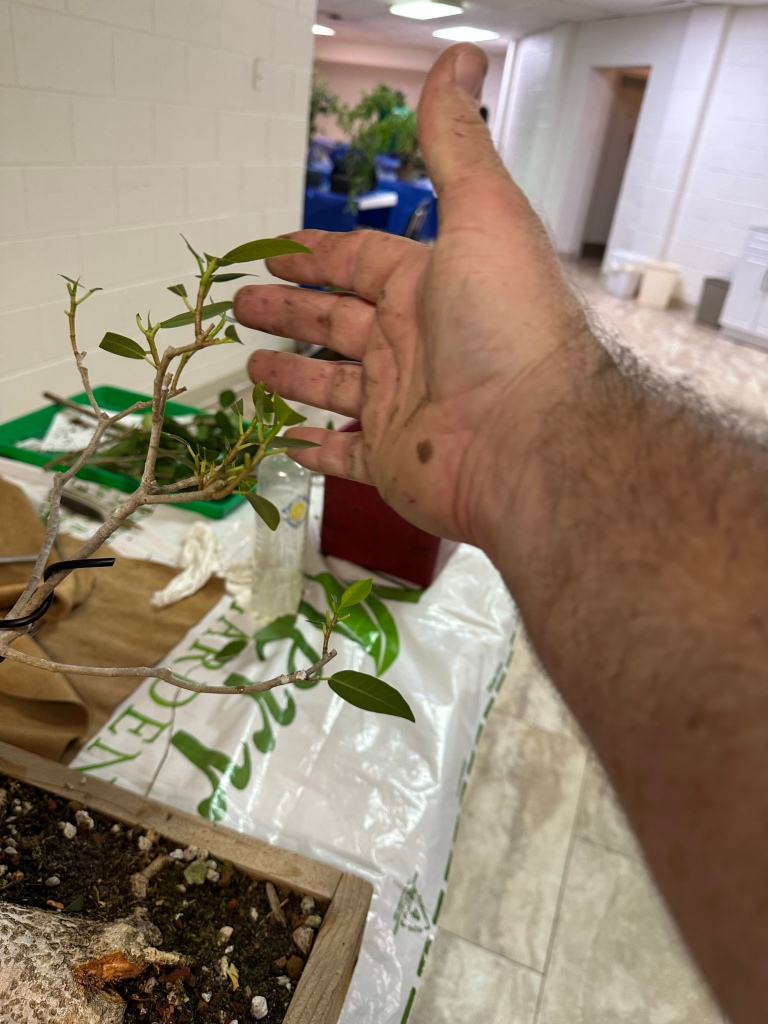
To get the graft to grow faster, I remove all the leaves except the last few, and I leave the grow tip.
There is still a hole, but as the graft grows, it’ll fill it up. That’s LeAnn, on the left, who was my host, giving me the same look my wife gave me. Both of them want me to work on her buttonwood. don’t worry ladies, it’s next.
Some more pics to give you some detail.
Jonah has done well reducing the leaf size.
Just about done. We tied some aerial in place (bottom left).
And, finito!
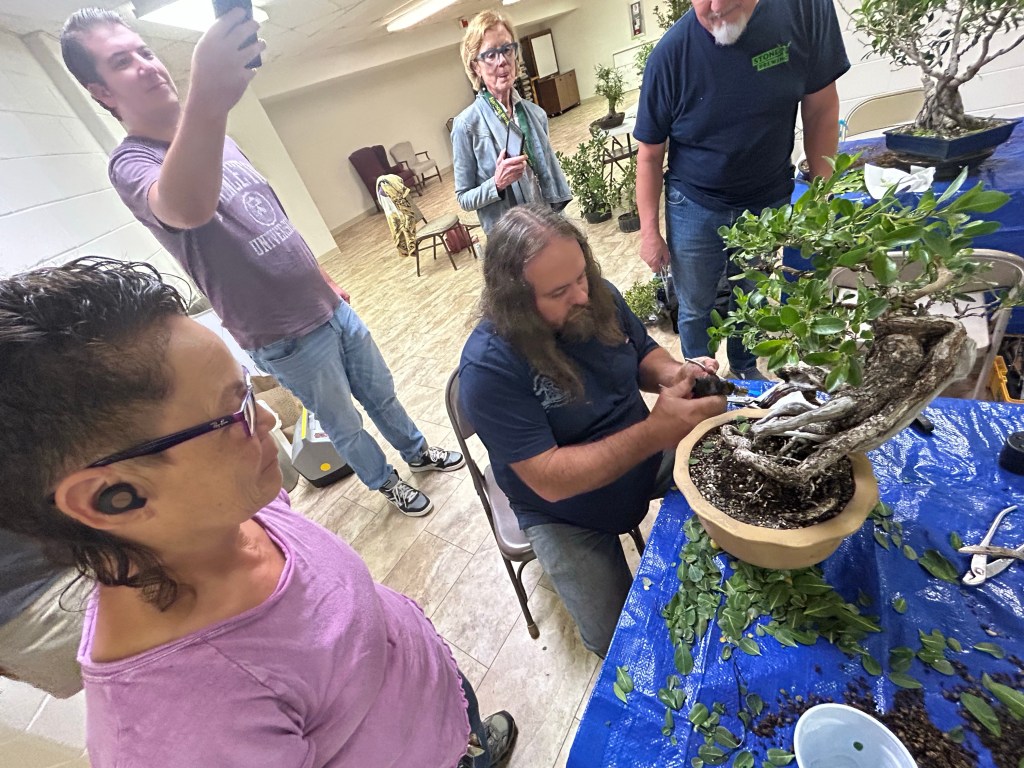
For the next tree, and the next post, we get to meet LeAnn’s buttonwood. An amazing tree, also from Florida (like Jonah’s tigerbark), and originally from none other than Mary Madison, the Buttonwood Queen.
That’s Washington DC. I think. Lots of converging lines and paths layered on top of each other. I posted a similar insane street map last time I was up in the area and I visited the Bonsai and Penjing Exhibit at the National Arboretum .
I was too busy working this tour to get to see the Collection. That’s ok by me. I like working. To be human is to work. To find meaning in that work is the sole purpose of this life on this earth.
Anyway, there’s room for philosophy later on in the mid and last section of this essay, so, as promised in the last post, here is LeAnn’s buttonwood.
She said it was collected (as most in the USA are) by the Buttonwood Queen herself, Mary Madison.
LeAnn is the lady in lavender (purple? Lilac? Not periwinkle, or plum, for sure) hovering behind me.
She waited very patiently while I worked through all the other workshop attendees trees and finally got to her tree.
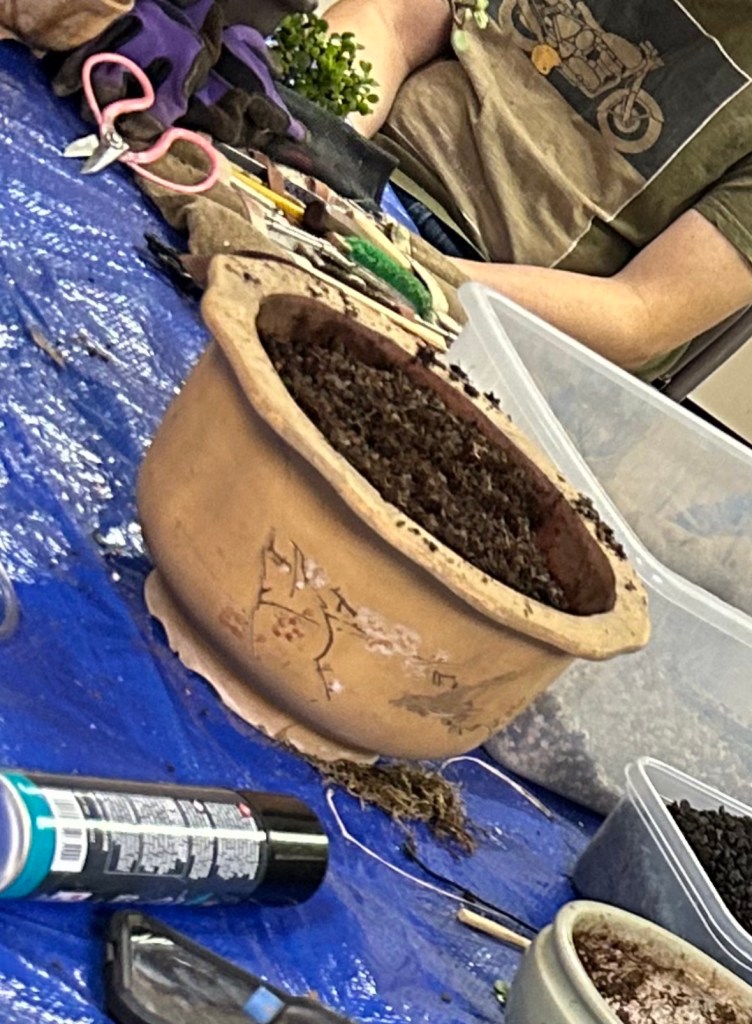
It desperately needed a repot. I teach my students in Florida that buttonwoods need a repot every year. Up north, like here in Virginia, it’s not so important. Unless you use a horticultural heating pad, that is. (Wait, is Virginia “Up North”? I’m not sure. Where’s the Mason-Dixon Line?)
Ok now…..WHAT? (not the North/South thing, even I’m not getting into that). What’s a horticultural heating pad?!
Here’s a few secrets for my northern tropical bonsai growers. First: get grow lights. We are in a golden age of indoor growing of plants. Yes, due to the legalization of cannabis, mostly, but we gain from it because all kinds of grow lights, from full spectrum LEDS to metal halide, are available almost anywhere for cheap. So get yourself one. But…BUT..secondly: heating pads!!! Horticultural heating pads are the game changer for those that need to bring in their tropical trees for the winter (one should always put your trees outside for spring and summer, there’s no replacement for the sun and rain. None). Most tropical trees growth habits are dependent on temperature. But not just ambient air temps. It’s the temperature at the root zone, in the soil, during the evening, that makes tropicals grow.
Which is why we here in the Sunshine State don’t repot buttonwoods until nighttime temps are above 65°F for at least 6 weeks after the repot.
In sweet Virginy, this particular operation is taking place in the middle of July, and LeAnn has the rest of July and most of August to grow more roots. So no worries there for her. But I knew of a guy in Cincinnati that repotted his buttonwoods in January. He had a greenhouse and heating pads. That’s where I got the idea.
Anyway, we got the buttonwood out of this pot:
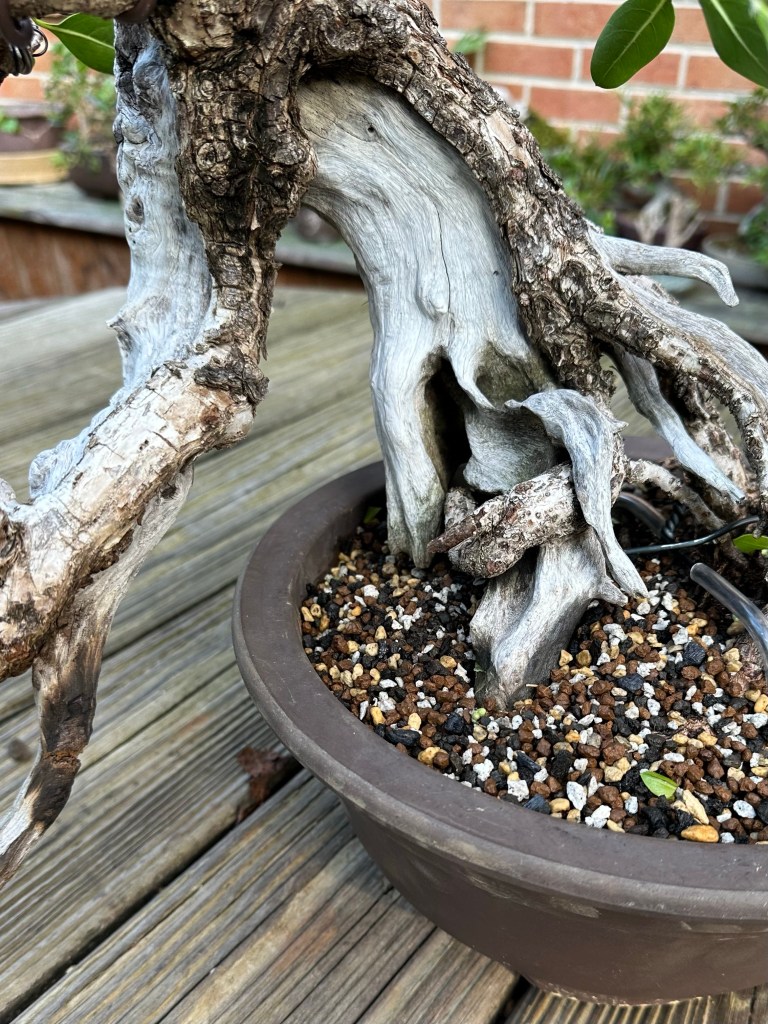
And into this pot:
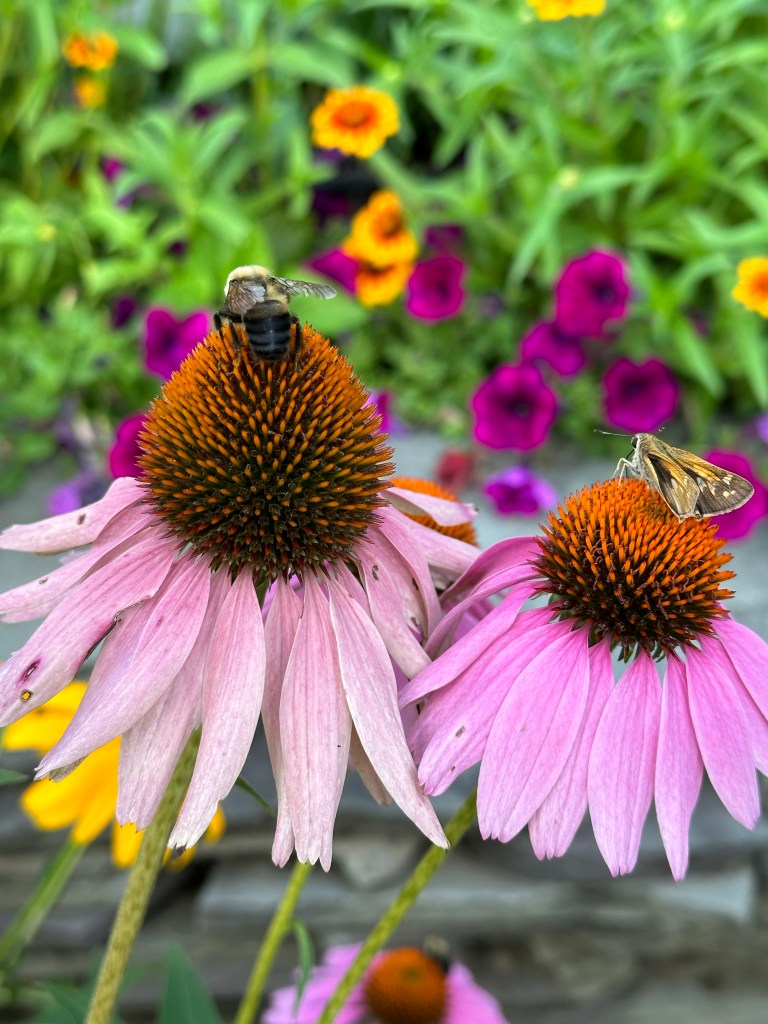
We wired it, tried to bend some deadwood with the torch and steam technique (only partly successful) and, now, just to make you wait, how about a bumble bee and a moth on a coneflower?
Awwwww, ain’t that cute?! LeAnn has an amazing garden and an even amazing collection of trees.
Here’s one of the more developed bullhorn acacias I’ve seen.
And a twin trunk willow leaf on a rock (a rock from Hawaii I believe, where LeAnn hails from).
And now, the buttonwood.
It’s an impressive specimen.
You can kinda see the burnt section where I tried to bend a straight piece of deadwood (middle of the below pic. It was ramrod straight).
View from above.
The constant reader is asking, “Why are there still leaves on it?”
Well, we are in The North, and the sun isn’t quite so strong as in La Florida, so, even though we are in full summer, I’m not comfortable totally defoliating a buttonwood up here.
And the main thing I don’t want to do is to kill this special tree. We really beat up the roots when the repot happened, and foliage is what grows new roots, so I left the foliage. Simple calculus, as they say in the movies.
And the tree was collected by Mary. Here’s the last pic I got of her before she passed away (that’s her daughter Terri, behind her).
Mary was such a force in bonsai, it’s hard to believe she’s gone. I truly miss her. There won’t ever be a woman in bonsai like her again.
And it was an honor working her tree with LeAnn. Thank you!
One last tip, and I learned it from Mary. Since we beat up the roots so much, I advised LeAnn to set the pot in a tray of water. One deep enough to cover the drainage hole. This will help the tree to grow new roots. Contrary to what I’ve said before about air being important for root growth on other trees.
A buttonwood lives in the coastal saturated zone, where mangroves grow, by the ocean, and are used to water. In fact, to make a cutting root, the easiest way is the old fashioned “Put the cutting in water” method. Oftentimes (don’t tell anyone) when we collect buttonwood, it’s really just a big cutting, with no roots at all, and we place the tree into the pot, and, as LeAnn is doing, place that pot into a tub of water.
One can, as many often do in bonsai, point out the unscientific practices of bonsai people. I do it often. But I have a saying I use religiously, and it applies to bonsai practice distinctly:
“Horticulture is a science, but the practice of horticulture is an Art”
I’ll leave you with that to mull over. Quote it to your best friend and your most divisive foe. It’ll separate the wheat from the chaff, real quick.
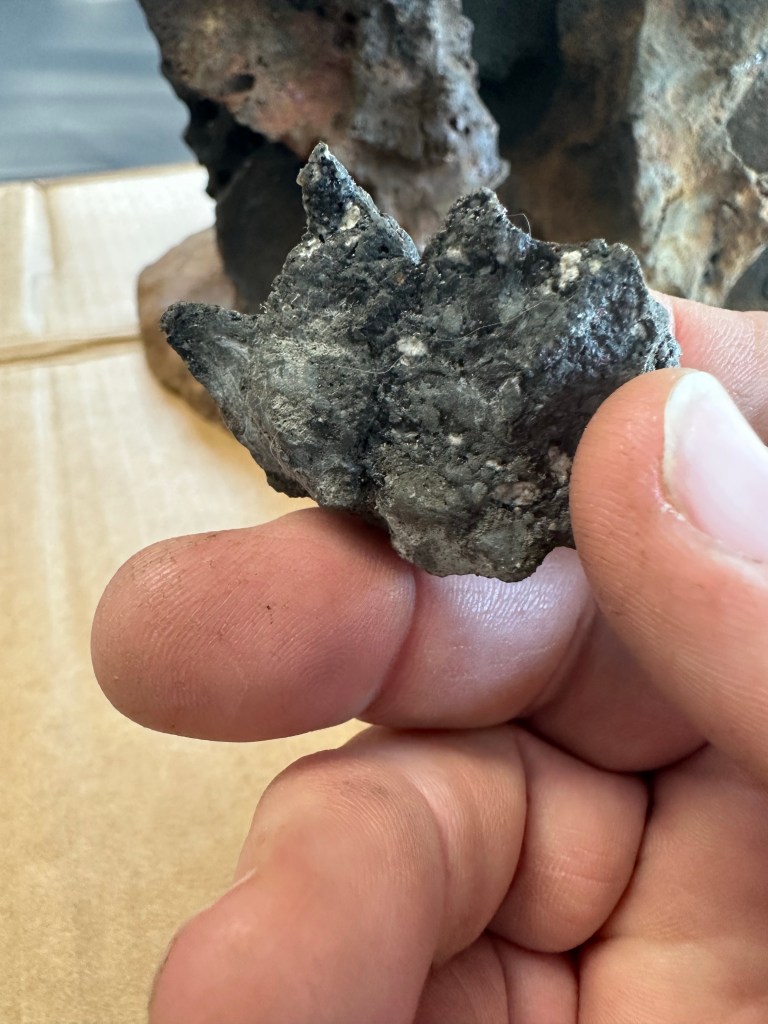
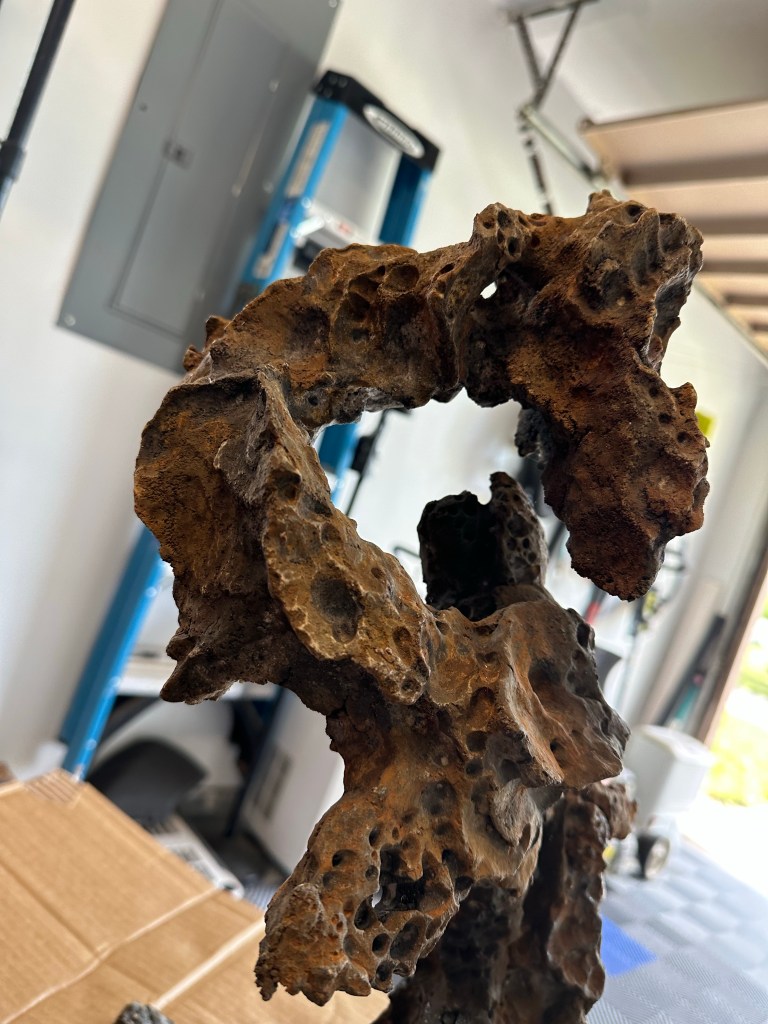
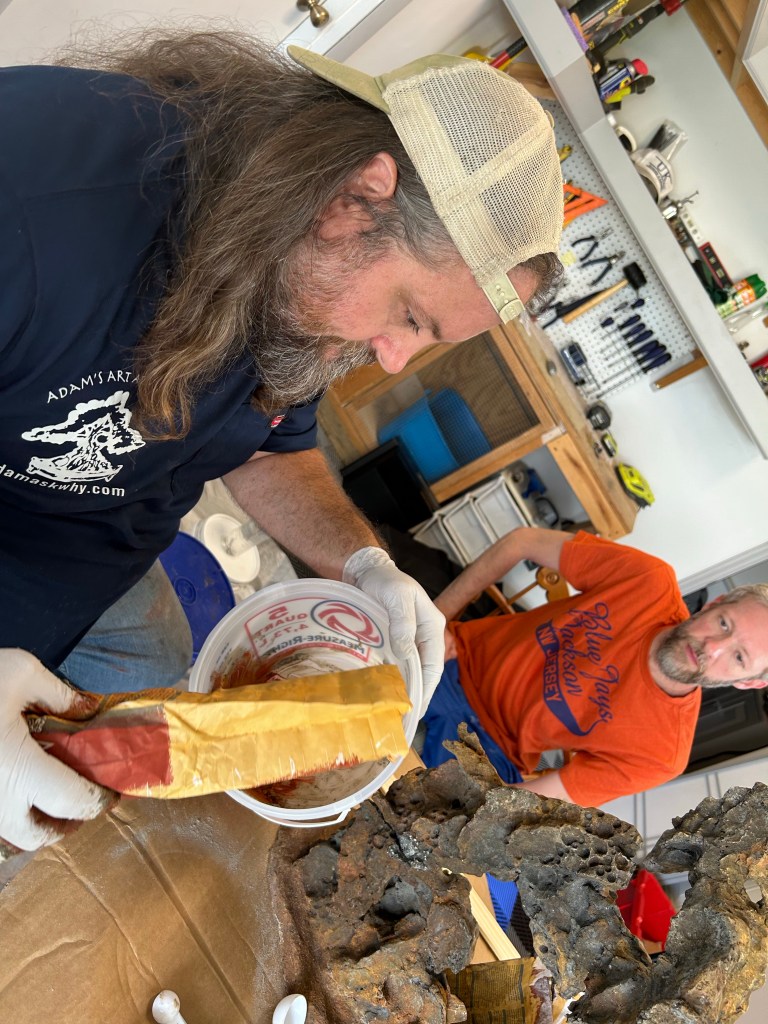
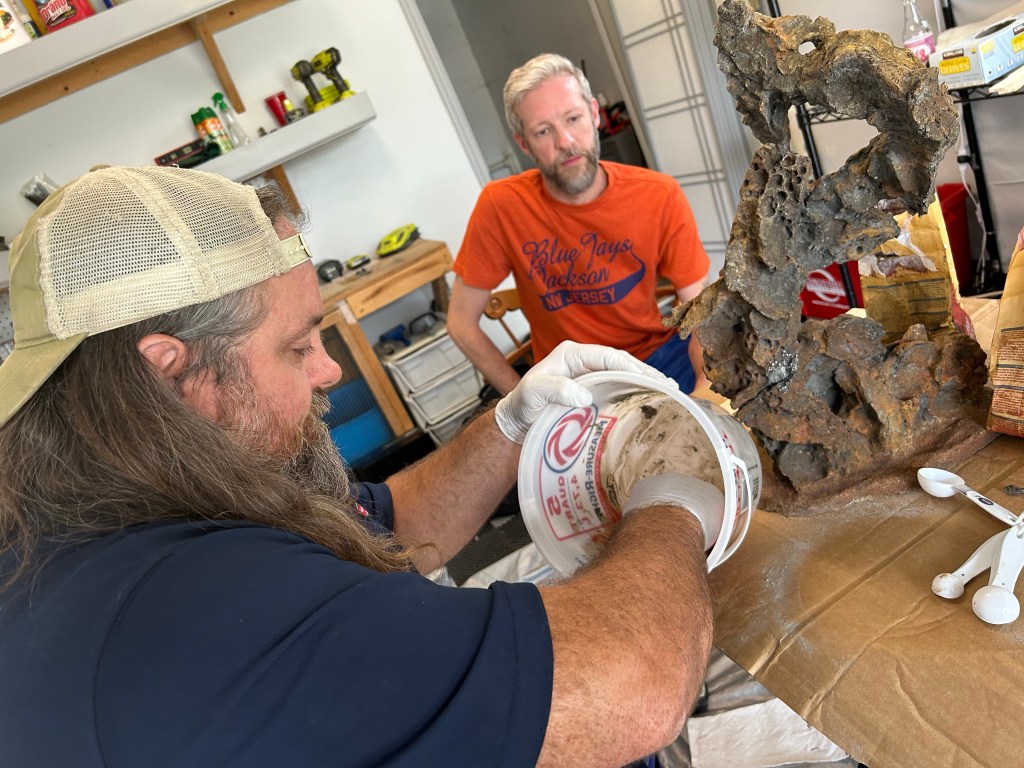
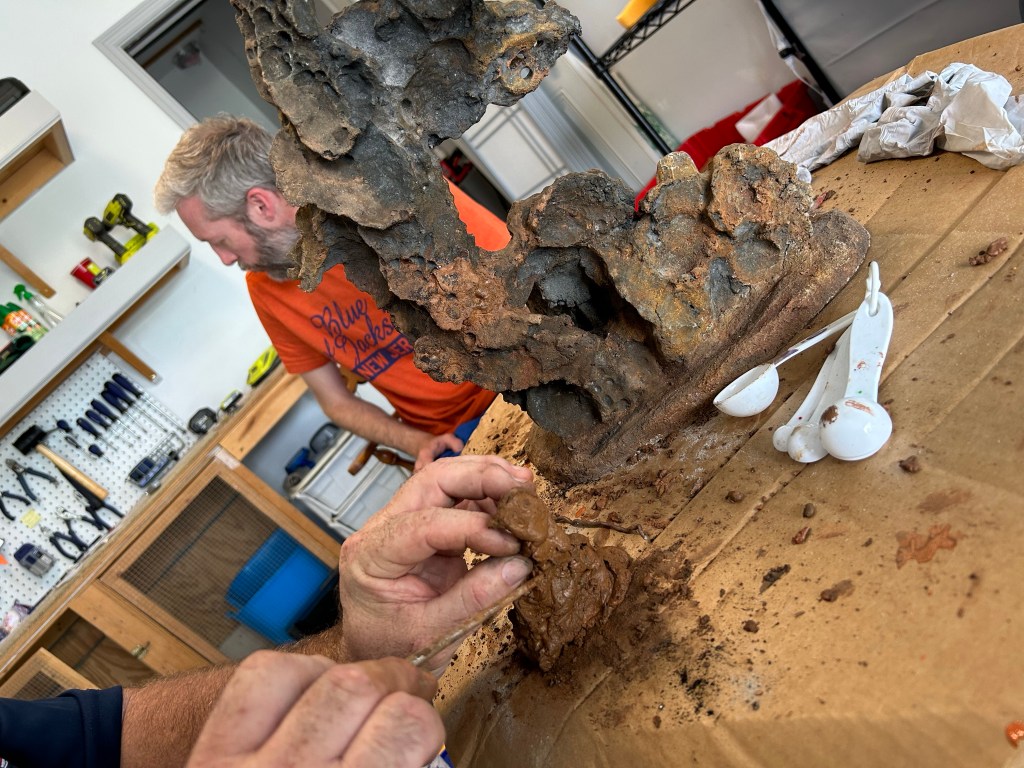
Now that’s a chunk of a block of a rock or something. Actually, it’s concrete, a manmade rock. But it’s “done broke” as they say…
It looks like a reptiles beak, below.
The story begins with a text, including some pics and videos, from Cincinnati.
The text was from Brendan. Say “Hi!” Brendan:
That’s him, my wife and me.
He got this “stone” from Poland, believe it or not. From a guy named Jacek Motyl. He makes rocks. Amazing rocks. Click on his name.
Anyway, Brendan ordered this stone and Jacek shipped it to him. In transit, it got “done broke”.
I’m not blaming the packing job. Jacek packed the rock well. I’m not blaming the Polish post office. Nor the USA postal service.
Let’s blame providence. The rock breaking gave me an opportunity to try something I’ve never done before. Sorry Brendan. Yes, this is my first attempt. I shall try my best sir.
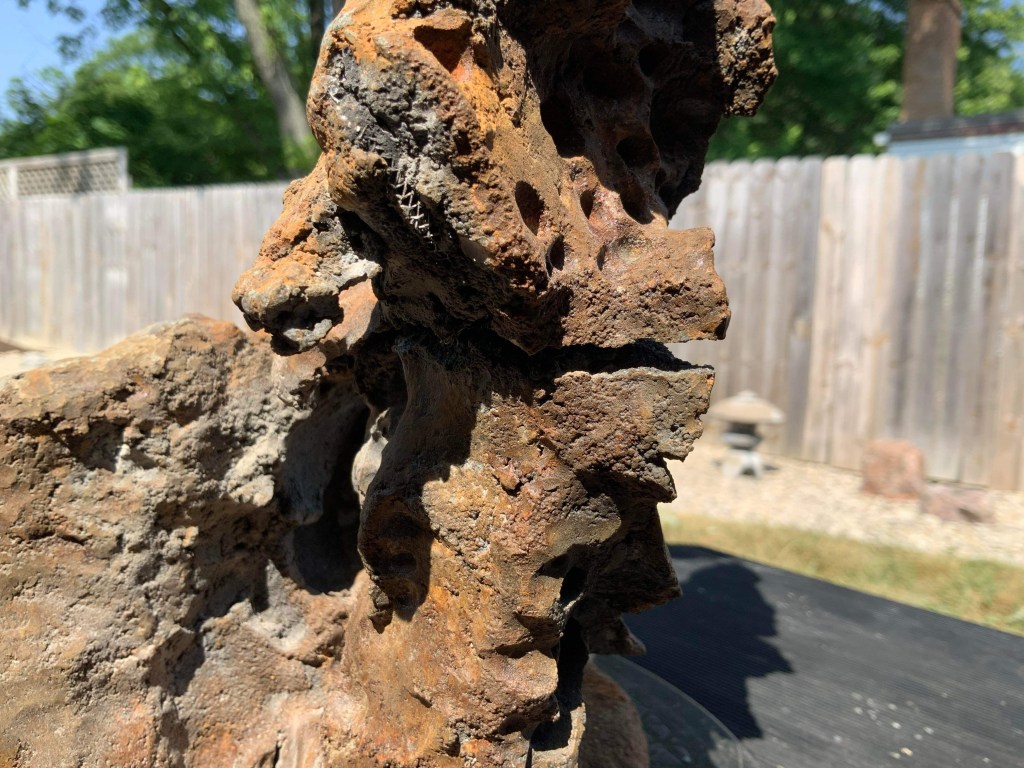
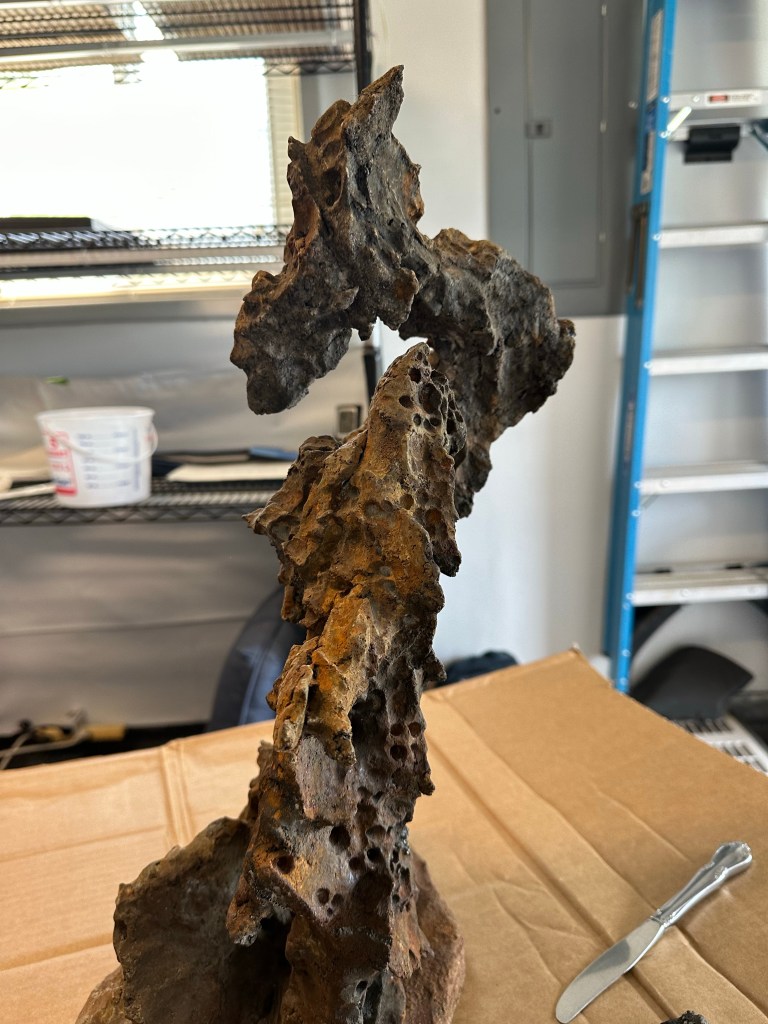
The type of rock is technically called “tateishi”, or standing stone, used in a root over rock style called, in many modern spellings, “ishisuki”. When I was growing up in bonsai, we spelled it “ishitsuki”. Yeah, ishitsuki, I shit you not….but the modern spelling helps us to pronounce it correctly. The “T” and the “S” make a singular sound in Japanese. Kinda like an “tssss” sound.
Anyway, that’s my joke about root over rock style. It’s better in person, with the hand gestures and all.
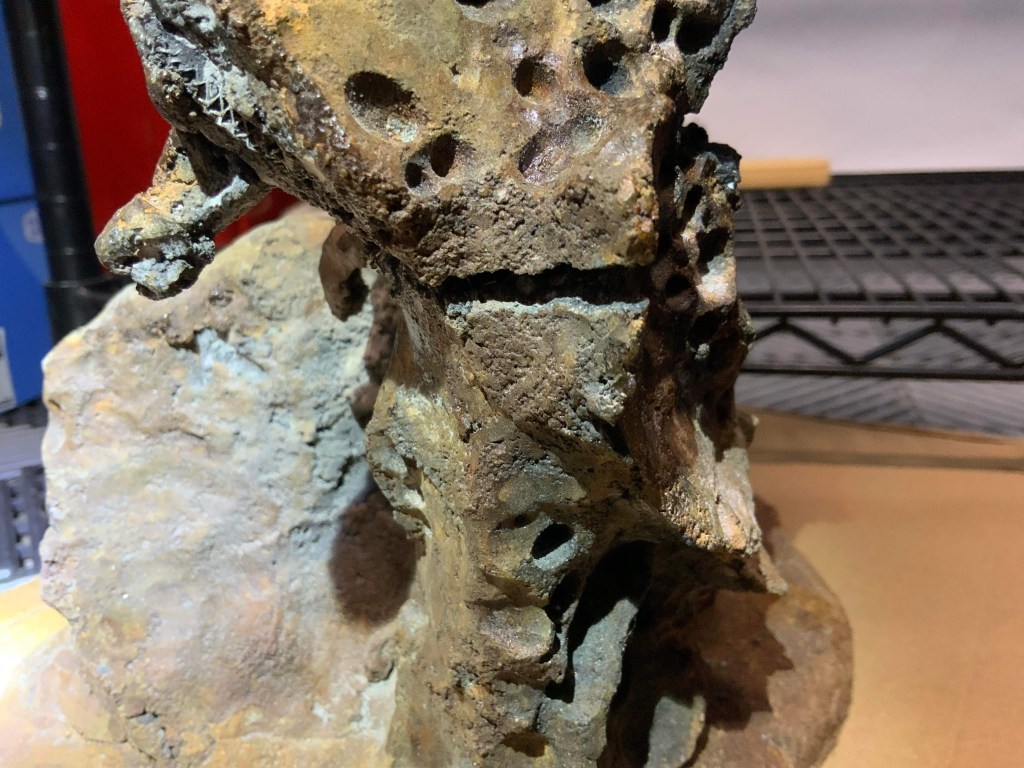
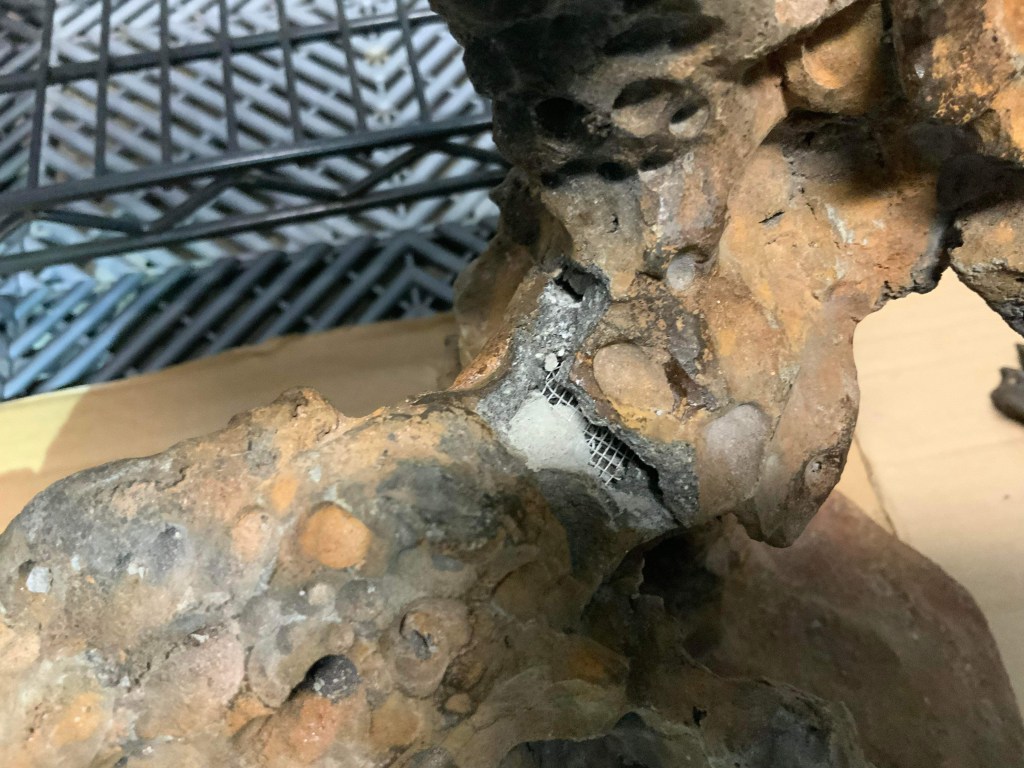
Watch the video below to see how bad the break is.
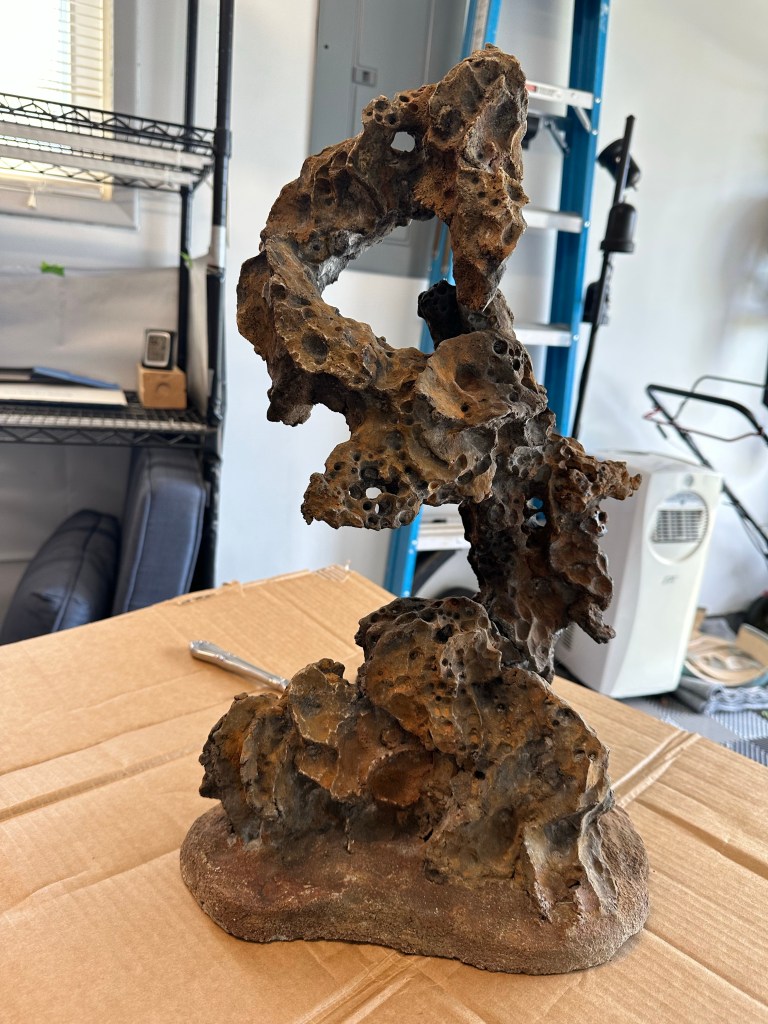
Not to give away secrets, but the shape was created by taking screen or hardware cloth and making the basic shape.
Then the screen is built up with cement. And colored, shaped, sculpted, aged, etc.
Pretty cool right?
My job is to fix the break and match the colors and texture. So I first had Brendan try to find Ciment Fondue. I had remembered reading about the stuff reading in the old books and magazines when I first started in bonsai (books and magazines are these amazing learning tools that one held in one’s hands, printed on paper. You would flip pages and read and the knowledge was amazing. I could tell you about encyclopedias but you’d zone out quickly).
Brendan couldn’t find Ciment fondue. Searching on google, I found it. What is it?
CIMENT FONDU® is a hydraulic binder with an alumina content of approximately 40%. Composed mainly of calcium aluminate.
It’s a brand name, only available in Europe, so I told him to find something similar. And he did.
Refractory mortar.
Why something similar? So it expands and contracts in similar ways to heat and cold cycles as the original sculpture. And refractory cement is waterproof. An important thing up north, as water freezes in the cold, and can explode our rock. That might sound spectacular. But that’s not conducive to stable bonsai plantings.
There’s something soothing playing with cement.
Measure out a portion….
Add color (we had red, tan, called buff, and black. I eyeballed it).
And a trick, don’t mix it fully. You want variations.
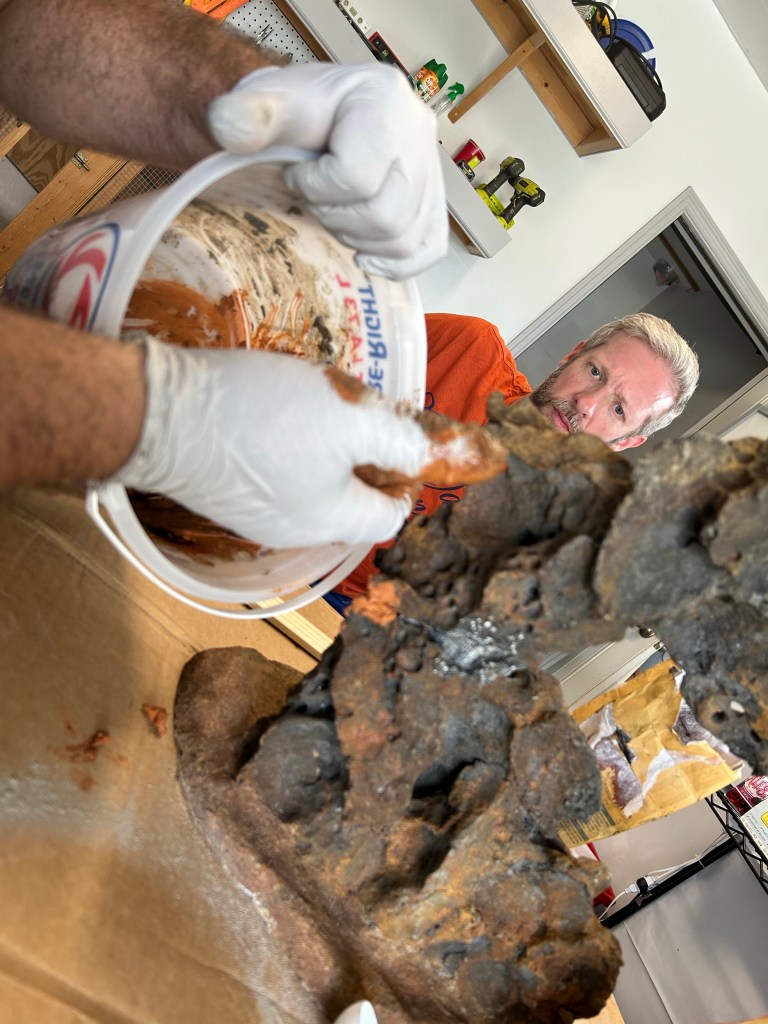
Add water.
And move fast.
Brendan was watching me closely.
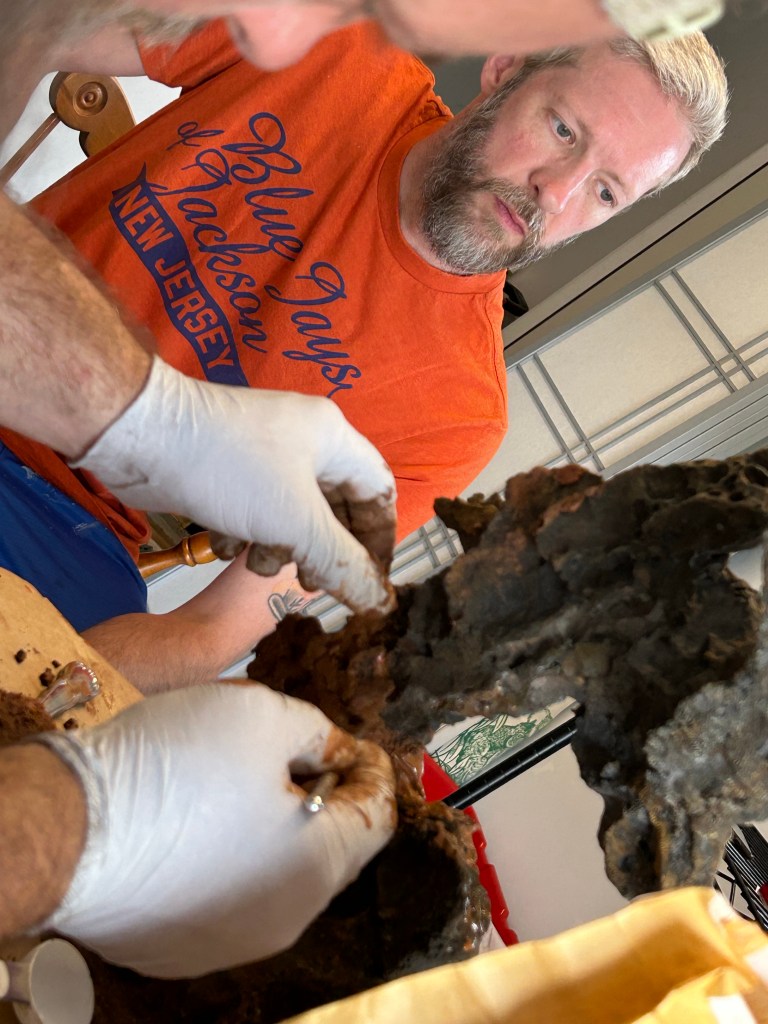
I smeared it, chopsticked it, blotted it. It’s a feeling thing.
I made sure to push the material into the cracks to ensure the repair of the rock, and not just make an aesthetic facade.
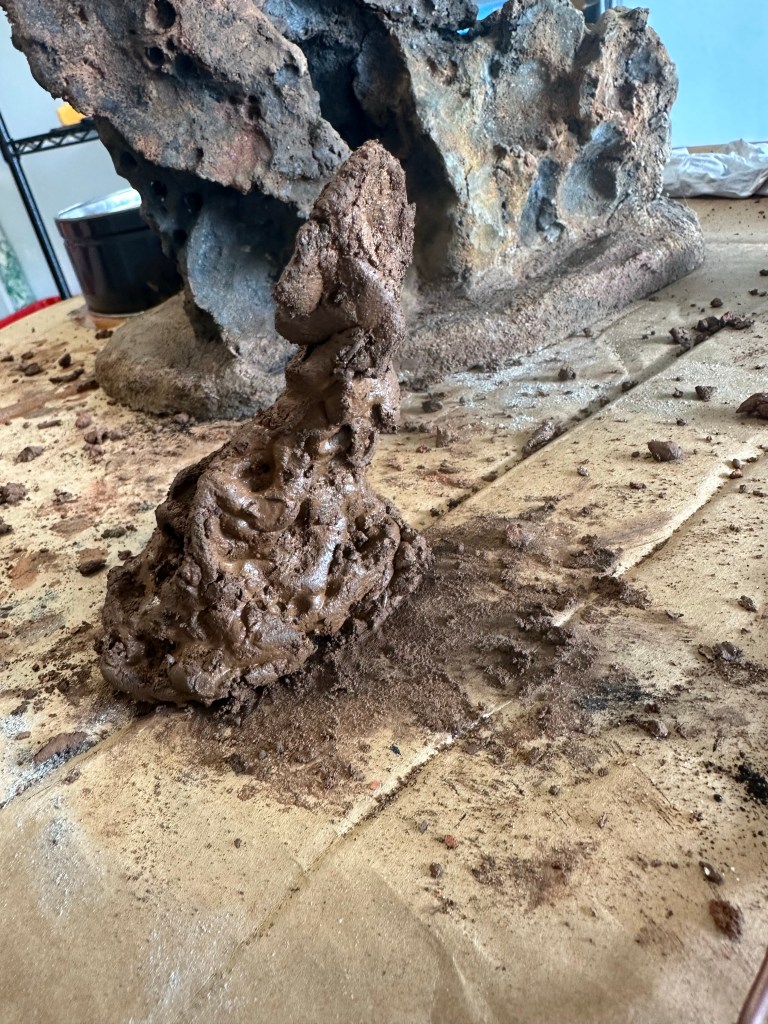
And with the leftover cement, I played around a little.
Yeah, I know what it looks like.
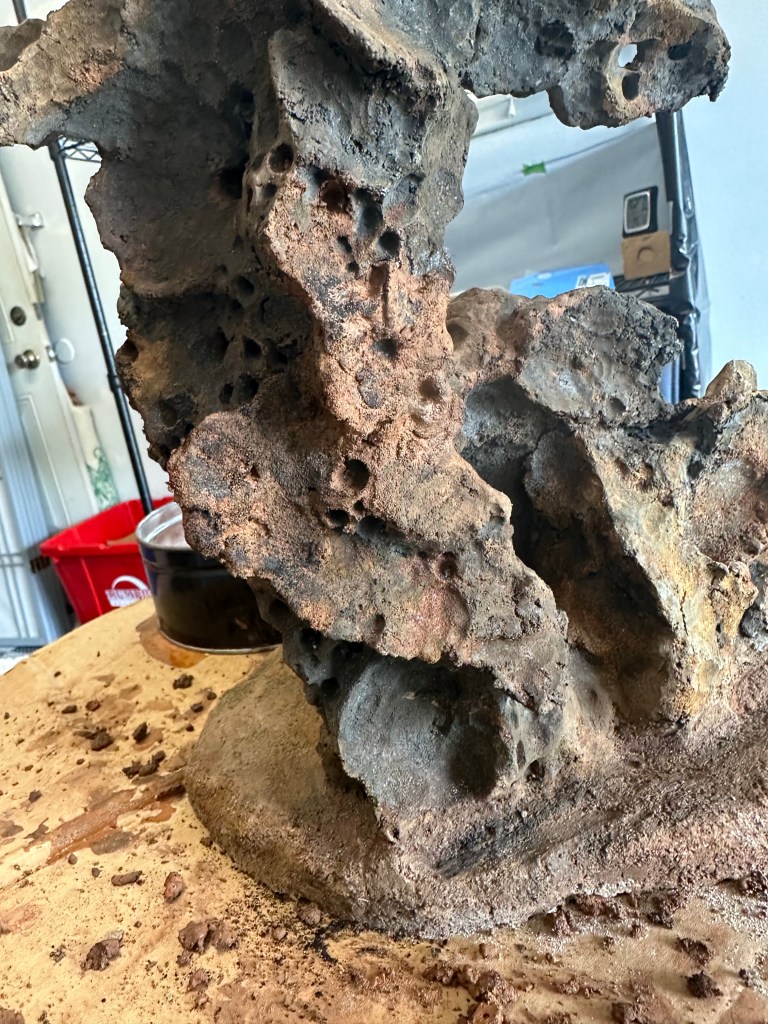
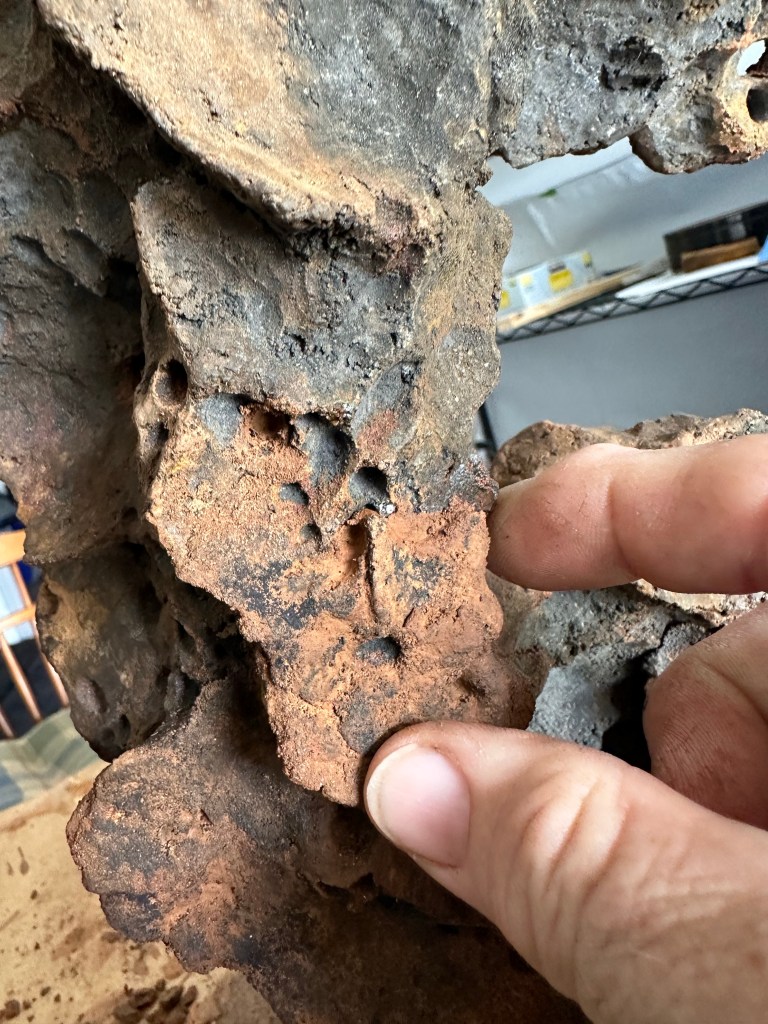
After the repair dried, I think it looks good.
I matched the texture and color. But most importantly, it’s solid.
I wouldn’t drop it, but it’s one piece again.
Below, is where I cemented that chunk back into place:
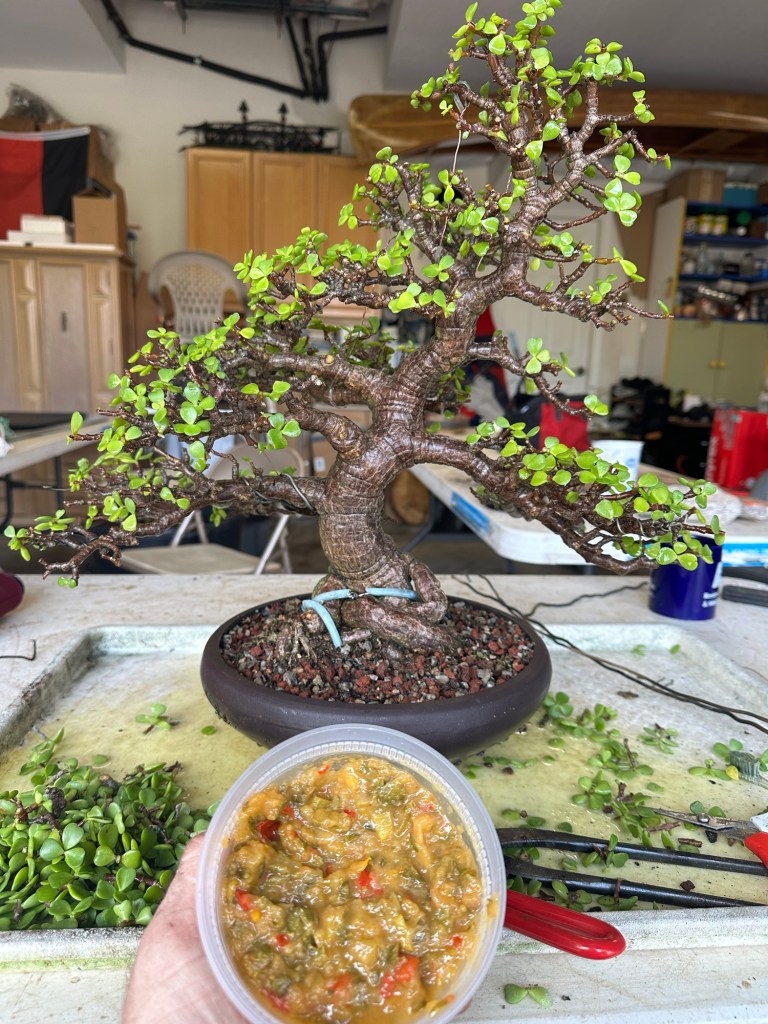
Consider the Portulacaria afra, what many call dwarf jade, or port, for short. In South Africa, where the tree is native to, it’s called “spekboom” which literally means “pork bush”. Interesting name…..
We know that it’s a favorite food of elephants (one common name is elephant bush) and rhinos. Goats love it too. What about us? Is it edible? More importantly, is it eatable? How does it taste?
My kids used to call it “apple tree” because to me (yes I tasted it. I’m a curious SOB), it tastes like a Granny Smith apple.
Here is an article I published in 2012 containing everything you ever wanted to know about Portulacaria afra. In it I talk about the habitat, the grazing practices of elephants, how a dwarf jade photosynthesizes and of course, all of the off topic rabbit holes I go down, the intemperate thoughts on life, the universe, and everything. I’m still even a little more upbeat in my writing, as I had not lived through the several long dark tea times of the soul I’ve experienced yet.
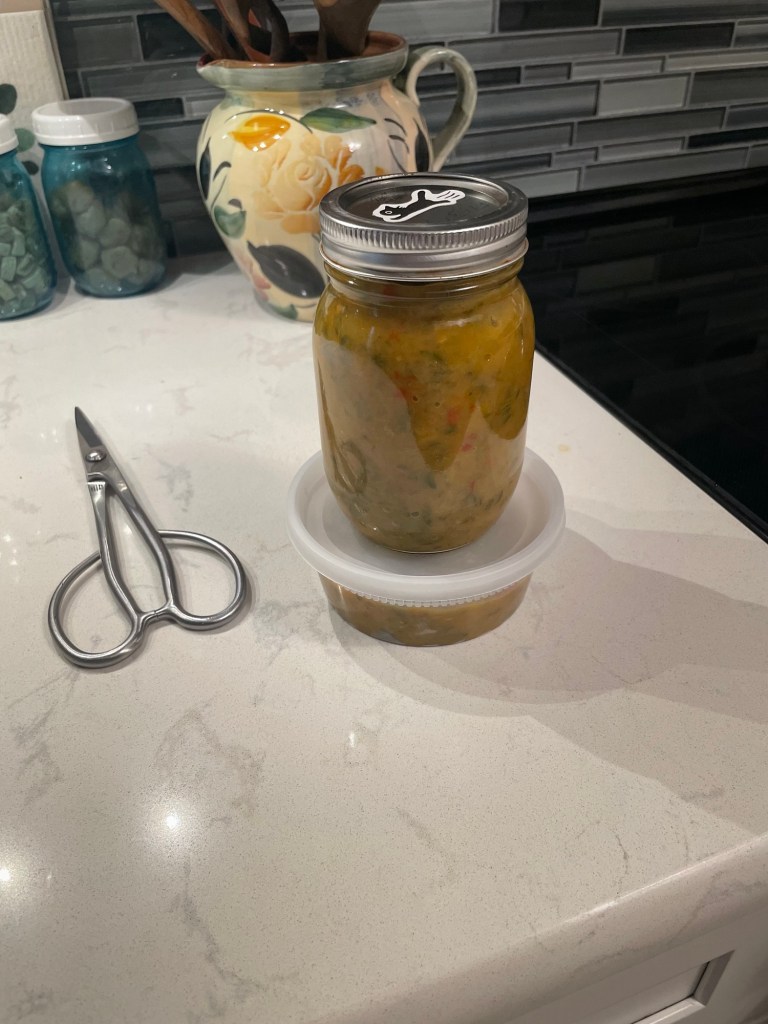
Any who (the who is Wil) I’ve been challenging my student (the aforementioned Wil) to come up with a dwarf jade chutney, like they make in the finer eating establishments (and farmhouses spattered around the wilderness) of South Africa.
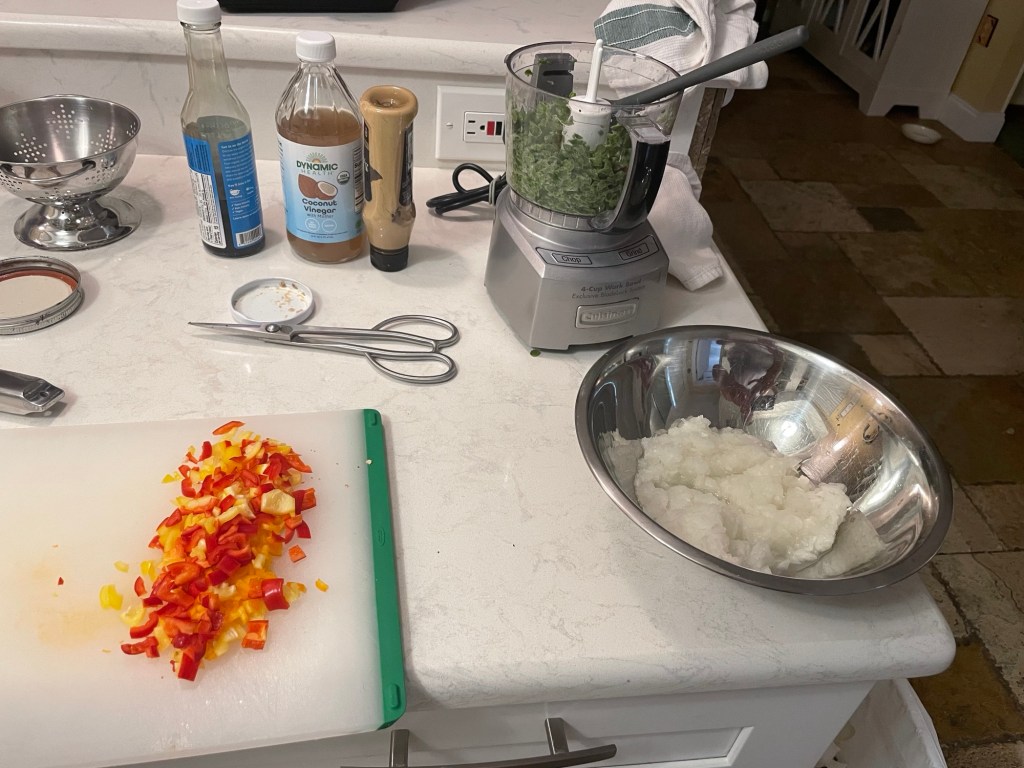
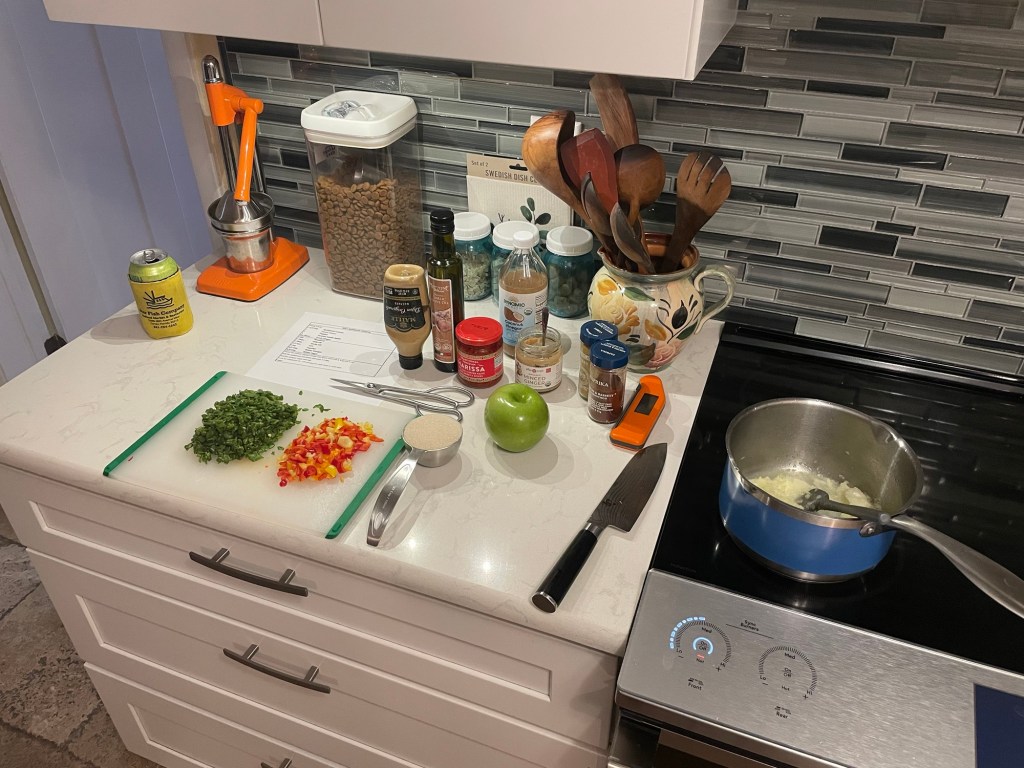
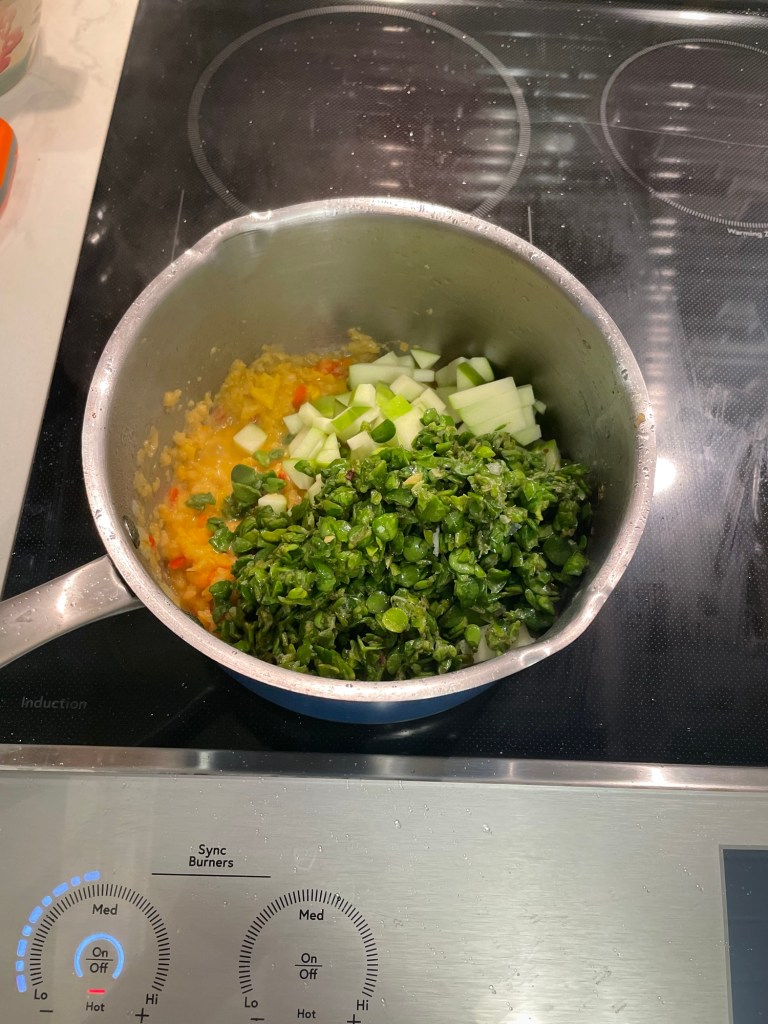
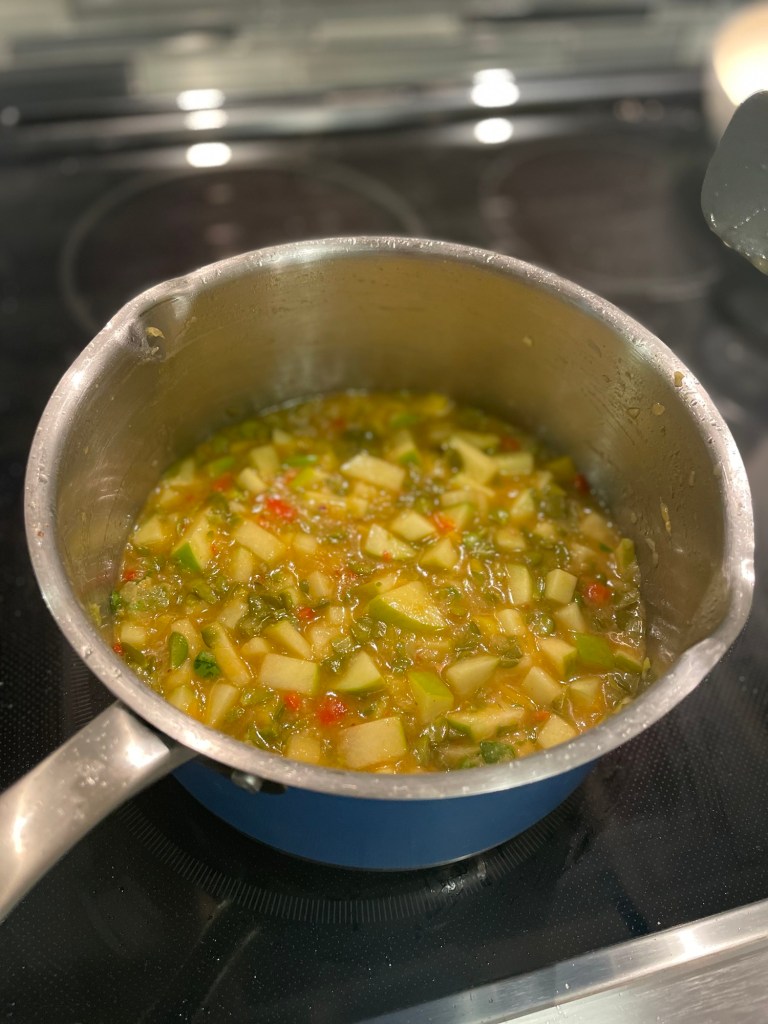
Finally, he did. First, he had to grow, harvest, and process some leaves.
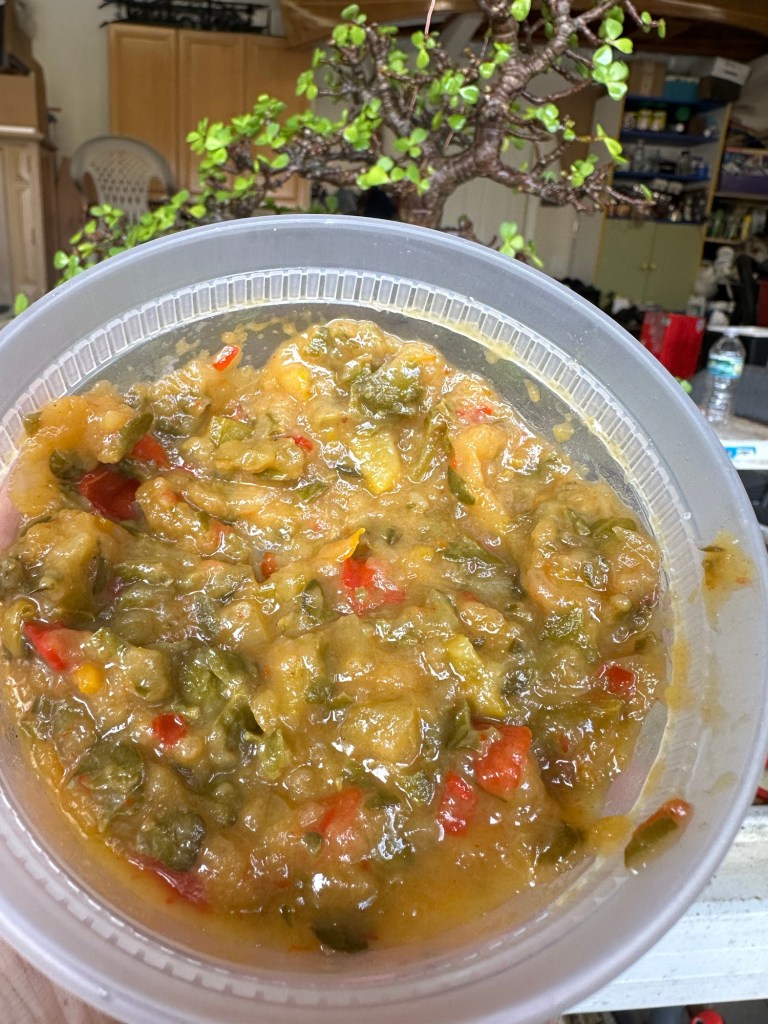
The recipe:
He had to make some changes to the ingredients as there are some products ubiquitous to South Africa that we just don’t have. Here’s the original recipe:
I mean, what’s up with a ml? And then a cm? You’d have to work at NASA to be able to convert from metric to whatever we call our units of measurements.
And what is “B-Well chilli oil? Is it chili oil or some other crazy thing called chilli oil? And who is getting well by guzzling oil? Oryx dessert salt? Is that salt from the desert but with an extra “s” or is it sweet salt?
Wil is a better chef than I. He knows when the garlic goes into the dish. And how much abuse it can take to survive the fire. Wil is the Man! And not in that negative connotated way, like “Down with the Man!” But like “Yo! Dude, you da’Man!”, though I do think he was a member of the CIA (not that one, but the Culinary institute of America).
Chopping and sorting.
Mis en place in…ah, place.
And so it begins!
I can smell it!
He kept sending me these pics as he was cooking.
It would be several days before I got to taste it.
He even made it fancy with a pussy cat sticker.
And he managed to get that pair of scissors in almost every shot.
Is it good? He’ll yeah. I’ve had it on pork chops, on bread, crackers….
It’s especially good on hot dogs.
Hhhmmmmmnnnnnn……
To answer the question, “Is it edible?” Yes, and nutritious.
Is it eatable? Definitely. Sprinkle it on salads, pickle the stems, or make WIL’s SPEKBOOM CHUTNEY for your next backyard get-together.
Below is Wil’s fantastic southern live oak style Portulacaria afra on display at the 2023 BSF Annual Convention in Orlando Fl.
Most of the pics are Wil’s, except for the first and last, and the food porn pics. Oh, and the screenshot. Don’t steal them.
It’s been about four years since I found this, and every year, looking at it and pondering the next move, I’ve missed the opportunity to work it. Why? I needed to repot it, get a look at the roots, figure out what was happening under the soil. You can only do the root thing in the late winter/early spring, before the tree sprungs, or you’ll tend to kill it. We don’t try to do no killin’ ’round here.
It’s my favorite deciduous tree, Celtis lævigata, and you need to repot it before the new leaves emerge. This year I got to it in time.
Let’s see what we can figure out.
I love odd shapes and challenging trunk lines in my personal trees. This is a root, I’m sure, off a bigger tree, and I love it.
The dead wood. The reverse (inverse, obverse, blah blah blah) taper. The species. I call it the ficus of the deciduous world. You just have to search “Hackberry ” in the search on the front page and you’ll get a bunch of hits on articles I’ve written on the tree (except that one Brazilian Raintree hit….).
Funny thing just occurred to me. When I write my blog I try to explain what’s happening, or what’s going through my head, as I work on the tree.
During a demo, I’ll often just get lost in the tree, and forget that the audience is there and I’m supposed to be performing. A bonsai demo is really a kind performance art (and I say that tongue in cheek, because many bonsai practitioners are kind of conservative when it comes to bonsai-as-Art, no matter their taste in art or politicians. Me, I can’t stand the taste that a politicians actions leave in my mouth, except I don’t mind that one bonsai guy in Virginia. You know who you are, Roberto).
When I’m asked what’s going through my head during a demo I usually say “not much”. It gets a few laughs. Or I’ll say “you don’t wanna know what lives inside my brain”. That gets some too.
Sometimes I tell the story of how the chicken came to the west.
I’ll say, ” How many of you have heard the chicken story?”
Those who have, groan. But they encourage it because, though they’ve suffered through it, they want others to know the pain of sitting through it as well.
Shared pain is lessened, after all.
Anyway, the chicken story:
What you may not know, is that the chicken originally came from Asia. Look it up, I ain’t lyin’. And in Asia, there is a strong Master/Apprentice relationship in the passing down of knowledge.
Now, anyone who’s raised chickens knows that it’s prit’near impossible to tell the difference between a male and a female chick (baby chicken). And it should be self explanatory that a female chick is more valuable than a male chick, because of, you know, eggs and all that, so there evolved a very prestigious occupation in the world of animal husbandry know as a “Master Chicken Sexer”. A real job. A dirty job you might say (you remember Mike Rowe and Dirty Jobs? There was an episode about just this thing).
So, being that chickens are from Asia, and they were imported into the West (how else do we have omelettes?), it soon became clear that the western farmers needed help trying to figure out how to distinguish between a male and female chick. Still obvious, right?
So the western farmers hired the Asian Master Chicken Sexers to teach the westerners how to do this.
The scene: we have the apprentice chicken sexers sitting at the conveyor belt, and the yellow chicks are coming down the chute, onto the belt, and the apprentice picks up the chick, tickle its butt or something, and throw the chick into either the male bin, or the female bin.
The poor male chicks are mostly made into….ah, feed for other chickens. The females were let go to make nests and lay eggs for the farmers to harvest and make their scrambled egg breakfast or quiche (if they’re French farmers).
As I mentioned before (about 100 words earlier) it is exceedingly hard to figure out the difference between the male and female chicks; they’re both yellow, the males haven’t learned to cock-a-doodle yet, the females don’t even gossip. So the apprentices are sitting there, chucking the yellow birds in whatever bin they thought they should go into. When they got it wrong, the master, who was standing behind the apprentice, would whack the poor student on the back of the head.
Slap!
Eventually, the apprentice could unfailingly tell the difference between male and female chicks.
Now, they had no idea how they knew, but they did know. That slap hurt.
Again, obviously, the point of the story isn’t about chickens or East and West or even farmers. It’s more about how to teach. Some bonsai teachers teach using the rod, telling you you’re wrong and to do it again, and again, and again, until you have it right.
That’s not me. My online name is Adamaskwhy. Most people think it’s that way so you can ask me “Why?”
And you can.
Most of the time I know the answer, or I can find it.
Or I make something up that sounds plausible.
But the real reason for my name is that, as a student, I don’t just want to know the answer. I want to know why. I was (and still am) that annoying kid in the back row that said “oh yeah, prove it!” And it angered some teachers, bothered others, and I was loved by the smallest percentage. Those were the good ones.
I’ve talked about this before, so excuse me if I’m repeating myself, but a teacher who doesn’t know why, ain’t much of a teacher.
If you can only recite your lessons, then you haven’t learned a thing.
Which brings us to the initial styling of this hackberry. You remember it? The subject of this article and all? I know, you got lost in the chicken story. It happens.
What in the hell is going through my head?
Well, you’ll have to trust me on this one, and see what happens this year.
It seems that a lot of “rules” are being thrown away with this tree.
I mean, they do say that “rules are meant to be broken”. But why do they say that?
Let me tell you another story, this time about a boy named Pablo. Pablo’s father, Ruiz, was an artist that specialized in realistic drawings and paintings of wildlife. He was an instructor and professor at several art schools. He started training Pablo at the age of seven, and insisted that Pablo learn how to draw and paint properly, in the classical and realist style that was popular at the time, and was profitable, as artists jobs back then was to paint portraits and art to be hung in wealthy patrons homes.
So Pablo learned. It came easily to him. At age thirteen, his father, Ruiz, proclaimed that Pablo had surpassed him in talent and technique, and enrolled him in a prestigious art school in Spain.
Pablo quickly understood what art school was for, and formed serious friendships that would help him later in life, all the while slacking off on his lessons. He knew them anyway.
That, by the way, would be the one lesson to take away from this parable, college is to make contacts in school, that will help you later in life. The bosses who hire you only want to know that you got the degree, not that you were a “C” student. But if they know you were in their sorority or the chess club they were in, you, my friends, are in, as they said in my youth, like Flynn.
Pablo was so good a draughtsman that, in his later years, when everyone called him Picasso, he would sit and drink his coffee at the cafés in Paris, and draw photorealistic flies and bugs on the walls. Drawings so real the waiters would rush over and try to swat the fly off the wall. Pablo, as you might think, got great pleasure in these escapades.
We are all just boys and girls, trying to smile at the tragedy that life sometimes is.
What is to be learned by this last story?
If you learn to do the work, as a craftsman should, you can then use that work to accomplish the Art that your soul requires to feel alive.
It seems I’m at the end of the work.
I would try to get a good pic, but my photography area has been battered by a hurricane or two. It’s on the list to repair.
And here’s the obligatory tortoise pic. I need to build him a proper enclosure. That’s sooner on the list than the photo spot.
This is the best I can do for now.
I’ll post updates as I make changes in the tree. Maybe. I have a long list of “To-Do’s”.
The Shofu Bonsai Society of Sarasota has a pretty good auction every year. Granted, some years are better than others, but the year I got this one, maybe 2021, was spectacular. This tree was on the silent auction.
Yeah, not the live auction, the silent auction! I didn’t have to raise my hand or pull my earlobe to win this beauty. I just wrote a bid down on a piece of paper.
I don’t even think I went higher than $100 on it.
Since I’ve had it, it seems like only a few branches have grown.
But that’s typical. I don’t do anything to it for those few years except to water it. And when you ignore this species, a Ficus microcarpa, it will pick one shoot on each branch to feed the sugars to, and, like the pic above, you get long spindly branches and the smaller, interior branches tend to die off.
The lack of sun is the impetus to tell the tree how to allocate the resources.
(Not to belabor a point, but that’s another reason for timely defoliation techniques on figs. Defoliate to let sun in, calm down the randy shoots and allow everyone to grow. )
Oh! Notice the blue bottle? That is one thing I’ve kept up on for this tree. That bottle has a systemic insecticide in it called “imidacloprid”, which is a synthetic nicotine (what they call a neo-nicotinoid) that I treat all my F. microcarpa with to control thrips. An insidious insect that takes the leaf and folds it to make an incubation structure to breed more thrips.
Below, there’s one on my arm. They call this one the “Cuban Laurel Thrip”, as that’s one of the common names for this ficus, Cuban laurel. I call it the “Indian laurel” as it’s more indigenous to India than Cuba, though it is endemic in the island.
The tree does have flaws, like the wire scars below.
And, as a species, the leaves are bigger than say, the “tiger bark” variety. And they are prone to branch dieback (like the Ficus benjamina) if you don’t leave strong growth on the tips when you prune.
Let’s open it up and select some branches.
Hmmmmmm….might be useful. Below?
Nah
Below, there’s that growth tip.
I’ll leave it to grow longer.
But some I’ll cut back to encourage back budding.
Clean up, clean up….everybody do your share.
Kah-chop!
There we go.
Some wire.
The result of clip and grow. Good movement.
More grow tips to preserve.
Now just let it grow.
But not willy nilly growth, directed growth.
If you ever take a class with me, and I say let it grow, you should let the things left, to grow, but get rid of growth that’s not needed.
Here’s a video
And here’s an idea of what it’ll look like. Needs a better pot.
Let’s see what happens, I promise to show the repot and updates
This work was from February or March of this year, 2024. It took me that long to figure out where the comma goes in the title. And which words to capitalize. Not really but an excuse is an excuse.
So, with that said, here you go, a little late is all…
An Ilex vomitoria “schillings”. From my student, Sharon. She grows them in her landscape and has some impressive bonsai specimens as well.
But this one came from a Bonsai Societies of Florida convention workshop from several years ago. I’m not sure why she took the class, but she did, and I get to work on it. The yaupon holly is one of my favorite species and this one is fat and chunky.
I believe the trees for the workshop were collected somewhere in Brevard county. By the Bonsai SOB’s.
I know, bad joke. But clever. The Bonsai Society Of Brevard: Bonsai SOB’s.
One of the clubs that’s seat to my heart and I consider it a home away from home (I belong to the Central Florida Bonsai Club in Orlando).
For clarification purposes, Sharon lives in the Tampa/St. Pete area of Florida. Opposite coast from Brevard.
My Job, which I did late winter early spring (for y’all confused peoples out there) is to prune, style, and repot this old tree into this classic oval-shaped bonsai pot.
Damn what a sweet trunk. Like an ancient oak tree out of a story, maybe a Robin Hood and Maid Marion fairytale, enjoying a late spring, early evening stroll amongst the fireflies and sweet blooms of Nottingham Forest.
And that hollow, or, as they call it in some Japanese bonsai nurseries, an “uro”. Roll the “r” in the Japanese way.
Let’s get into it. Those concave cutters are ready, looks like.
Snip!
There are a lot of branches, which is good, more to choose from. The craft of bonsai is knowing the most amount of branches to remove from your tree and still survive. The art of bonsai is knowing what to keep so your tree still looks like a tree.
Craft, knowing the whens and hows to cut. Art, knowing the whys and becauses.
Early spring (in Florida that’s mid-February) the tree begins to push new growth. Below, that new growth has begun to harden off.
Now’s a good time to get some cutting in.
This’ll be quick, so pay attention.
Sharon has been selectively pruning for movement, as you see below.
And if I had the druthers, I’d make some warriors roasted yaupon tea with all the leaves on the ground.
There we go. Lookin’ good.
A mind puzzle for ya’ll:
I have a farm. There’s a drought, but I have a deep well.
It’s drying up, but there’s still water left to live off of to water the crops and for the animals and my family.
Maybe enough until the rainy season.
Maybe. My house, where I live, catches fire. Do I let the house burn down or do I use up my water to put out the fire.
For the smarty pants, those two options are your only choices.
What should I do?
Now that’s a root ball!
The tree is old in this pot and well established. Ilex like good drainage and this depth pot is well suited for it. But aesthetically, the art part, it’s not.
That’s a question, why do we use shallow pots when, horticulturally, a deeper pot is better.
Not many know. I’ll ask this question during demos and I’d get answers like: it helps to dwarf the tree, or, it slows the growth. The only reason is it makes the trunk look bigger.
Bigger trunks look older. And that’s what the Art of Bonsai is: making a little, young tree, look like a big and old tree.
In fact, most of all the craft of bonsai, and the soil components and composition, are there to serve the art.
Take the roots. We know that the roots are responsible for most of the water absorption and nutrient uptake. They’re also the main storage facilities for excess sugars for those lean times a tree has to endure. The only reason we use expensive aggregate as soil is to increase drainage when we put our trees into shallow containers. Bonsai soil is not magical, and it’s not really suited for deep containers, as it dries out too fast (there’s a lot to say about that, but those posts have already been written. Start at this post: Akadama, the Ideal Bonsai Soil and follow the related posts at the bottom), but it works for bonsai containers.
For this tree, and its roots, it’s been prepped for a more shallow container, but there are still a few roots to get rid of.
I’m not worried too much about chopping those big roots (they hold the sugar remember) because the species grows fast and makes tons of sugars. So just leaving the feeder roots (the small ones) is good enough for the health of the tree. Knowing that (to continue the theme) is the craft. You have to learn the craft just as much as the art part.
The tree is healthy enough to handle this rough treatment.
And I know how to sharpen my scissors, so I don’t want to hear anything about using my good scissors on the roots. But you shouldn’t. Do as I say, not as I do.
Here’s a crossing root. Kinda straight too.
Cut it off and that’s what’s below it. It’ll puff back out, but it was beginning to girdle the lower root.
And I might just need a shoe horn. Maybe I should advise American Bonsai tools to make one…….
And it fits! Bob’s yer uncle!
I’m still on the fence with that first branch on the right. I can’t bend it, so Sharon either lives with it, or we cut it off.
You read earlier that this tree lives in St. Petersburg FL. If you’ve been reading the news, you should know about the two hurricanes that have impacted the Gulf Coast of Florida. Sharon stayed for Helene, but she evacuated for Milton. I don’t have the heart to ask her how her trees have fared (her house and family are well).
This year has been trying, especially for those in the path of Helene; Florida, Georgia, Tennessee and especially North Carolina. I had very little damage, just a little debris. All I did was sweat a little cleaning it up. But there are people who’ve lost everything. The towns they live in are even gone.
All the loss of life is devastating. I have no words for it.
Well now, this tree is bigger than my head. Which is saying something, I got a big head. This is what they used to call, in the seasons of my youth, in bonsai, when I was green and learning the words of this , our Bonsai World, a Schefflera arboricola. Being that I also learned it in the southern latitudes of my country, they pronounced the last part, arbi’cola.
Now, they’ve changed it, and it’s just an unpronounceable and easy to forget name: “Heptapleurum”. Hepta- meaning seven, and pluerum-meaning side. Seven leaflets on each leaf. I feel sorry for the poor botanist, Johann Peter Ernst von Scheffler (born in 1739), who they named the genus for. He is an unknown man (in our time) but ever the hard worker I’m sure, who I can’t find hardly a biography on, but did something, either great or enduring, that made them name a whole genus of plants after; Schefflera.
I’m sorry but suddenly I’m feeling some existential pondering. Try to keep up….I’m a wandering ponderer, I’ll take lefts, rights, u-turns and switchbacks. Ready?
Can you think for just a moment about all the people who have ever lived, either important or unimportant lives, and their everyday existence, with families, friends, meals, whether they used chamber pots or outhouses or just pissed in the streets. Whether they ate with spoons (silver?) or just a knife, or a full place setting at the table. There are those that lived, struggled, and died never knowing the pleasure of biting into the juicy, sun drenched goodness of a red tomato with just a little salt, or a bowl of strawberries with fresh whipped cream. Or the caress of a lover, the slap of an enemy, or the warm embrace of a bed on a cold winters morning.
I know that’s hard to imagine, all the billions of joys and defeats, triumphs and pain. We can’t do it easily. It’s hard just to be aware of what’s happening across the street. Across the street, like my neighbor Bob, how he lost his wife from smoking induced emphysema, how he lives next to his mom and took her away for the last hurricane, Milton. His struggles with health, and pain. His life playing on the coasts of Florida, fishing and staying up all night on the beach, huddled around a bonfire, with his friends, drinking beer and smoking what used to be much more illegal, back in the 1960’s and ’70’s. His loves, and children, and his profession. He was a contractor. A builder of homes for so many others to live their lives in. Will anyone remember him? I’ll try.
How about just all the lives lived in the life of today’s tree. I’d say it’s close to 50 years old. Oh, don’t worry, you can’t really tell, it’s so bushy, but there’s a tree in there.
I got it from Dragon Tree nursery in Palm City FL. From a man who I’ll try to remember and remember to my students and fellow bonsai friends, Robert Pinder. Robert is, along with Ed Trout, one of the last gentlemen of Florida Bonsai left. That includes me. I grew up in a rough city in Massachusetts, called Brockton, as a feral child, born in 1975, out exploring the world on my own or with friends. I never learned to talk to people (my sisters tried to tame me, they mourn the failure every day). I try to be nice but I’m far from a gentleman.
I first styled the tree during one of the pandemic era meetings we had for the Central Florida Bonsai Club. We held it at my nursery, outside in the sunshine. Safe.
Here we go, halfway defoliated.
Robert sold this to me for less than I paid for my first automobile, a 1966 American Motors Rambler four-door sedan (no, not the hot rambler, it was a family car. Single barrel Holley carburetor, in-line six cylinder engine, four doors, army green. I bought it from an older lady who owned it new. I miss that car, but it became obsolete. No parts, worn out upholstery. And I’m just a poor itinerant bonsai traveler from the projects of Brockton Massachusetts. At the time I had no money to fix it, not that I could fix it now).
Now we can see what we have. There’s some wire on it. I’m thinking it’s been there since late 2020. Hmmmm….wire. Brings me back to my first Central Florida Bonsai Club meeting.
Here’s a cautionary tale. A famous (at the time) bonsai guy from Canada came down to tour the state and the club hired him to do a critique/help session.
It was my first meeting, and it was a cute couples first meeting too. They were waiting their turn, with a small schefflera held between them, like a child sitting up on the table. They looked so proud, bringing their tree in to get help from this “master”.
He was up at the front, and the tree was placed in front of him. He picked it up, holding it with his fingertips and turning it around, peering at the pot and the branches. Almost like he was examining a turd, trying to find a clean end to hold it.
He proclaims, in his best expository voice, projecting to the rear of the room,
“Well, we don’t have this in Canada, or we might, but we don’t consider them ‘bonsai'”
You could see the couple slowly deflate like those giant, blow up snowman holiday decoration on January 2nd when people start to take them down. The bonsai artist continues,
“I’m not sure you can even wire these, and I do believe that wire is necessary for bonsai…”
“In fact, I like to call these ‘Mutt Bonsai’, meaning they look like bonsai but really aren’t”
That poor couple took their tree and sat down, heads lowered and eyes averted. I never saw them again.
There’s no place in bonsai for that pomposity.
Anyway, I took all the wire off and now it’s time to prune again and rewire those branches that I’ve let grow. This is the growth tip.
In case you’re curious, when I begin a blog, and as I write it, I research. Here’s a snippet of the type of papers I read:
“Attachment of branches in Schefflera is unusual in that it involves fingerlike woody extensions that originate in the cortex and pass gradually into the woody cylinder of the parent shoot. We tested the hypothesis that these structures could be roots since Schefflera is a hemi-epiphyte with aerial roots. These branch traces originate by secondary development in the many leaf traces (LTs) of the multilacunar node together with associated accessory traces. In the primary condition, the LTs may be described as cortical bundles. Leaves are long persistent and can maintain a primary stem connection across a broad cylinder of secondary xylem. Under the stimulus of branch development, the LTs form a template for secondary vascular development. Because the LT system is broad, with many traces, the branch attachment is also broad. The fingerlike extensions are attached to the surface of the woody cylinder of the parent stem but are progressively obscured as a continuous cambium is formed. Bark tissues are included within the branch axil because of the extended cortical origin of the initial attachment. The results are discussed in the context of branch-trunk unions in tropical plants, an important component of canopy development.”
A what they call a “scholarly” publication, meaning that when you research a subject, put in whatever you’re looking for and add “scholarly” and you’ll get primary research papers, by real scientists doing real science work.
This one branch decided to grow the most of any branch. It’s fortuitous as the branch is in good proportion now, instead of a skinny shoot.
That’s what we want. You could say that the practice of bonsai is just: cut, wire, grow, unwire, cut again, rewire, let it grow. The one thing, considering all the aging techniques we have available to us, we can’t fake is the element of time, which is demonstrated by the concept we call “ramification”.
How do we get there? We cut the growth tips, which then causes back-budding, and a branch goes from one, to two, to four, to sixteen. In bonsai, those layers of ramification are called:
Primary, secondary, tertiary.
Cut, wire….
The debris after all that cutting. Thats a thirty gallon pot (what they call a “number 30” in metric system nations) easily halfway filled with schefflera.
Wired up and made pretty.
That night, I went to see my friend Jack (on the left in the red coat playing guitar) in his new band Afterglow).
He’s a great player, with great feeling. And his knowledge of music allows him to figure out a song just by hearing a few chords. Music is akin to math, notes and progressions follow certain rules and you can figure out a song if you understand this. Much like botany.
Jack has been playing professionally since he’s been a kid. He’s been in several original bands, and cover bands (he was the founder of the central Florida area band called Papa Wheely). He’s seen more faces than Bon Jovi, and has rocked them all (sorry, had to make the joke). I appreciate him and try to see him play, no matter the band or the song.
His life, though ordinary, is also exceptional. If you take all the ups and downs, he may give more weight to the one or the other, but to live at this time, in this place, is a privilege. And he has fun.
As do I. As you should too. Take pride in the small things, because it those are the things that make up the big things. Learn that b sharp minor chord, learn the bass line picking technique. Then you can play along when I play the songs too.
I’ve been asked how I make an omelette. Here you go.
Save the recipe
To the young @bonsai_evan
“Three eggs, beaten, but not like the stepson, just like the middle child. Then salt and pepper to taste.
In the pan, use more butter or margarine than you think.
Enough chopped ham to heart, and cook about 39-57 seconds. Just enough to make that poor pig’s mama sweat.
Add eggs and fold in that excess butter into the egg. Omelet-ize it. Let it set on the fire (by the way, if the fire isn’t on high, then have them make your omelette at Denny’s). Keep jiggling it until the top undulates like a belly dancers belly, then add shredded cheese.
Let it warm up until the cheese is about melted, but still wet, then fold it onto the plate. I prefer to fold it in half. If you’re fancy, fold it in thirds. But that’s just snobbery.
Farmhouse style for me. Let sit for about the time it takes to wash the frying pan and make your coffee.
If you take your coffee black, firstly, you’re probably a psychopath, secondly, that means you know how to mask, so pretend you’re fixing coffee like us normals, with three spoons of sugar and some type of dairy.
Go to the table, use a fork you animal, and enjoy.
It should be brownish on the outside, but wet, almost like a cheesy, buttery, eggie sauce, on the inside. You’re welcome.
What we used to call a “Shefflera aboricola” back when I grew up in bonsai, has now been renamed to the oddly hard to pronounce “Heptapleurum arboricola”.
This time it was actual genetic testing that changed the eggheads minds. But, to quoth Kipling, “it’s not ours to wonder why, only to do, and to die”.
This morning at 4 am, myself and the best bonsai artists in Florida (yeah, what the hell was I doing there, right?) picked up the bonsai on display for the 2025 Epcot International Flower and Garden Festival. The trees were there for about three months, outside in the Florida heat and rain, on view to about 4 million viewers as they passed through the Japanese Pavilion in the World Showcase at Epcot.
That’s another tree that was on display, a Neea buxifolia. And that’s Rosie Posie Puddin’ Pie, the cat.
She kisses all the boys and makes them cry.
And the schefflera.
What’s the work today? A hard cut back and defoliation. Then a repot.
It’s been eating up all the Florida sunshine for the last few months, and it’s bursting and ready for some work.
It’s about to walk out of the pot.
The question is, I’m sure, why do you feel the need to defoliate?
It explains more precisely what defoliation does. But basically, the tree does things, like grow, flower, drop leaves, etc., because of hormones. All because of hormones. Some people say “energy” is what causes growth. But no. Nope. Nada. Energy facilitates growth. But a tree will grow itself to death. It will use all its energy without anything left, and it will die.
Why? Because of hormones. So when we hear “them” say that by utilizing a specific pruning regimen of techniques, they are “balancing the energy, what they are really doing is utilizing the hormones to make the tree grow a certain way we find favorable.
By defoliating, first, we are taking the trees ability to feed itself. Therefore, the hormones cause growth of new leaves, and, by proxy, more branches.
But, if we cut the terminal buds (like the blue circled branch below) and remove the hormone that causes branch elongation, we will free the hormone that causes backbudding to cause, well, more backbudding (auxin and cytokinin, respectively). Go back and read that post I linked earlier.
If we defoliate, and leave the terminal bud (like the red circled branch above) the branch will get longer.
Now to prune the aerial roots. I know, I know, we like aerial roots.
But we also like to have a believable tree. And aerial roots this high….
…don’t make for believable banyan trees. An artist isn’t a camera, we don’t have to copy nature as it grows, we show you what should be, or could be, or, simply, what we see.
Snip snip snip!
Getting close.
Take a look, from all sides.
That’s a lot of leaves. Looks like an explosion.
Needs some wire….
And a “quick” repot. Remove the old moss, save for later, it’ll green up again.
Maybe the repot won’t be so quick. Those roots are rooty.
Old bark on on a big sheff. Looks old, like my face in the morning after a night out.
Or just any morning. I’m getting old.
Yeah, this will be a chore removing the tree.
DOH! Actually not bad. It just popped out.
The damn thing is heavy and I’m alone in my driveway, that ain’t gonna work.
That’s a better setup. Now for the hook
THE HOOK! A new product made by my friends at American Bonsai Tools, based in part on my handmade hook.
Makes for short work.
I’ll tell you what, the fragrance from a schefflera will clean out the nasal passages
The Central Florida Bonsai Club, my club in Orlando, has been representing Florida Bonsai at this festival for several years now.
I like to go for the day and work one of my bigger trees to show the public that bonsai don’t need to be, or are limited to, small hand-held trees.
This year I brought a Ficus microcarpa. Just the plain species. Not tiger bark or green island or melon seed. Here’s how it looked after I cut it to a line way back in 2013.
I got the trunk from my good friend Ronn Miller, a Florida bonsai artist of great renown.
The link below shows a previous blog post on the tree:
Defoliation, unwiring (I think I did that already) and pruning for shape/taper/ramificatiom, and rewiring of course. But not every branch.
Sometimes that’s needed, wiring every branch, but most times it’s not. I had a former friend who insisted on wiring every branch because that’s how he learned (he watched a video on YouTube that told him to ALWAYS wire every branch, and he was a paid subscriber to this channel, so he obviously has to do what he’s told, cuz it’s worth more to him. I wish I had a simple mind like that. I have to question everything. Just last week I was tying my boots and I wondered if they’d be tighter if I used an overhand knot instead of a sideways, underneath knot. Took me 15 minutes to tie my boots…..
If you’re looking at the leaves closely, you’ll notice the white build up on some of them.
Like above. I see this question a lot on the bonsai forums: “What is this? Is it harmful? How do I get rid of it? “
It’s usually just water spots from dissolved solids in your water. Like calcium, or lime. If it’s red or orange, it’s iron rust. it’s not harmful acutely, just ugly, but it could be a problem if it’s built up so much that it blocks the sun and restricts photosynthesis. And how do you get rid of it? You can polish the leaf, or use leaf shine, or, like I’m doing, cut them off. A ficus can hold a leaf for up to three years (it’s a tropical, broadleaf evergreen). But you can defoliate one, as long as it’s healthy, up to four, five times a year. I usually do at least twice in my normal maintenance. If I’m really pushing a tree, 3-4 times.
Anyway, I have a bunch of leaves. Let’s see if I can count….
There we are. I counted 2,713 leaves.
Actually no, but that’s a good number. It’s a prime number (only divisible by itself) and sounds good saying it out loud
“two thousand seven hundred and thirteen”.
Sounds like it belongs in the first, or last, sentence in the Great American Novel:
“In the year two thousand, seven hundred and thirteen, the hero man was born.
Or died.
It was a time of illogic and lost tales, with many great humans born or killed. Some by the hands of evil men, or by their own hands as the era was one of pain.
The world had just gone through a bloody interregnum, accented by war and famine, city and states wiped off the countryside and built up into empire. Cultures distilled out of the quirks and pathology of a leader, or group.
Our hero begins the day chopping wood, collecting water, and making tea.”
I’d read that book. Maybe I’ll even have to write it.
Let me finish this post first. The branch my hand is on has risen from its original place in the design.
So that’ll need to be wired back down.
That’s the life of a ficus bonsai owner: put the wire on, take the wire off, put the wire on, take the wire off.
Anyway, enjoy the next twenty following pics of me pointing at various parts of the tree.
Straight lines must be made curly.
Some things gotta go.
I just realized that in the background of these pics, you’ll be seeing a pretty detailed accounting of certain attendees visiting the restroom.
Now for wire..
For the sake of a good anchor, one should try to wire two branches with one wire.
Always start in the branch crotch (I just learned that “crotch” is a word first used to describe the meeting of two branches, or the trunk and branch, and not the area between your legs).
And wire one side clockwise, and the other counter clockwise.
There’s a straight line that’s offending my eye.
I know I need to wire three branches. I’ll use two wires.
This will let me put two wires on some branches, to give better holding power.
Then the bend.
I usually use two hands to bend, but that’s hard to hold a camera, and bend. Pretend my left hand is steadying the branch.
There we go, one done.
Now for the rest
Zooming in, you’ll see wire marks. One of my favorite bonsai lines comes from an English man, he said “I’f’n you ain’t got no wire mahks, yer not using enough wire”.
Say that in a John Lennon accent.
Should you find yourself with too many wire marks, you can scrape off the ridges with a blade.
It mitigates them and makes the branch look gnarly.
And chicks dig scars.
And that’s it.
A video from the top
There’s just something satisfying in wheeling a tree around on a garden cart.
Walk this way!
We all have to walk the path we see before us. Sometimes we cross others paths at the same time they’re on it, and sometimes those paths parallel each other. Relish those times of a companionship, but realize you can’t get off your own path.


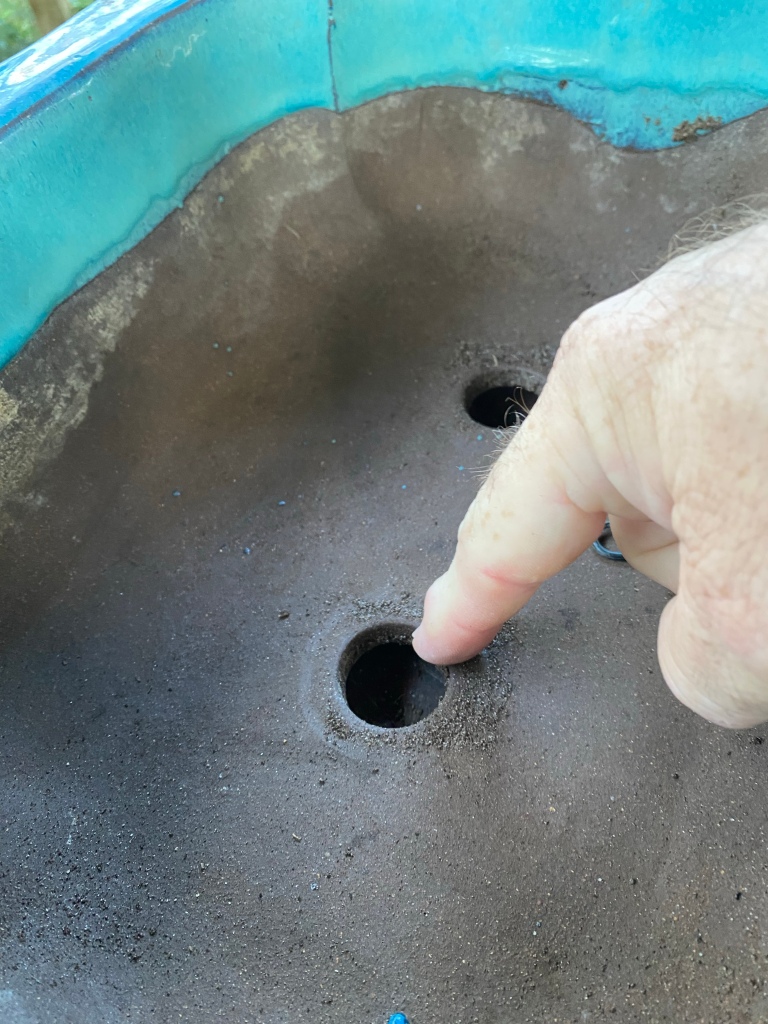
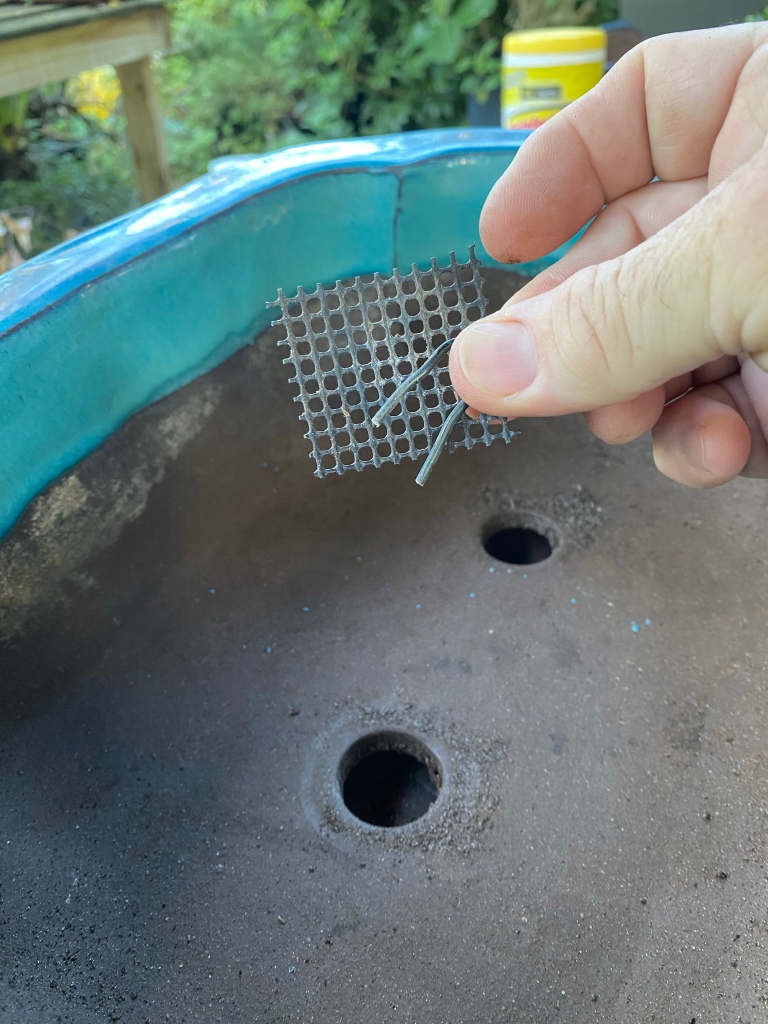


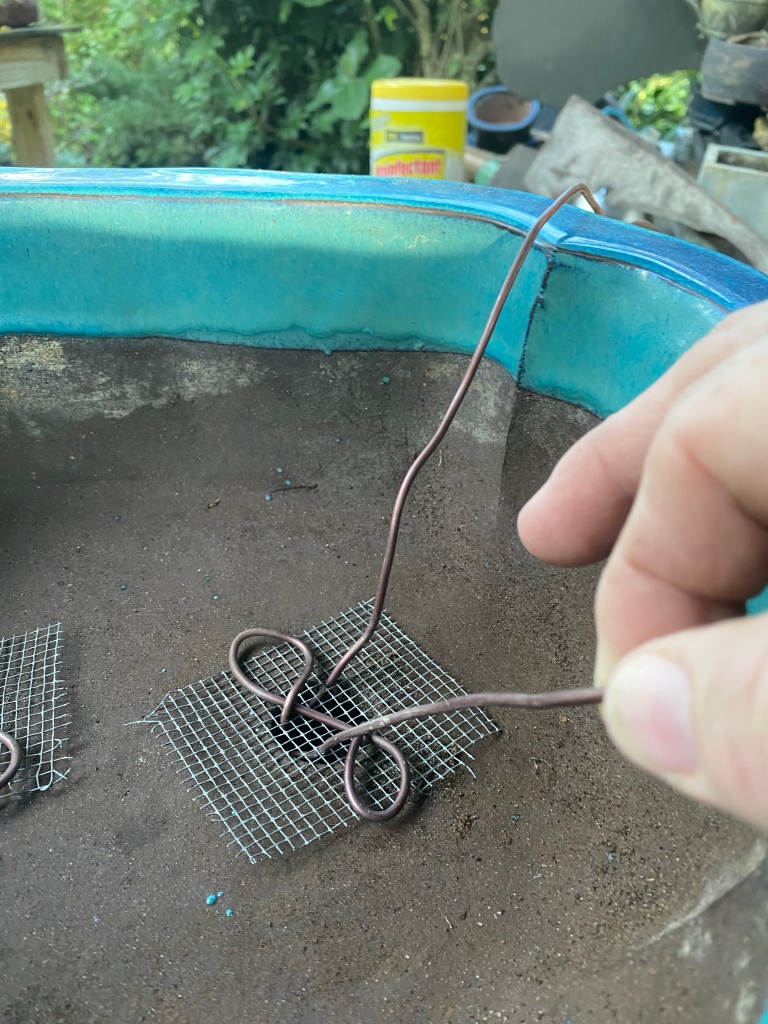


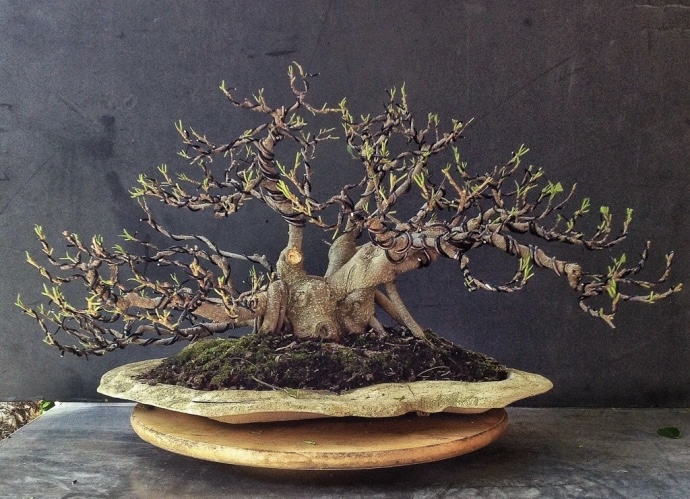


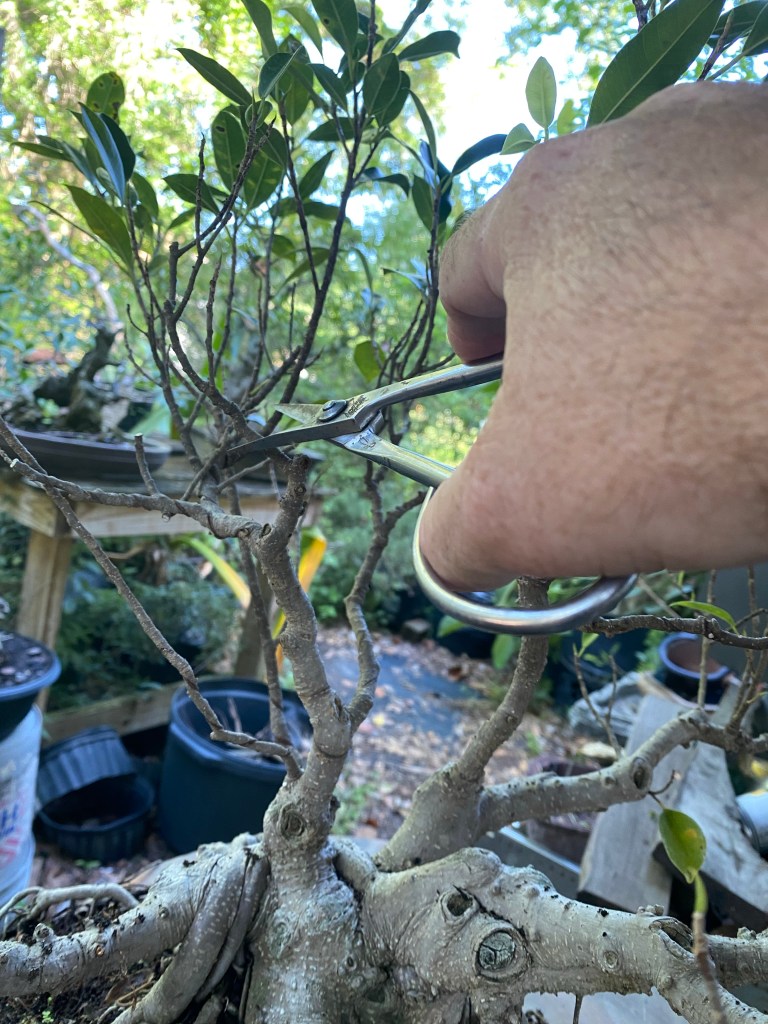


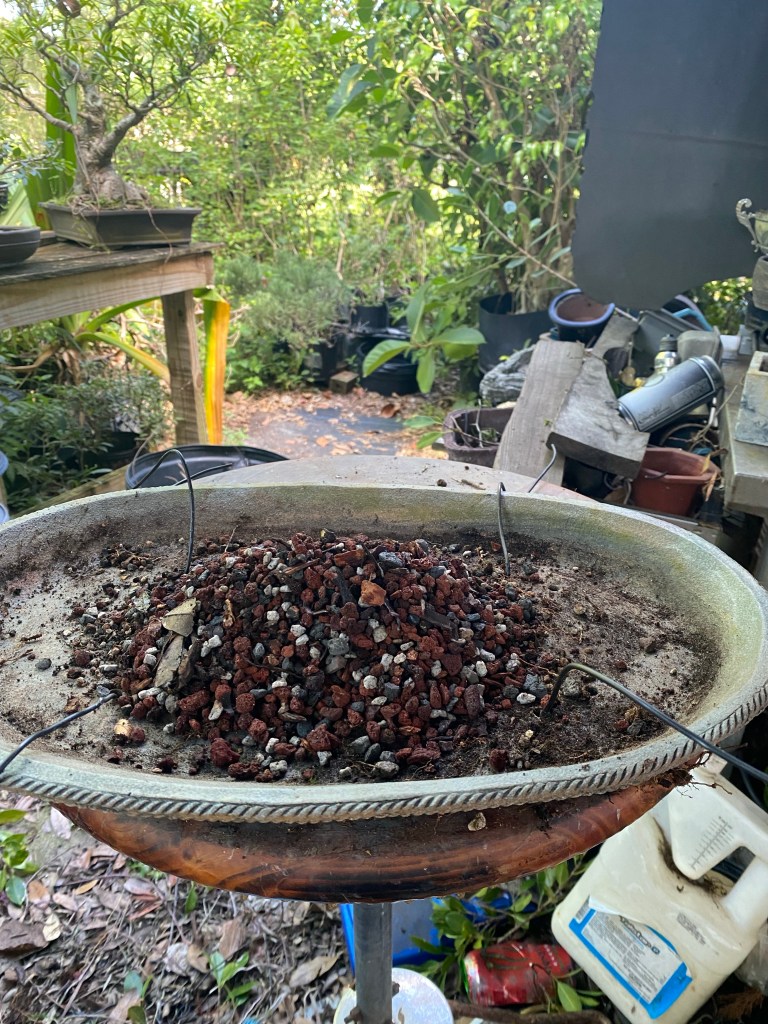


 , just like the old days. Here’s the tree, a willow leaf fig (Ficus salicaria, ofttimes erroneously called Ficus nerifolia, or F. salicifolia, or whatever it was called when you grew up in bonsai).
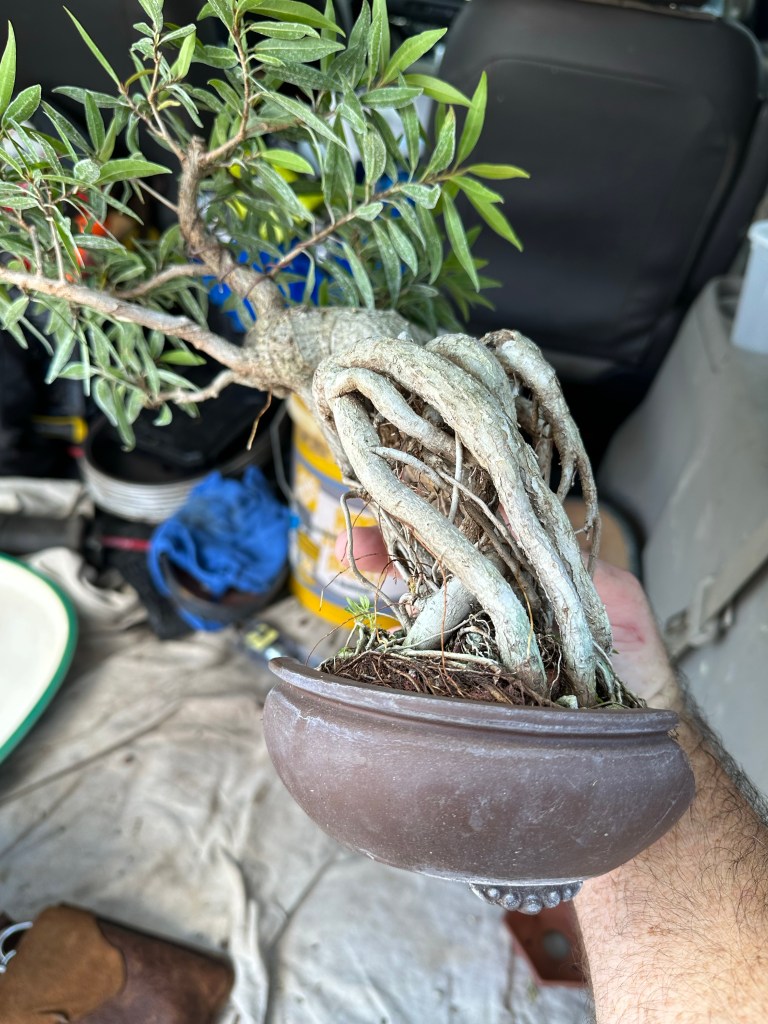


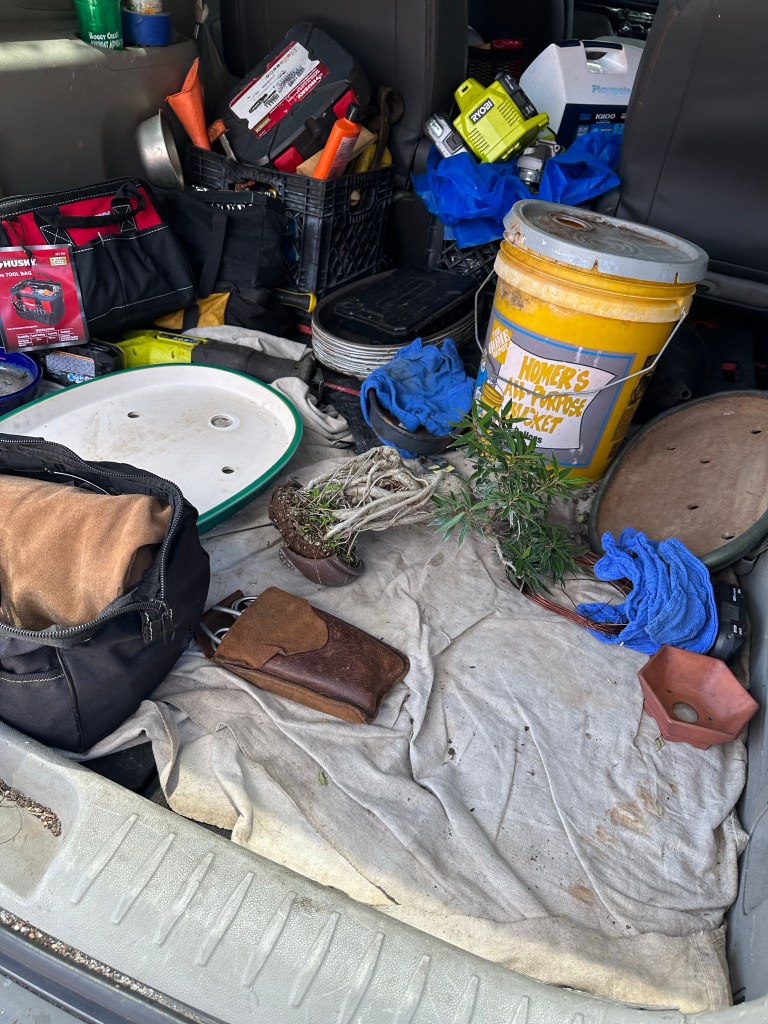
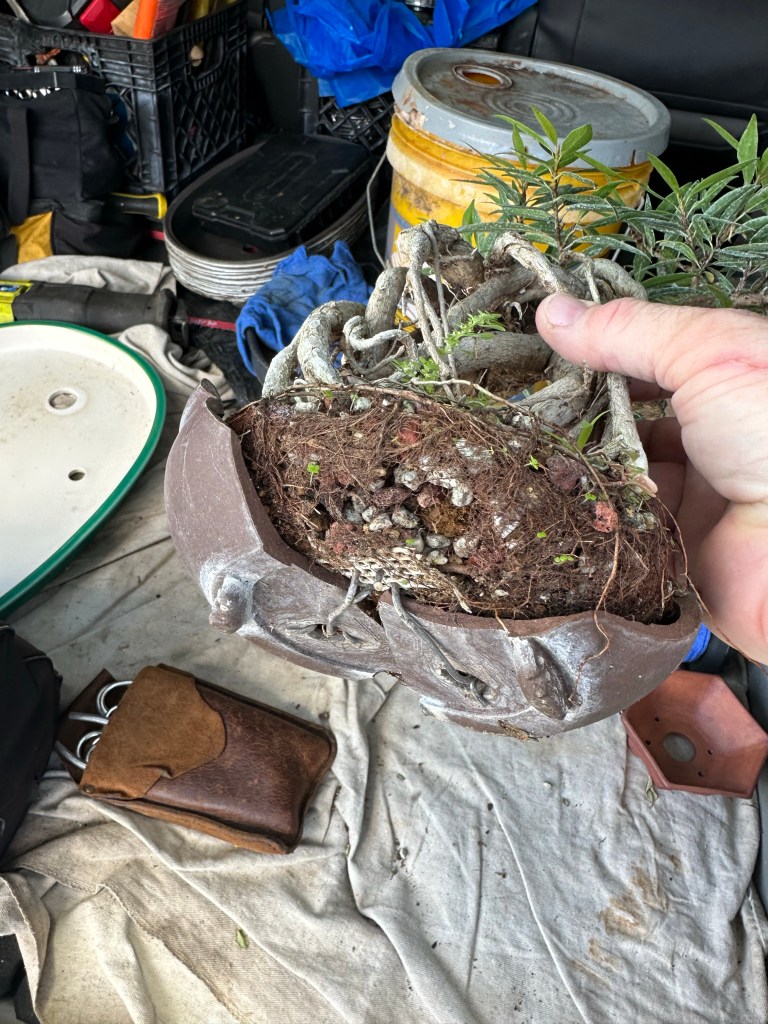
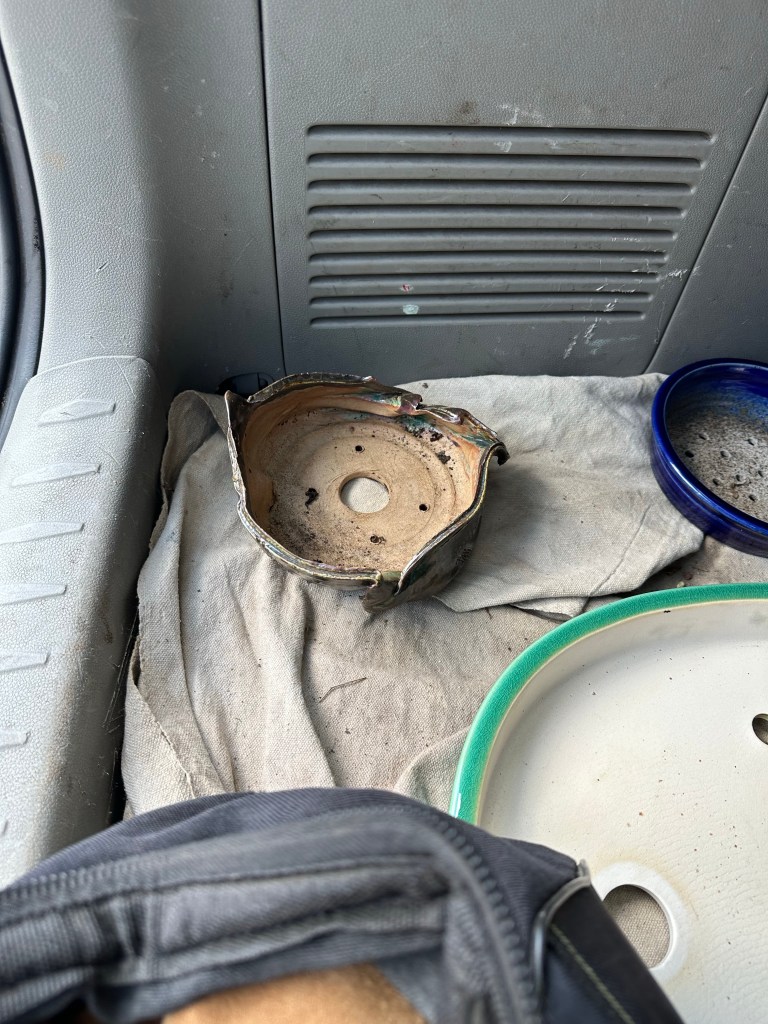
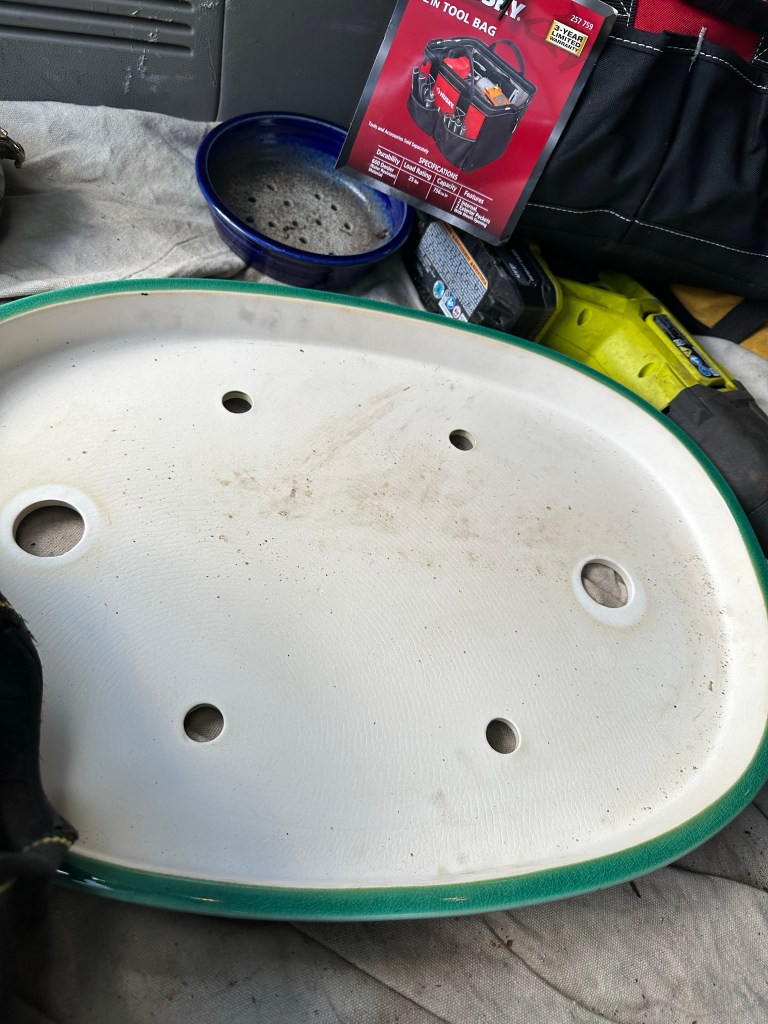
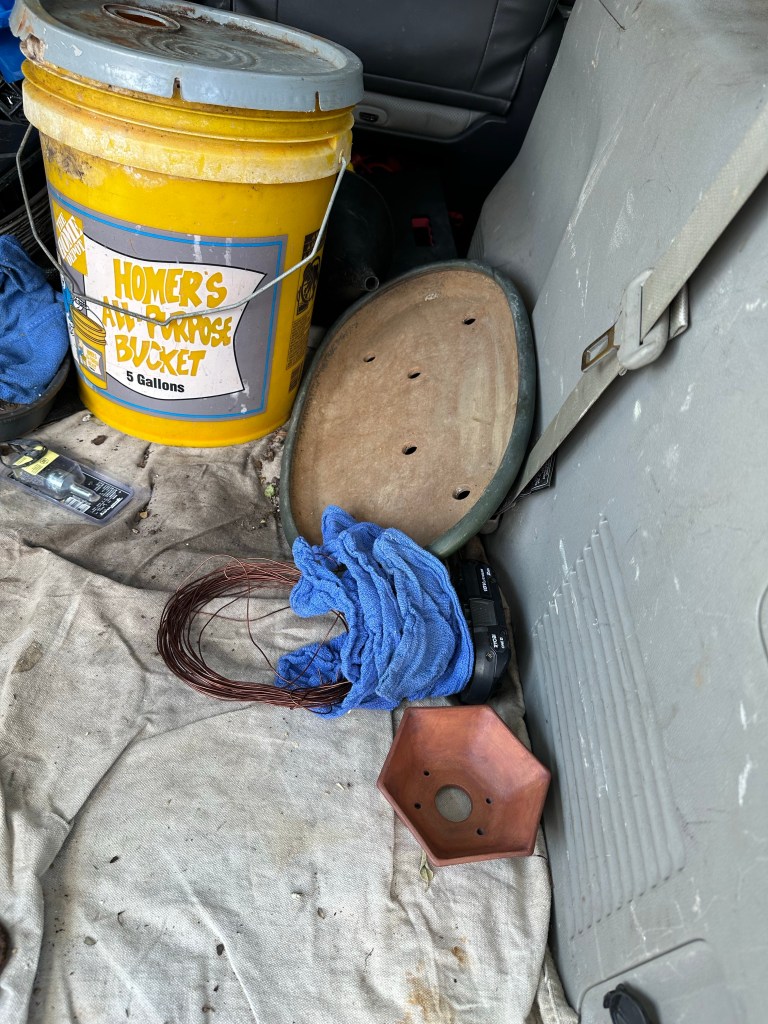
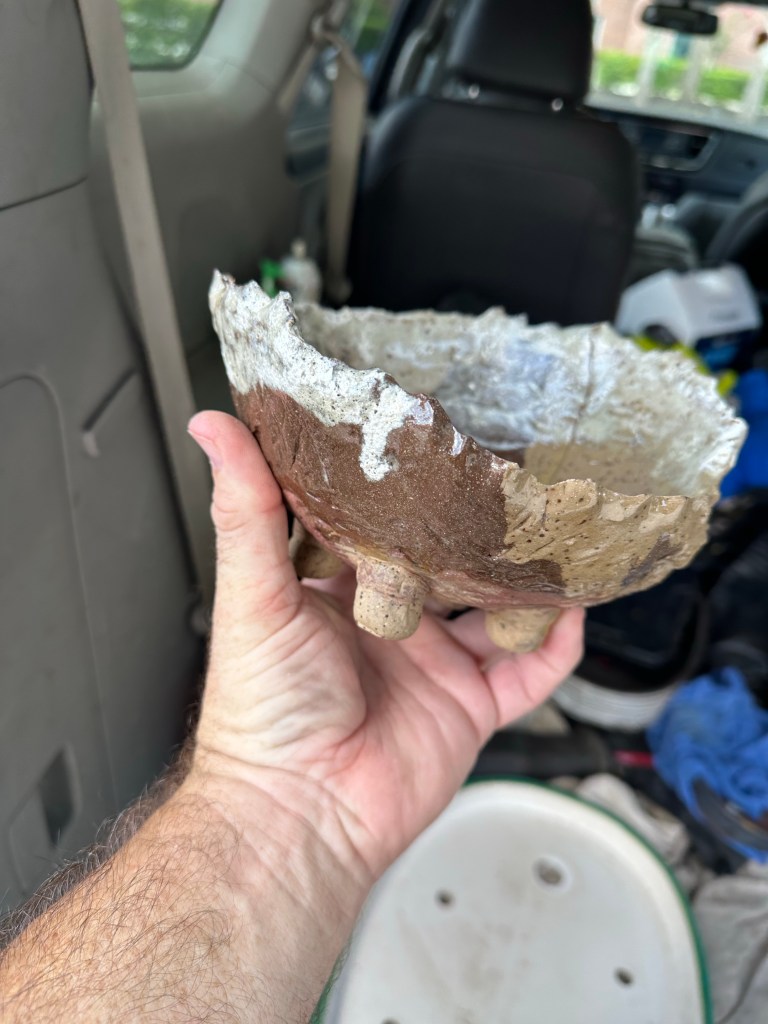
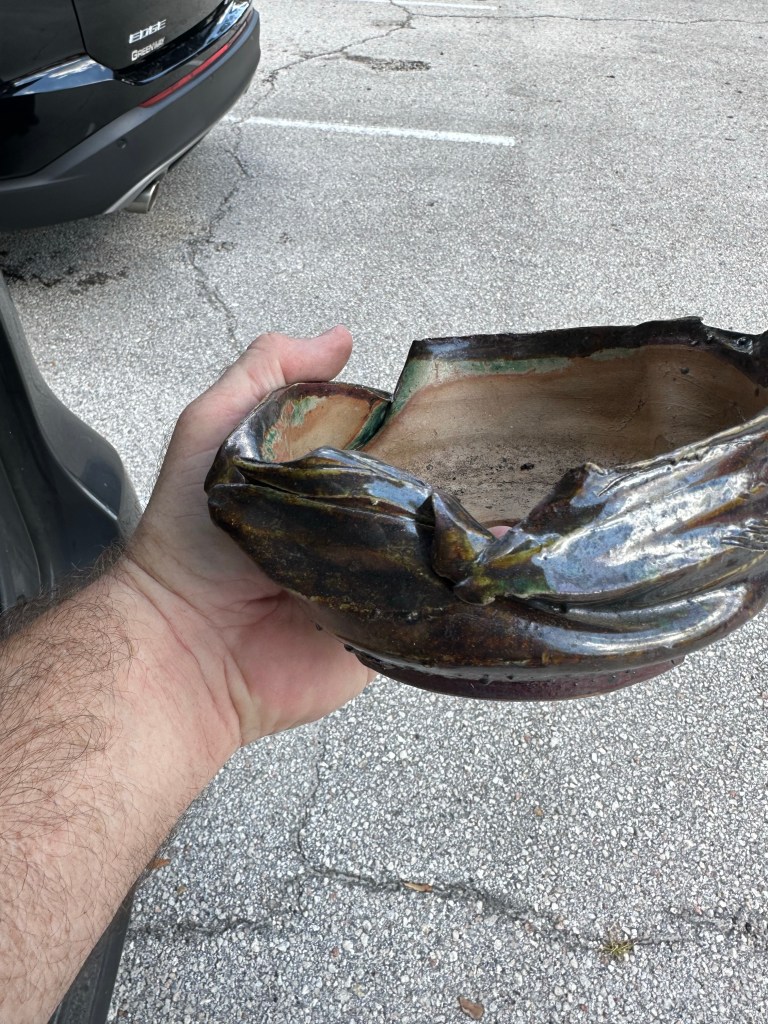
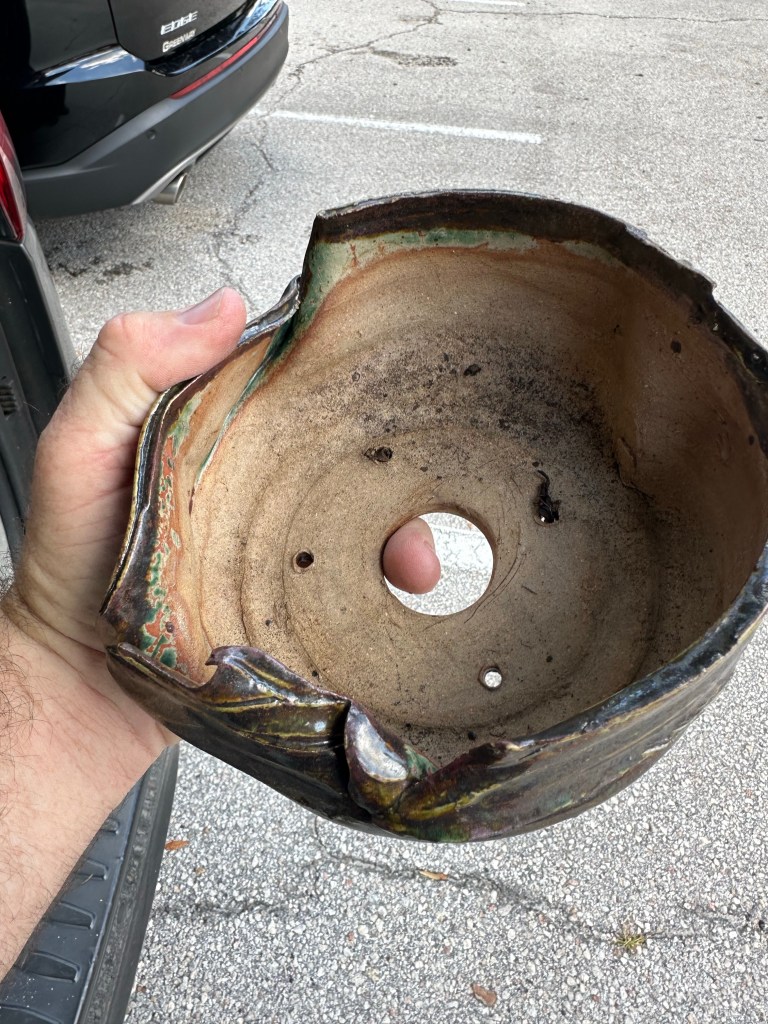

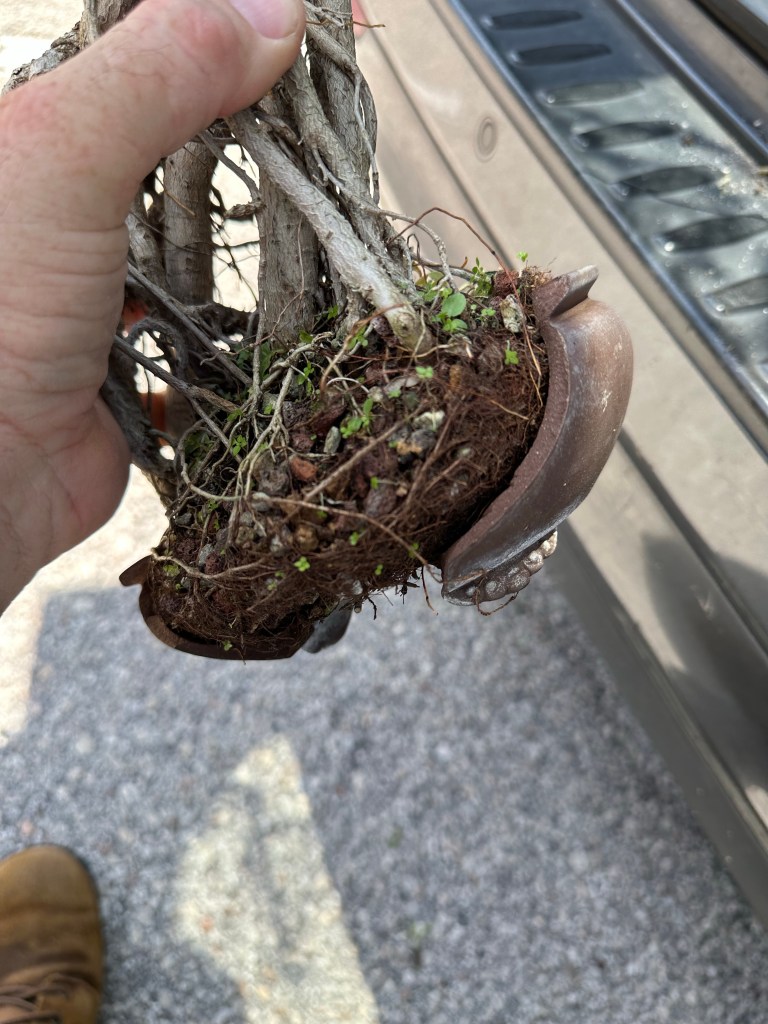

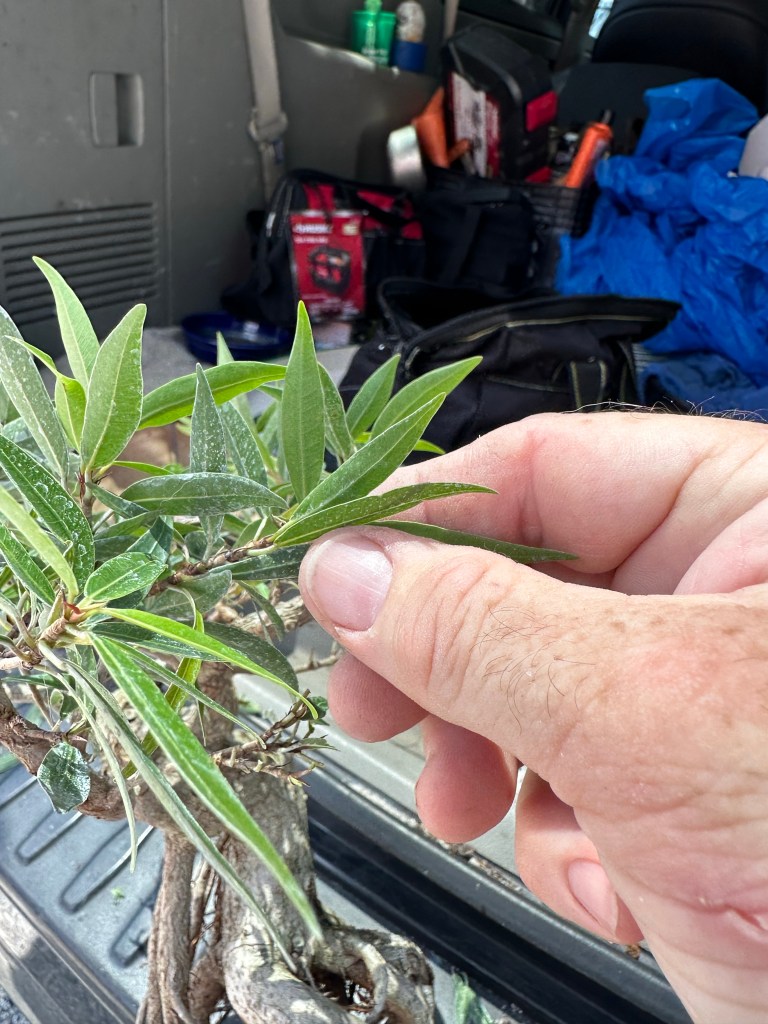
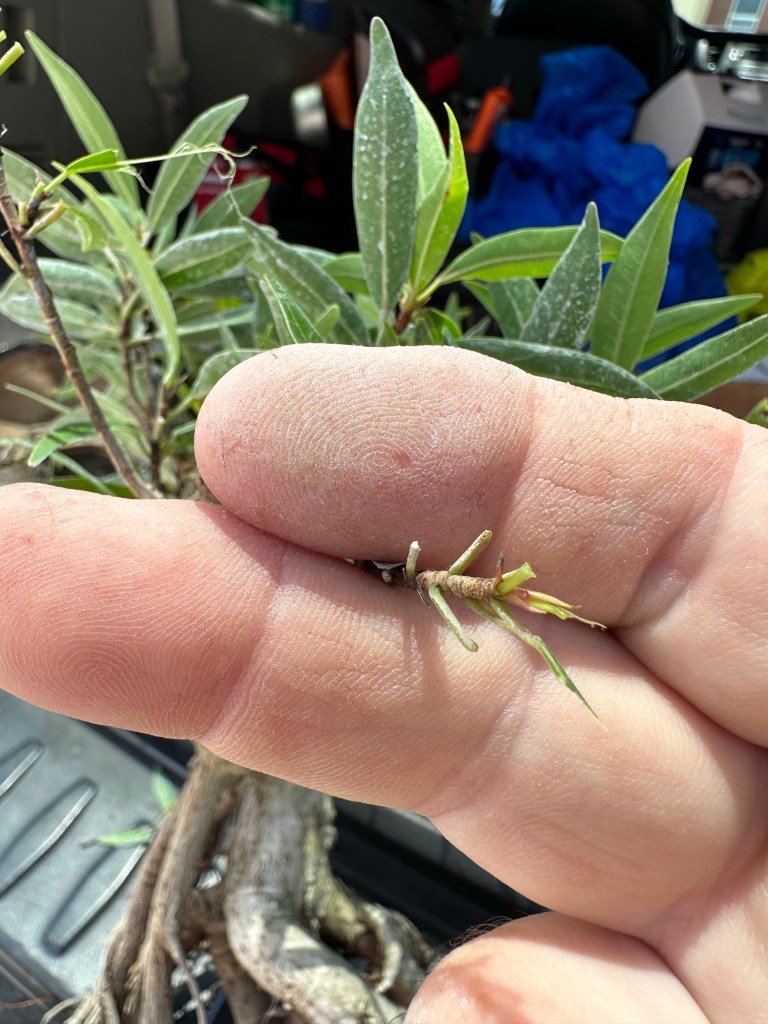
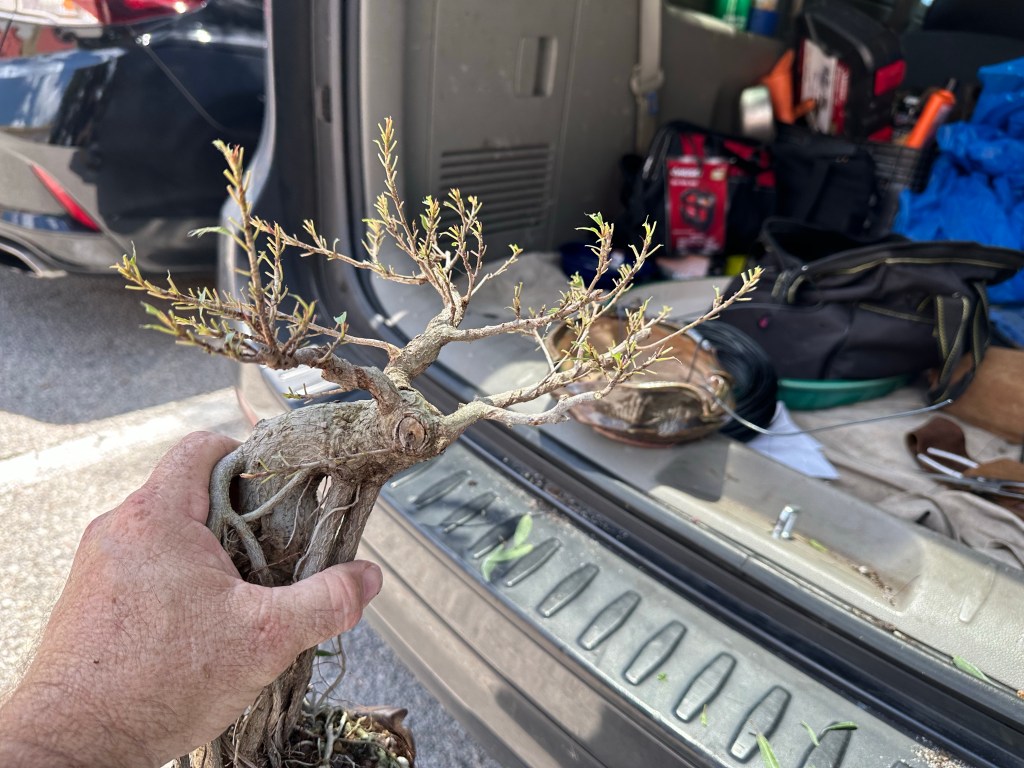
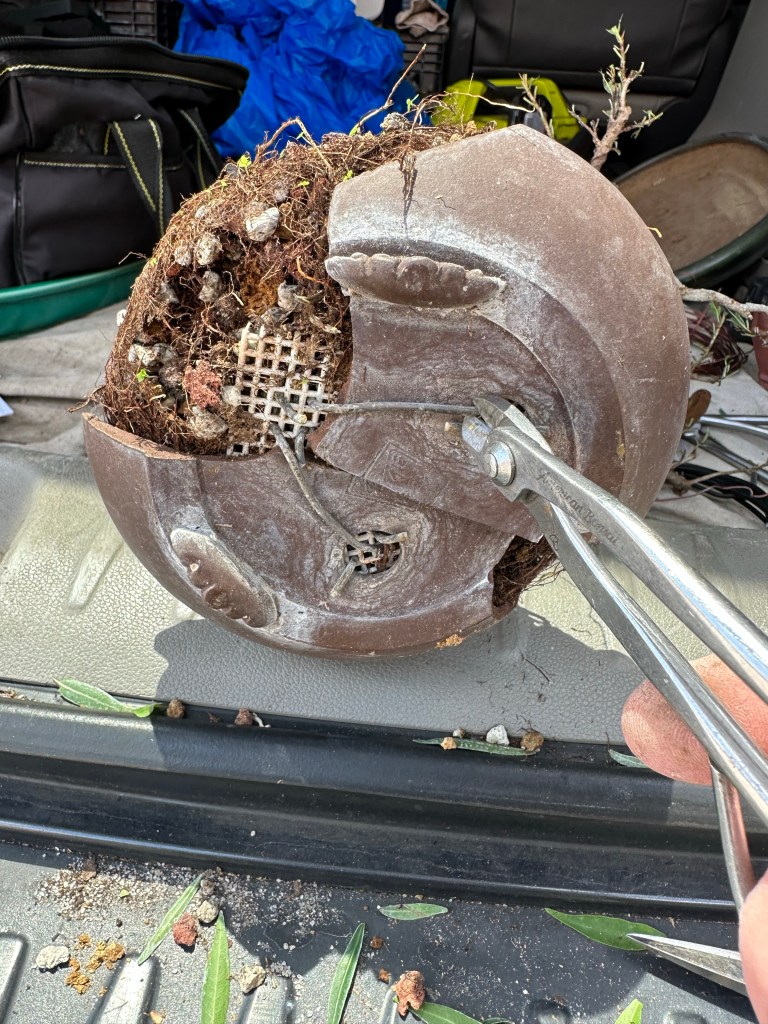
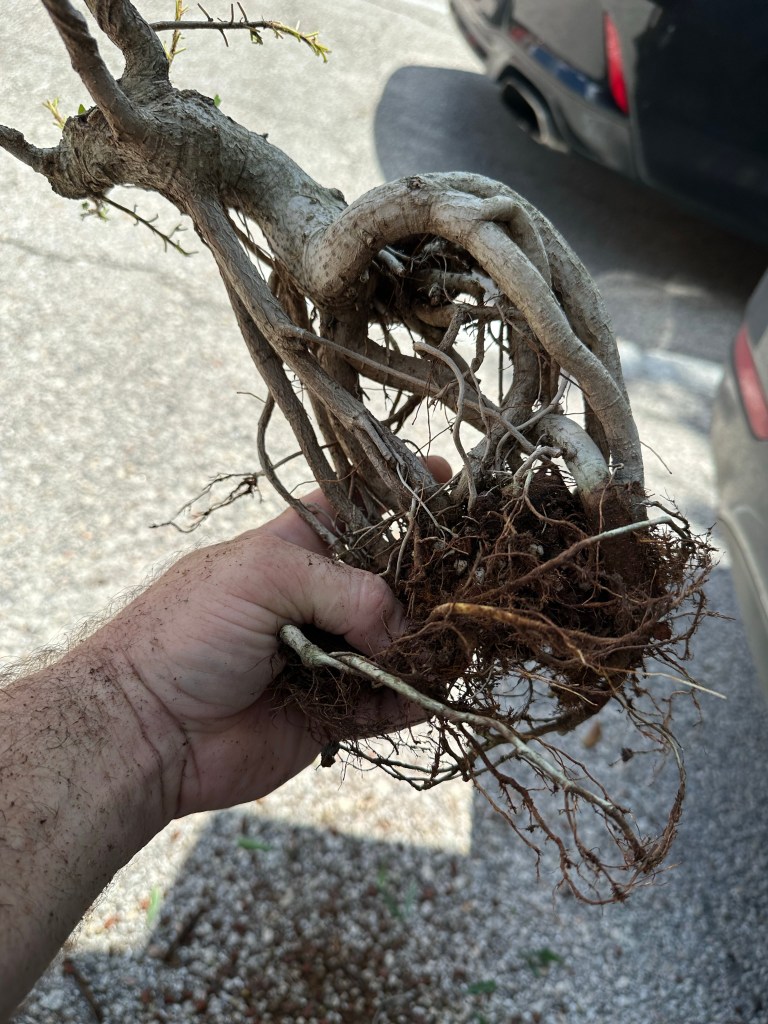
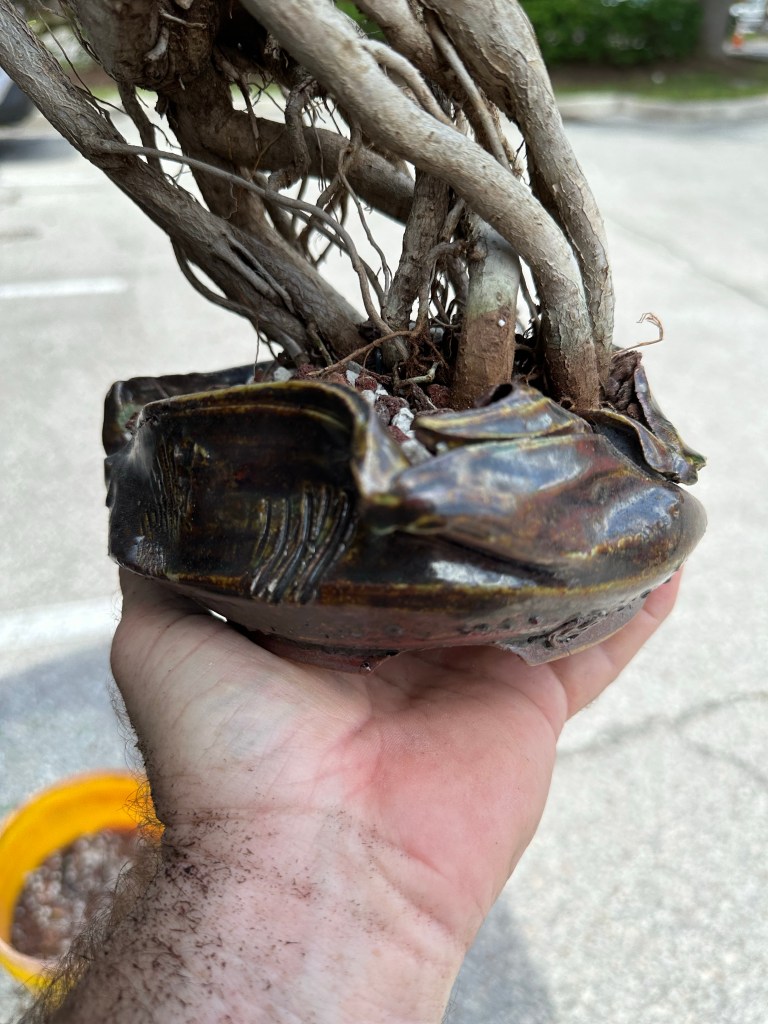
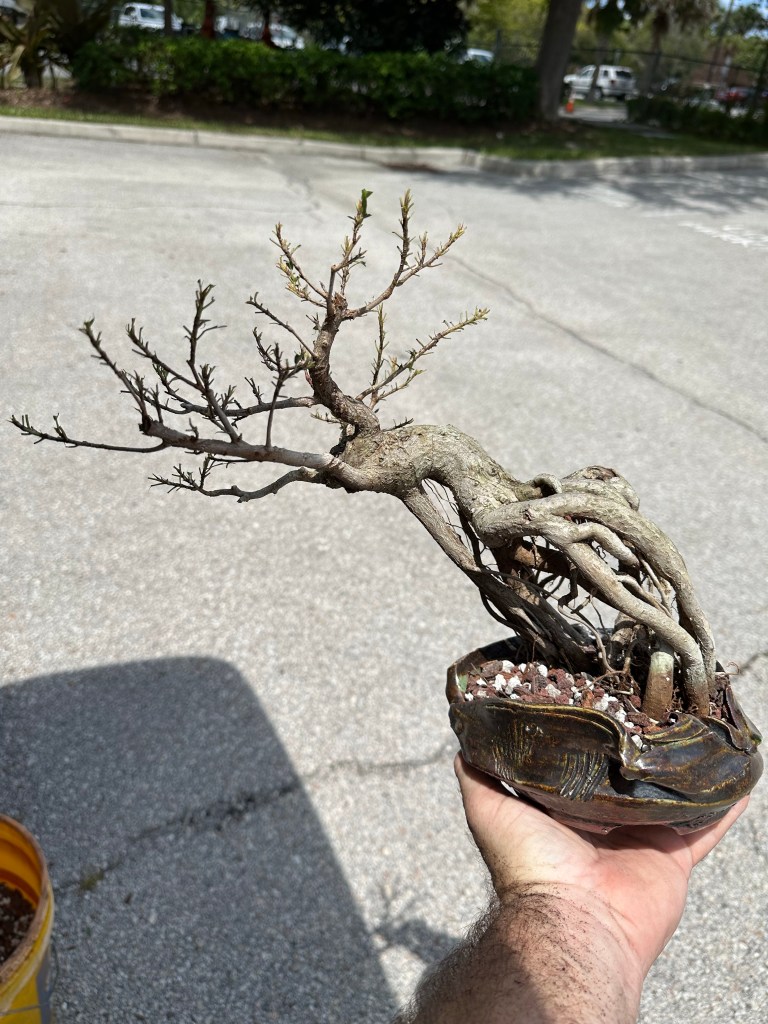

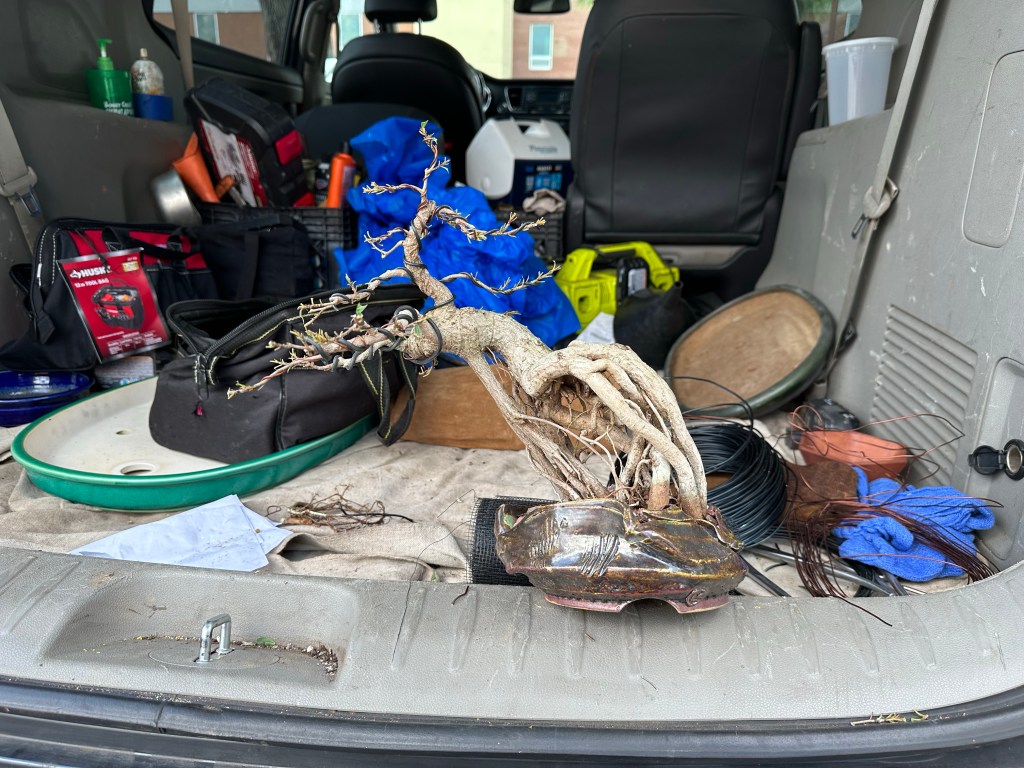
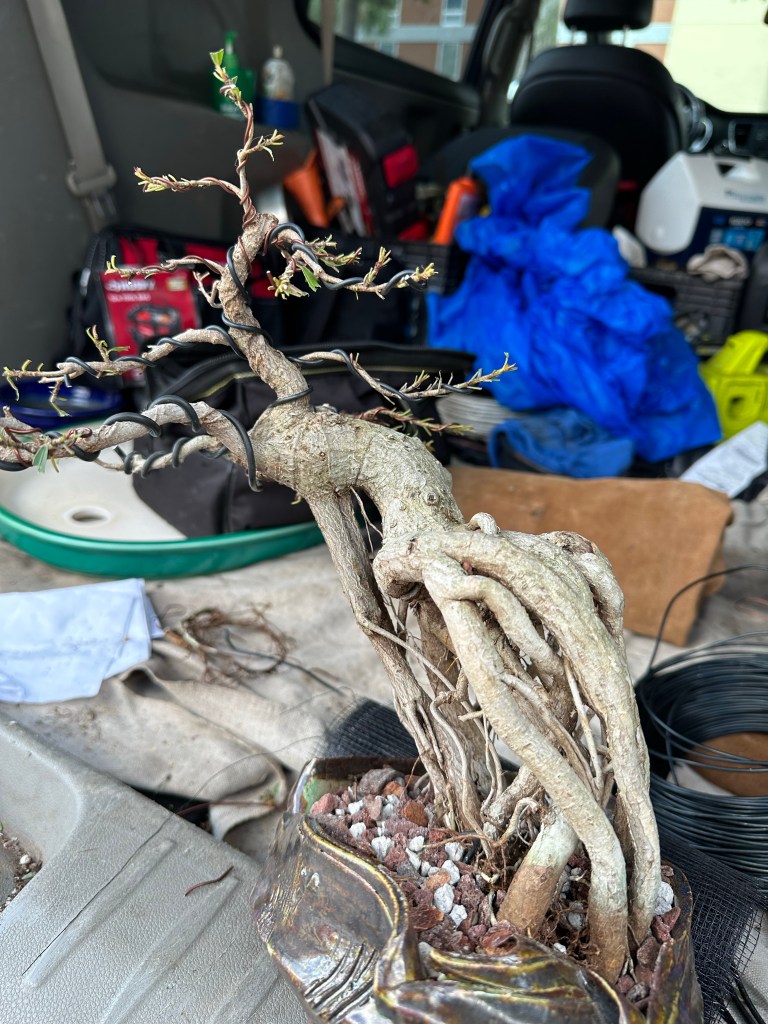
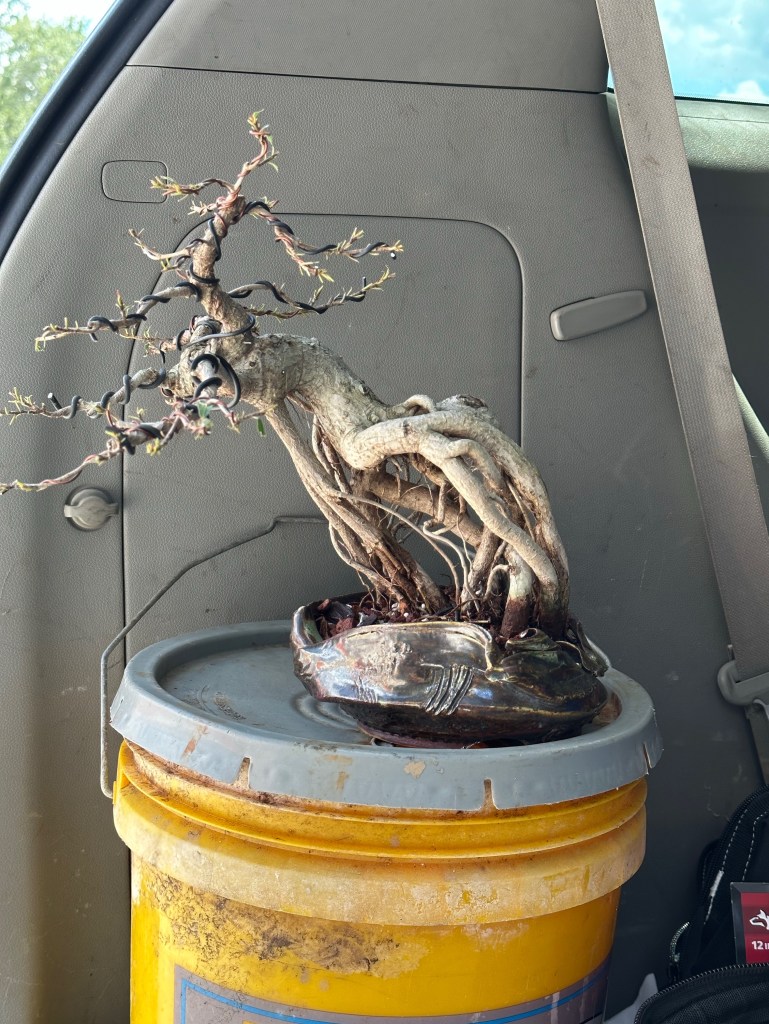

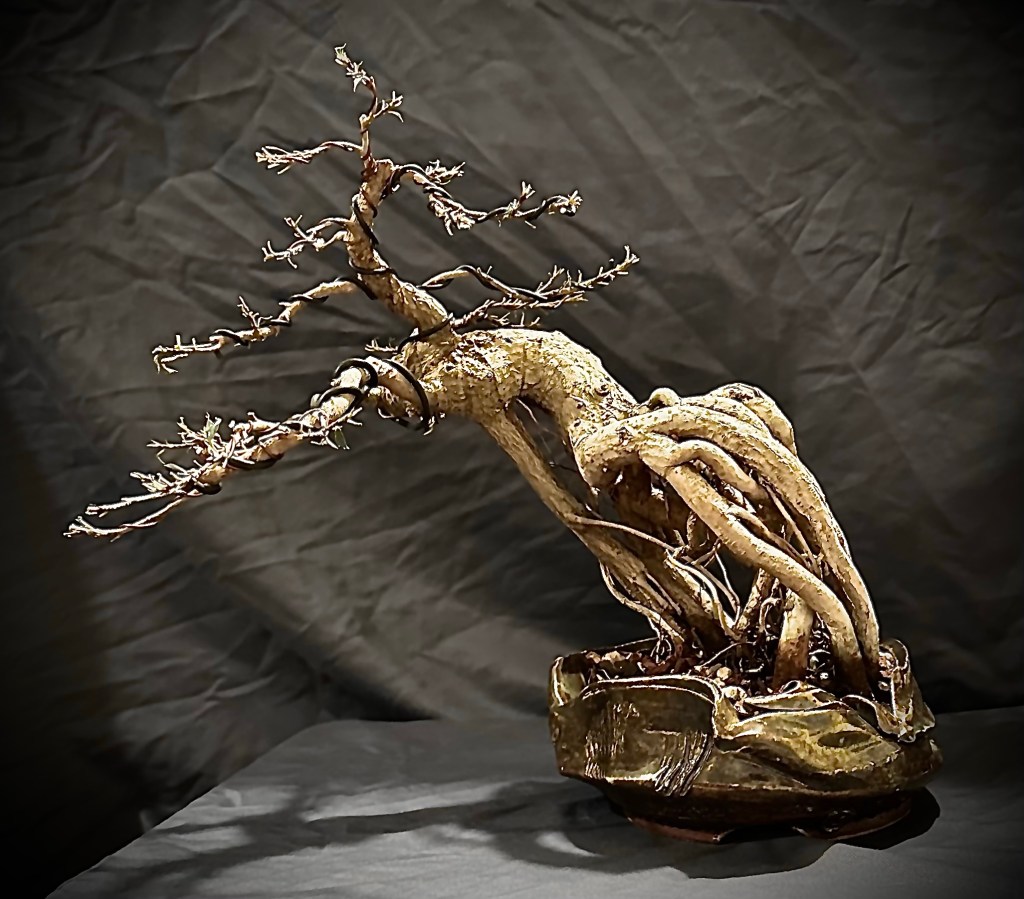


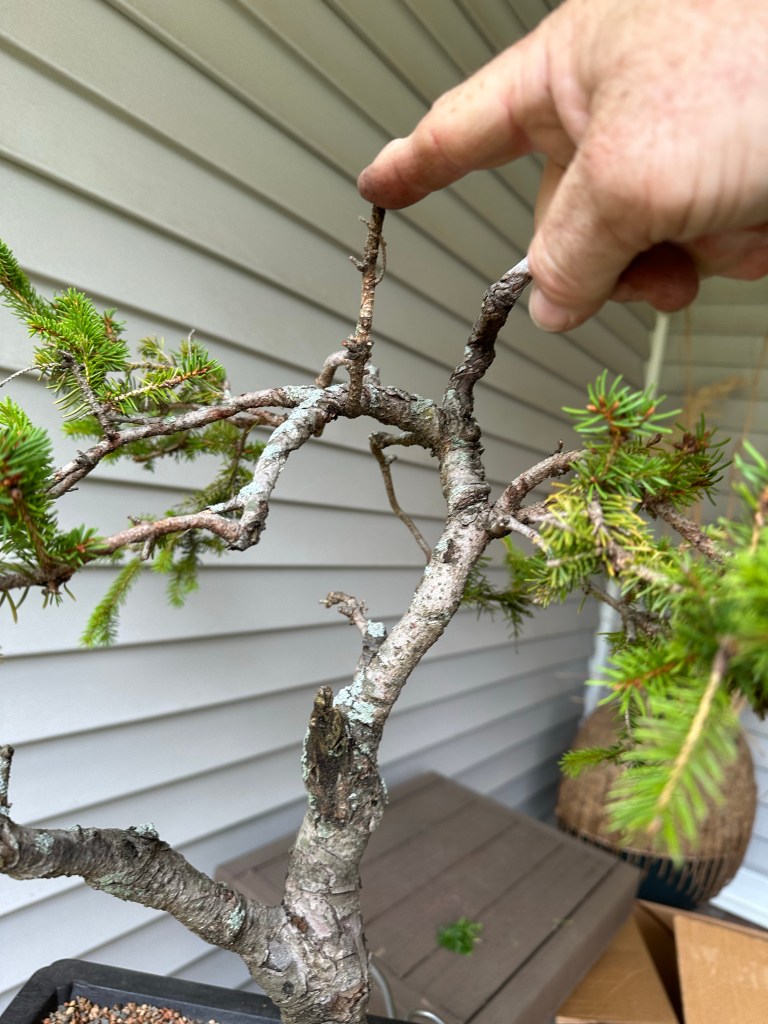
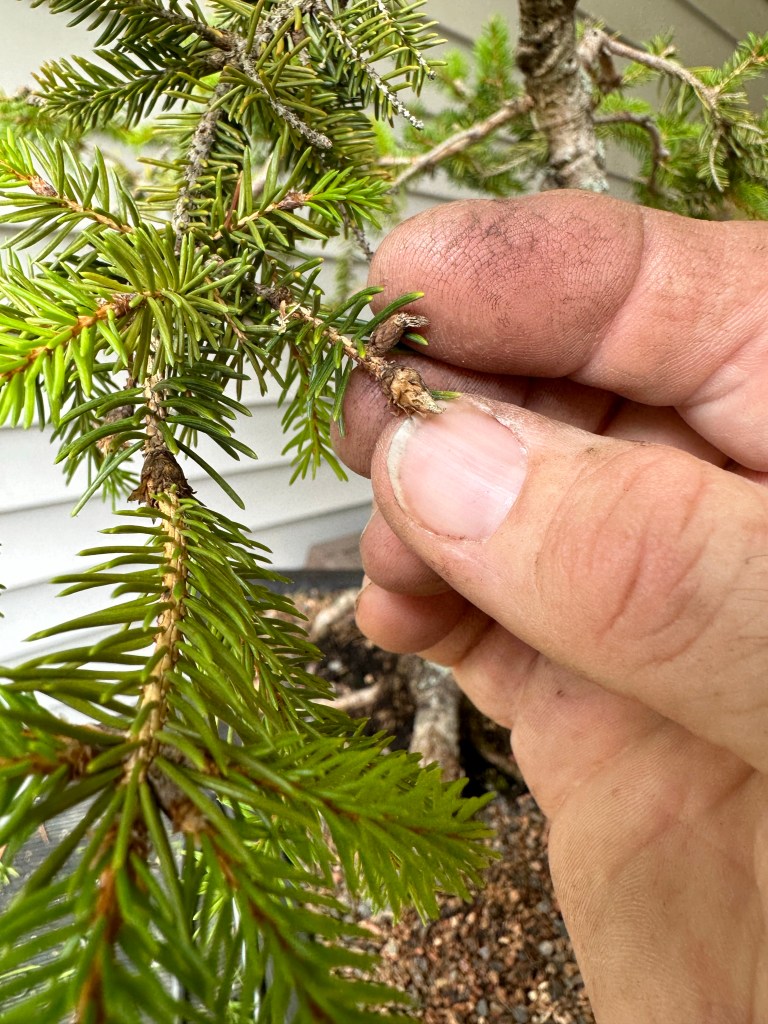
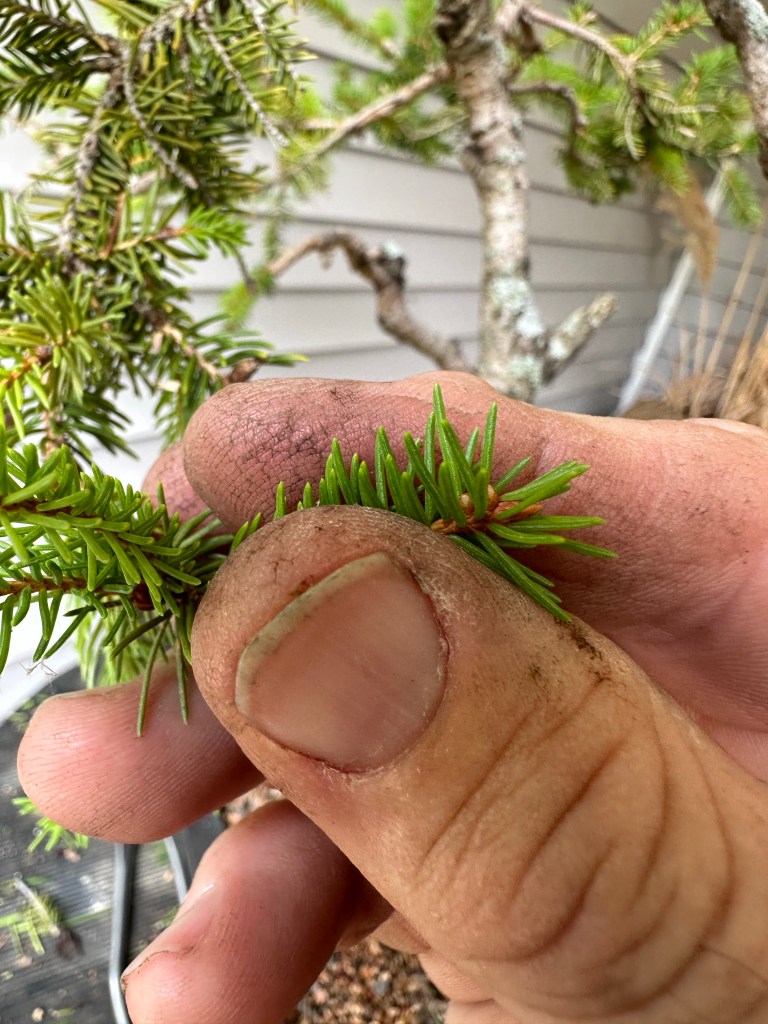

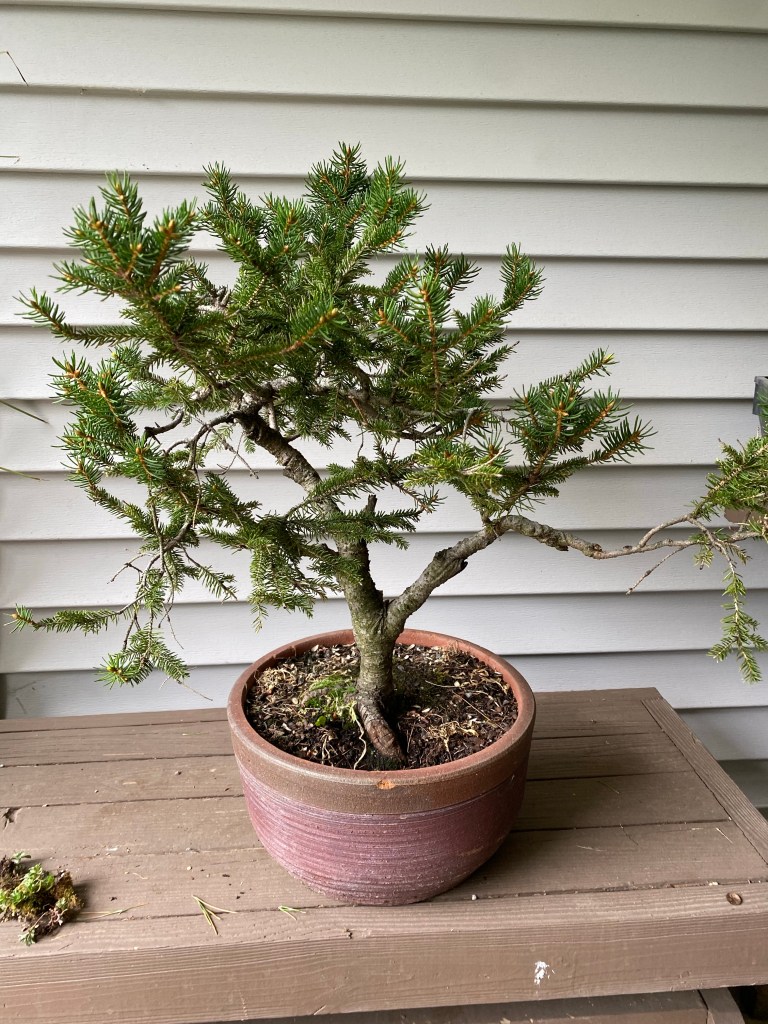
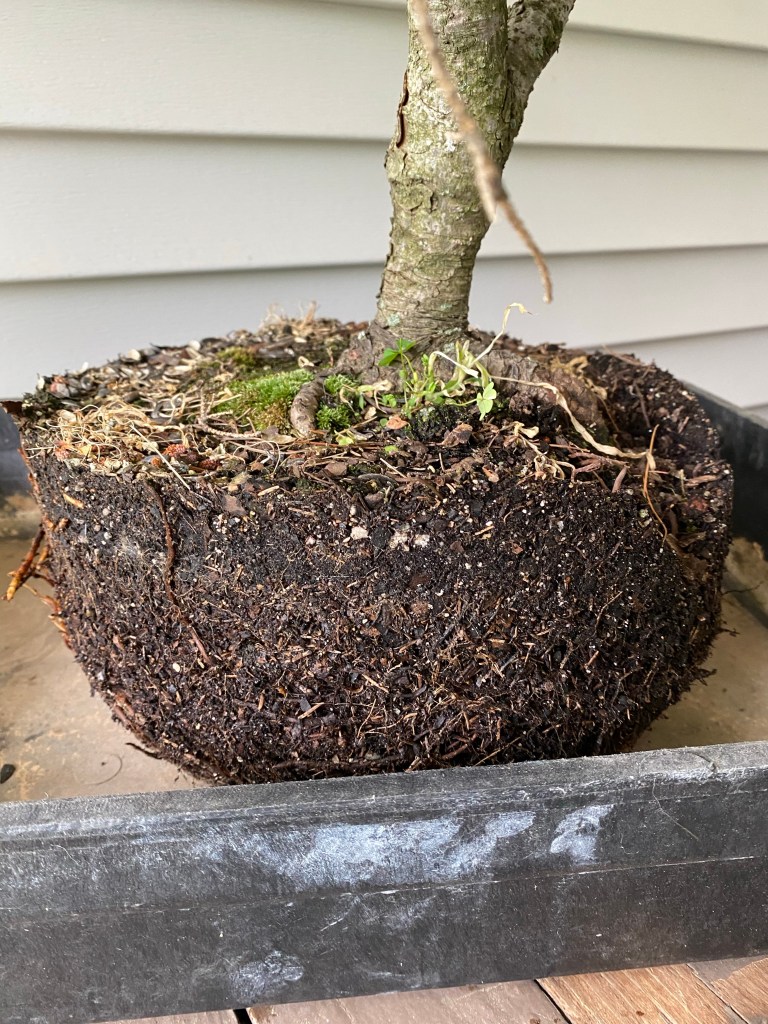
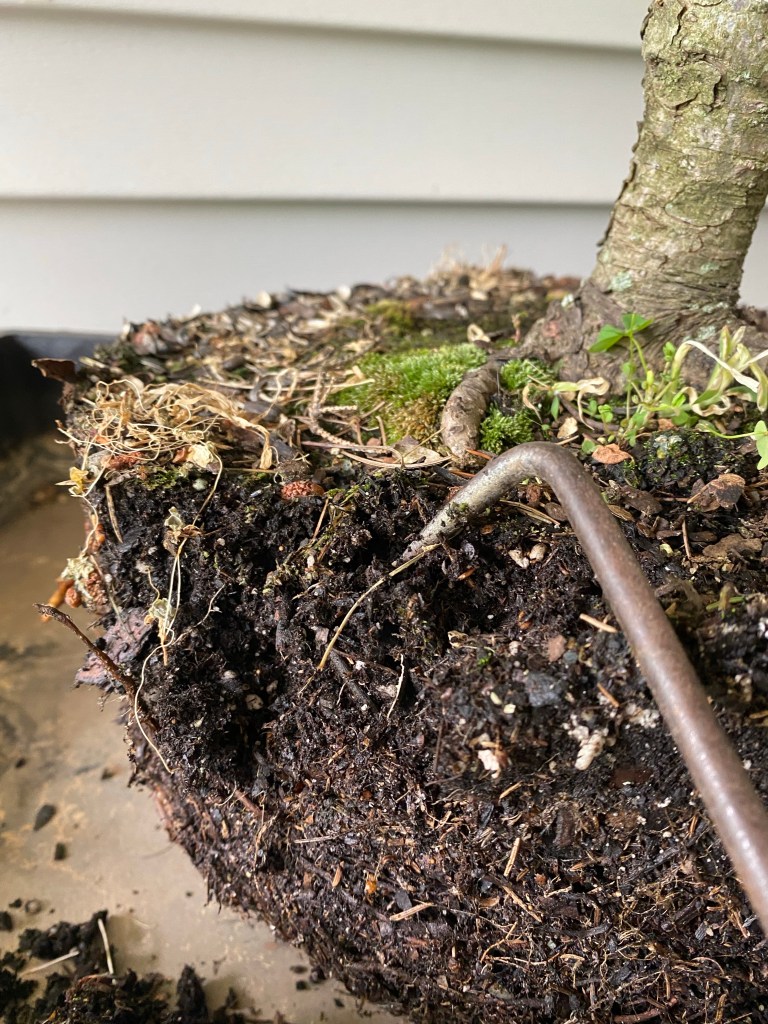
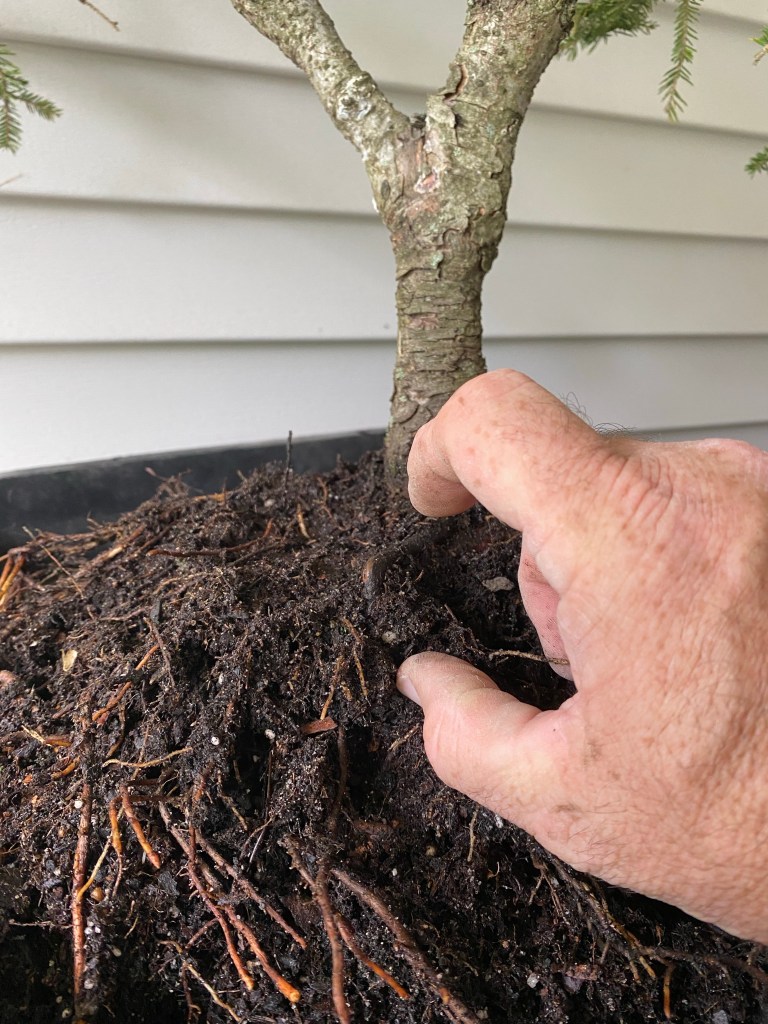
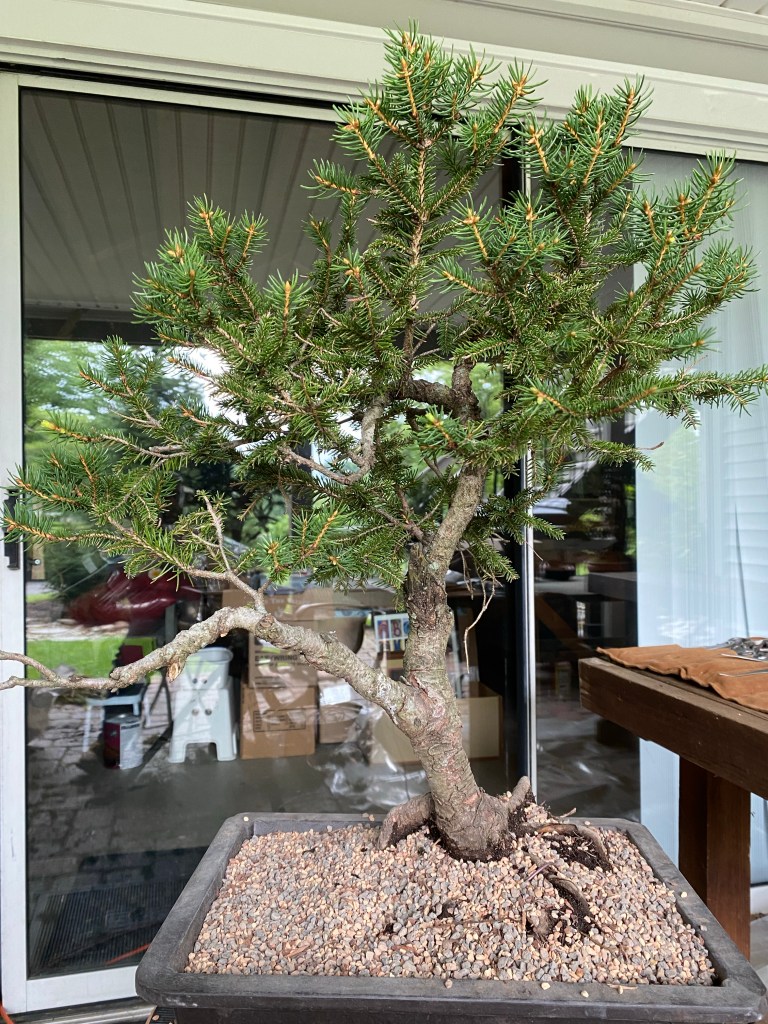
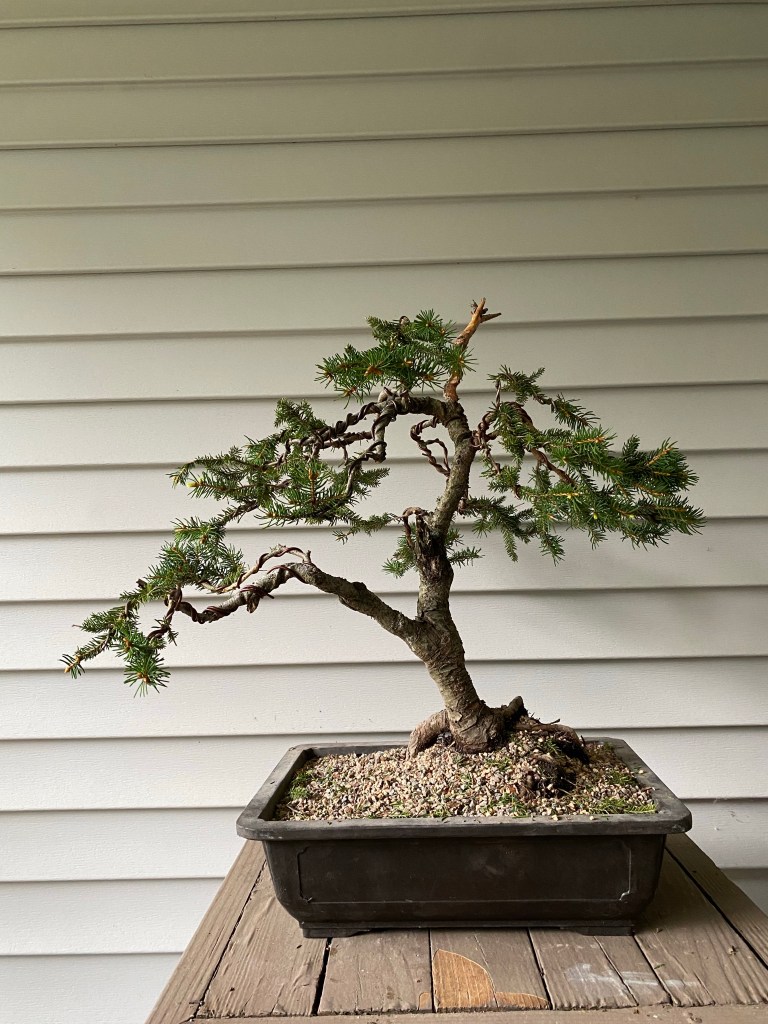
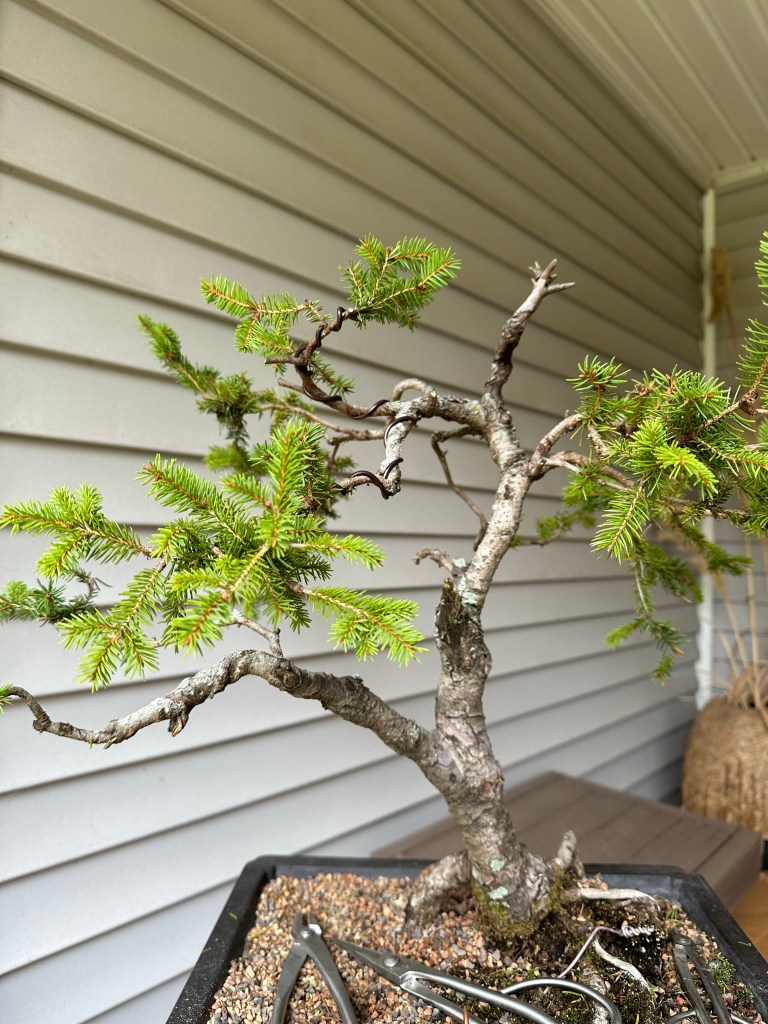

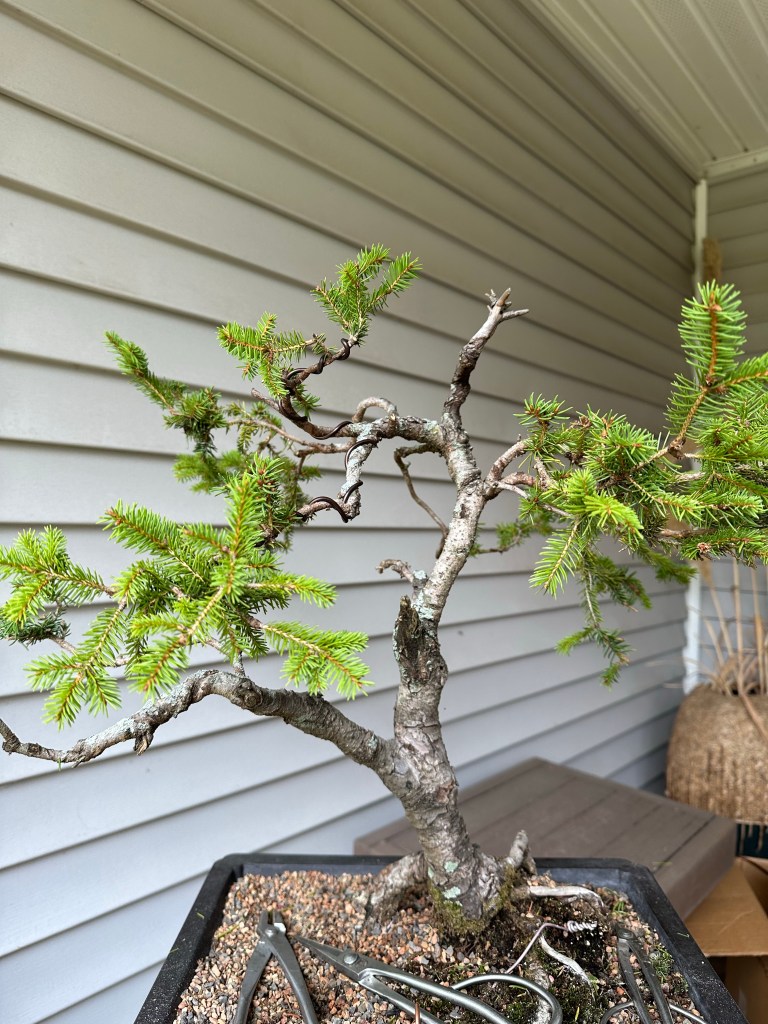

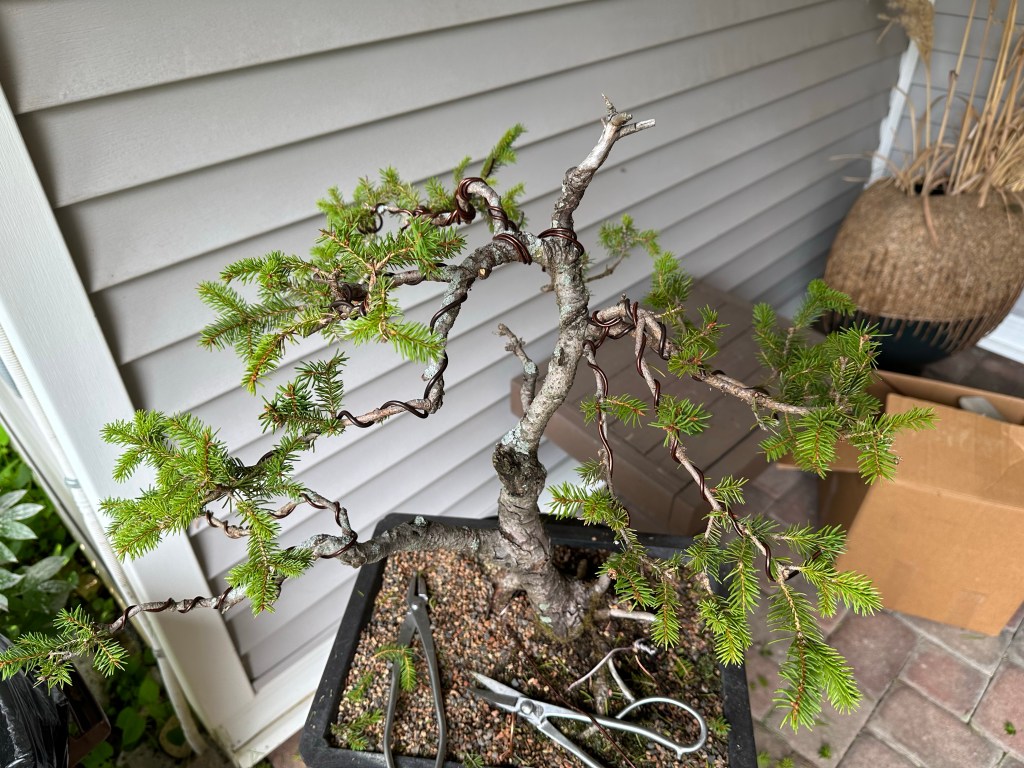

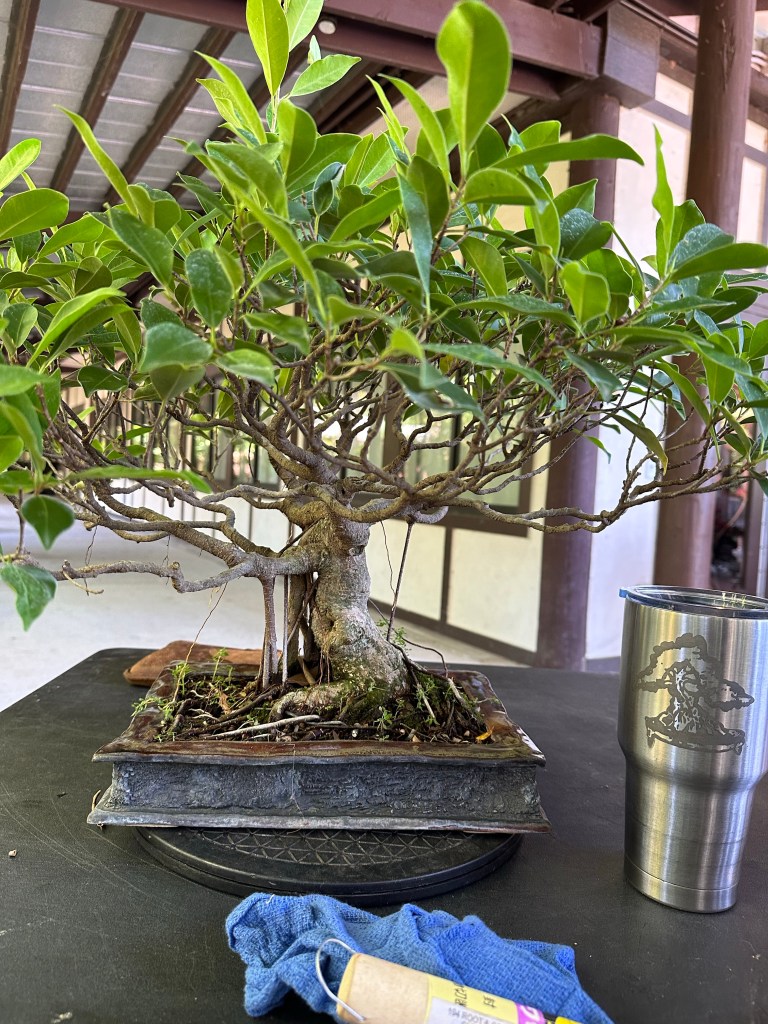

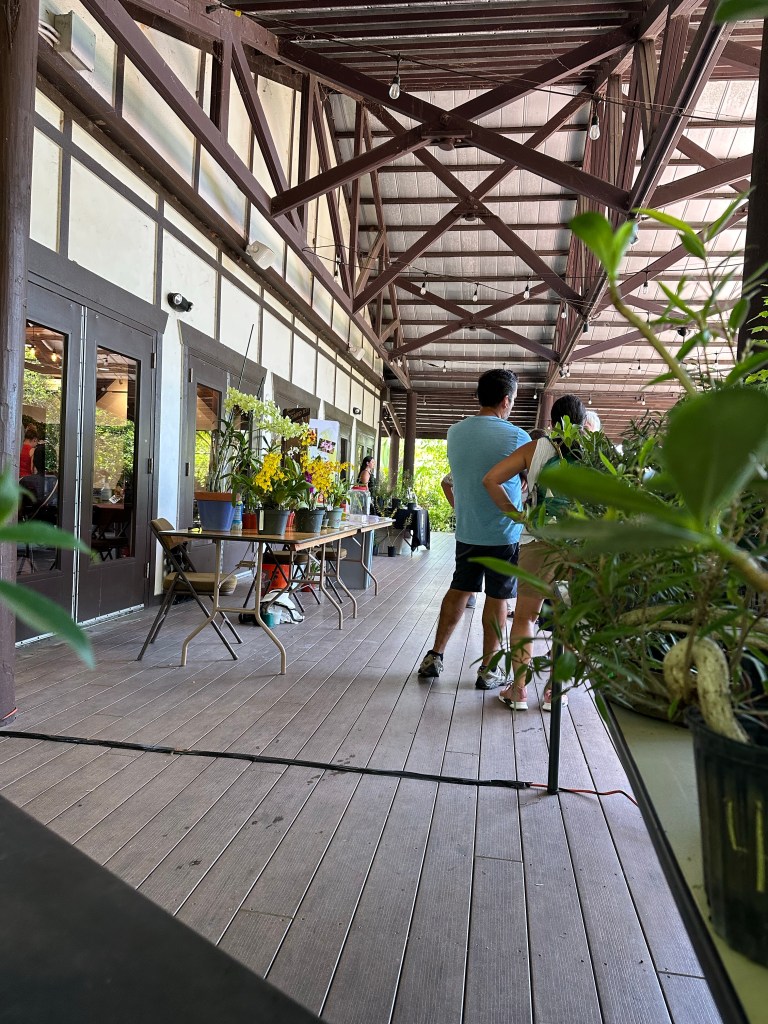

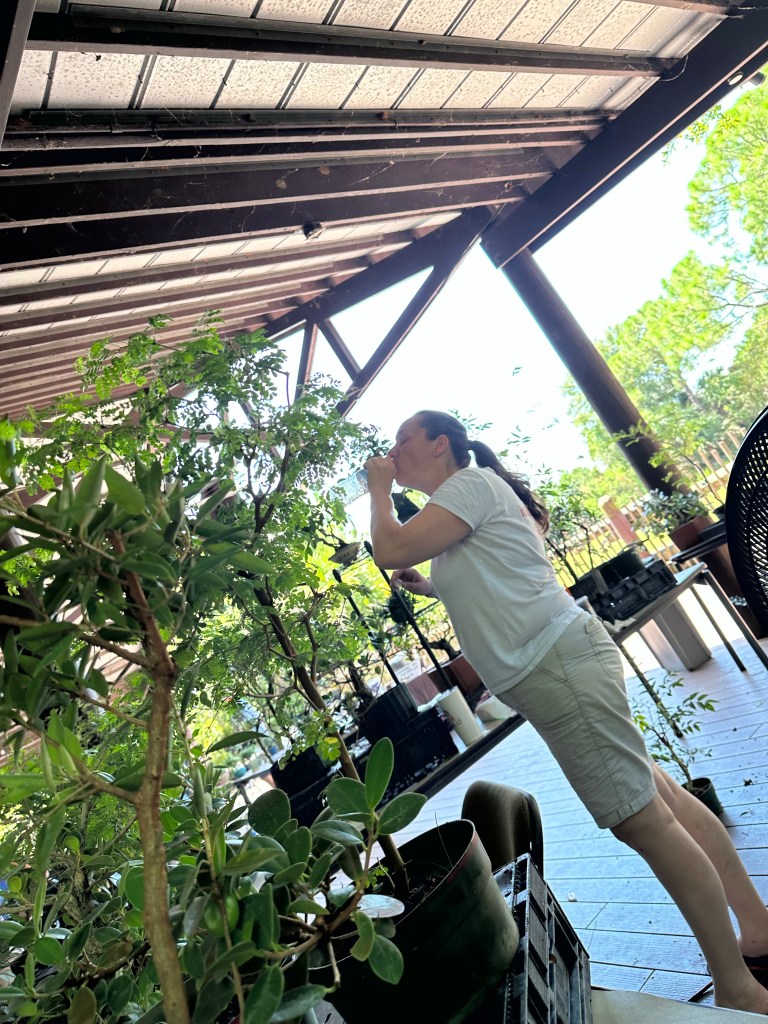
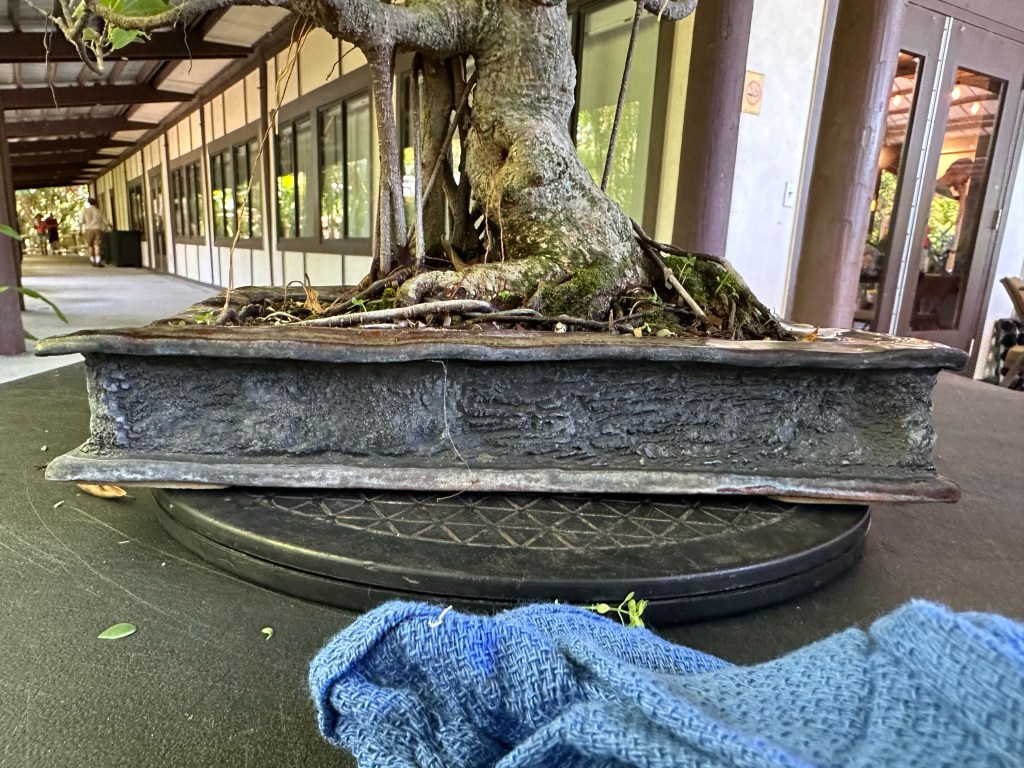
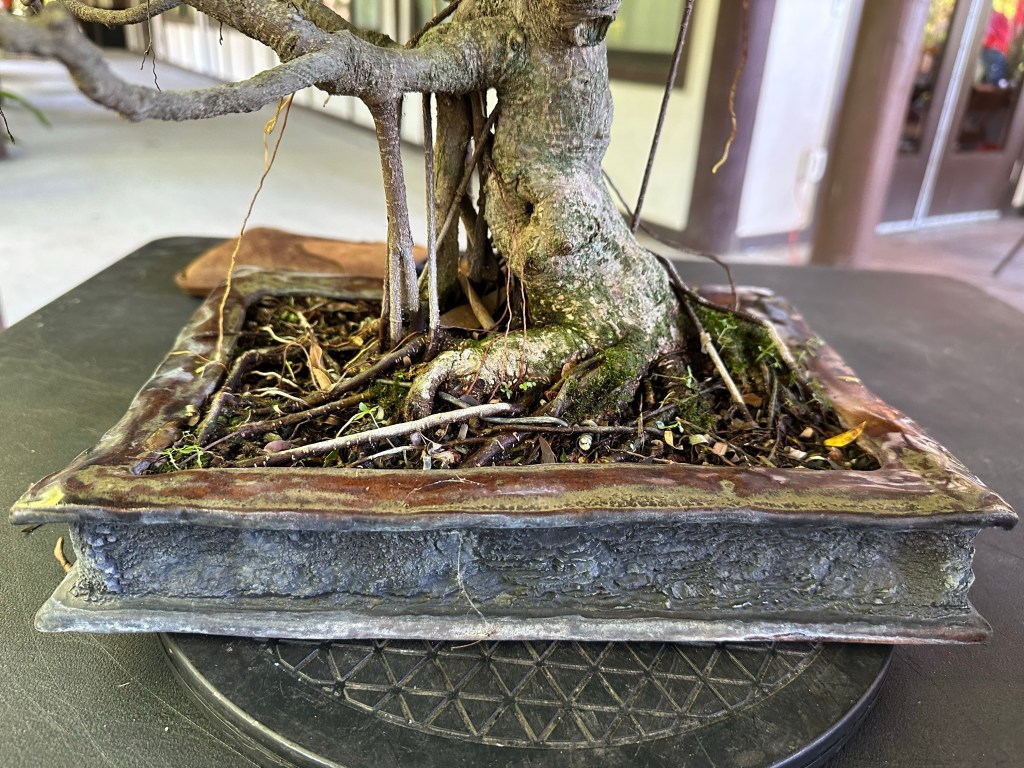
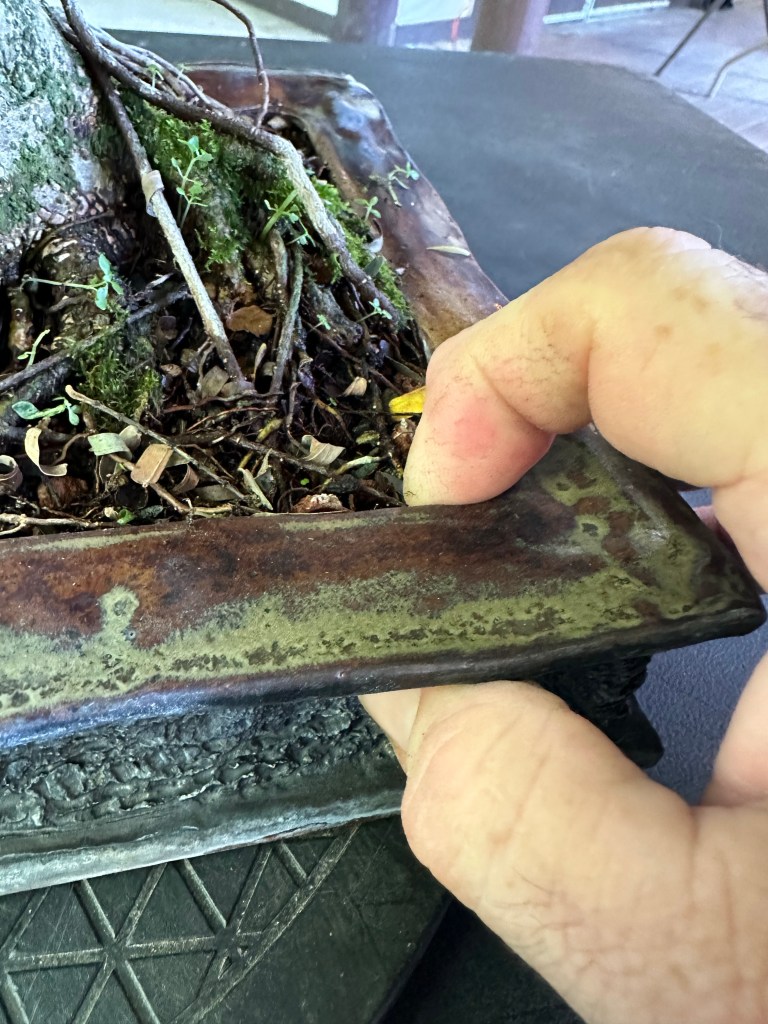

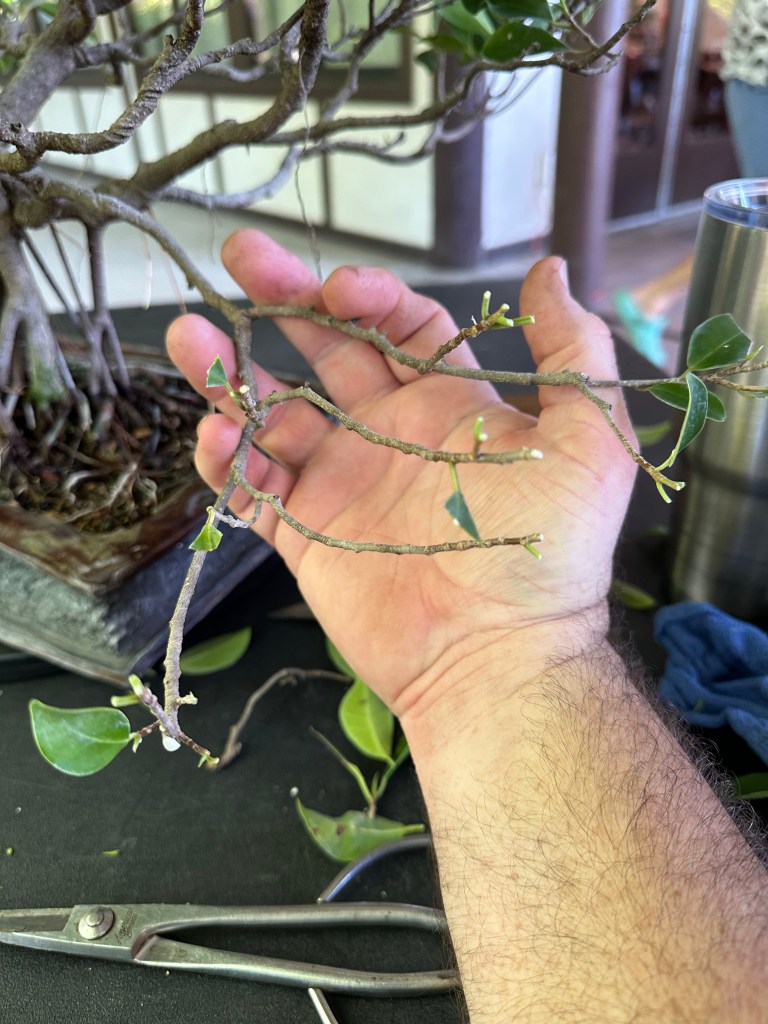
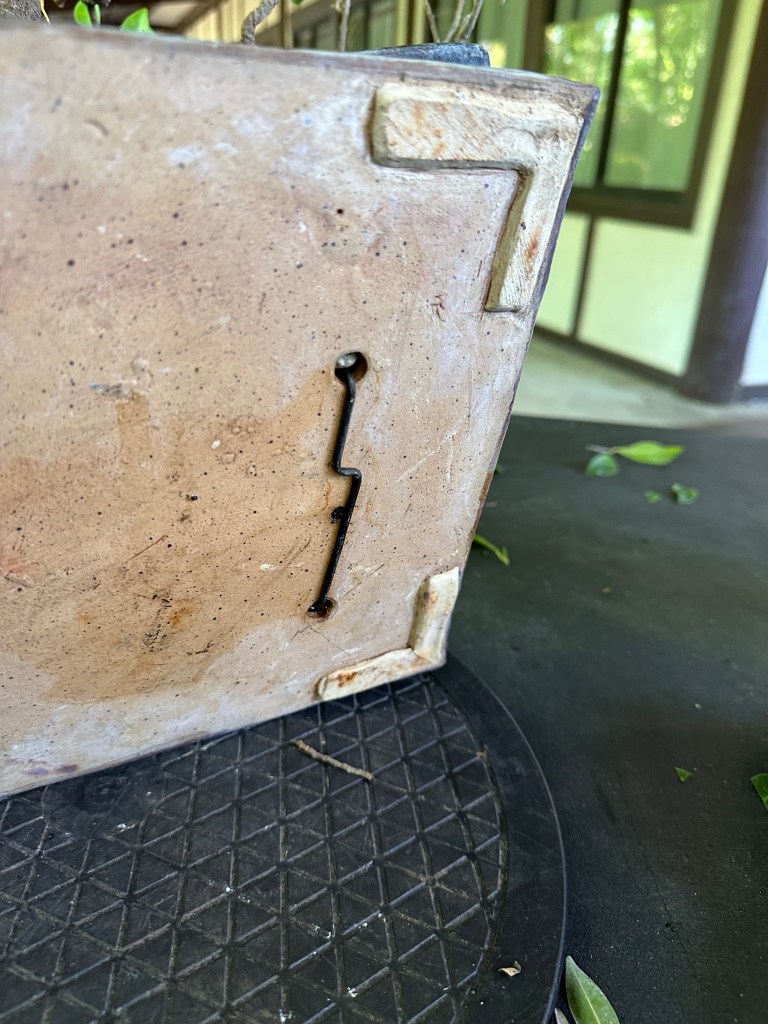
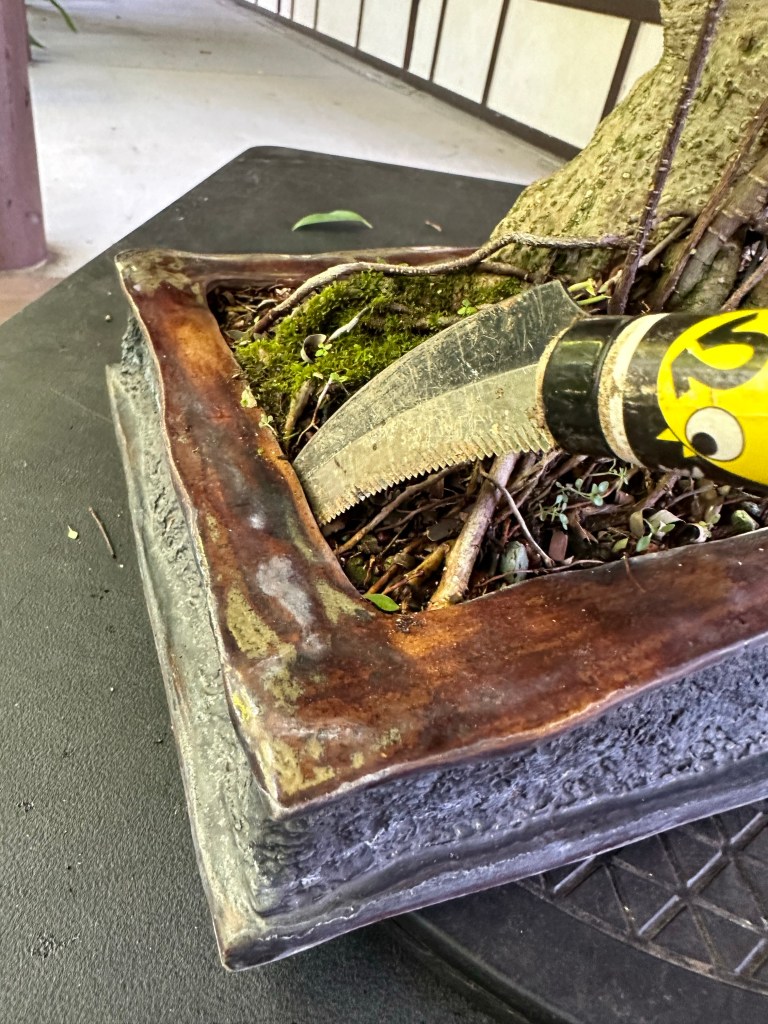

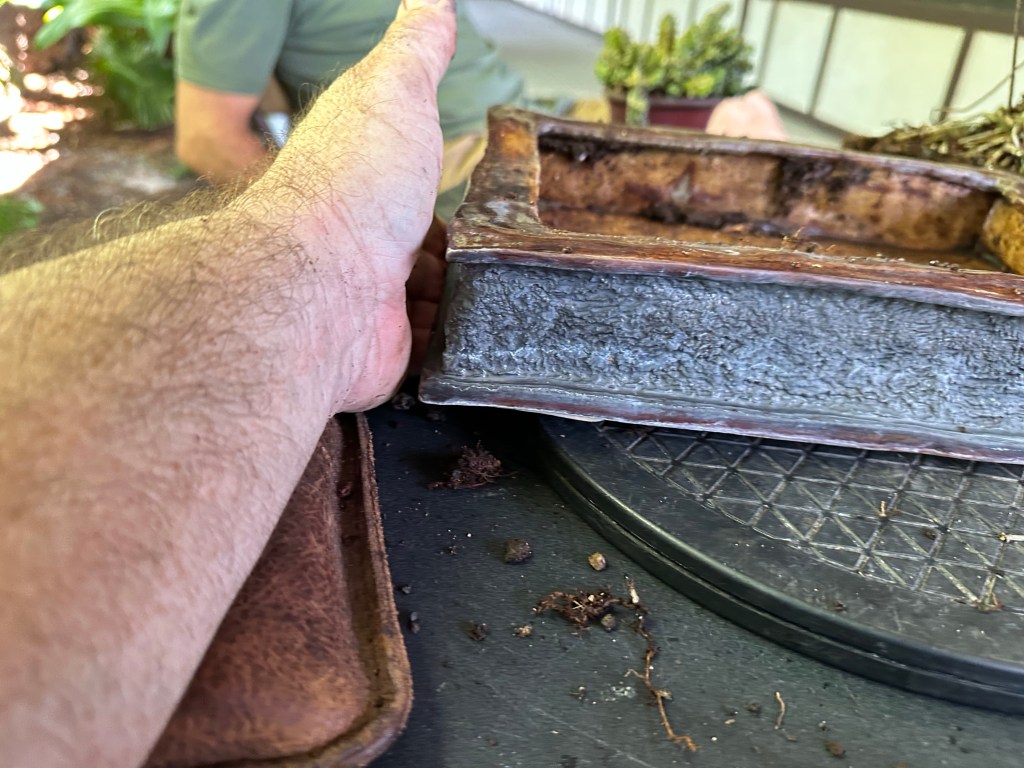
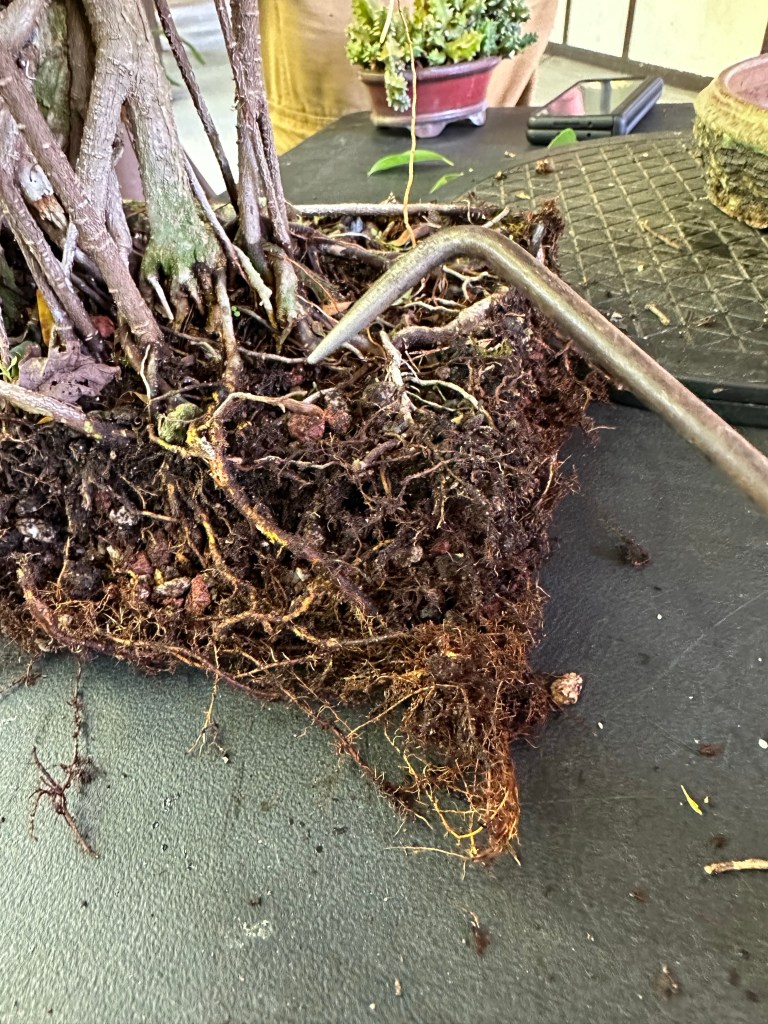
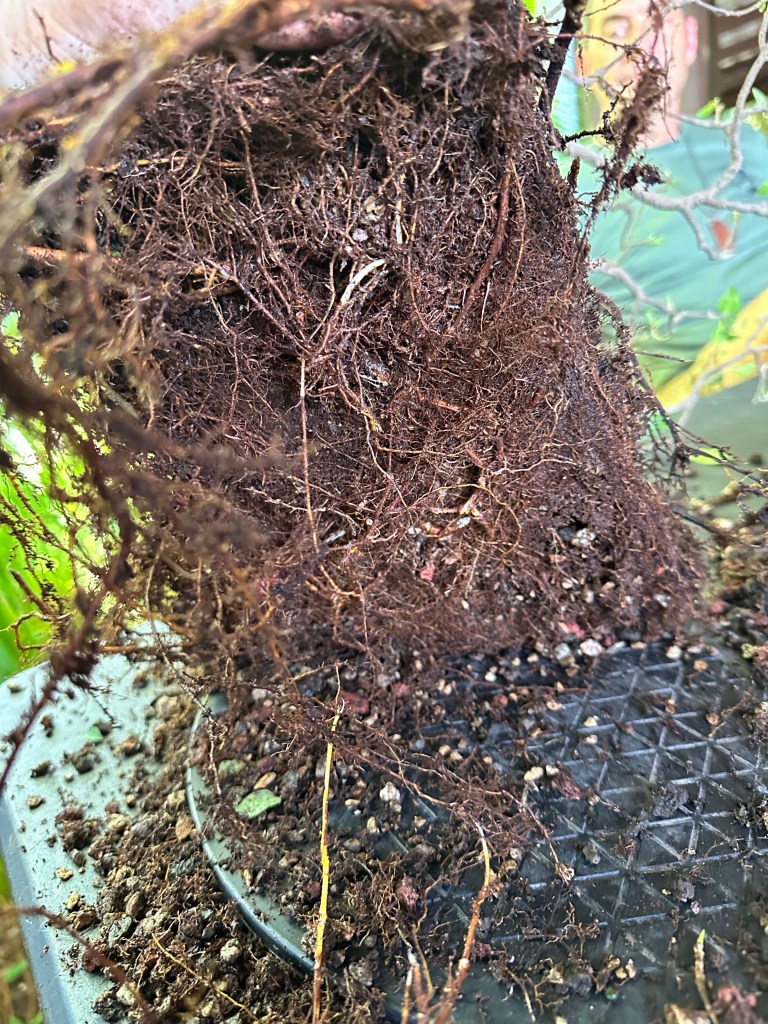
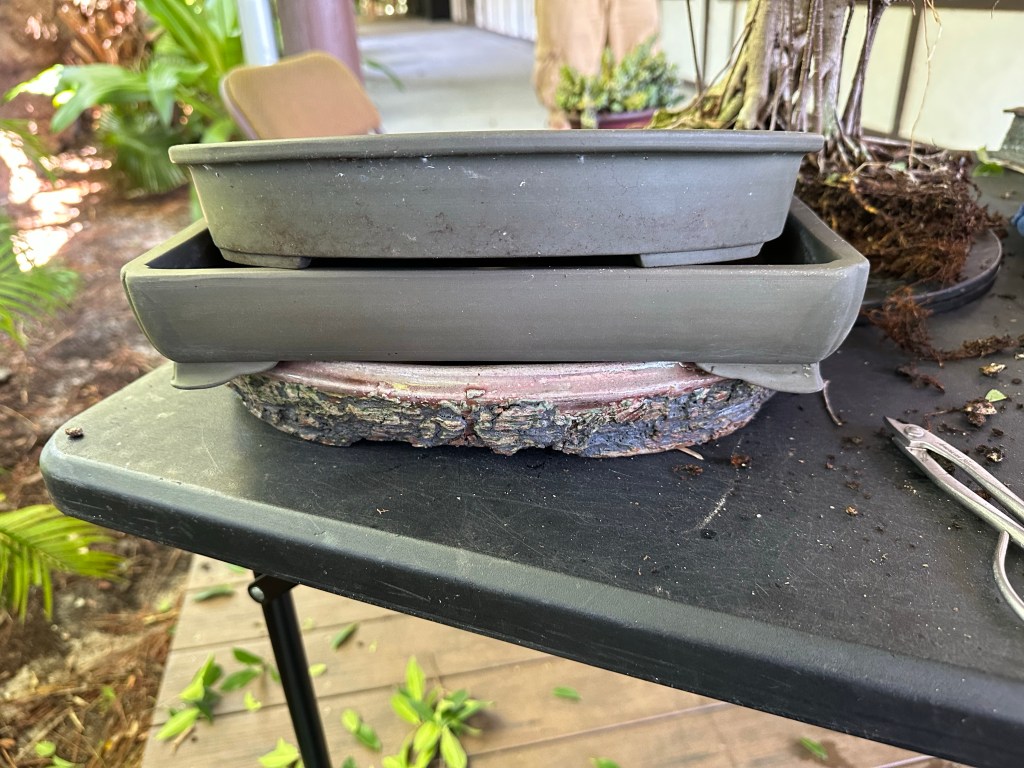
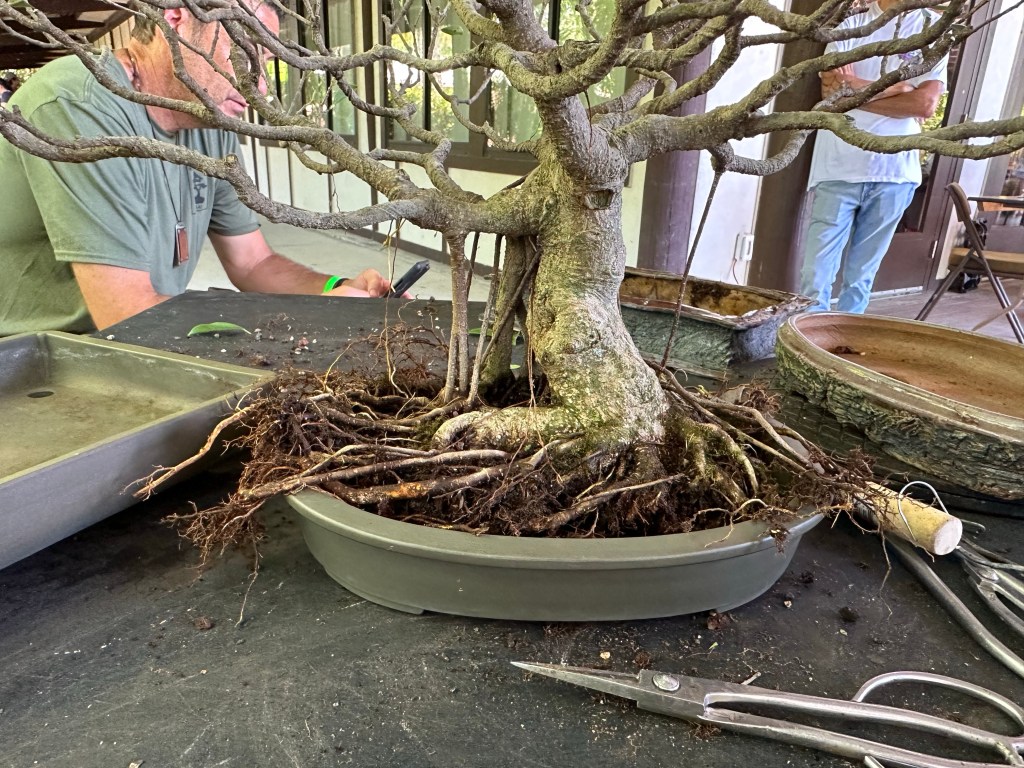
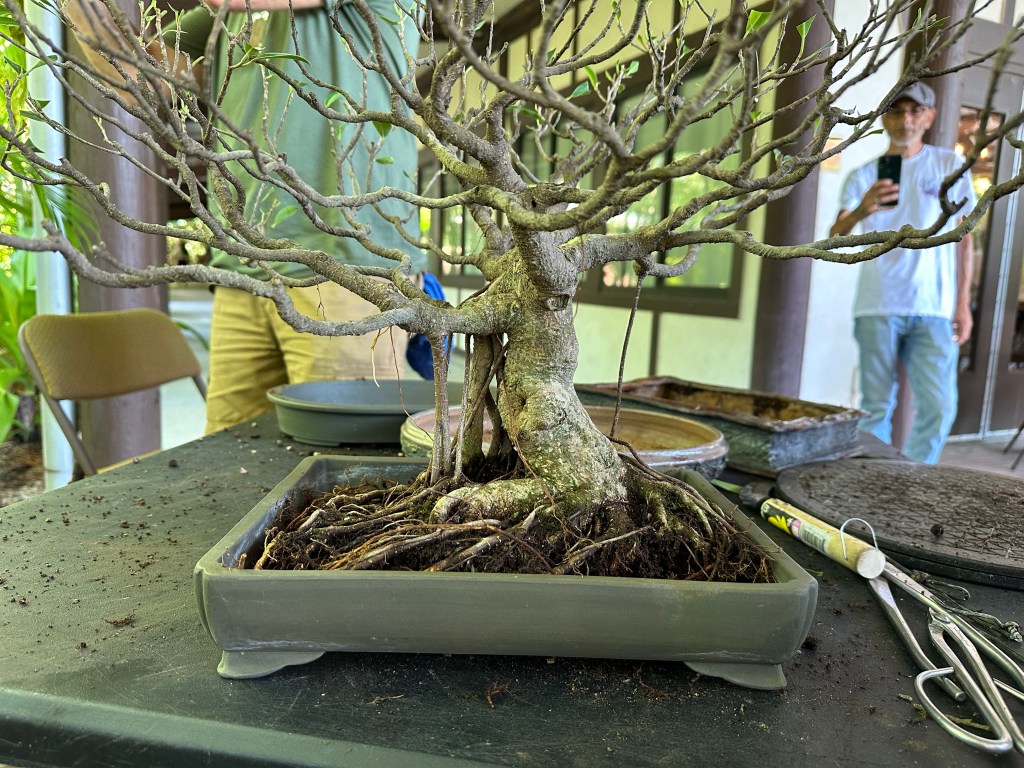
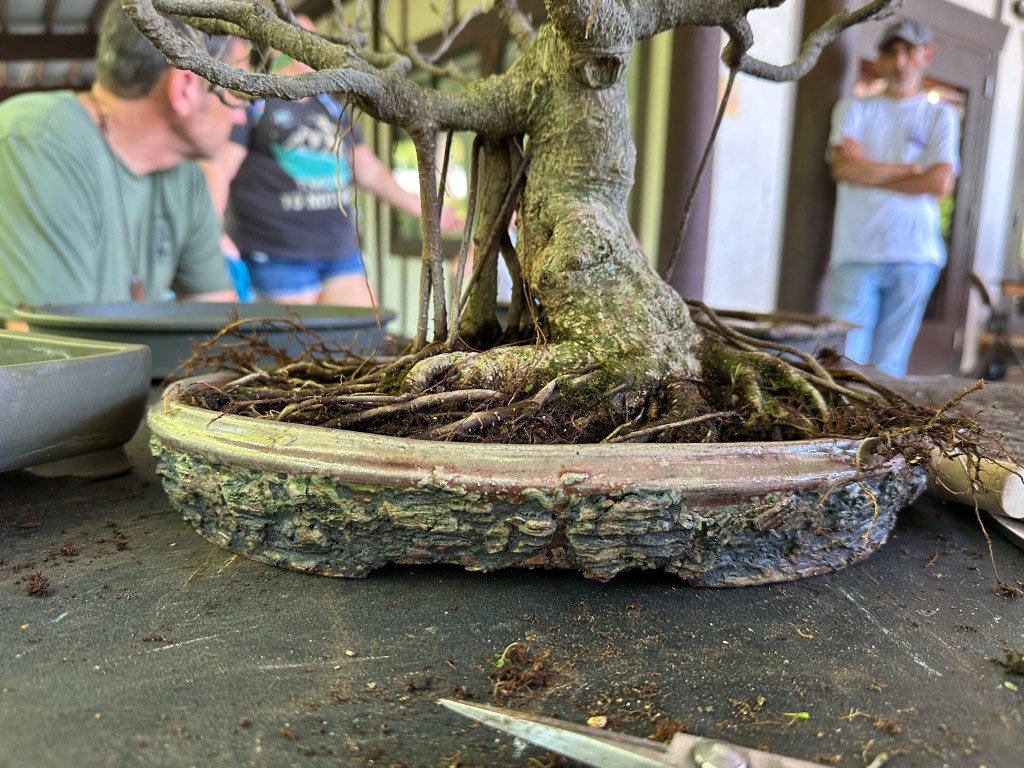
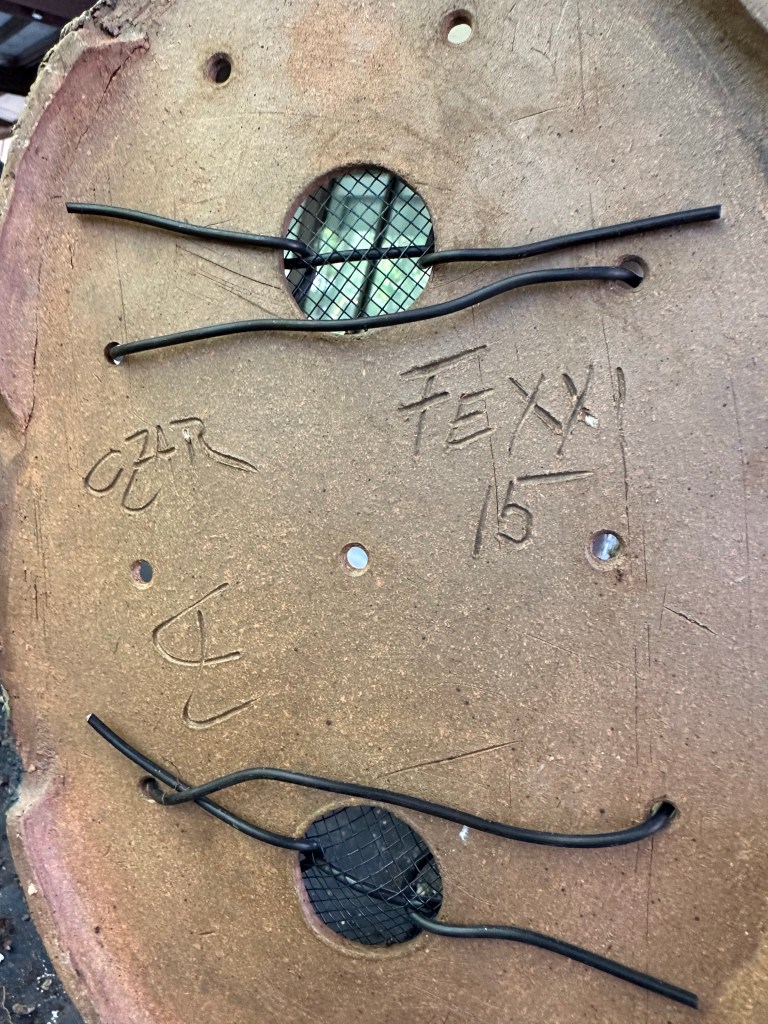
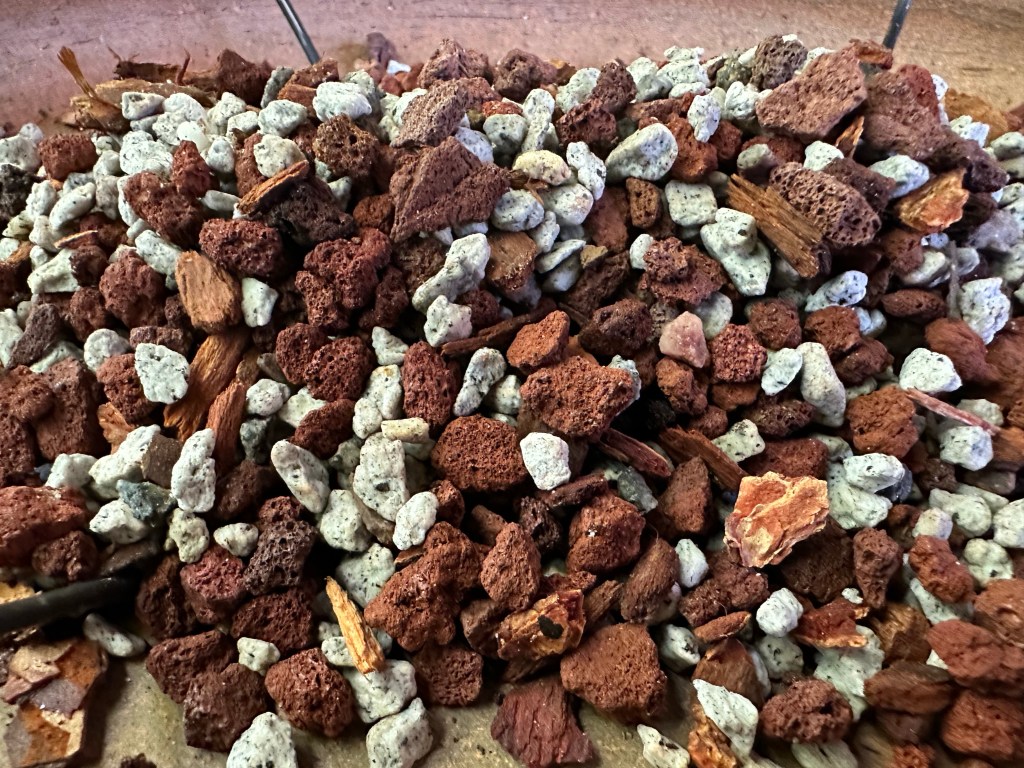
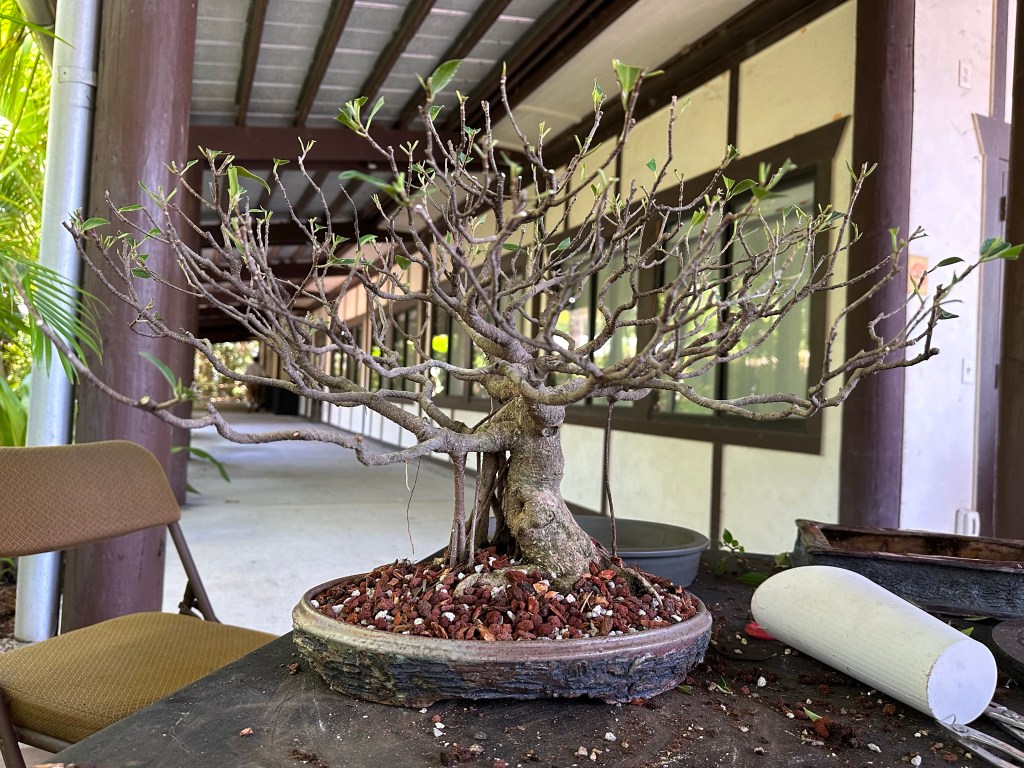
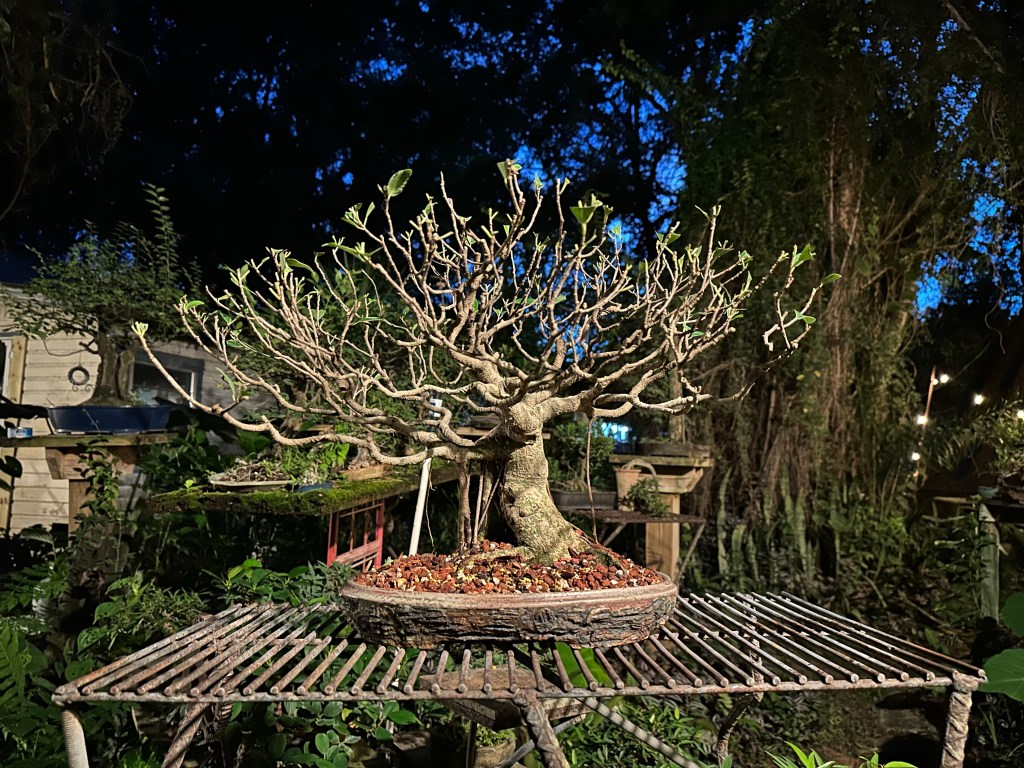


 I wanna go back to my Maumee