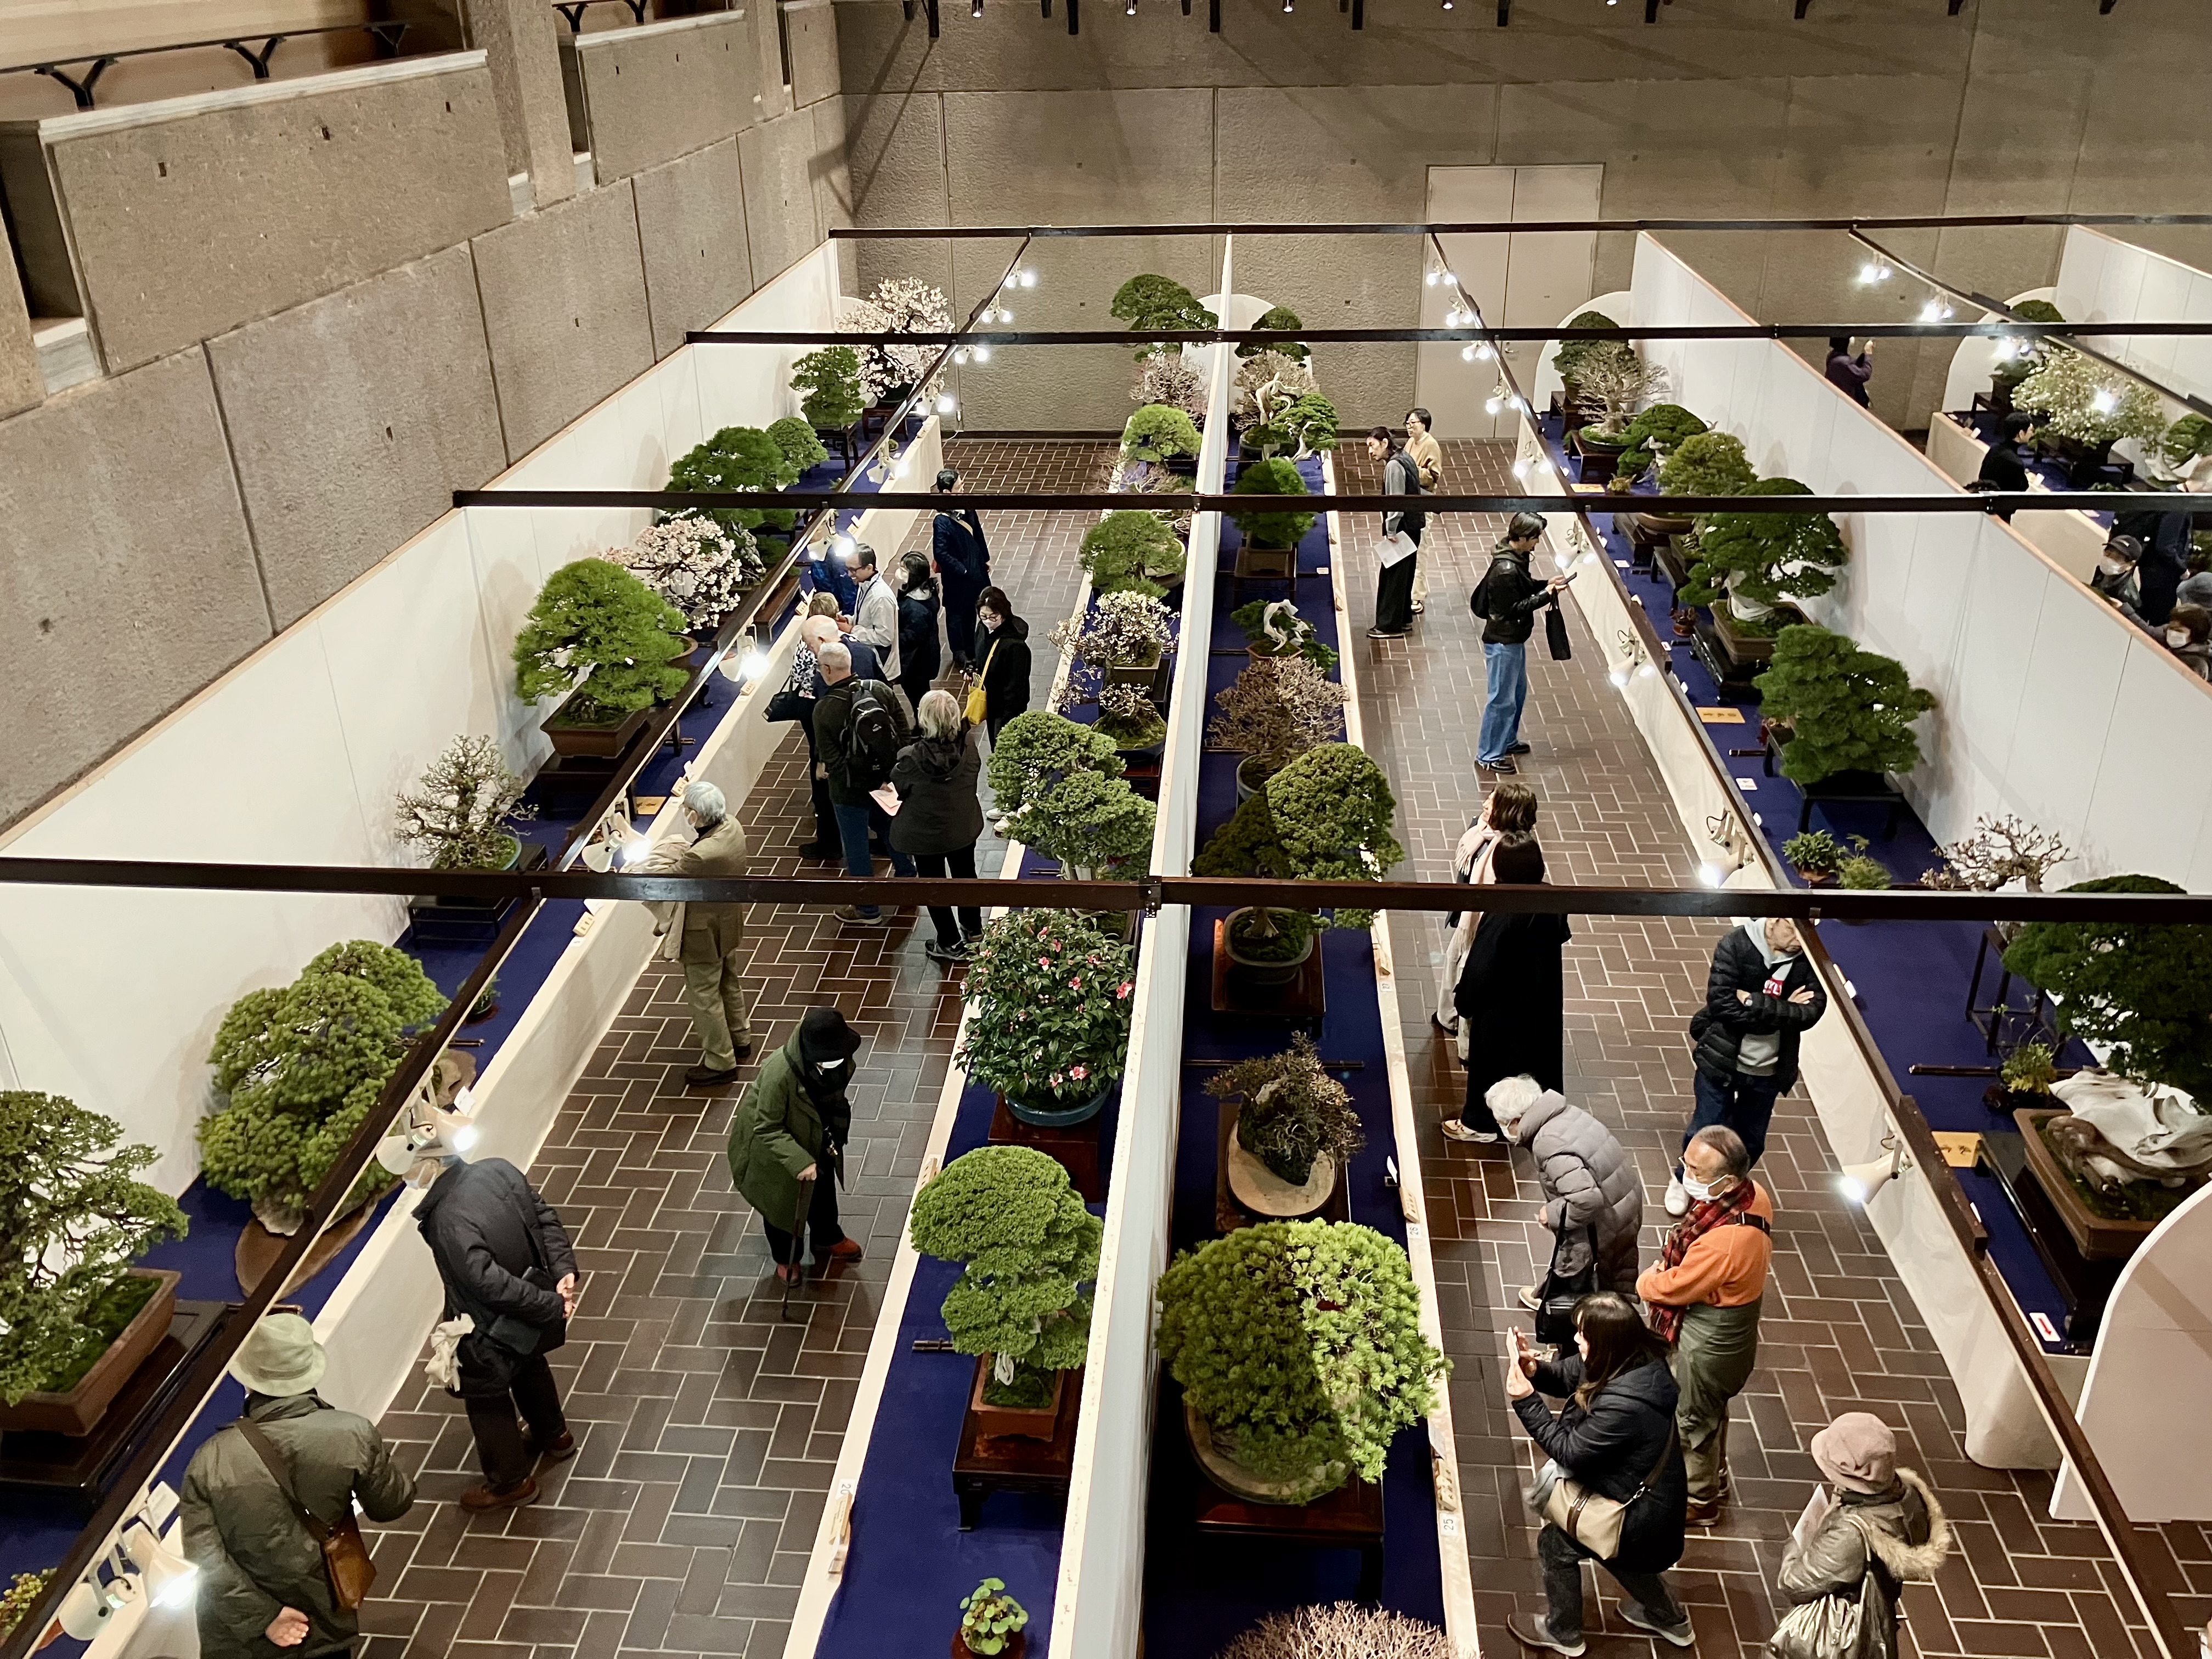
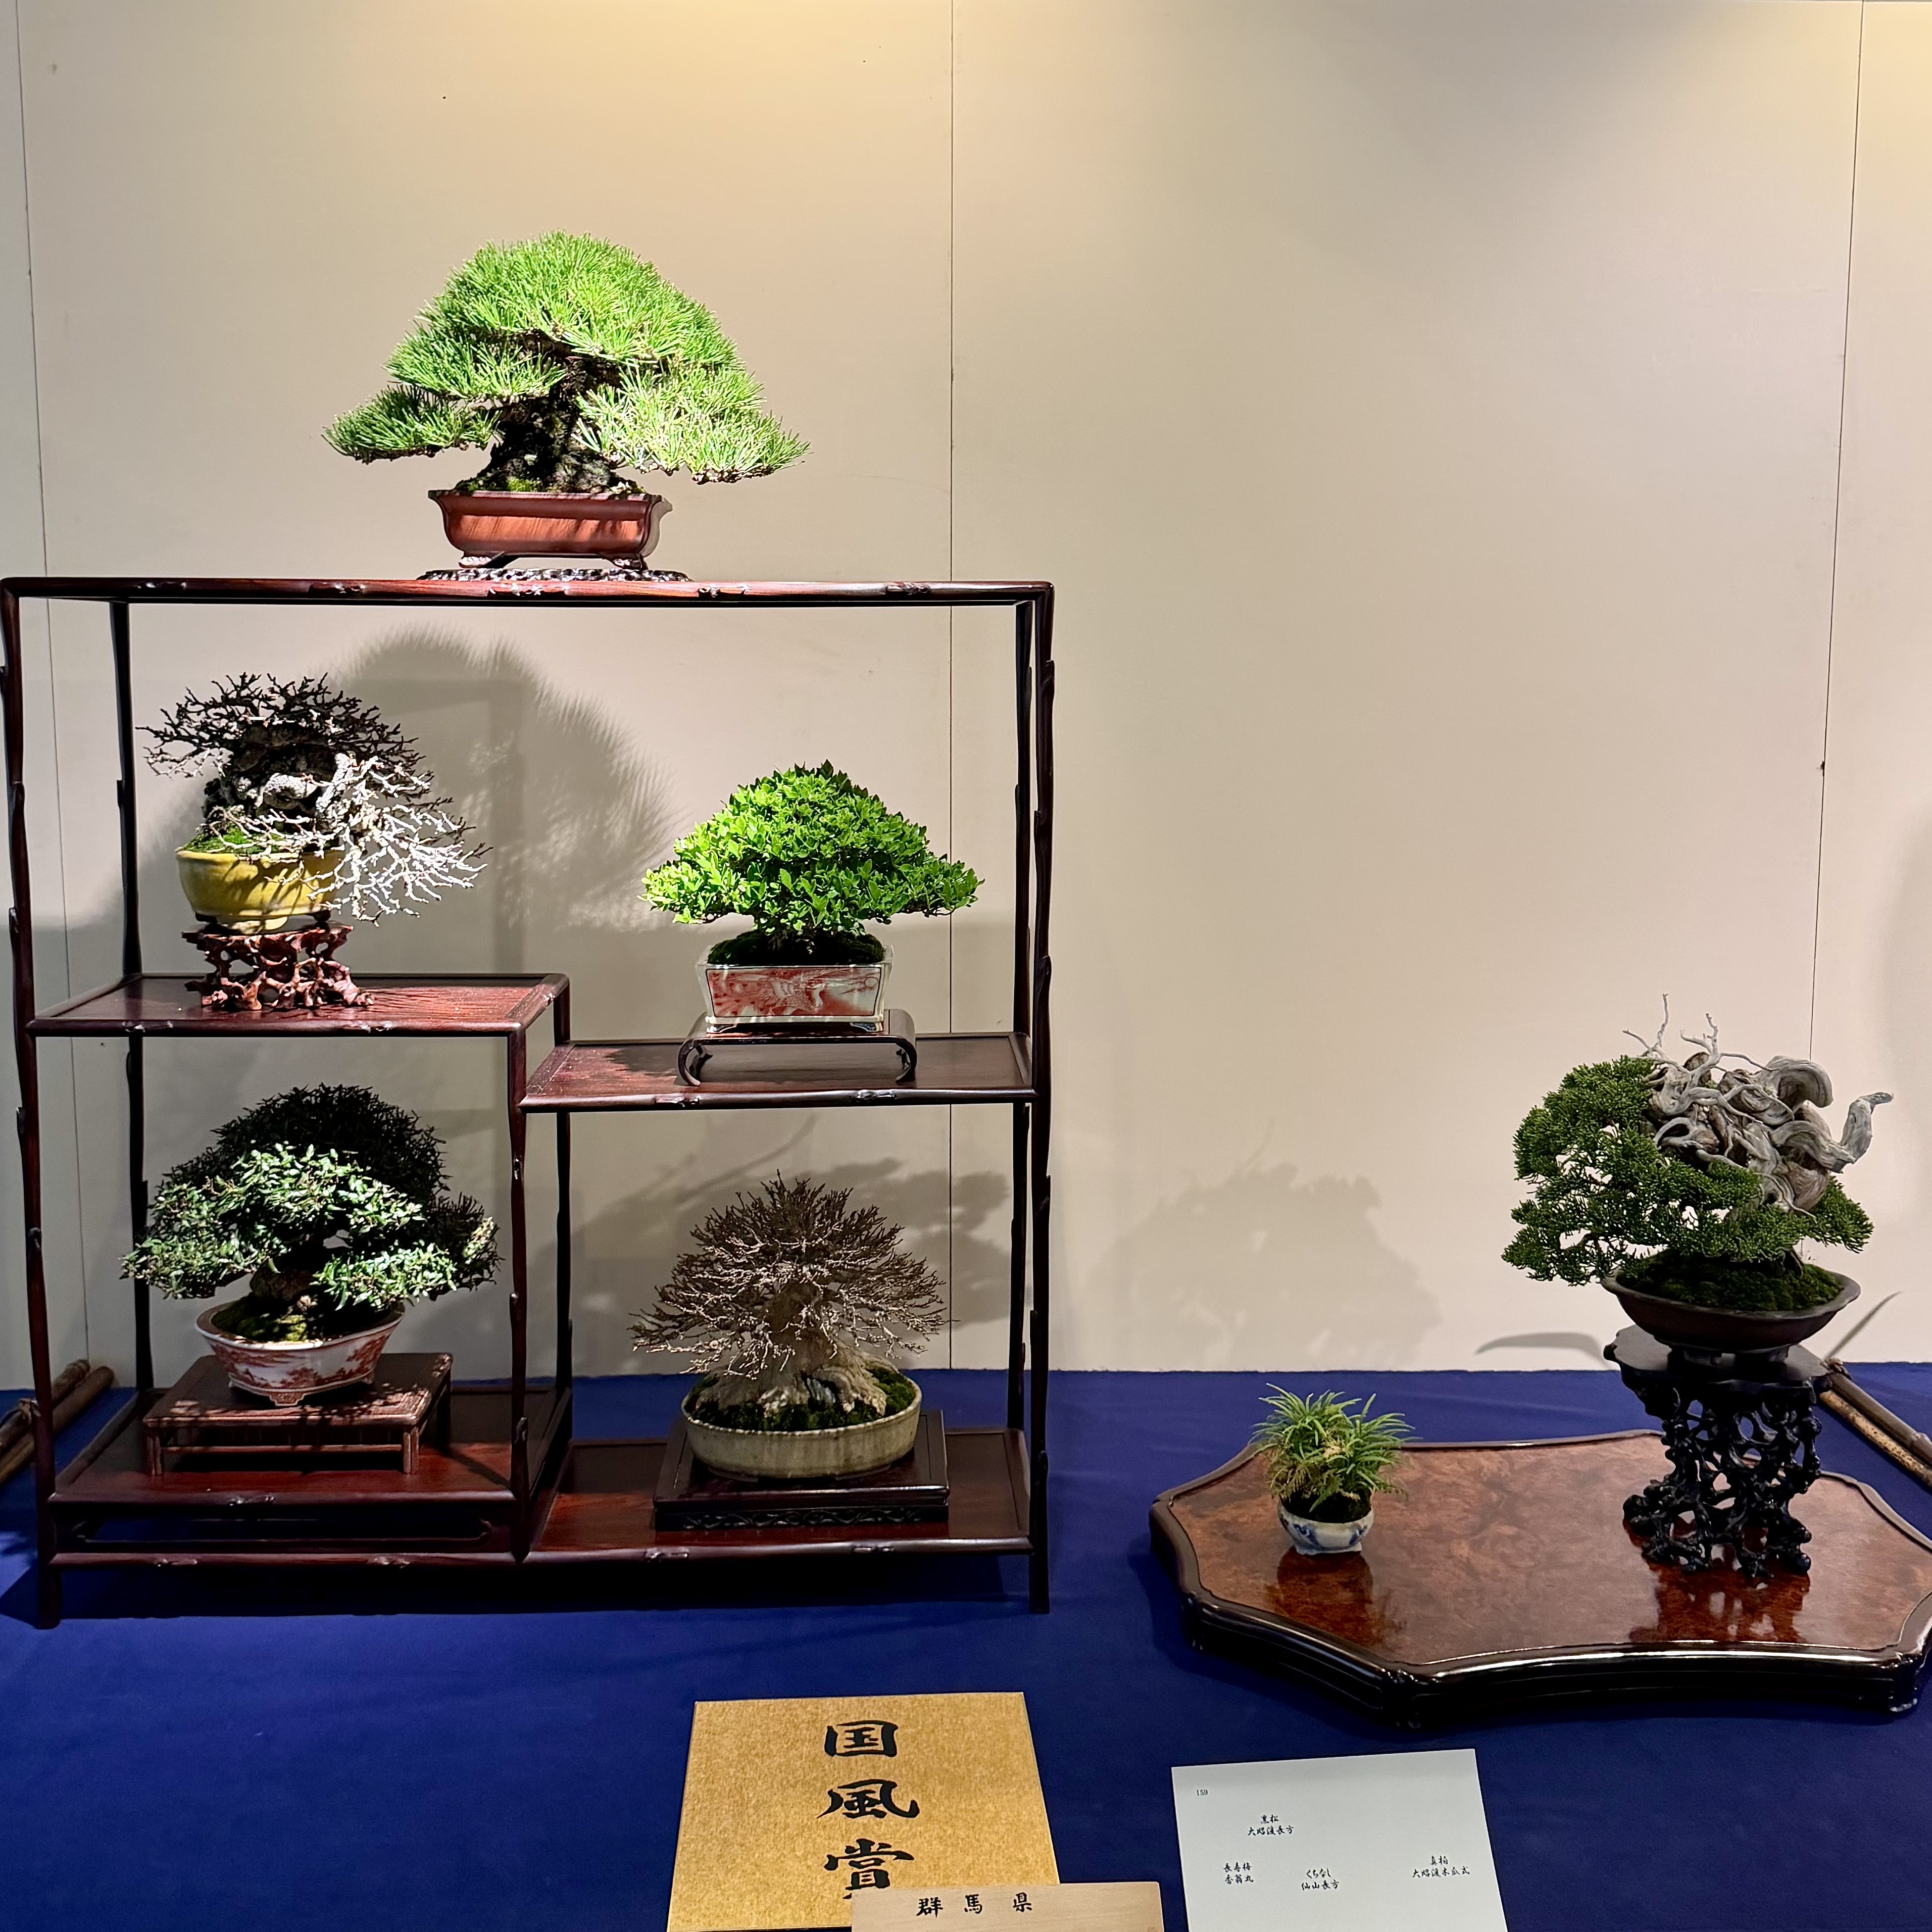
A few of the ridiculous trees in Part I of the Kokufu-ten. Wednesday was the take-down and switch-out to new trees. And now it’s open again for Part II.
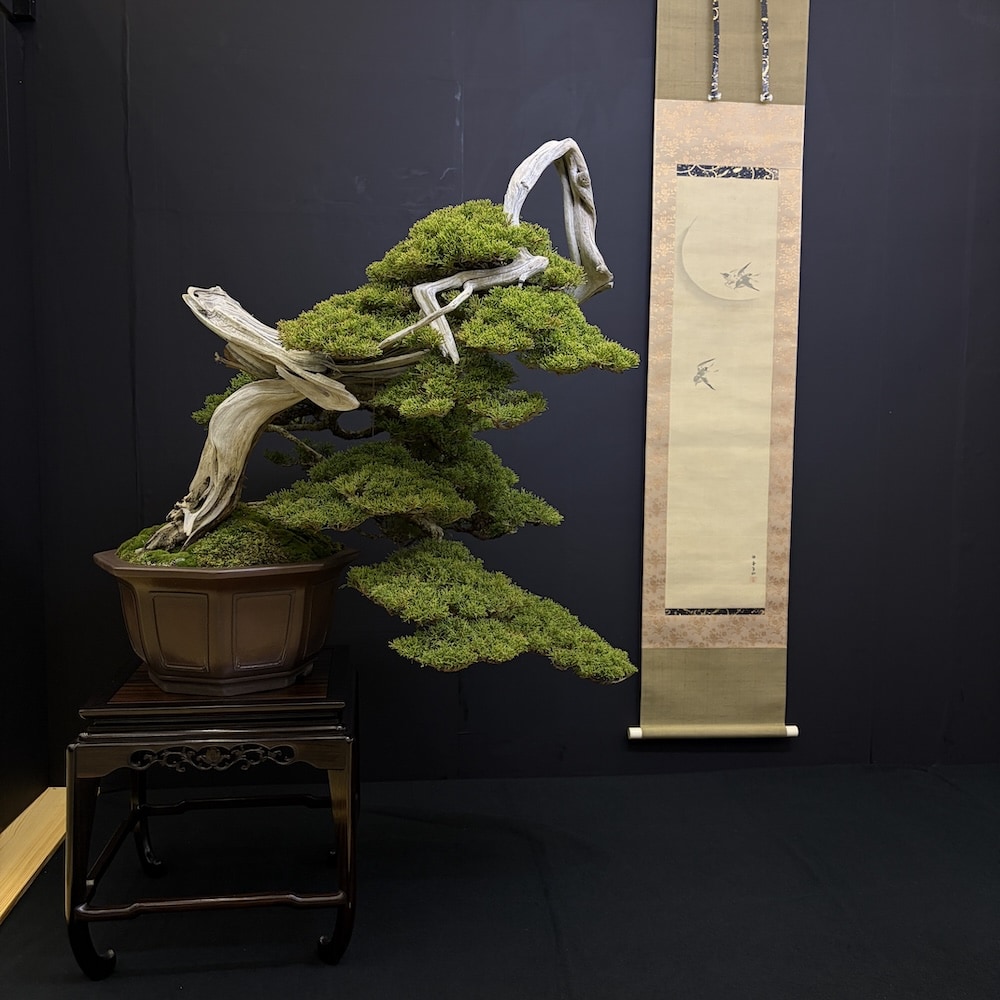
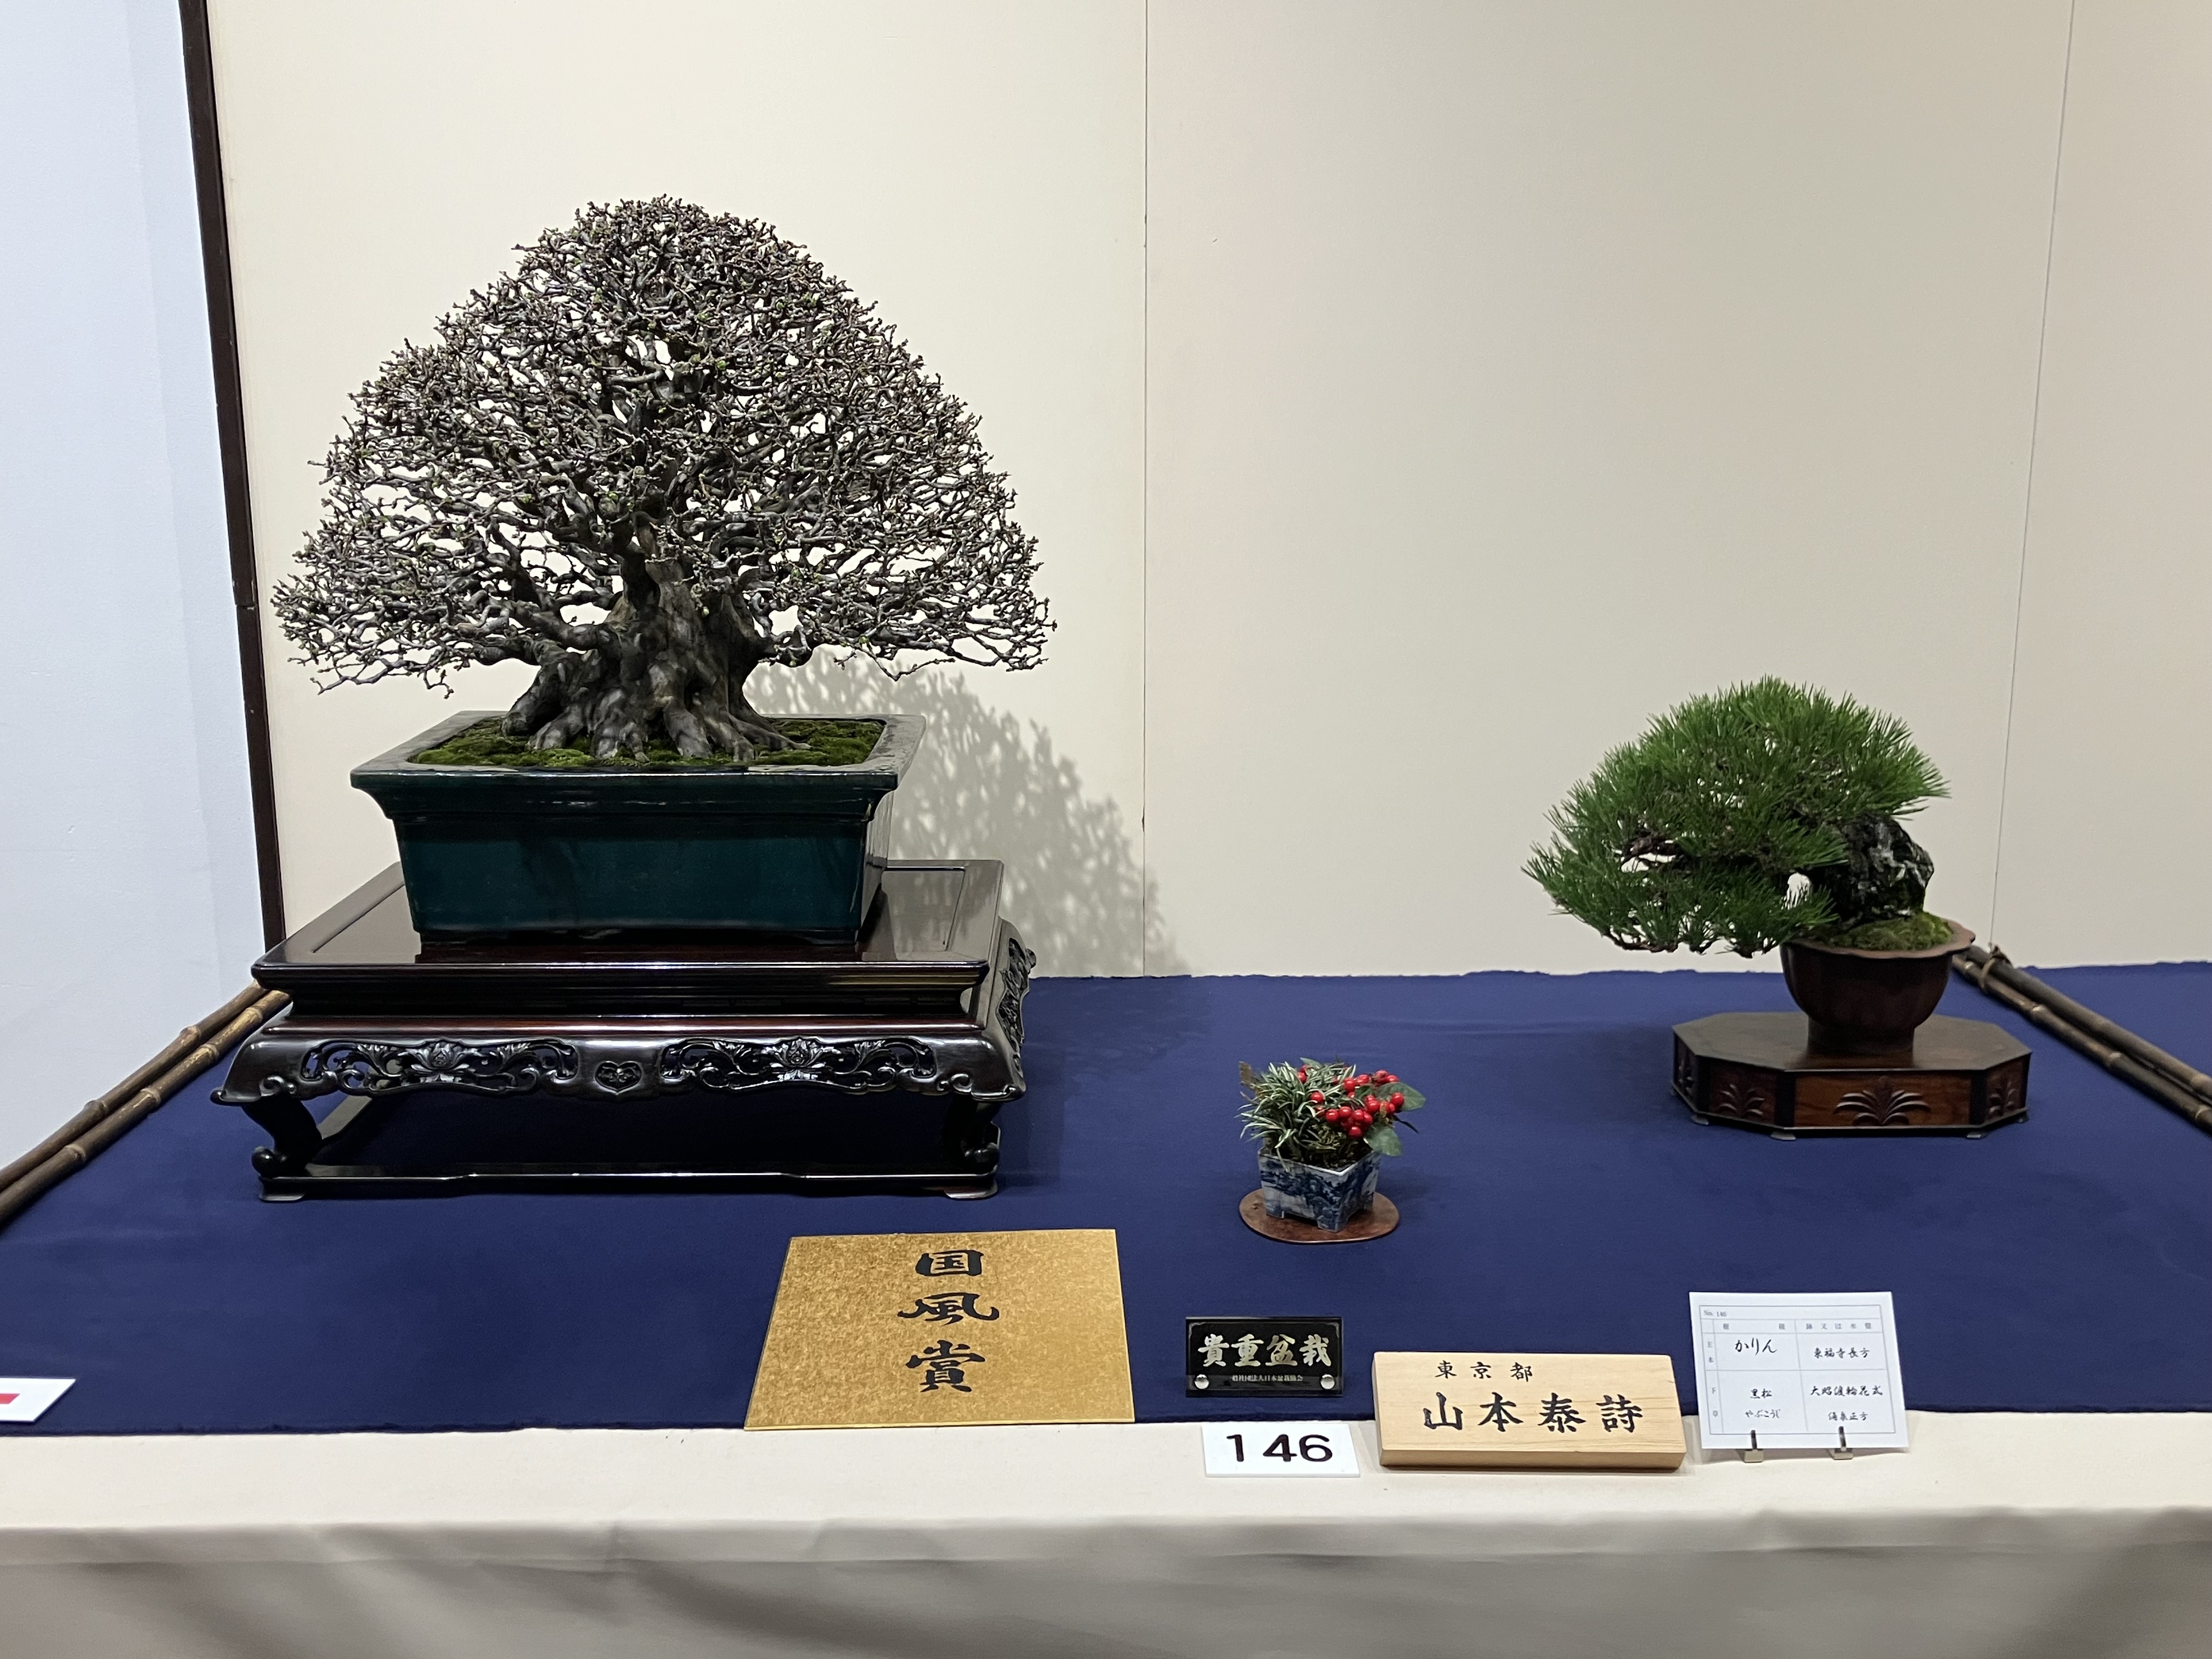
The entrance to the show looks down on the large displays. This is in the Tokyo Metropolitan Art Museum in Ueno. This view gives a sense of the scale and impact these huge trees might have only a few feet away.
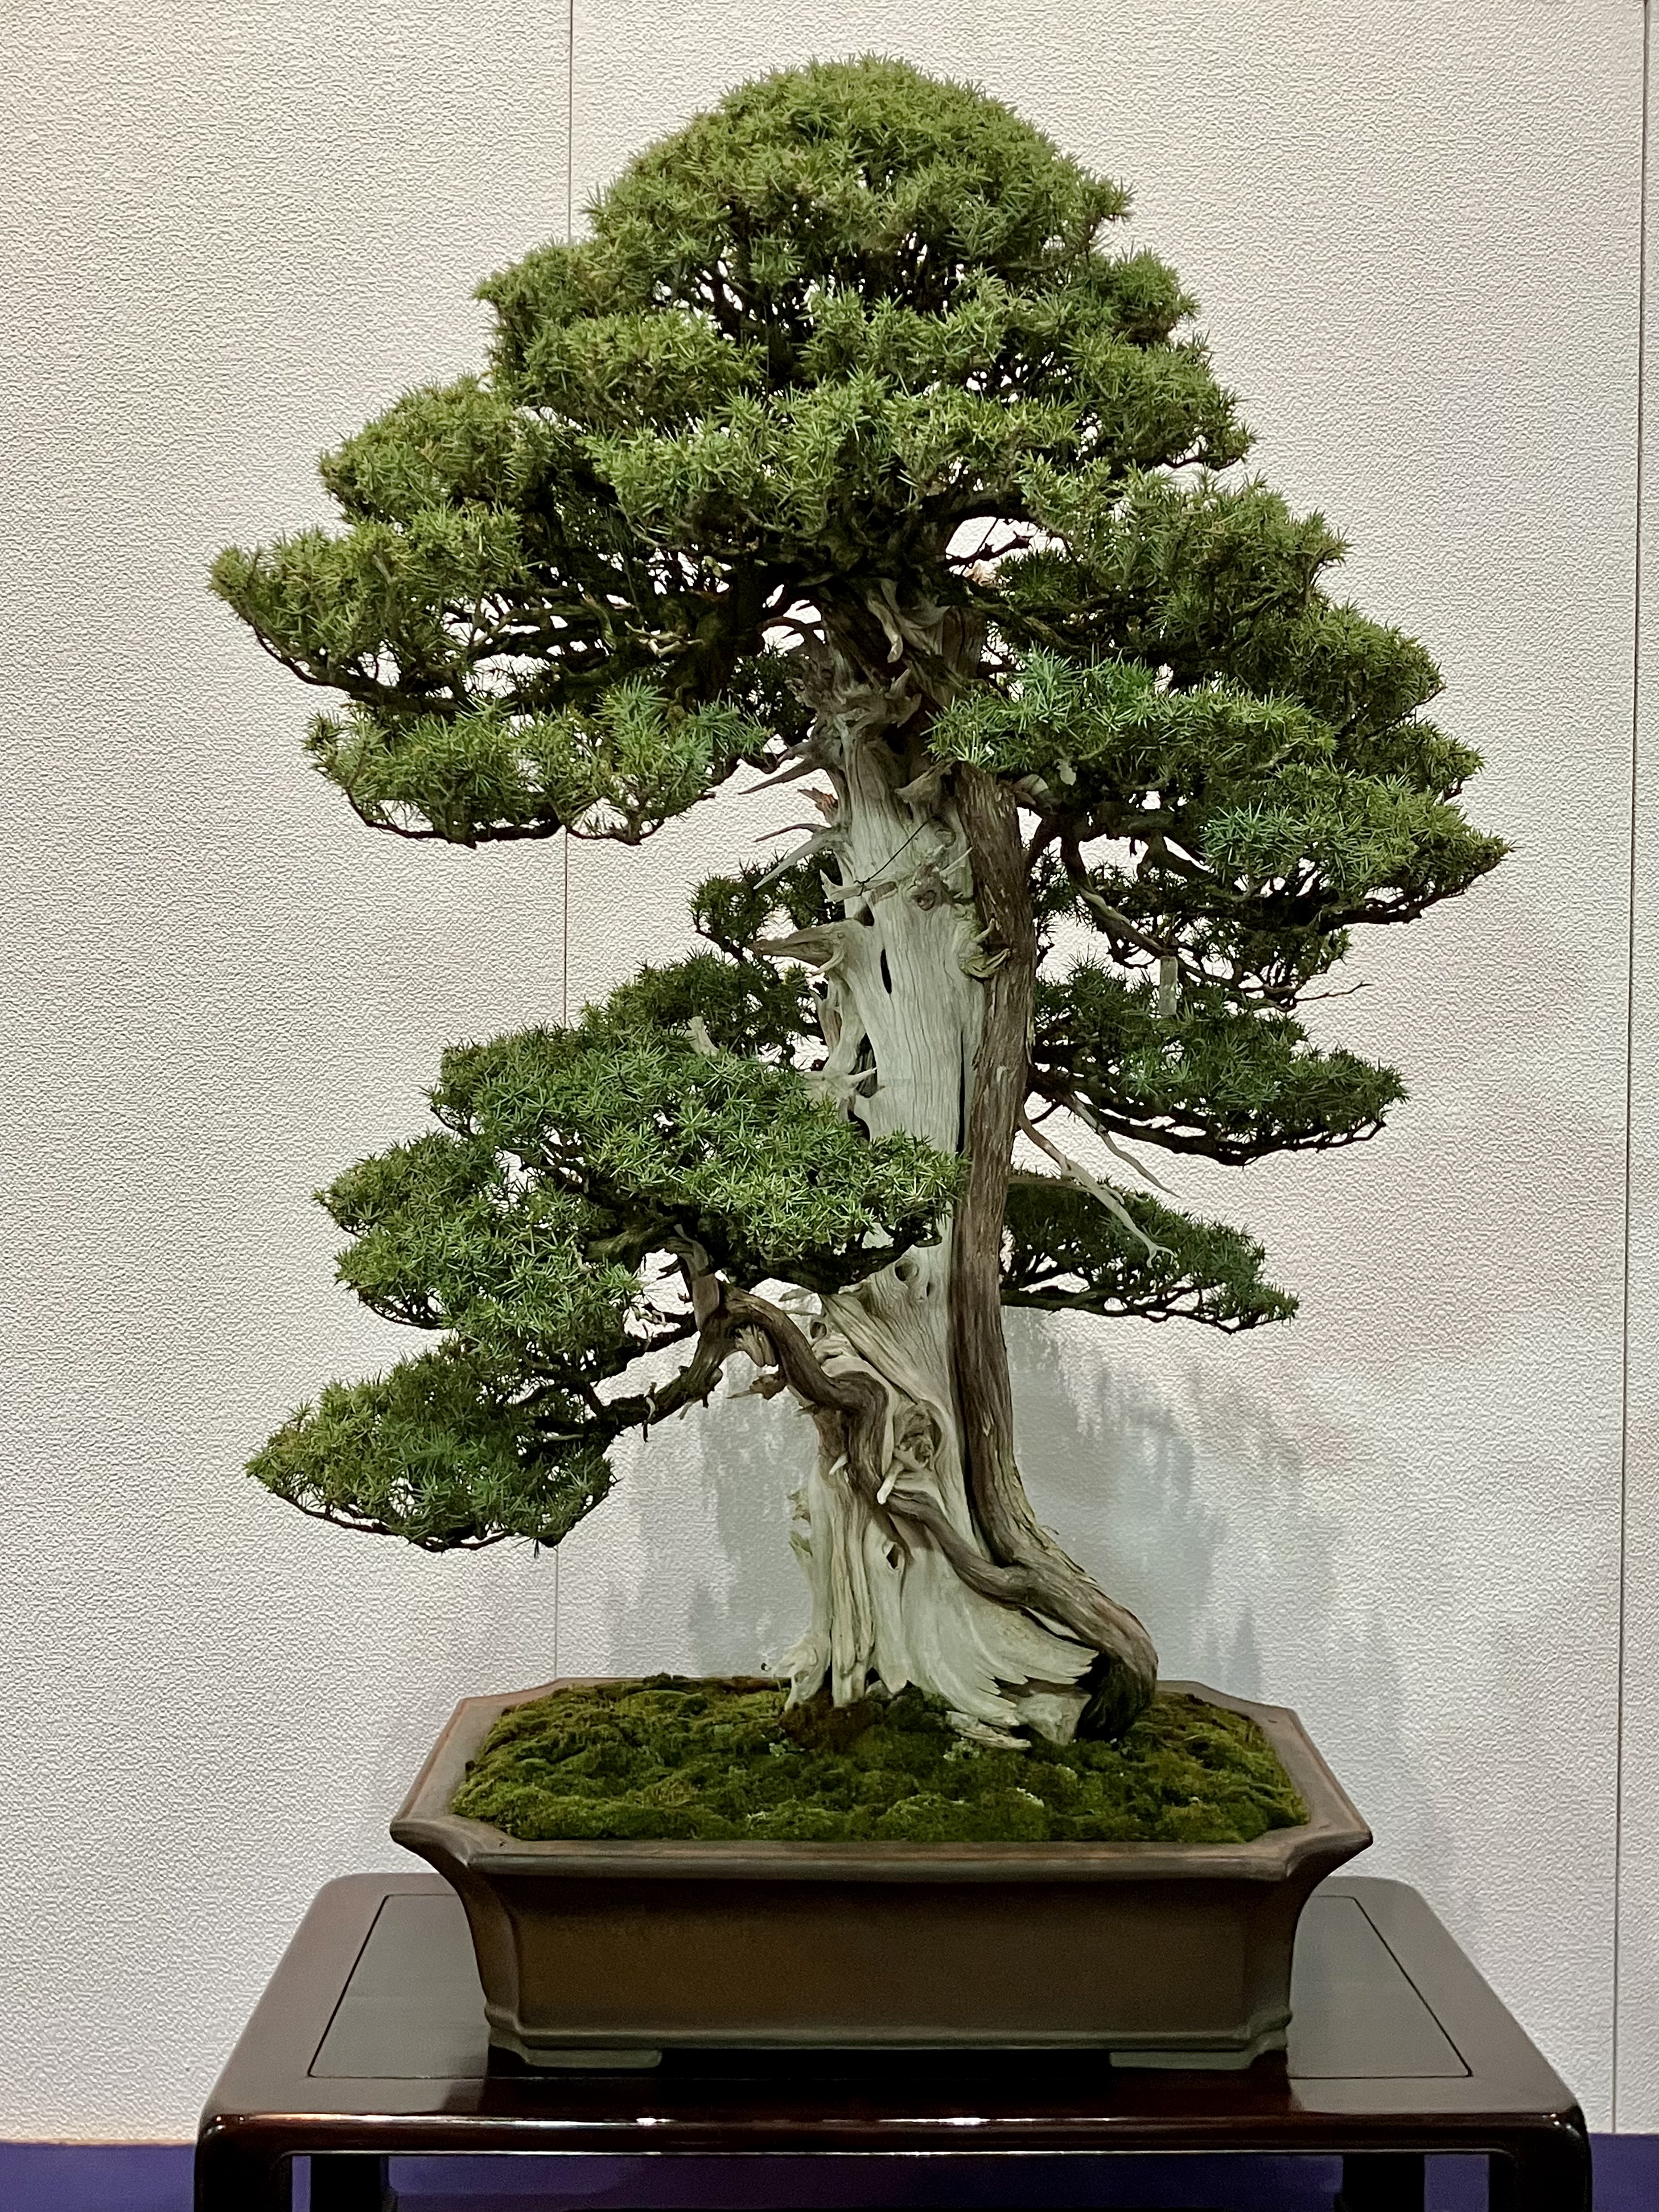
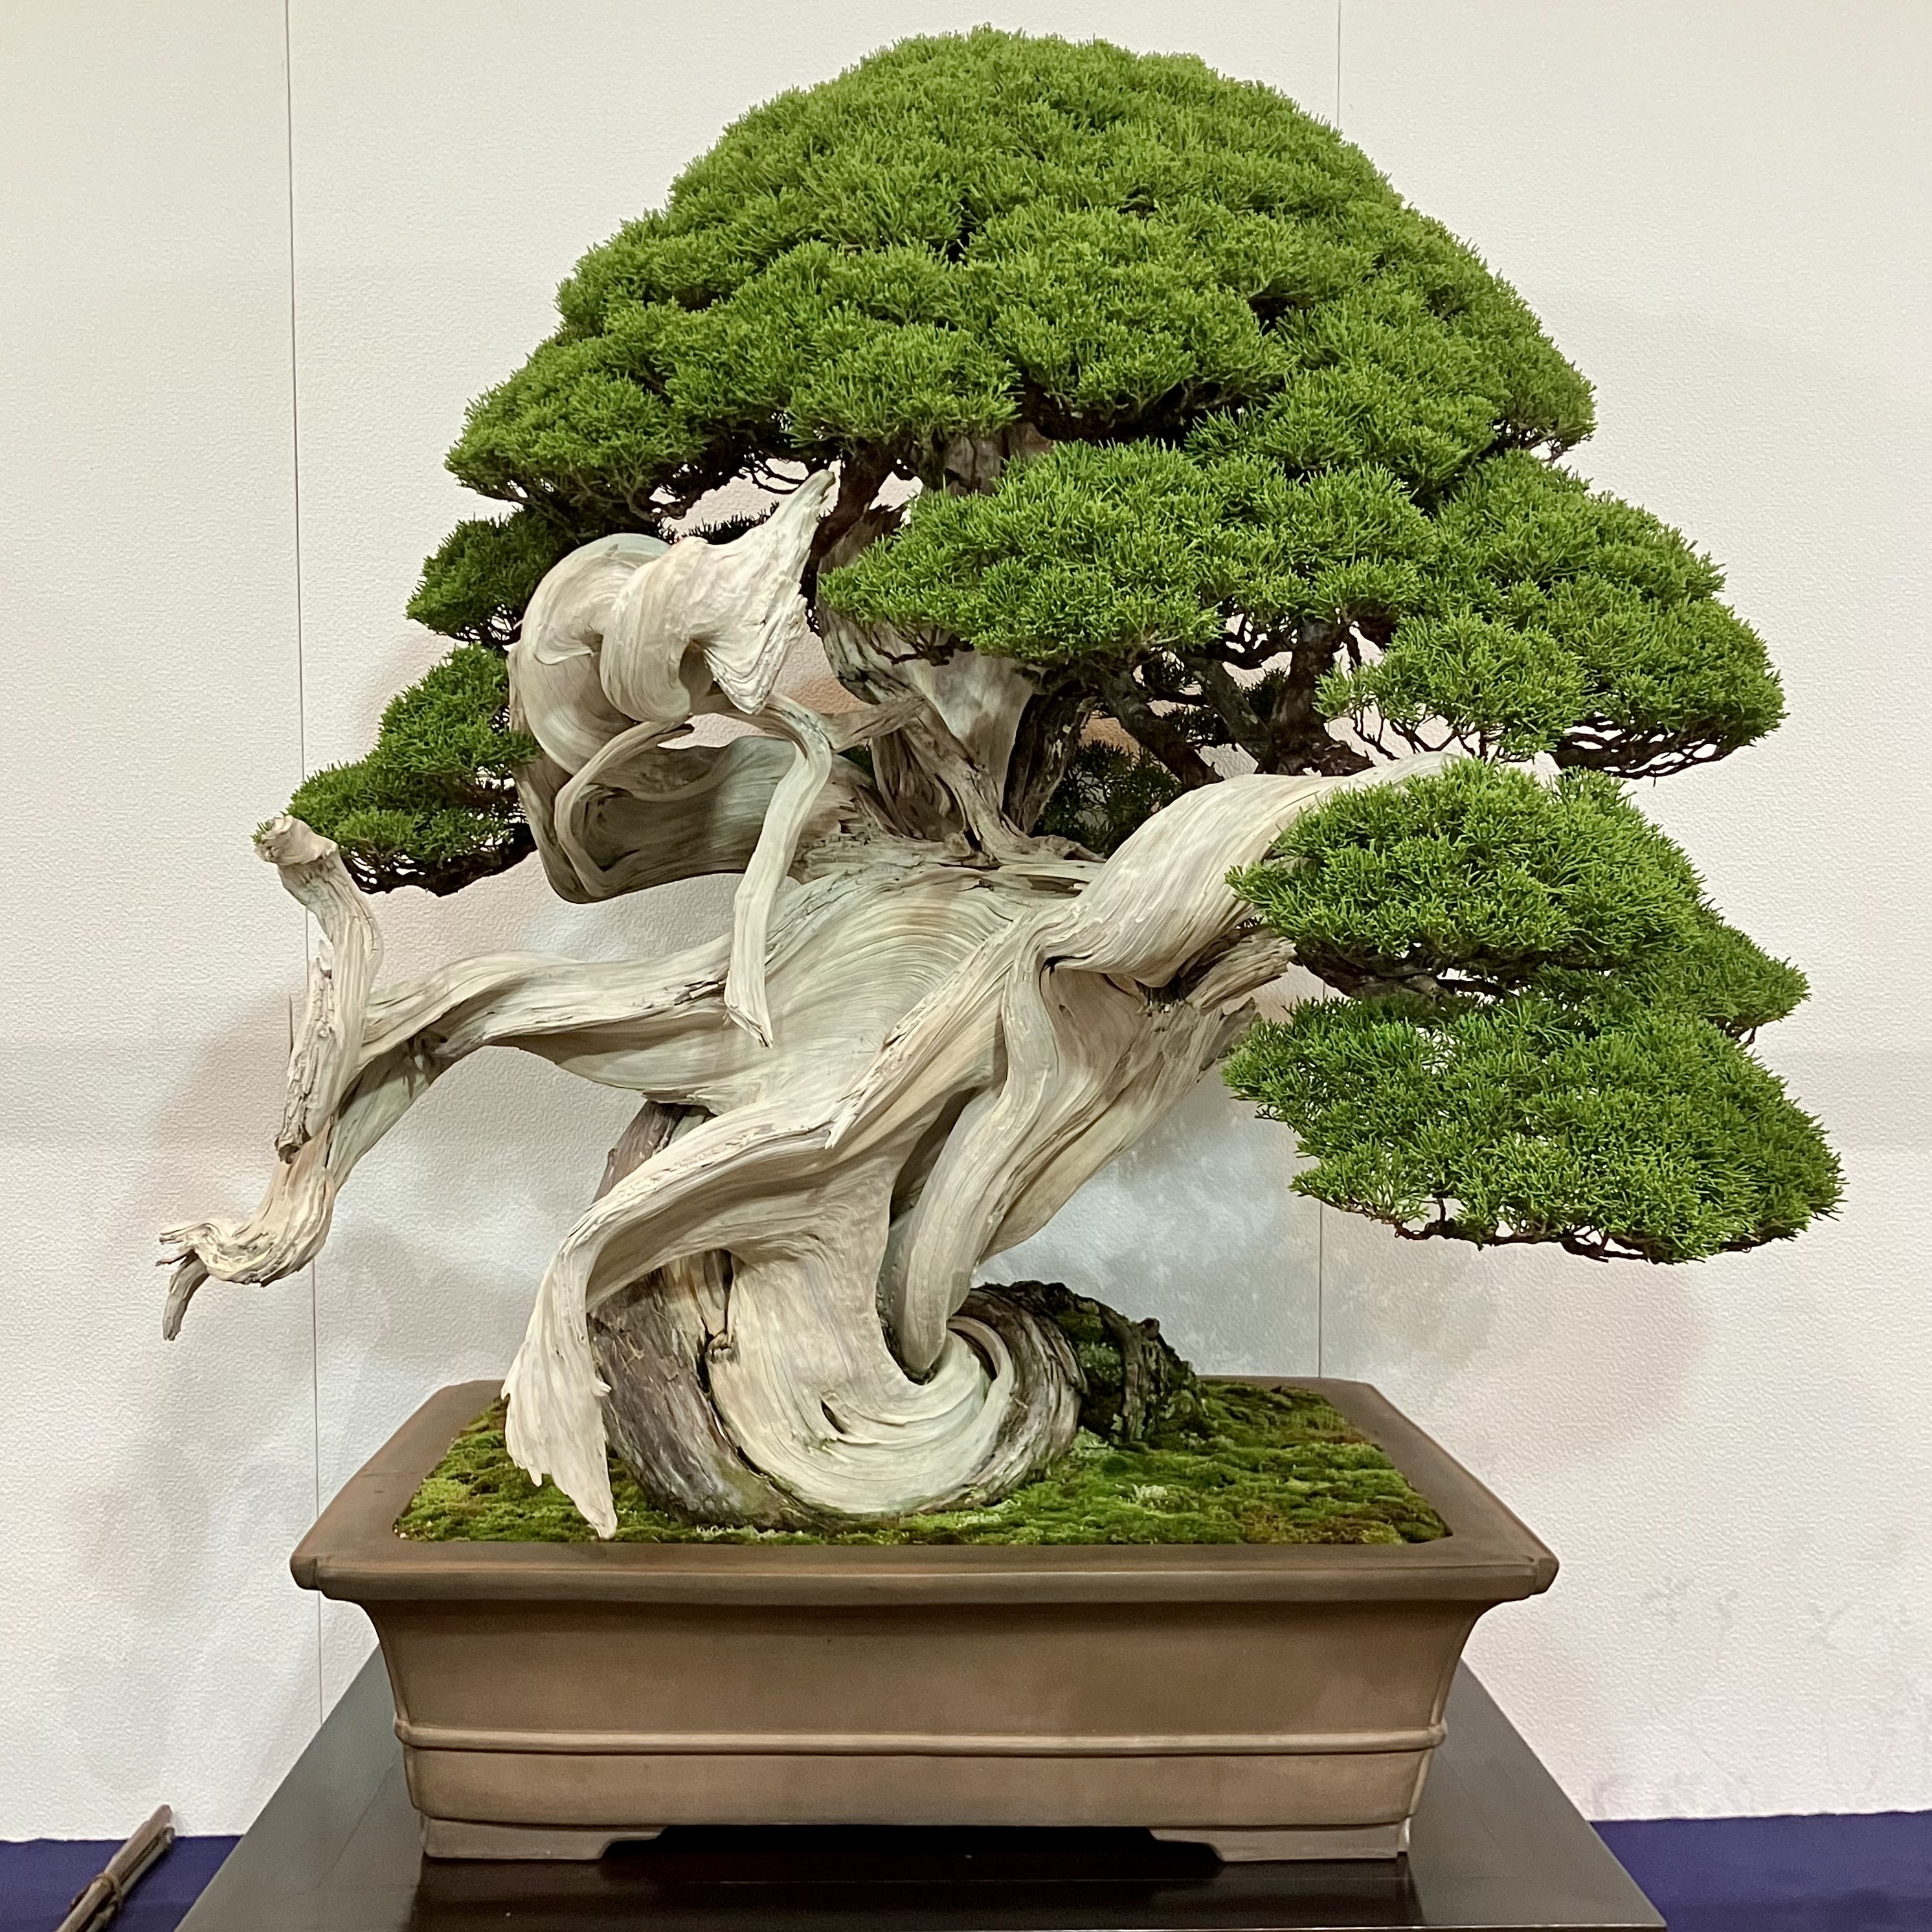
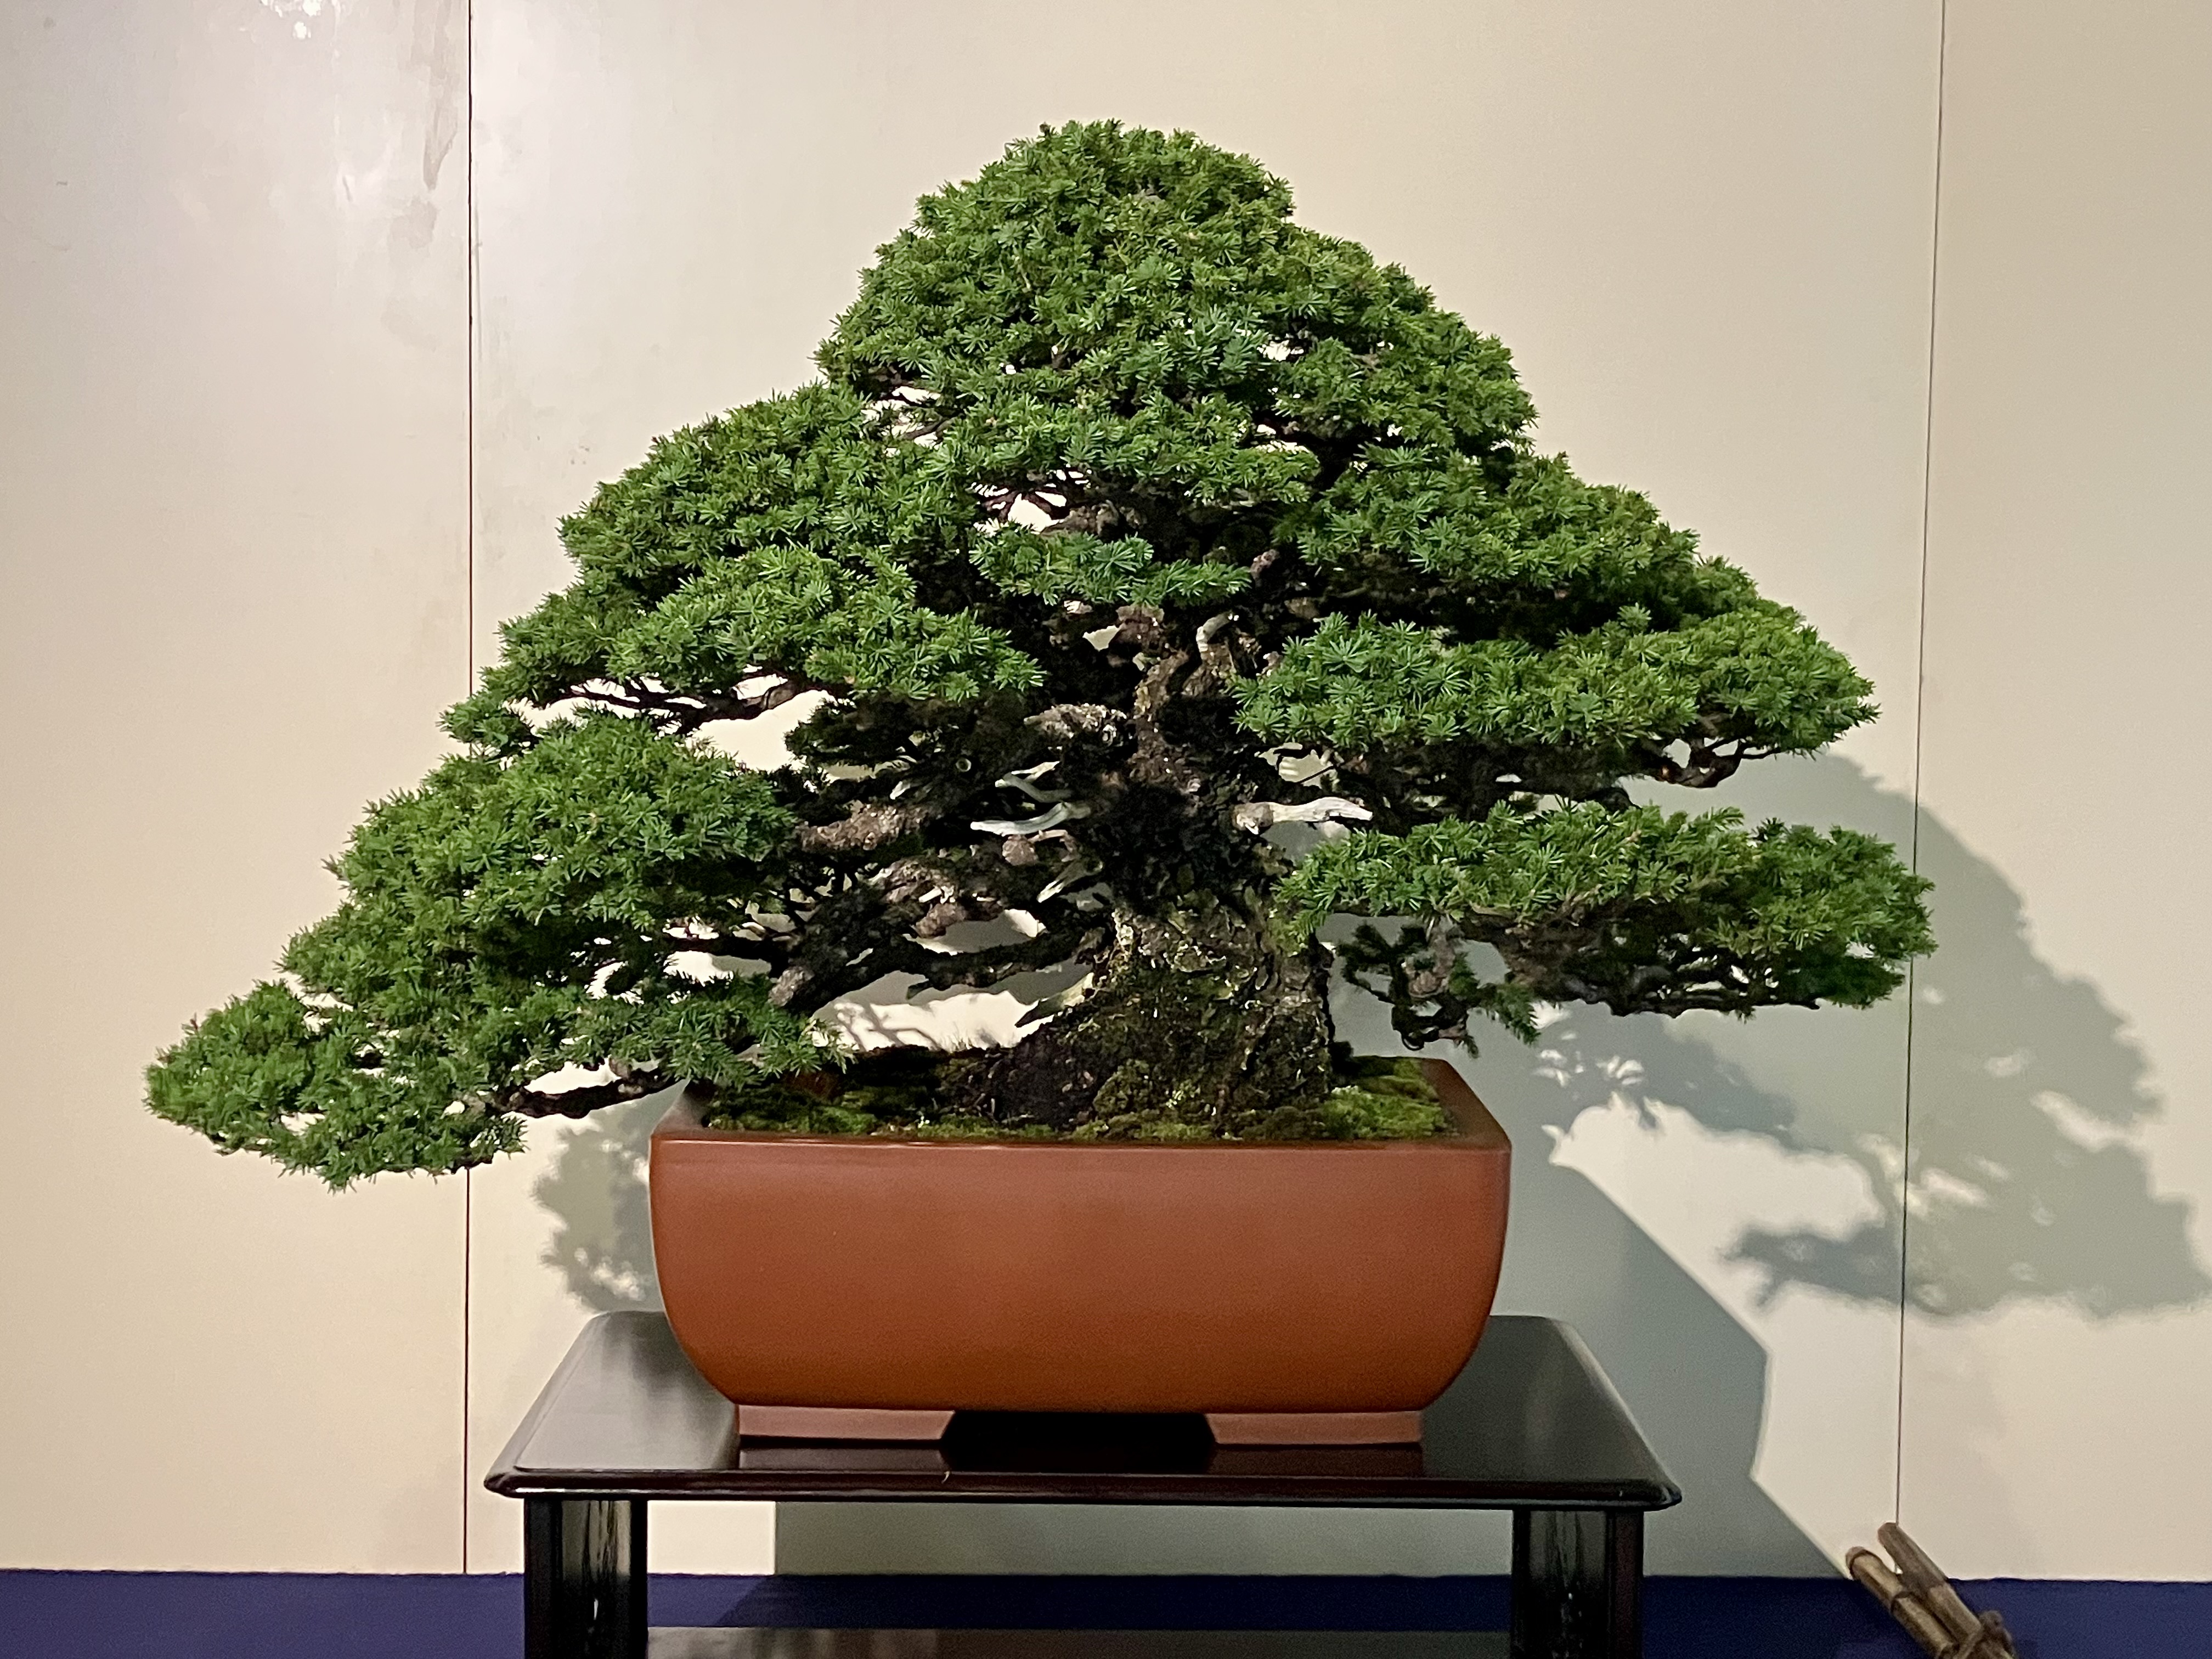
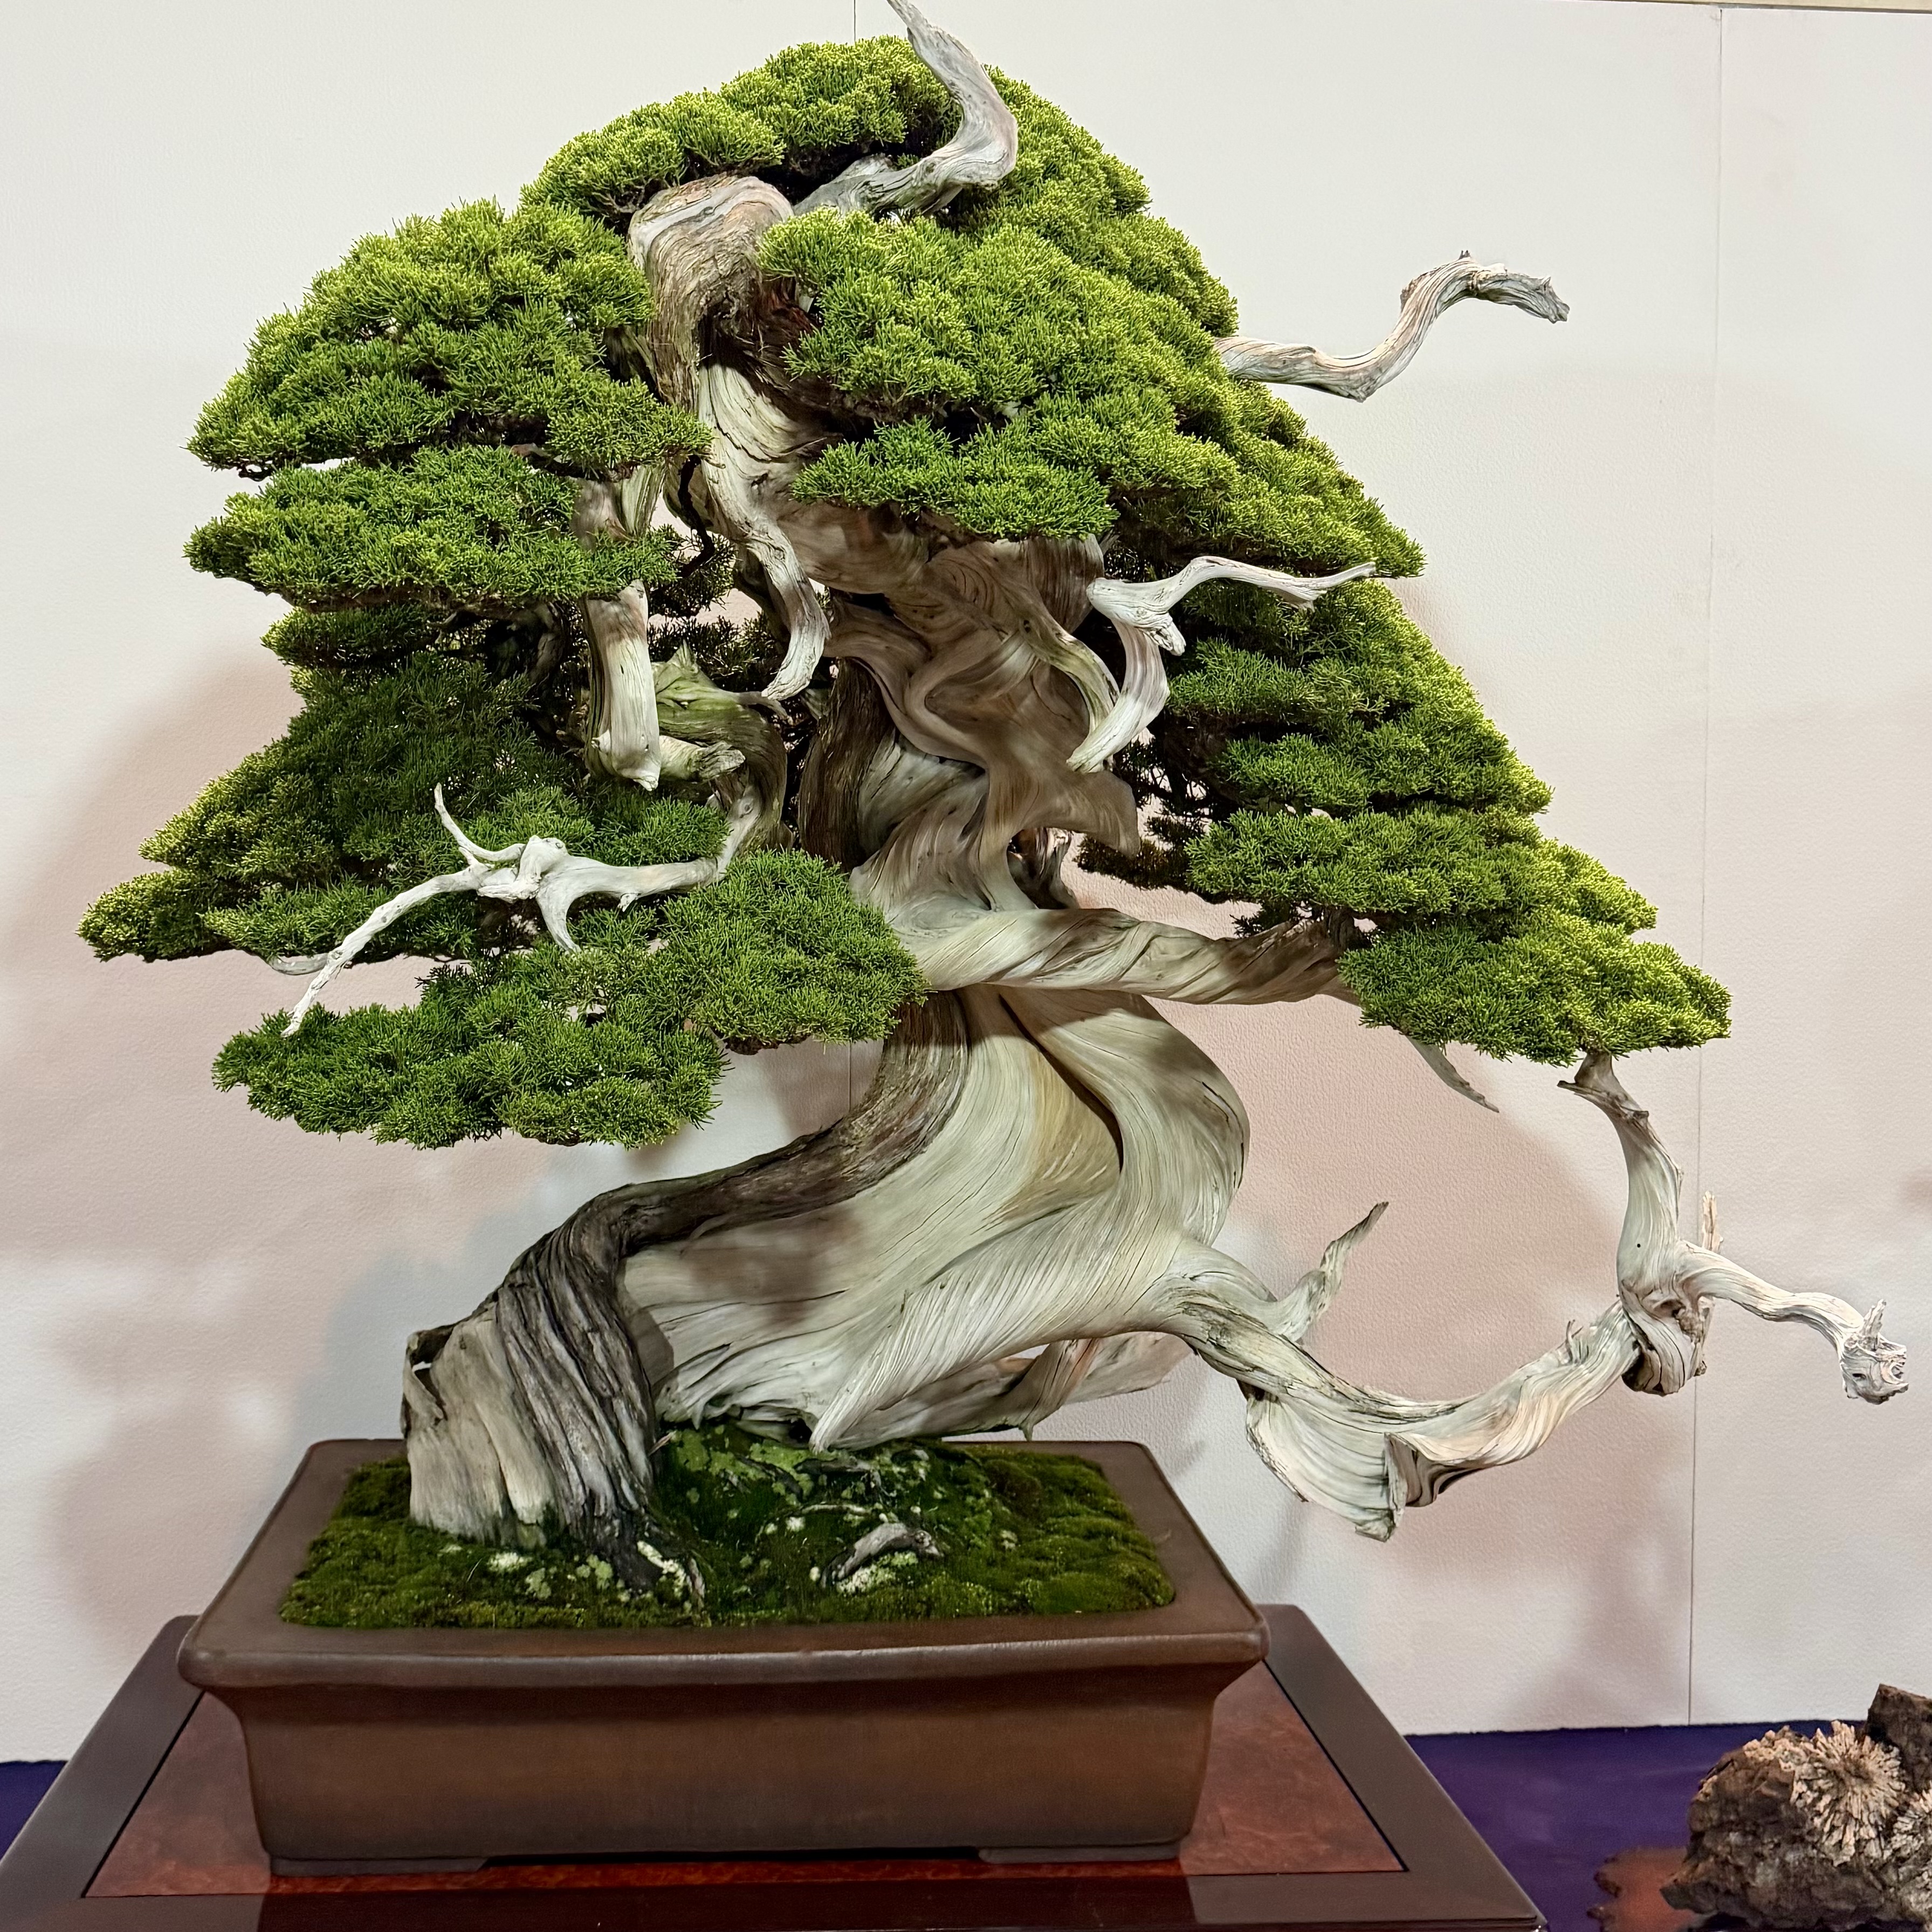
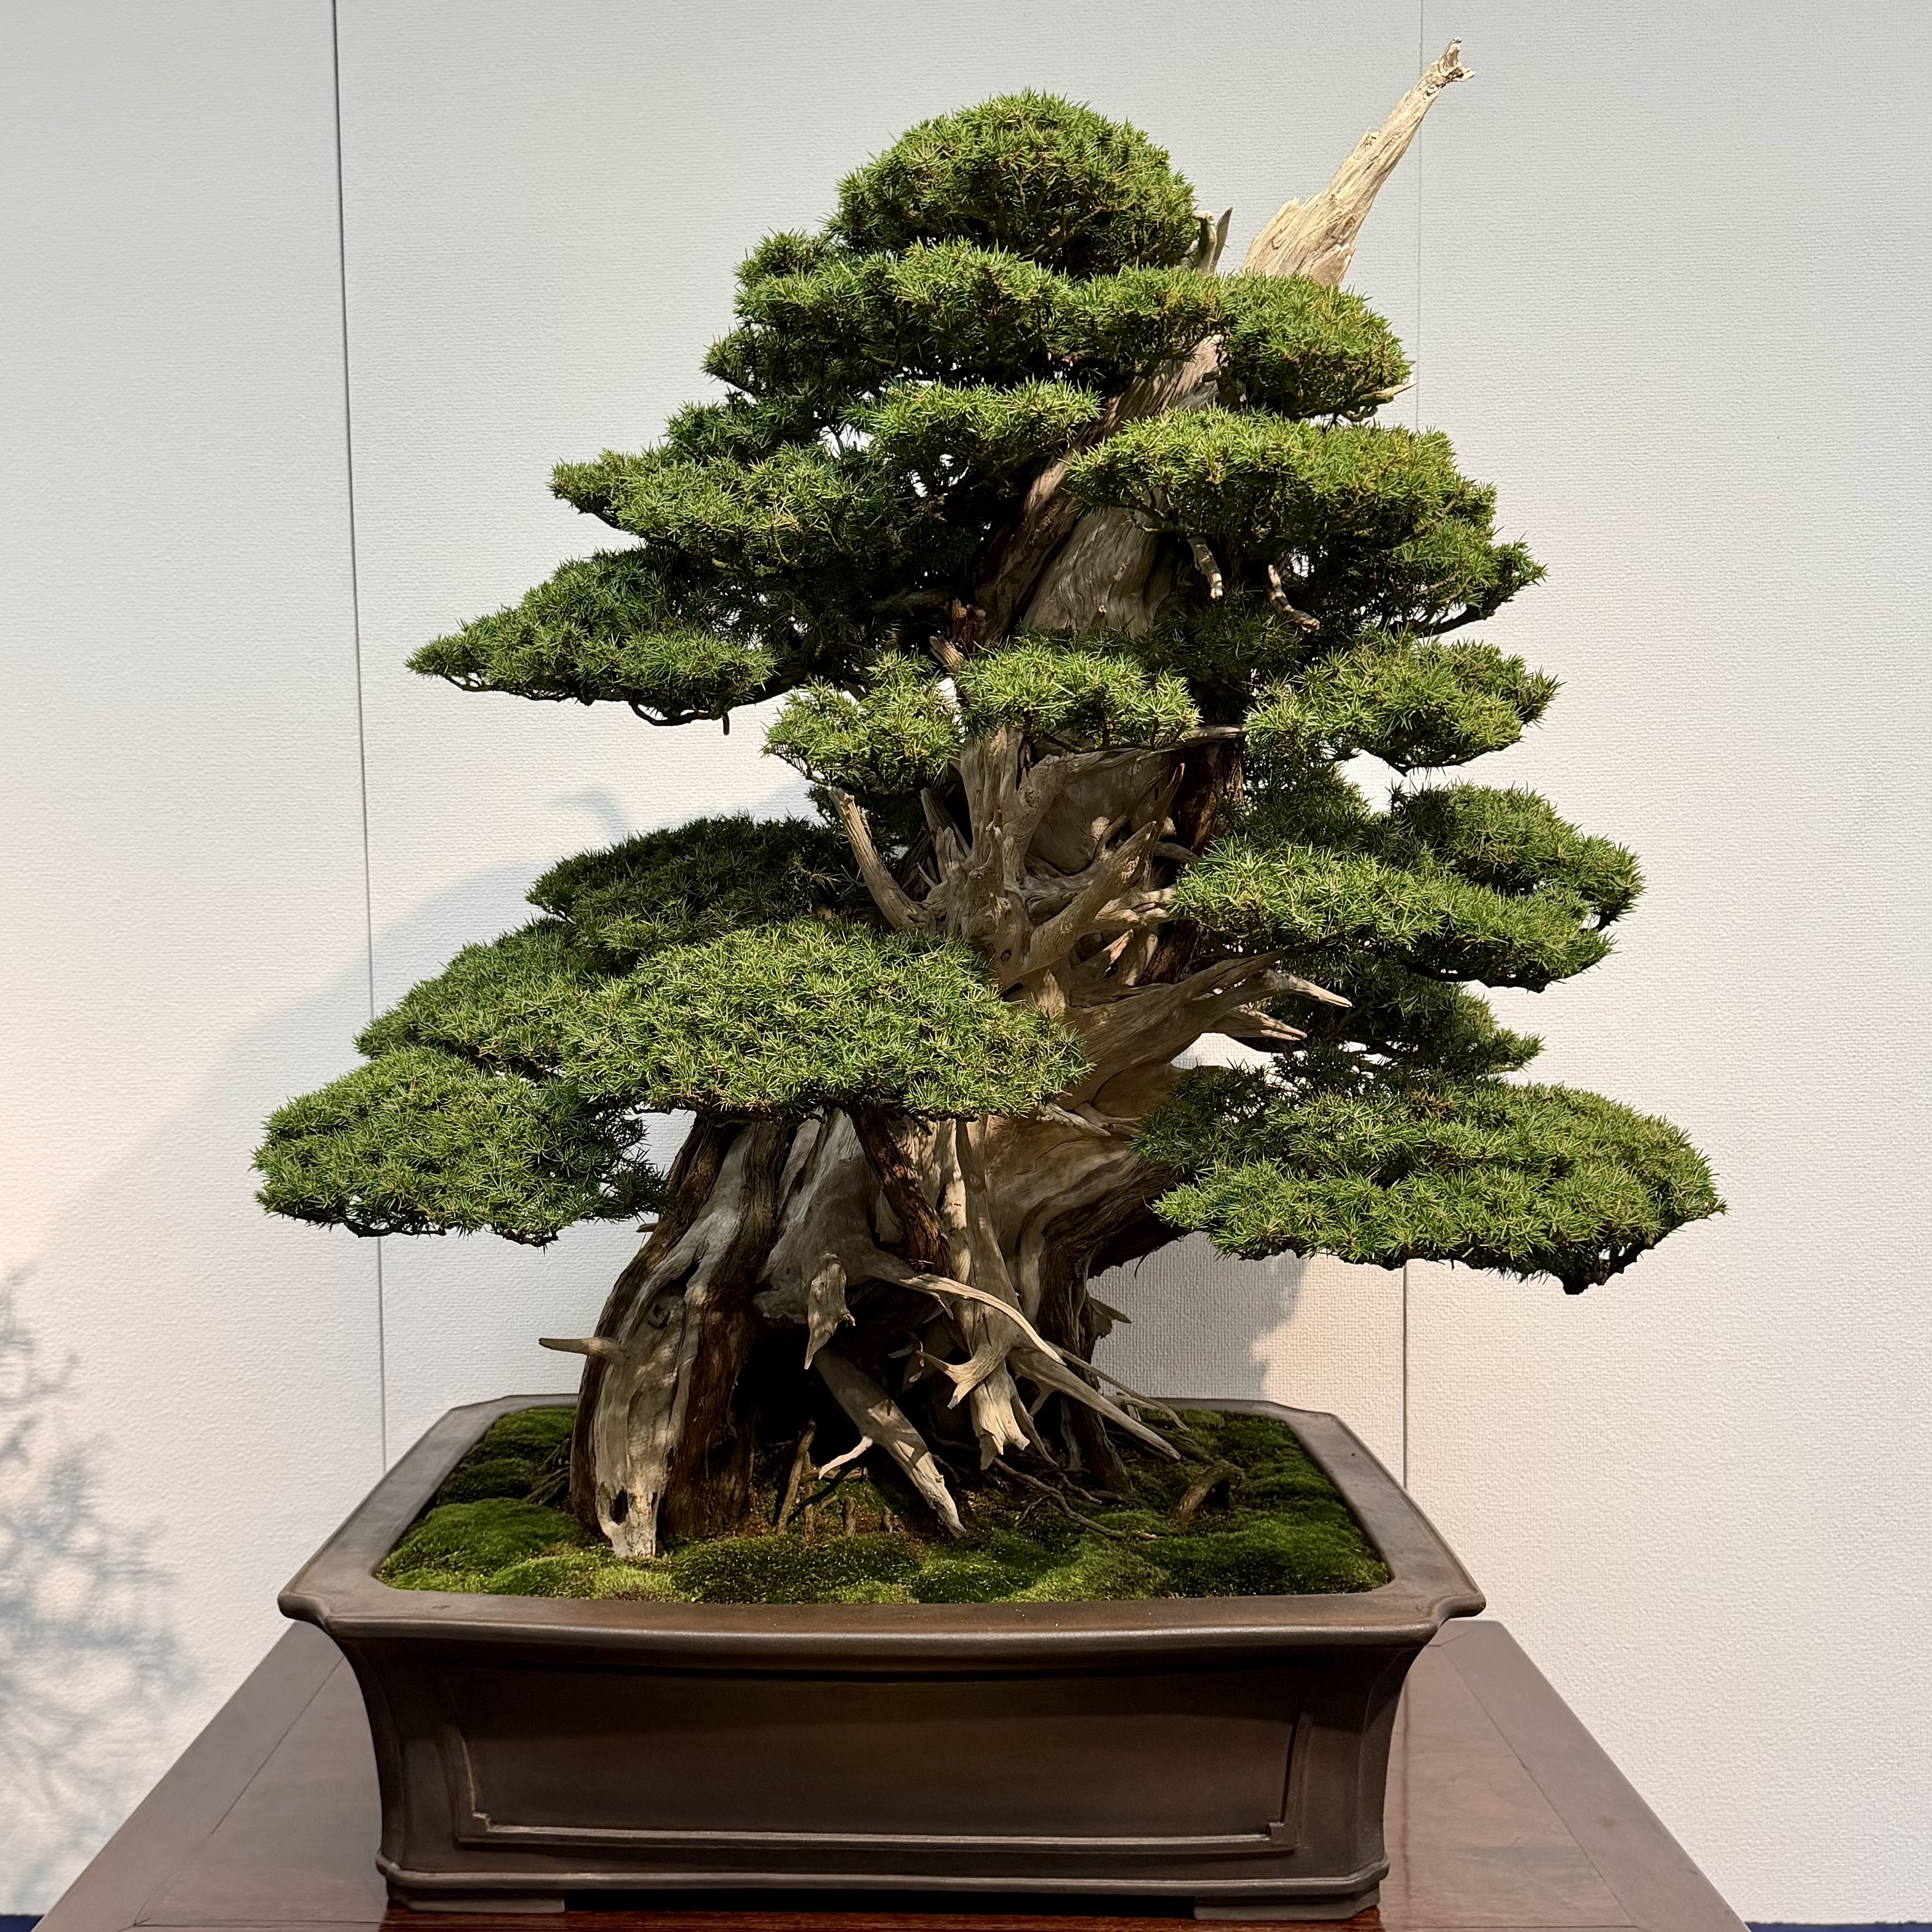
Needle Juniper. A well-known juniper making an appearance in the 100th Kokufu.
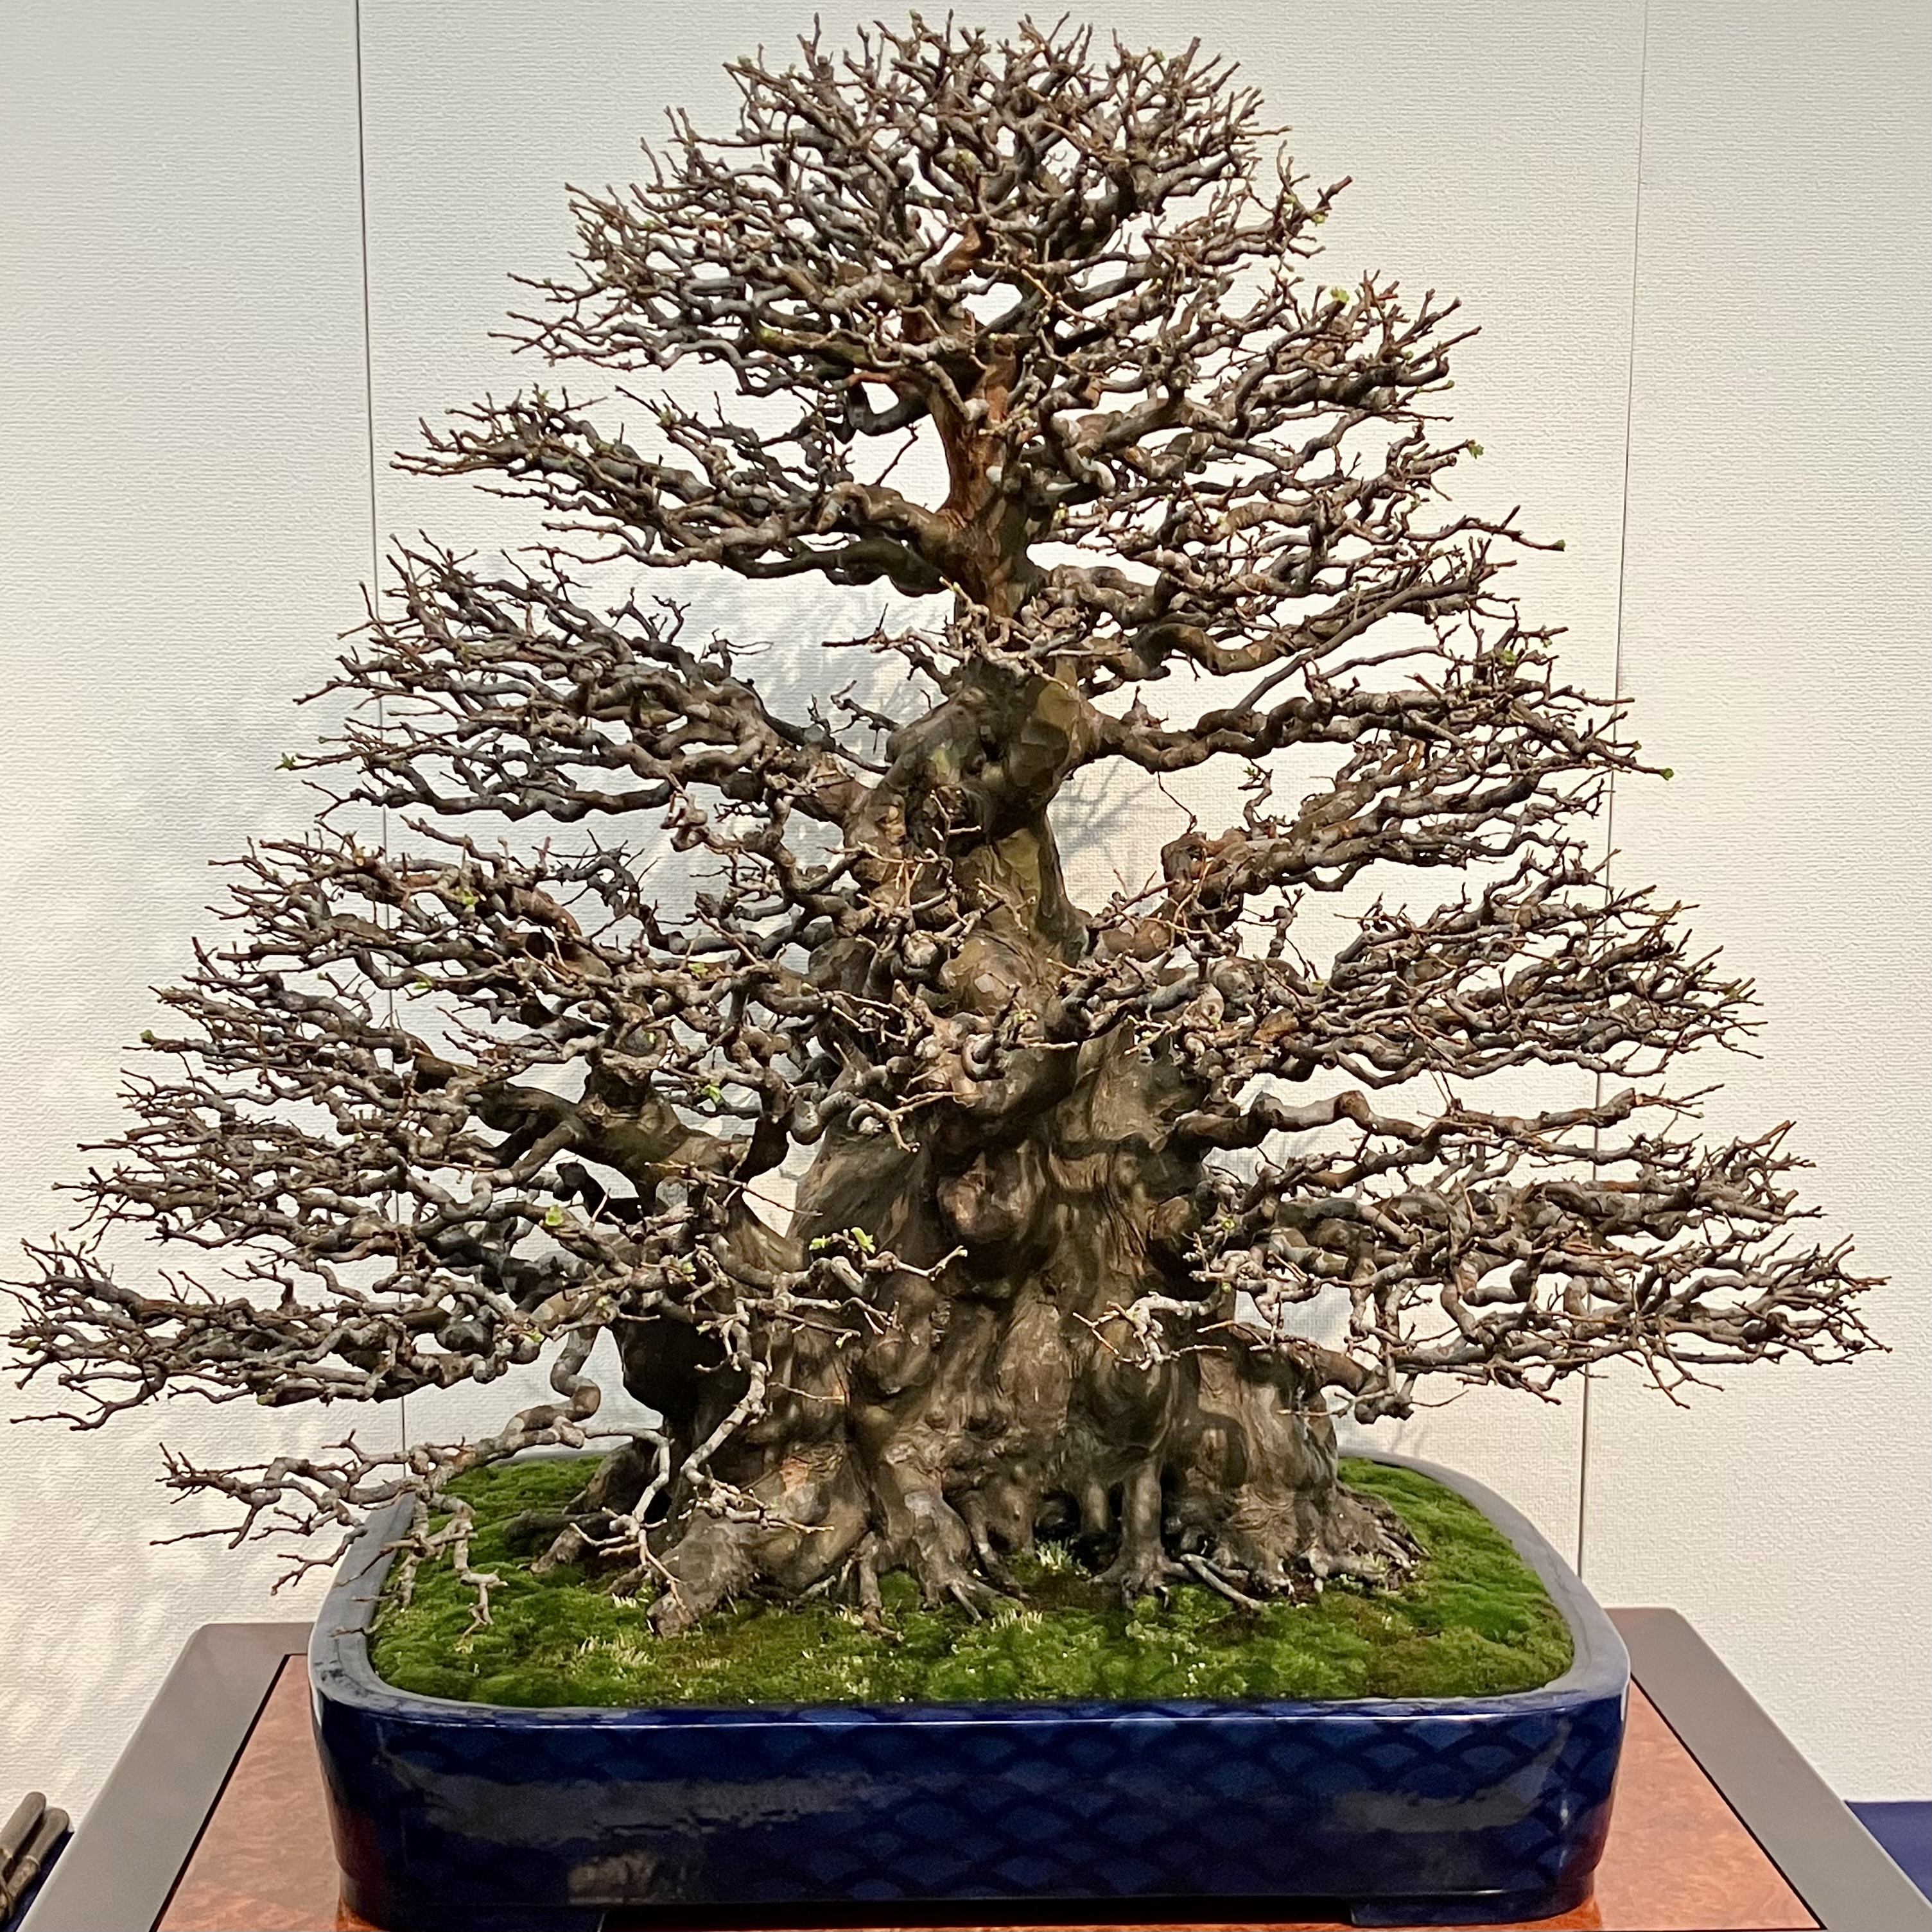
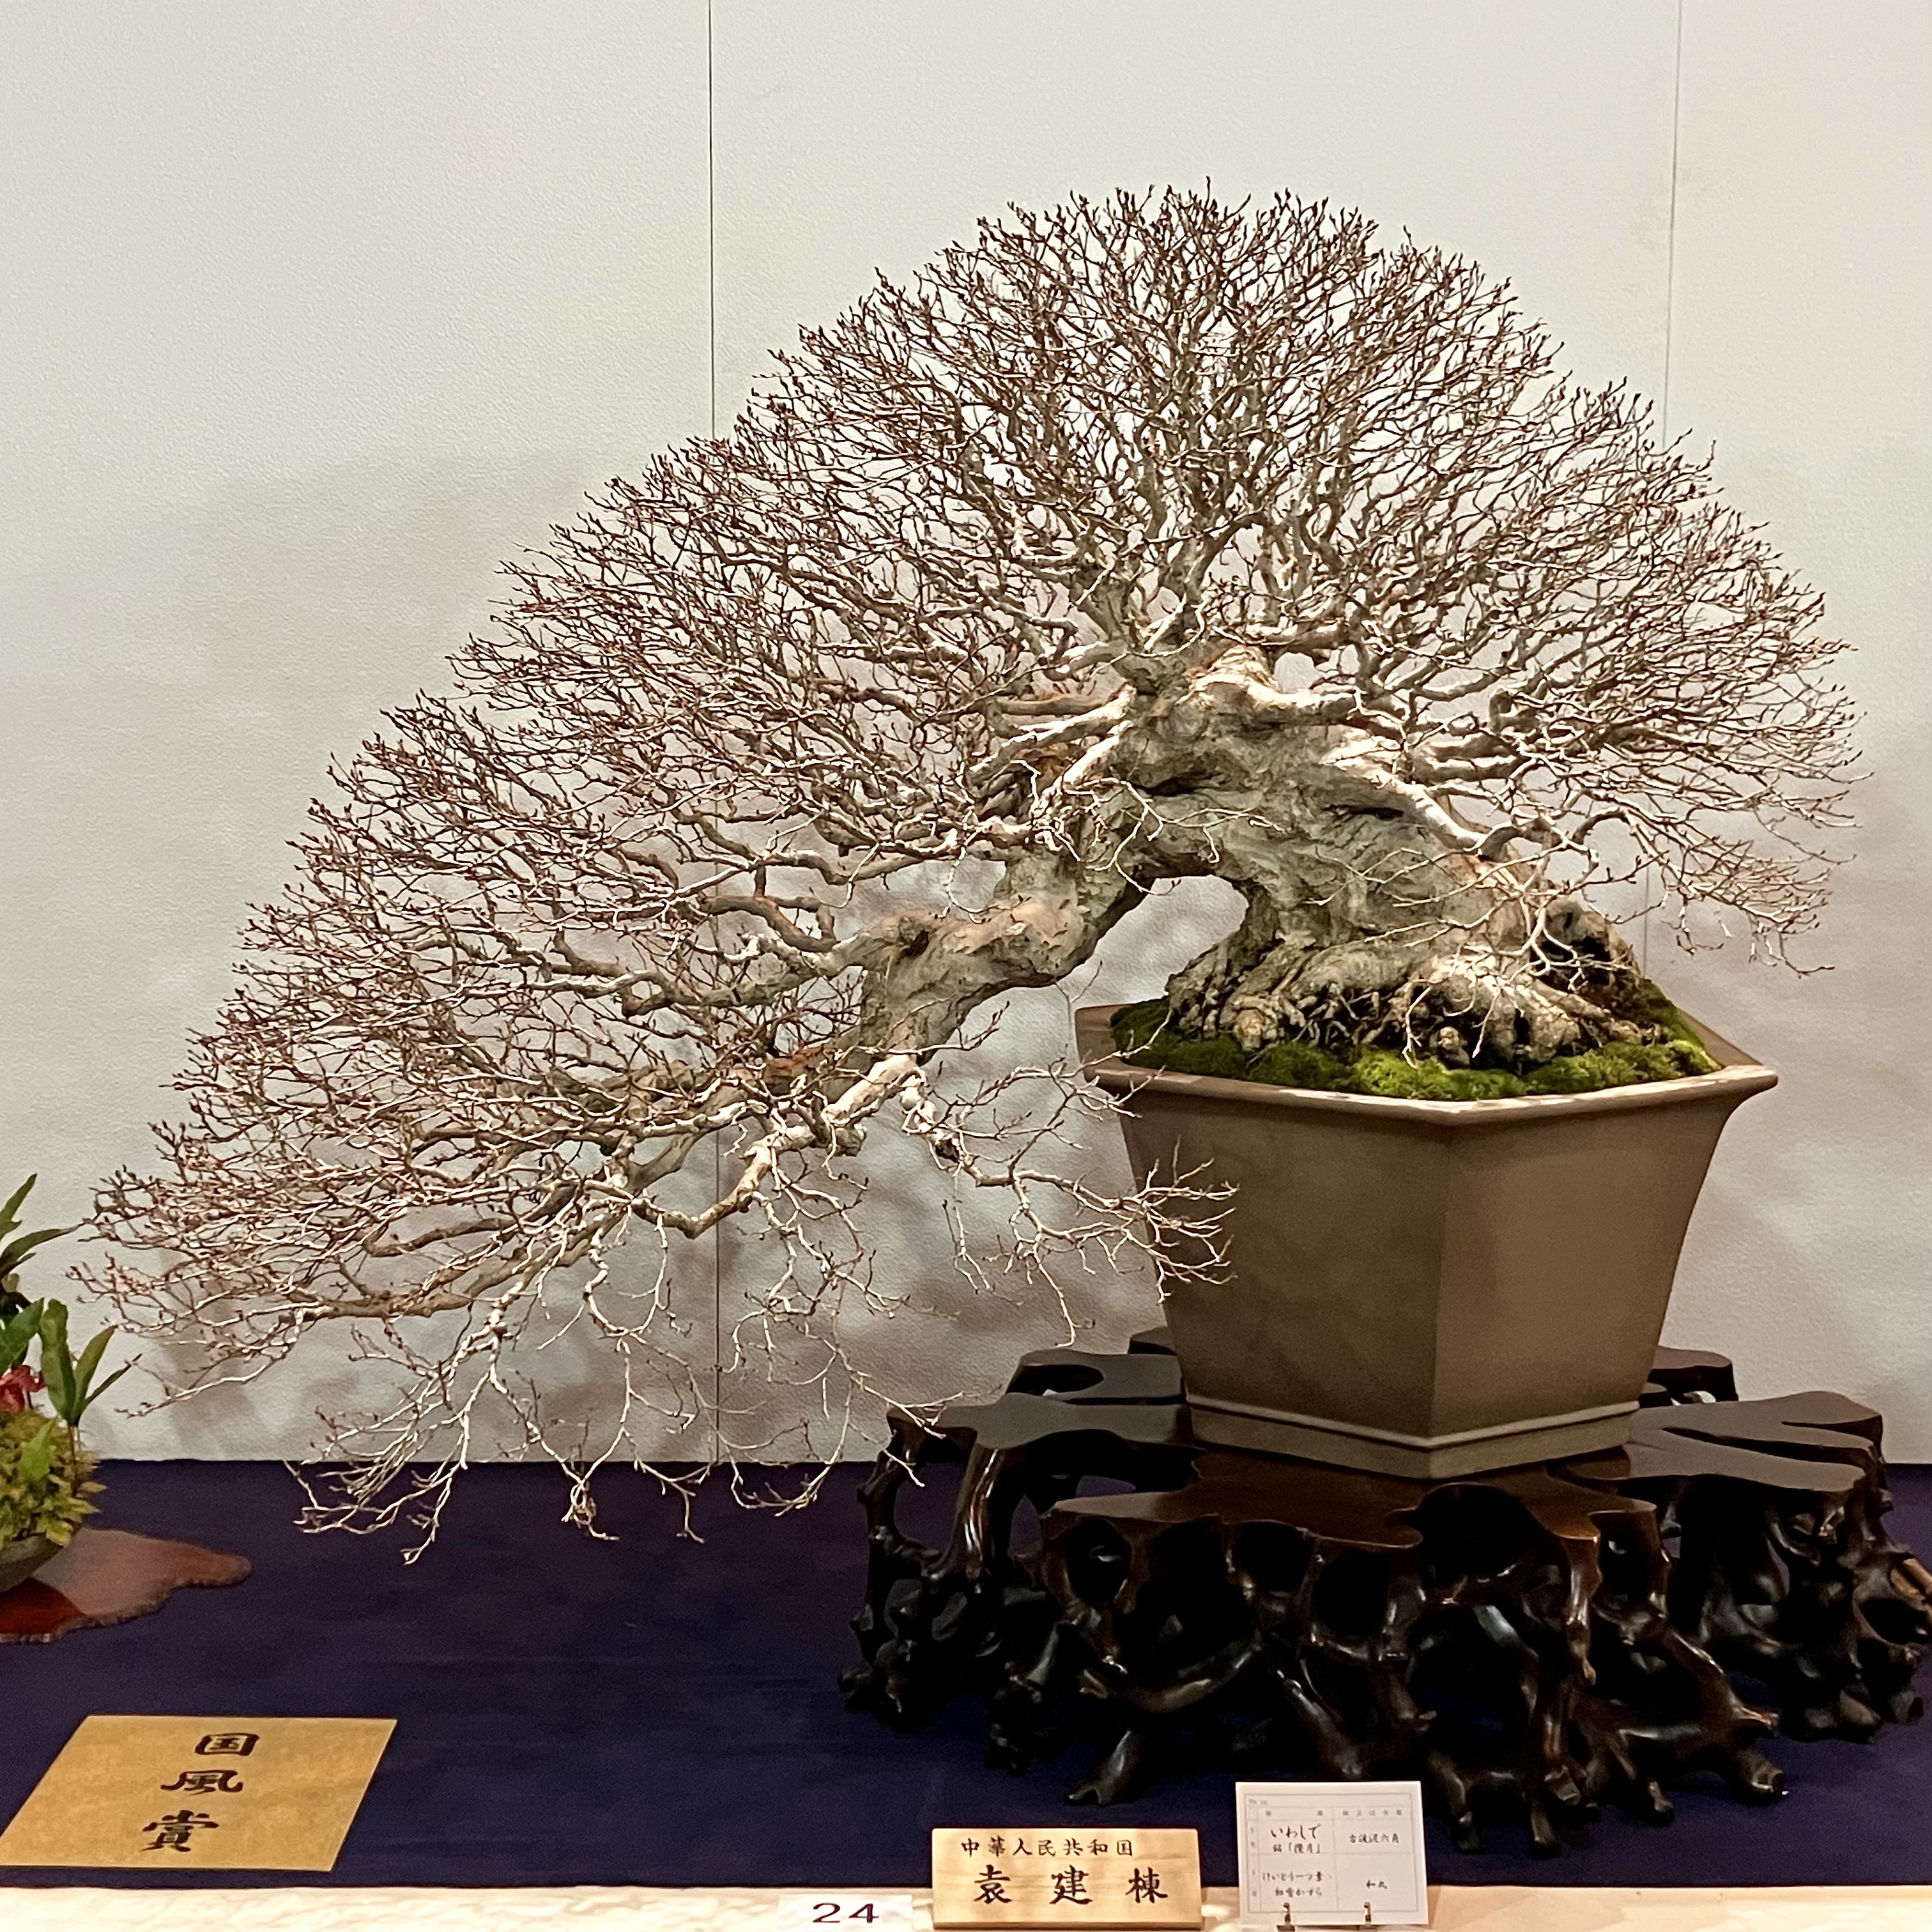
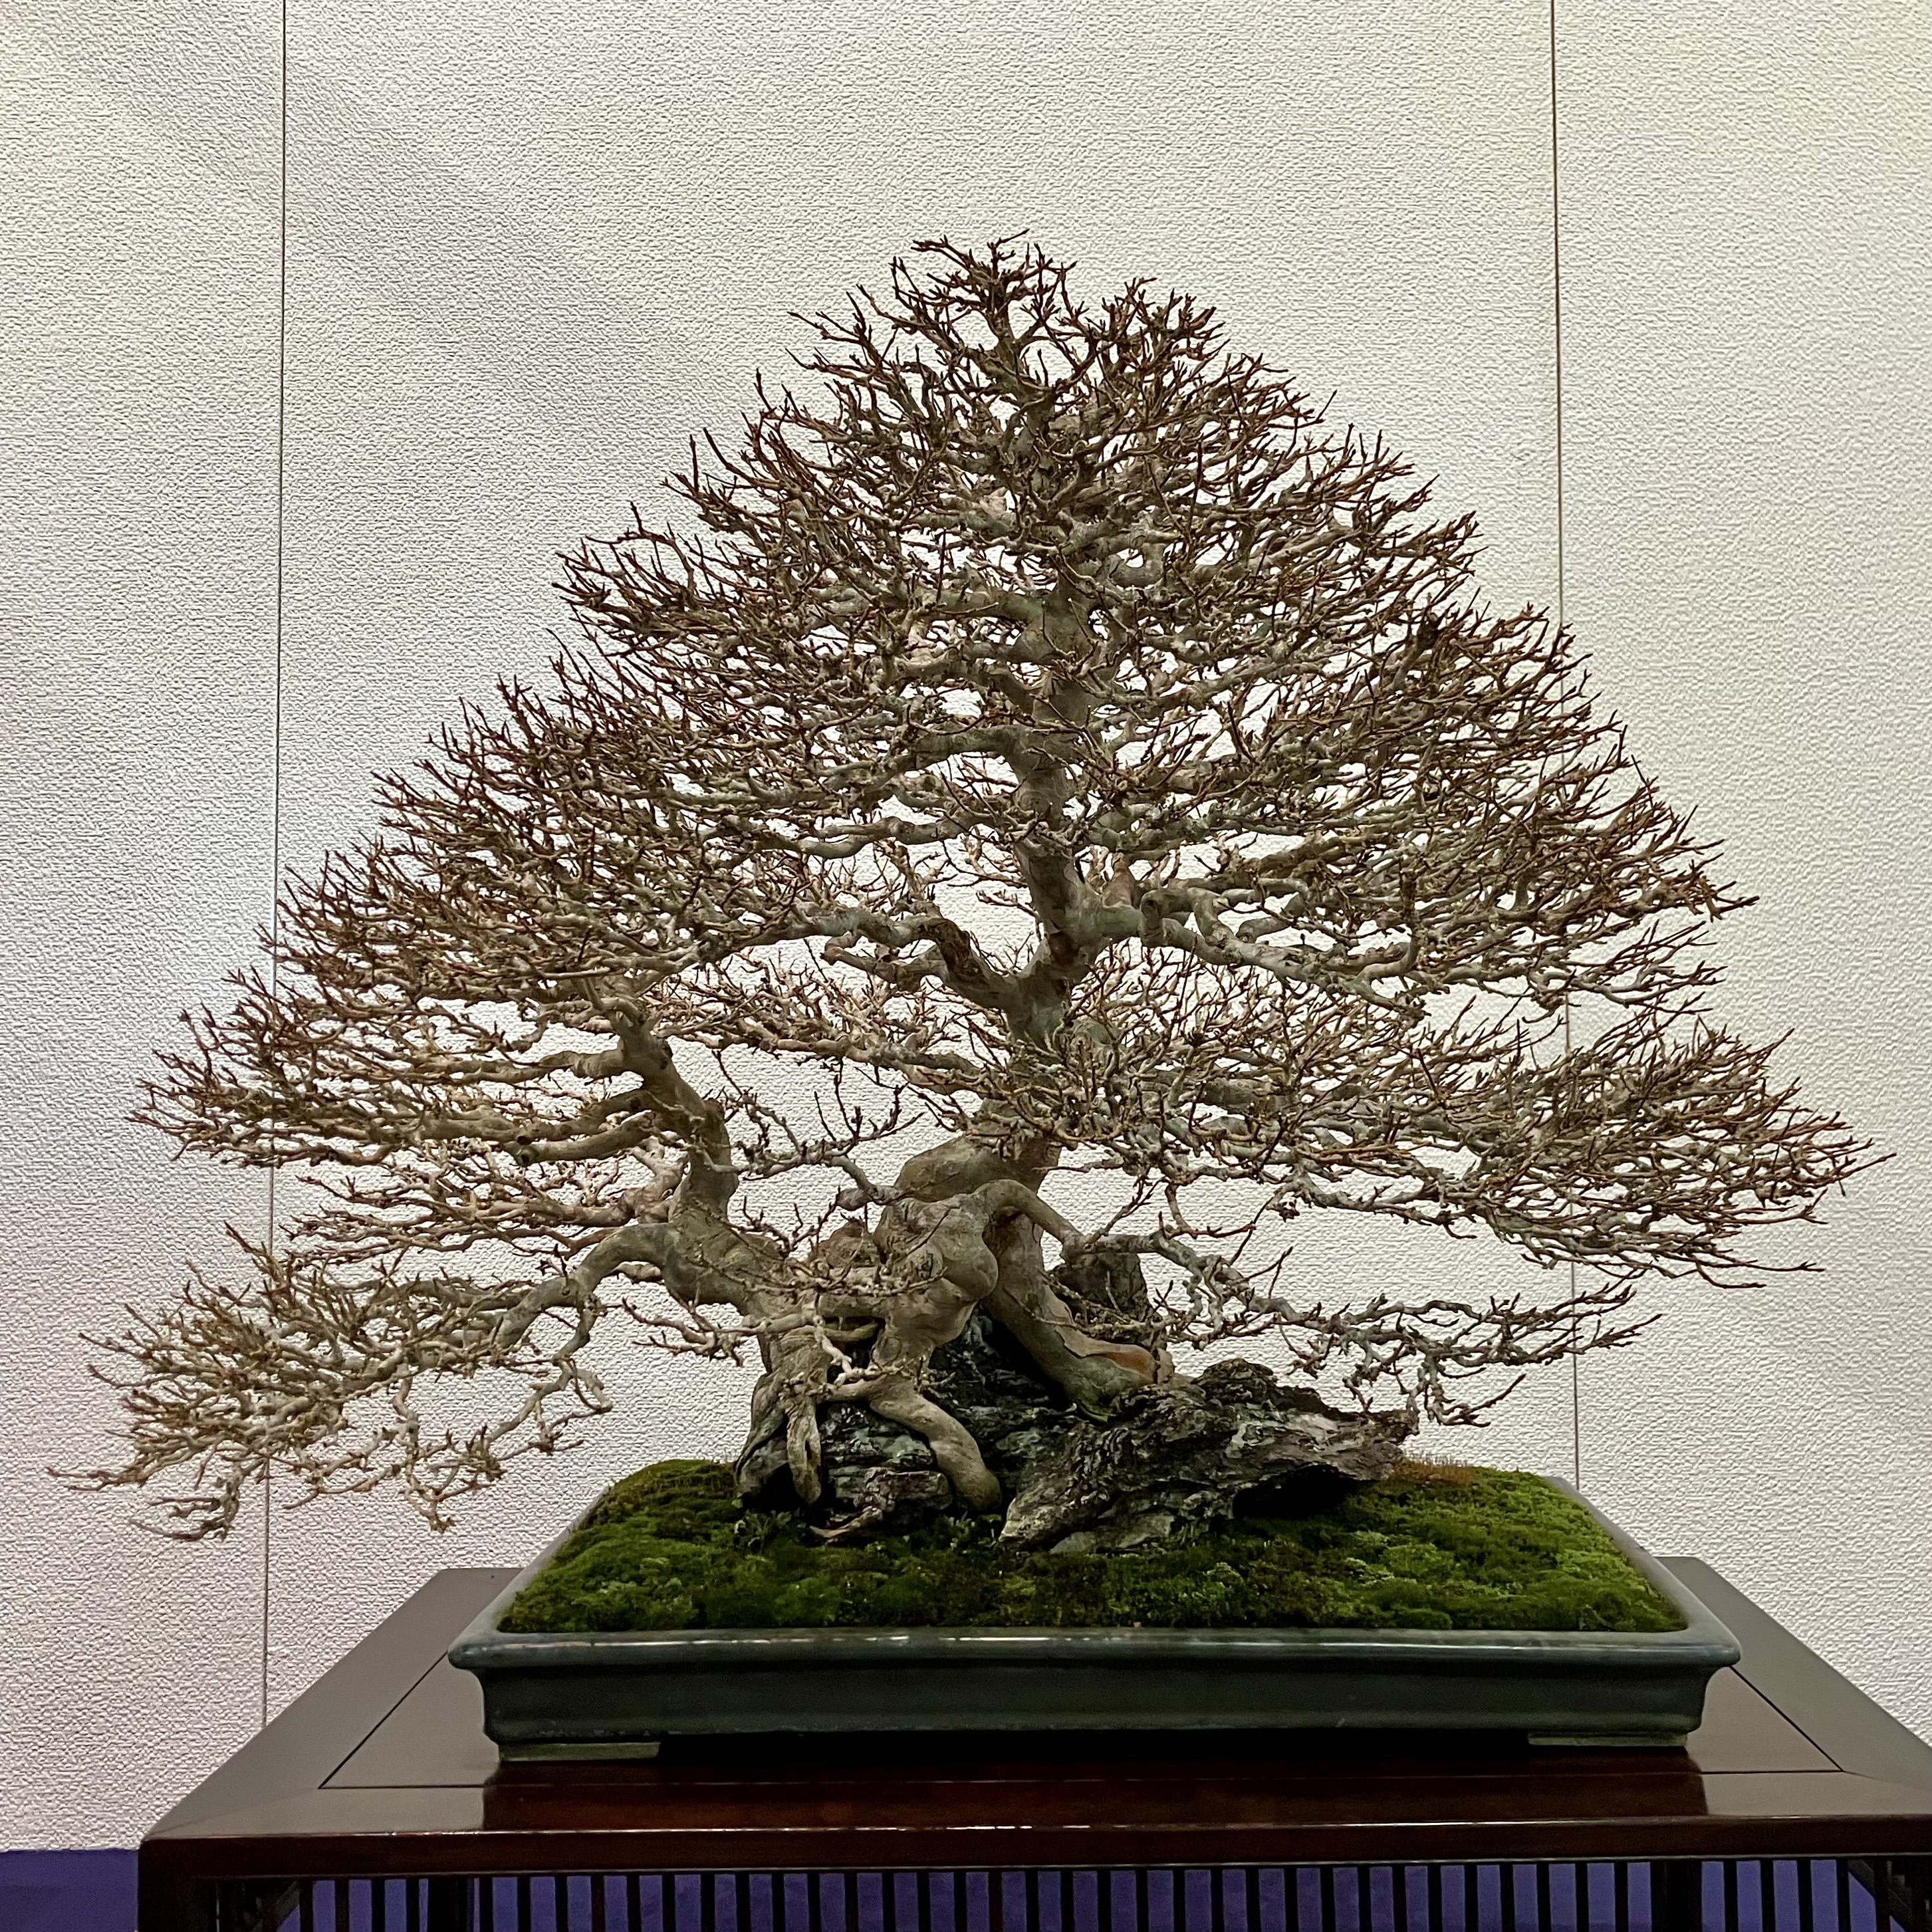
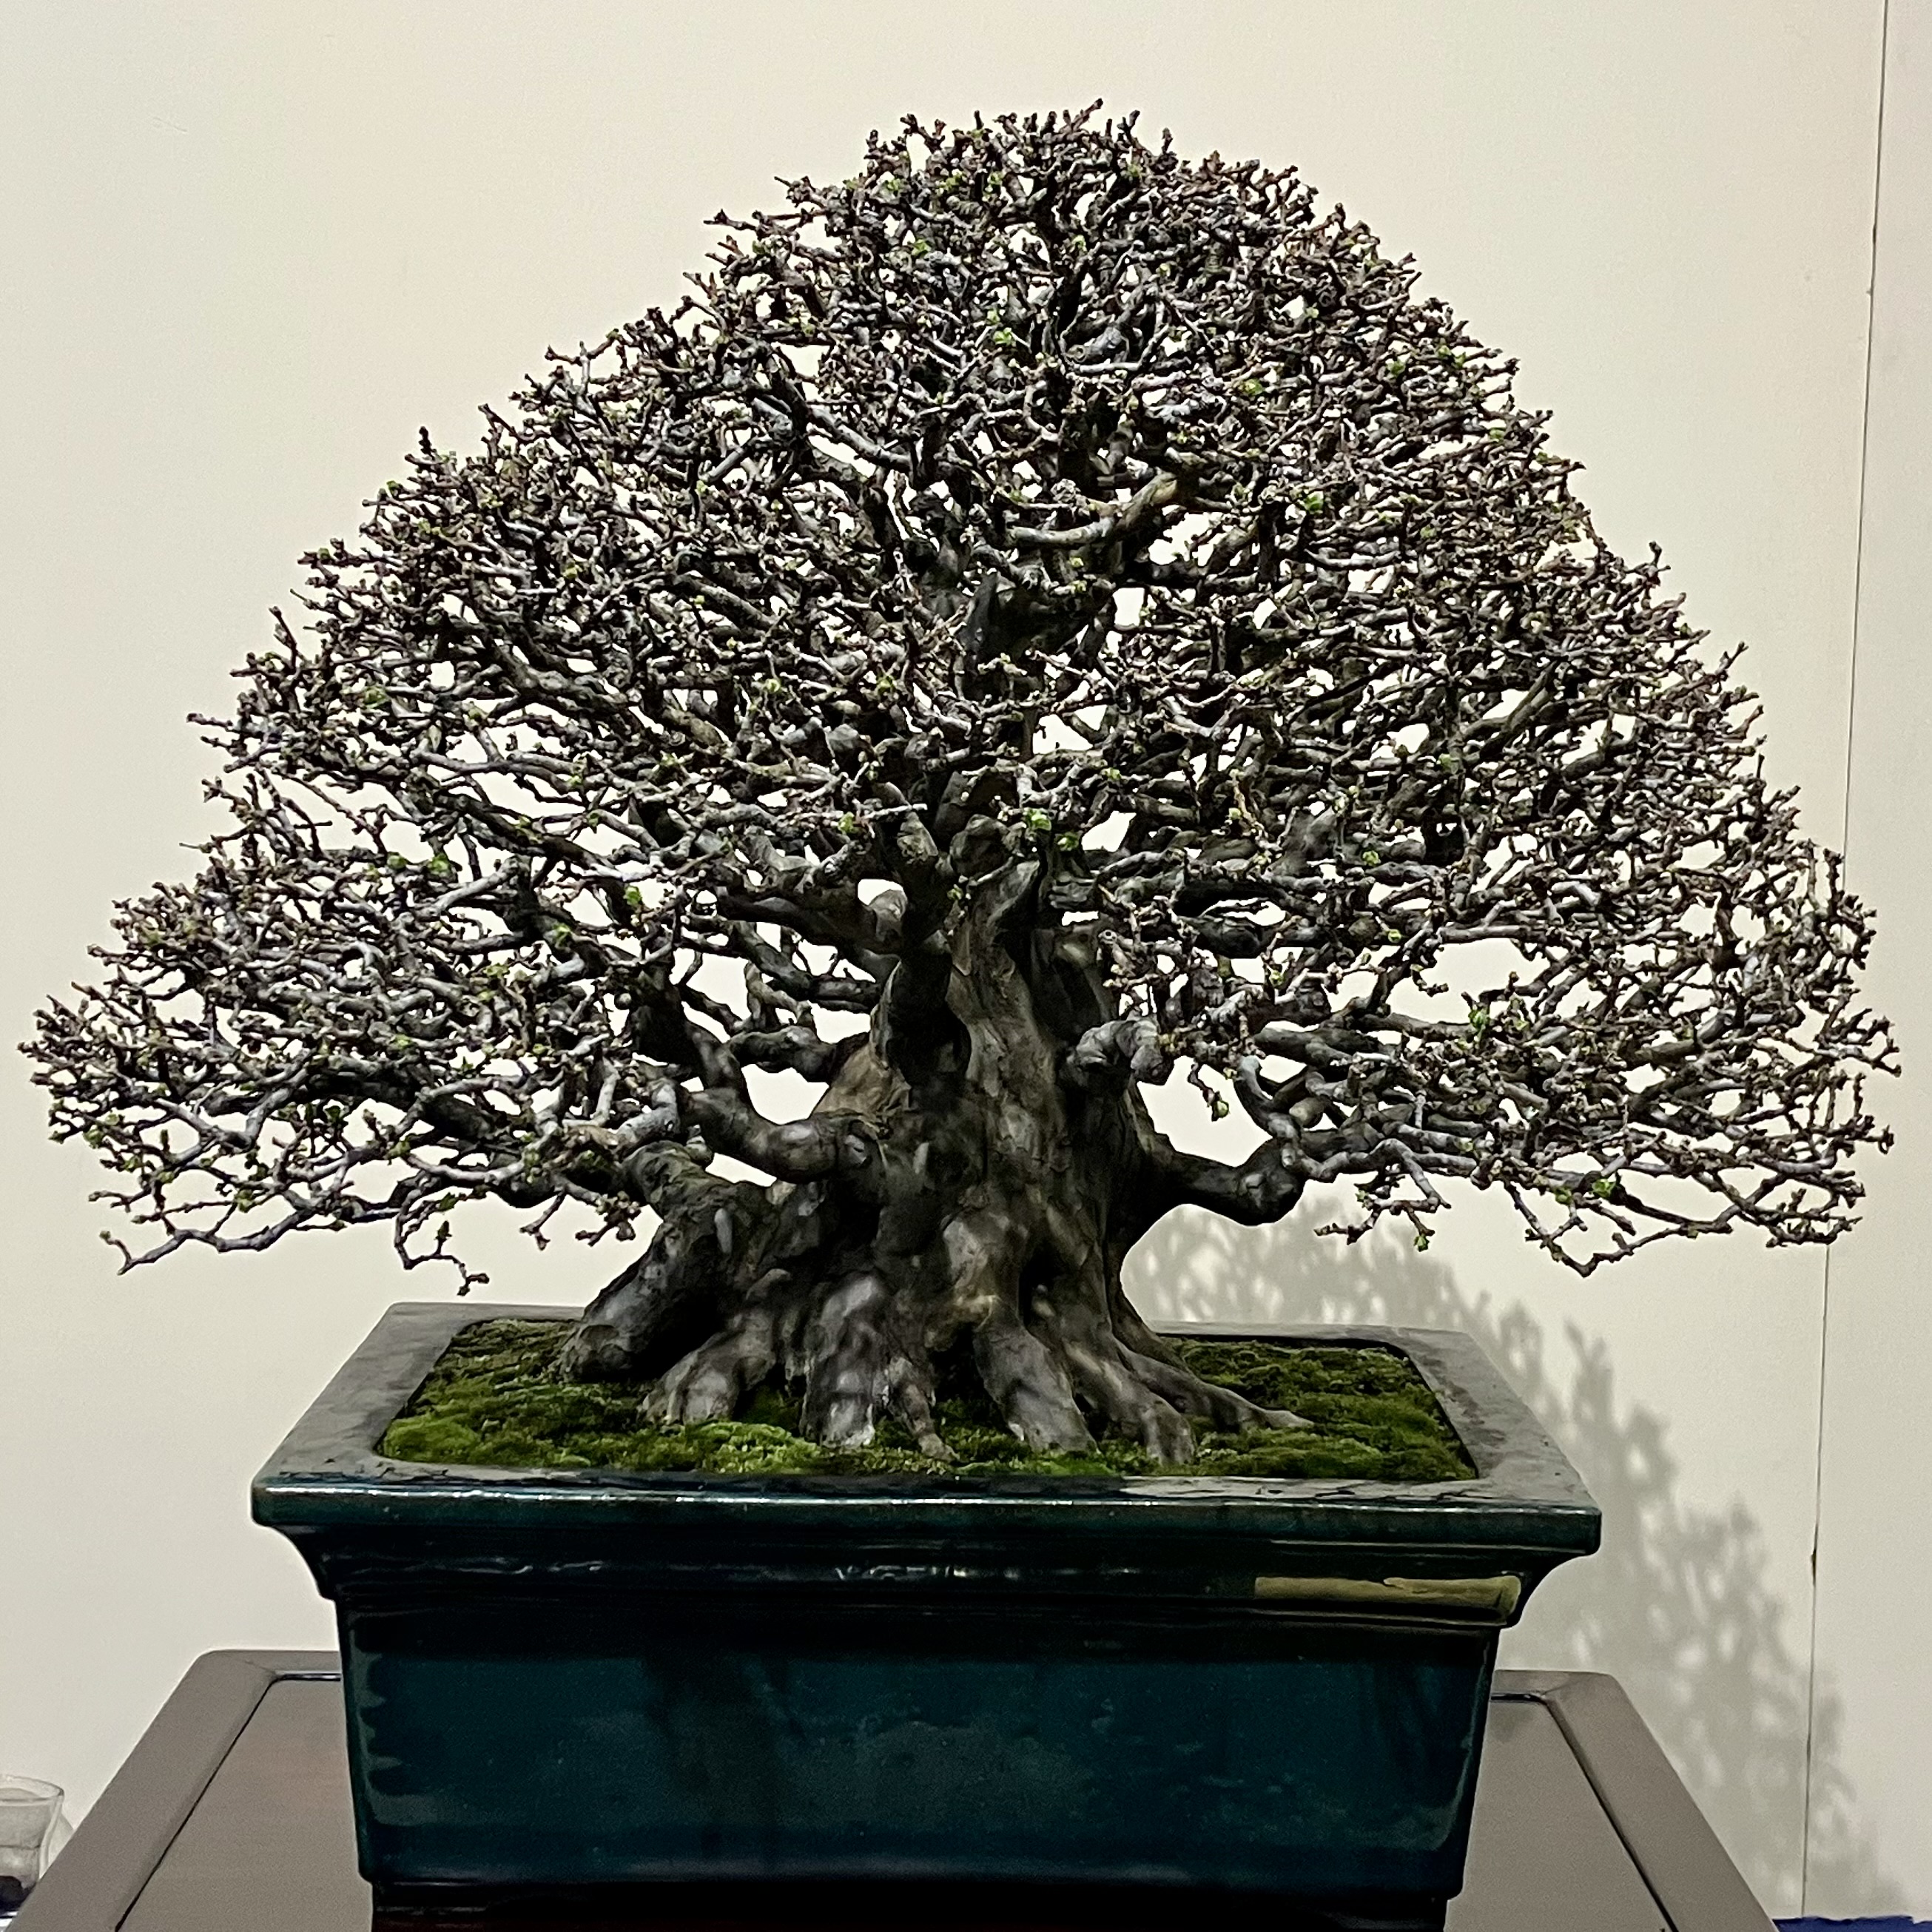
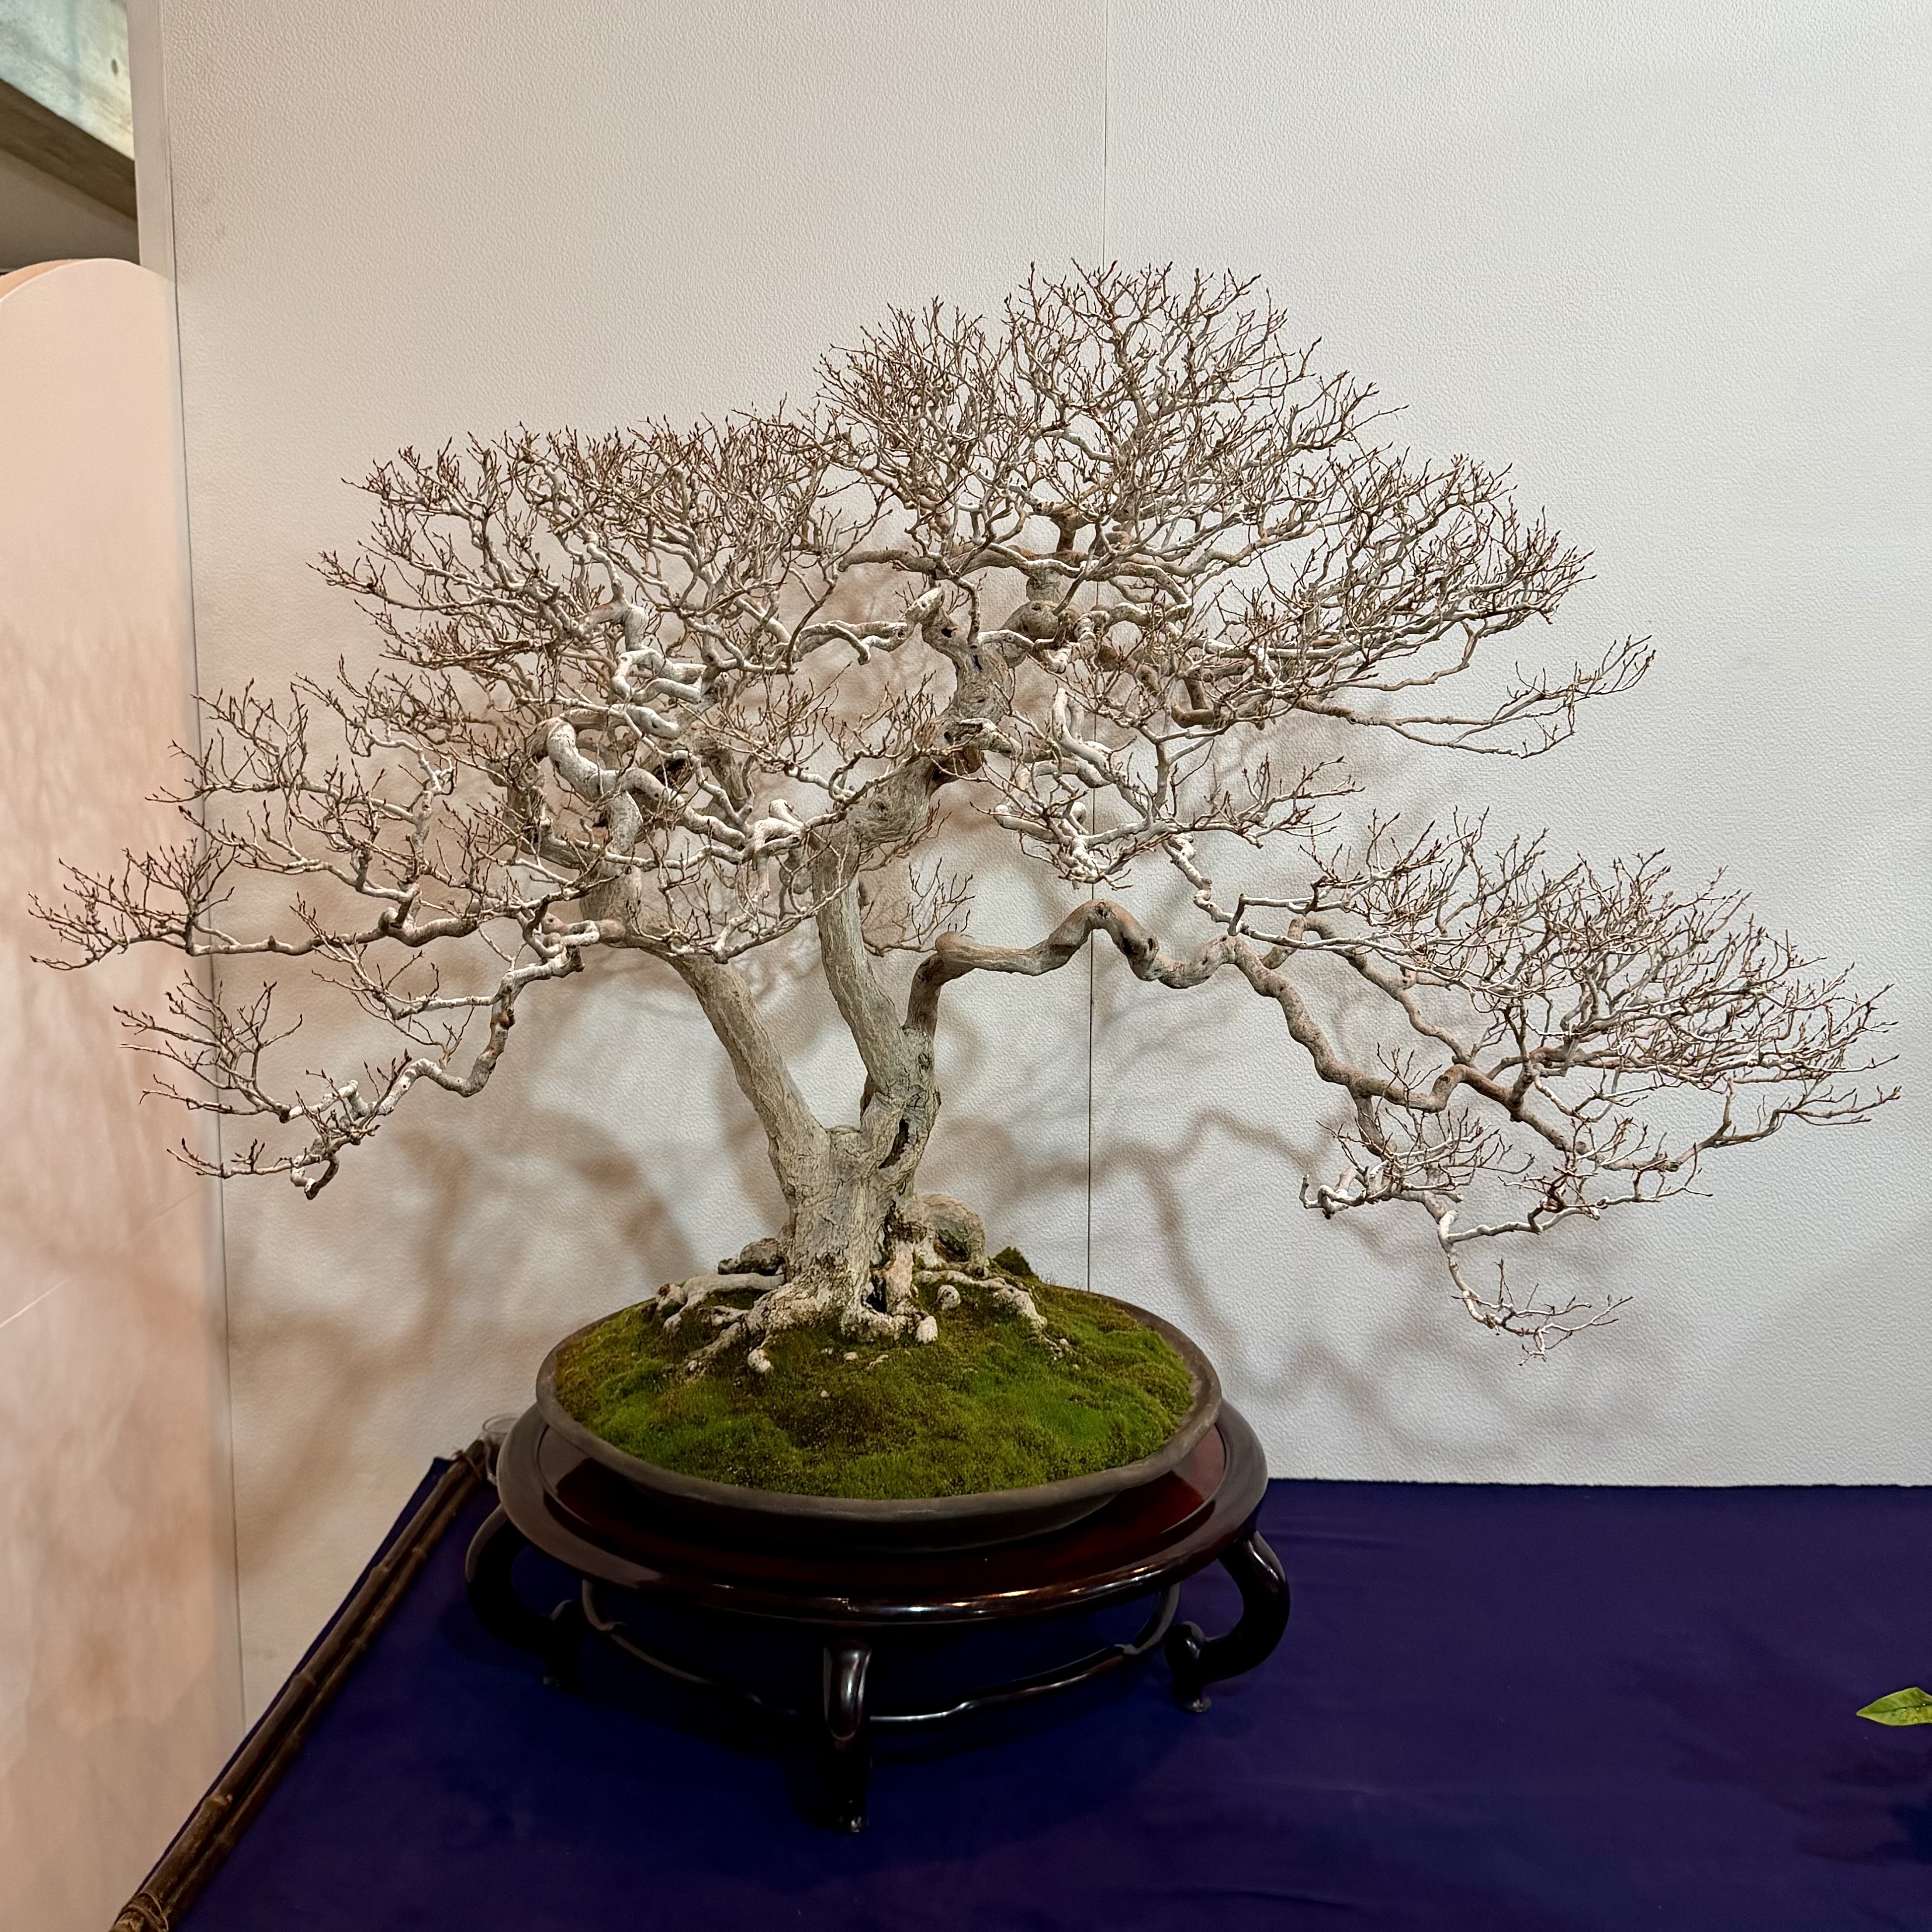
Chinese Quince. Every last twig had once been wired on this massive specimen.
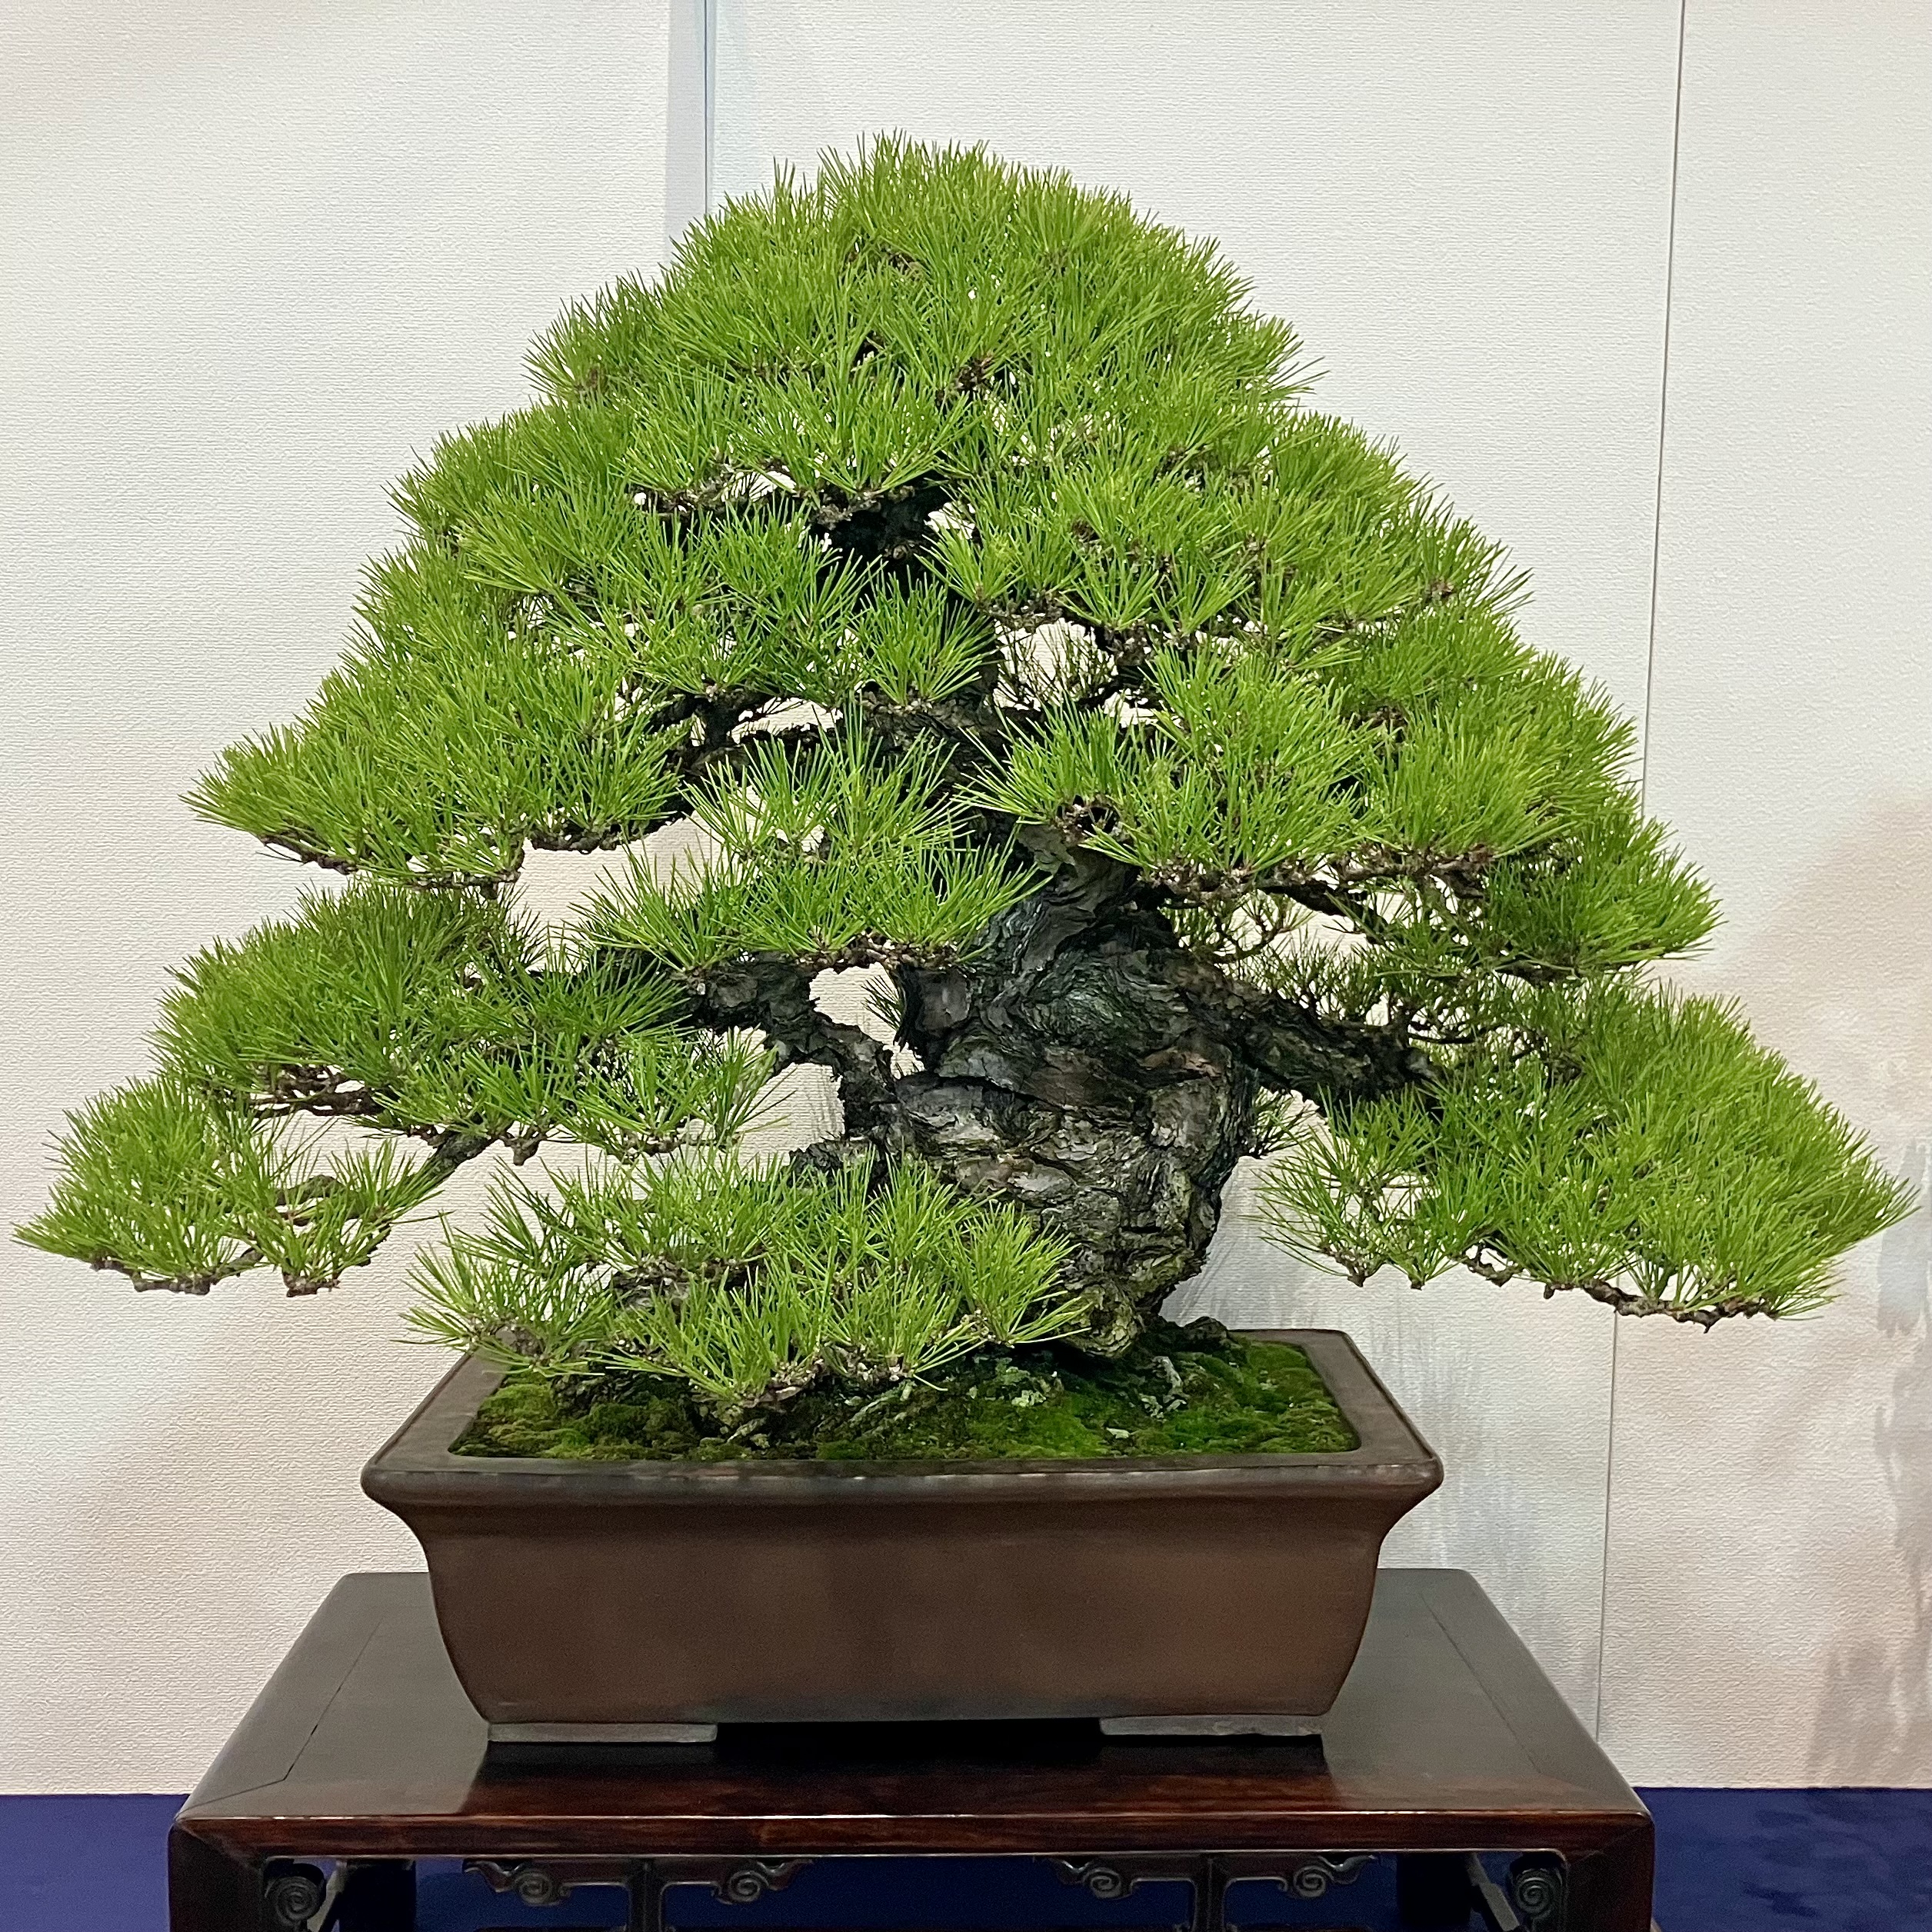
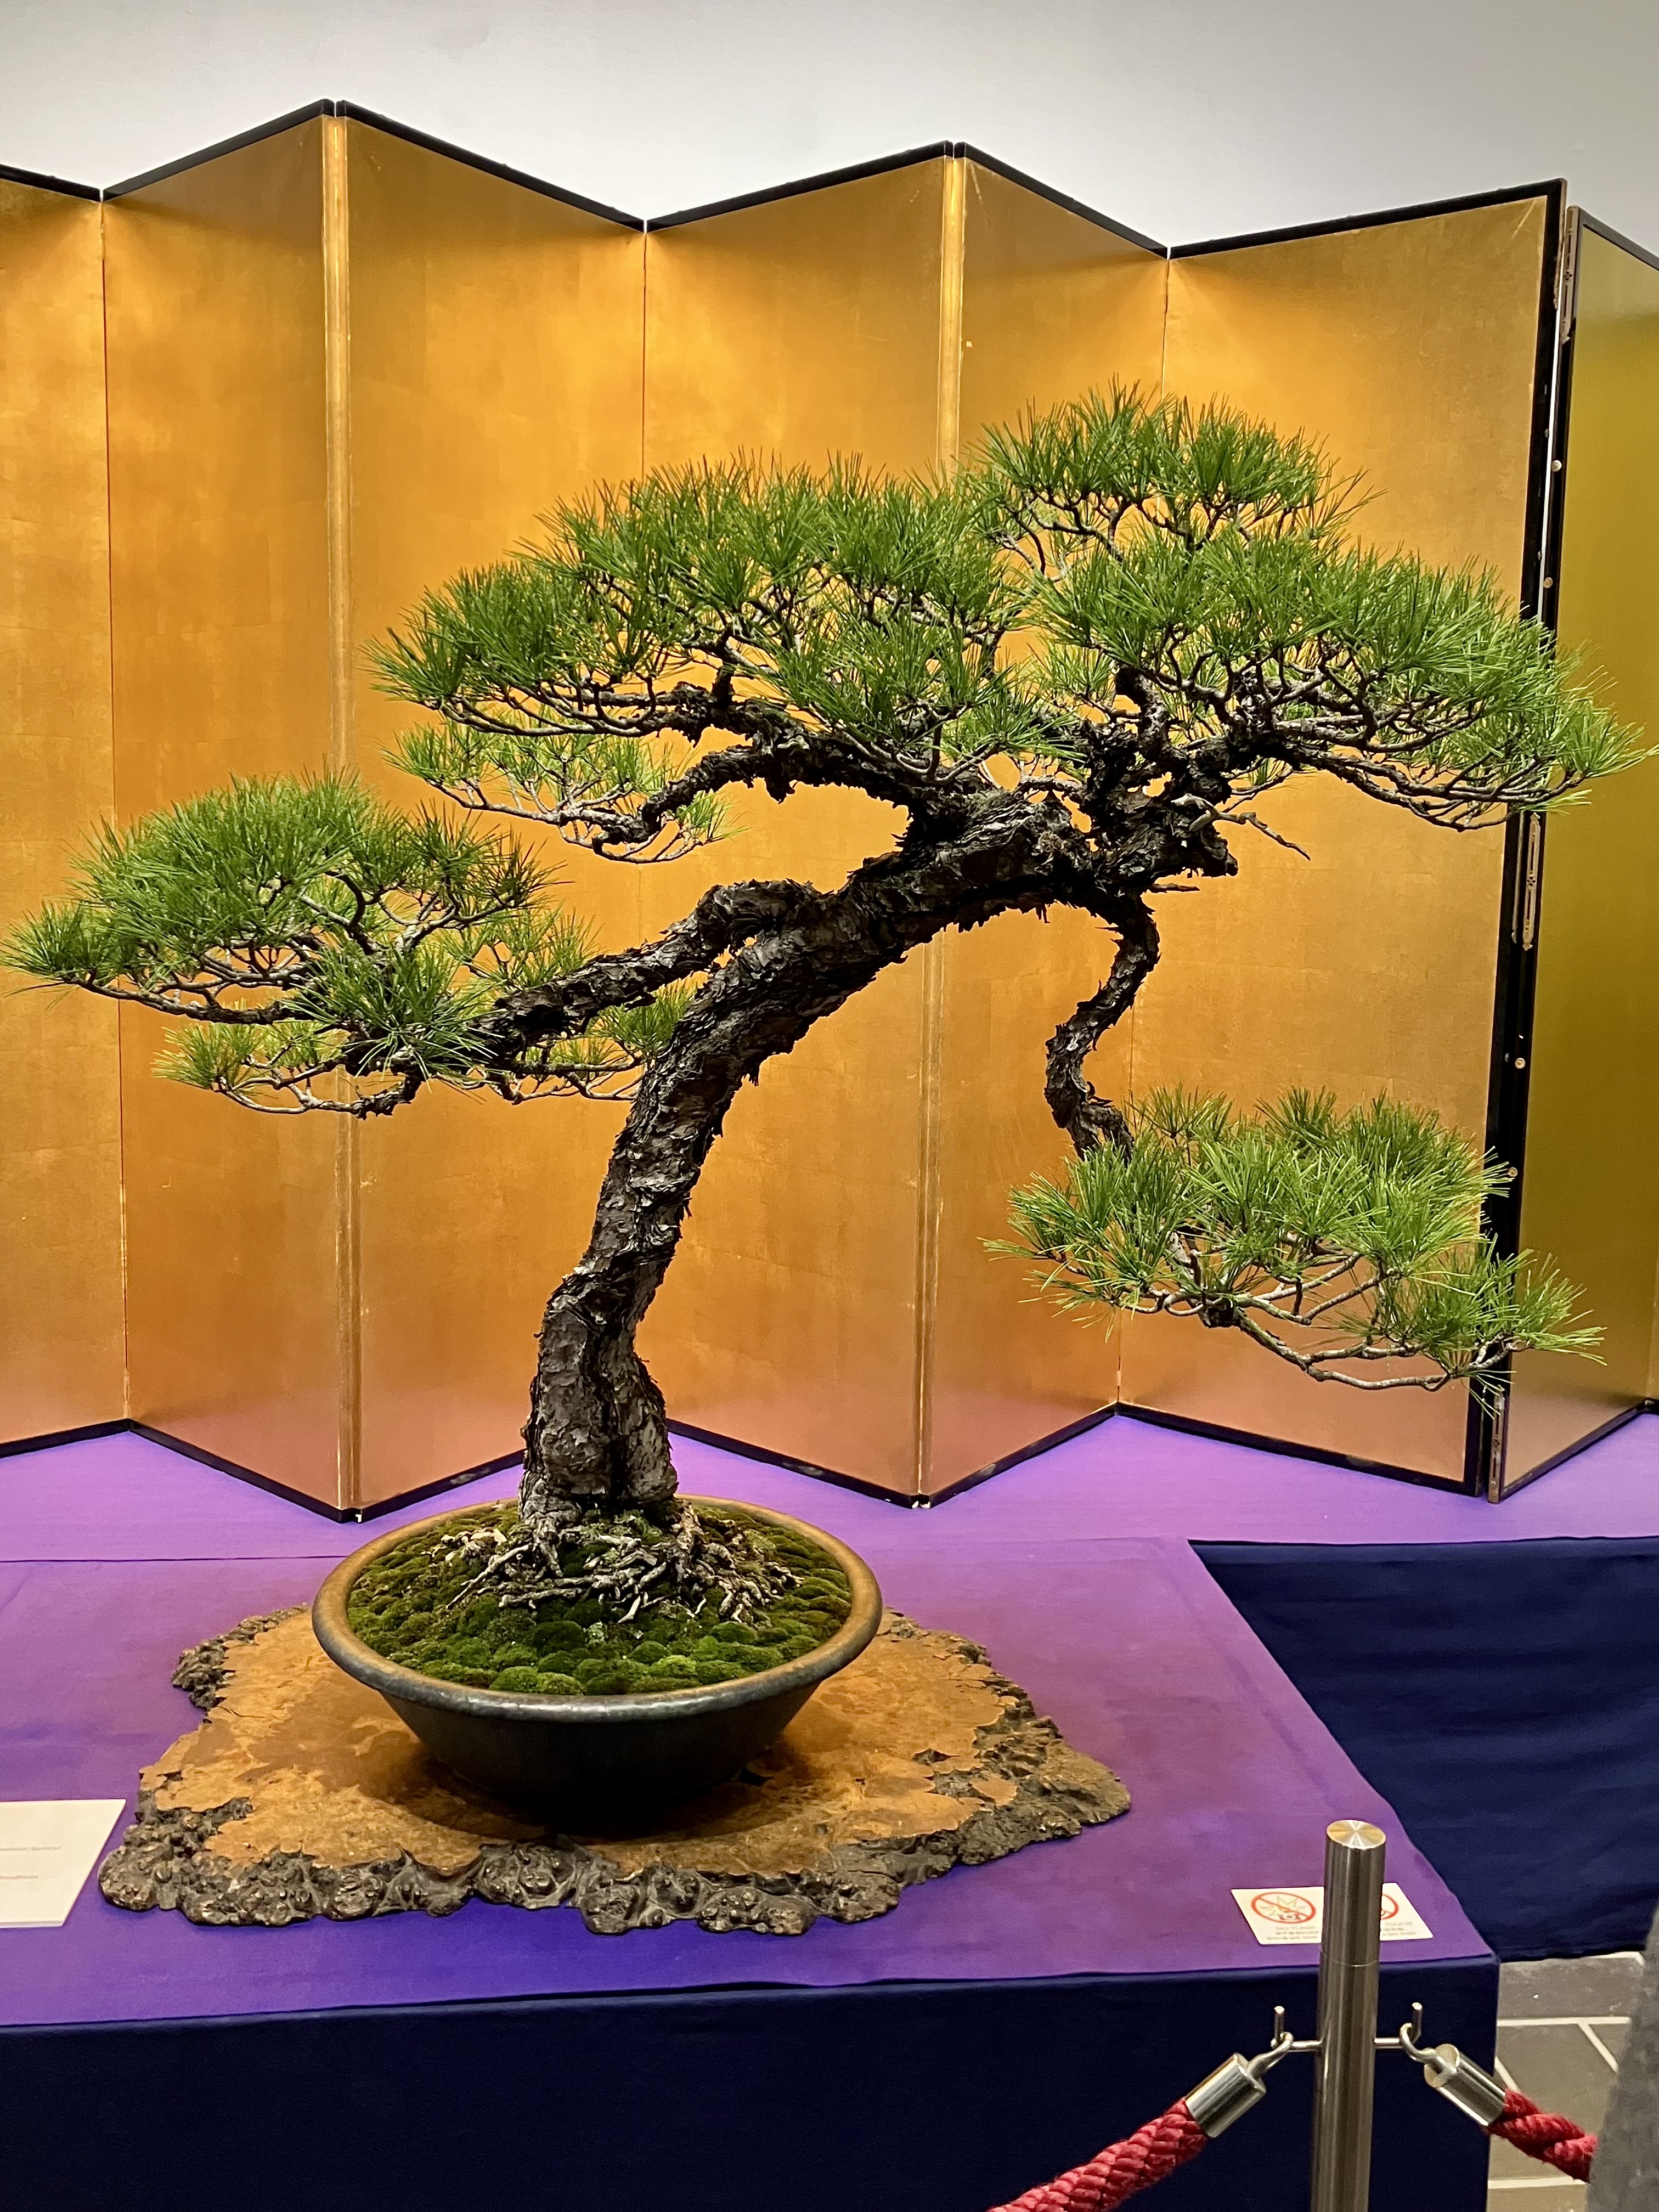
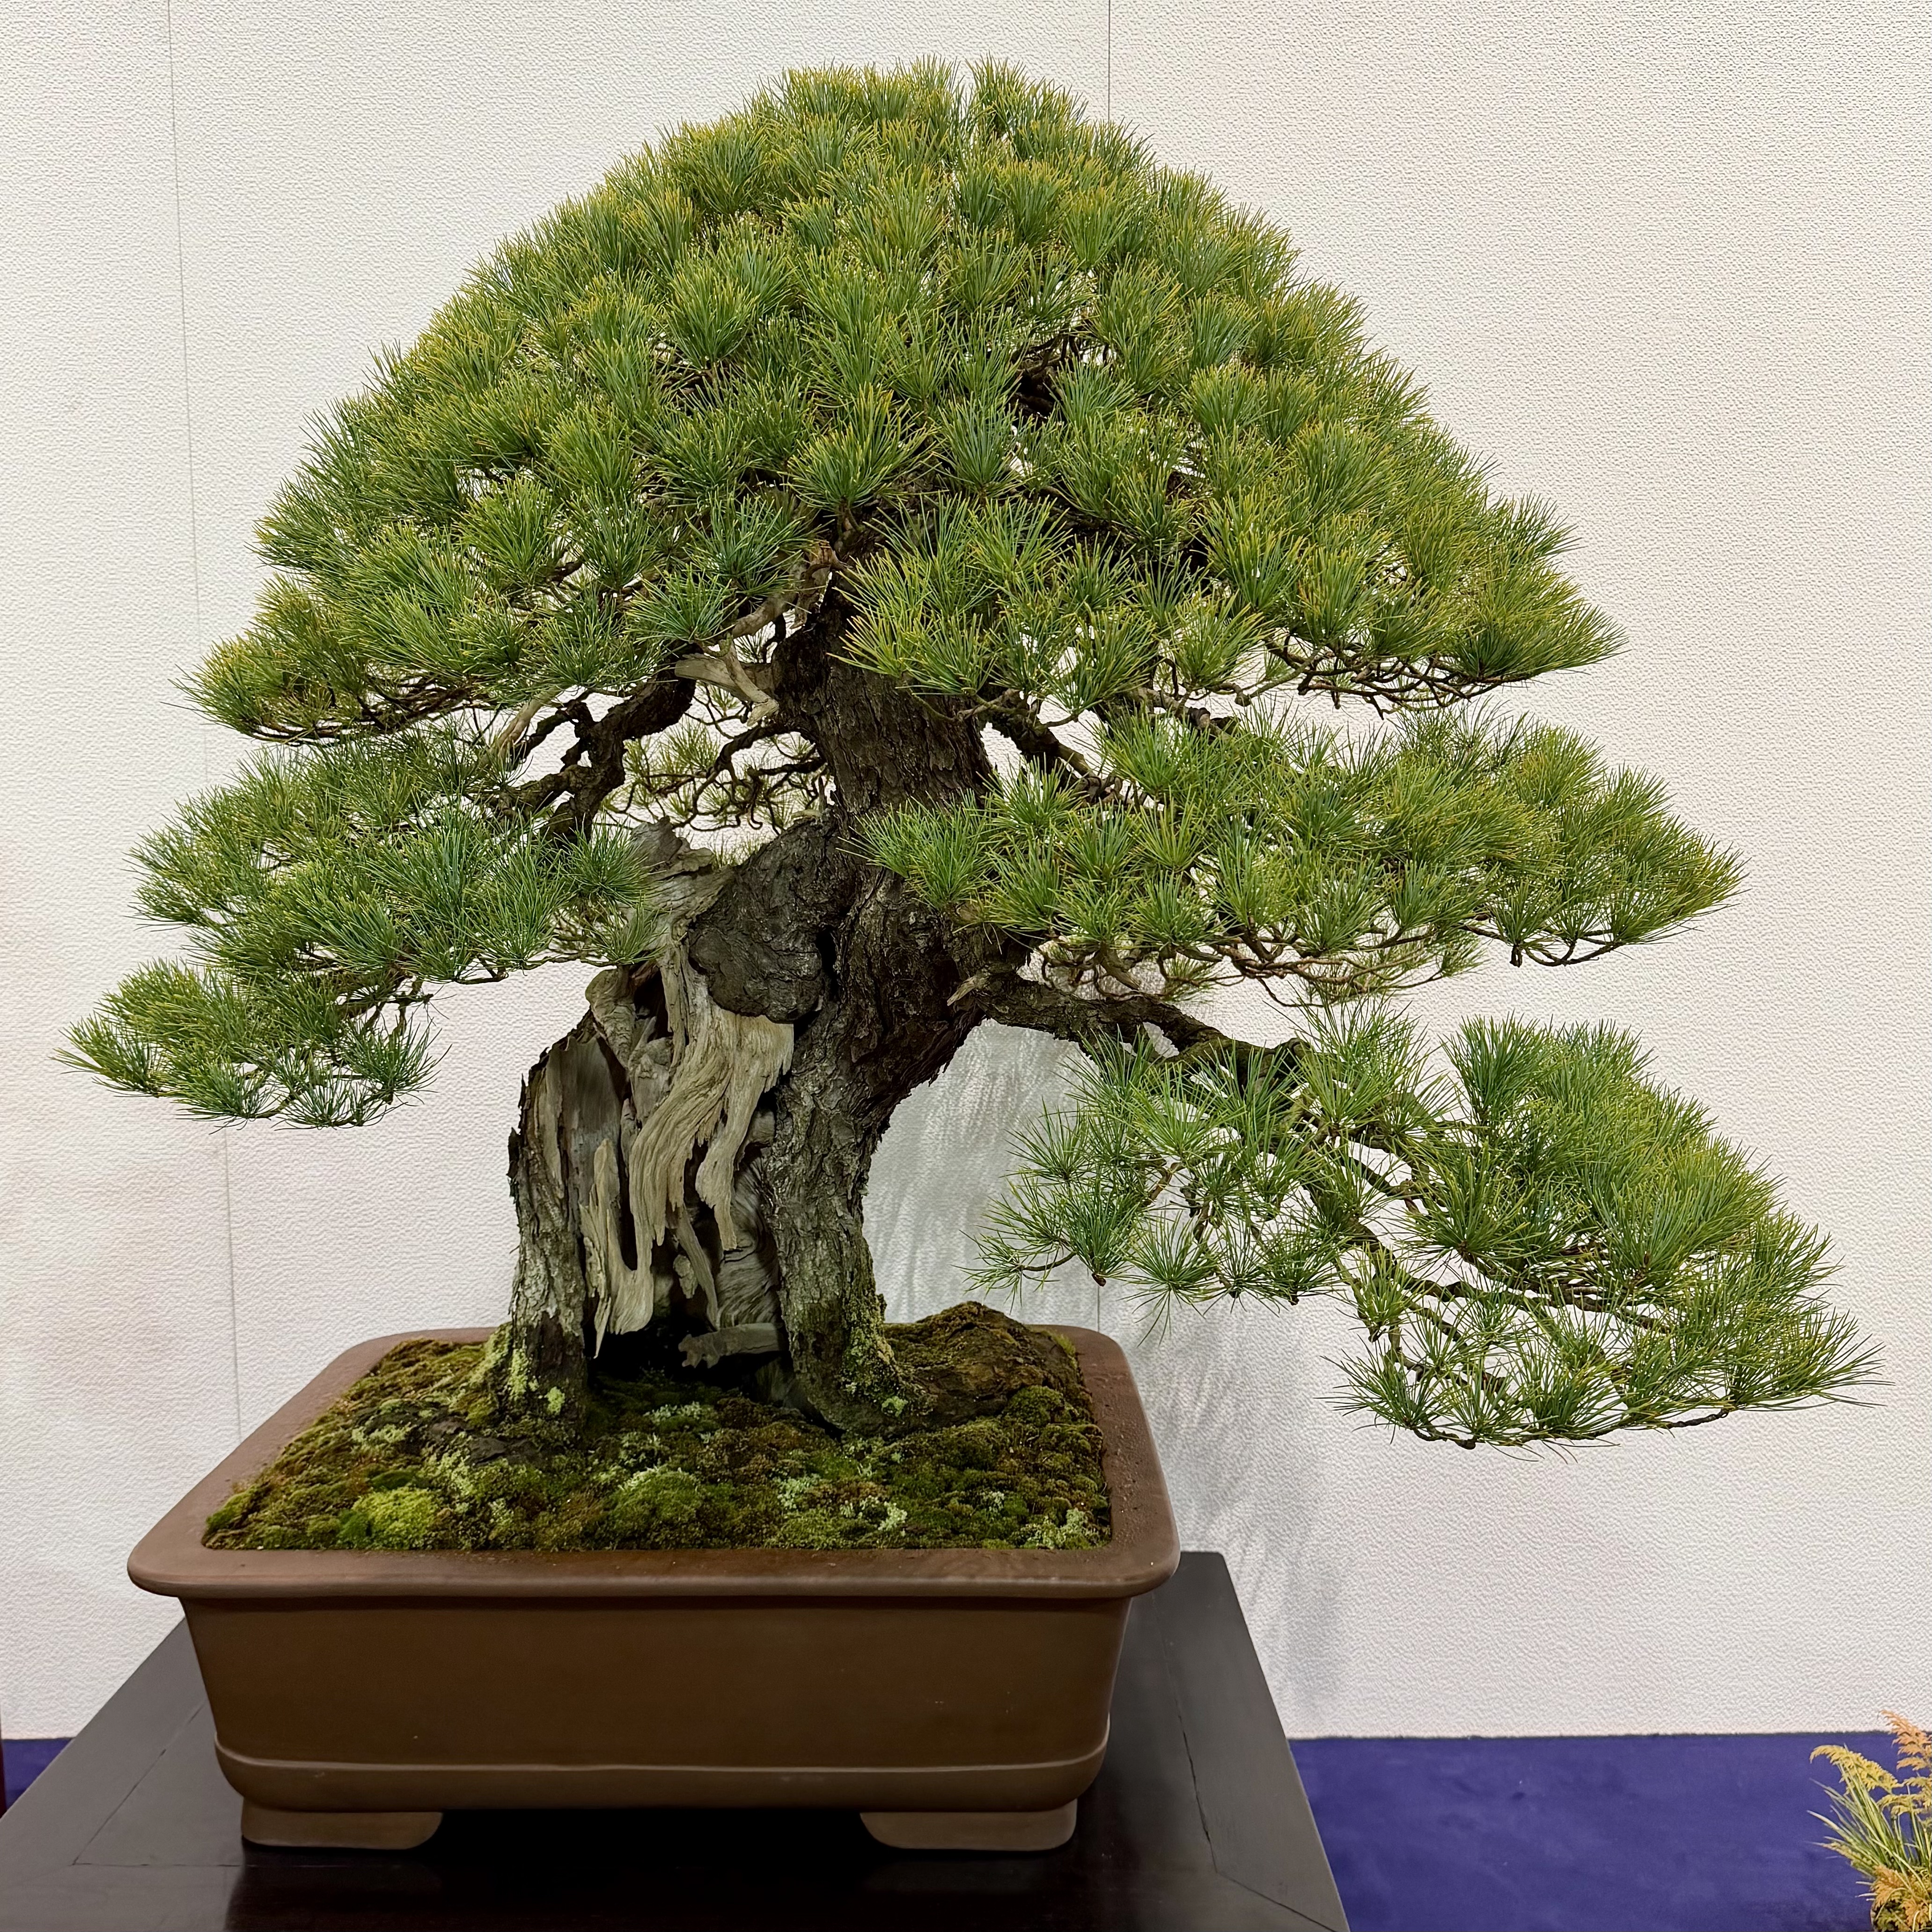
Japanese Black Pine; Kokufu Prize. Huge tree.
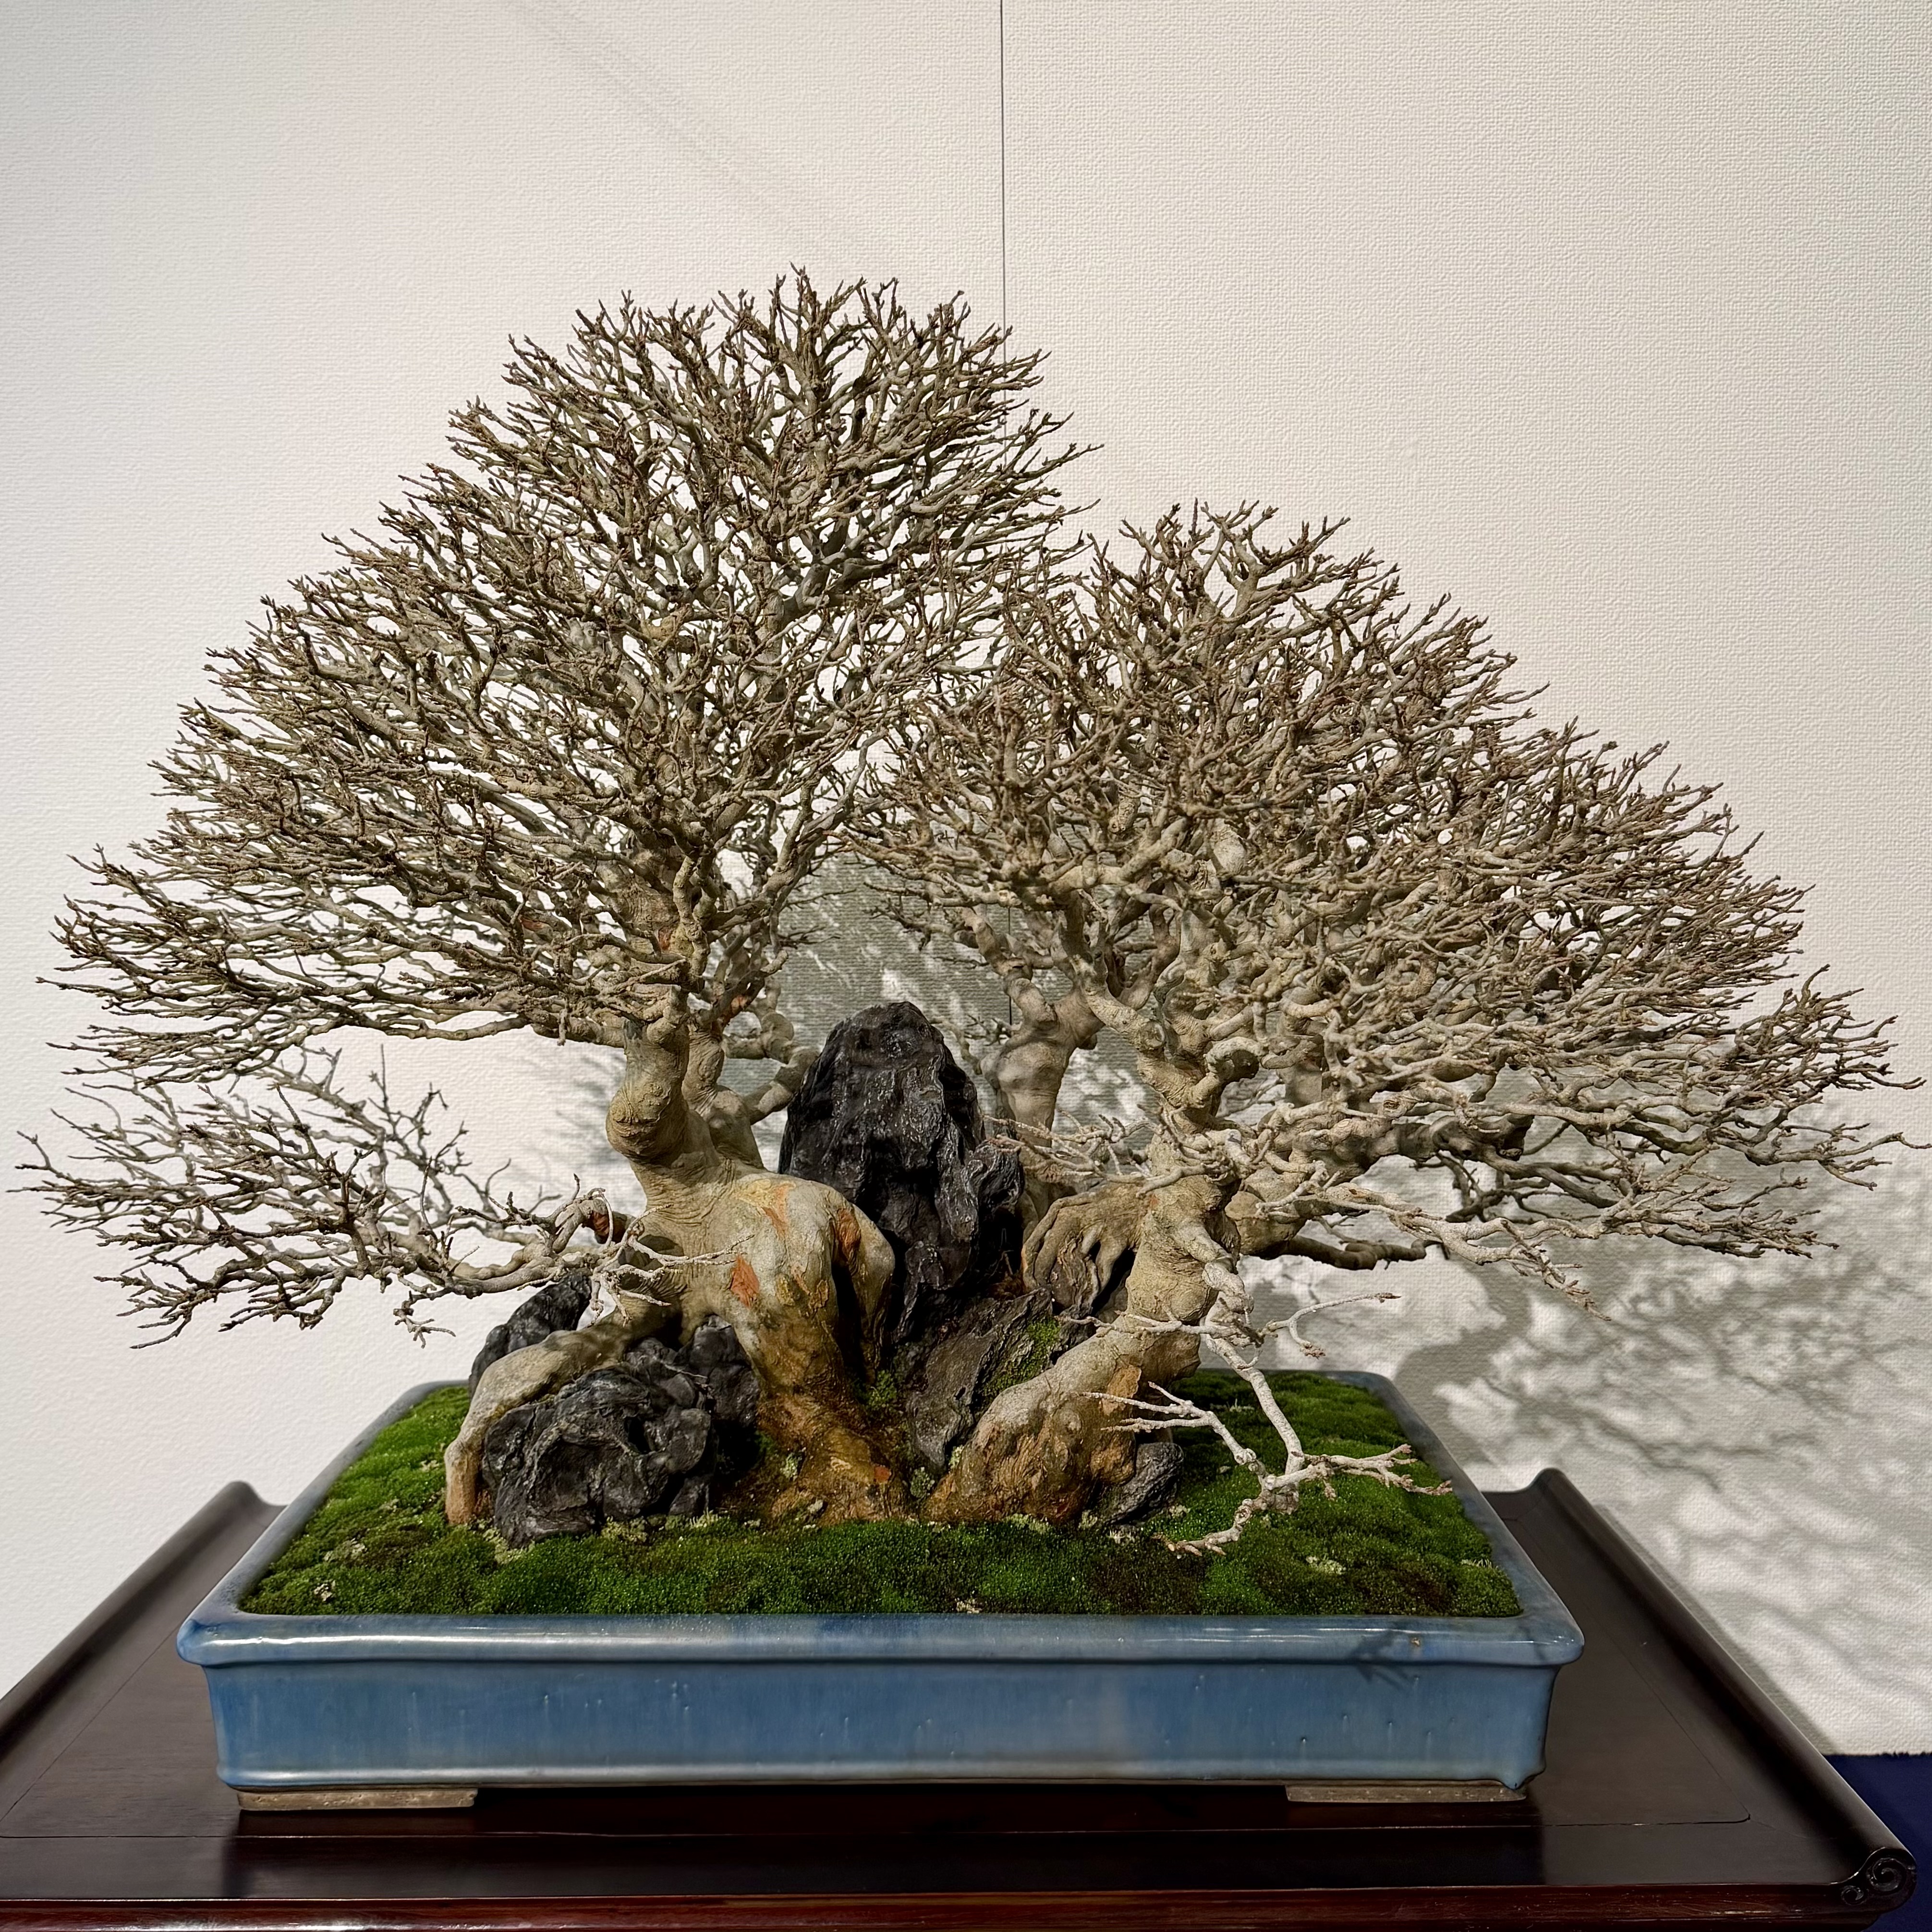
Korean Hornbeam; Kokufu Prize.
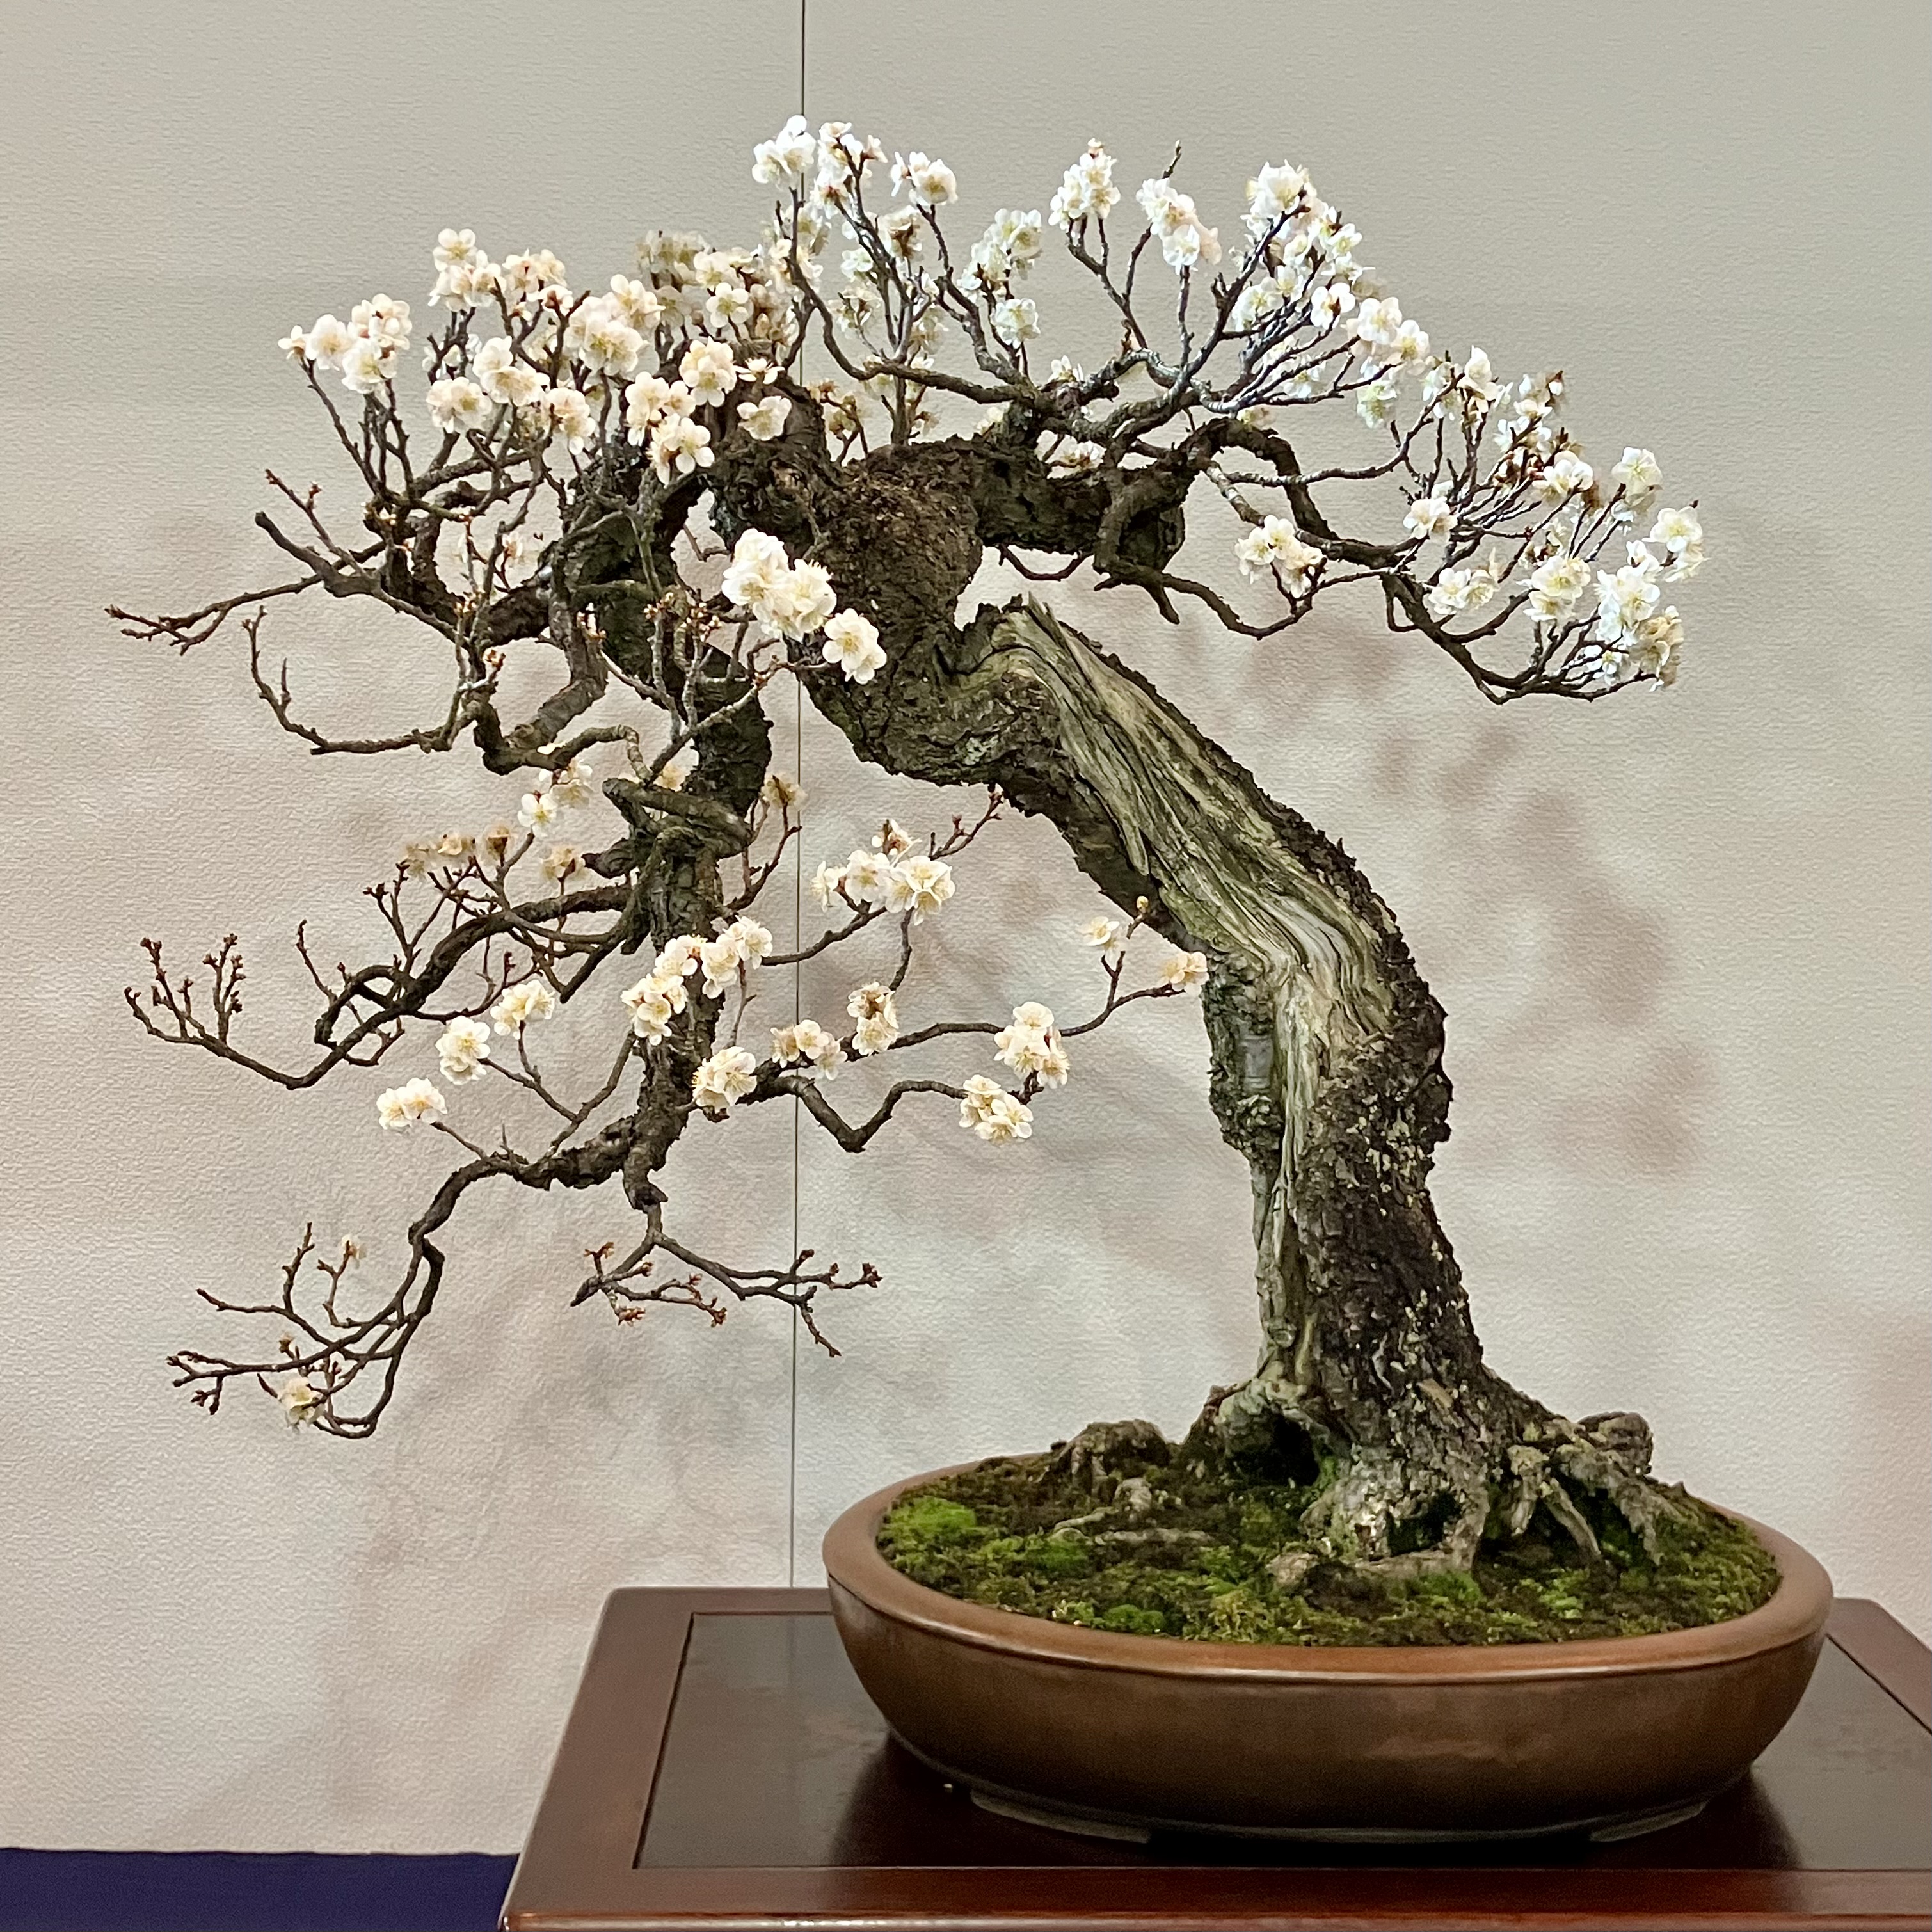
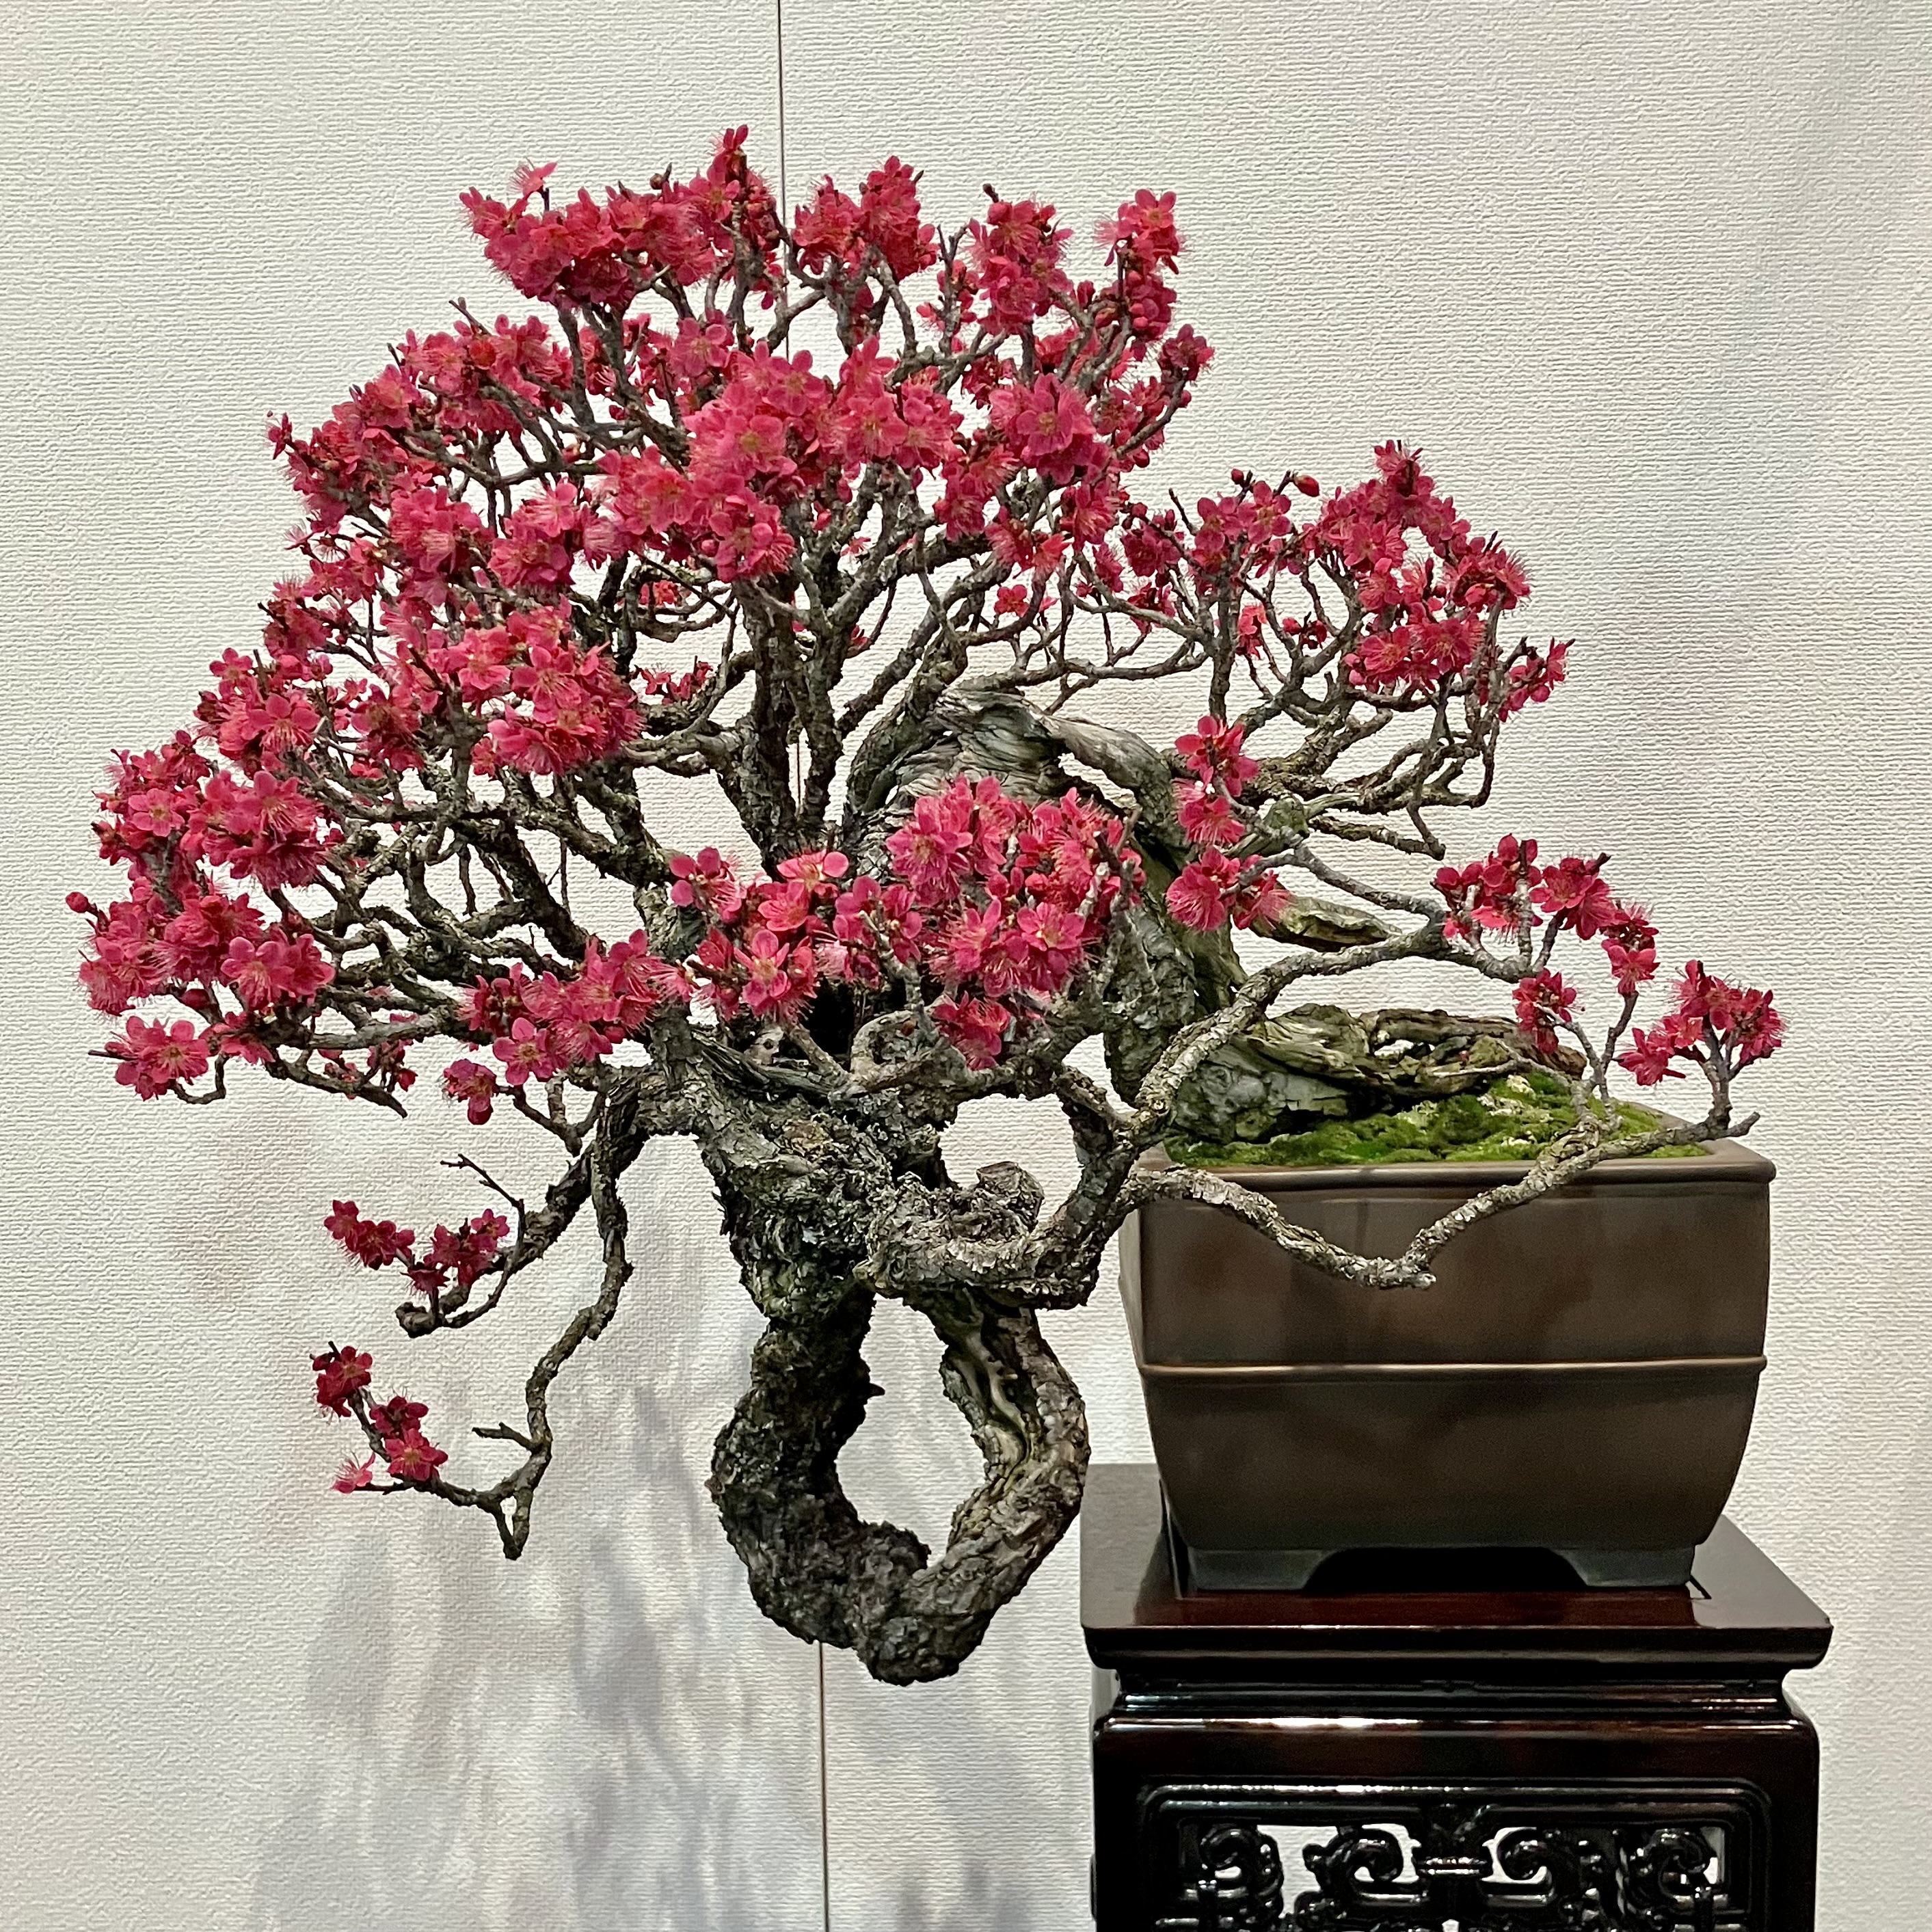
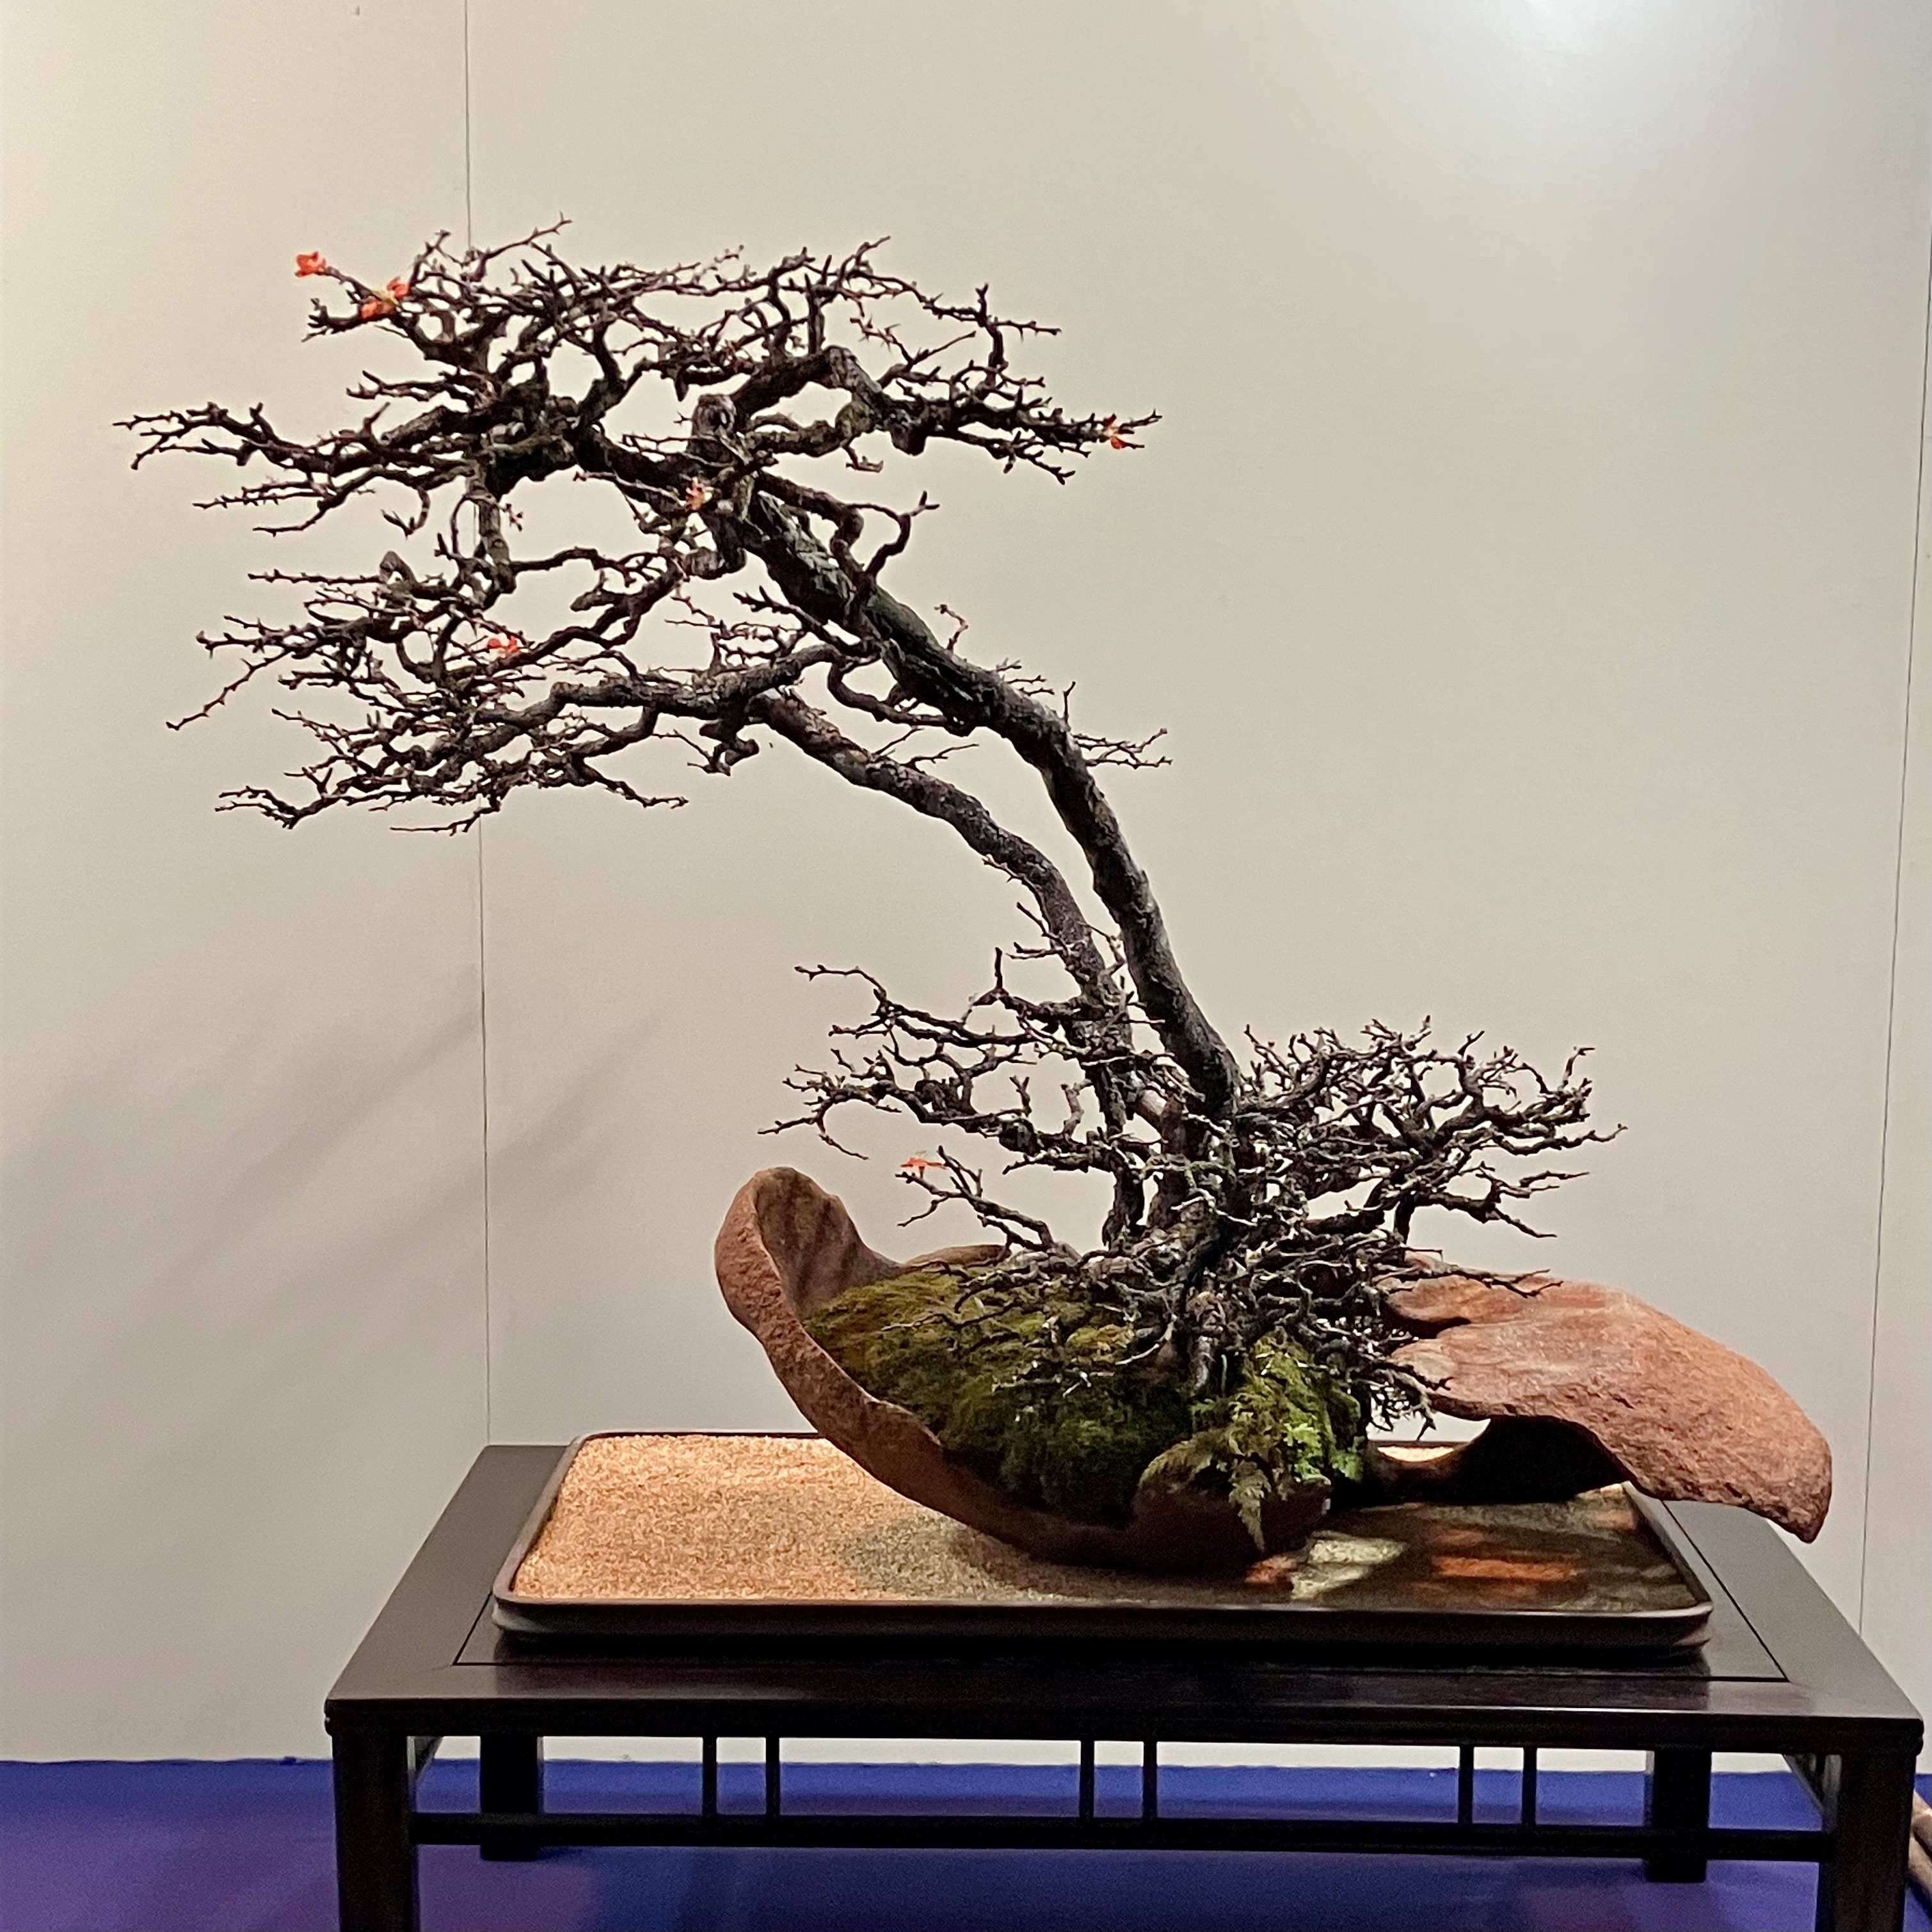
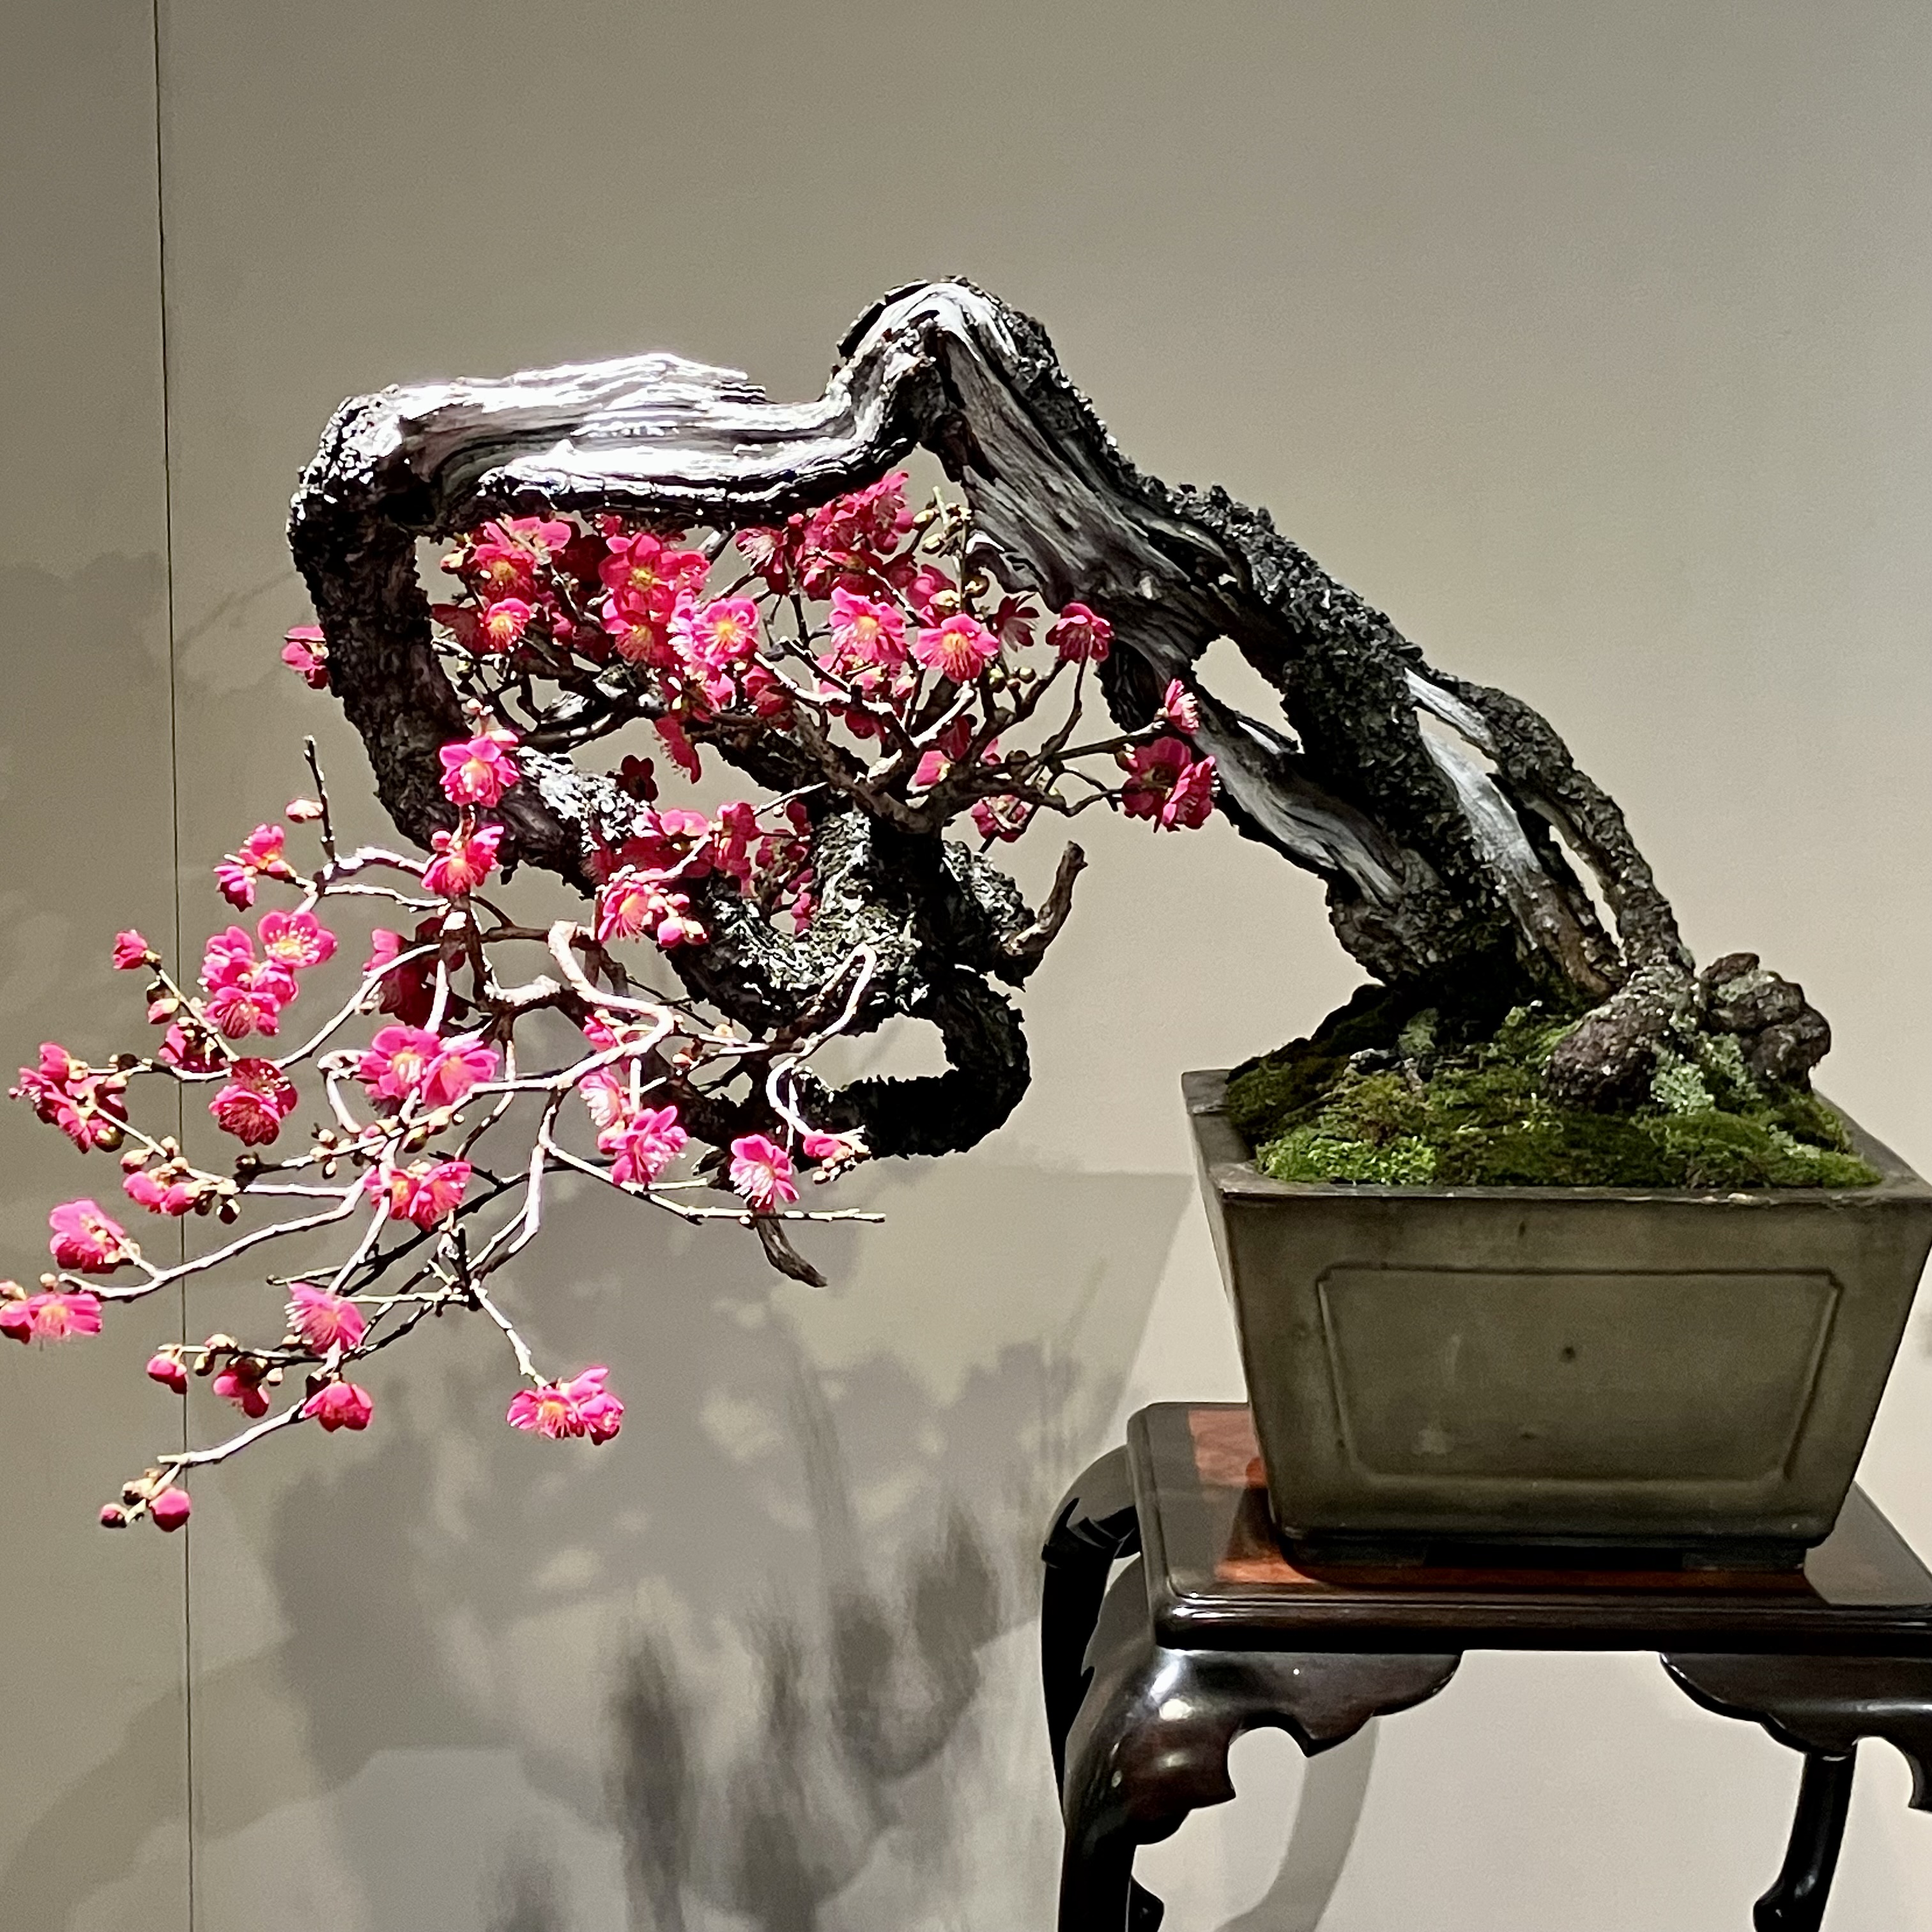
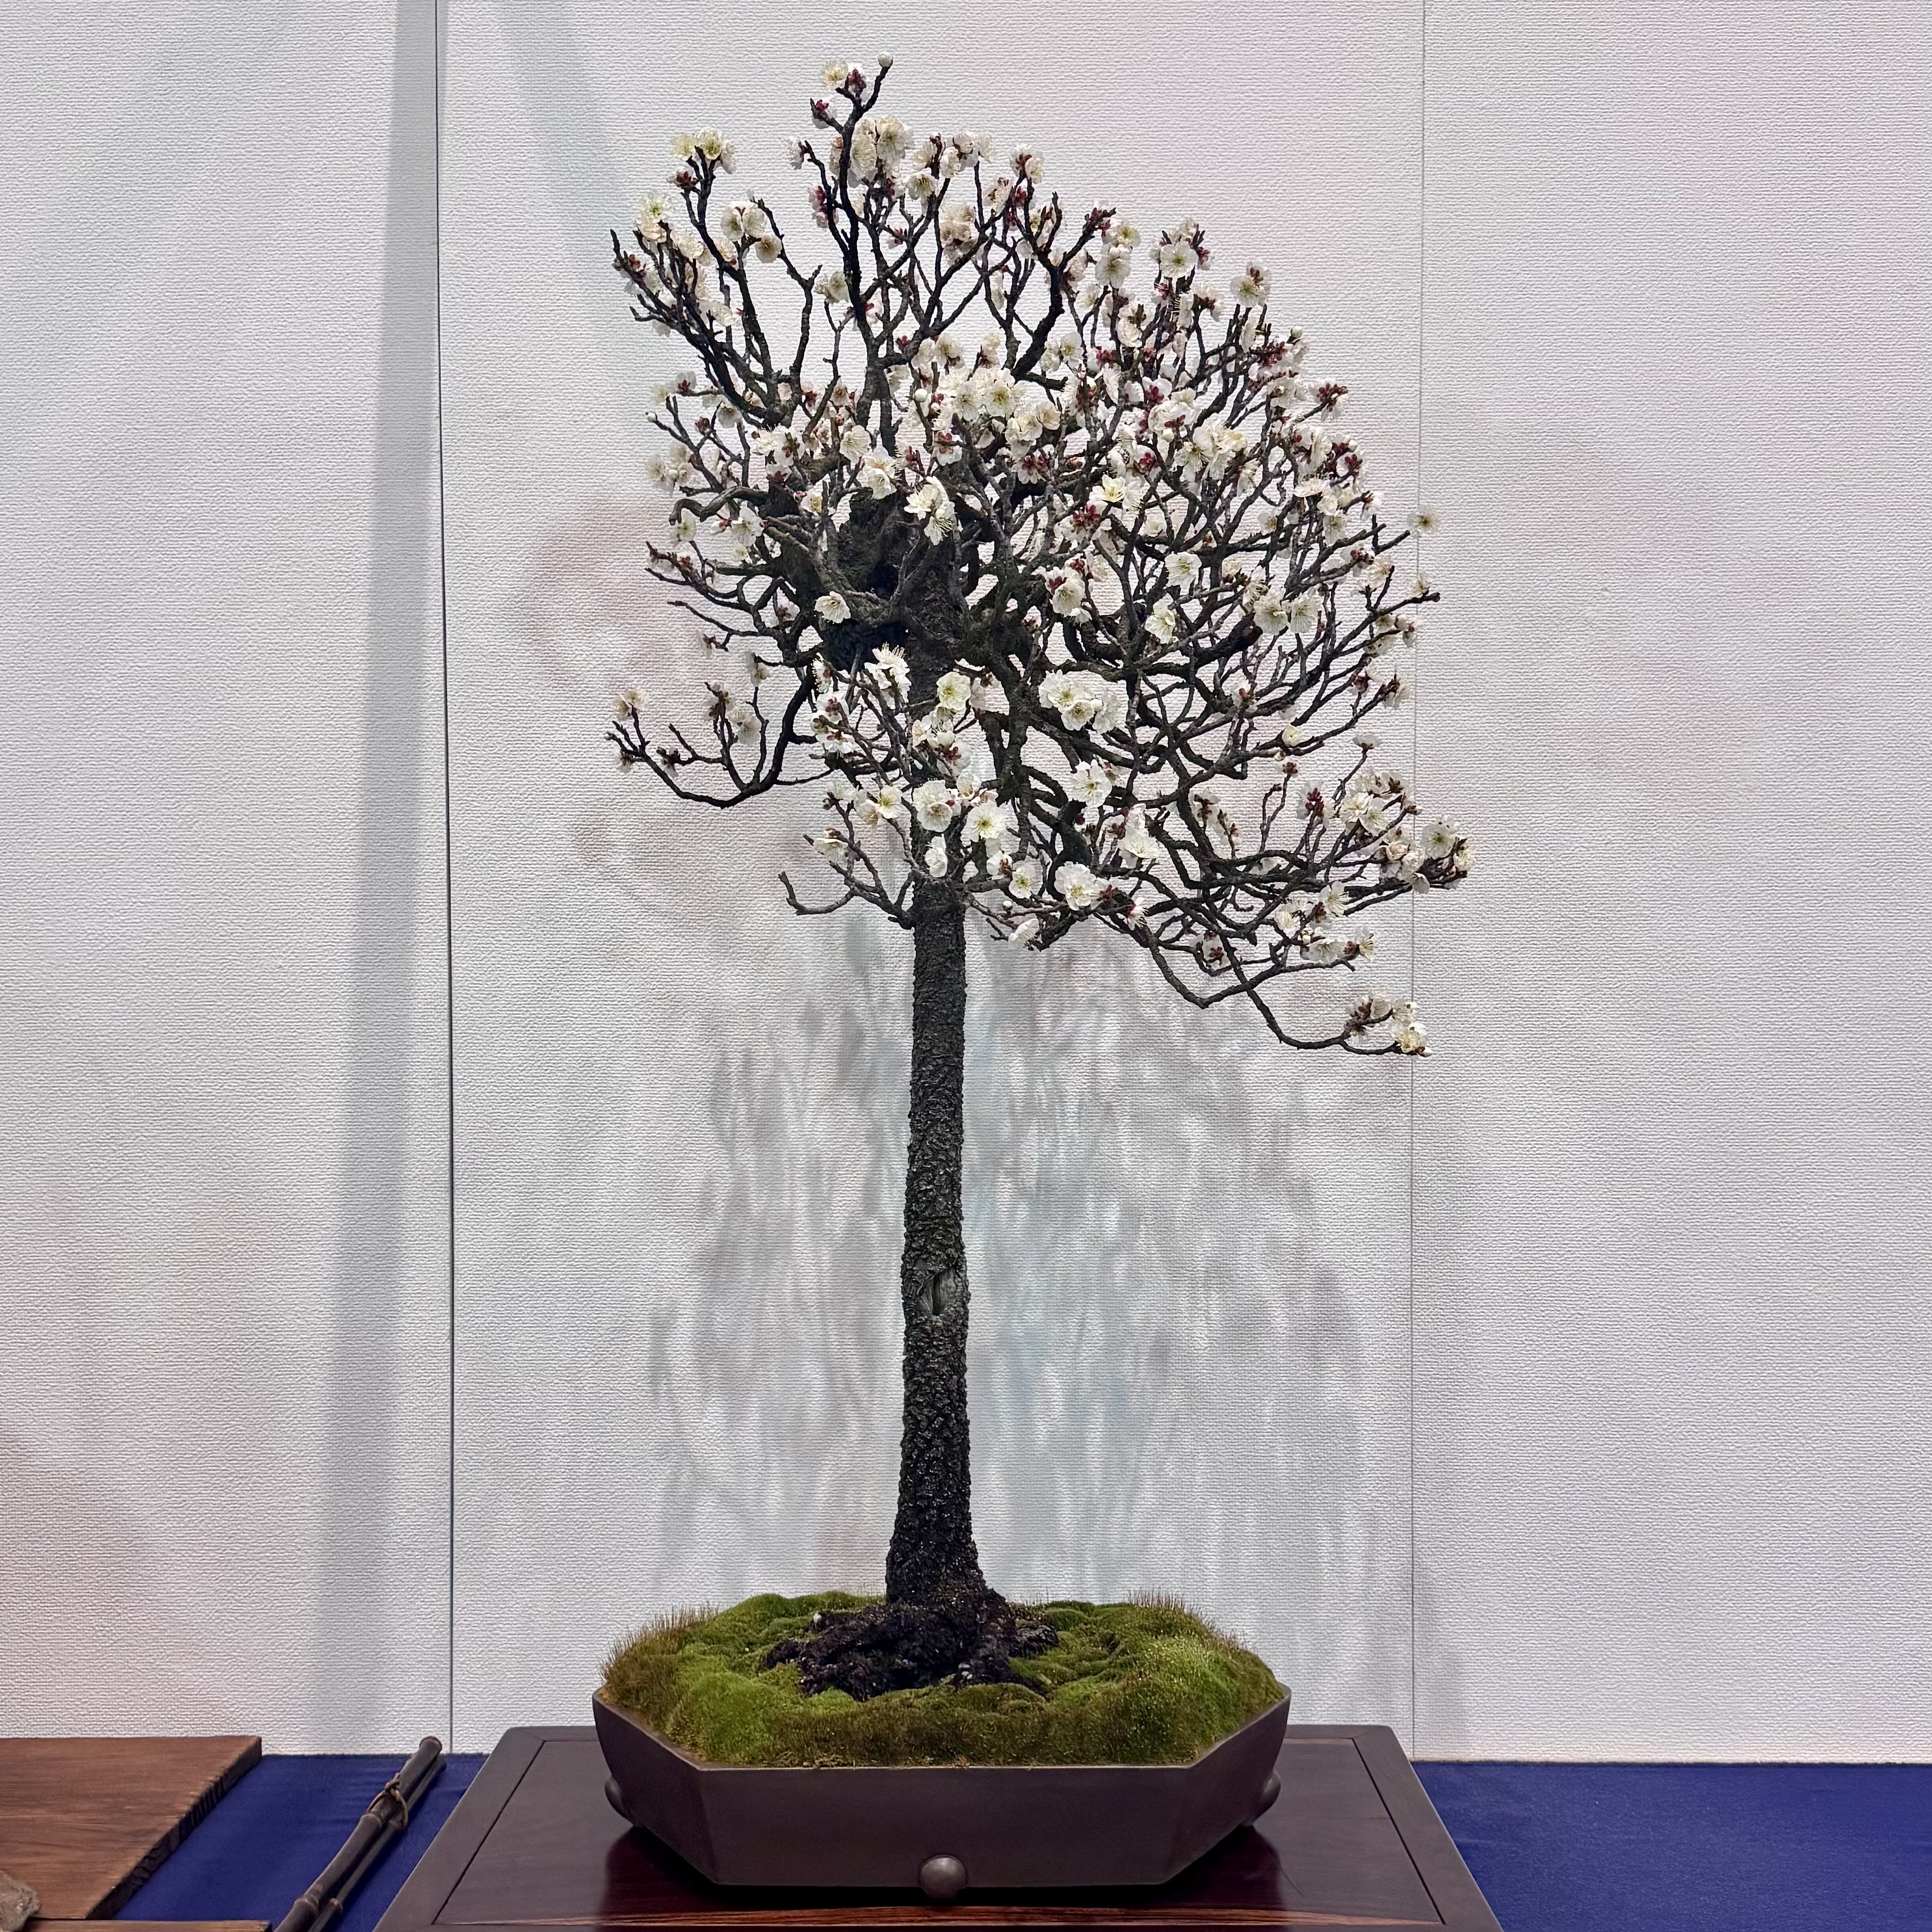
Ume. Excellent Ume in this year’s show.
Satsuki Azalea.
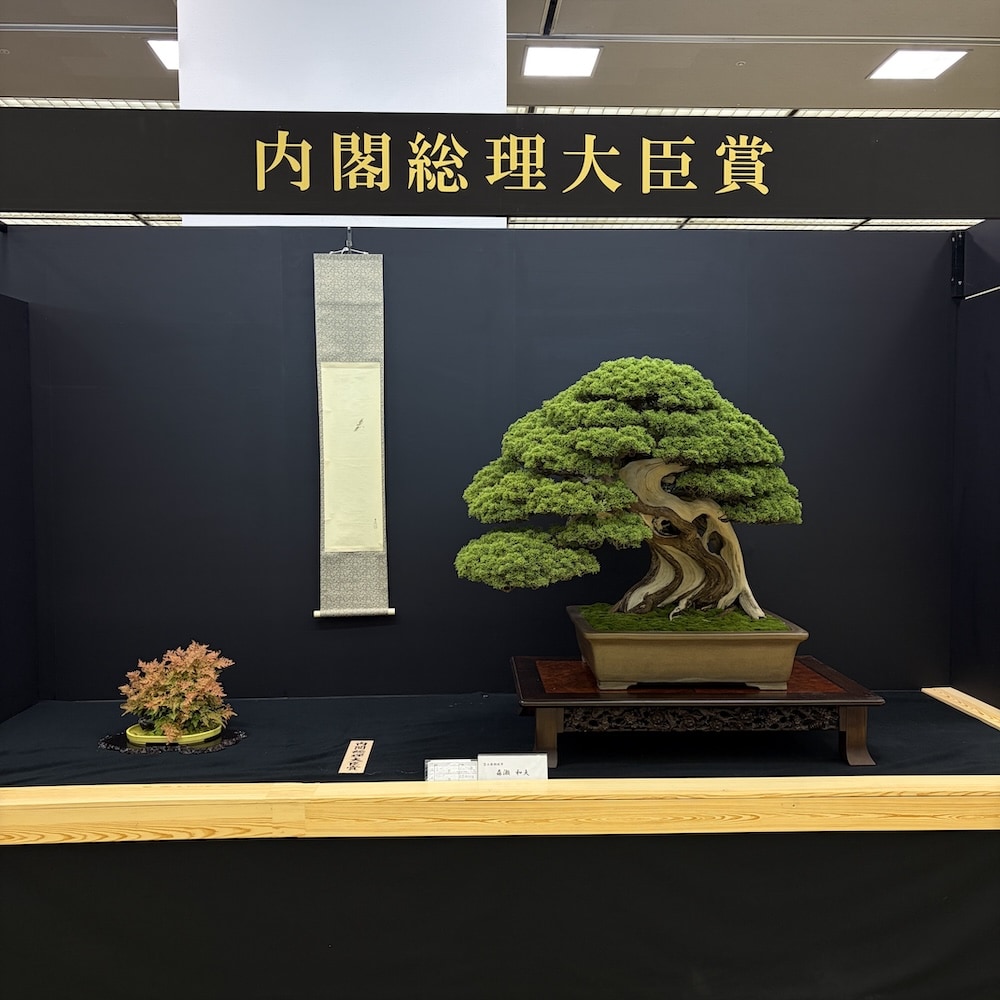
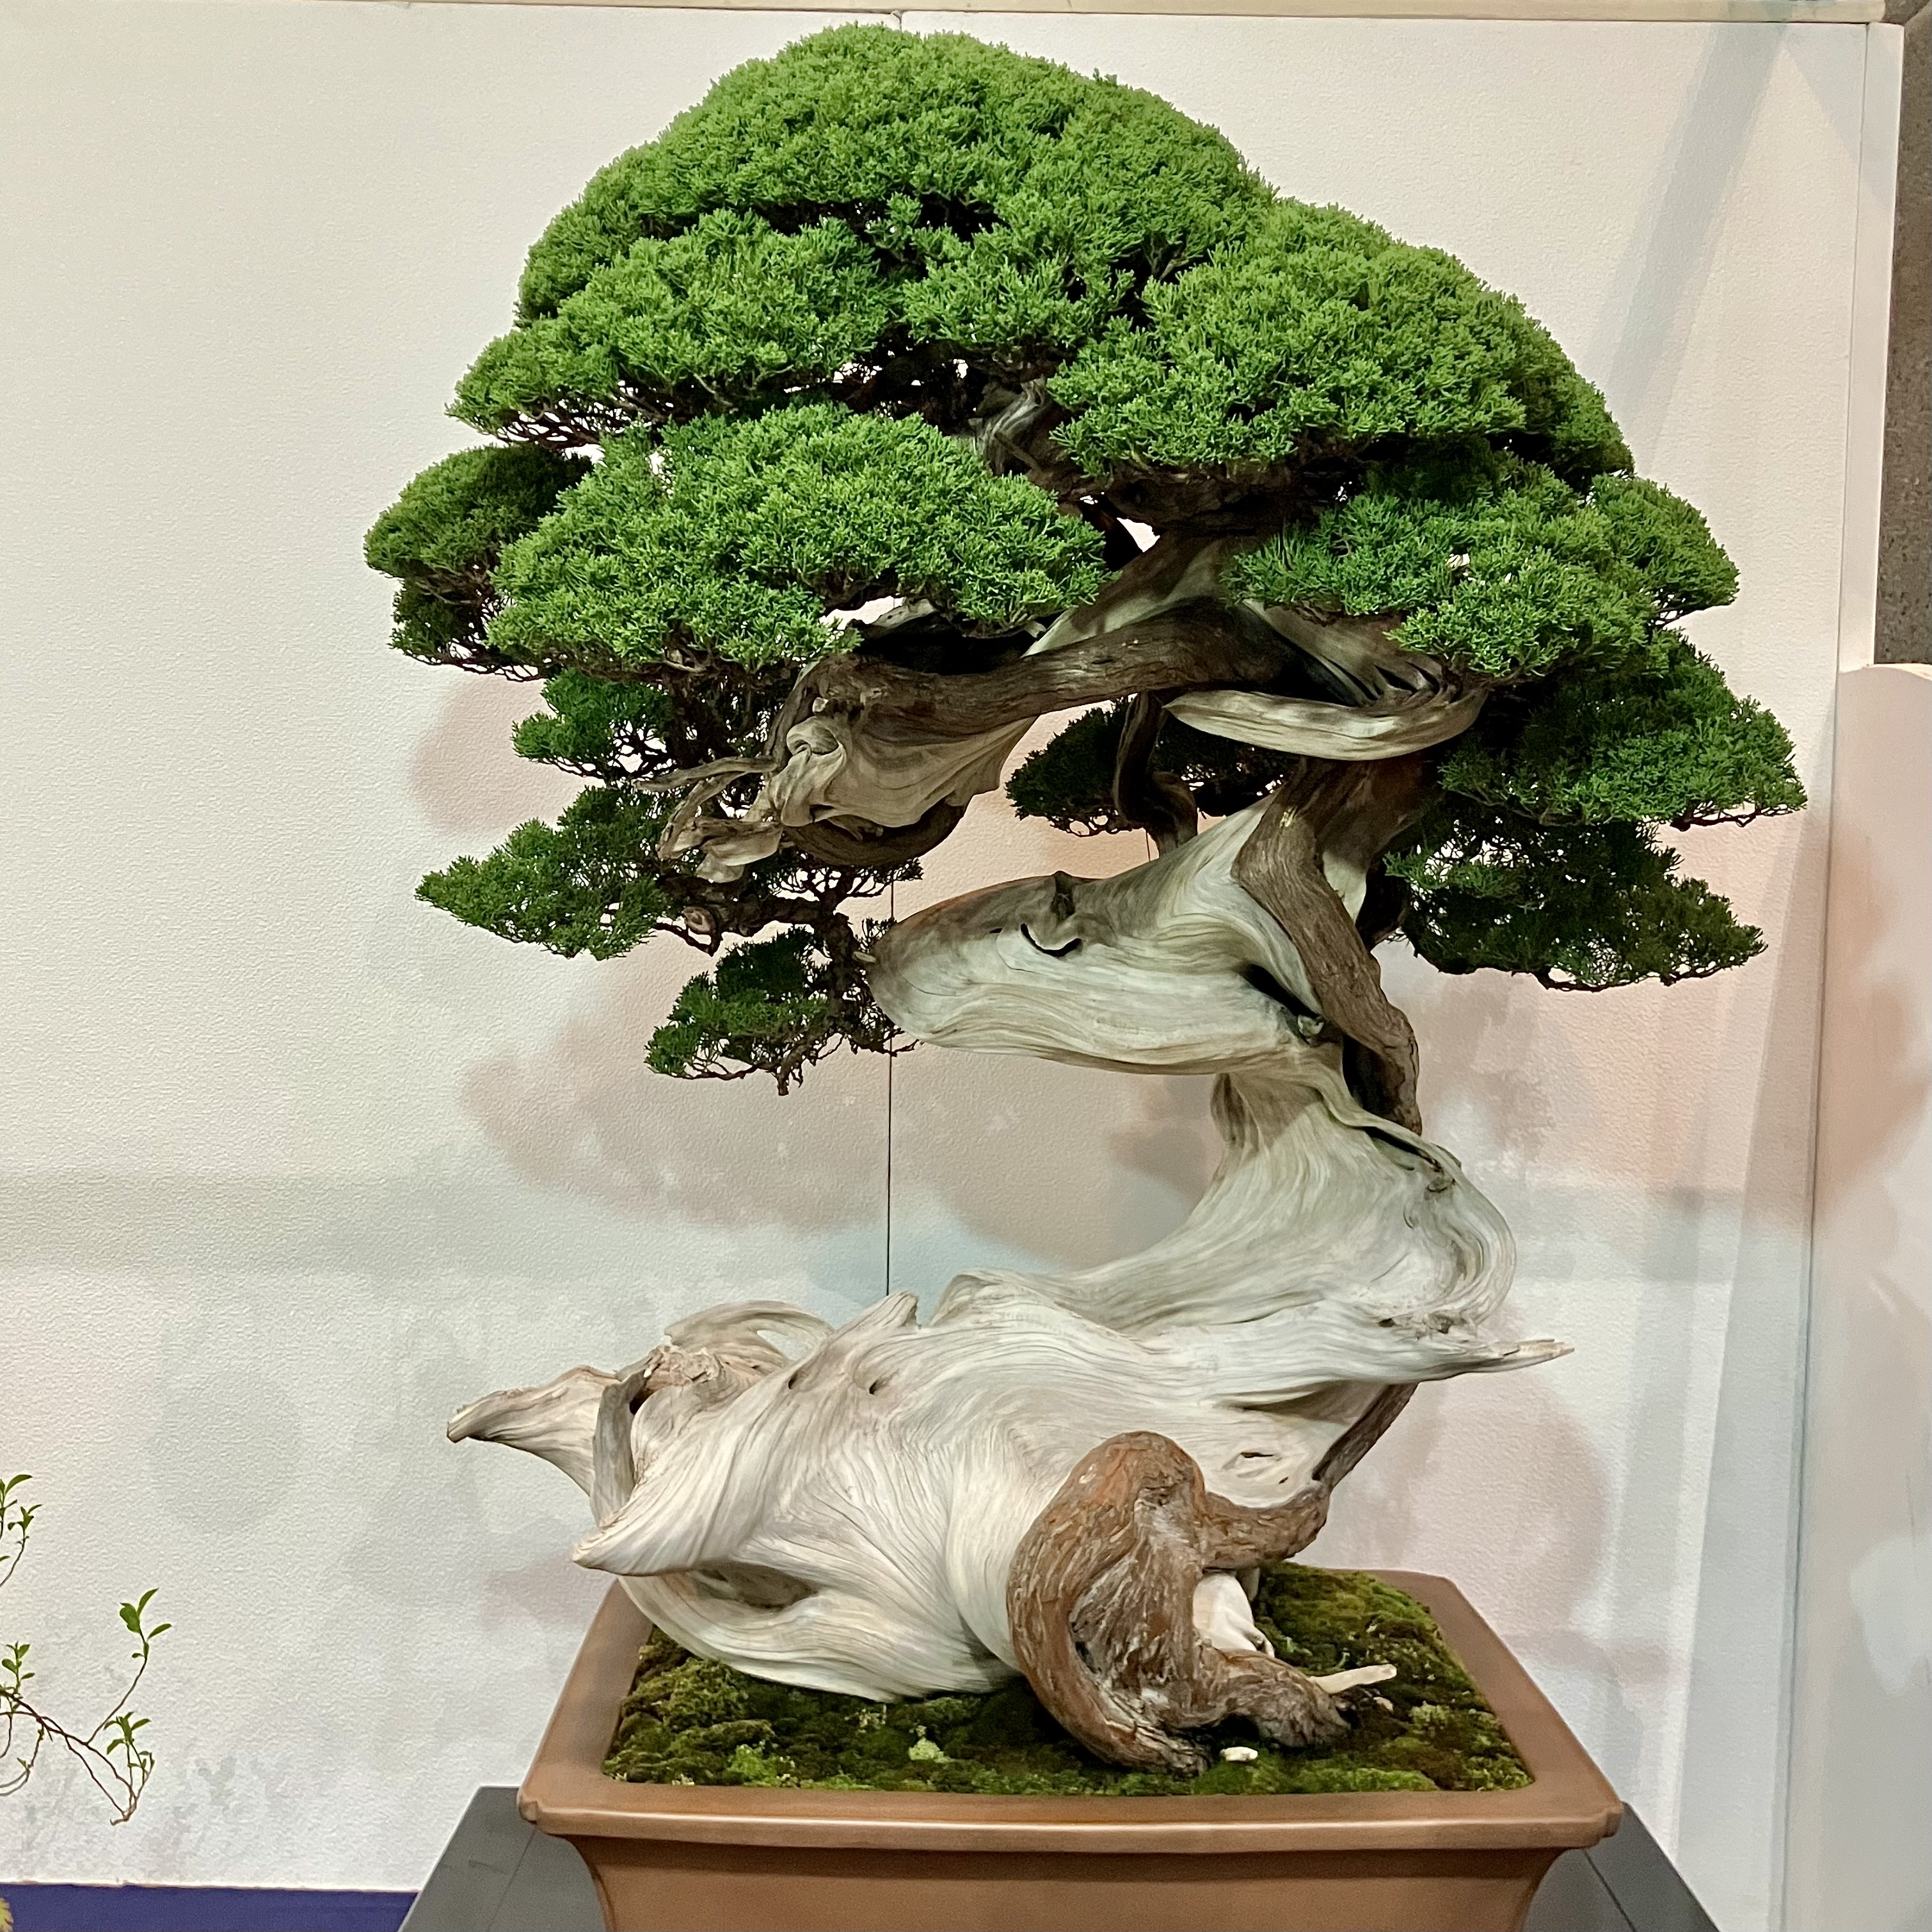
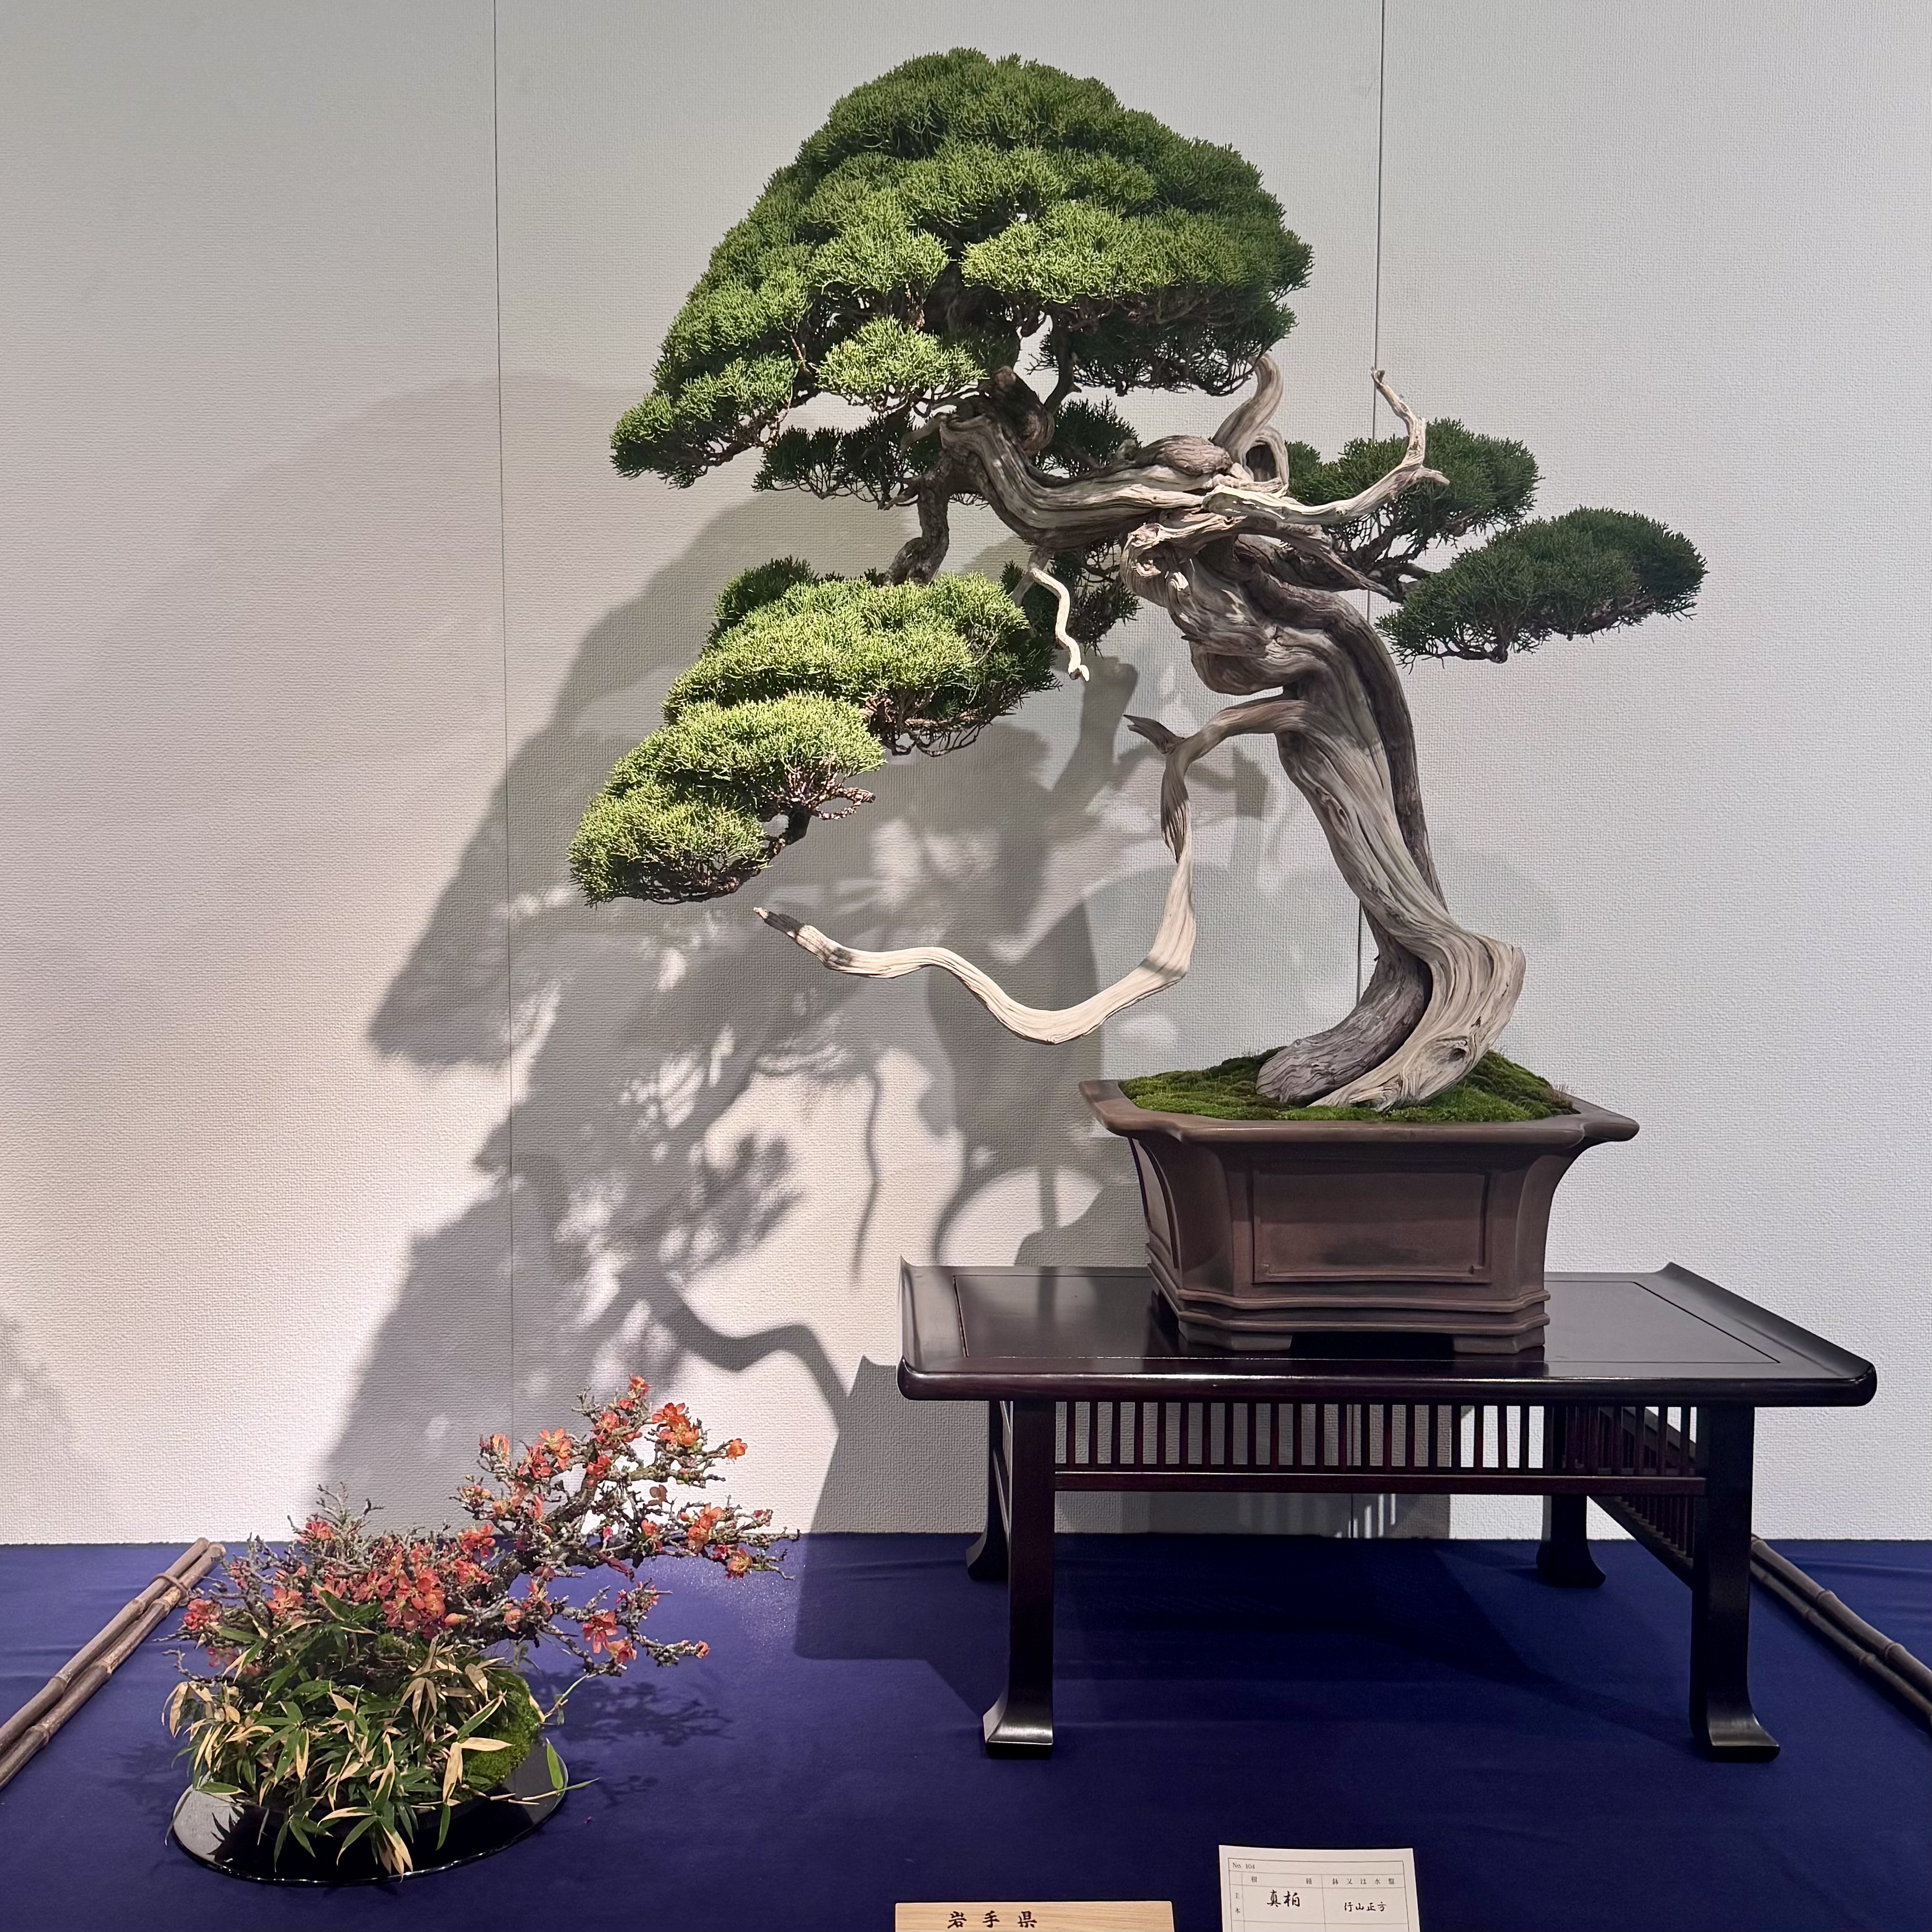
Shinpaku Juniper; Kokufu Prize.
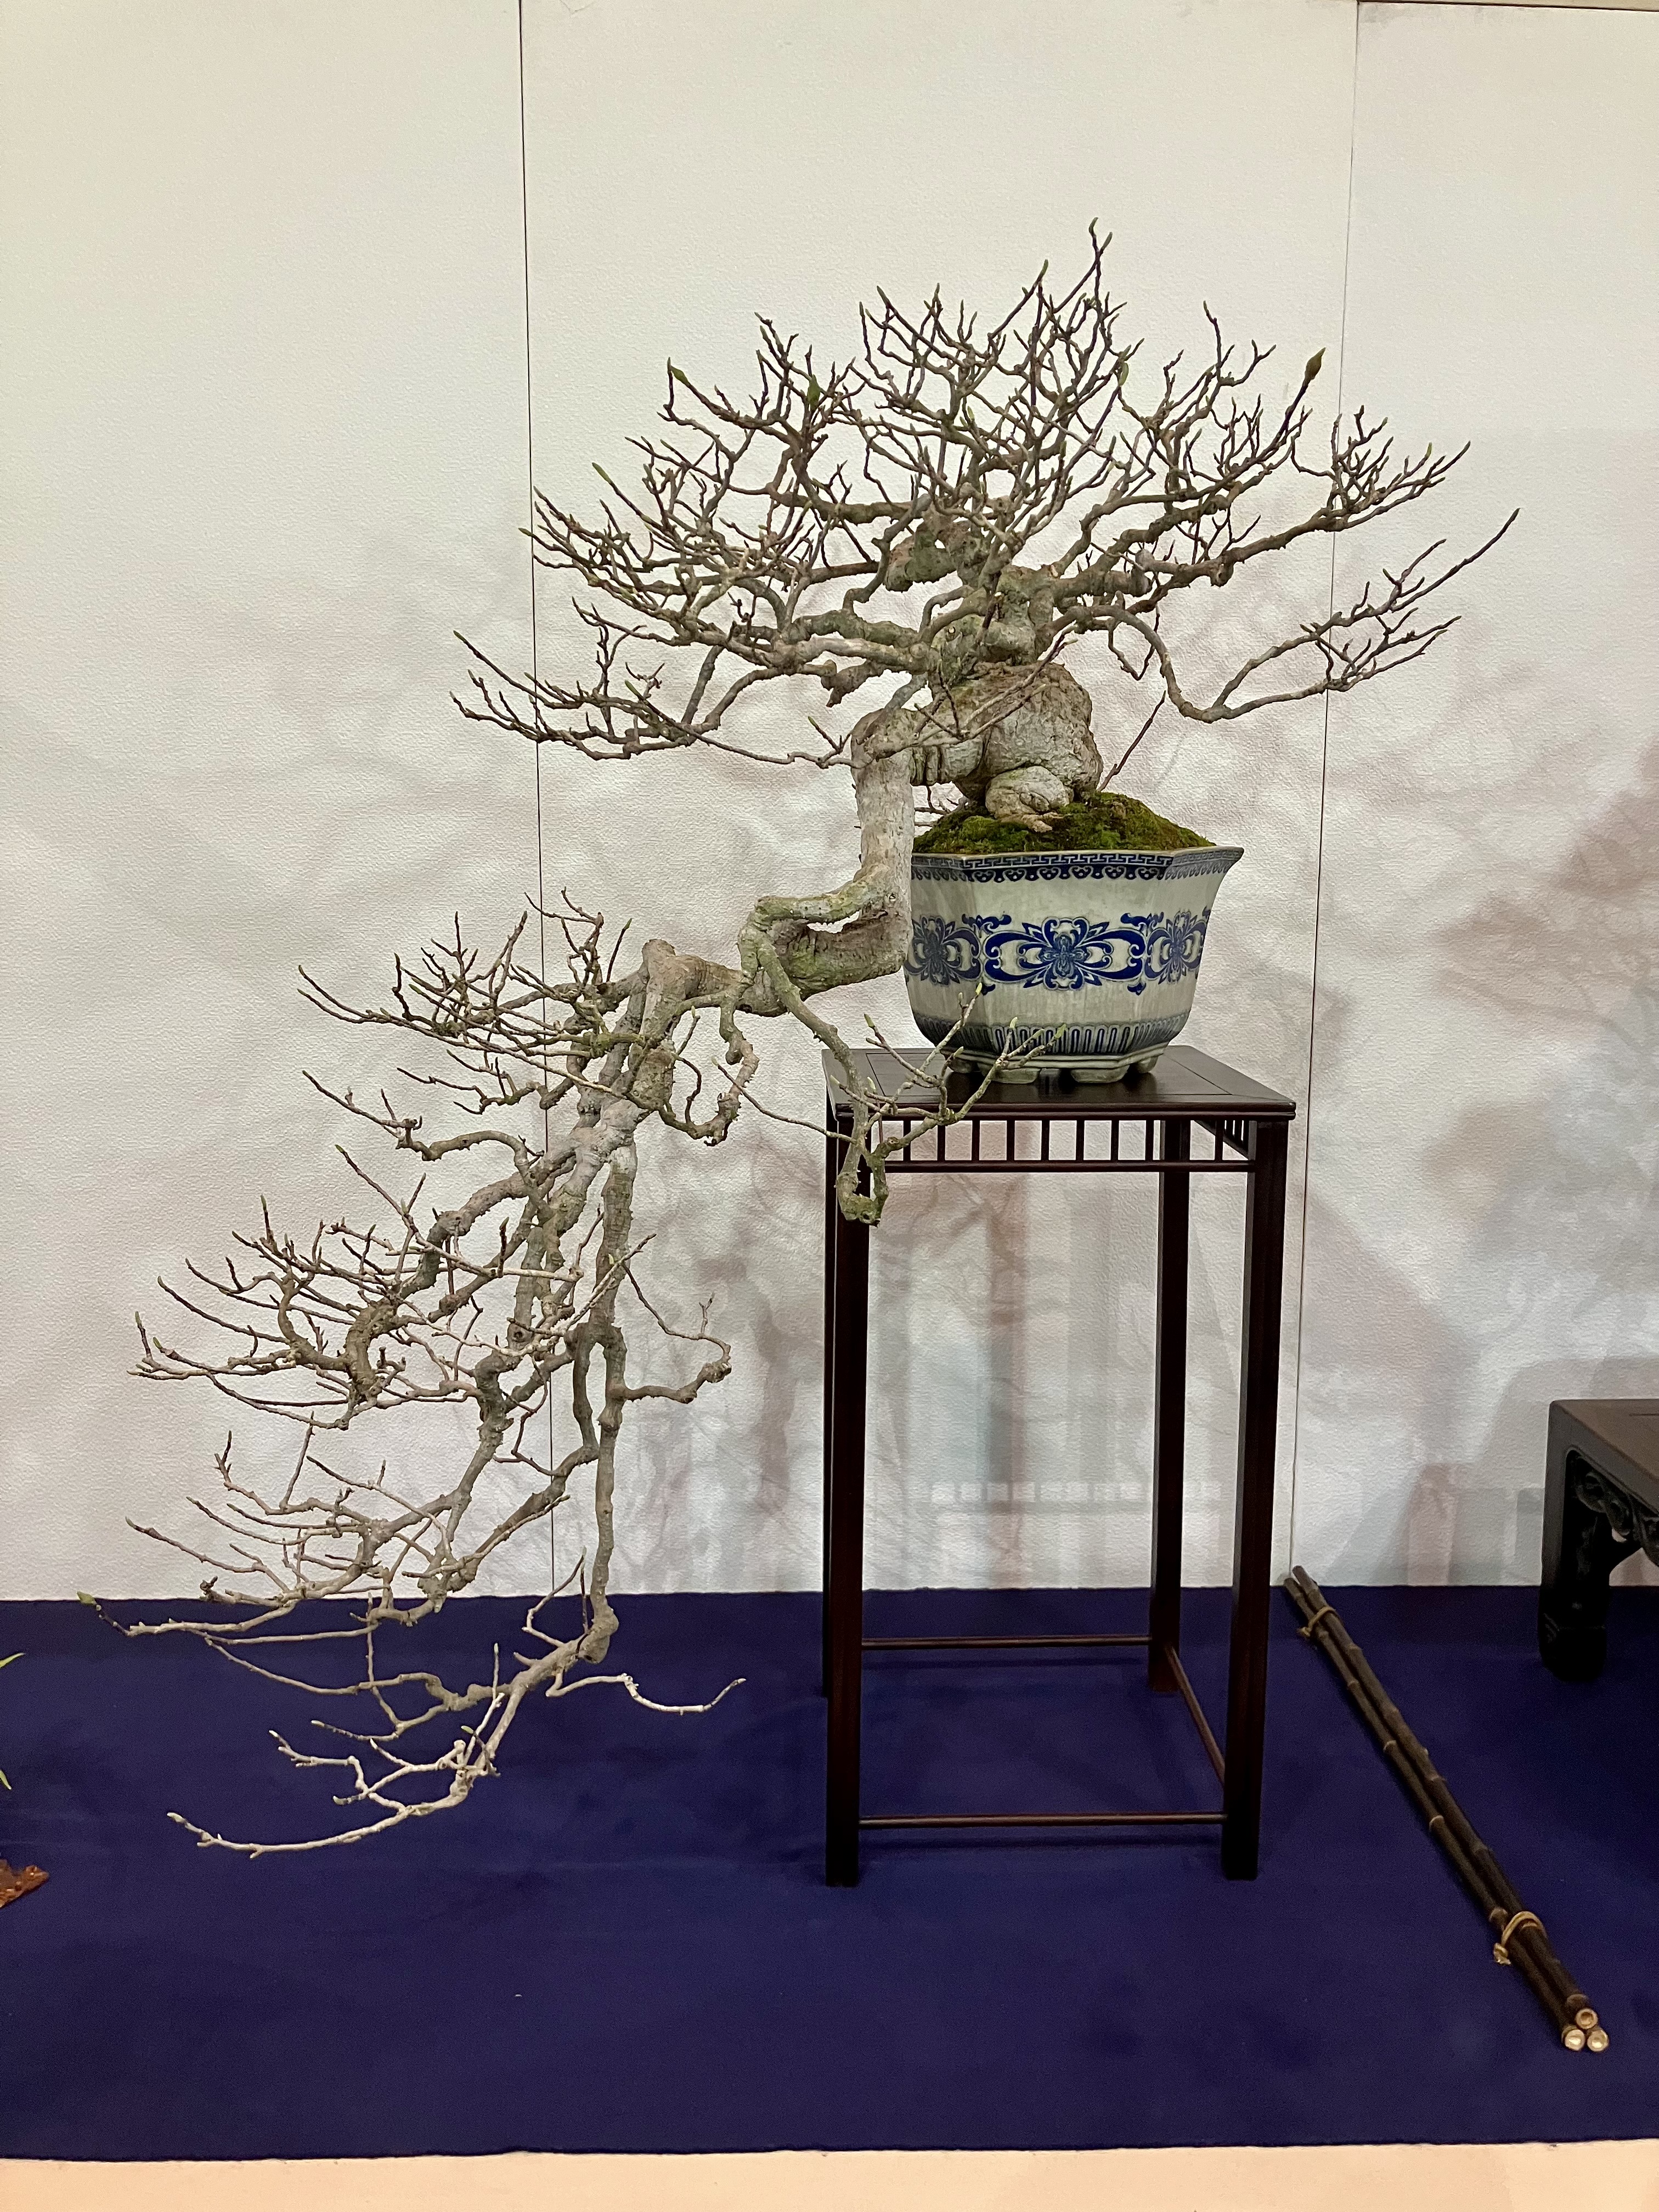
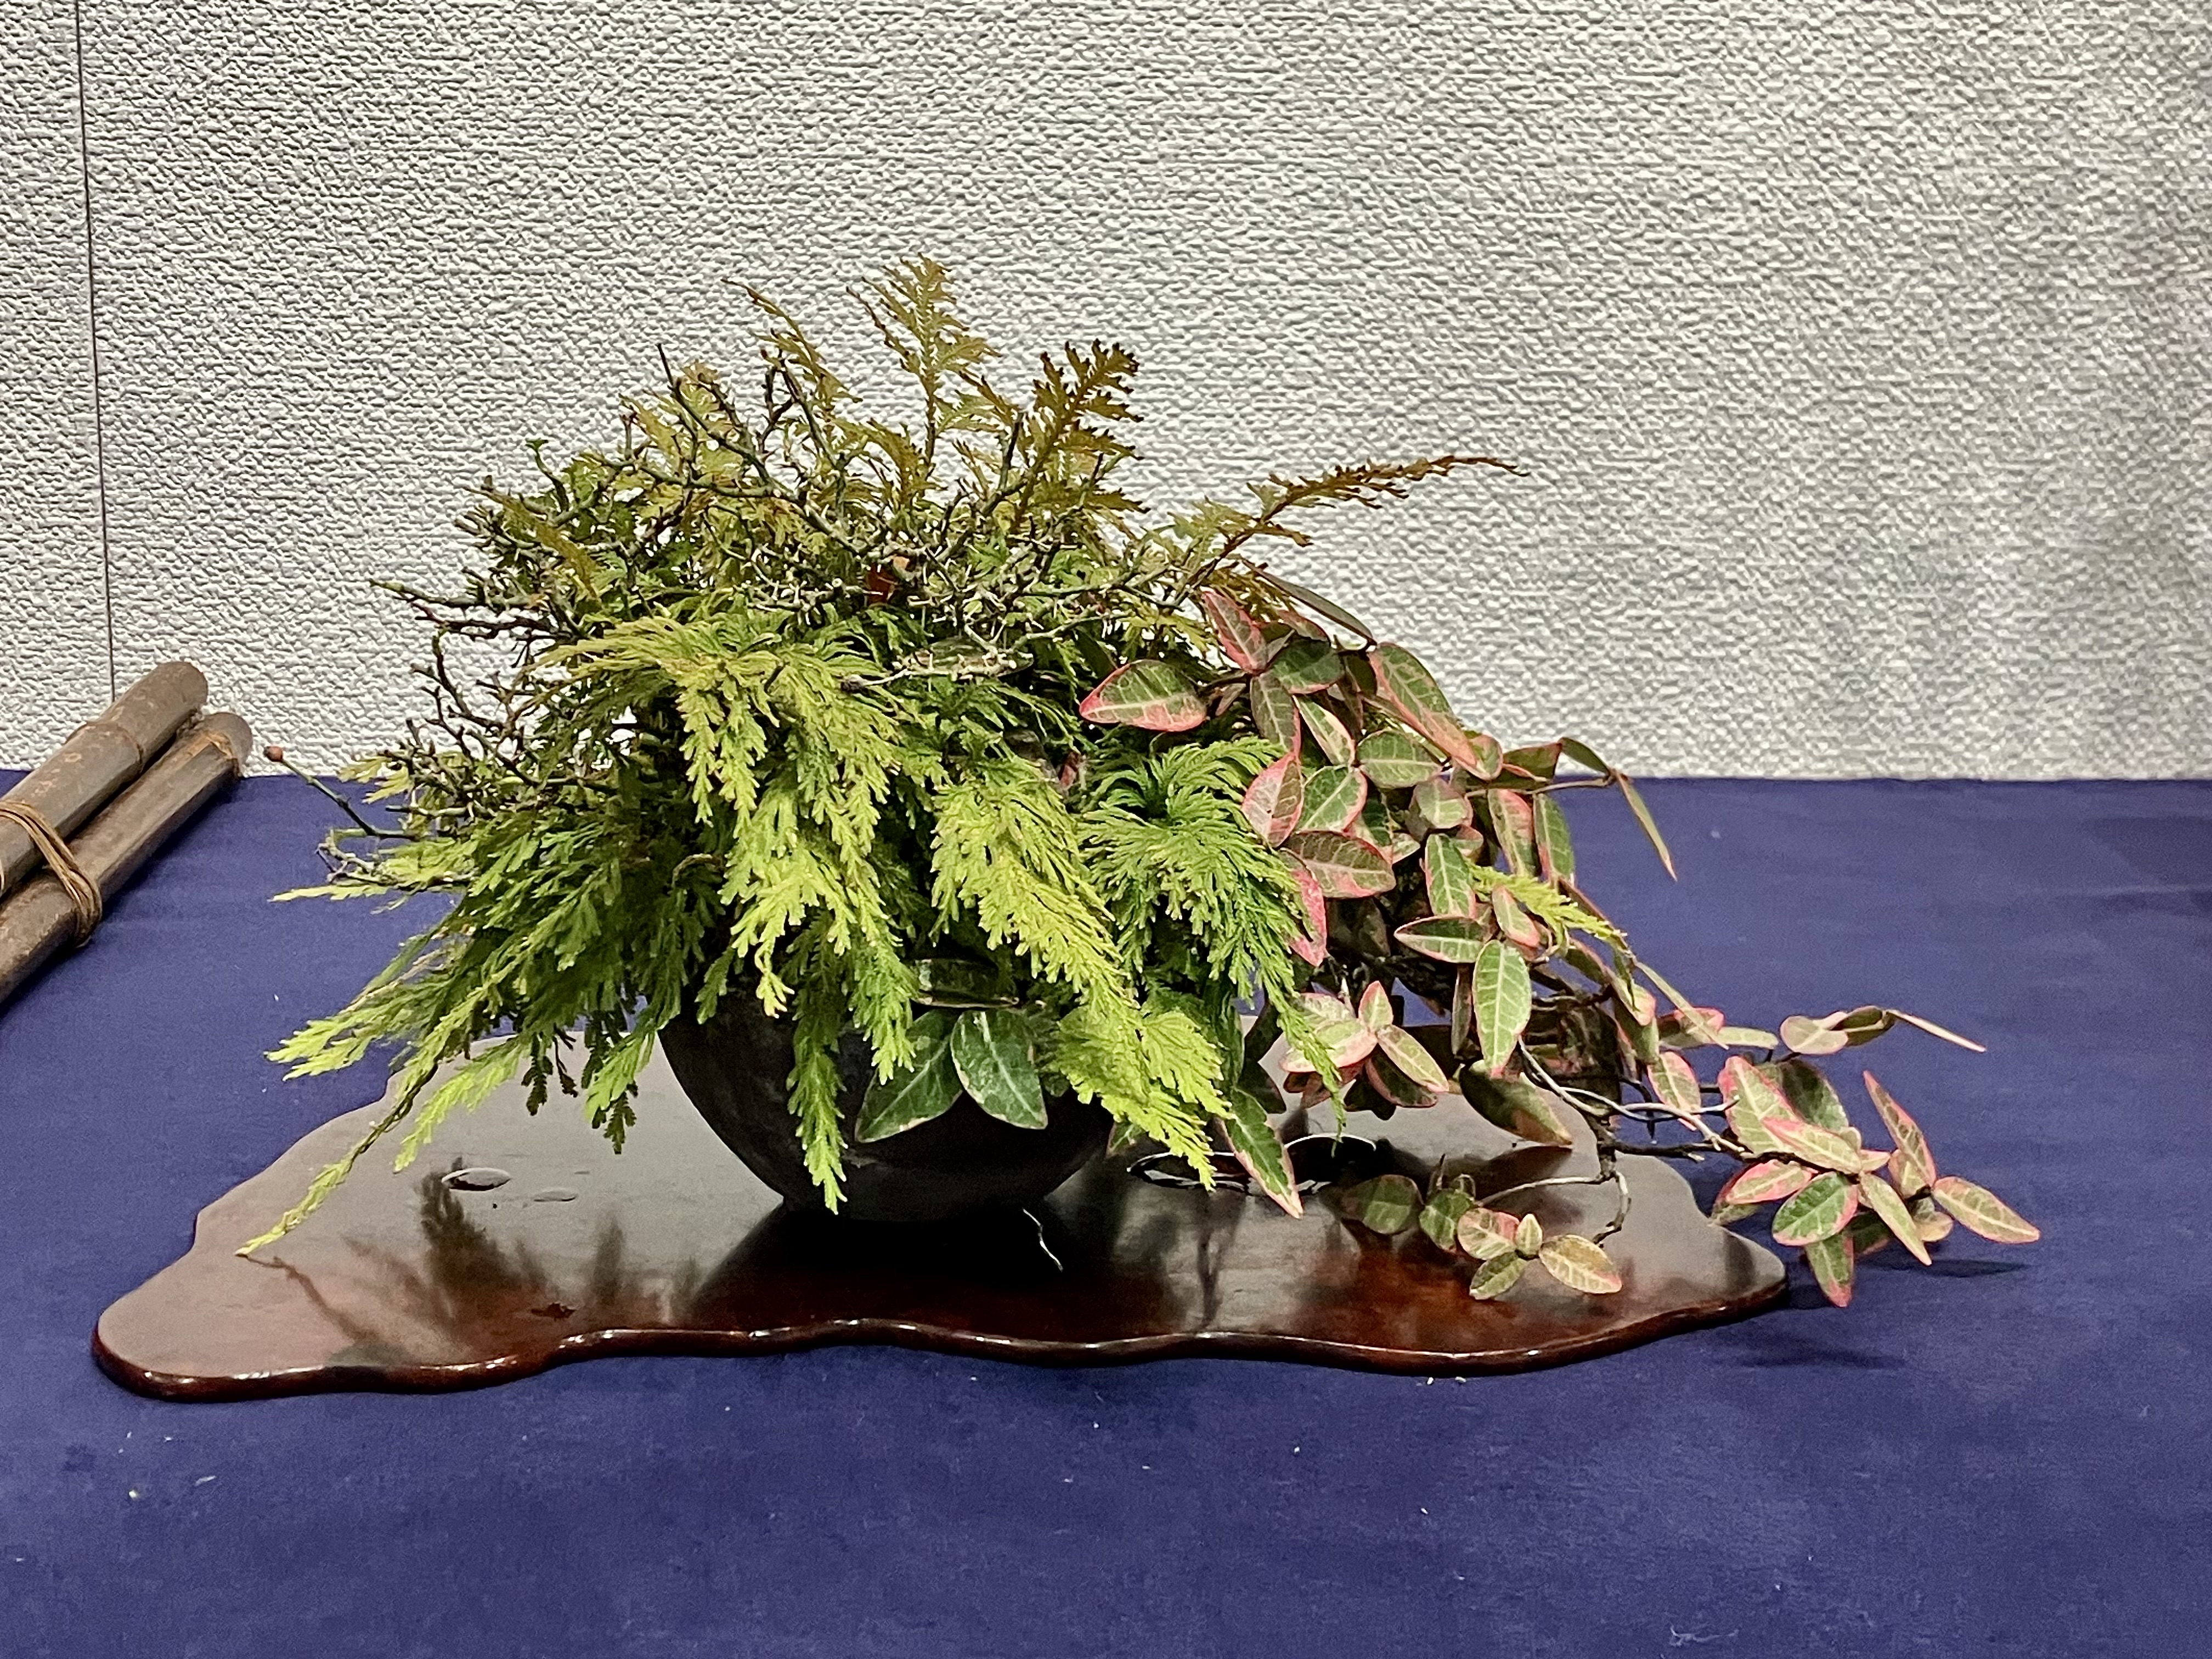
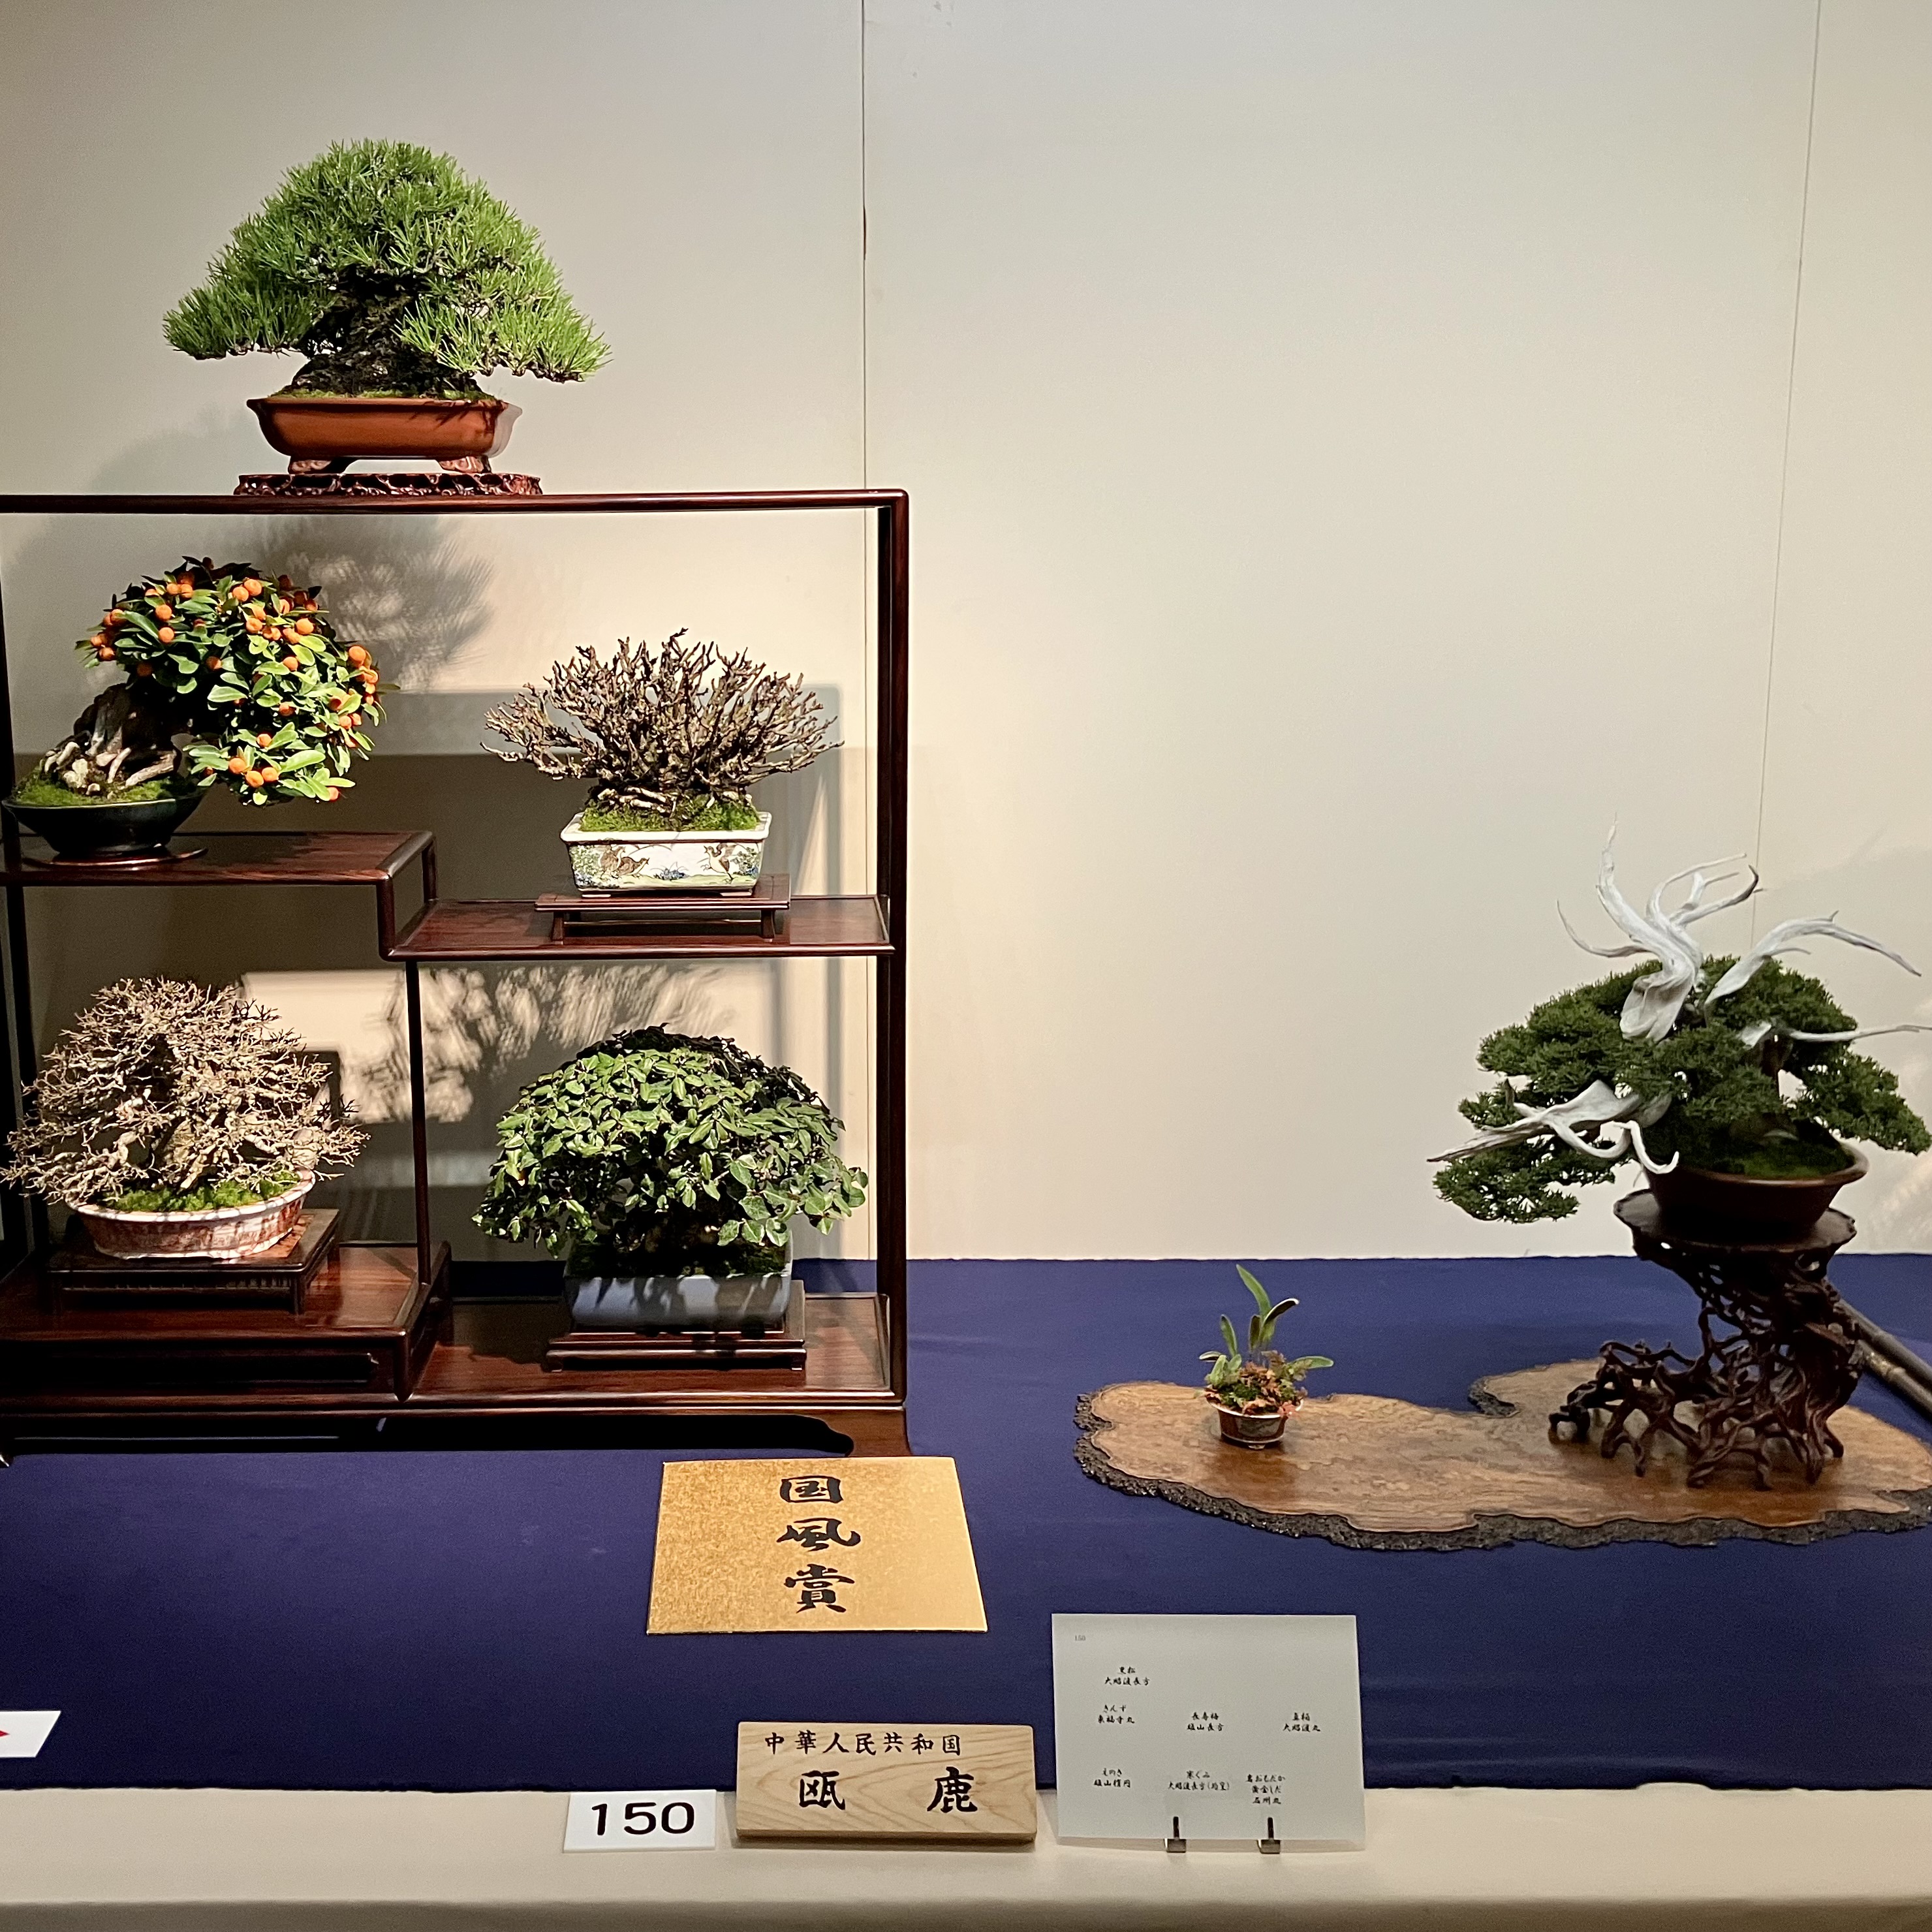
Magnolia. Resets the tone with an airy whimsicality.
Shinpaku Juniper; Kokufu Prize.
Selaginella, or club moss (light green plant).
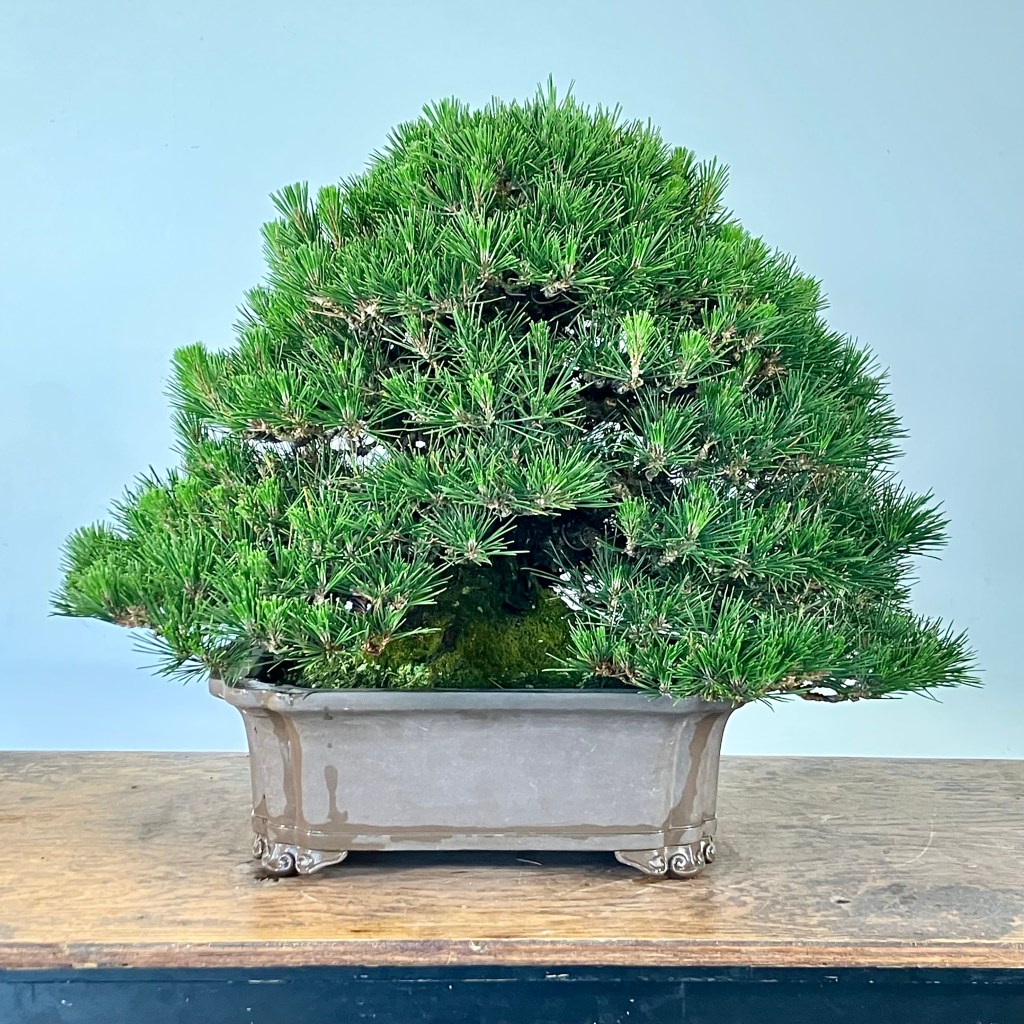
Japanese White Pine. A quiet multiple-trunk bunjin. The Kokufu highlights thicker-trunked trees.
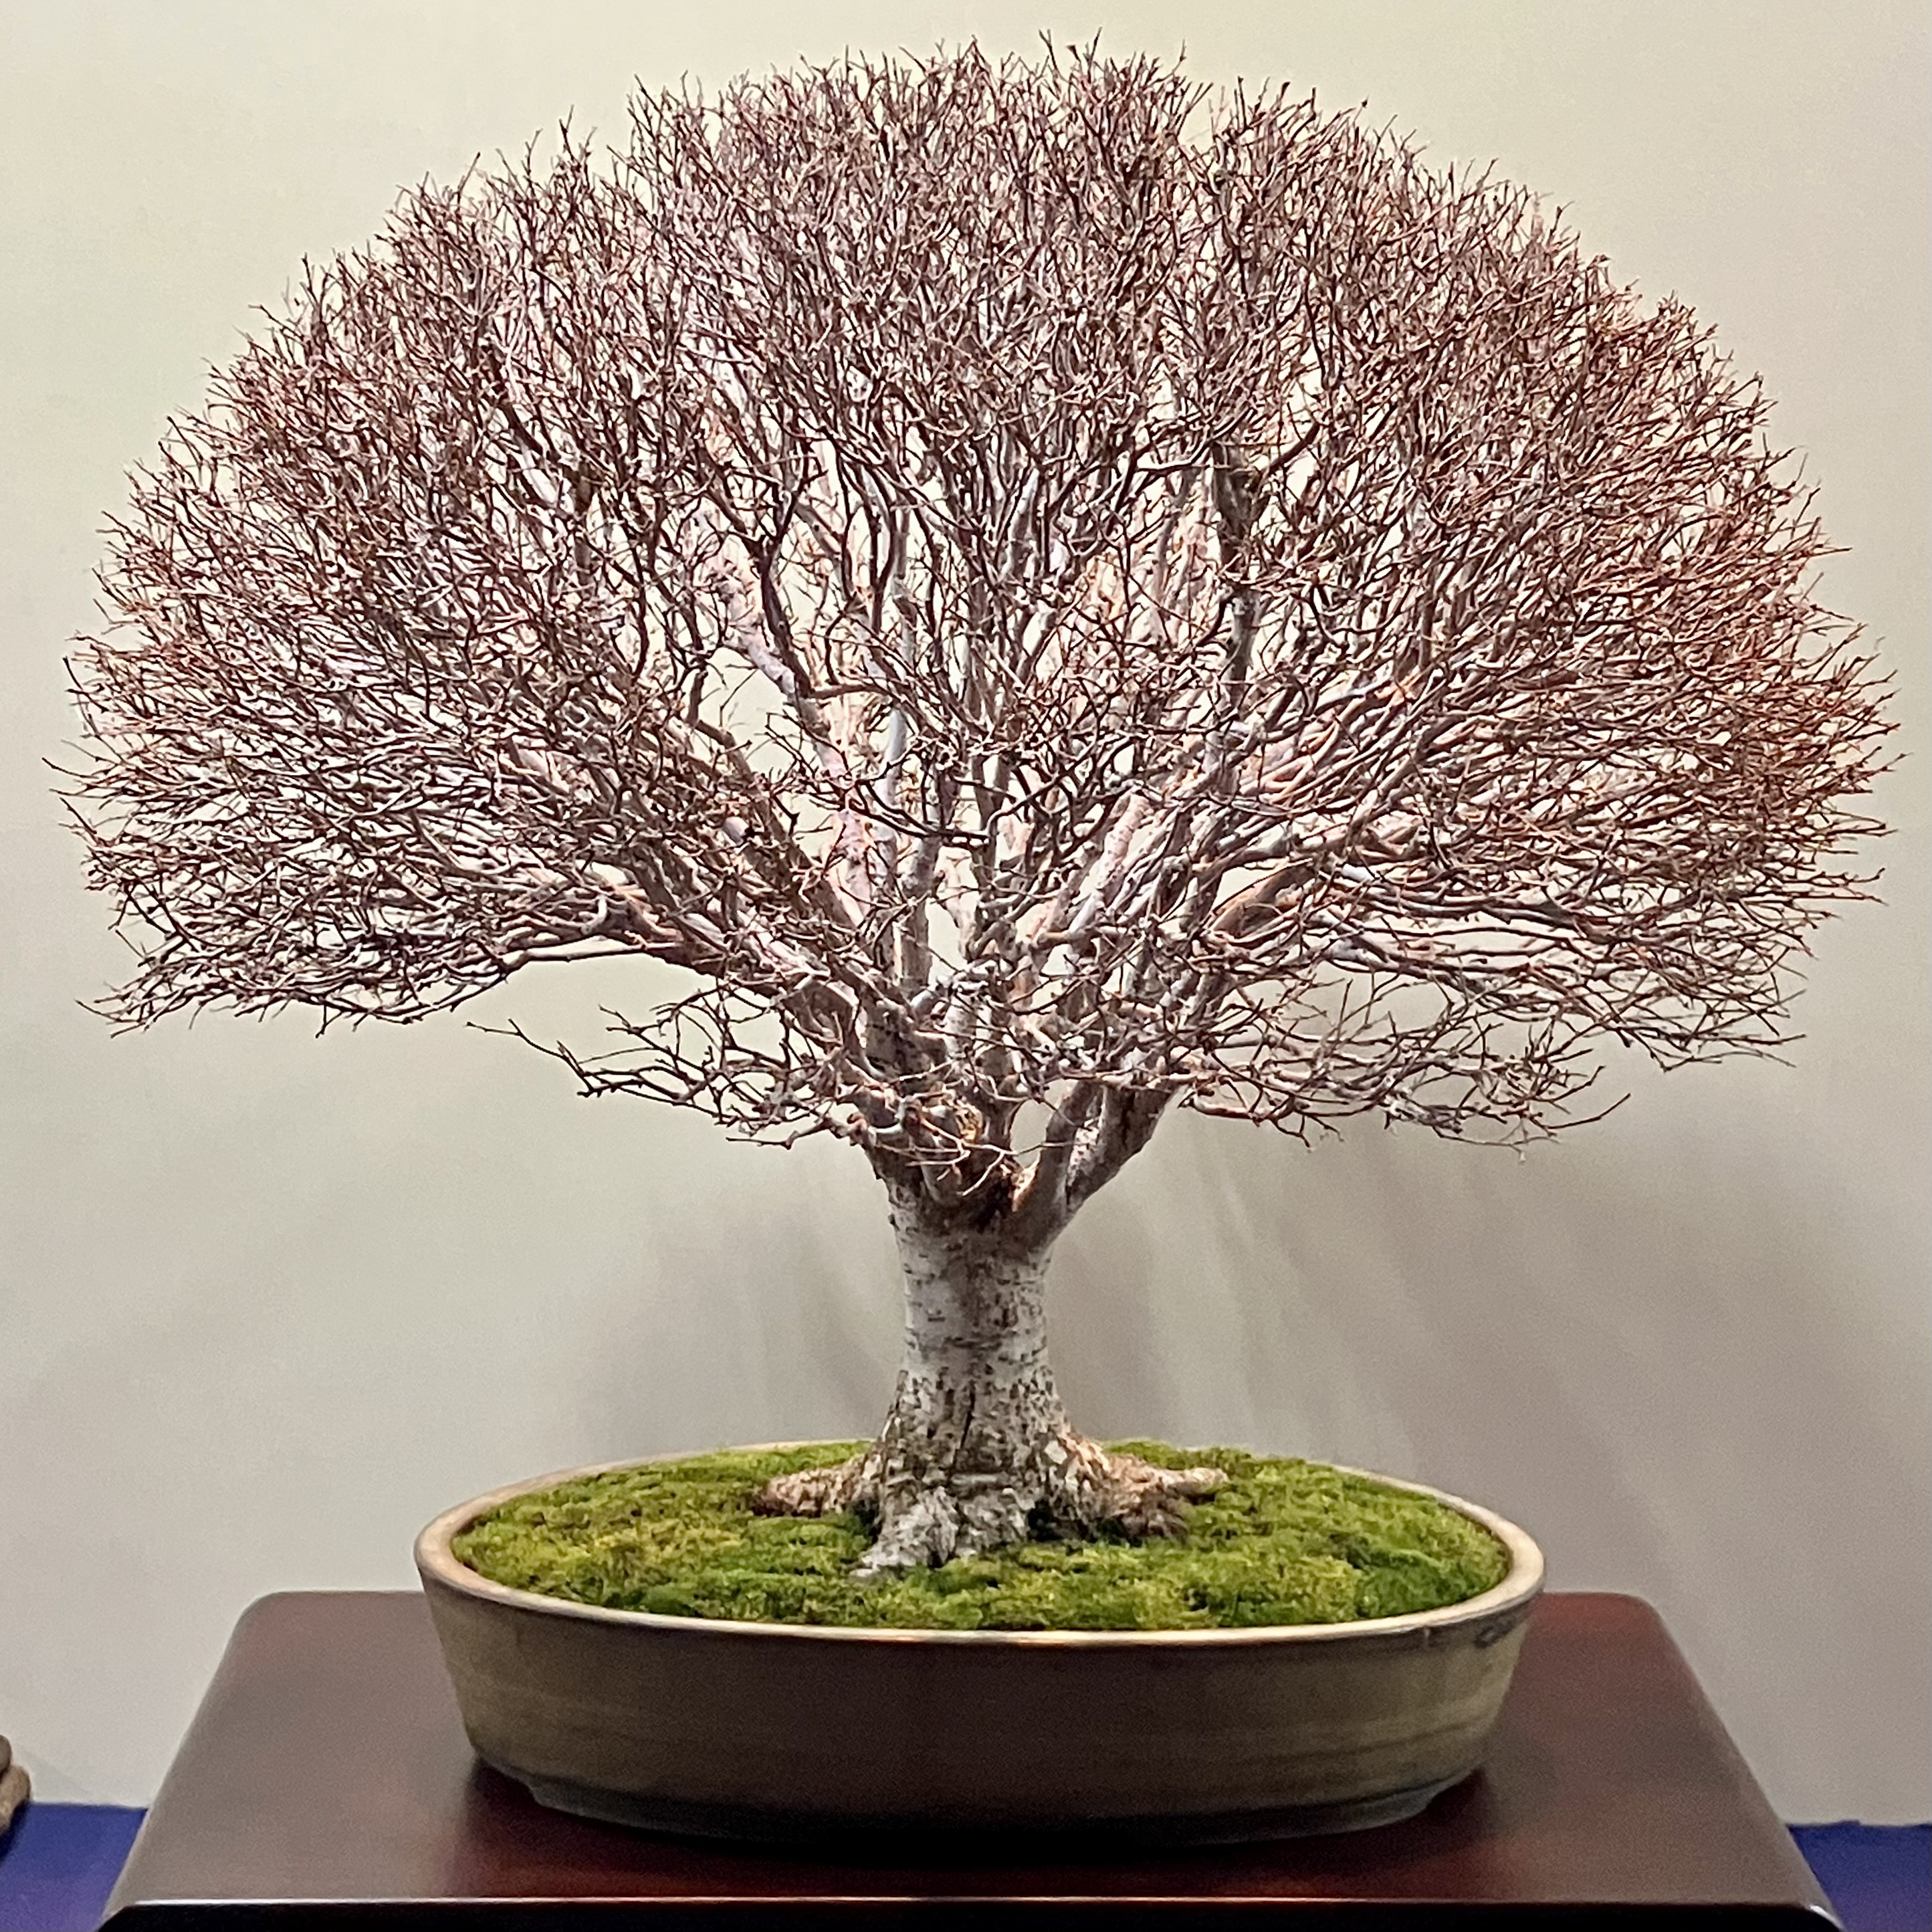
Trident Maple. Grown in a small pot it’s whole life, maybe 75 years.
Ume.
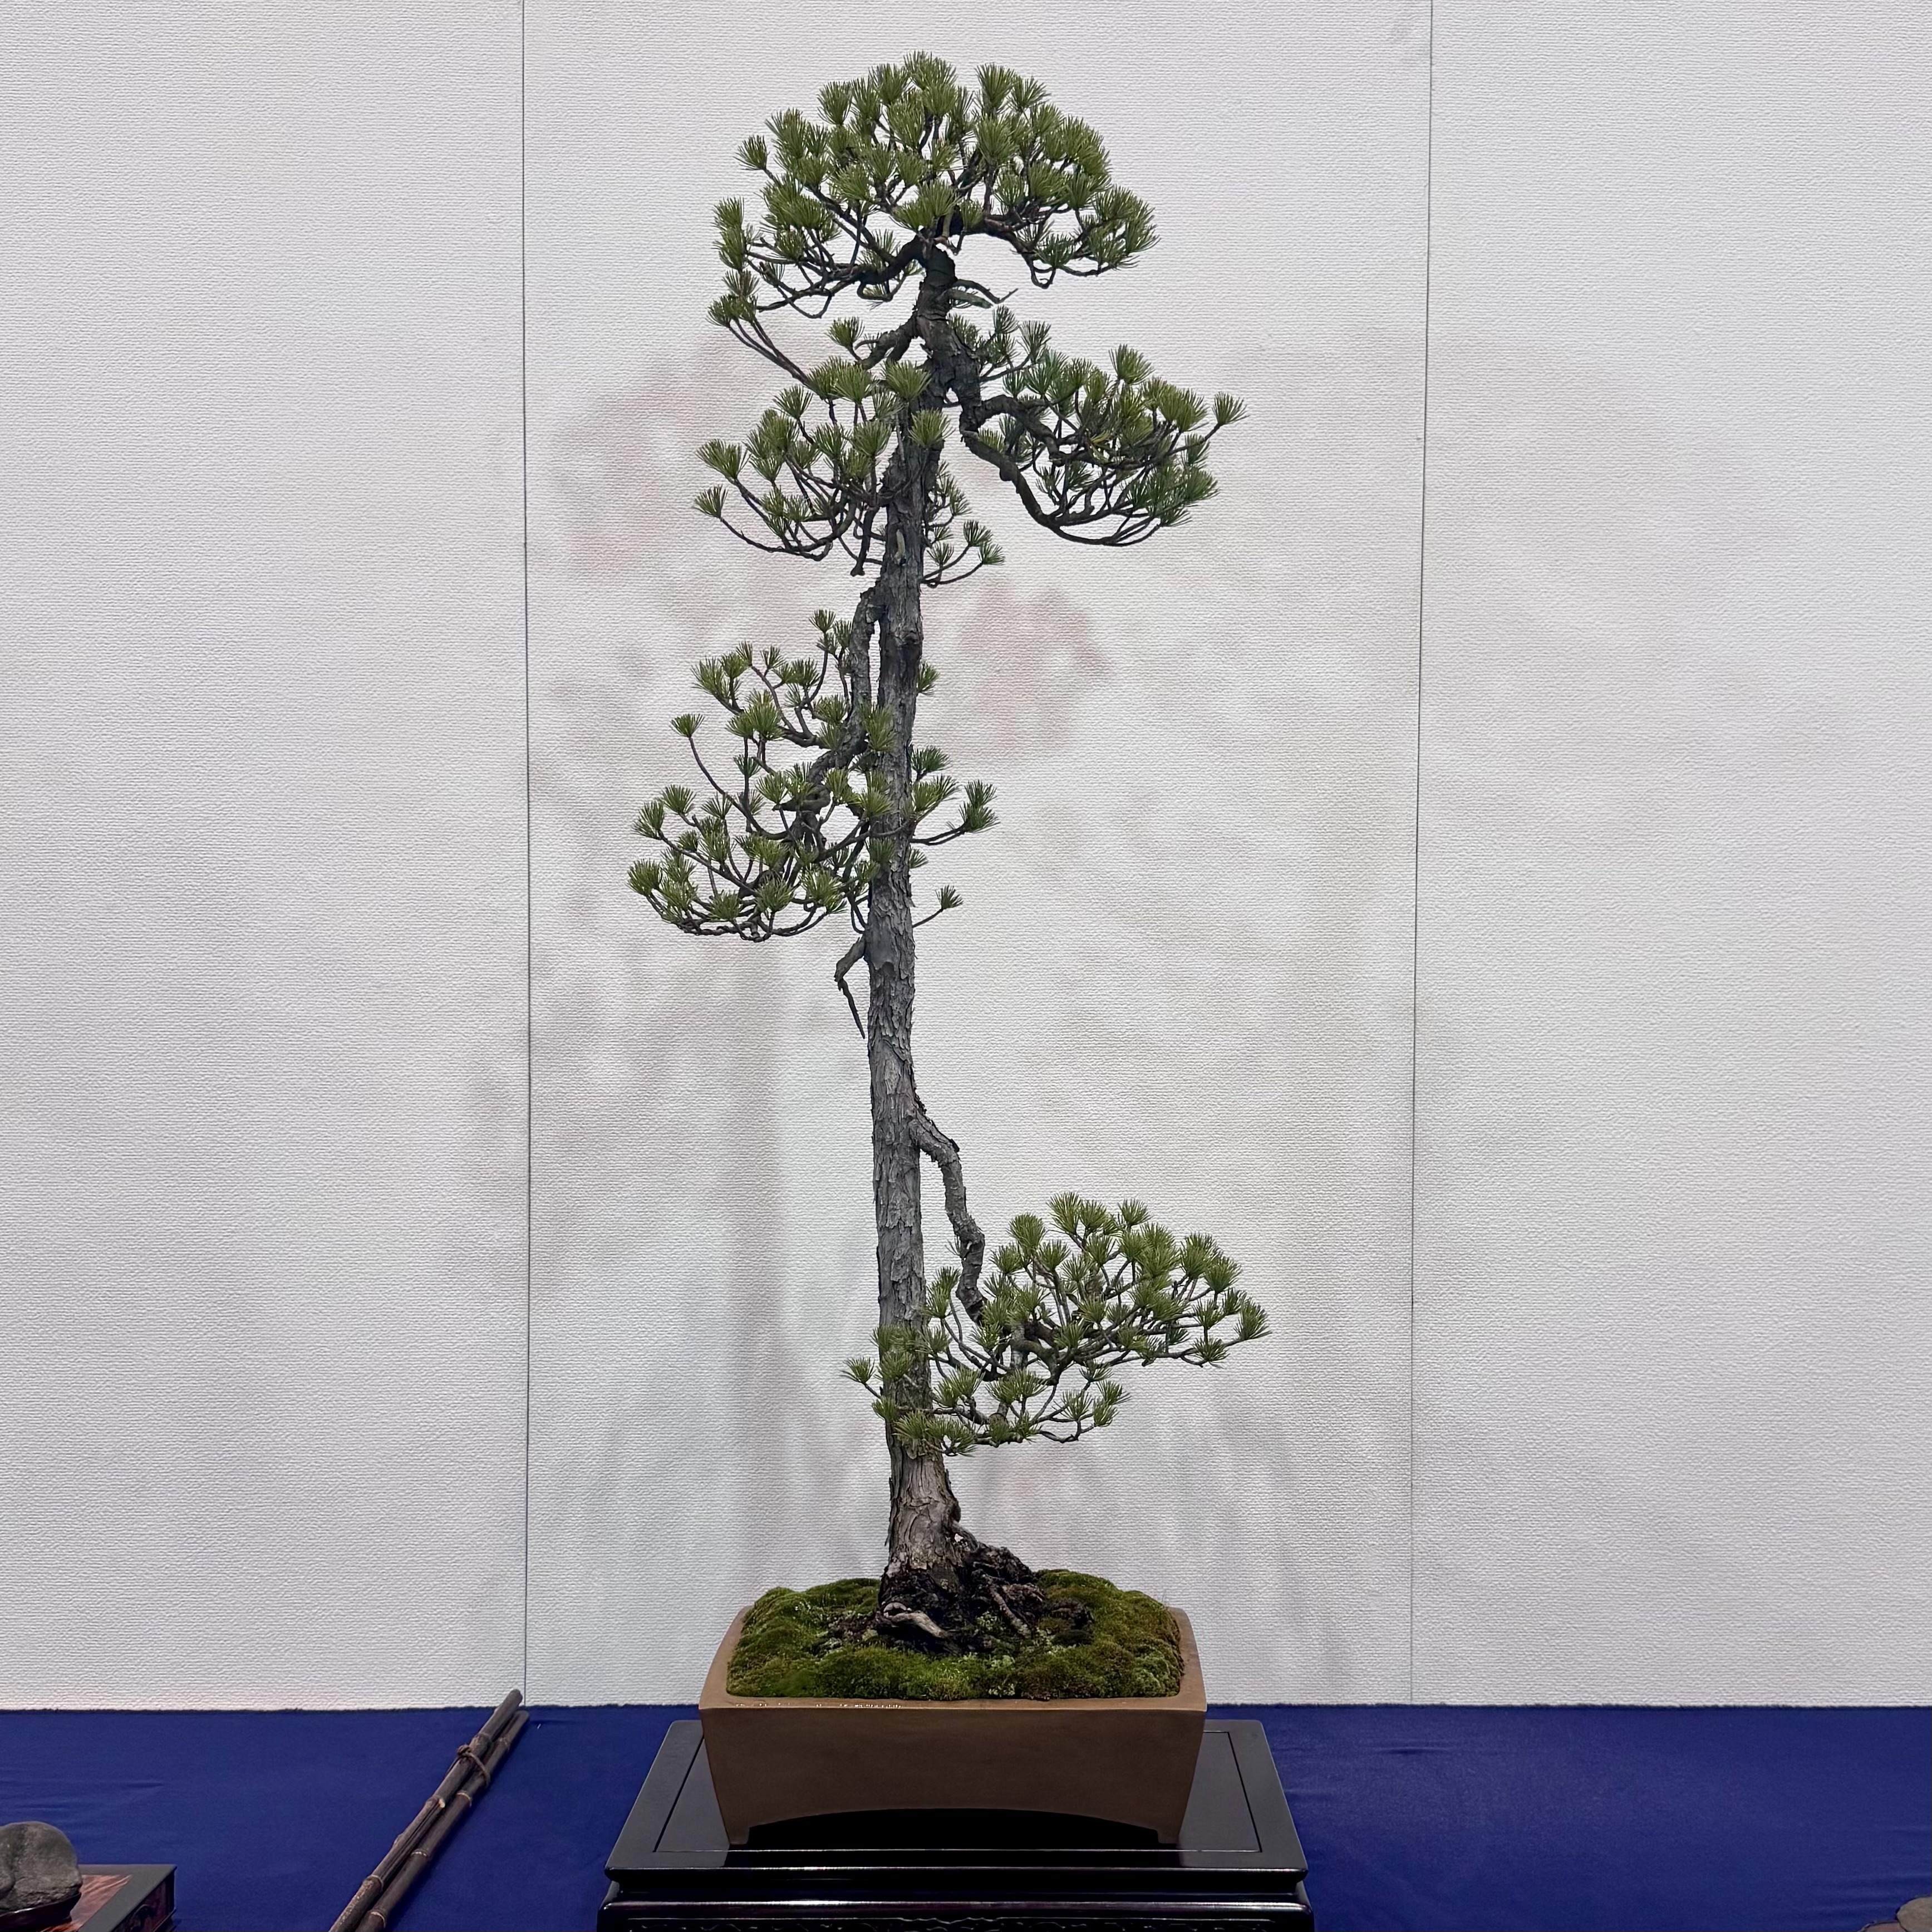
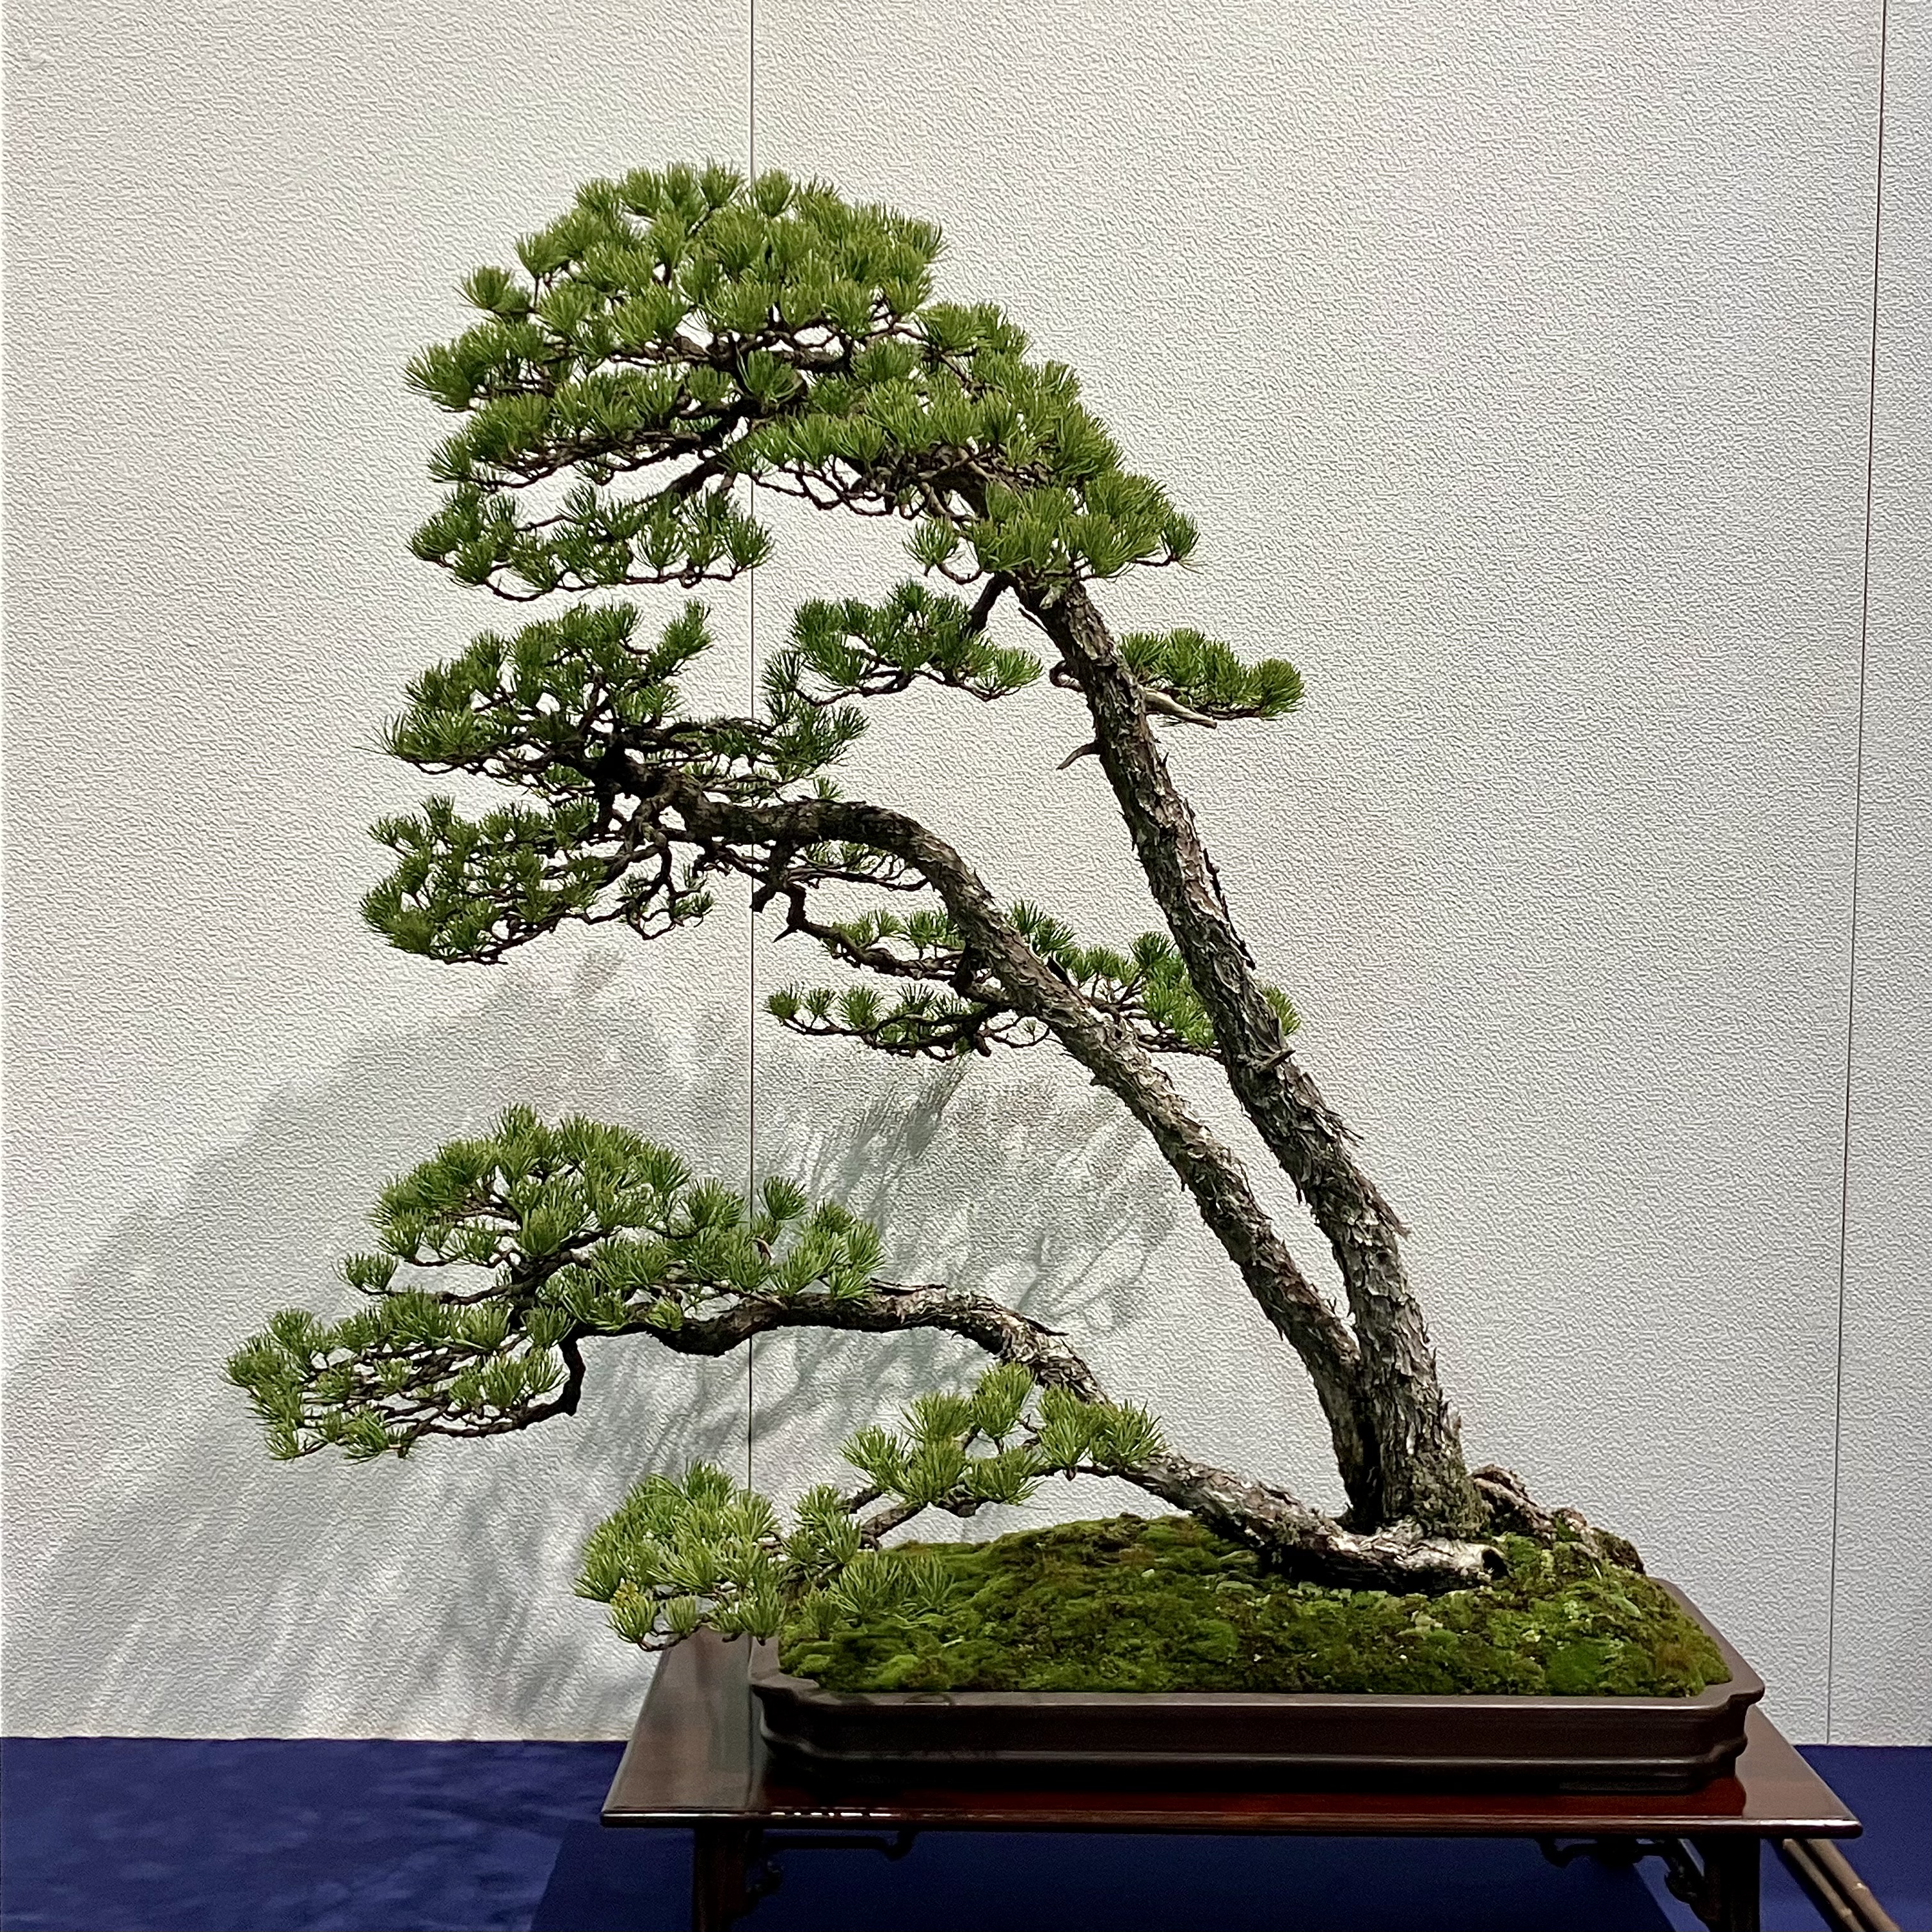
Red Pine from the Imperial Family. Notice the lack of conformity to modern bonsai expectations, particularly the lack of compaction.
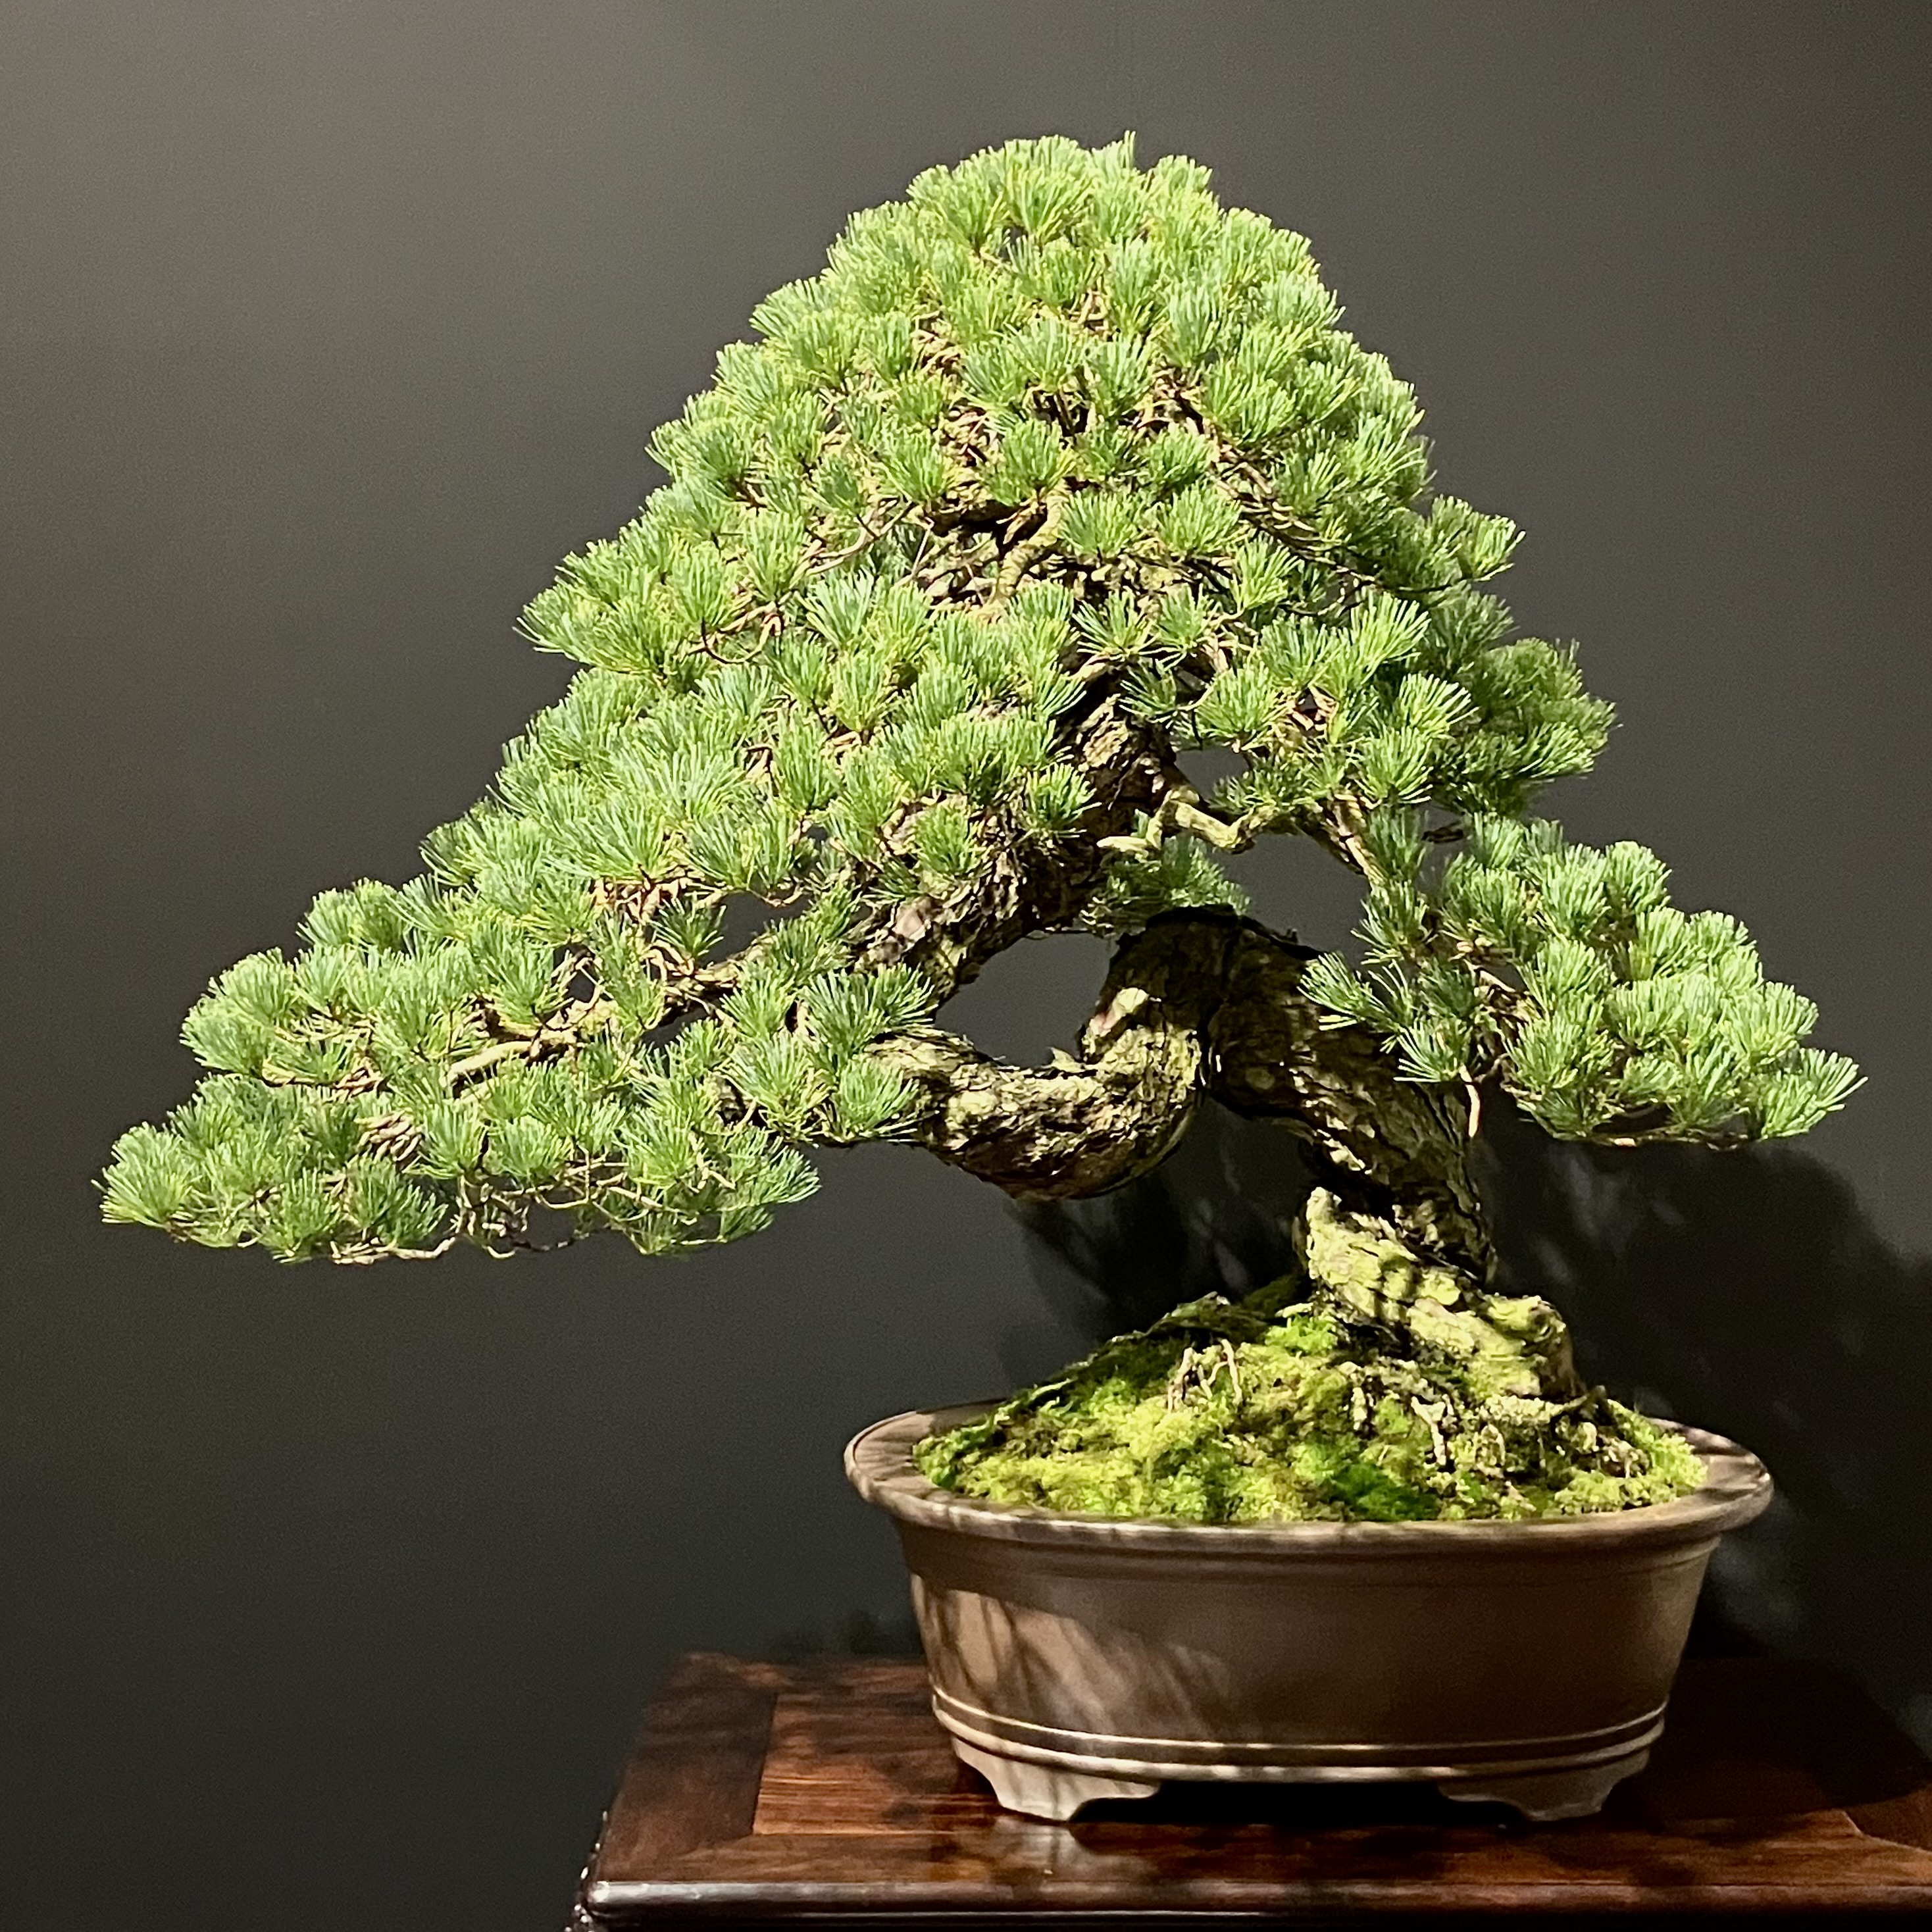
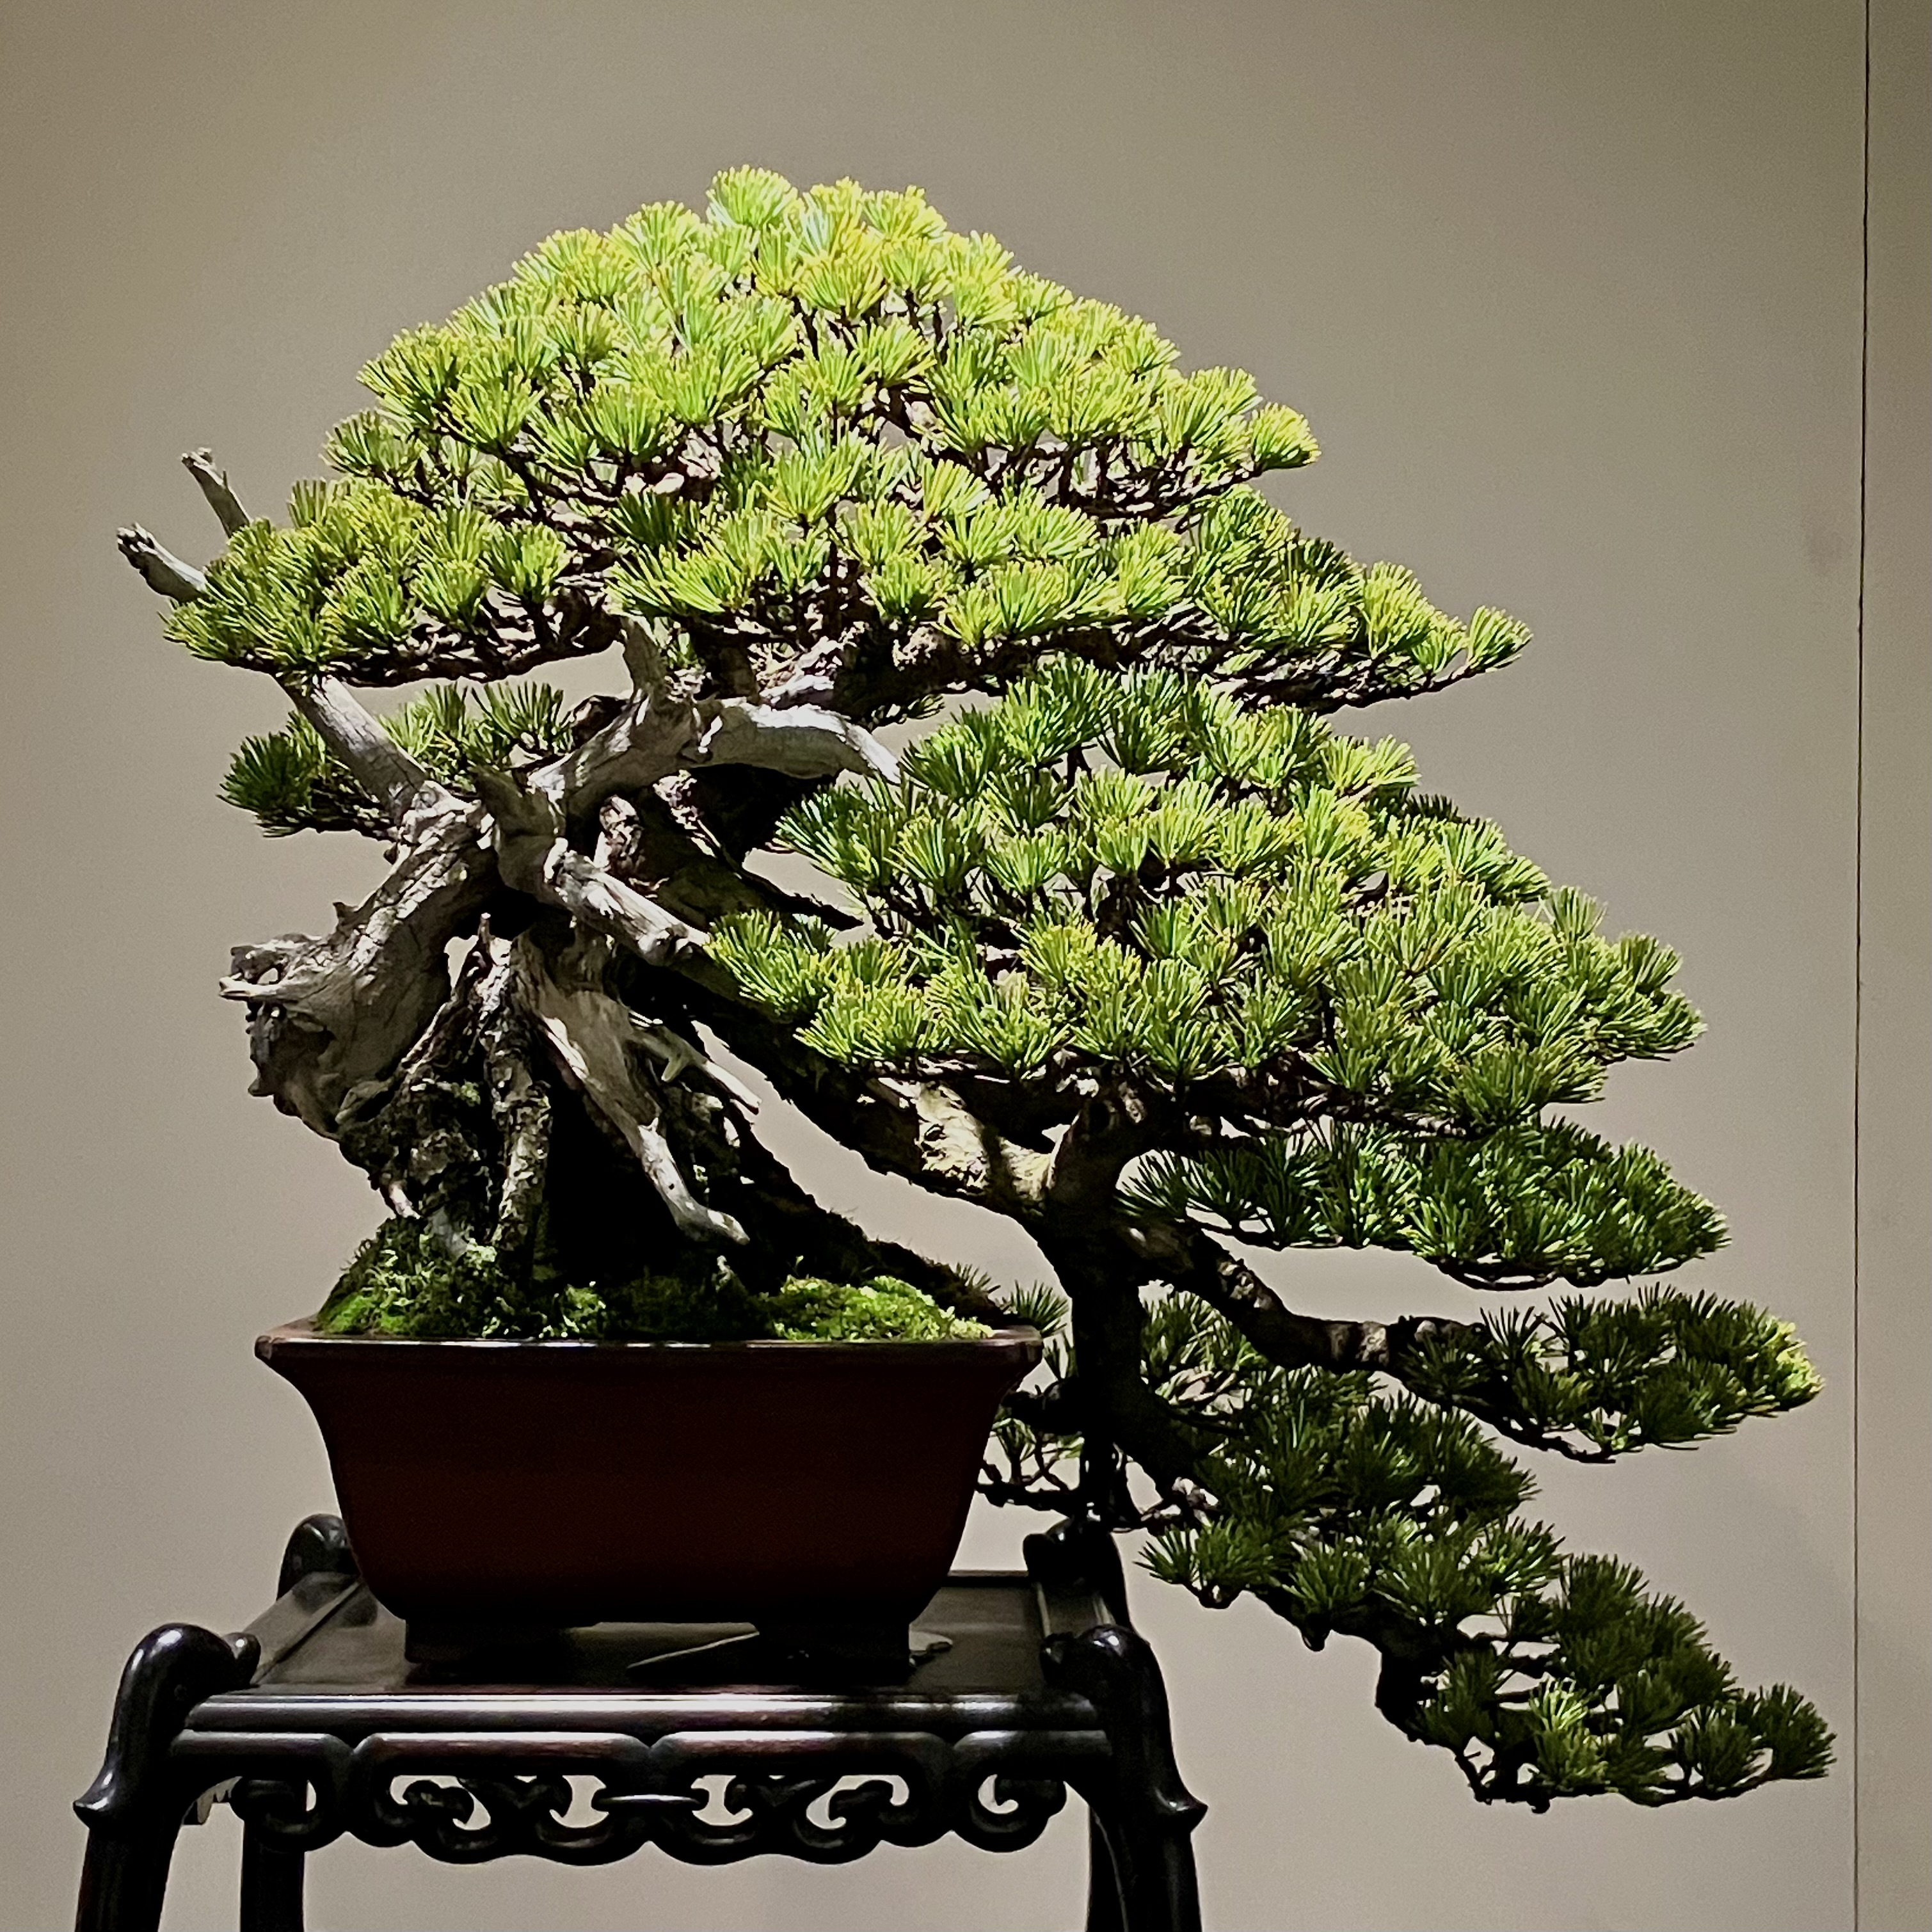
Japanese White Pine worked on by Mr. Shinji Suzuki. He was excited about this entry as it has a grand history…
The White Pine was shown in the first Kokufu-ten in 1934. It’s a great addition to this 100th show (not year, they took two years off and some of the early years had double shows). The entry is a nod to the durability of the show and the trees in it.
Zelkova.
Dwarf Flowering Quince ‘Chojubai’.
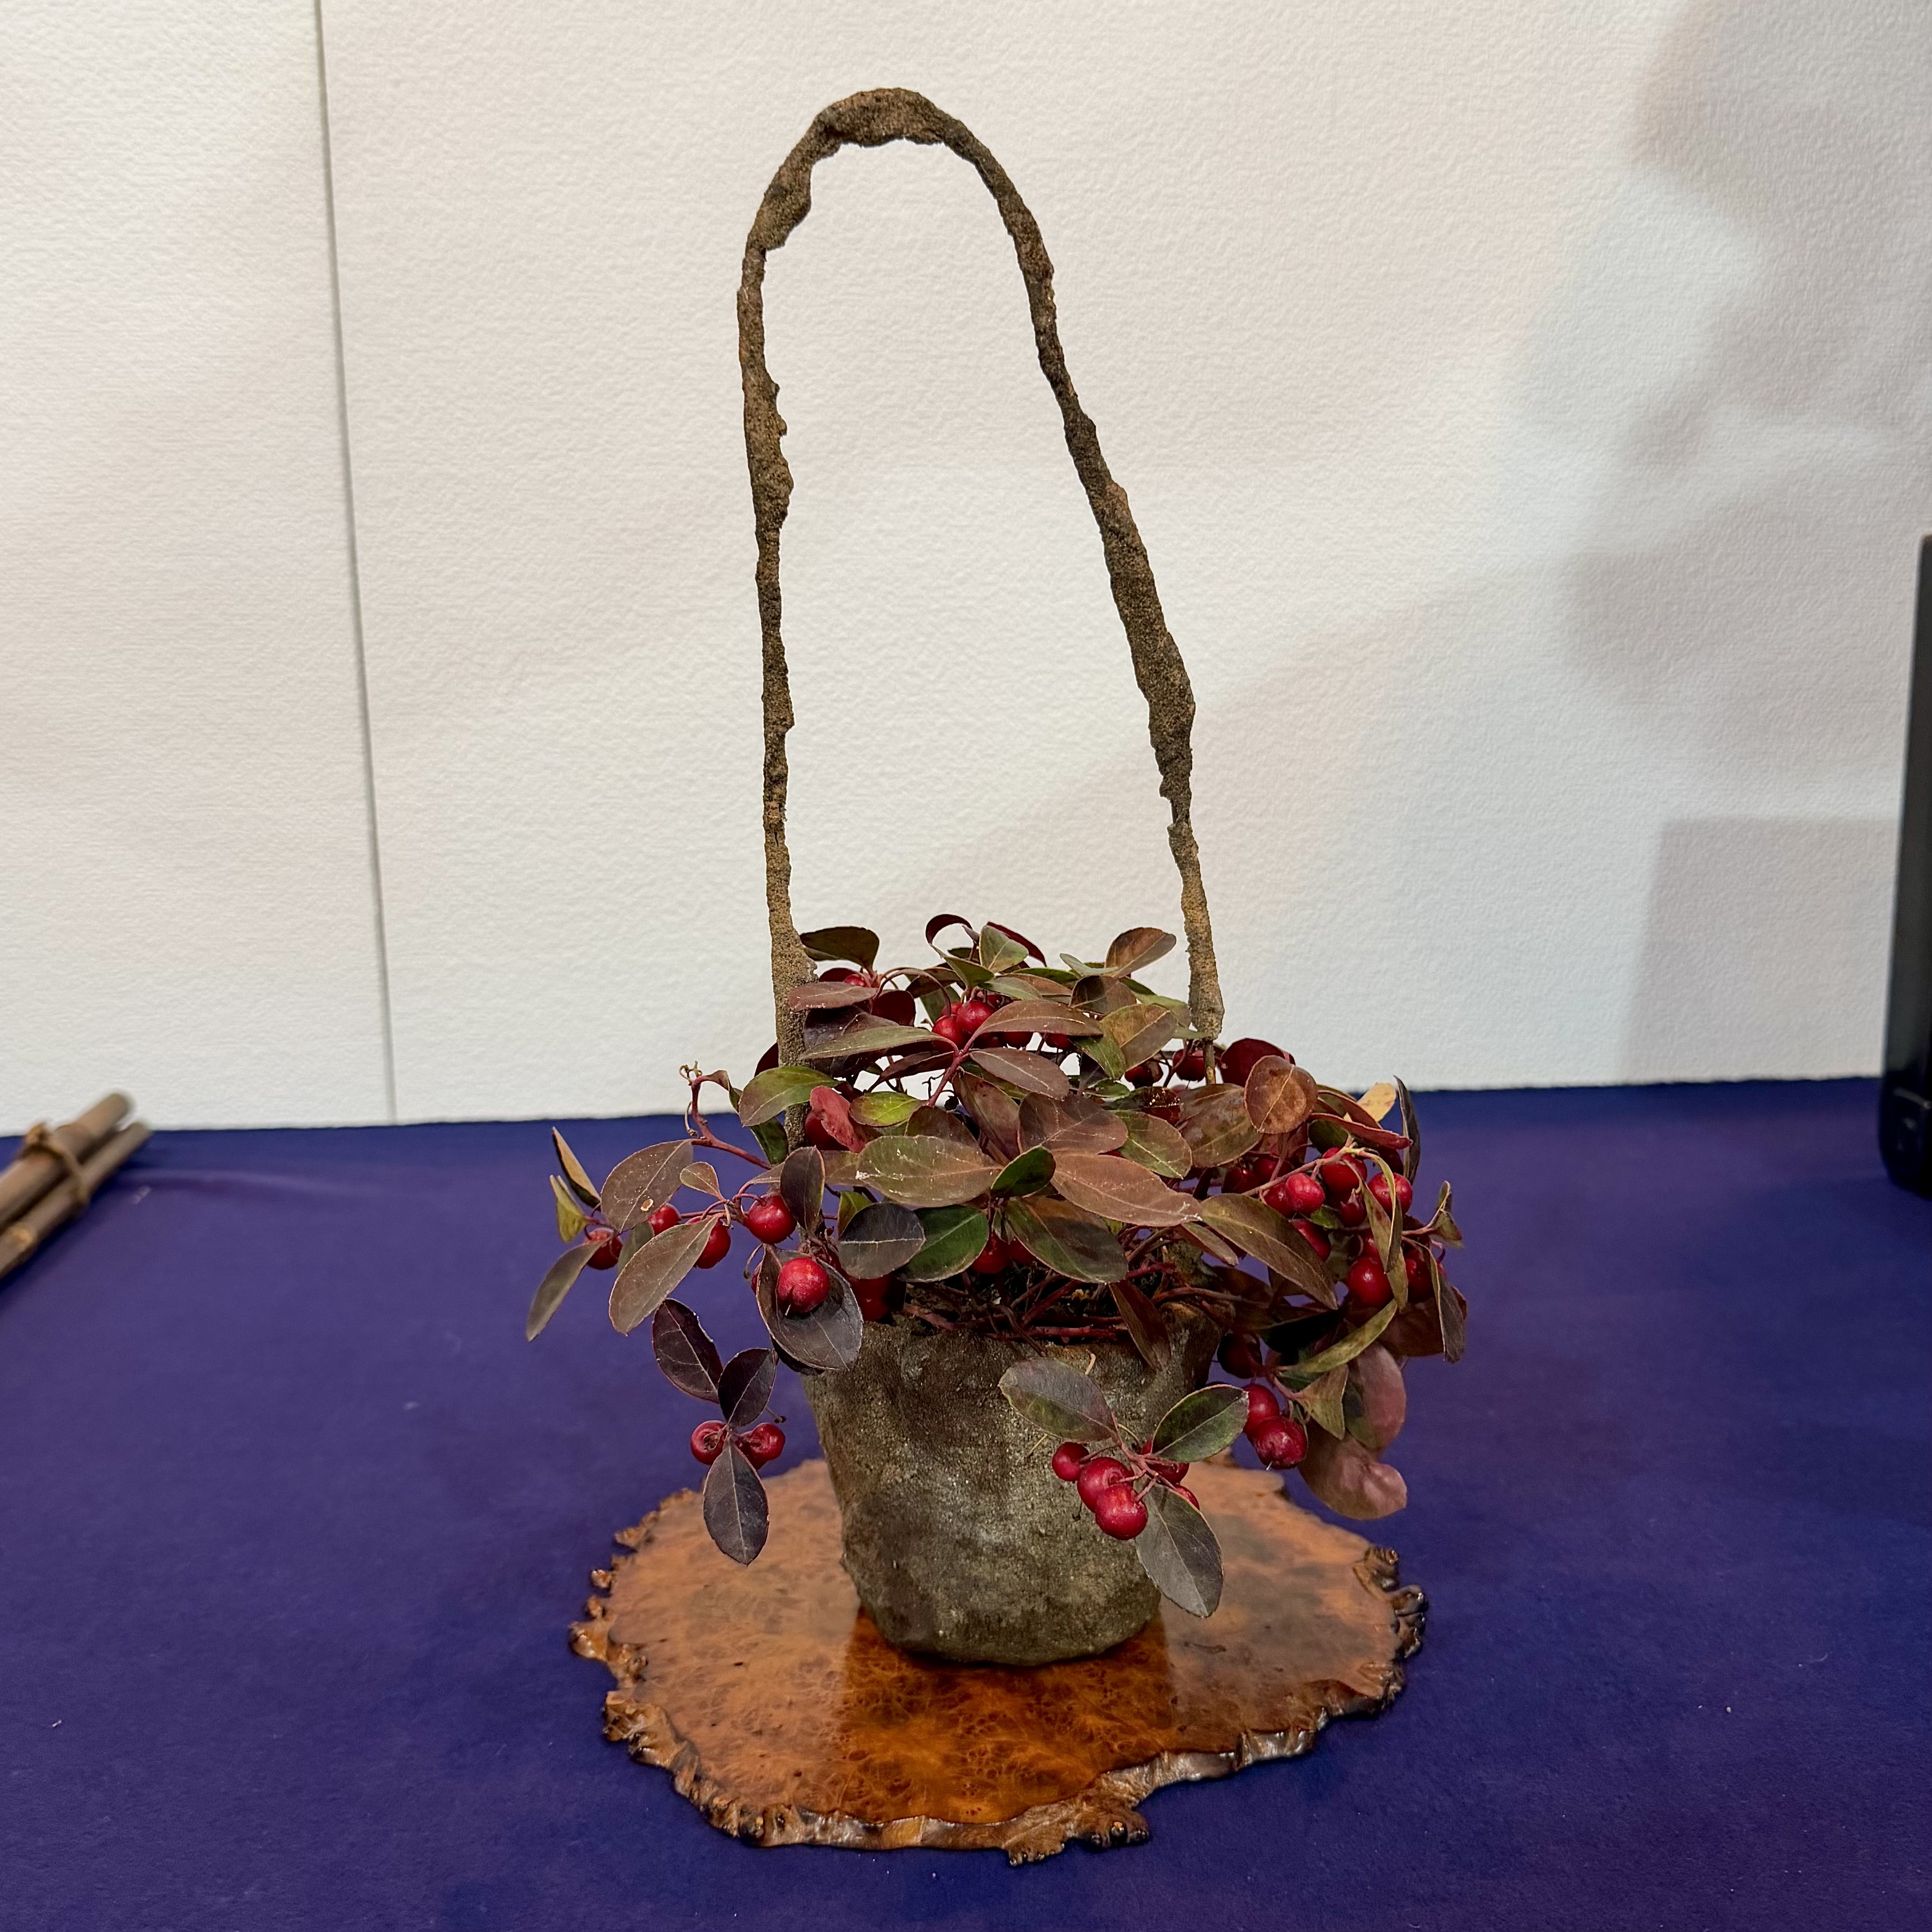
Honeysuckle.
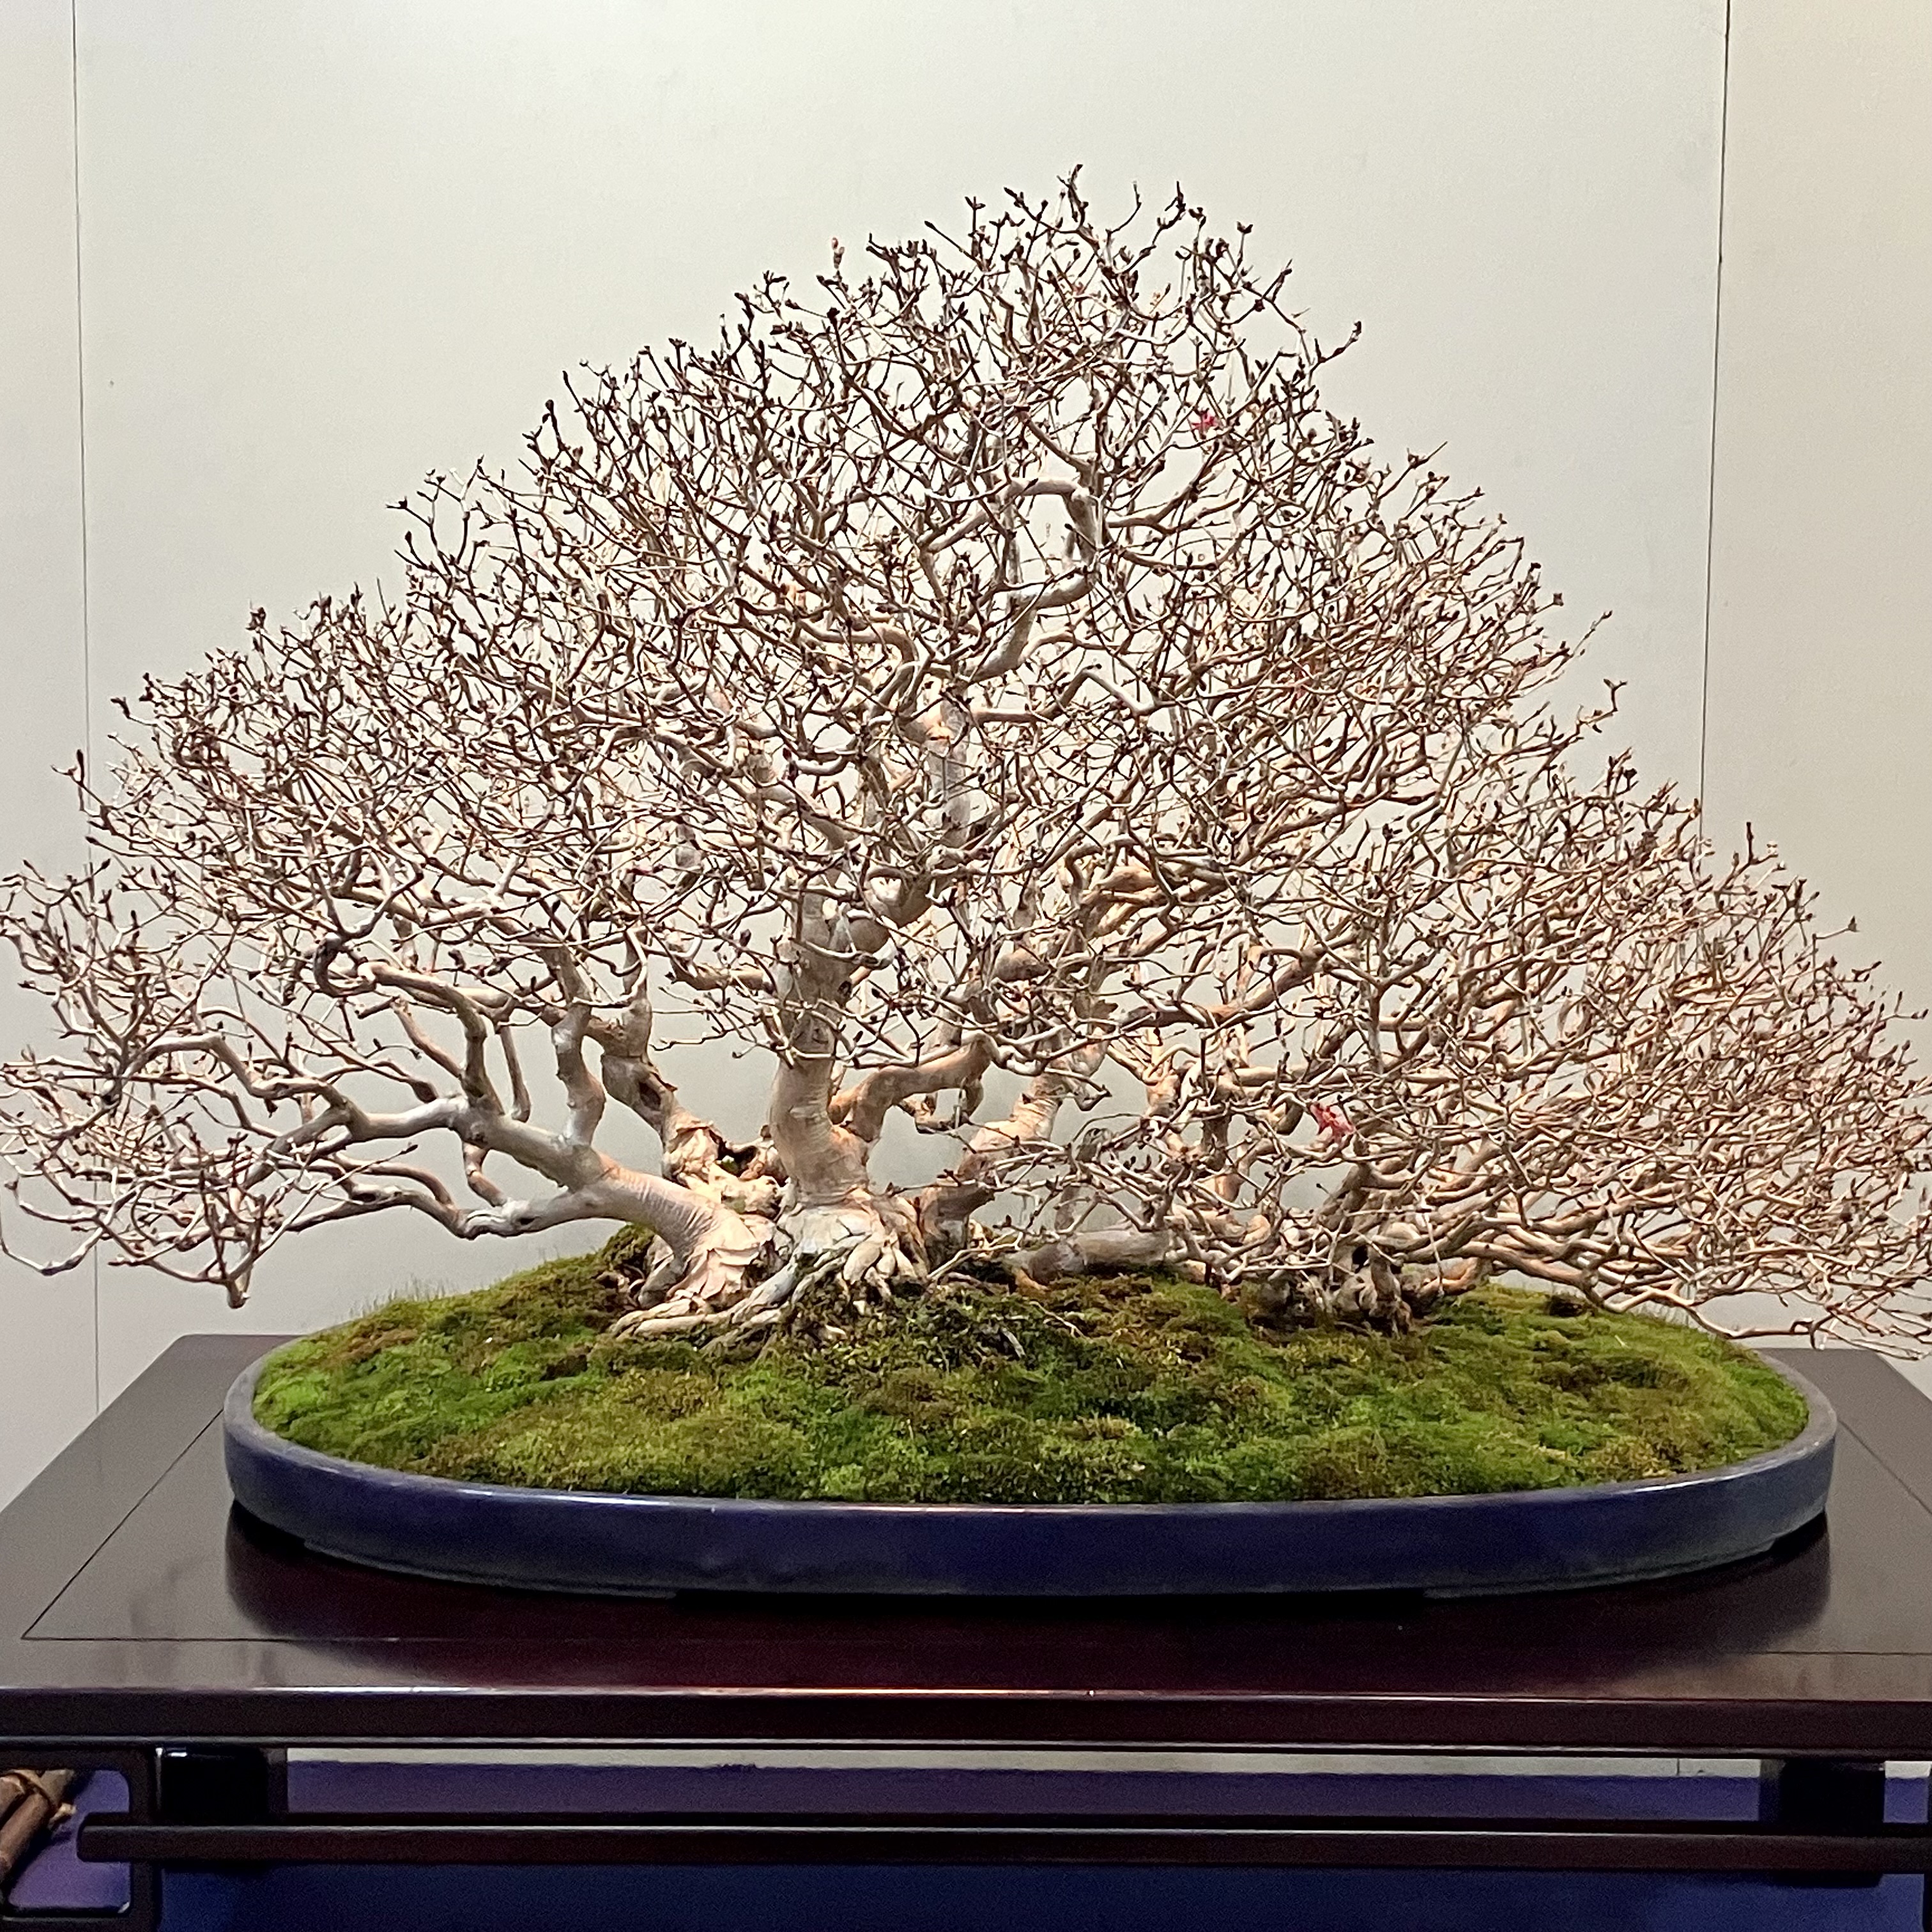
Chinese Quince. The intense ramification at this small scale is not easy.
This medium sized display won a Kokufu Prize.
And the shohin displays notched a prize winner.
An unusual raised-root Japanese White Pine—the lowest branch falls away to the back.
Ume.
Ezo Spruce. Only a few spruce in this year’s show.
A gathering of global bonsai friends—left to right—myself, Juan Andrade, Mario Komsta, Peter Gregg, John Eads, Carmen Leskoviansky, Evan Cordes, and Masaki Shimada.
I’m back home already, but with spies abroad I hope to offer a photo reel of Part II—
Many thanks to Evan Cordes, Carmen Leskoviansky, and Masaki Shimada for these photos of Kokufu-ten Part 2.
The Kokufu is well-known to showcase impressive, thick-trunked, dizzyingly developed old bonsai. I’ve included some of those meat and potato trees, but whimsy also shows up here and there. In this Part 2 I’ve included some of that.
Shinpaku. Crazy live vein.
Japanese White Pine. A formal-ish upright bunjin in a simple bridge pot.
Hitting the same note twice, here’s a formal upright Ume. Never seen that before. Appears to be in a hexagonal rectangle.
Japanese White Pine. Big famous tree. This was in Mr. Suzuki’s garden when I first arrived in 2003.
Hornbeam.
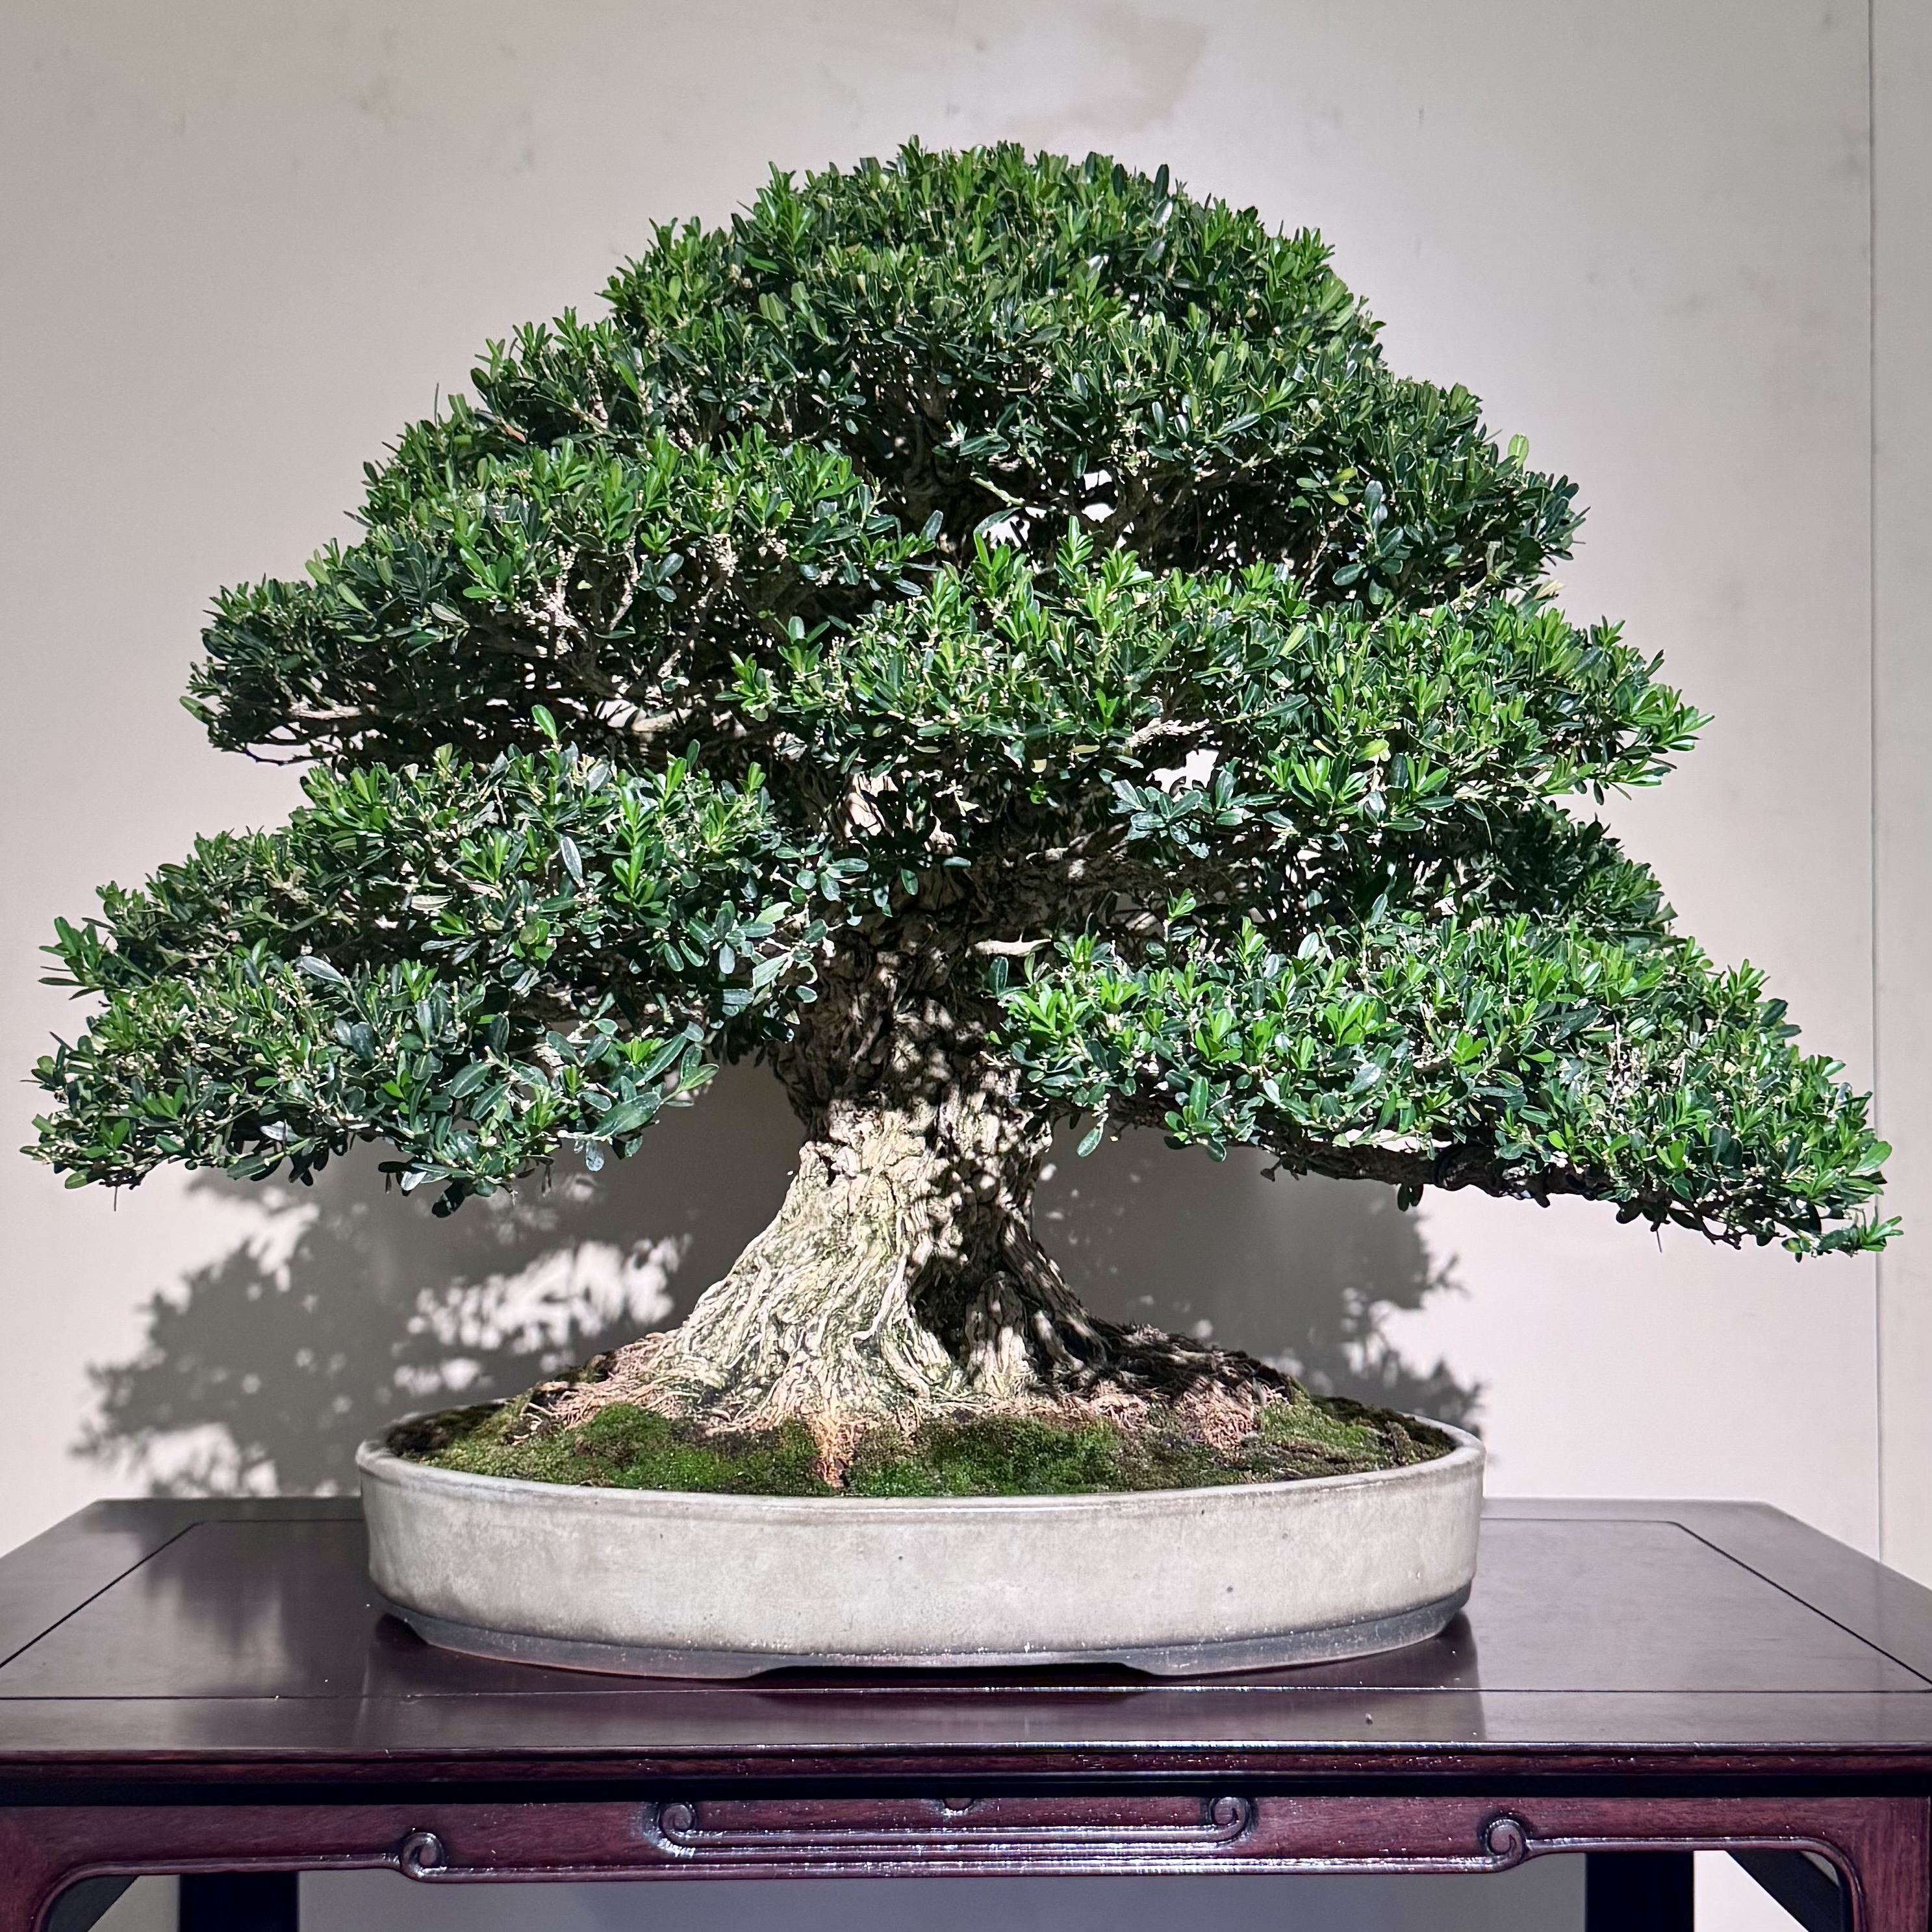
A Harland Boxwood. Unusual in the Kokufu. Excellent nebari. You’d struggle to get a fine and detailed nebari like this in the ground, likely pot-grown from a cutting or air-layer.
Root over rock Trident Maple.
This shohin display got a Kokufu Prize.
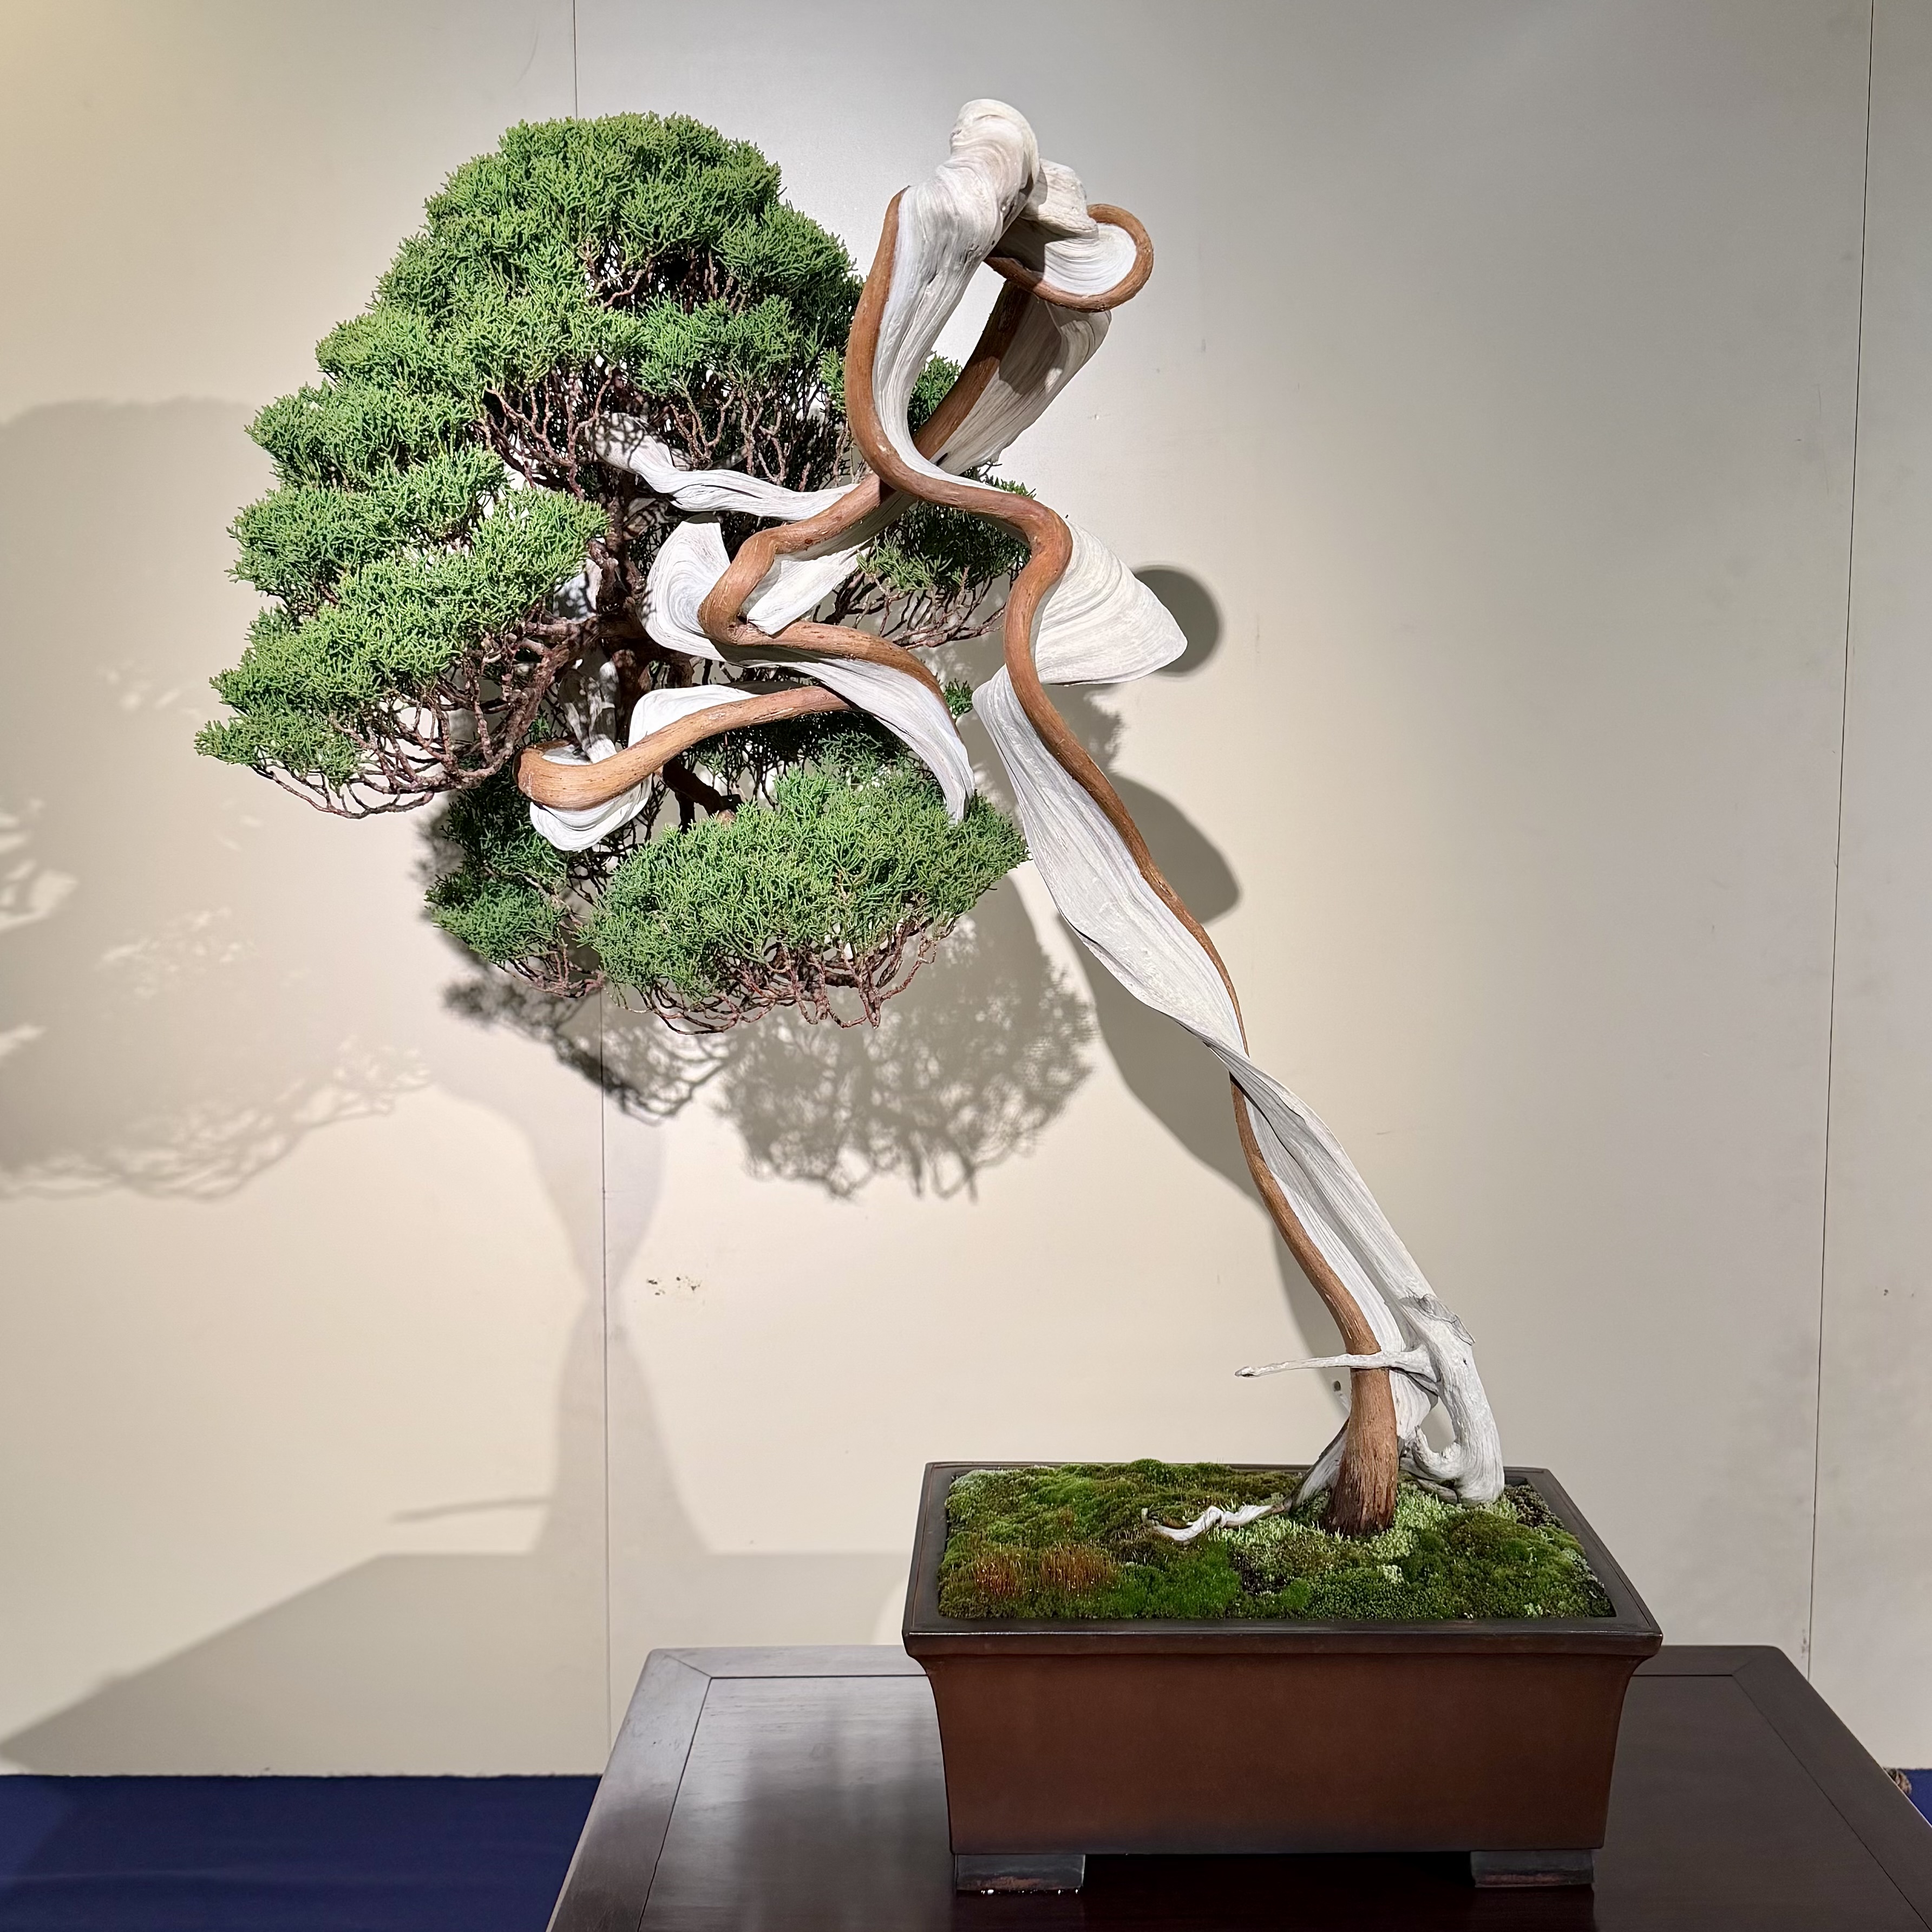
A swirling Shinpaku. Likely grafted foliage, it usually is when fine and tight. But not always.
A smaller Trident Maple.
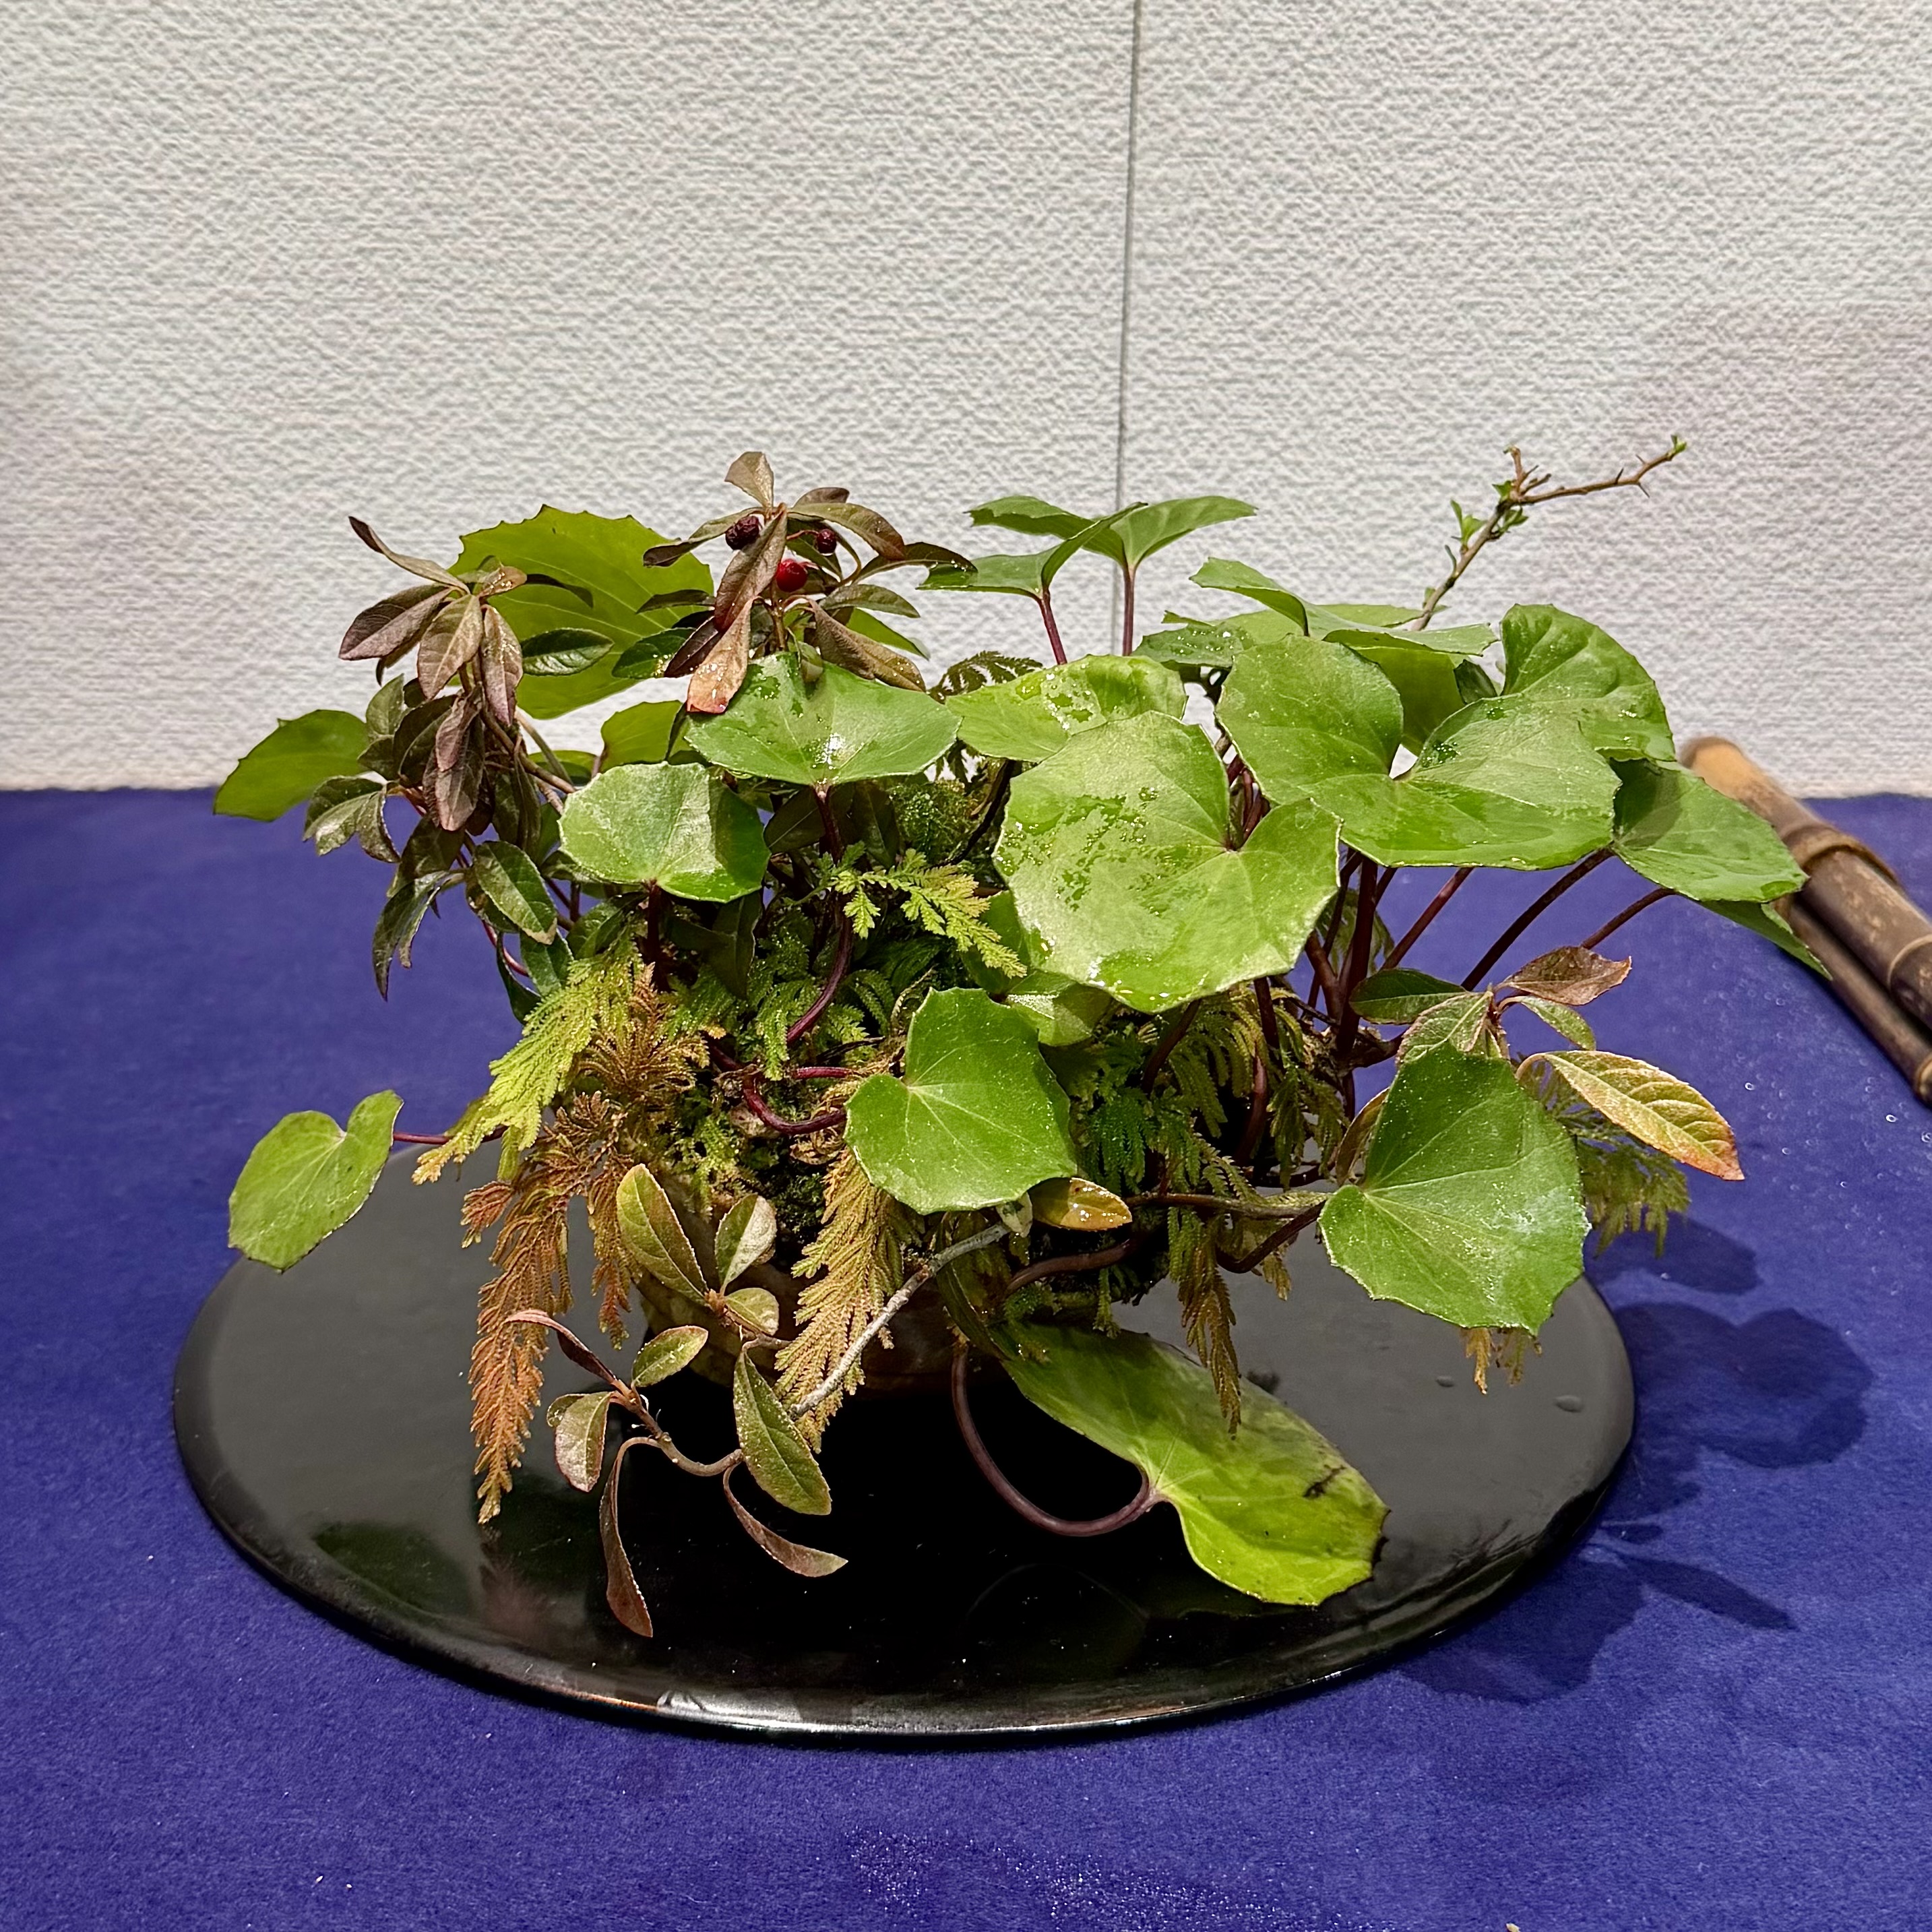
Lovely accent.
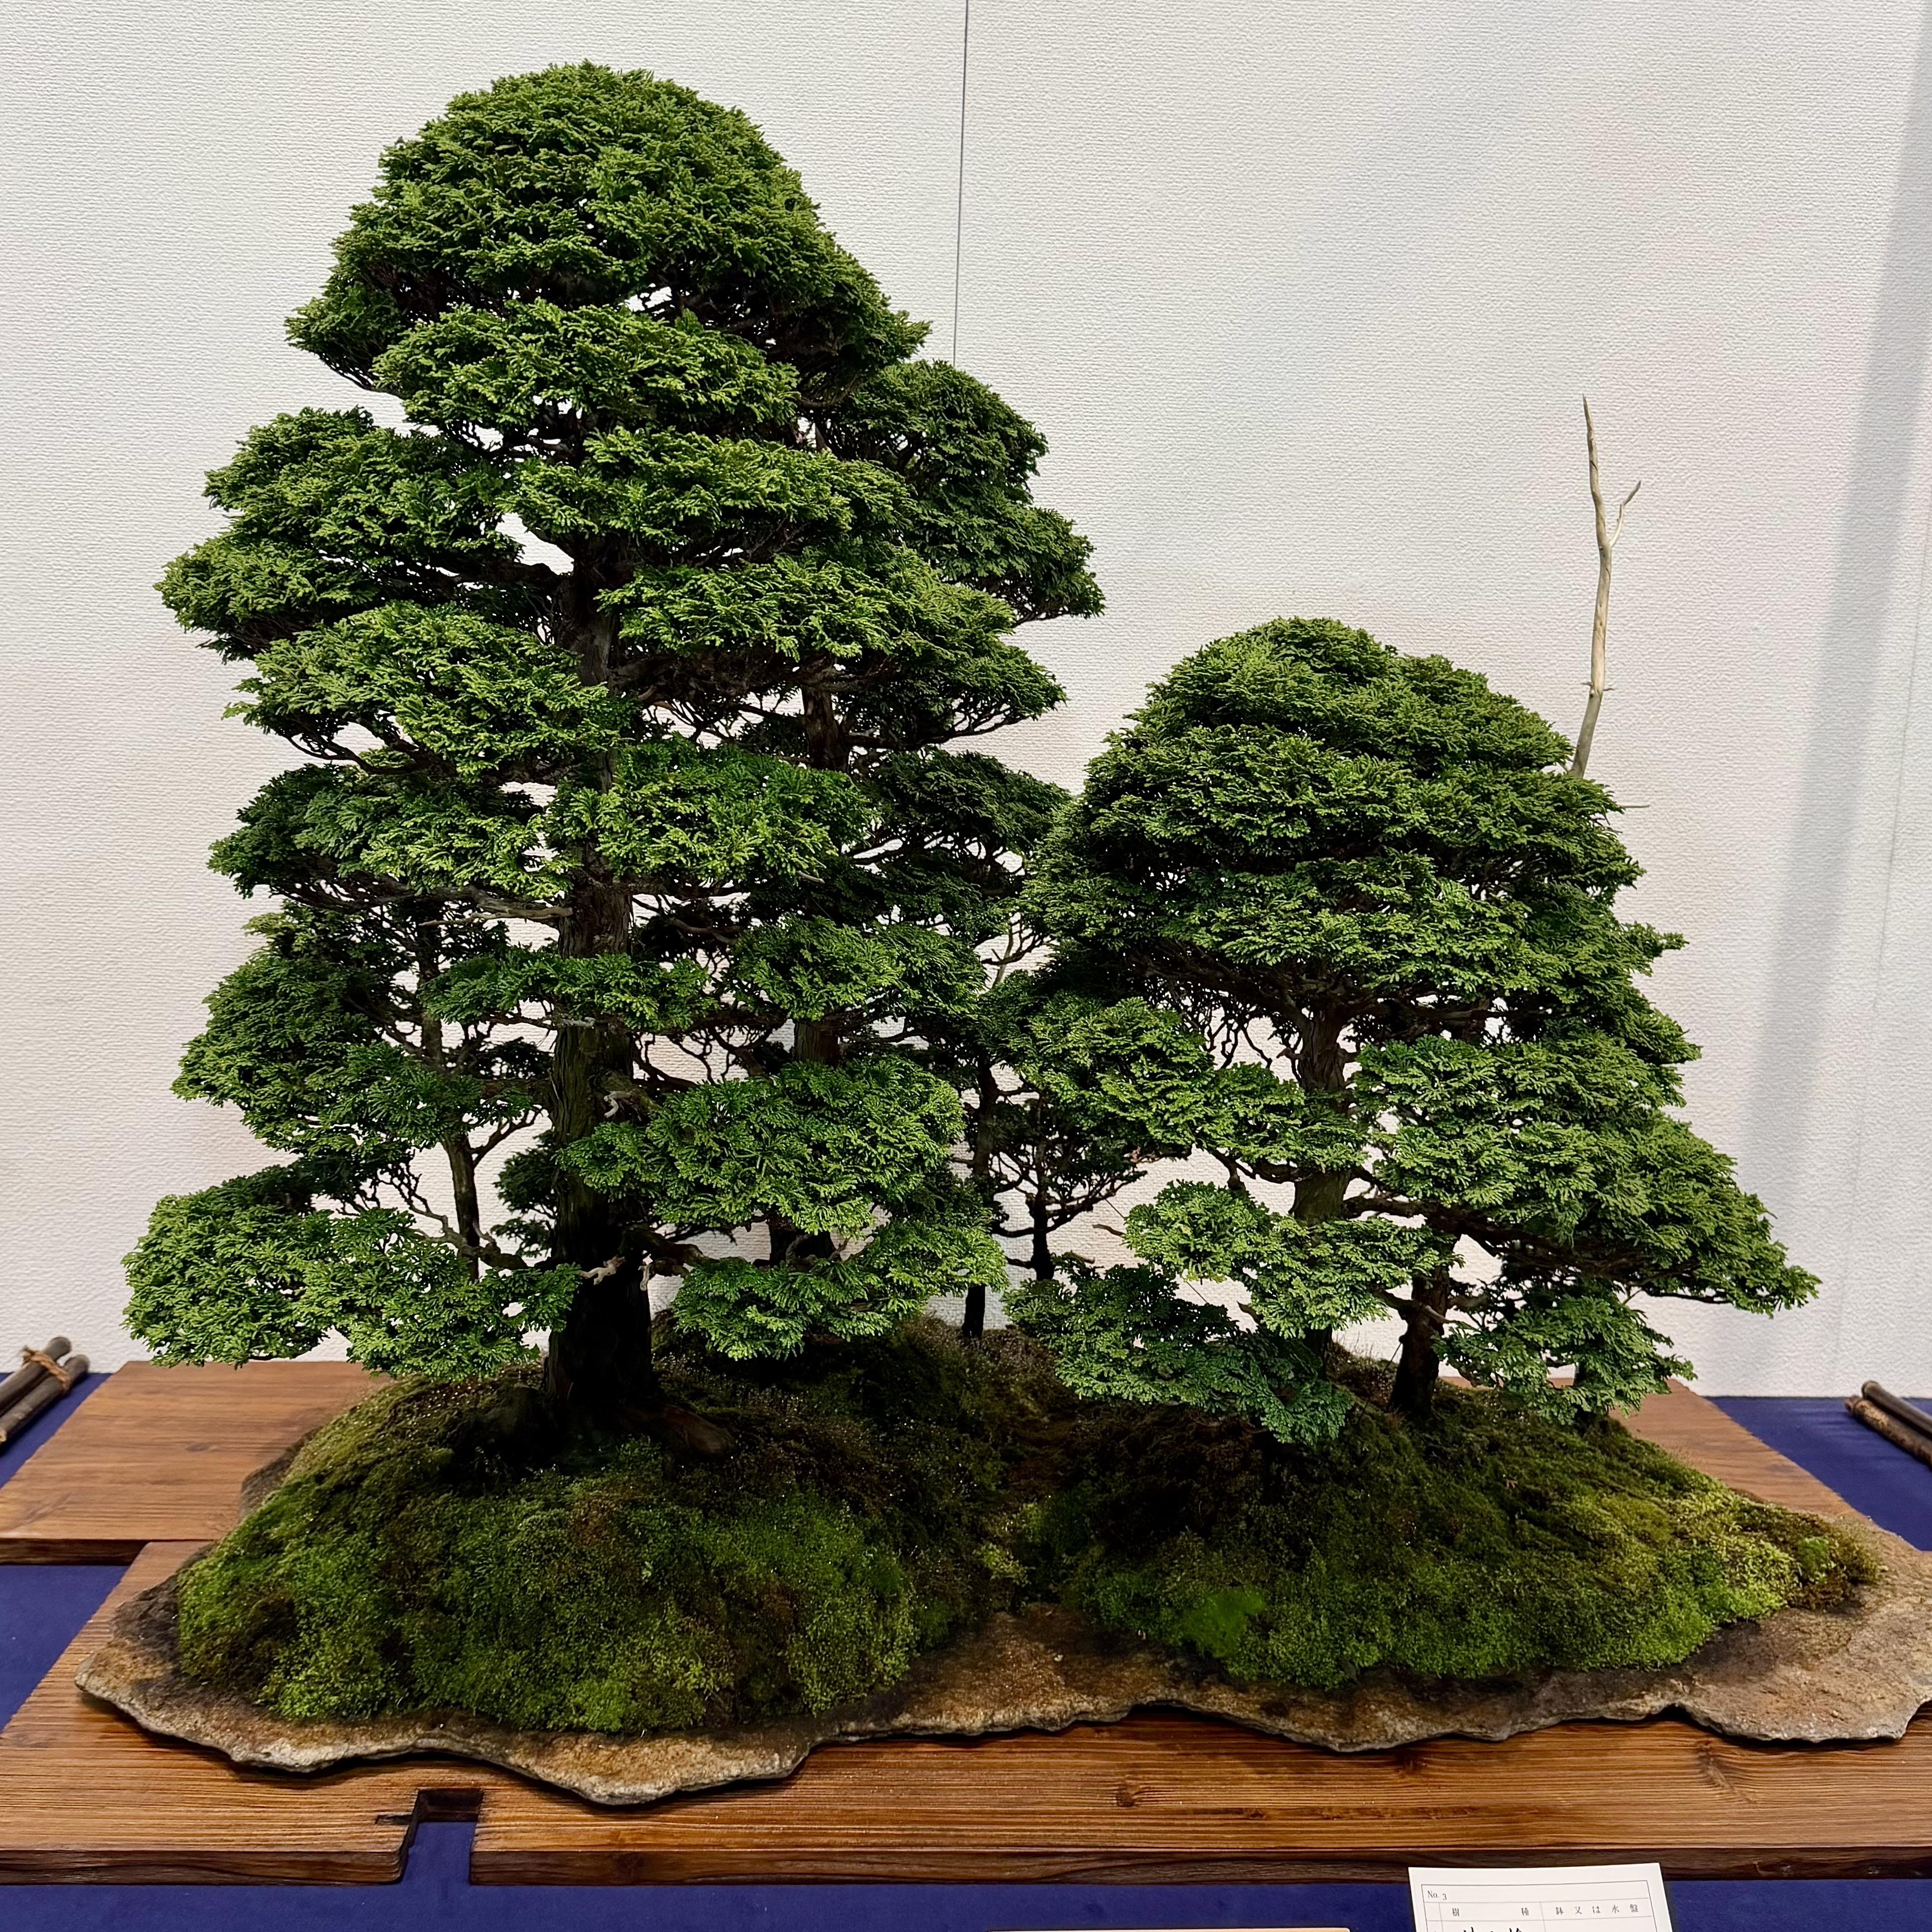
Hinoki forest. That tenjin deadwood rising off the right side strikes me as odd and out of place. Especially coming from one of the younger trees.
Needle Juniper. Kokufu Prize.
Japanese Maple.
A dancing pair of Shinpaku and Chojubai.
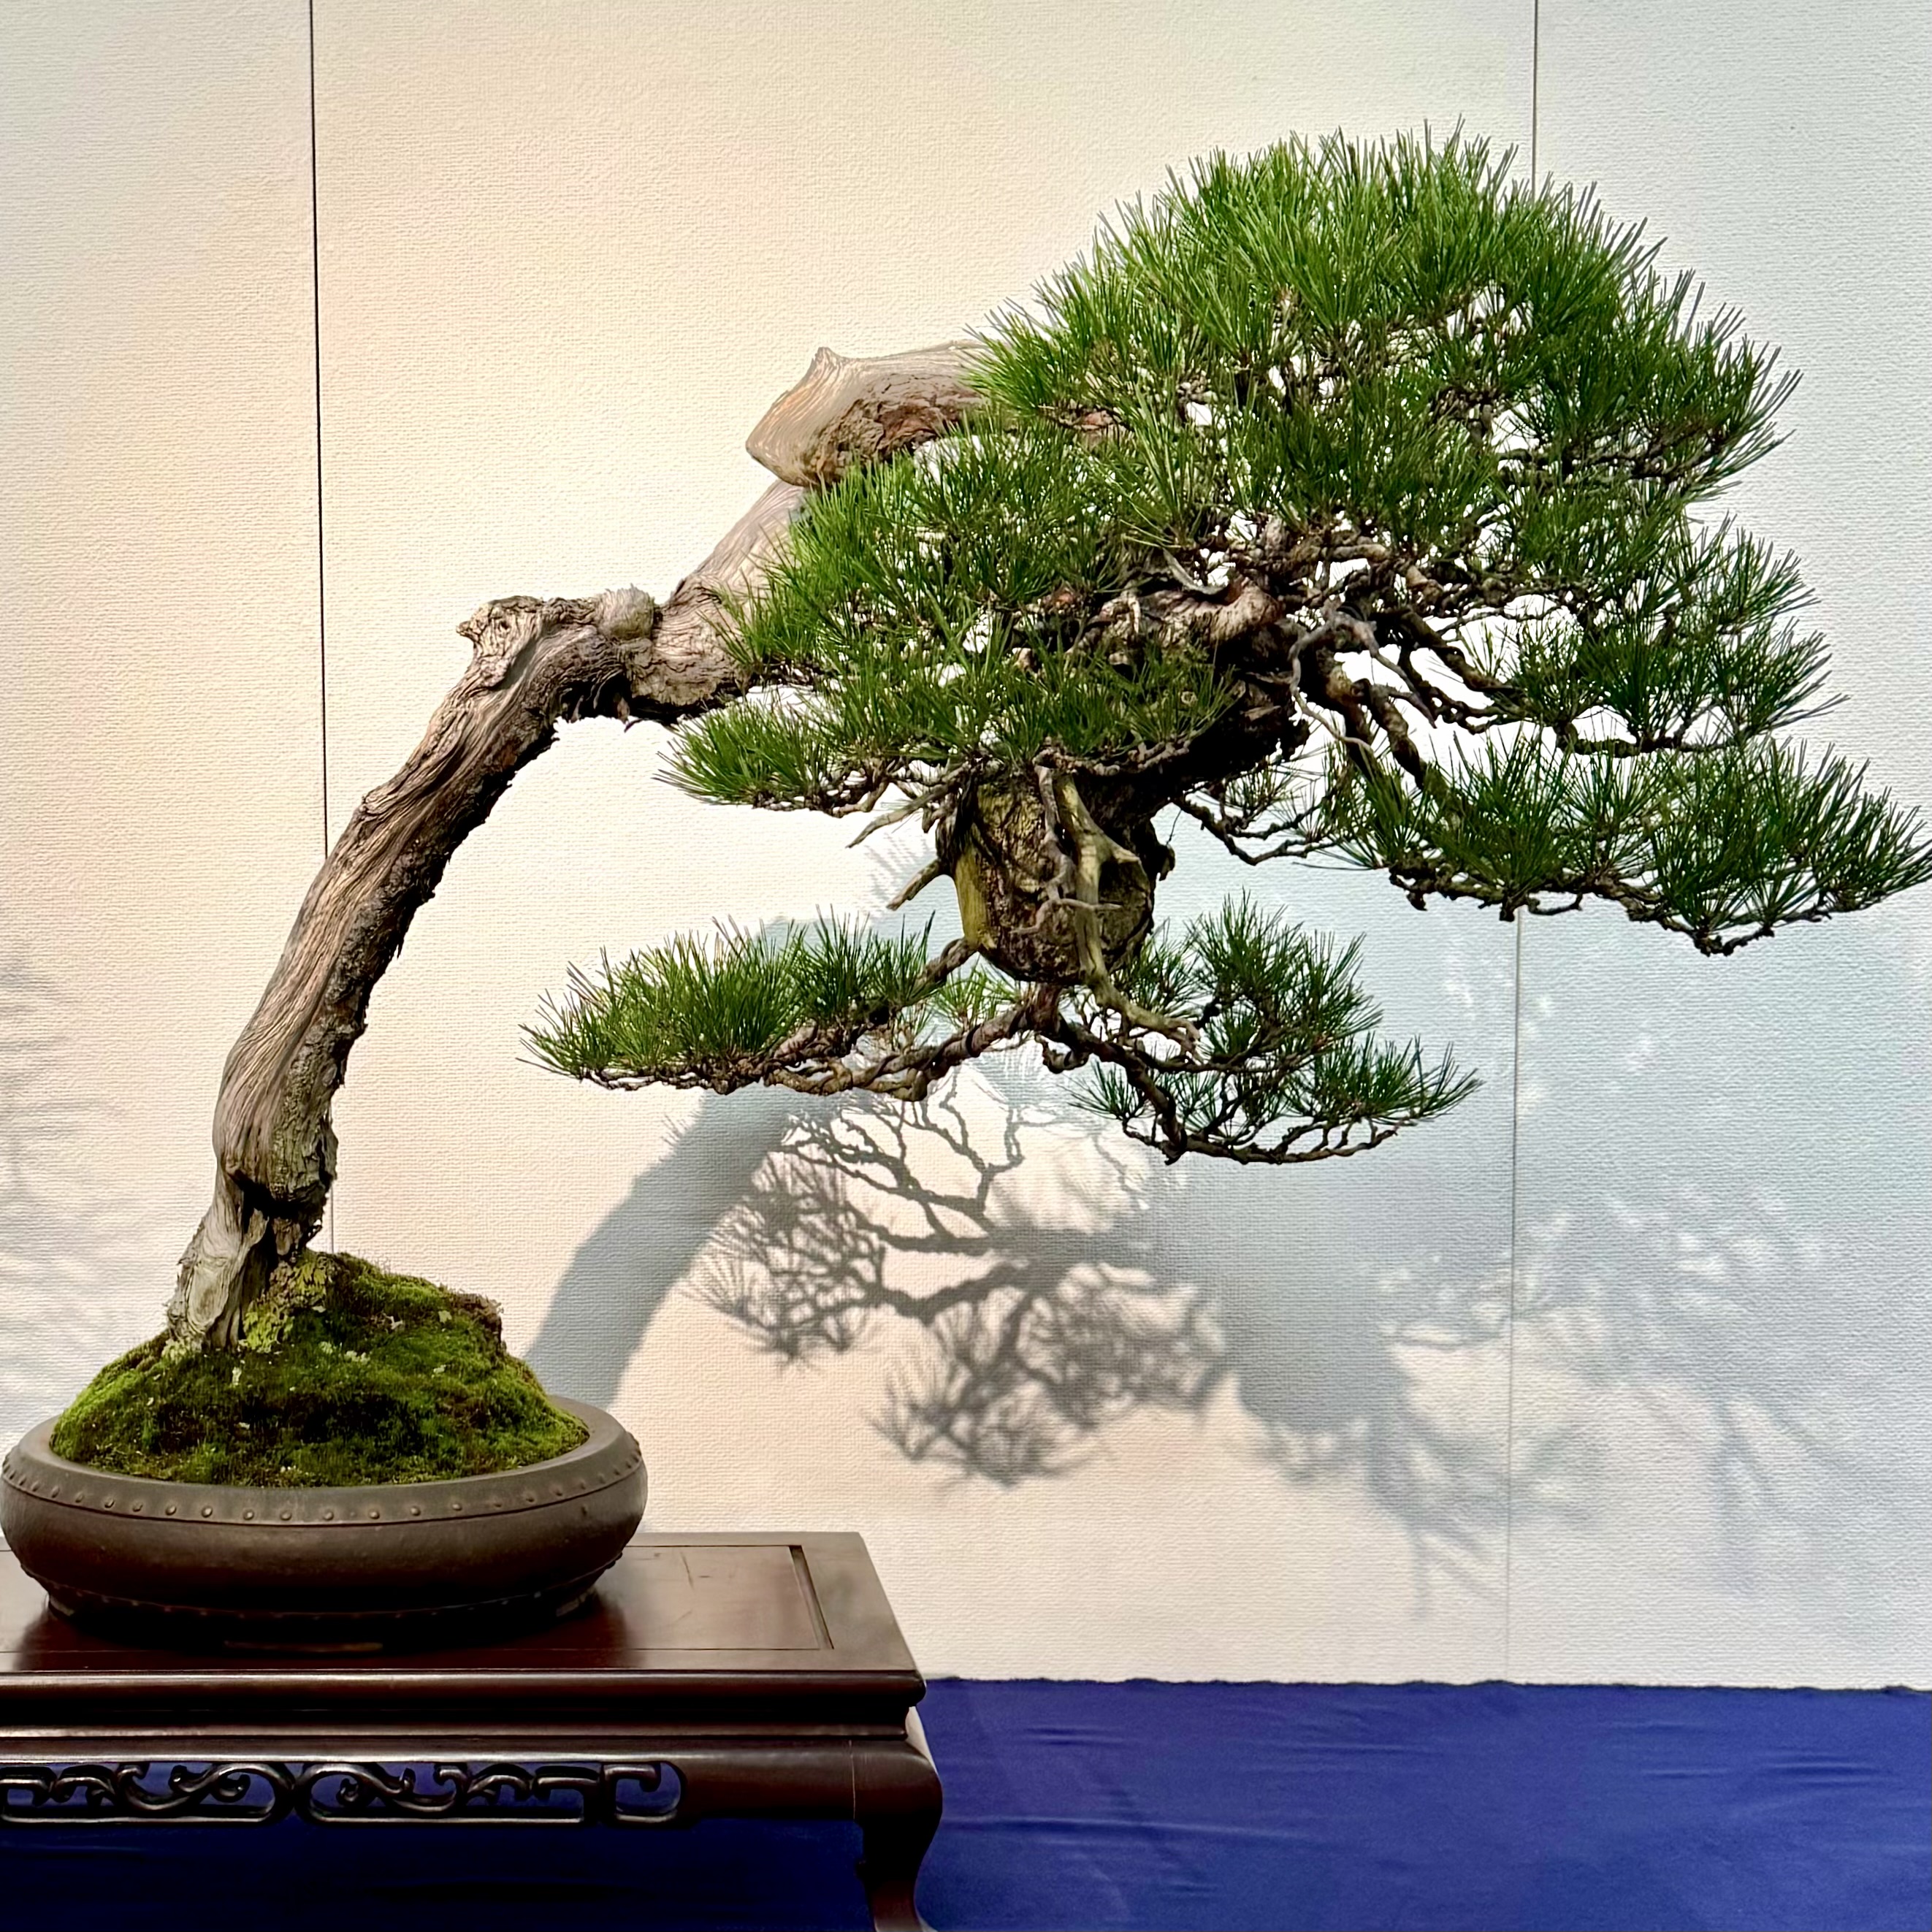
Japanese Red Pine.
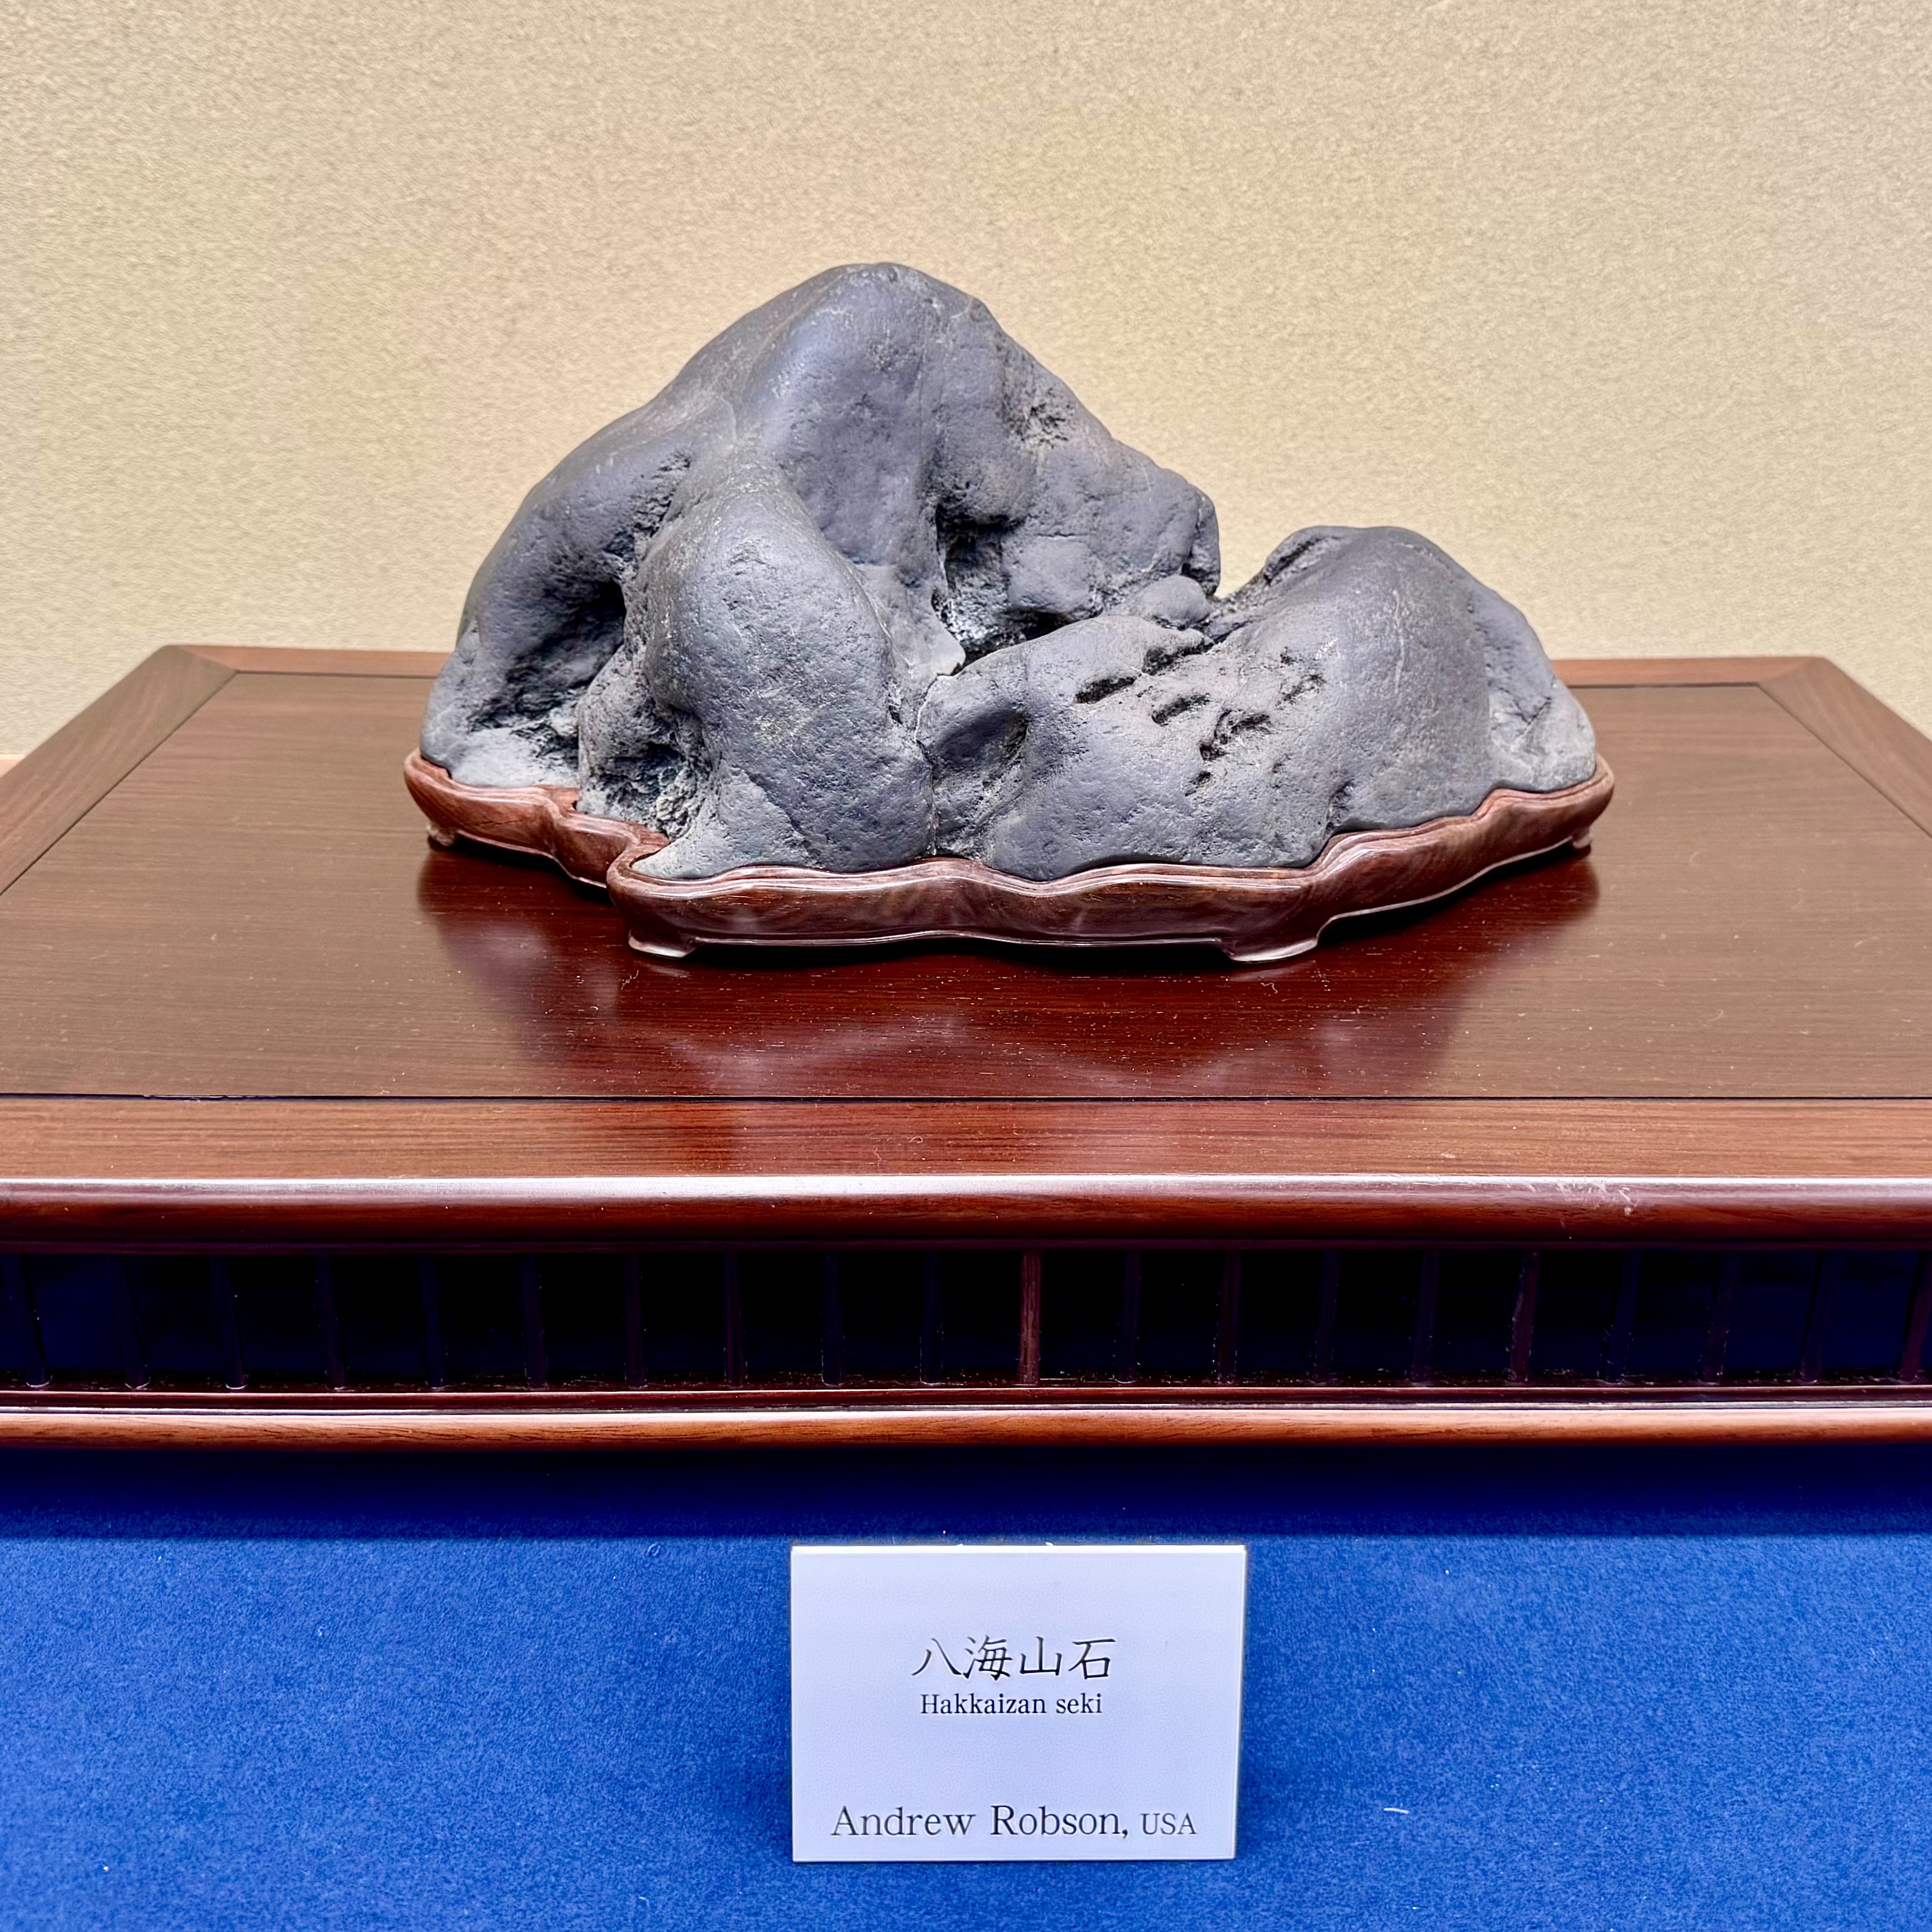
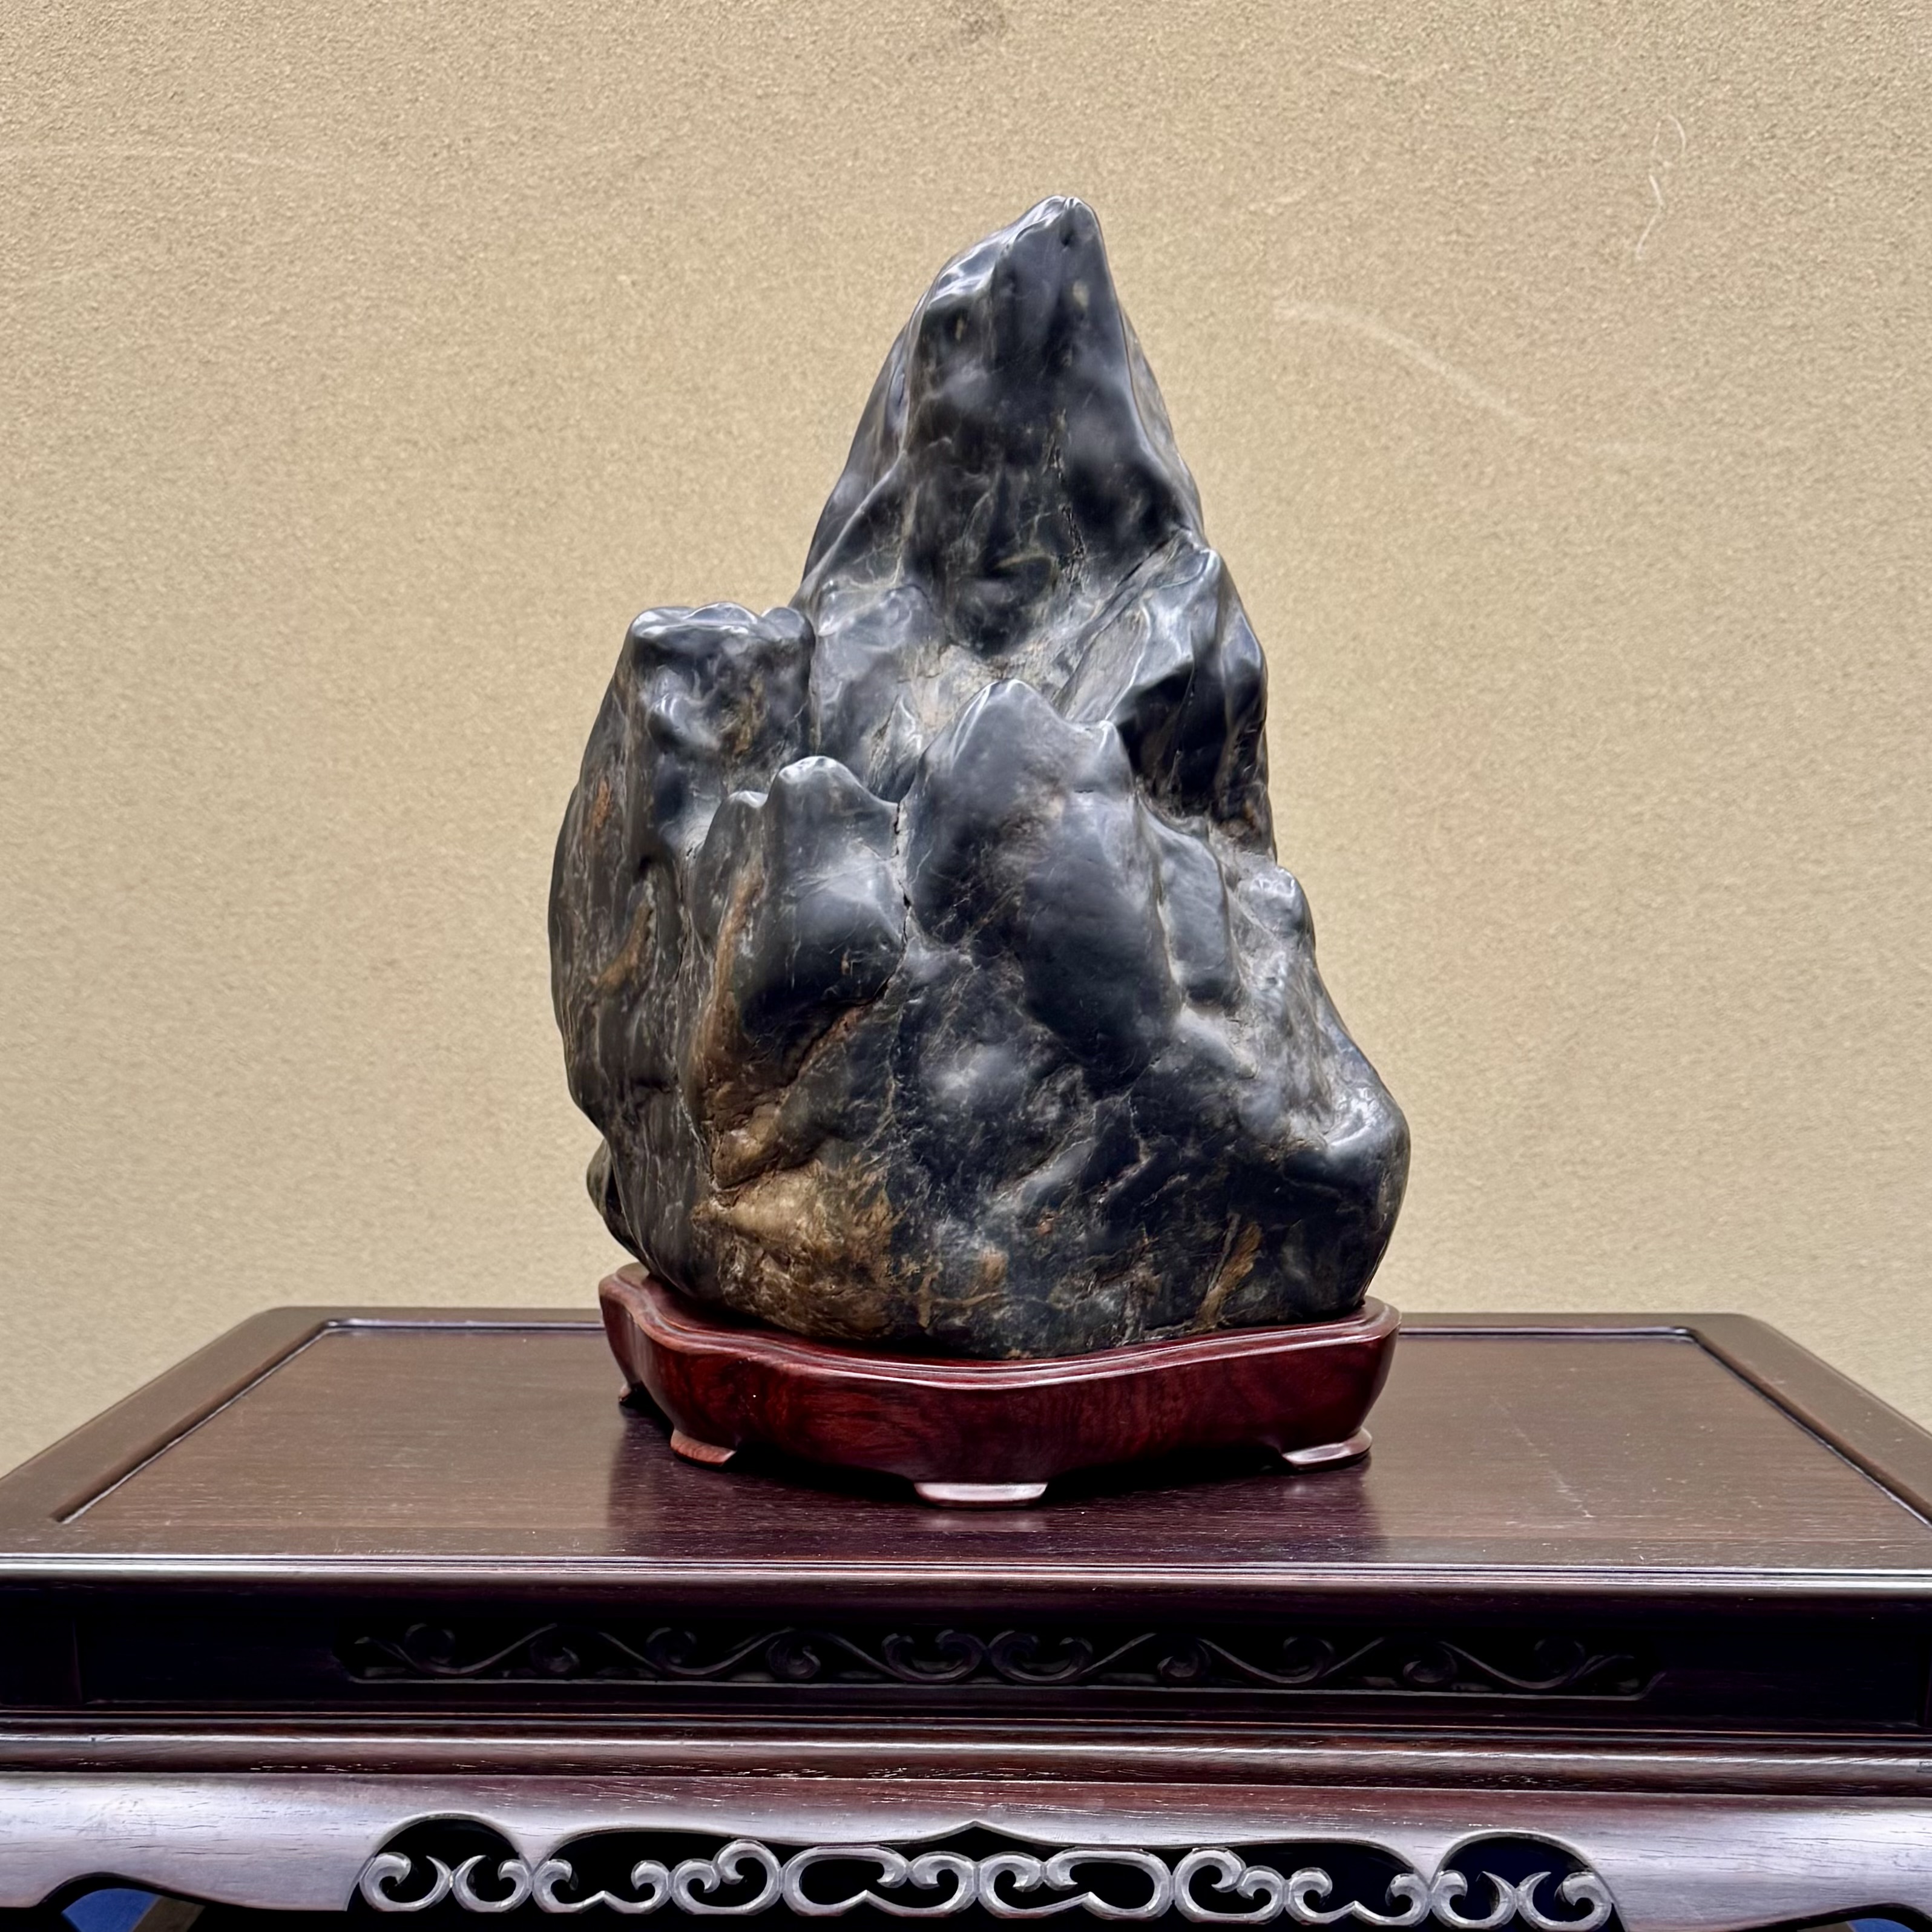
A stone exhibited by former apprentice Andrew Robson.
And another stone shown by Andrew’s father, Jeffrey Robson.
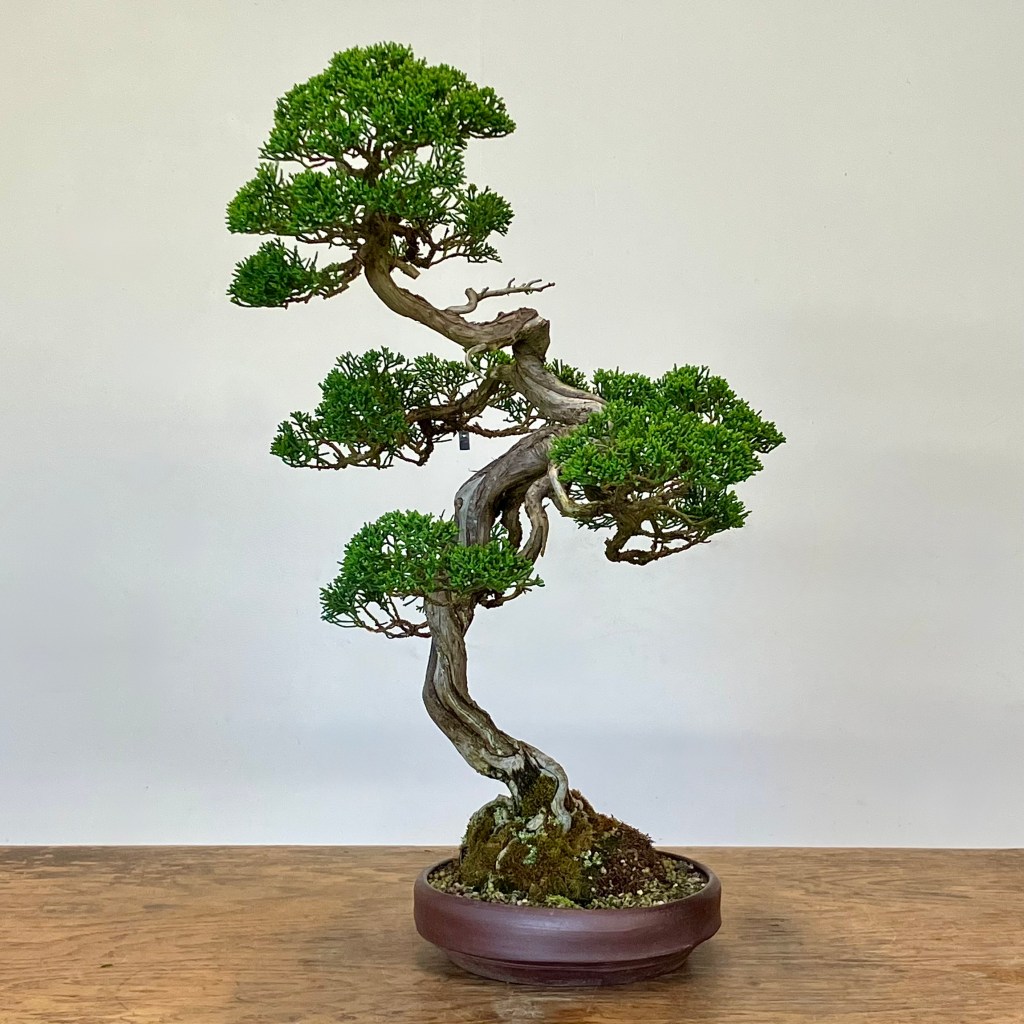
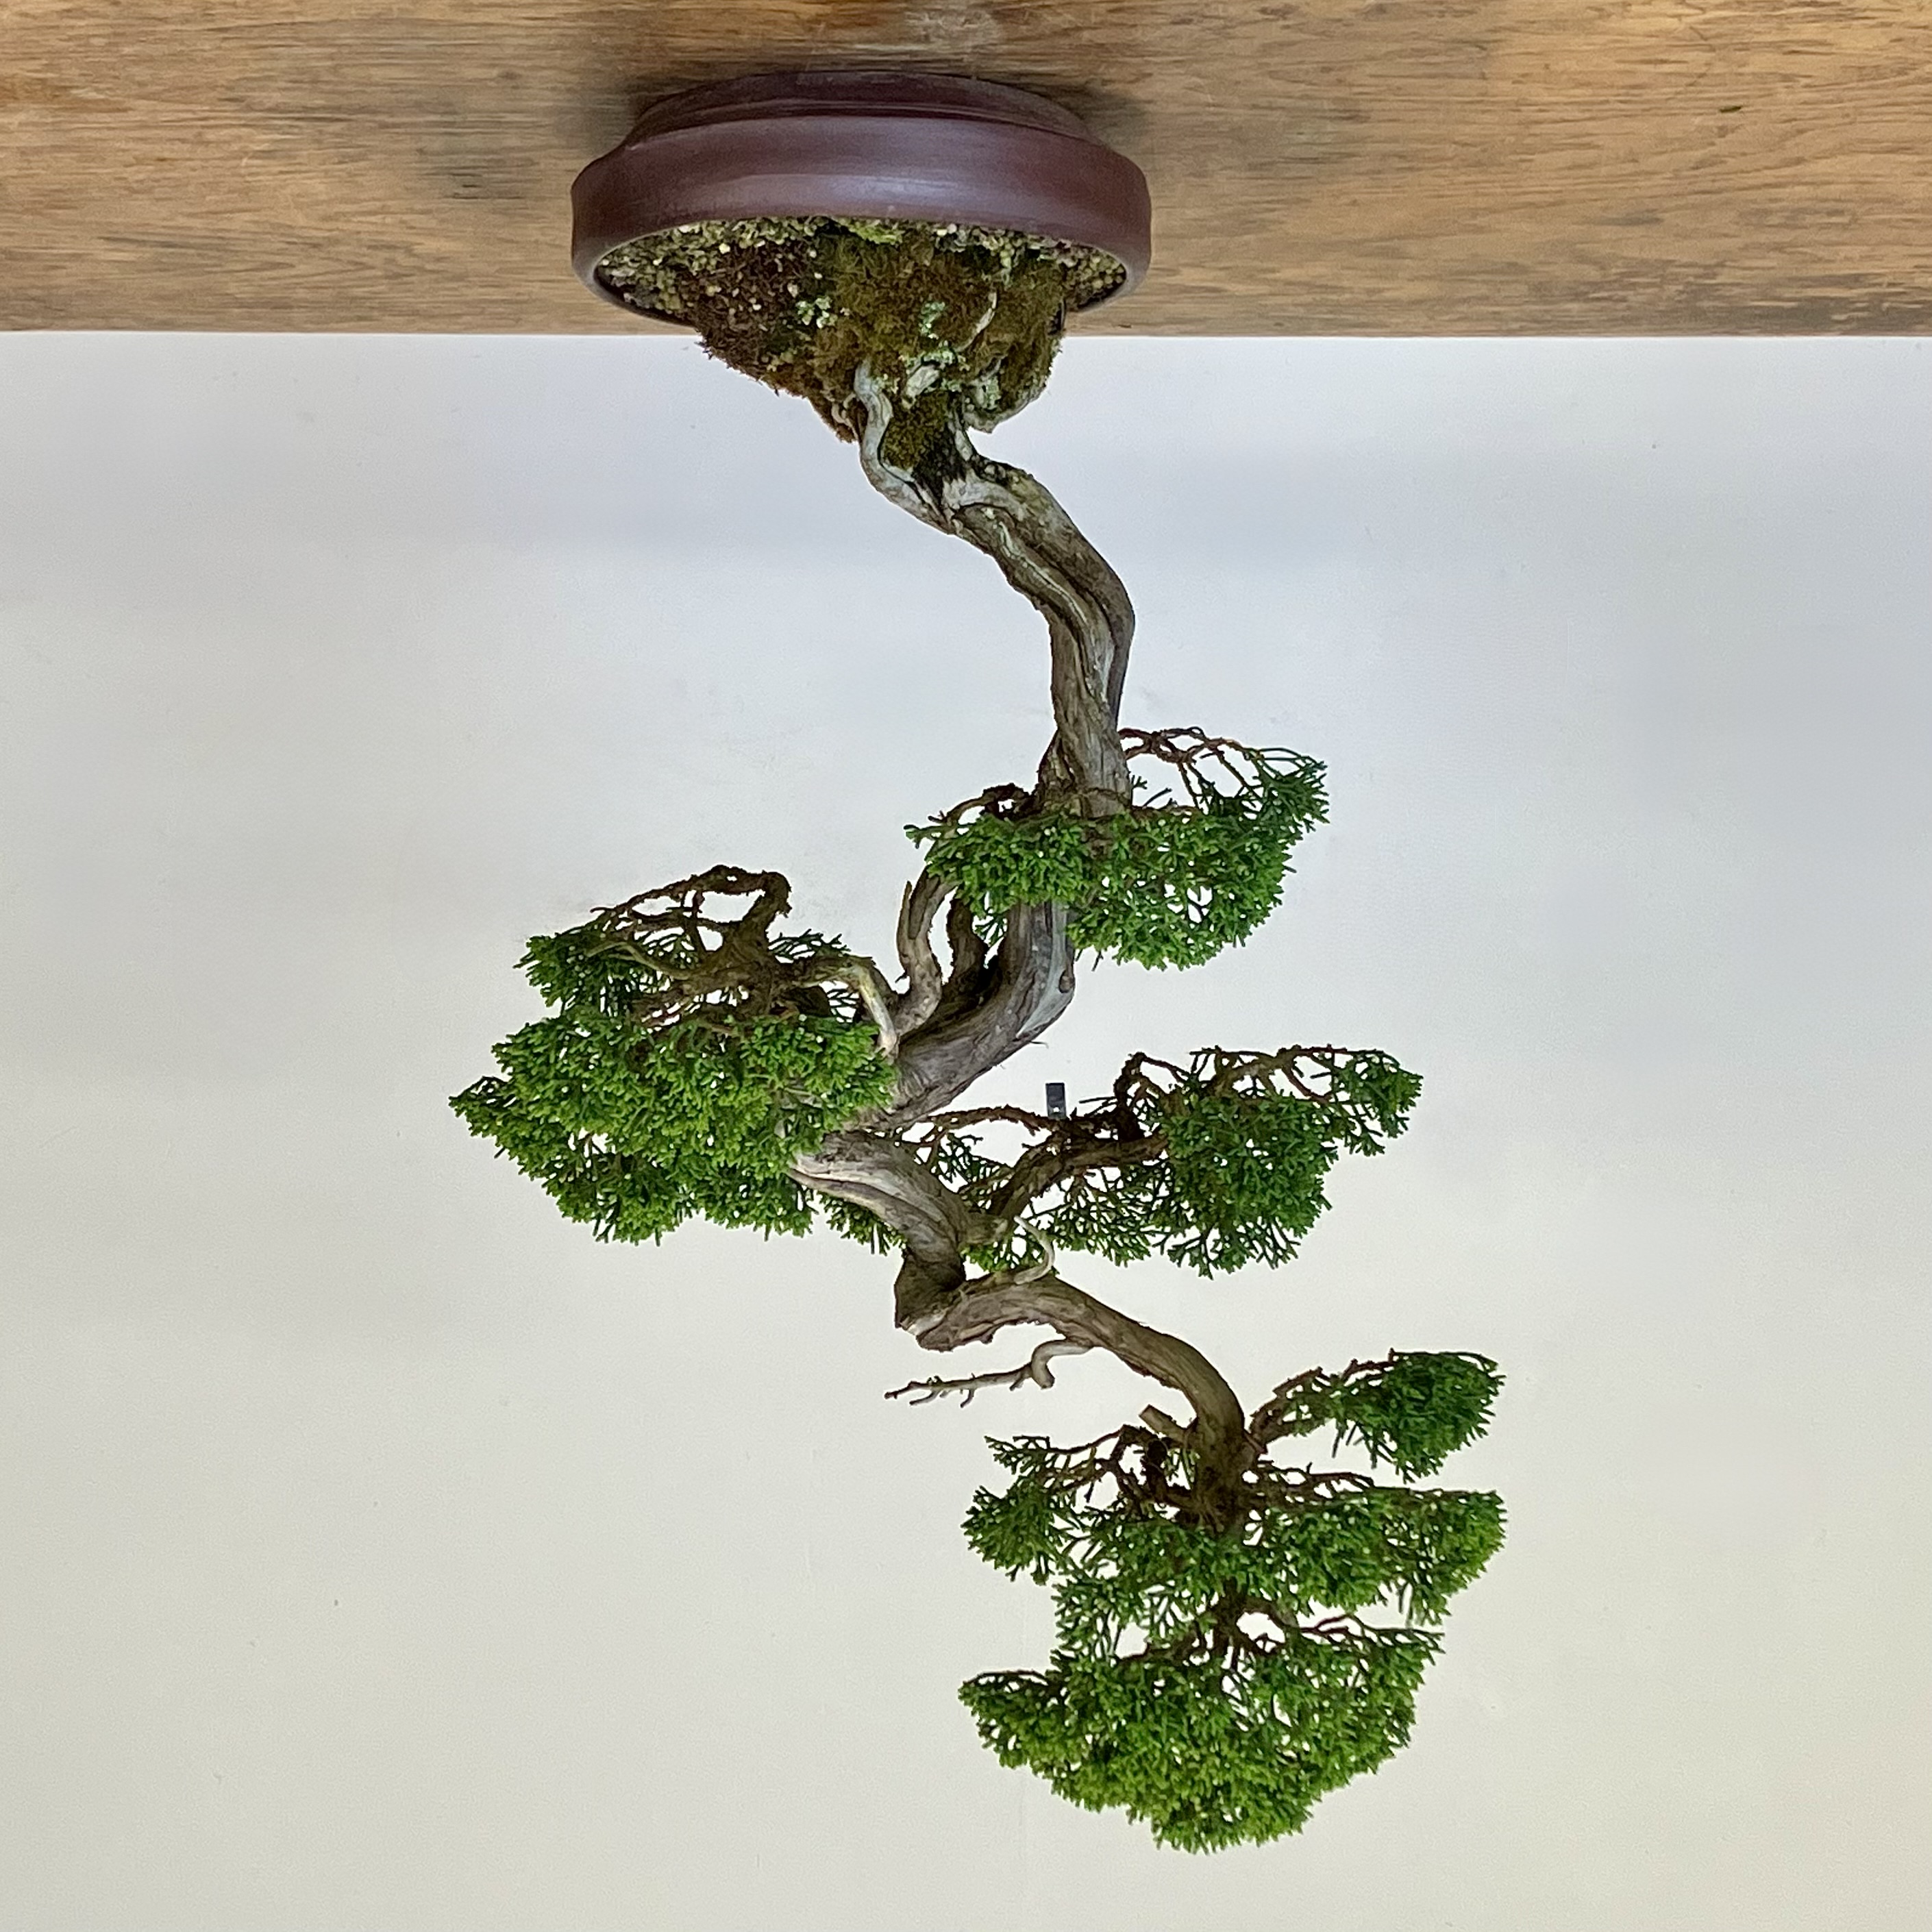
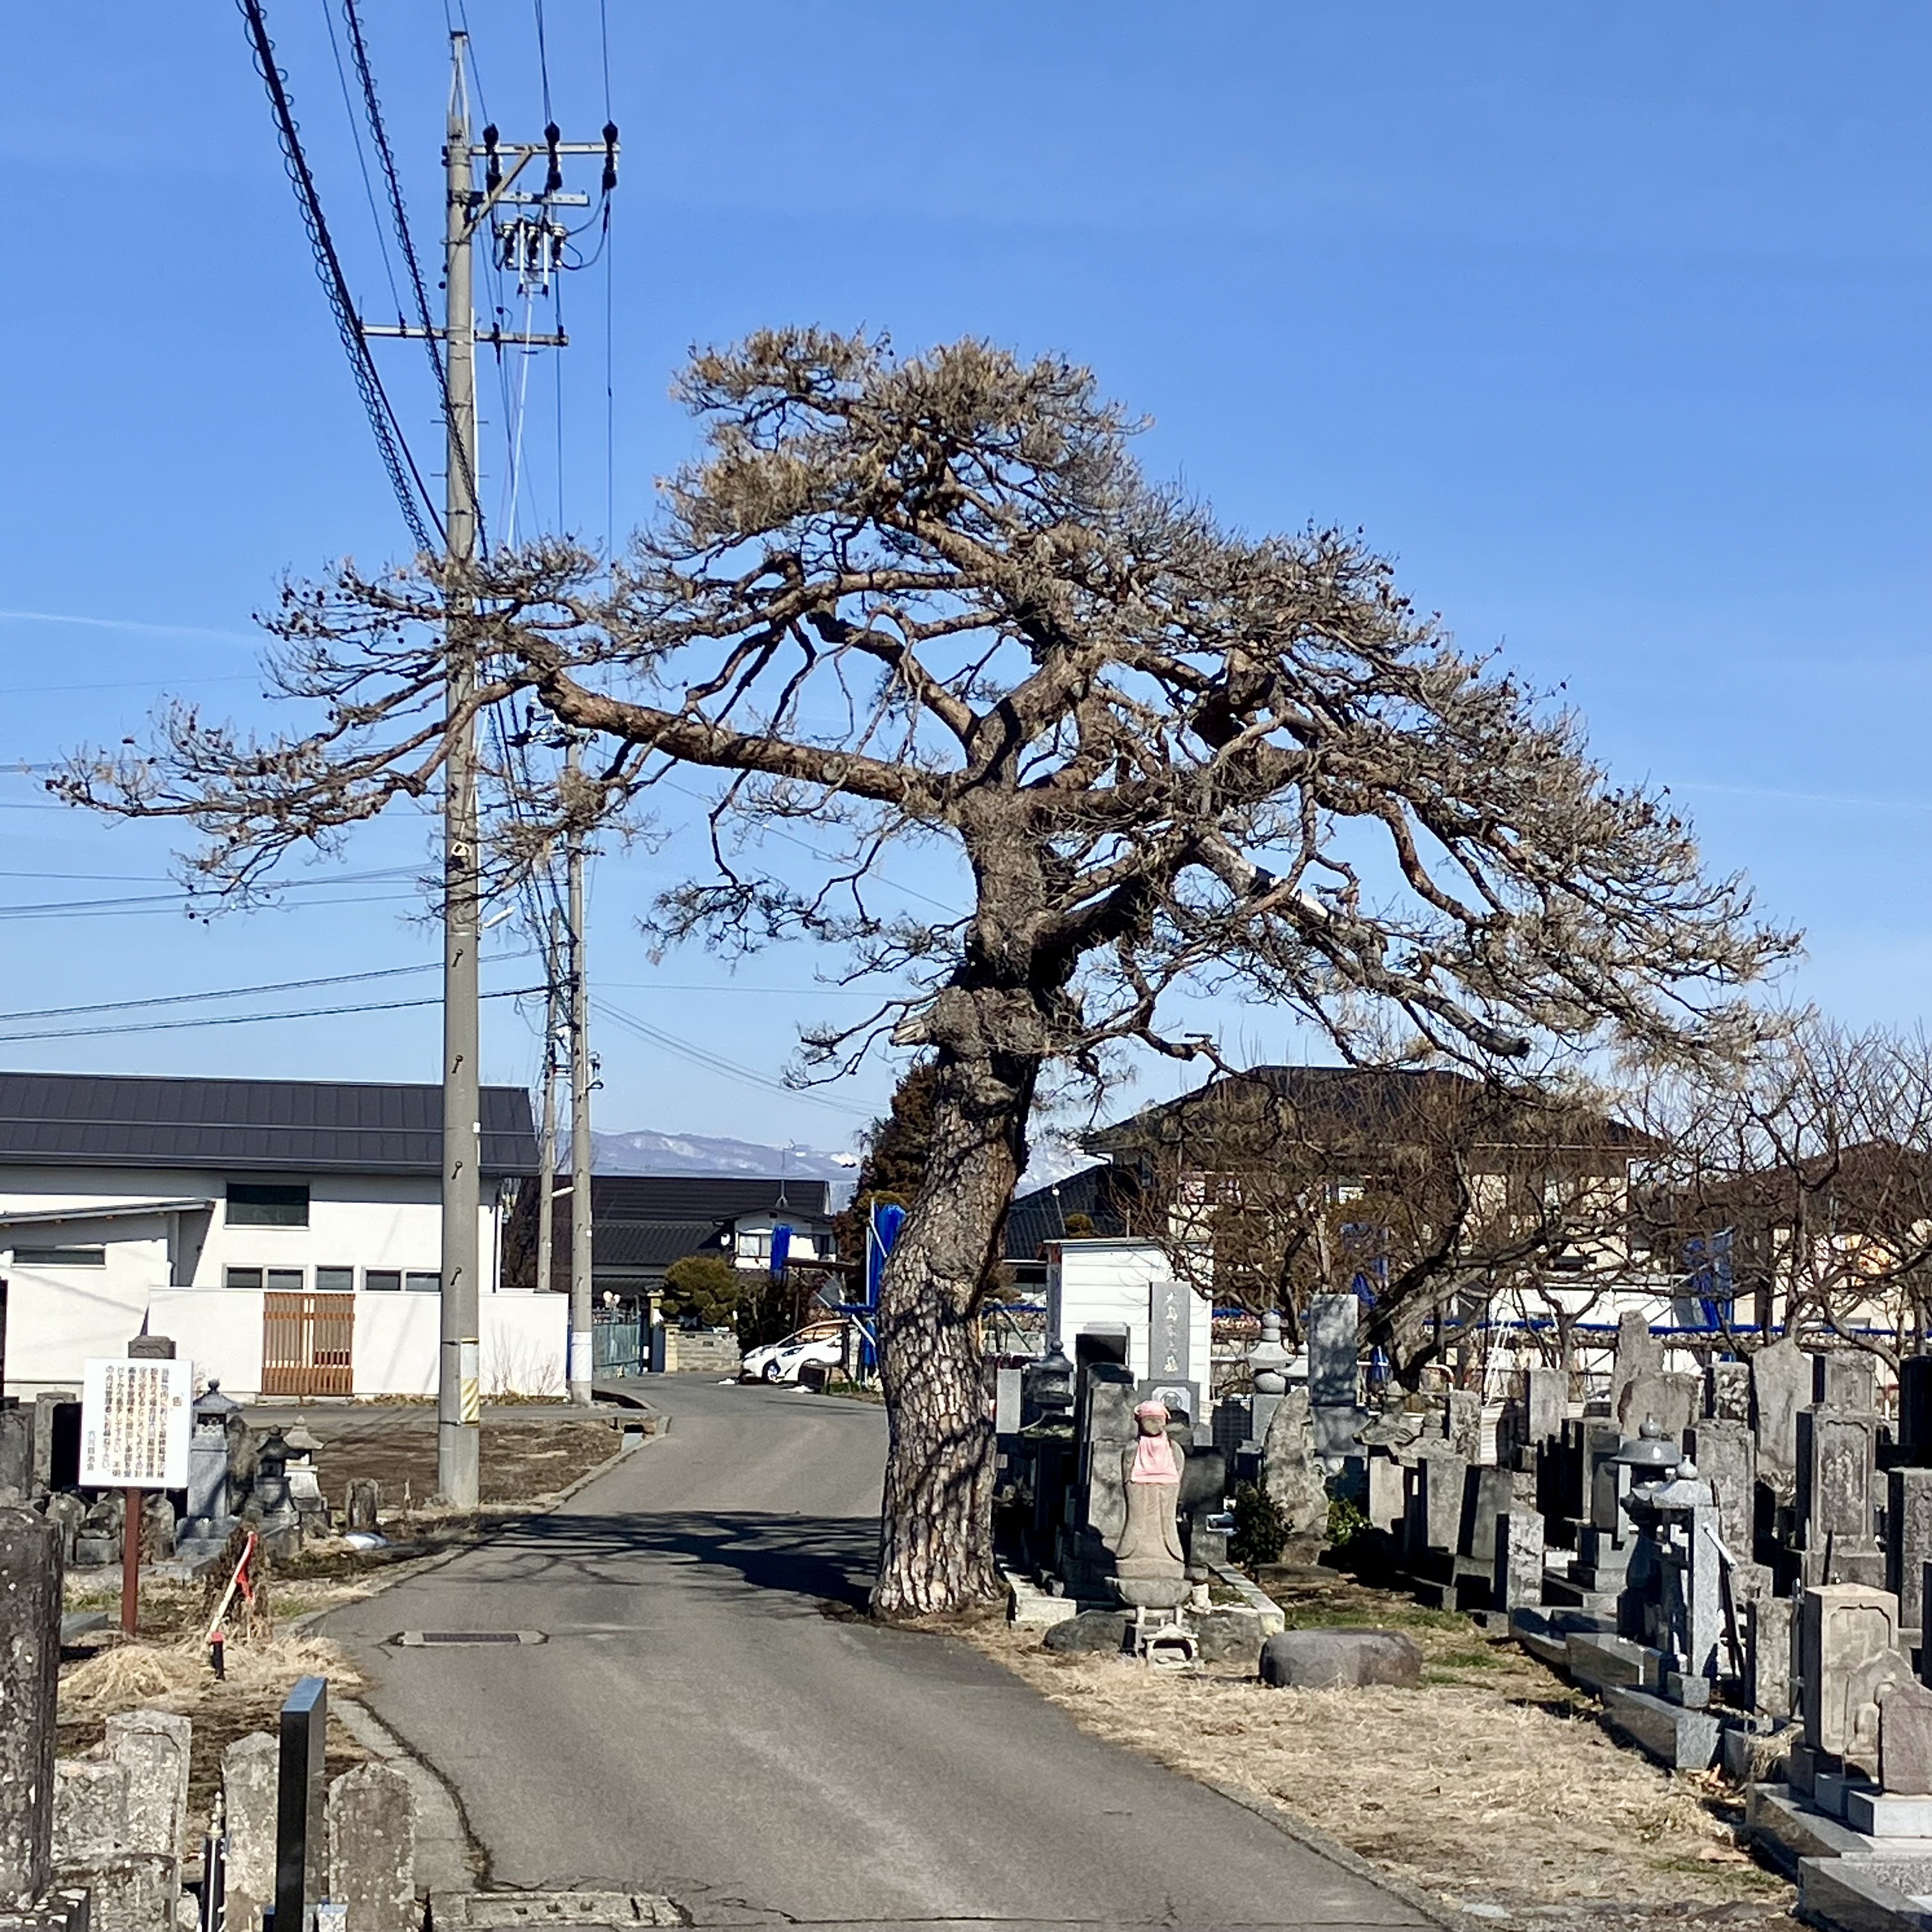
You might recognize this tree from a photo in Post-dated: The Schooling of an Irreverent Bonsai Monk. Walking home after a long day I’d pat its trunk or raise my fist passing under it, and say some version of, you and me pal, we’ll make it.
When we arrived in Obuse I split off to visit a small temple at the edge of town. I often went there as an apprentice, finding these quiet temples (some were Shinto shrines) restful. They drew me in.
On my way to the temple I didn’t realize I’d crossed the road I’d taken daily to and from work. I glanced left and stopped. Here was my tree.
But it was dead.
I stood there breathing. My tree was dead, my brother tree. We’d kept each other going, or at least, it had kept me going.
My memory of Obuse is no longer true. Not true for today. In my absence the place is changing. And next time I go, my tree may be gone entirely.
The next stop cheered me up.
Reunited with my group, we went to Mr. Suzuki’s garden. He met us in the teahouse, and brought out two pots, setting them on this wooden stand.
I knew these pots!
The blue one is a bonsai pot I’d given Mr. Suzuki in the states in 2003, a few months before I started my apprenticeship. The bottom one was a gift on a return trip to Japan after my apprenticeship ended. It was from a kiln I fired around 2012, my last kiln. A winter tea bowl.
And he had them there in the teahouse.
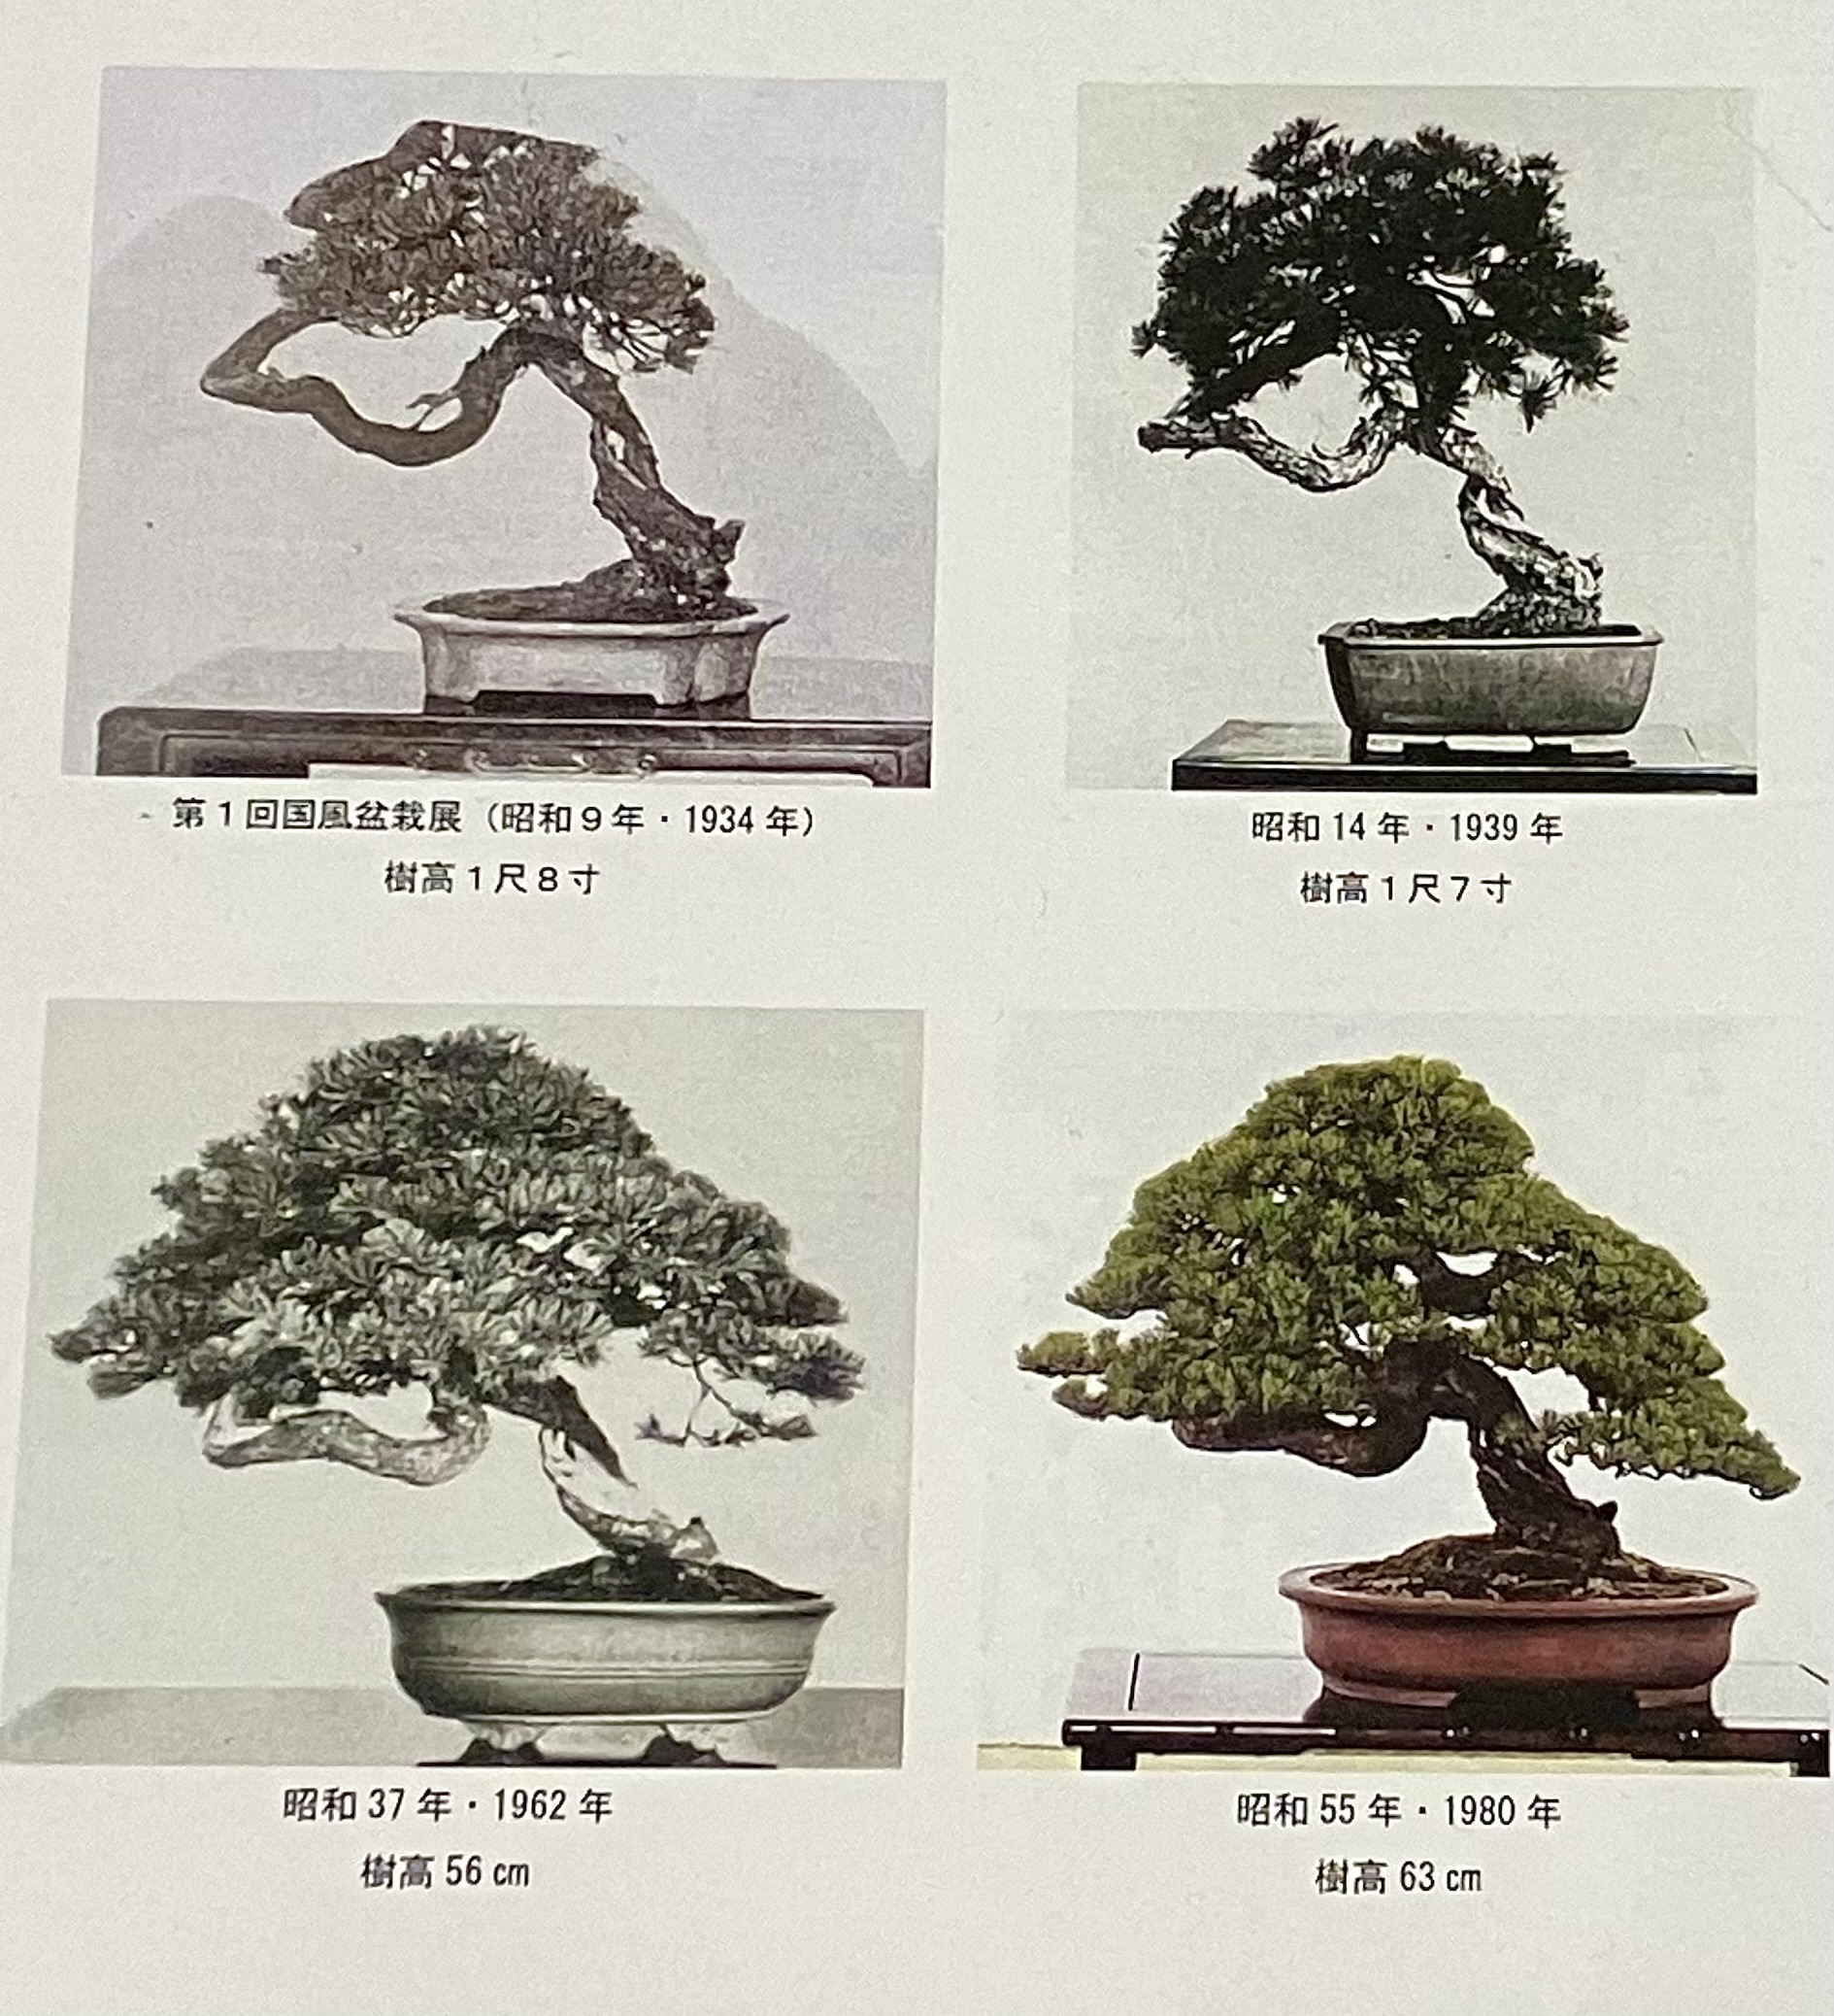
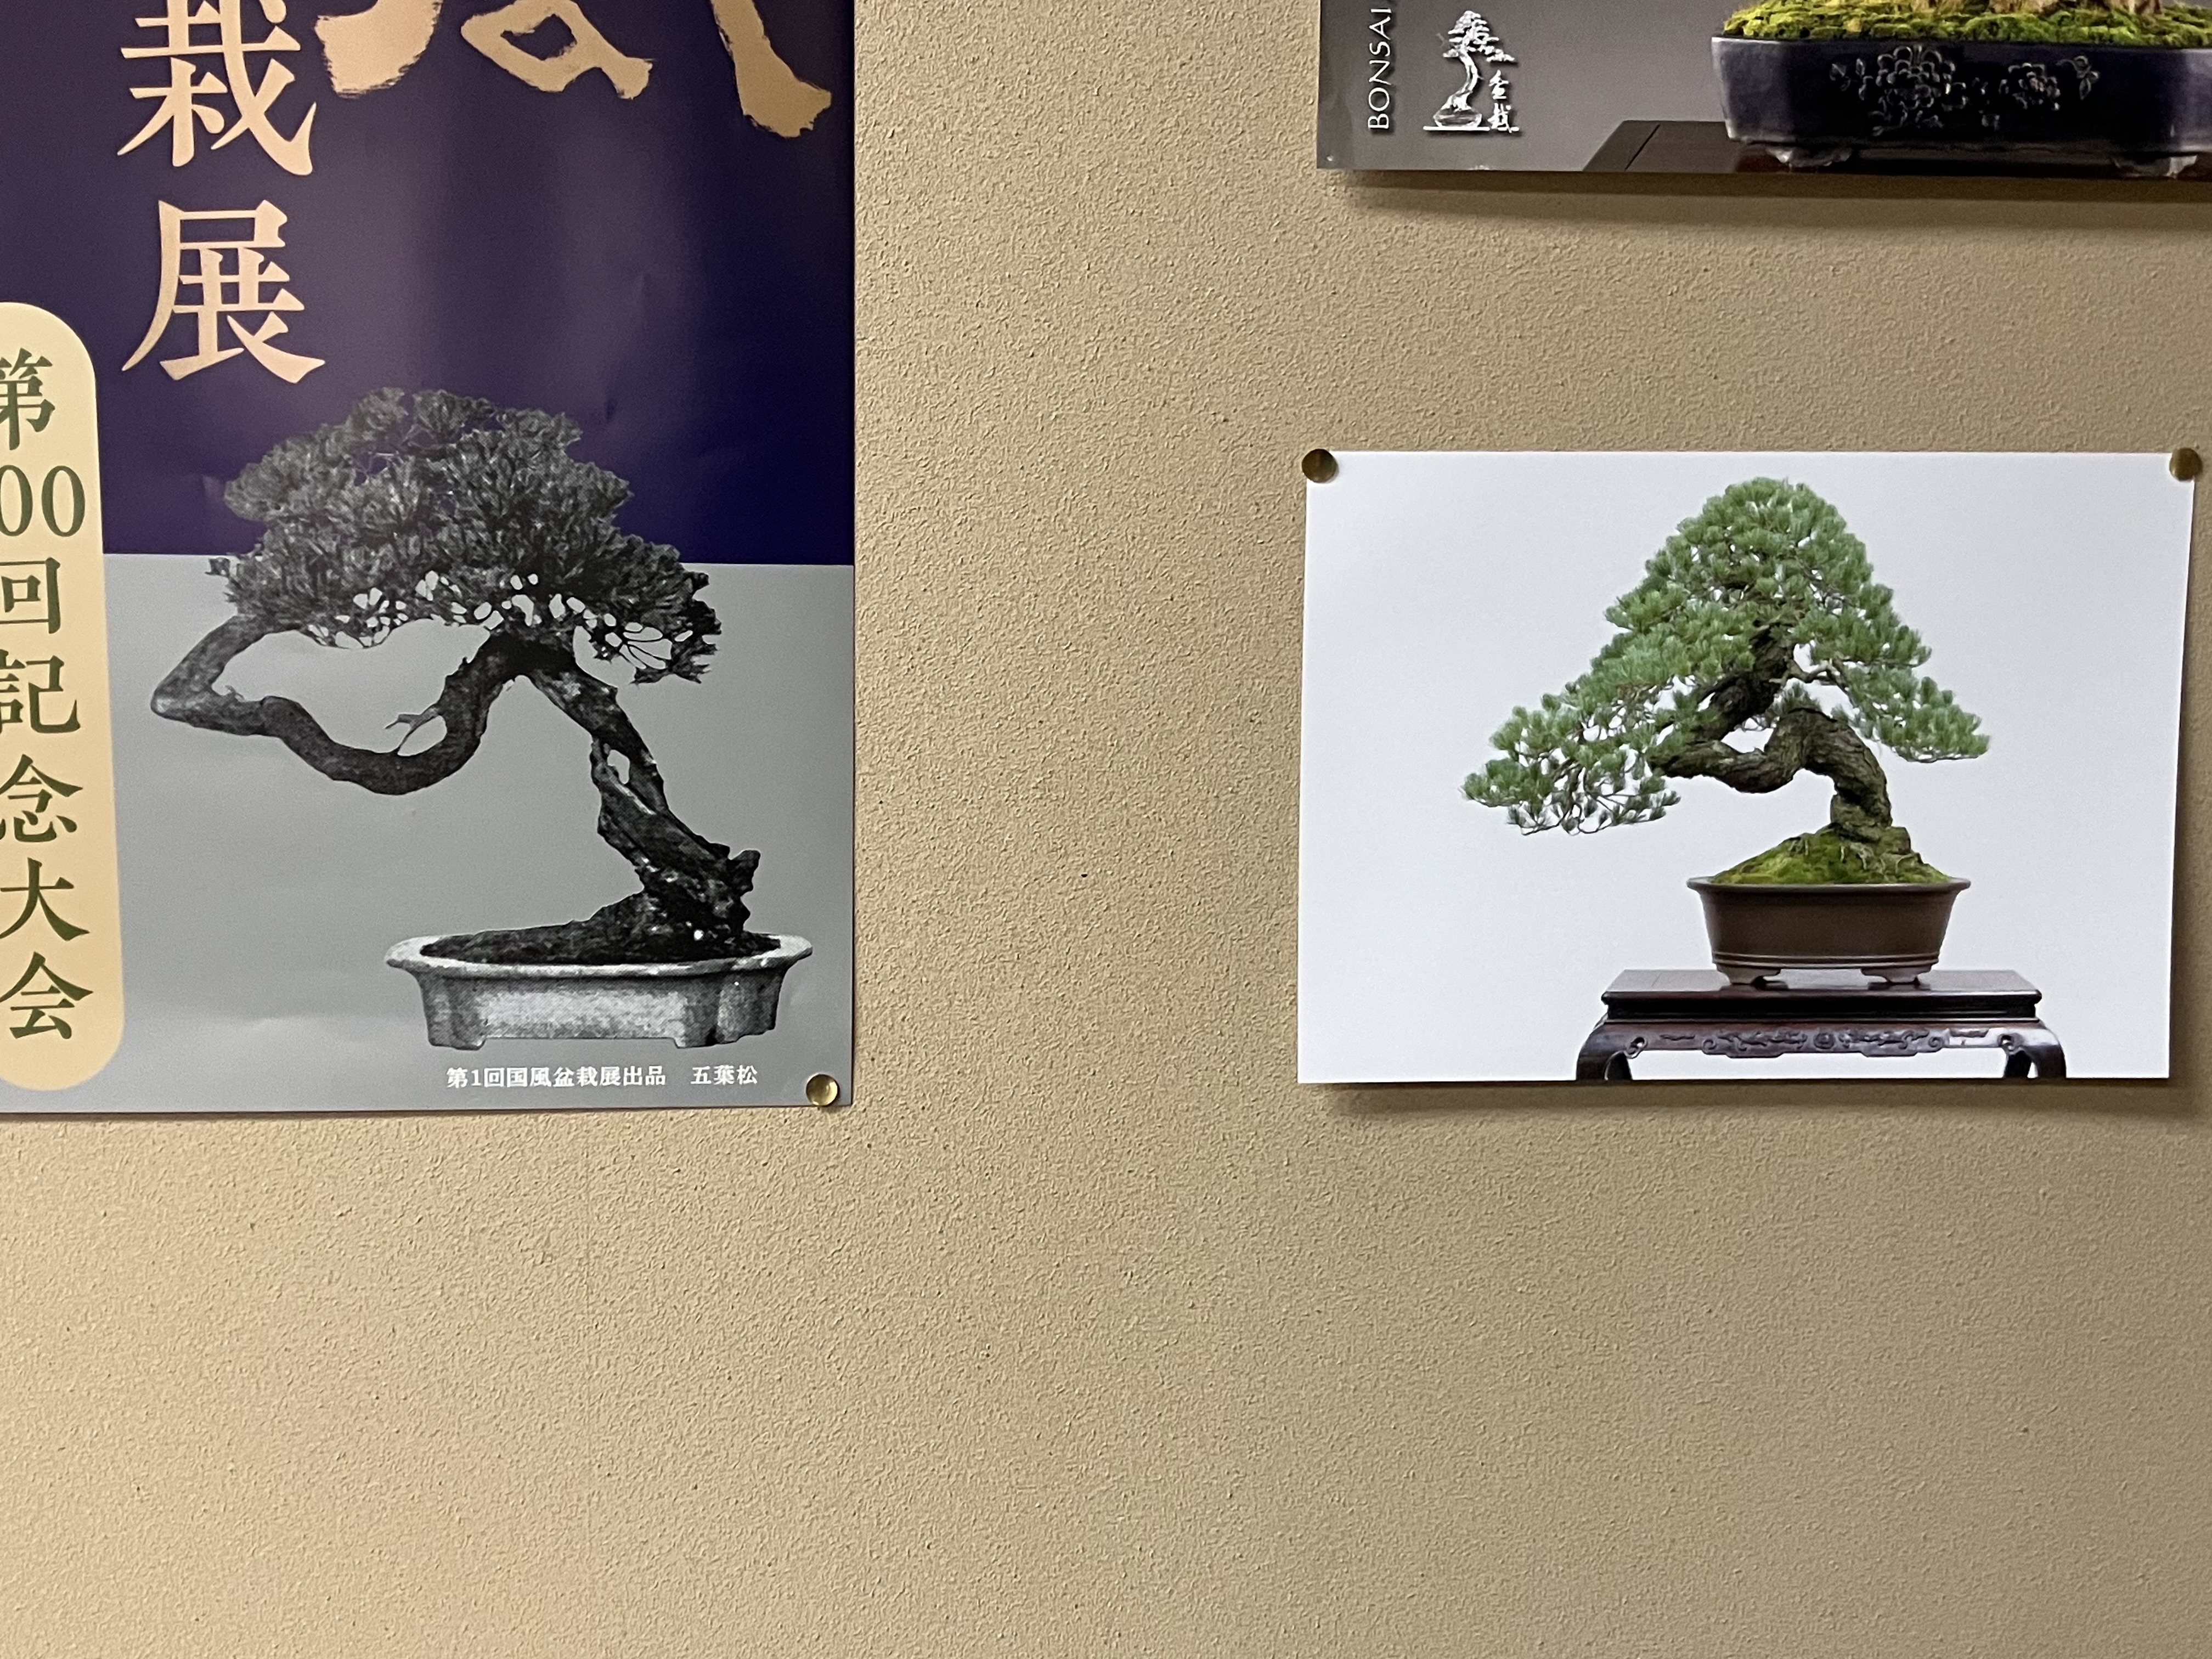
On a wall of the teahouse was a Japanese White Pine shown in the first Kokufu show, in 1934. The photo to the left is from that year, and on the right how it looked in this year’s Kokufu.
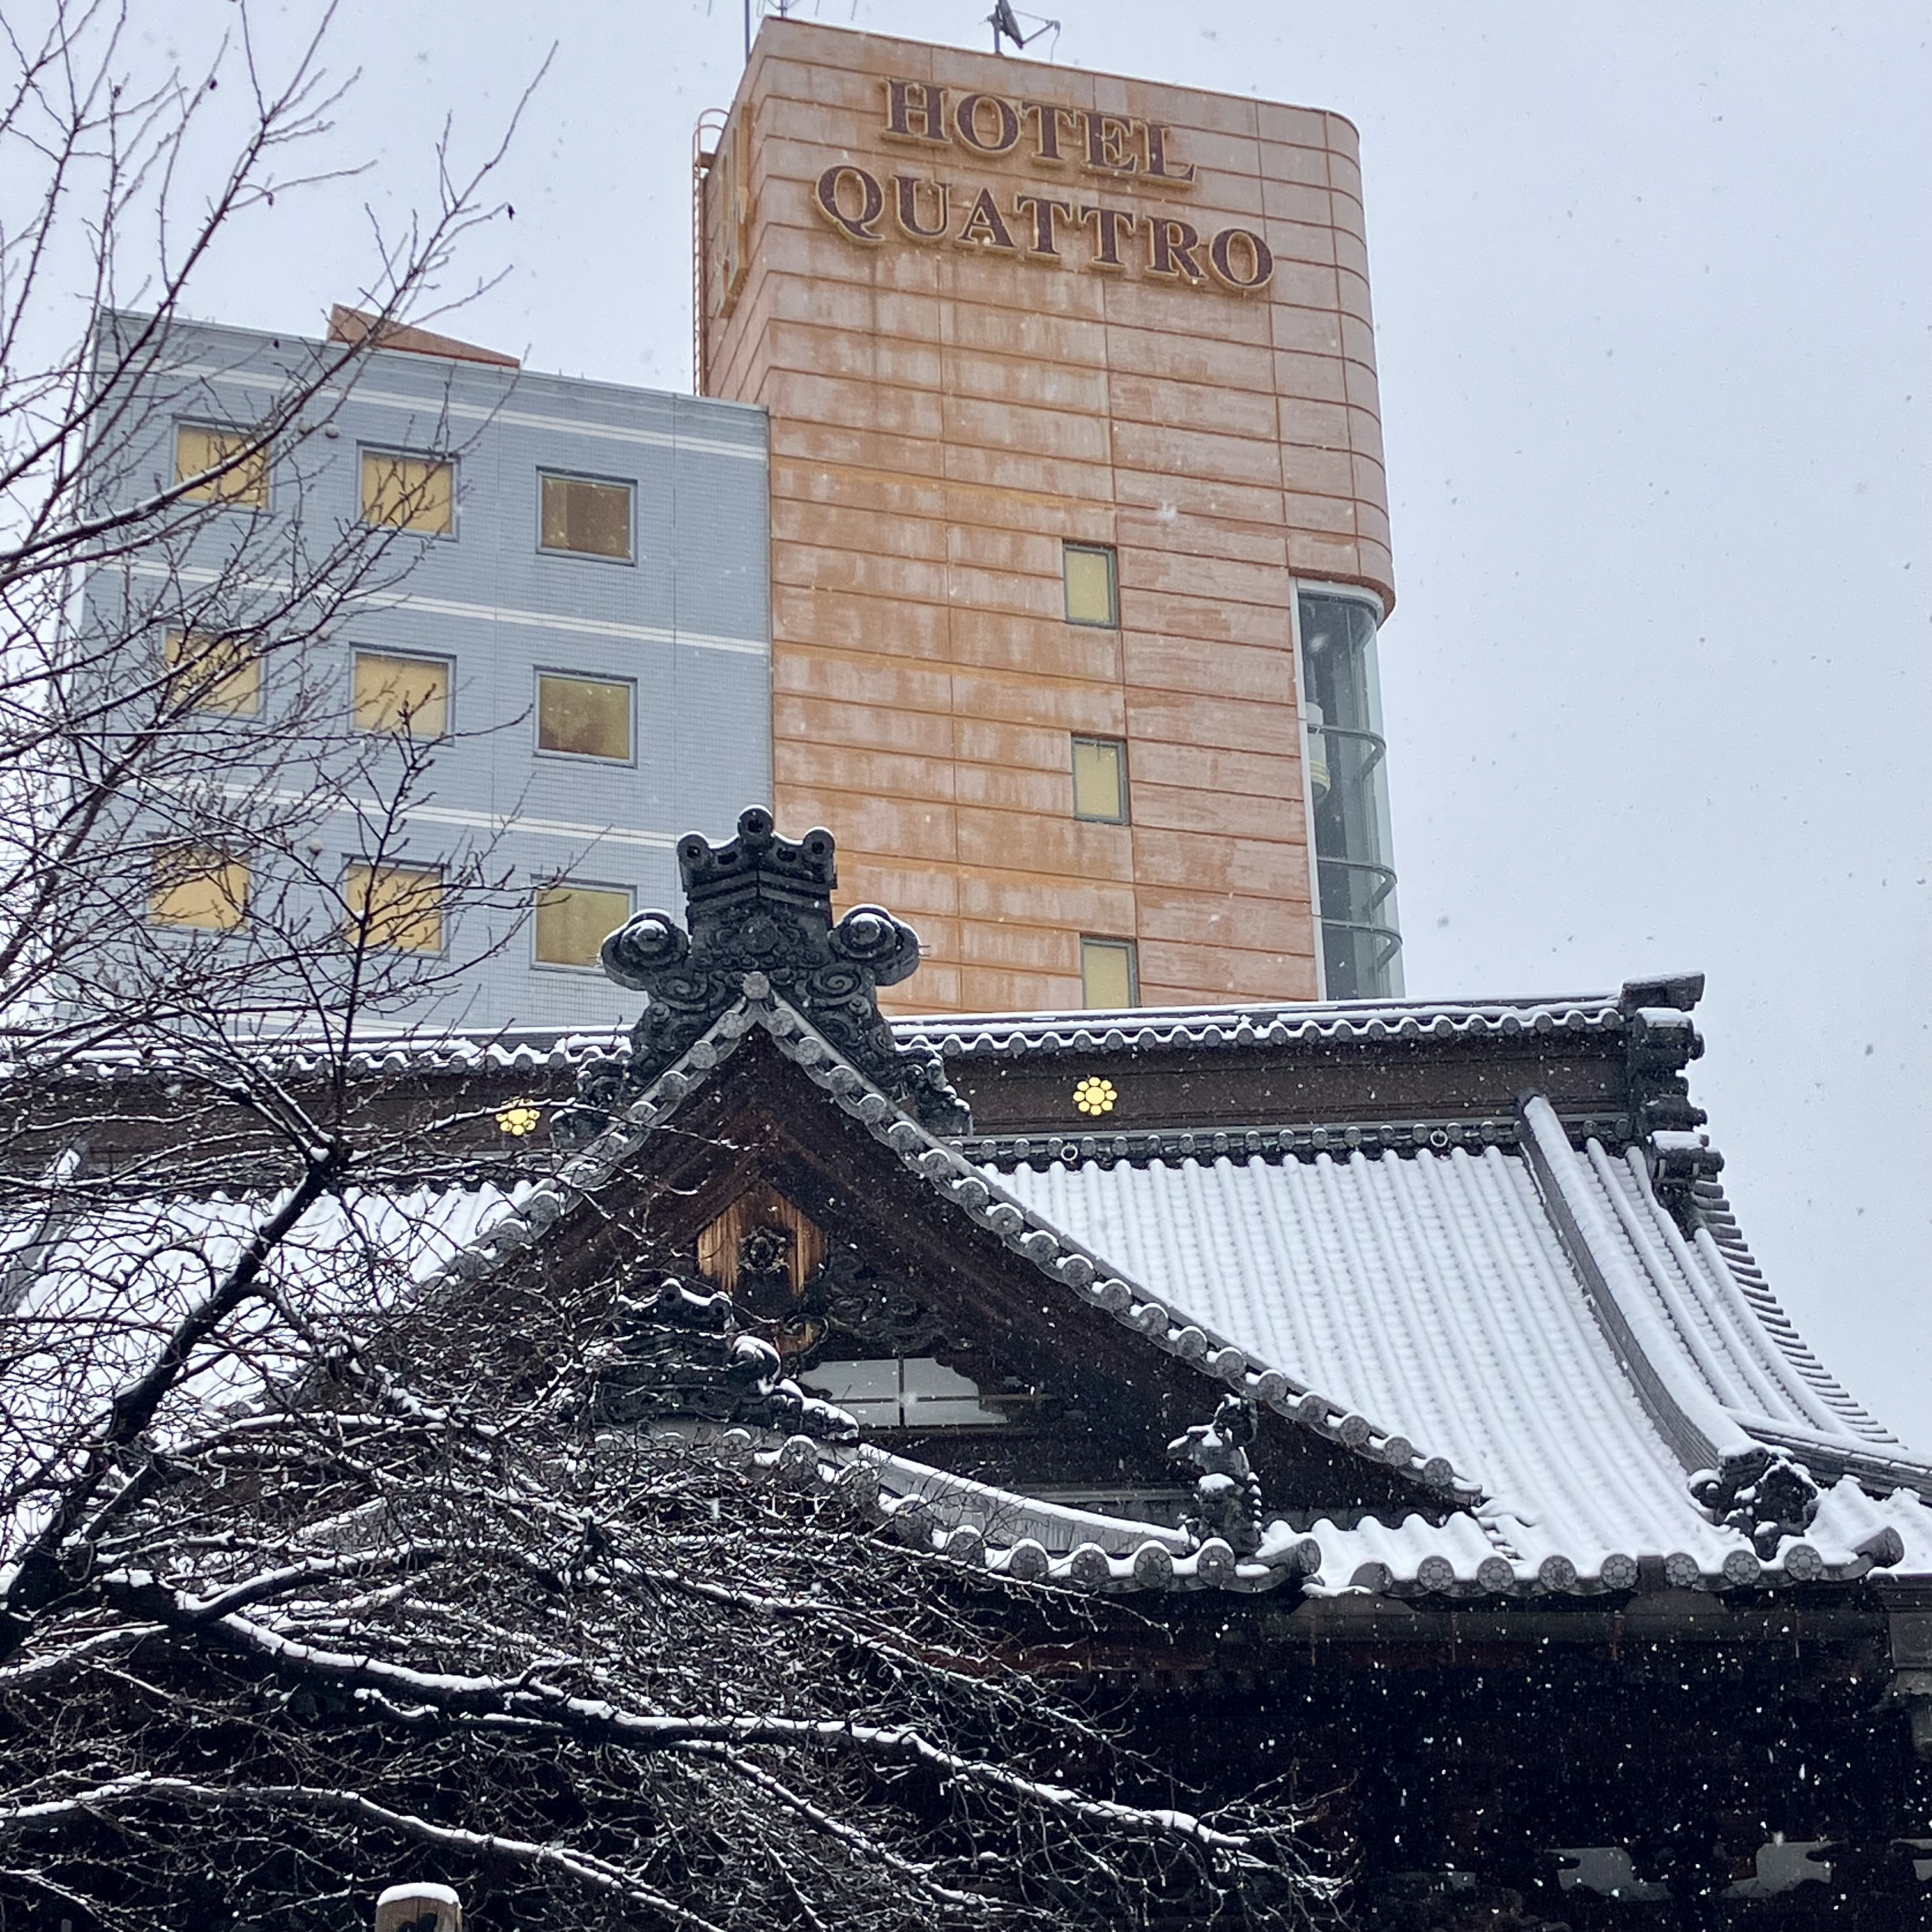
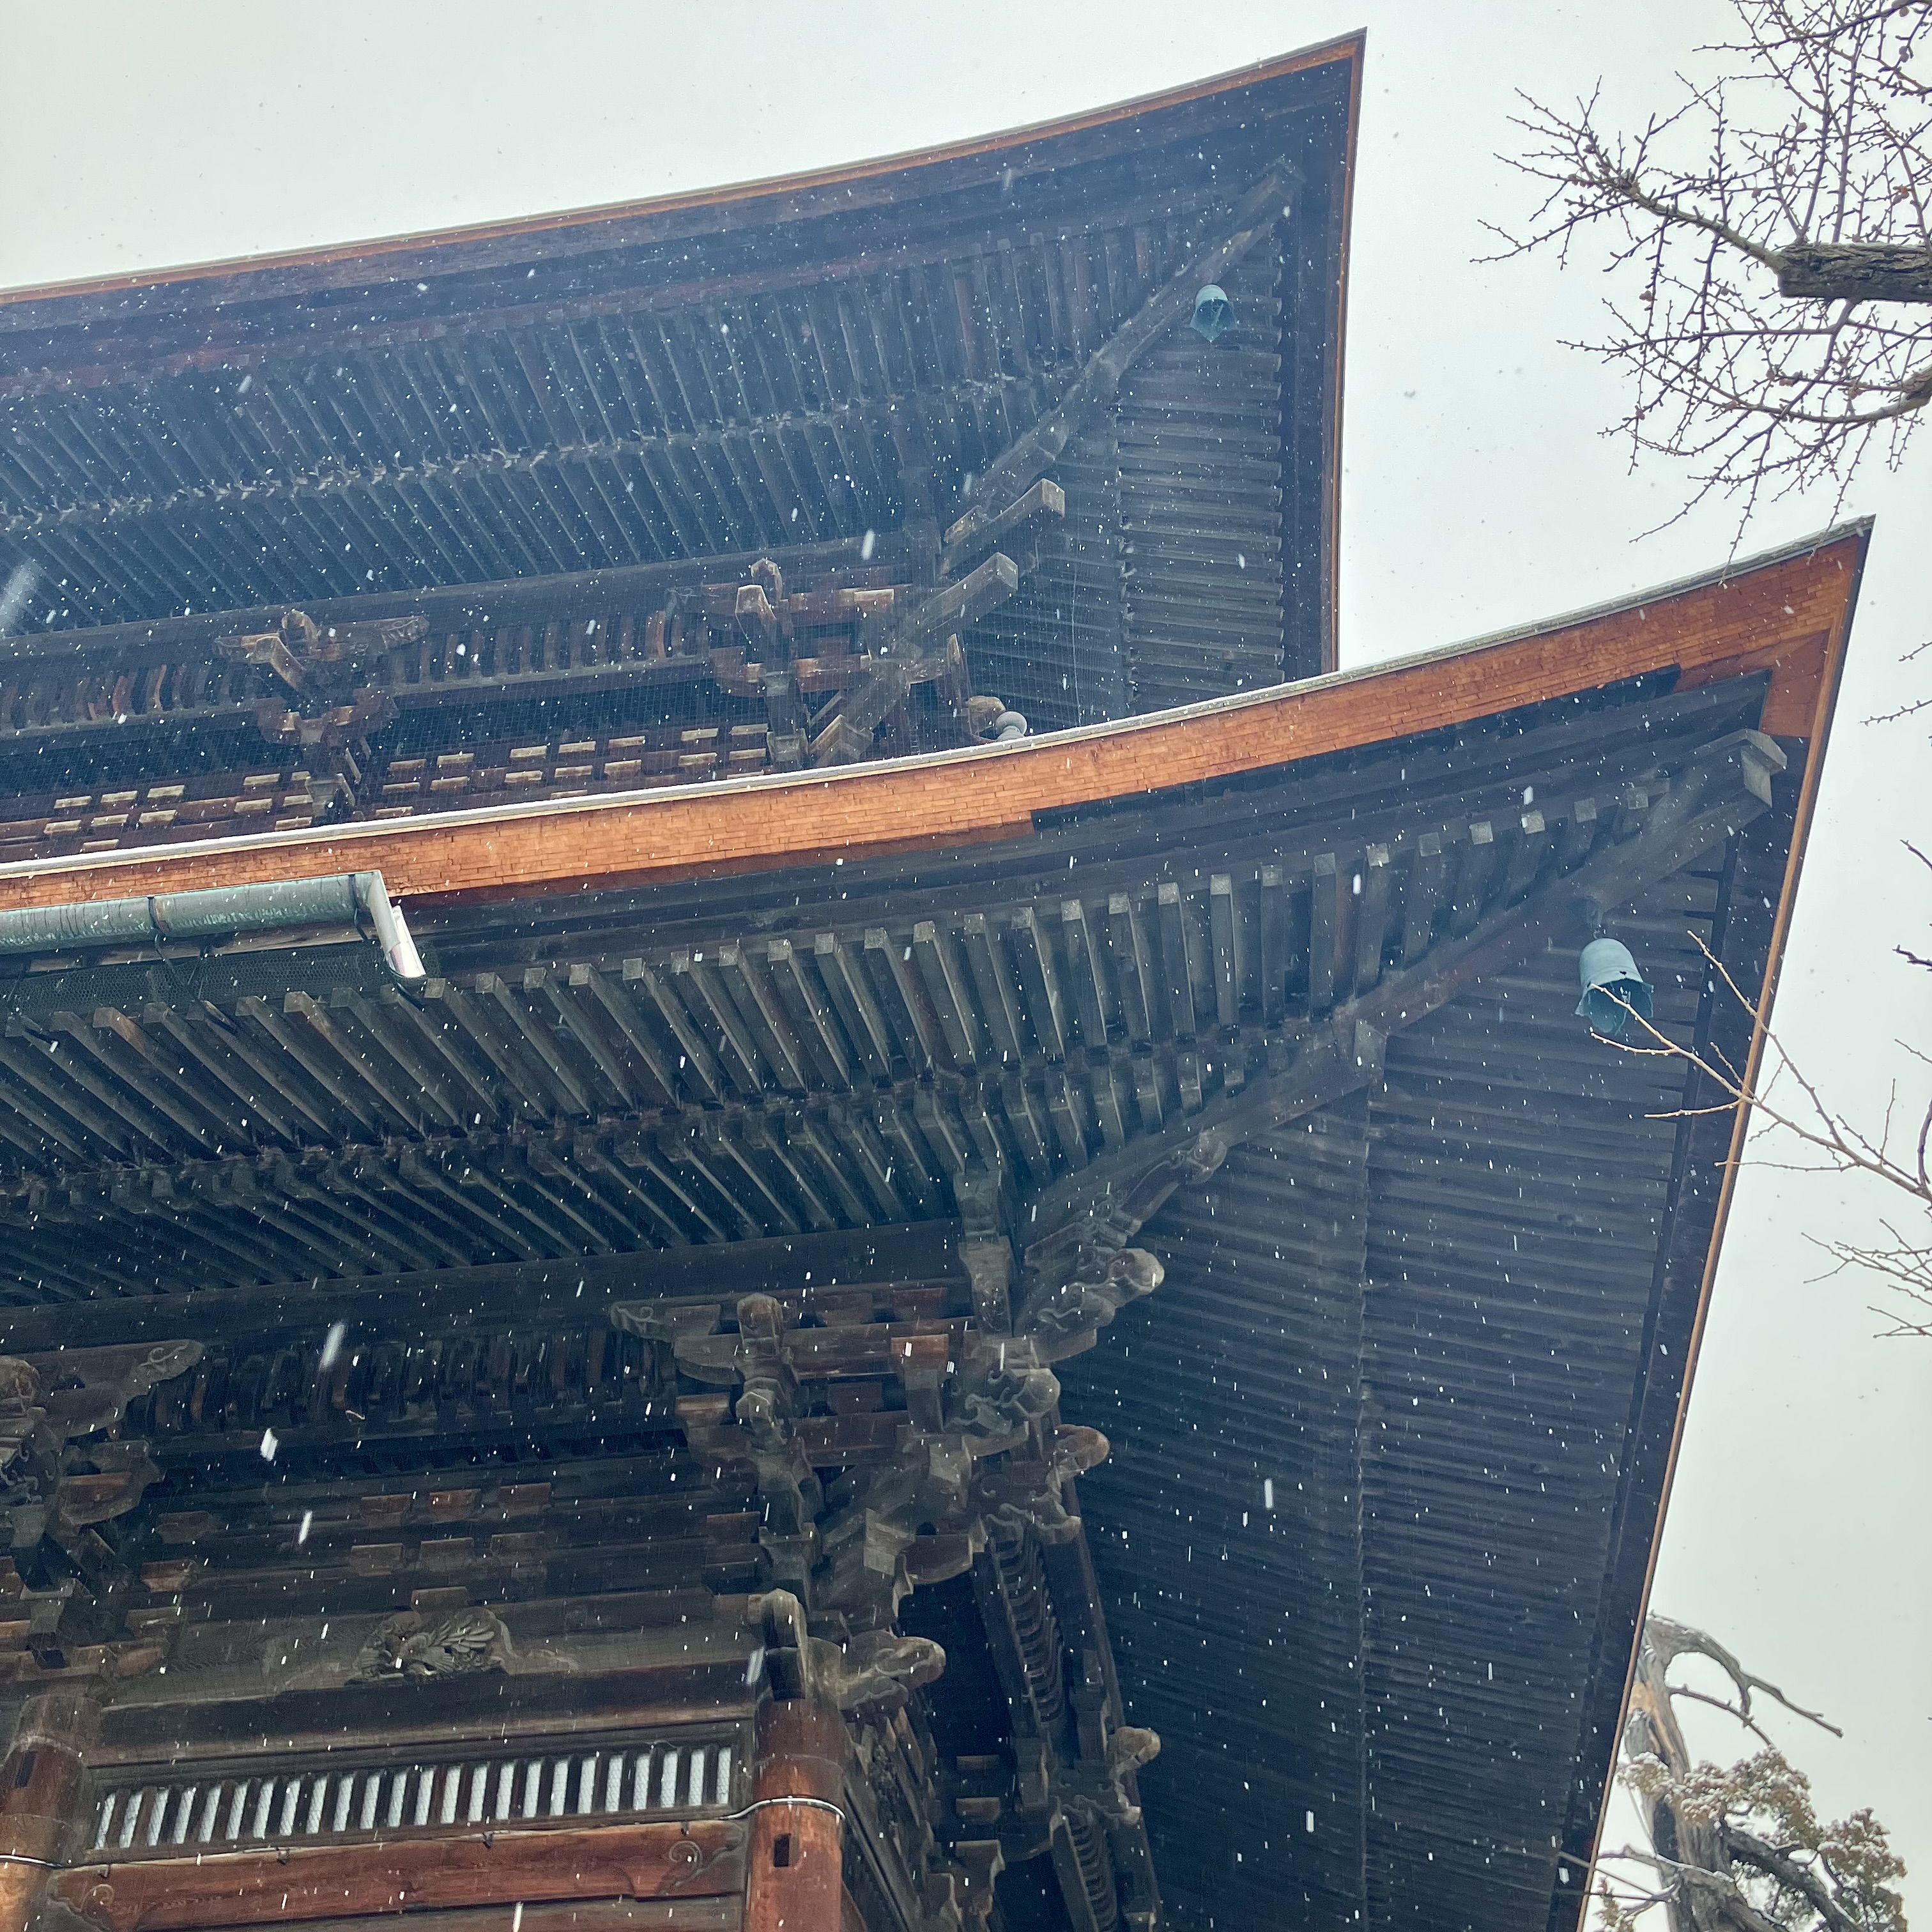
The next day our group split up for various adventures. My friend Evan Cordes and I stayed in Nagano to tour around a bit. This temple wasn’t on our itinerary, but it sums up the architectural chiaroscuro you can encounter in any urban Japan setting: an old temple, with a modern high-rise framing it.
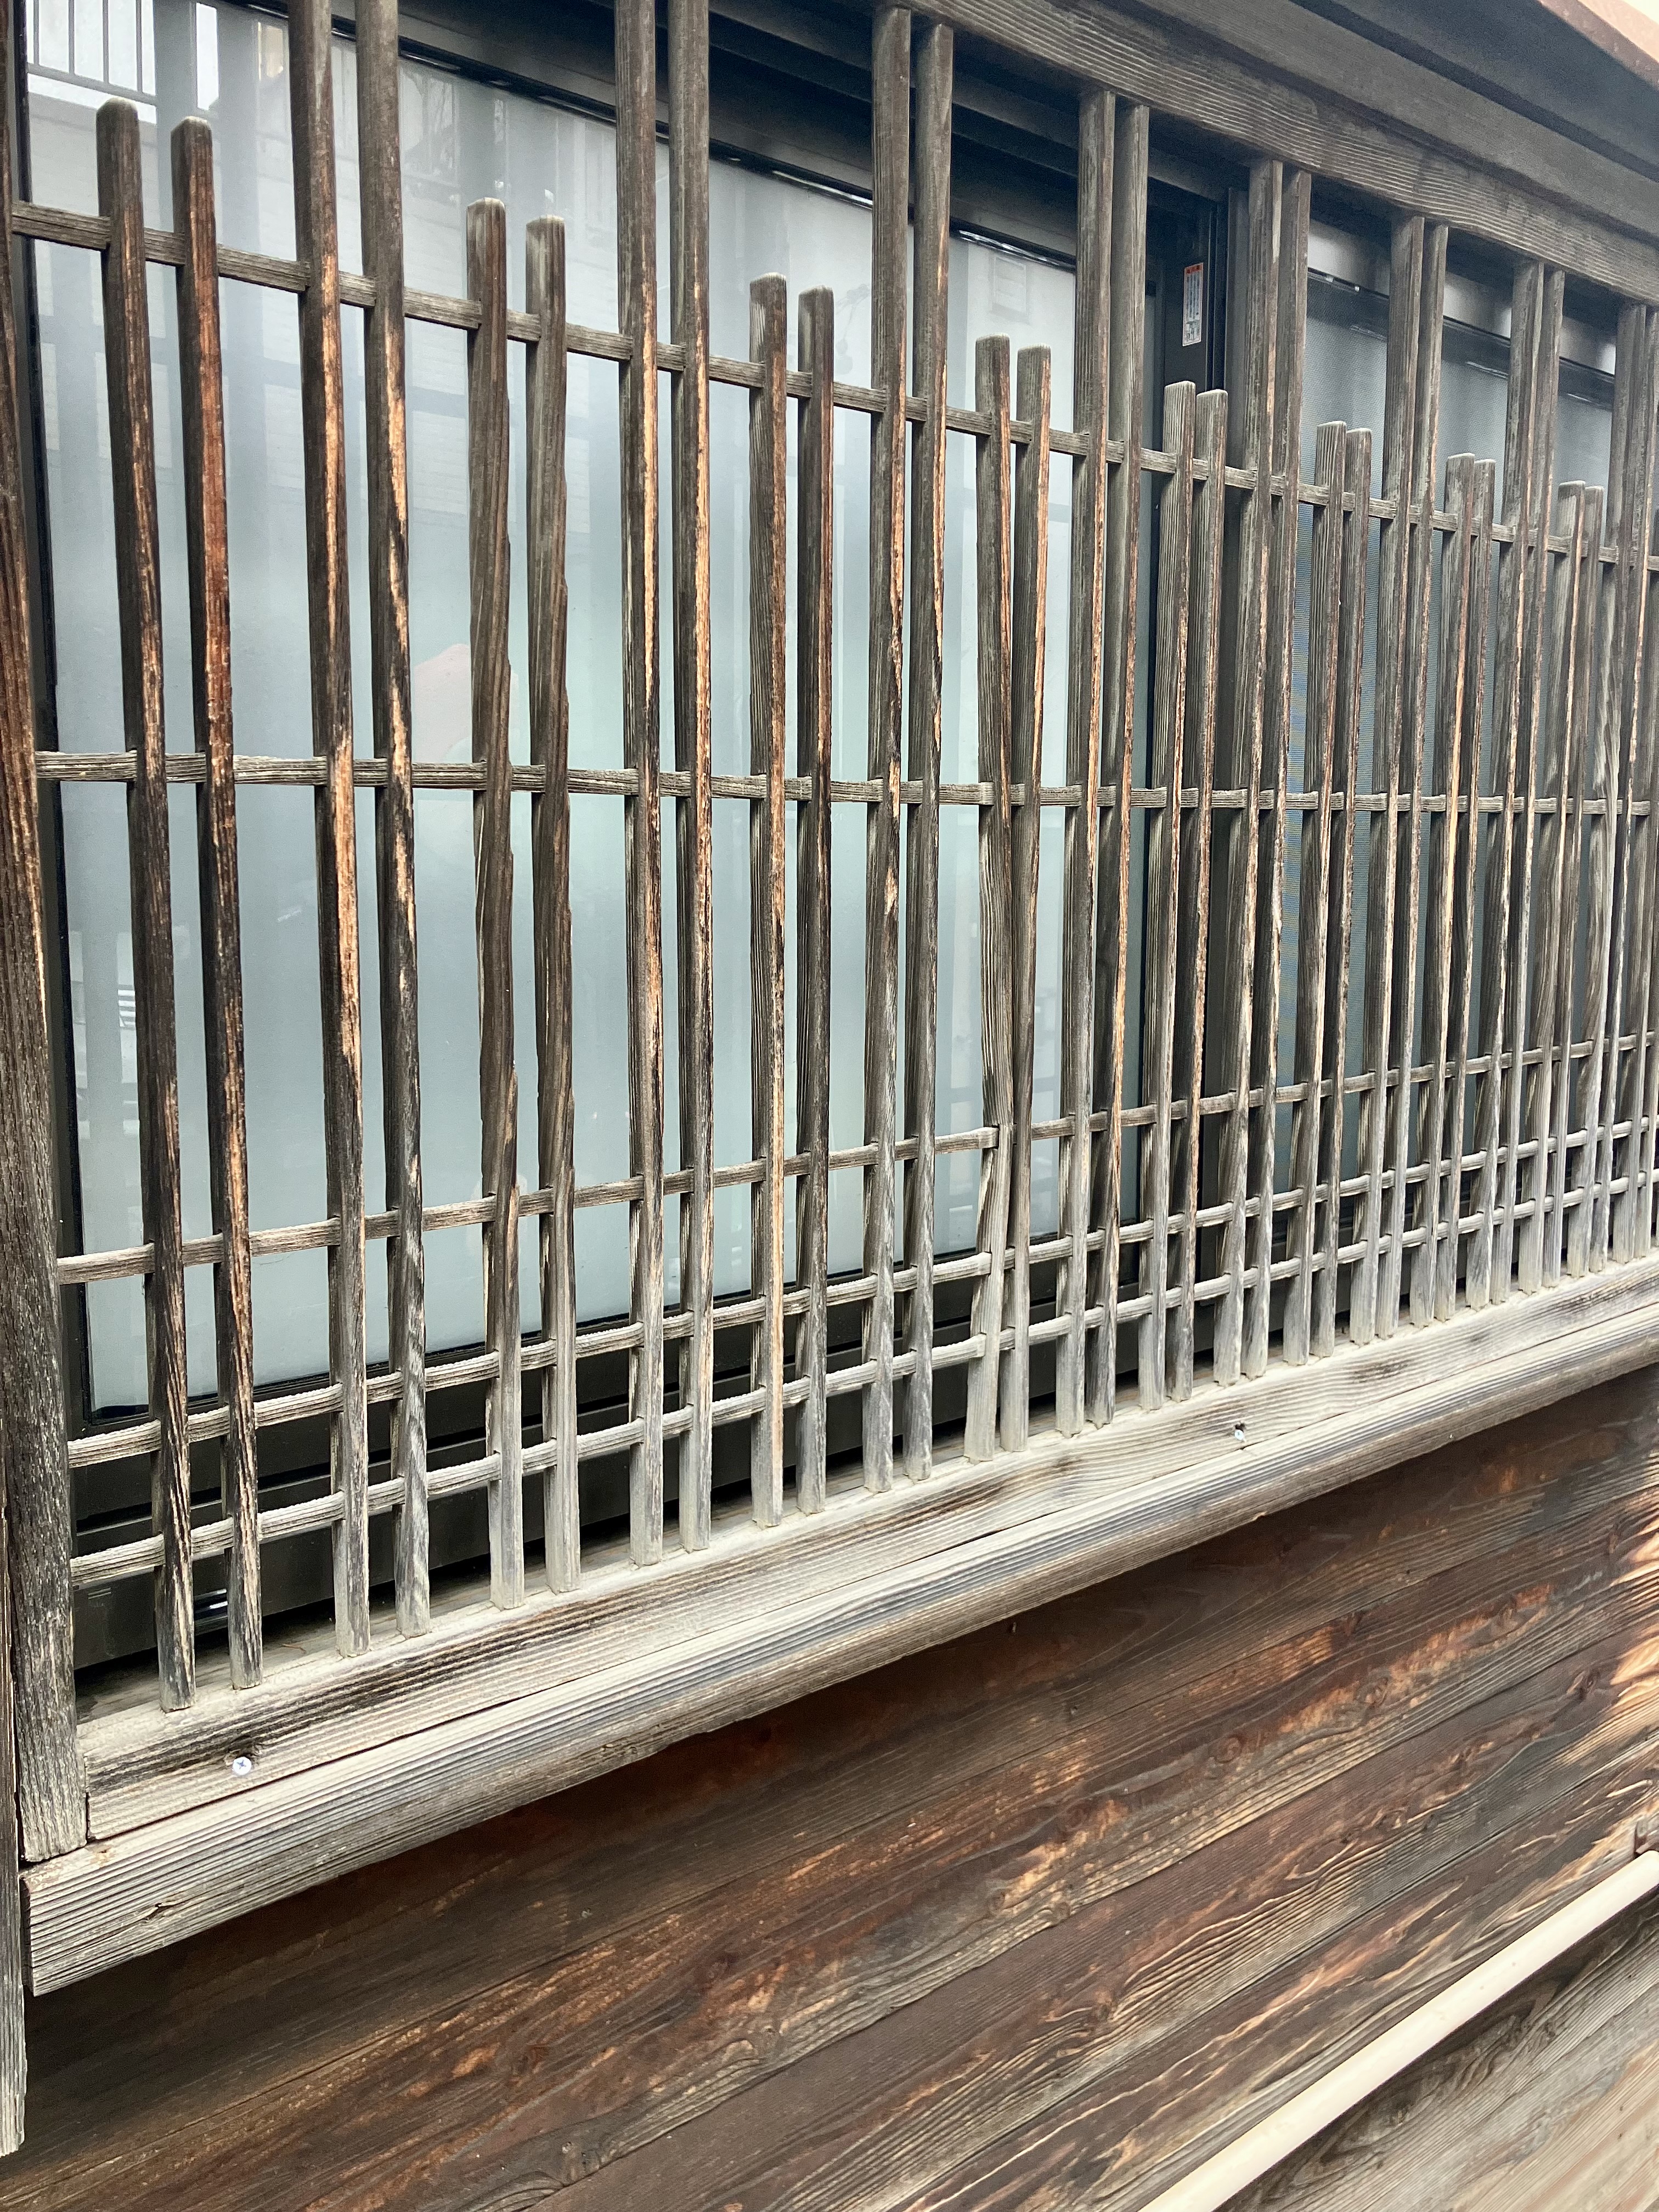
Any walk along the cold, snowy city streets of Nagano may pass by yakisuki—charred cryptomeria—on the older buildings. I fell in love with yakisugi while living in Japan 20 years ago, and had to have it for my tiny house siding. (Making it involved a lot of smoke and flames, loss of eyebrows, and even a run to the ER…a story in my forthcoming tiny house memoir.)
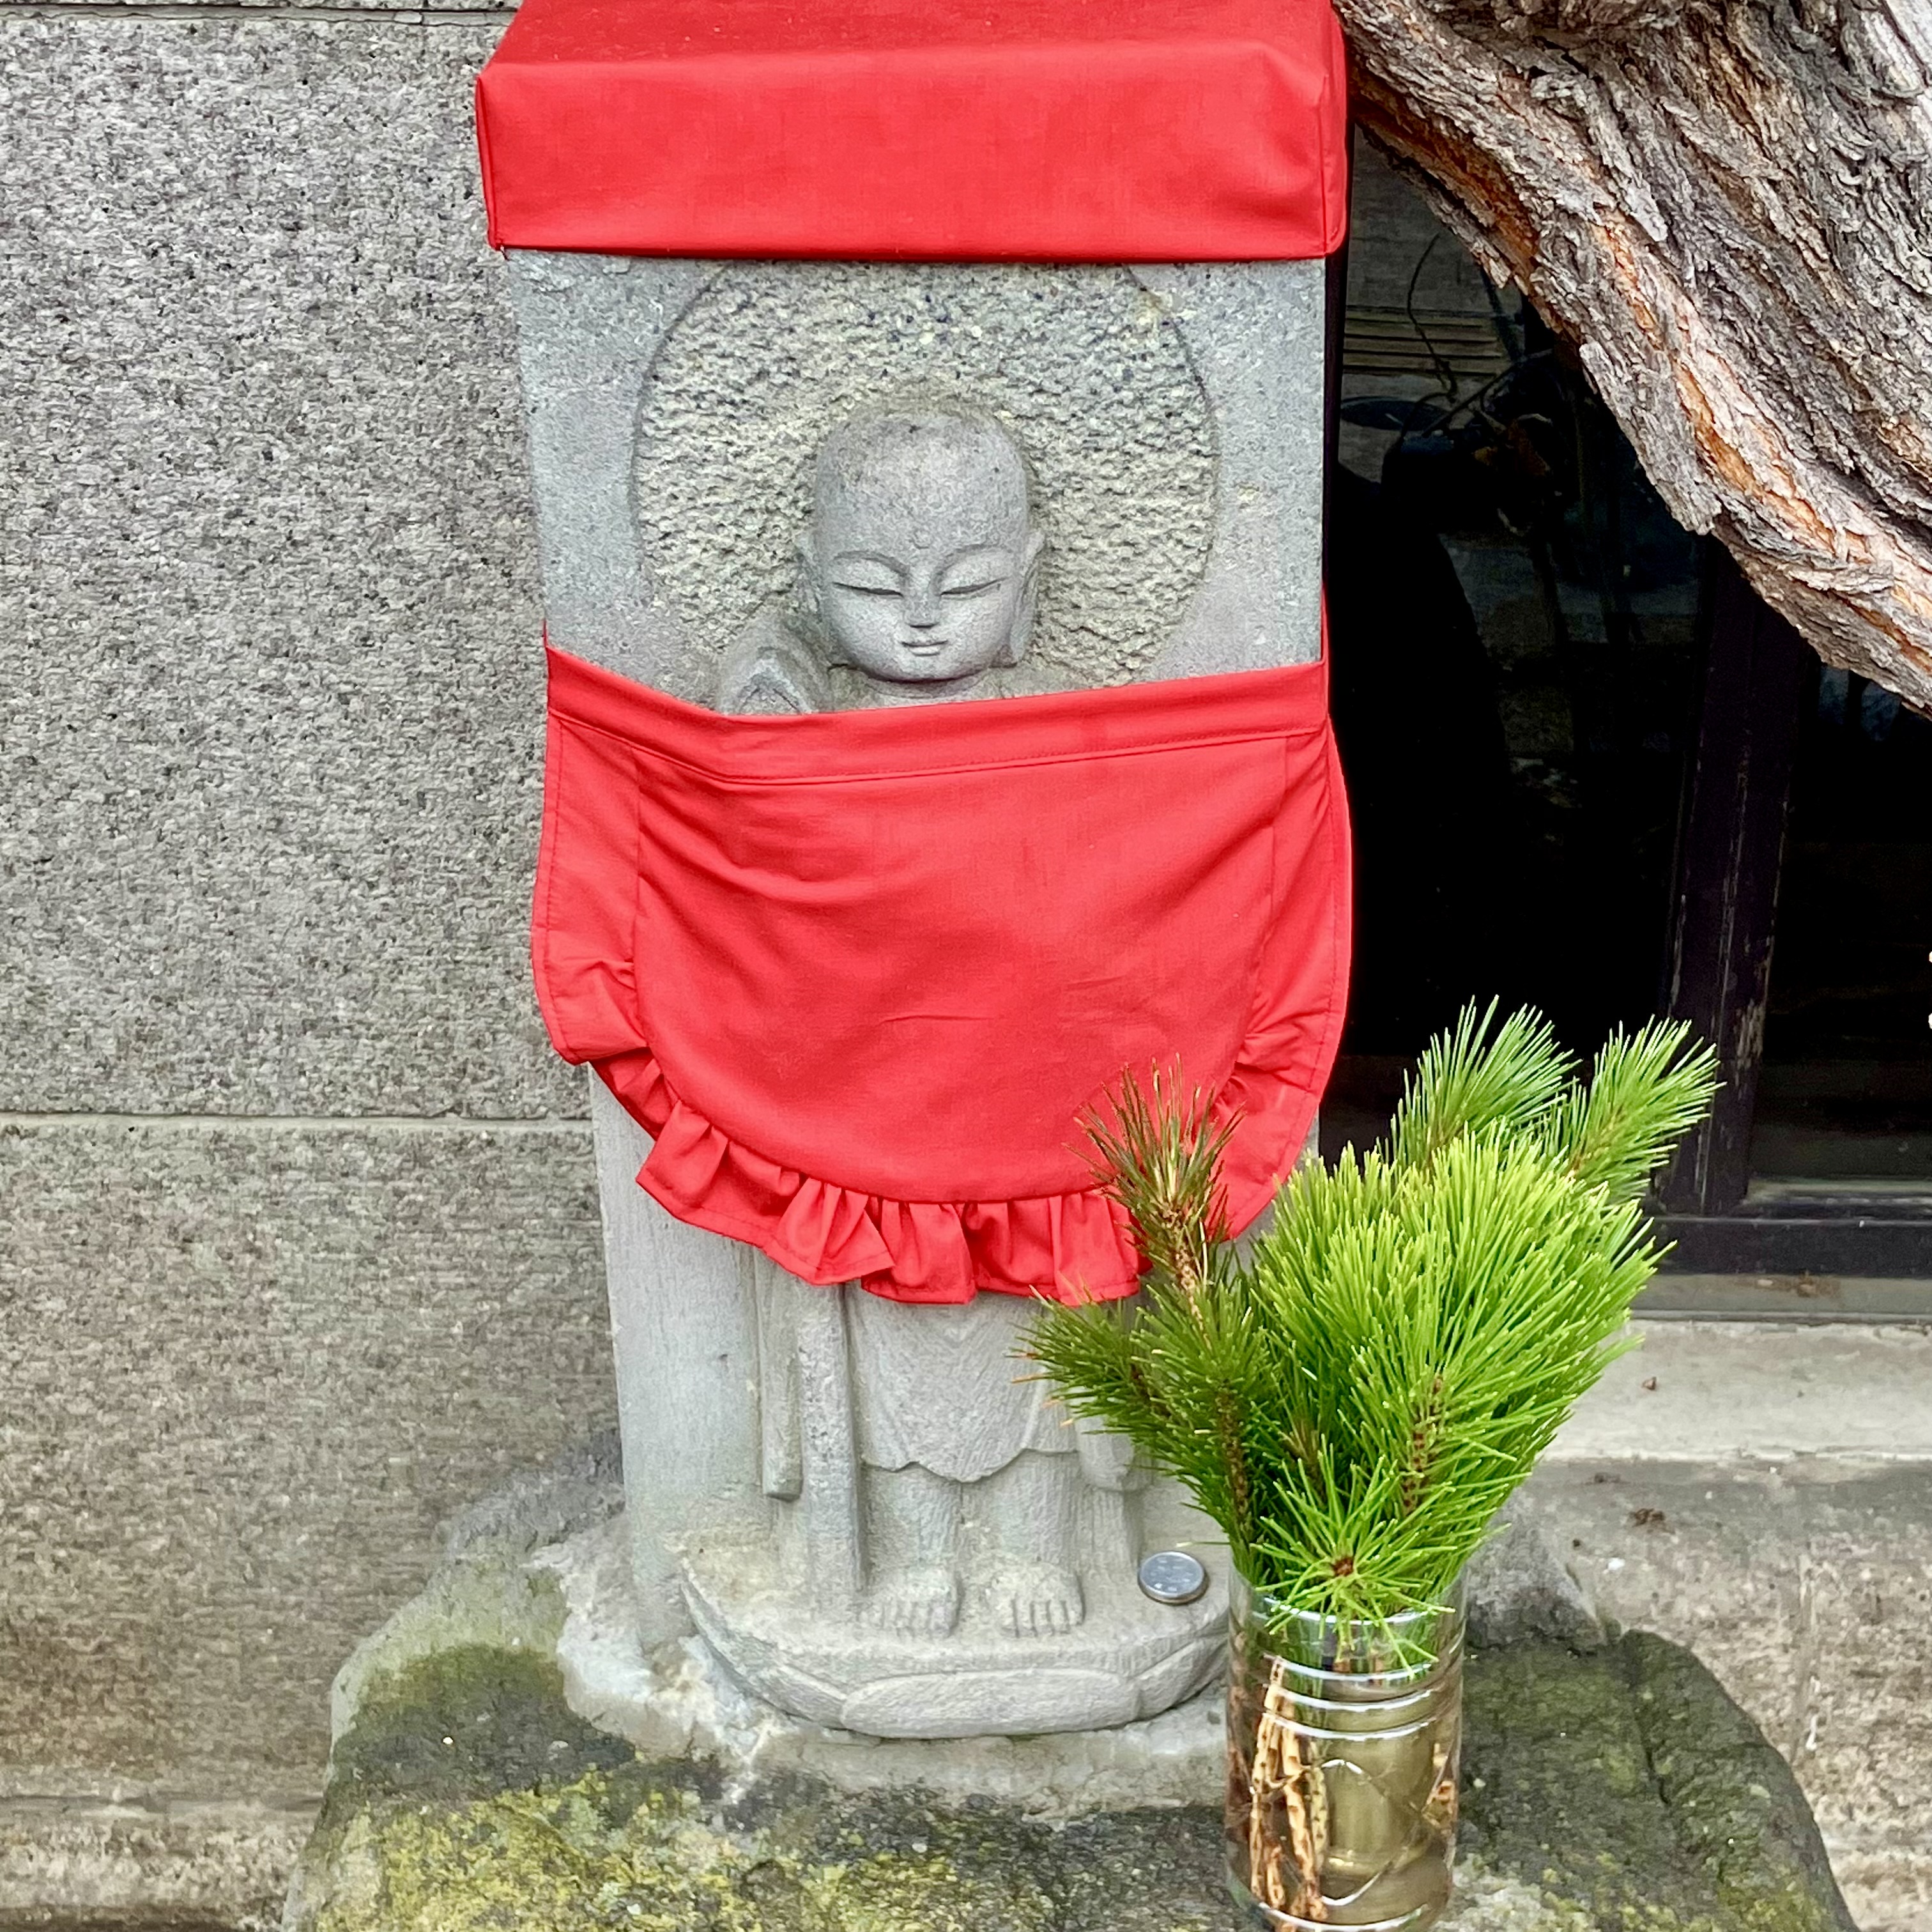
A Jizo statue with pine shoots. The red cloth is protective for children and travelers. The pine shoots are for longevity and good fortune.
To the side of a house in Nagano we saw a common sight anywhere in Japan: bonsai. Dangling Disney characters optional.
Metalwork on the Zenkoji temple. This is one of the oldest wooden buildings in Japan. Most of the older ones have burned down and been rebuilt, but this one dates to 1707.
The roof of Zenkoji is itself worth a visit. The layers of wood that hold up that slope and overhang are part of a traditional system of carpentry called kigumi. It uses interlocking joints that shift and absorb stresses, like earthquake. Which can make you think of aikido, the Japanese martial art that redirects an opponents energy.
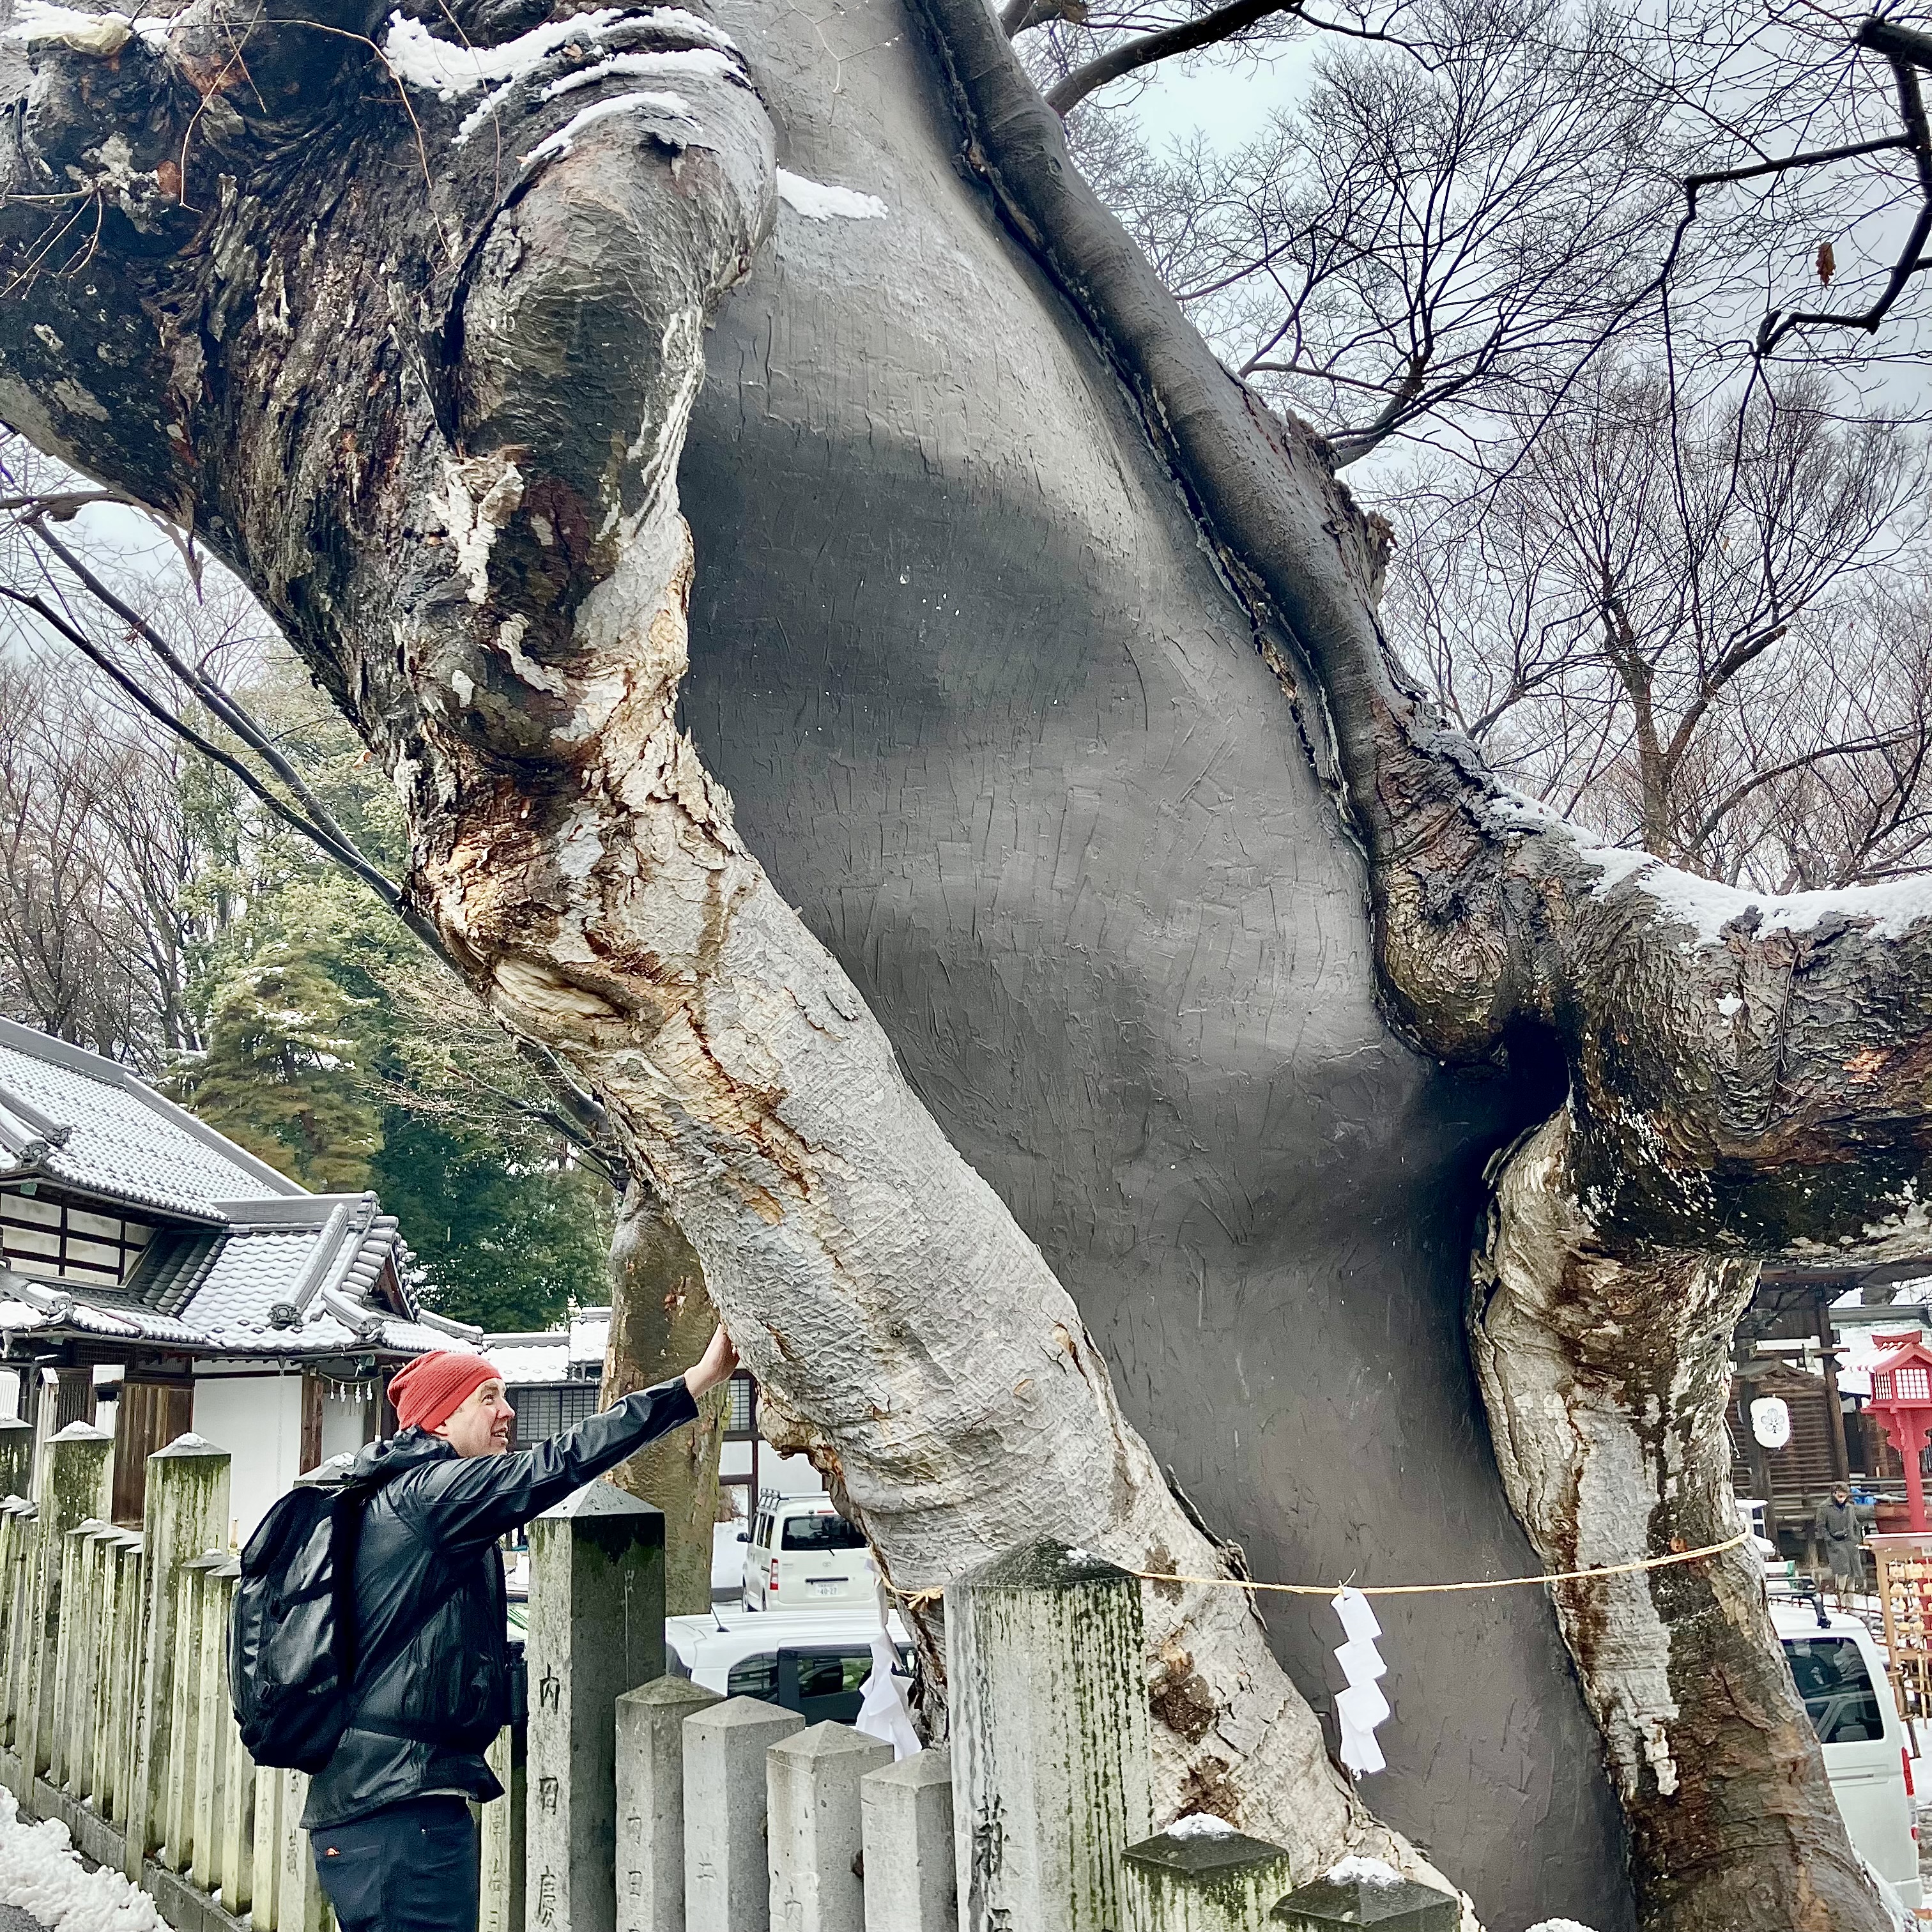
Evan with a ridiculous Zelkova. A concrete filling or something similar supports the hollowed trunk. The white paper zigzag in front of the trunk is called a shide. These protect from evil and purify a place, and its presence suggests the building beyond is a Shinto shrine.
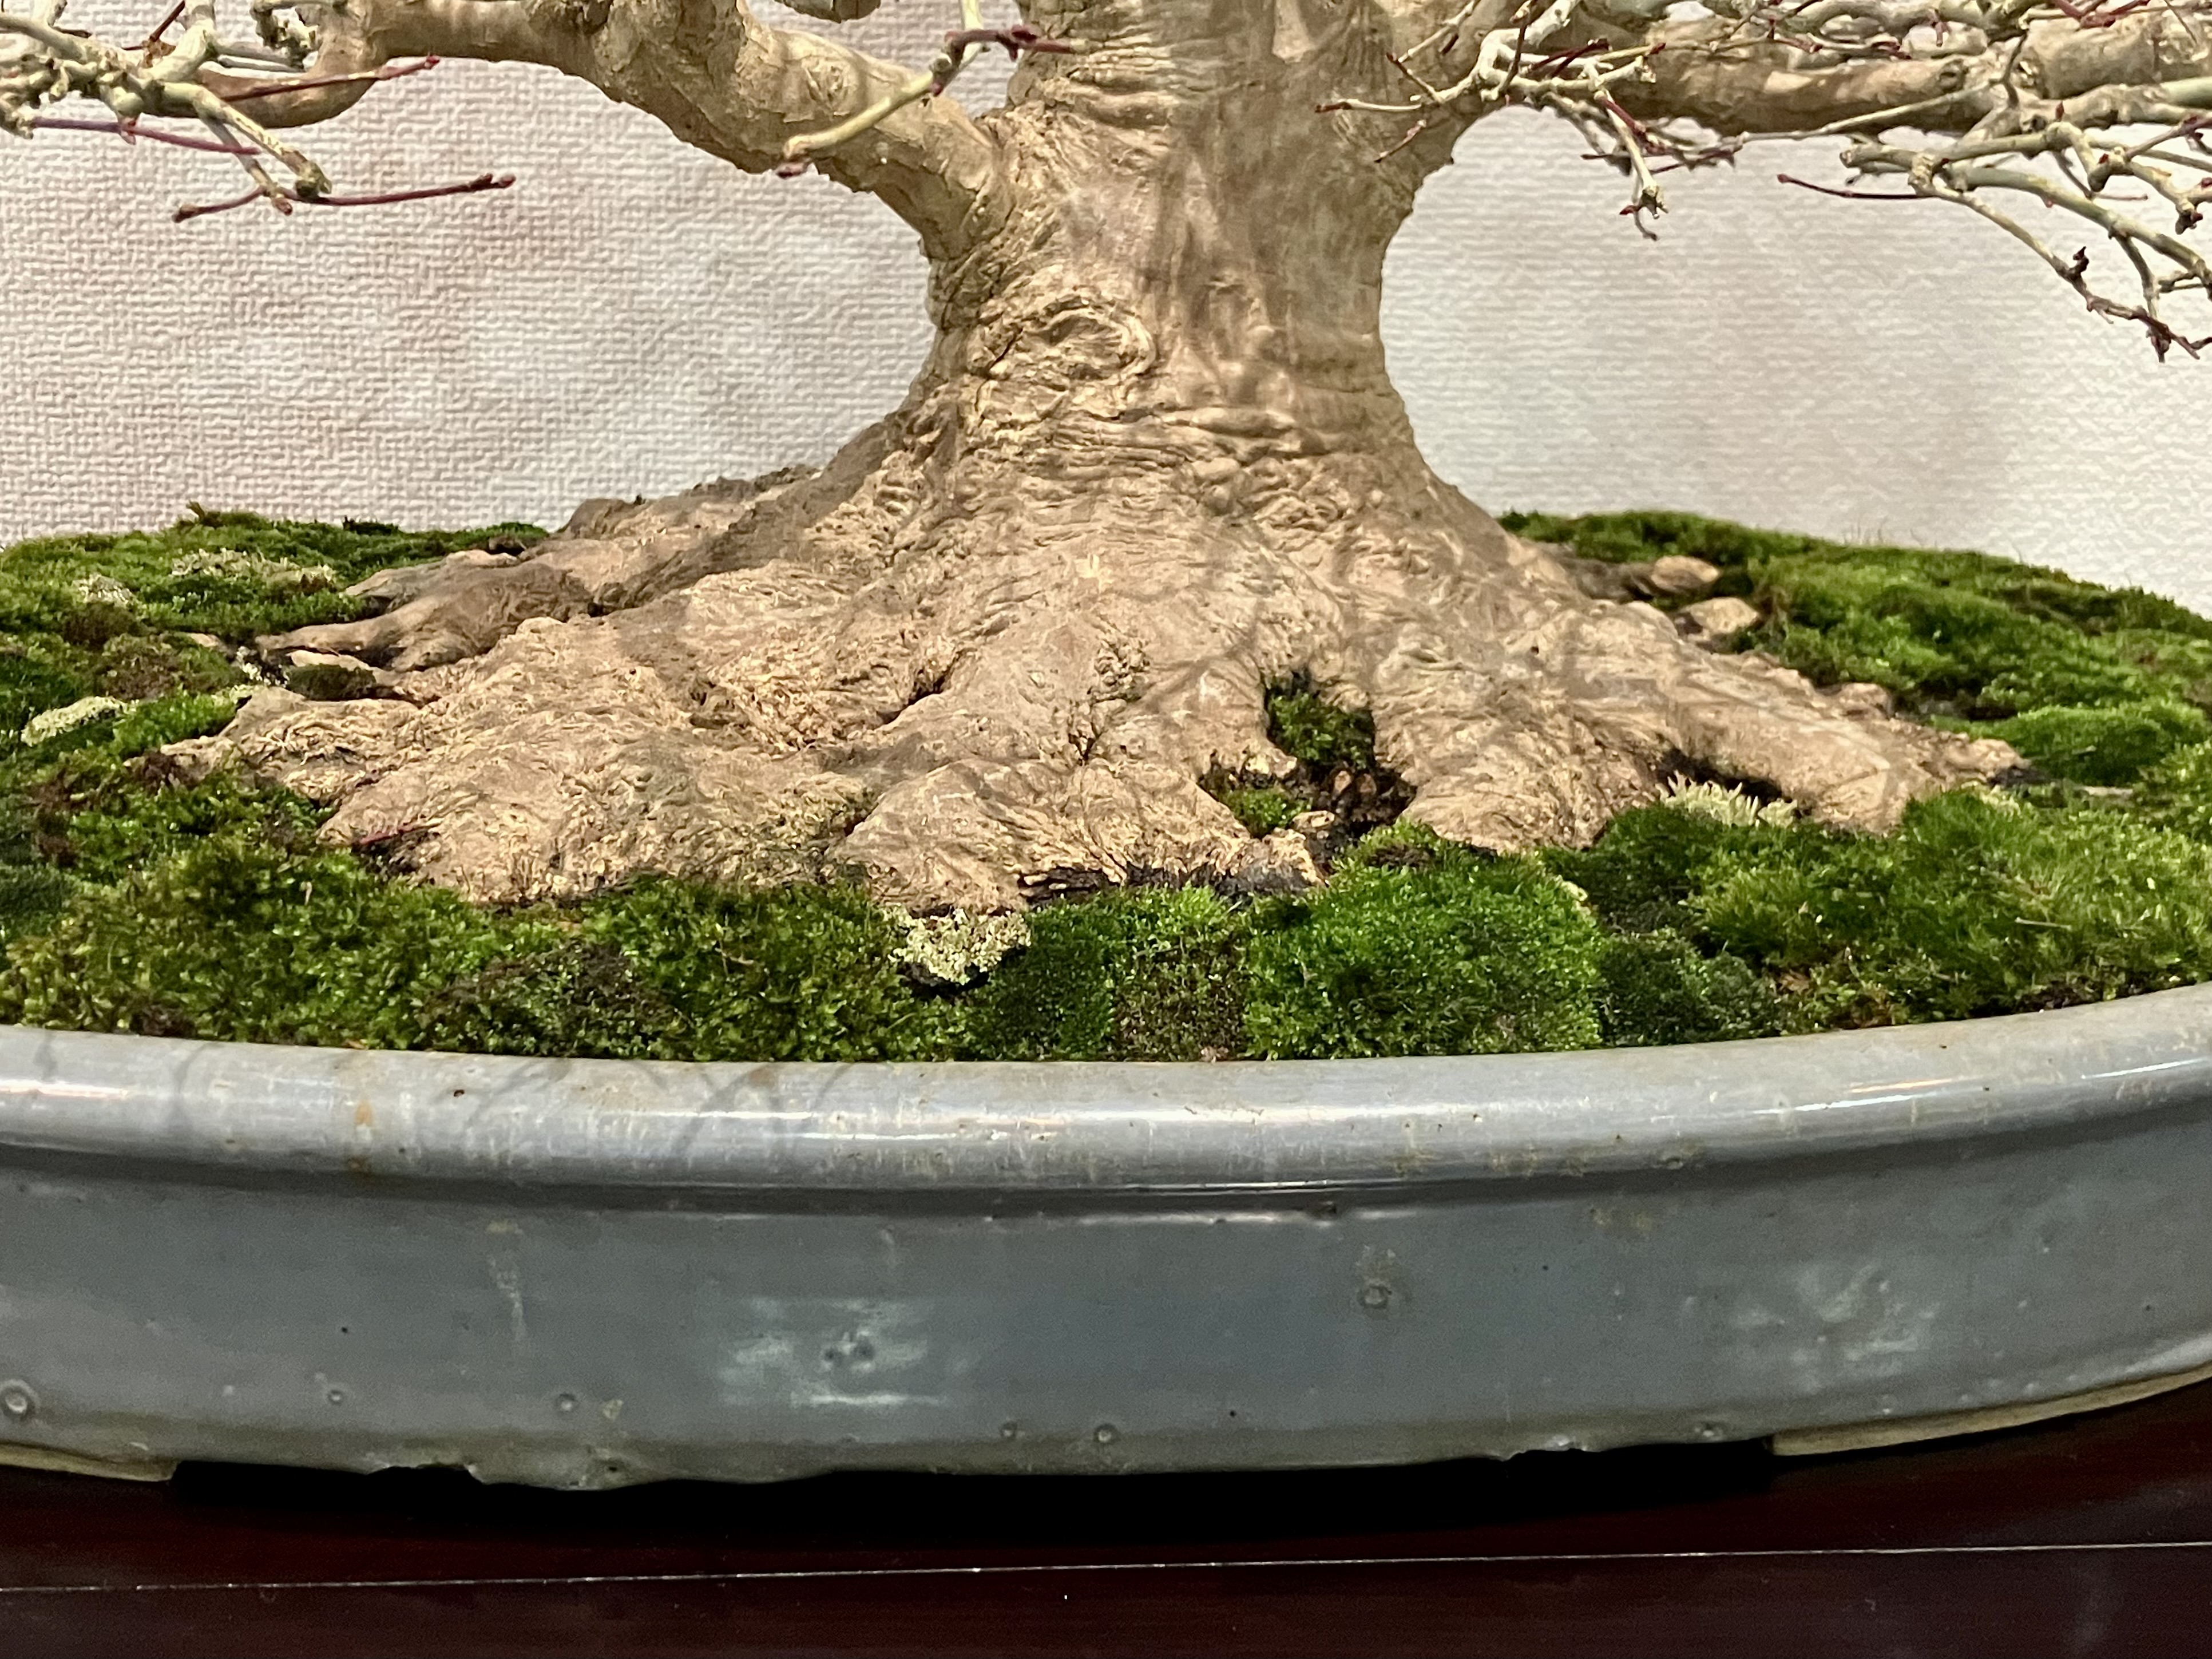
The Kokufu show is a goldmine. You can walk through it or flip through a show book and realize you’re just looking at the stands. Or the branch setting. Or the pots.
In this year’s Kokufu I took some closeups of the nebari. Here’s a handful of them.
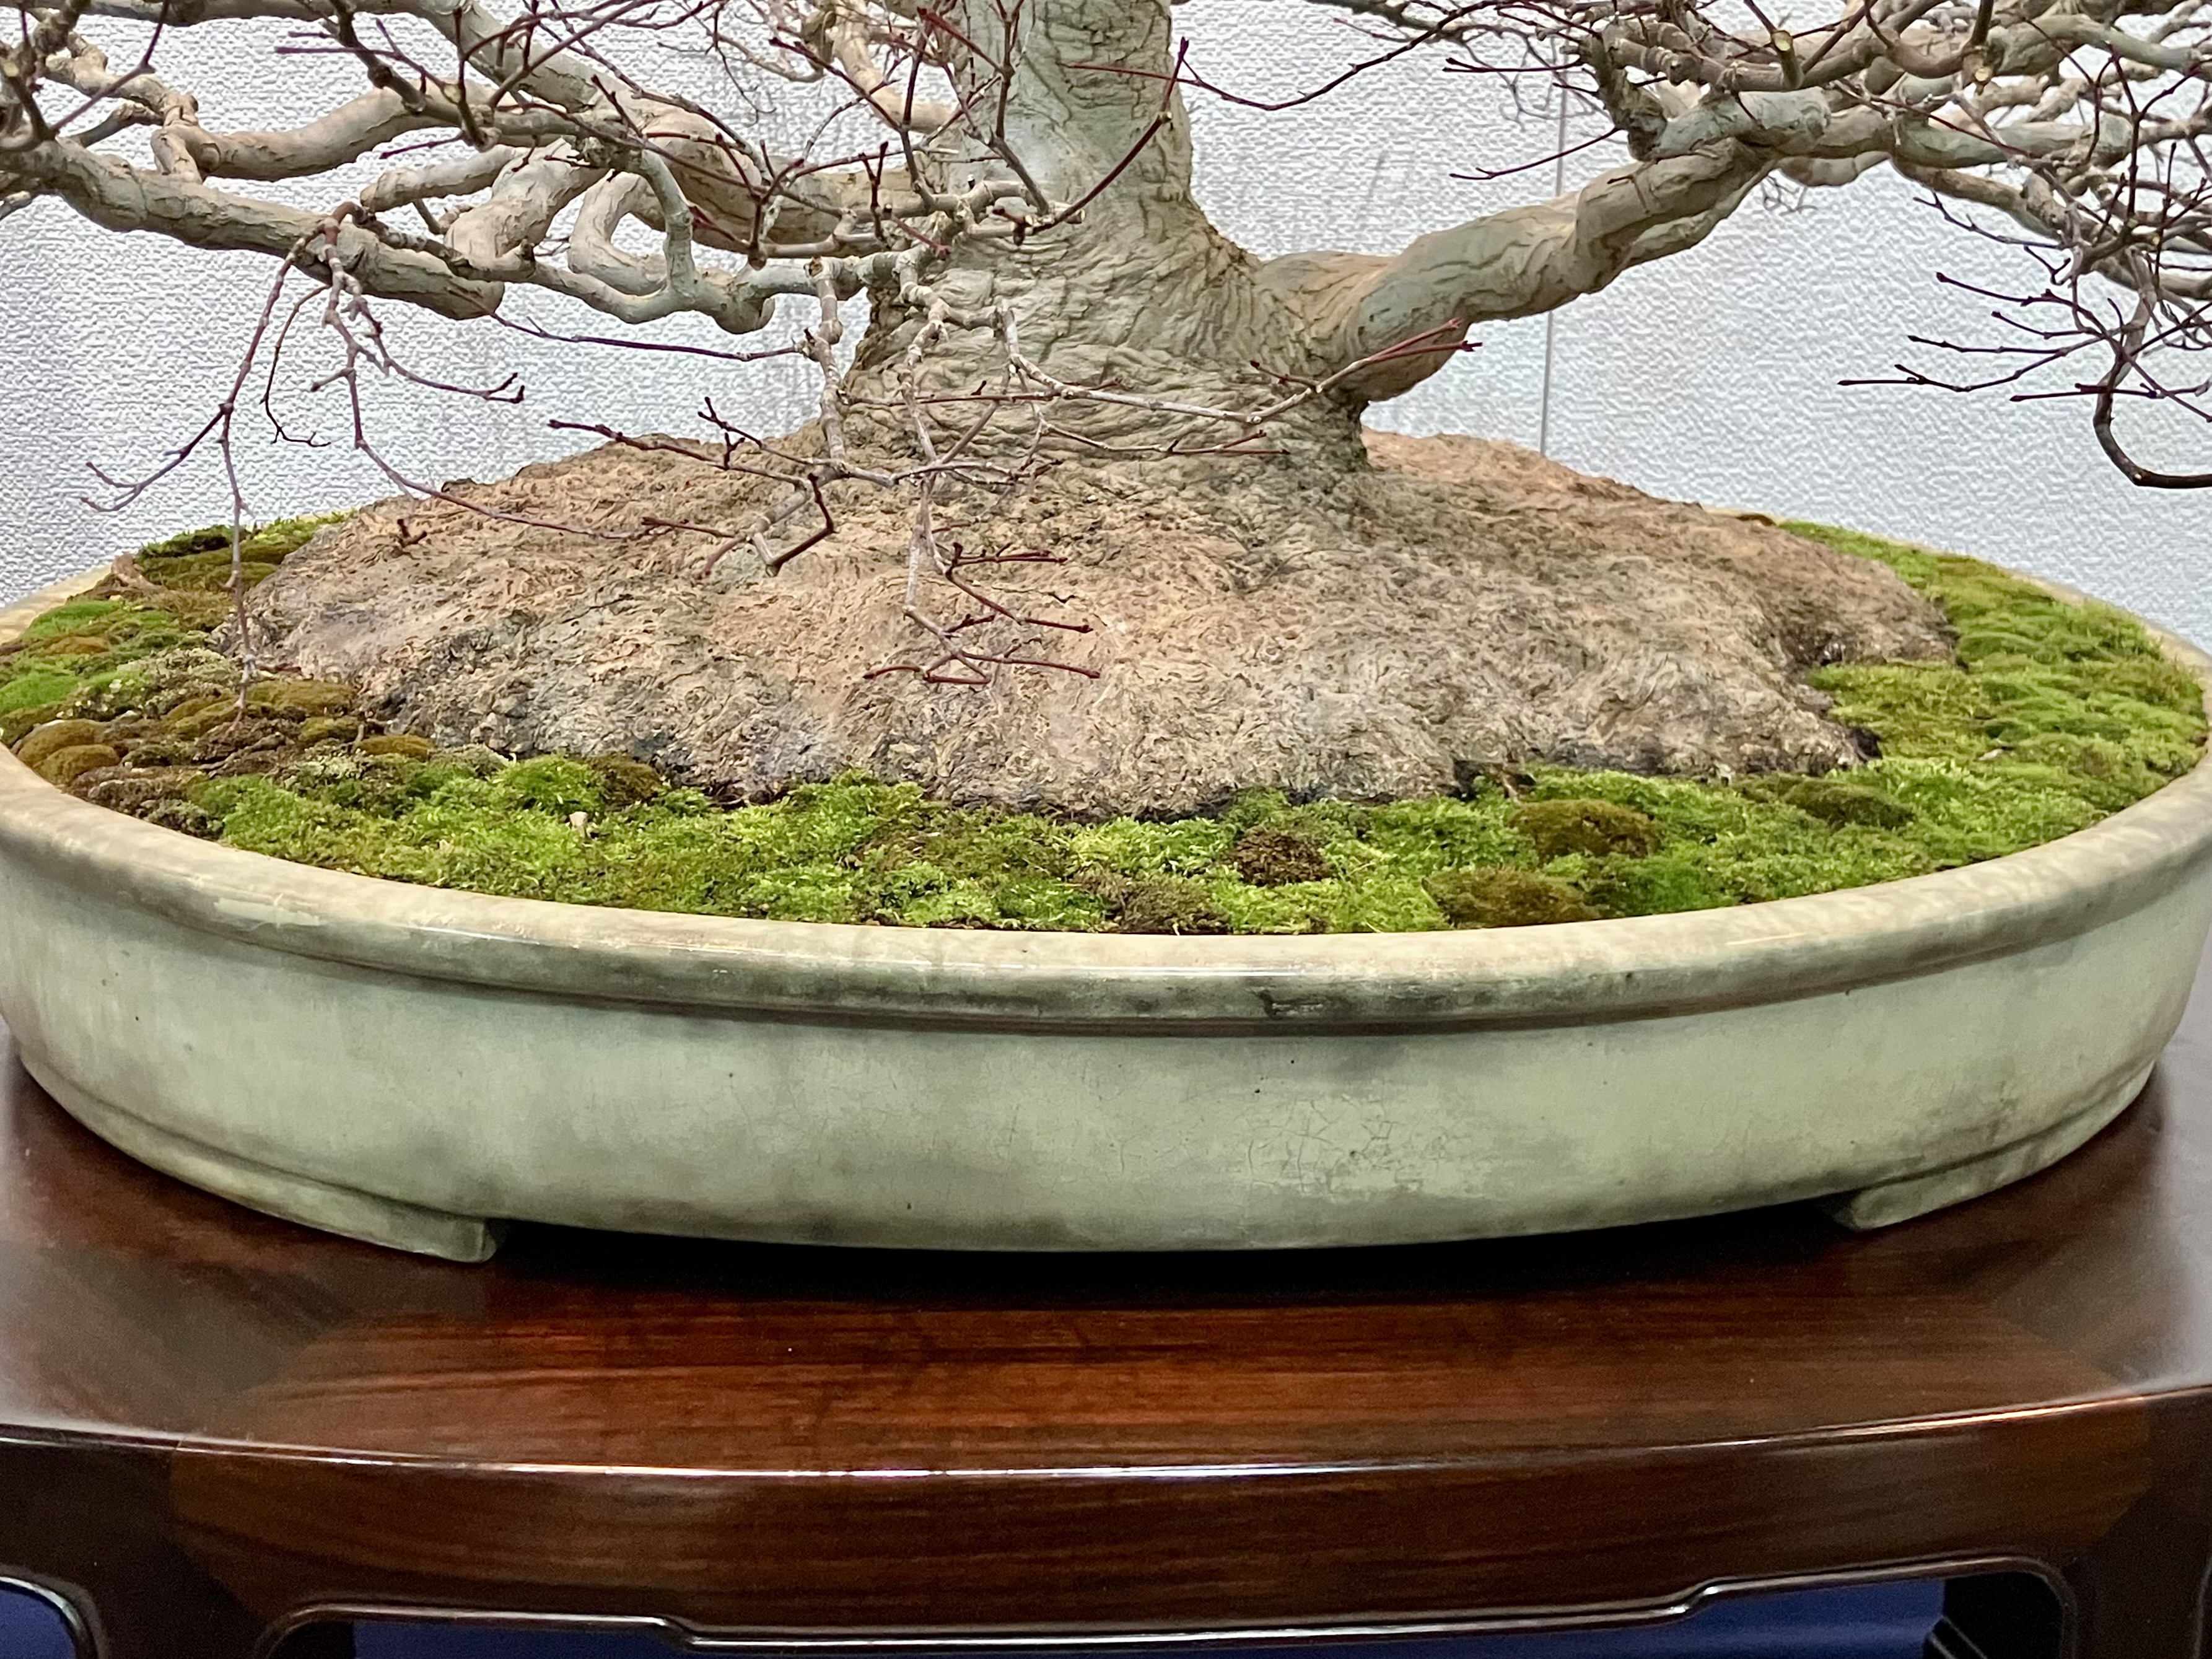
Japanese Maple with a wide, fused nebari. Hard to create without root grafting. Grafting is usually done by inserting a rooted cutting into a hole in the nebari, which will fuse and grow roots. Do that a LOT of times and you might make something like this. The extent of this root flare is a construct, a stylistic exaggeration that exists in almost any art.
Not to knock root grafting, a useful skill for sure.
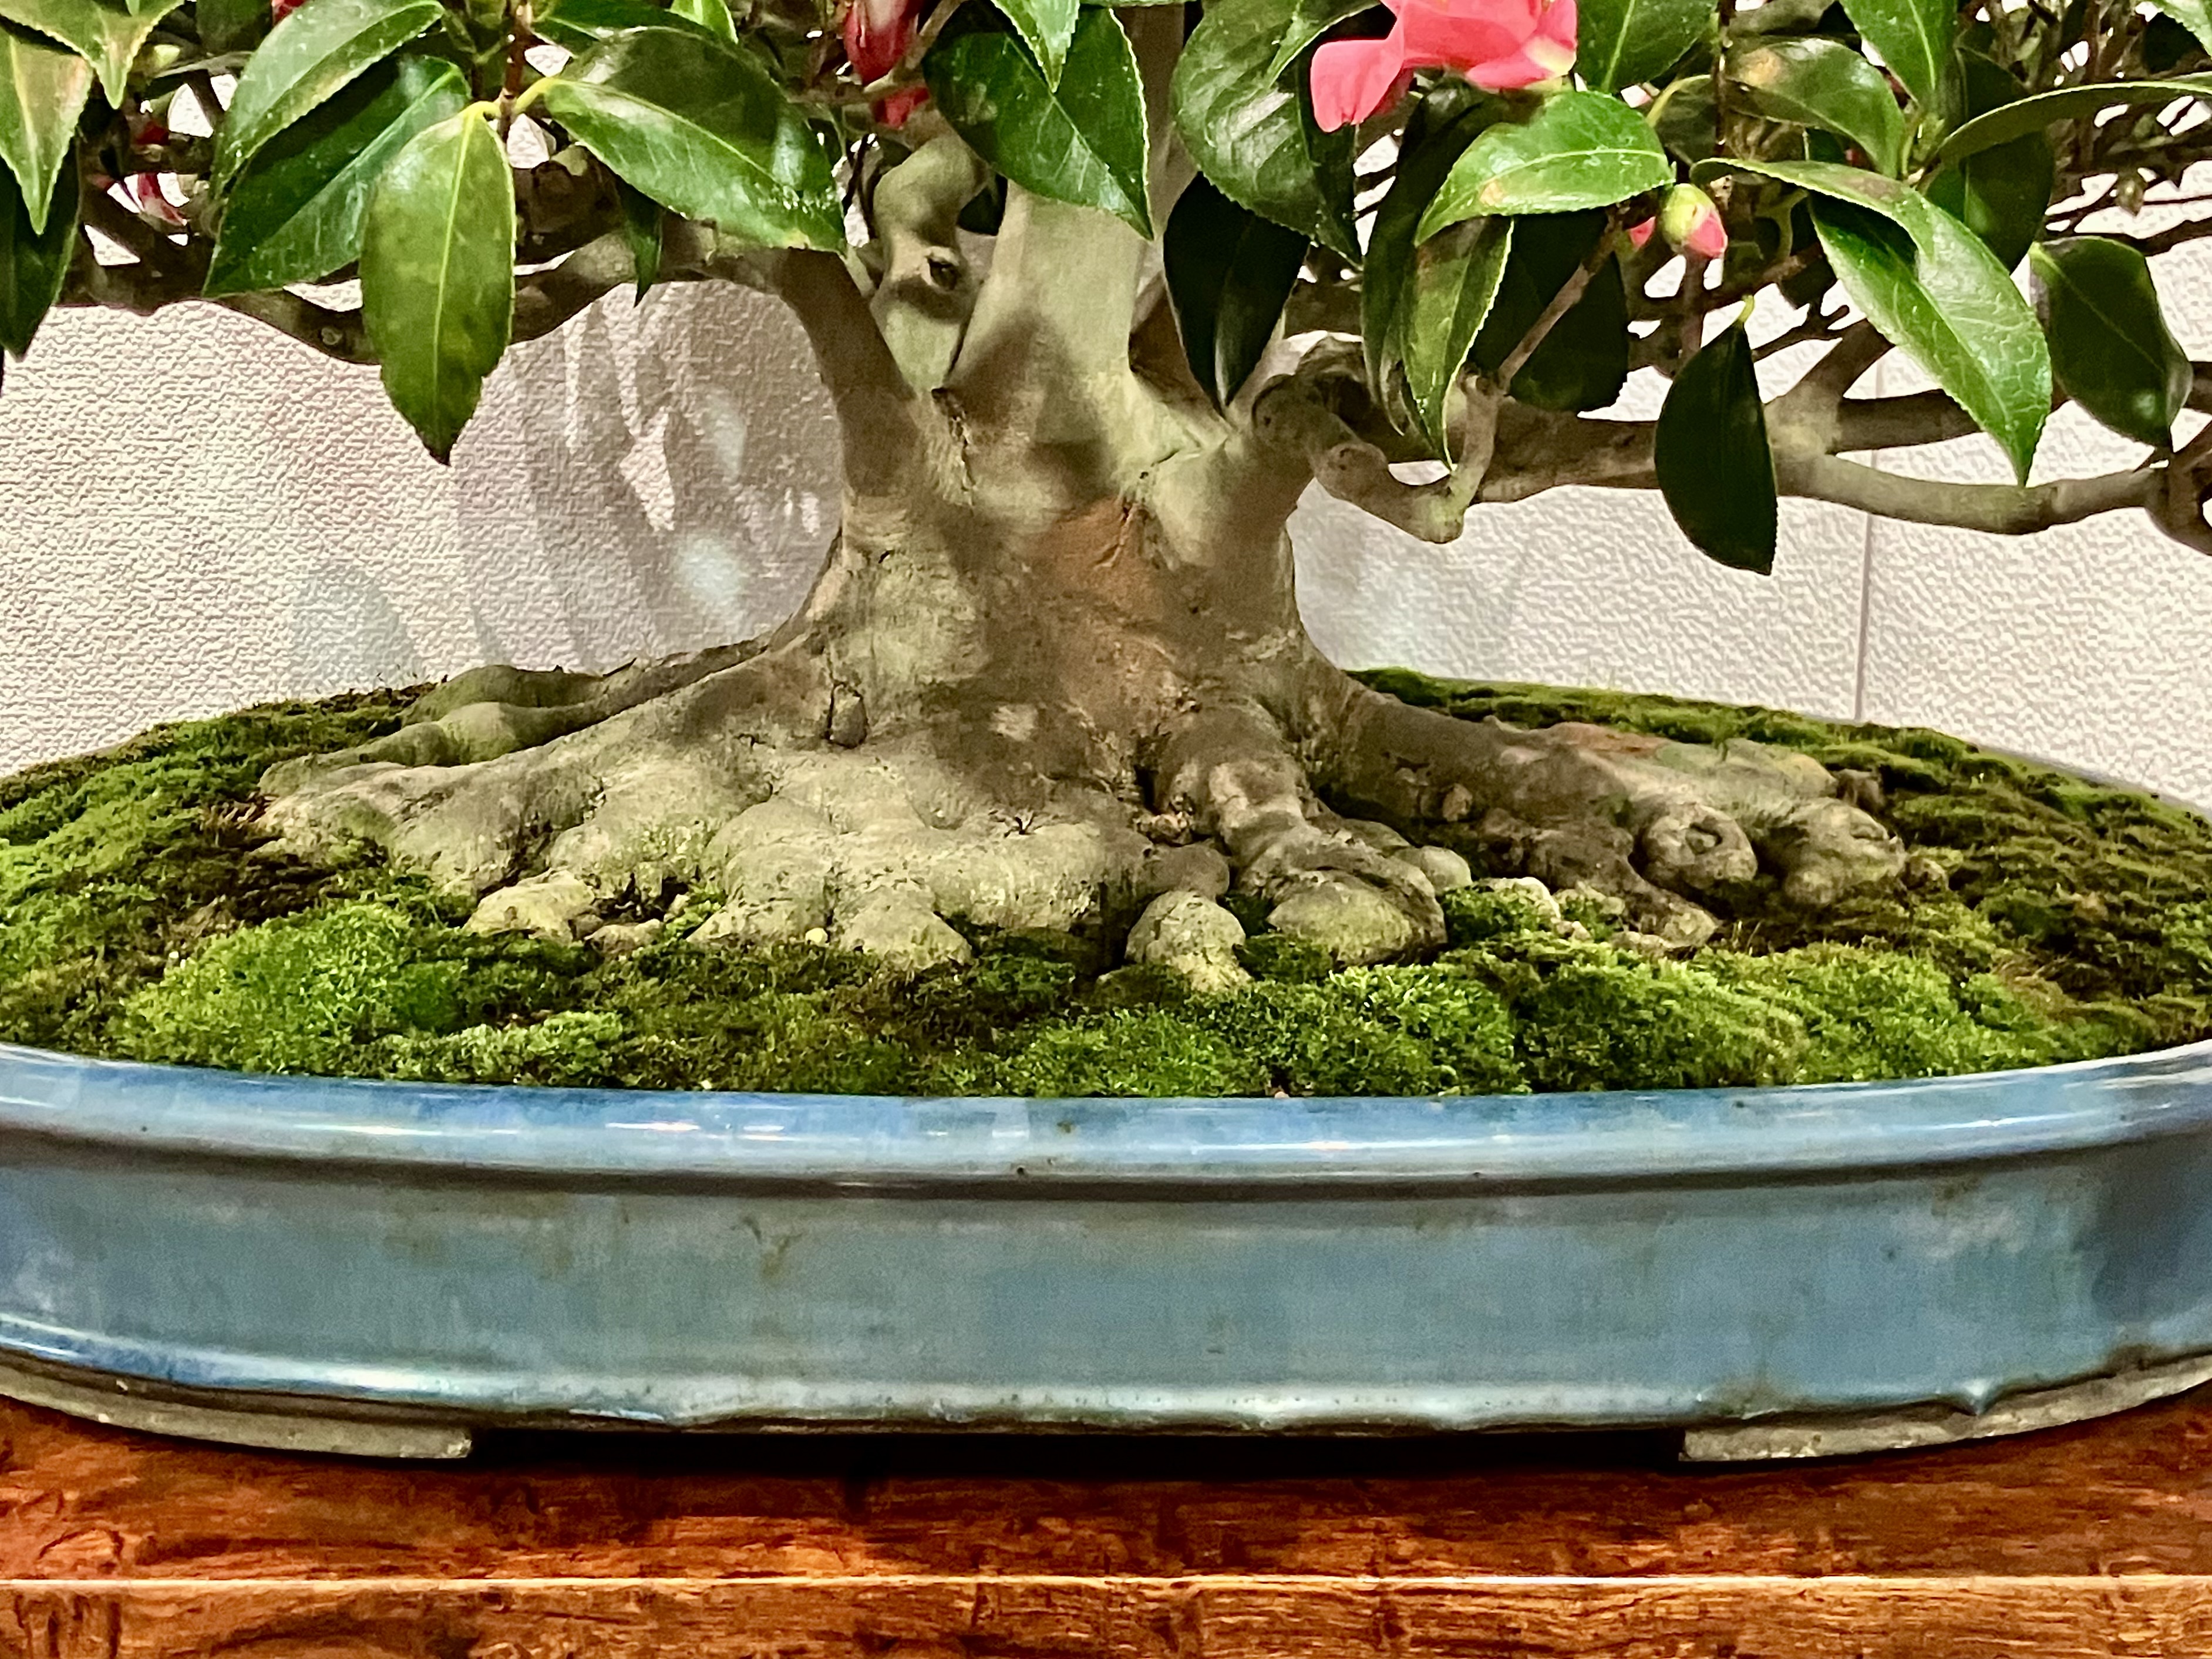
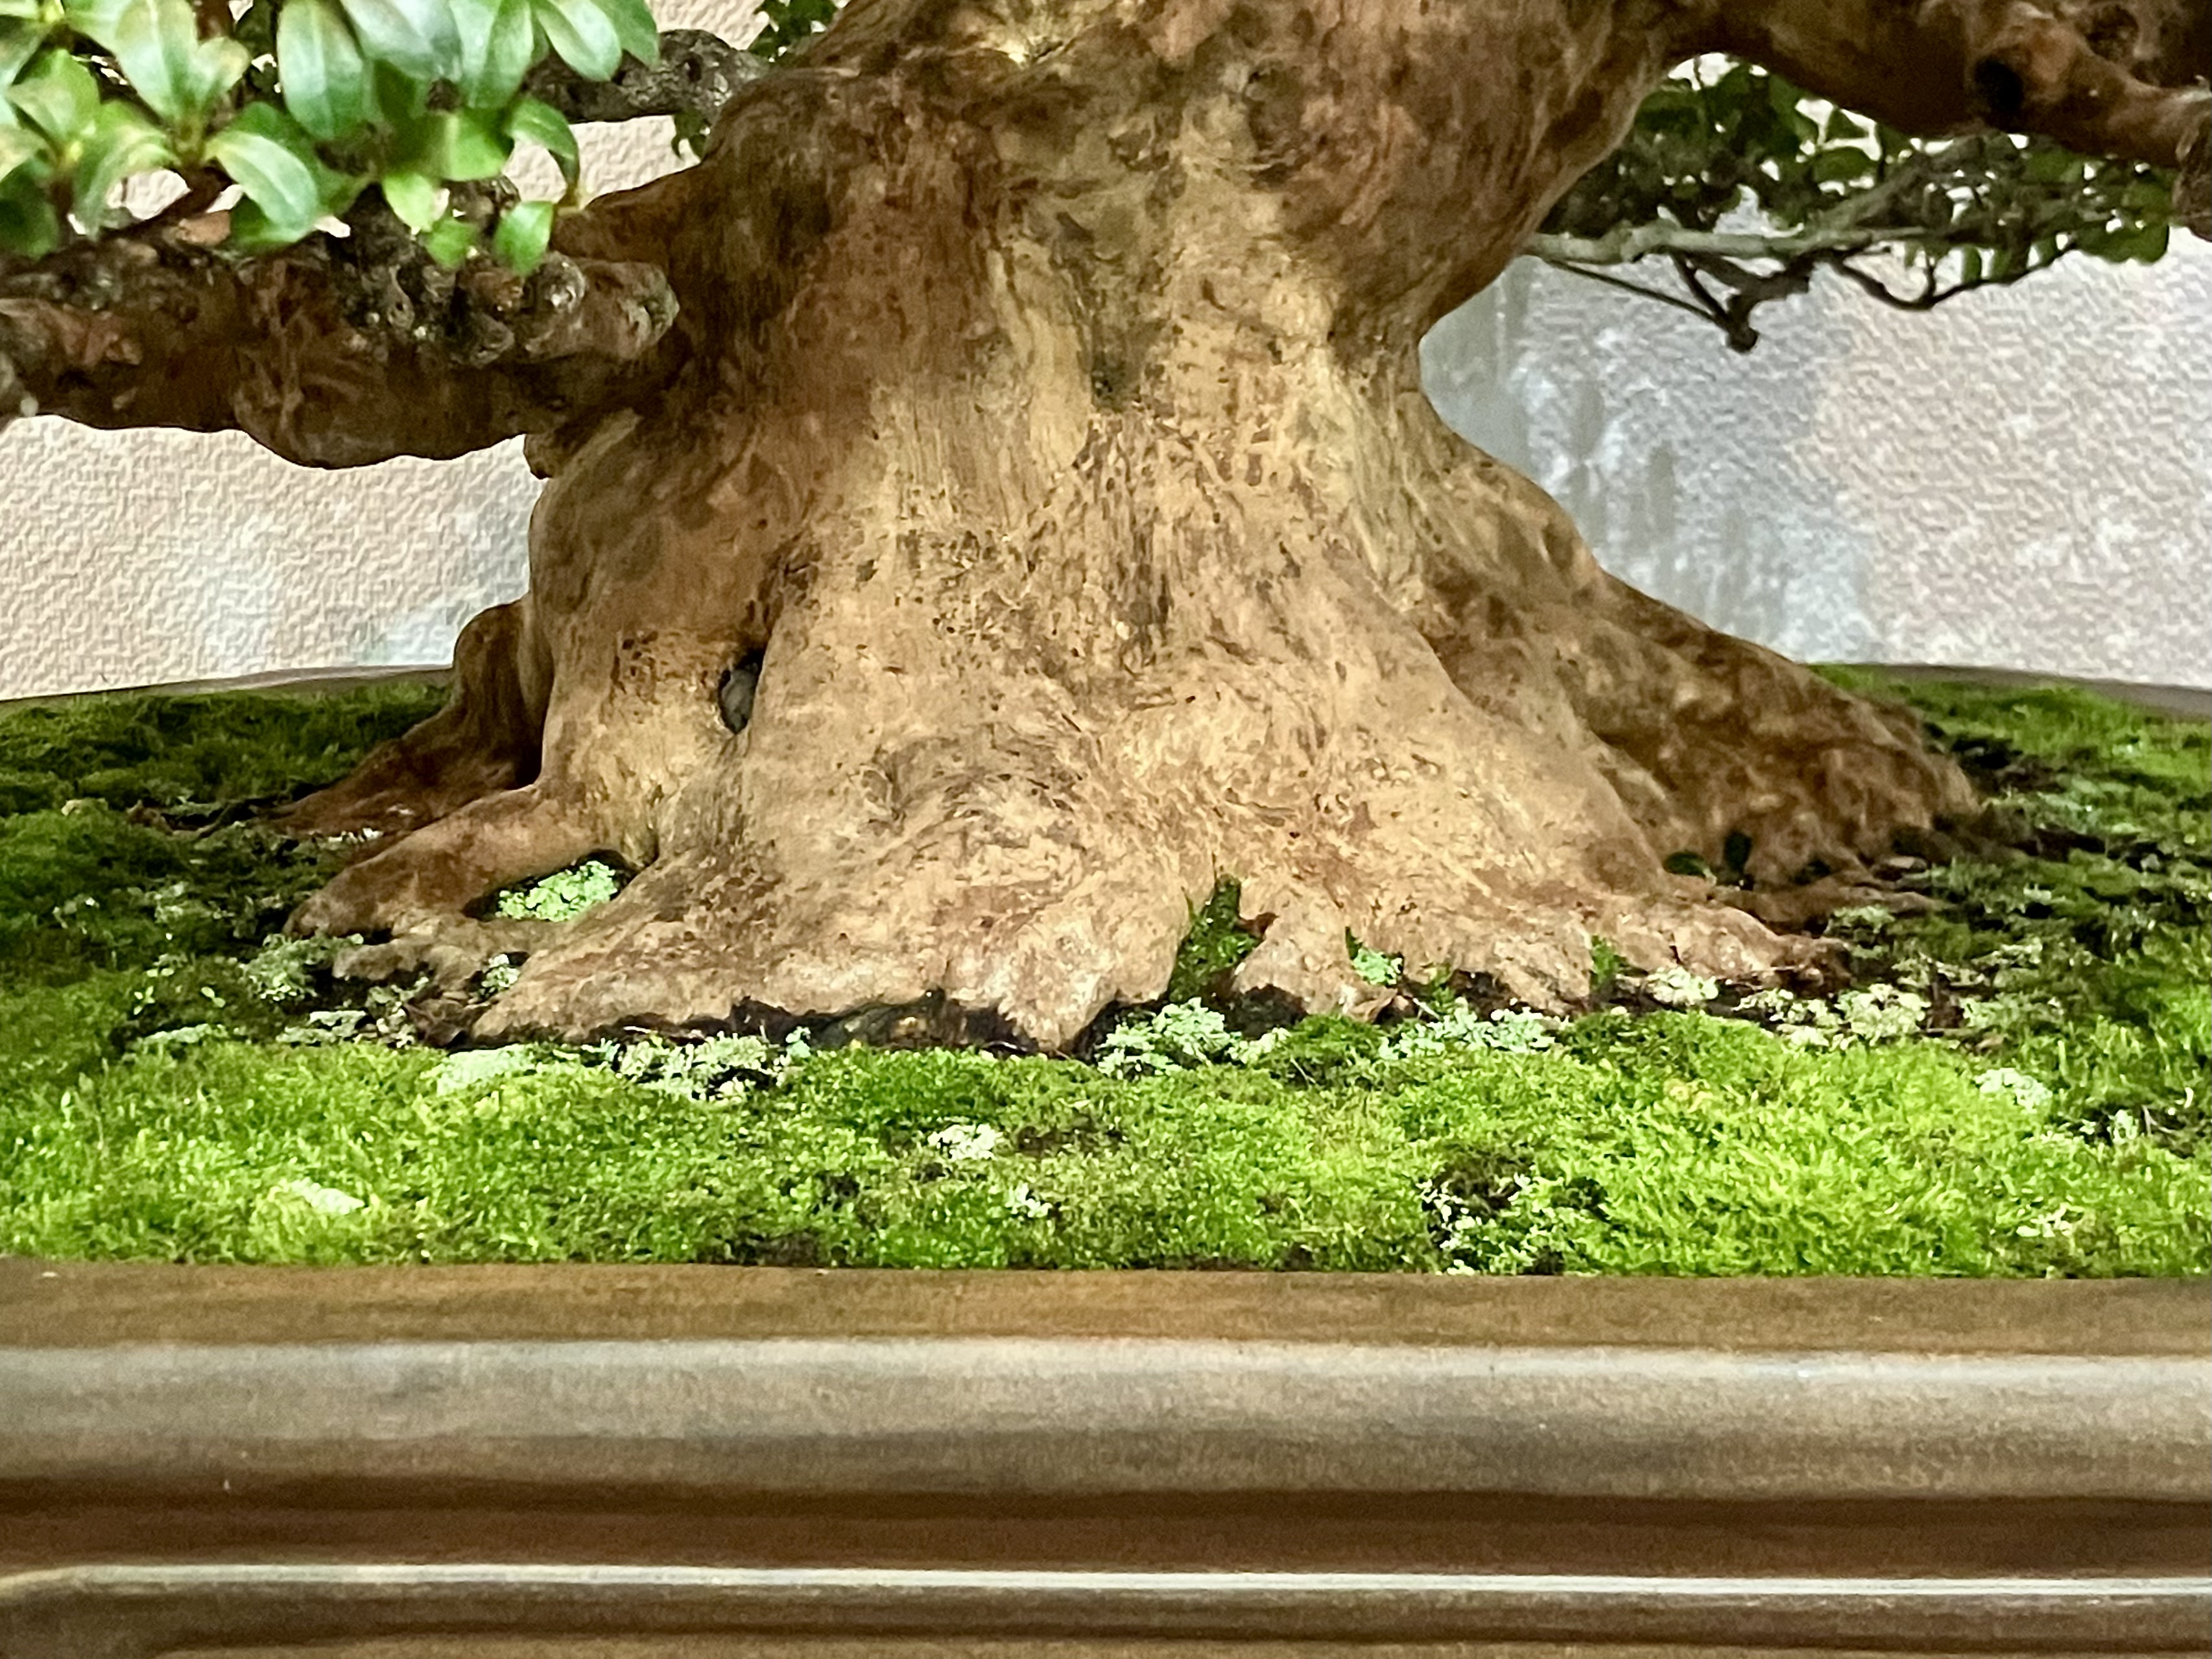
Camellia with a solid, broad nebari. It’s a lot, but not overdone. The tree feels stable.
Another Japanese Maple. To my sensibility, this is near ideal. It has a few holes in it, with minimal or no grafting. It looks natural.
An Azalea with a nice root flare. Like Maples, Azaleas will often create a respectable nebari without much fiddling. Just growing in a pot (rather than the ground) and either trimming the bottom roots hard under the trunk base and / or planting in a shallow pot can make a nebari like this. Although Azaleas prefer deeper pots, so the root trim technique would get the nod here.
You do see non-impressive—or absent—nebari in the Kokufu. This is a Trident Maple.
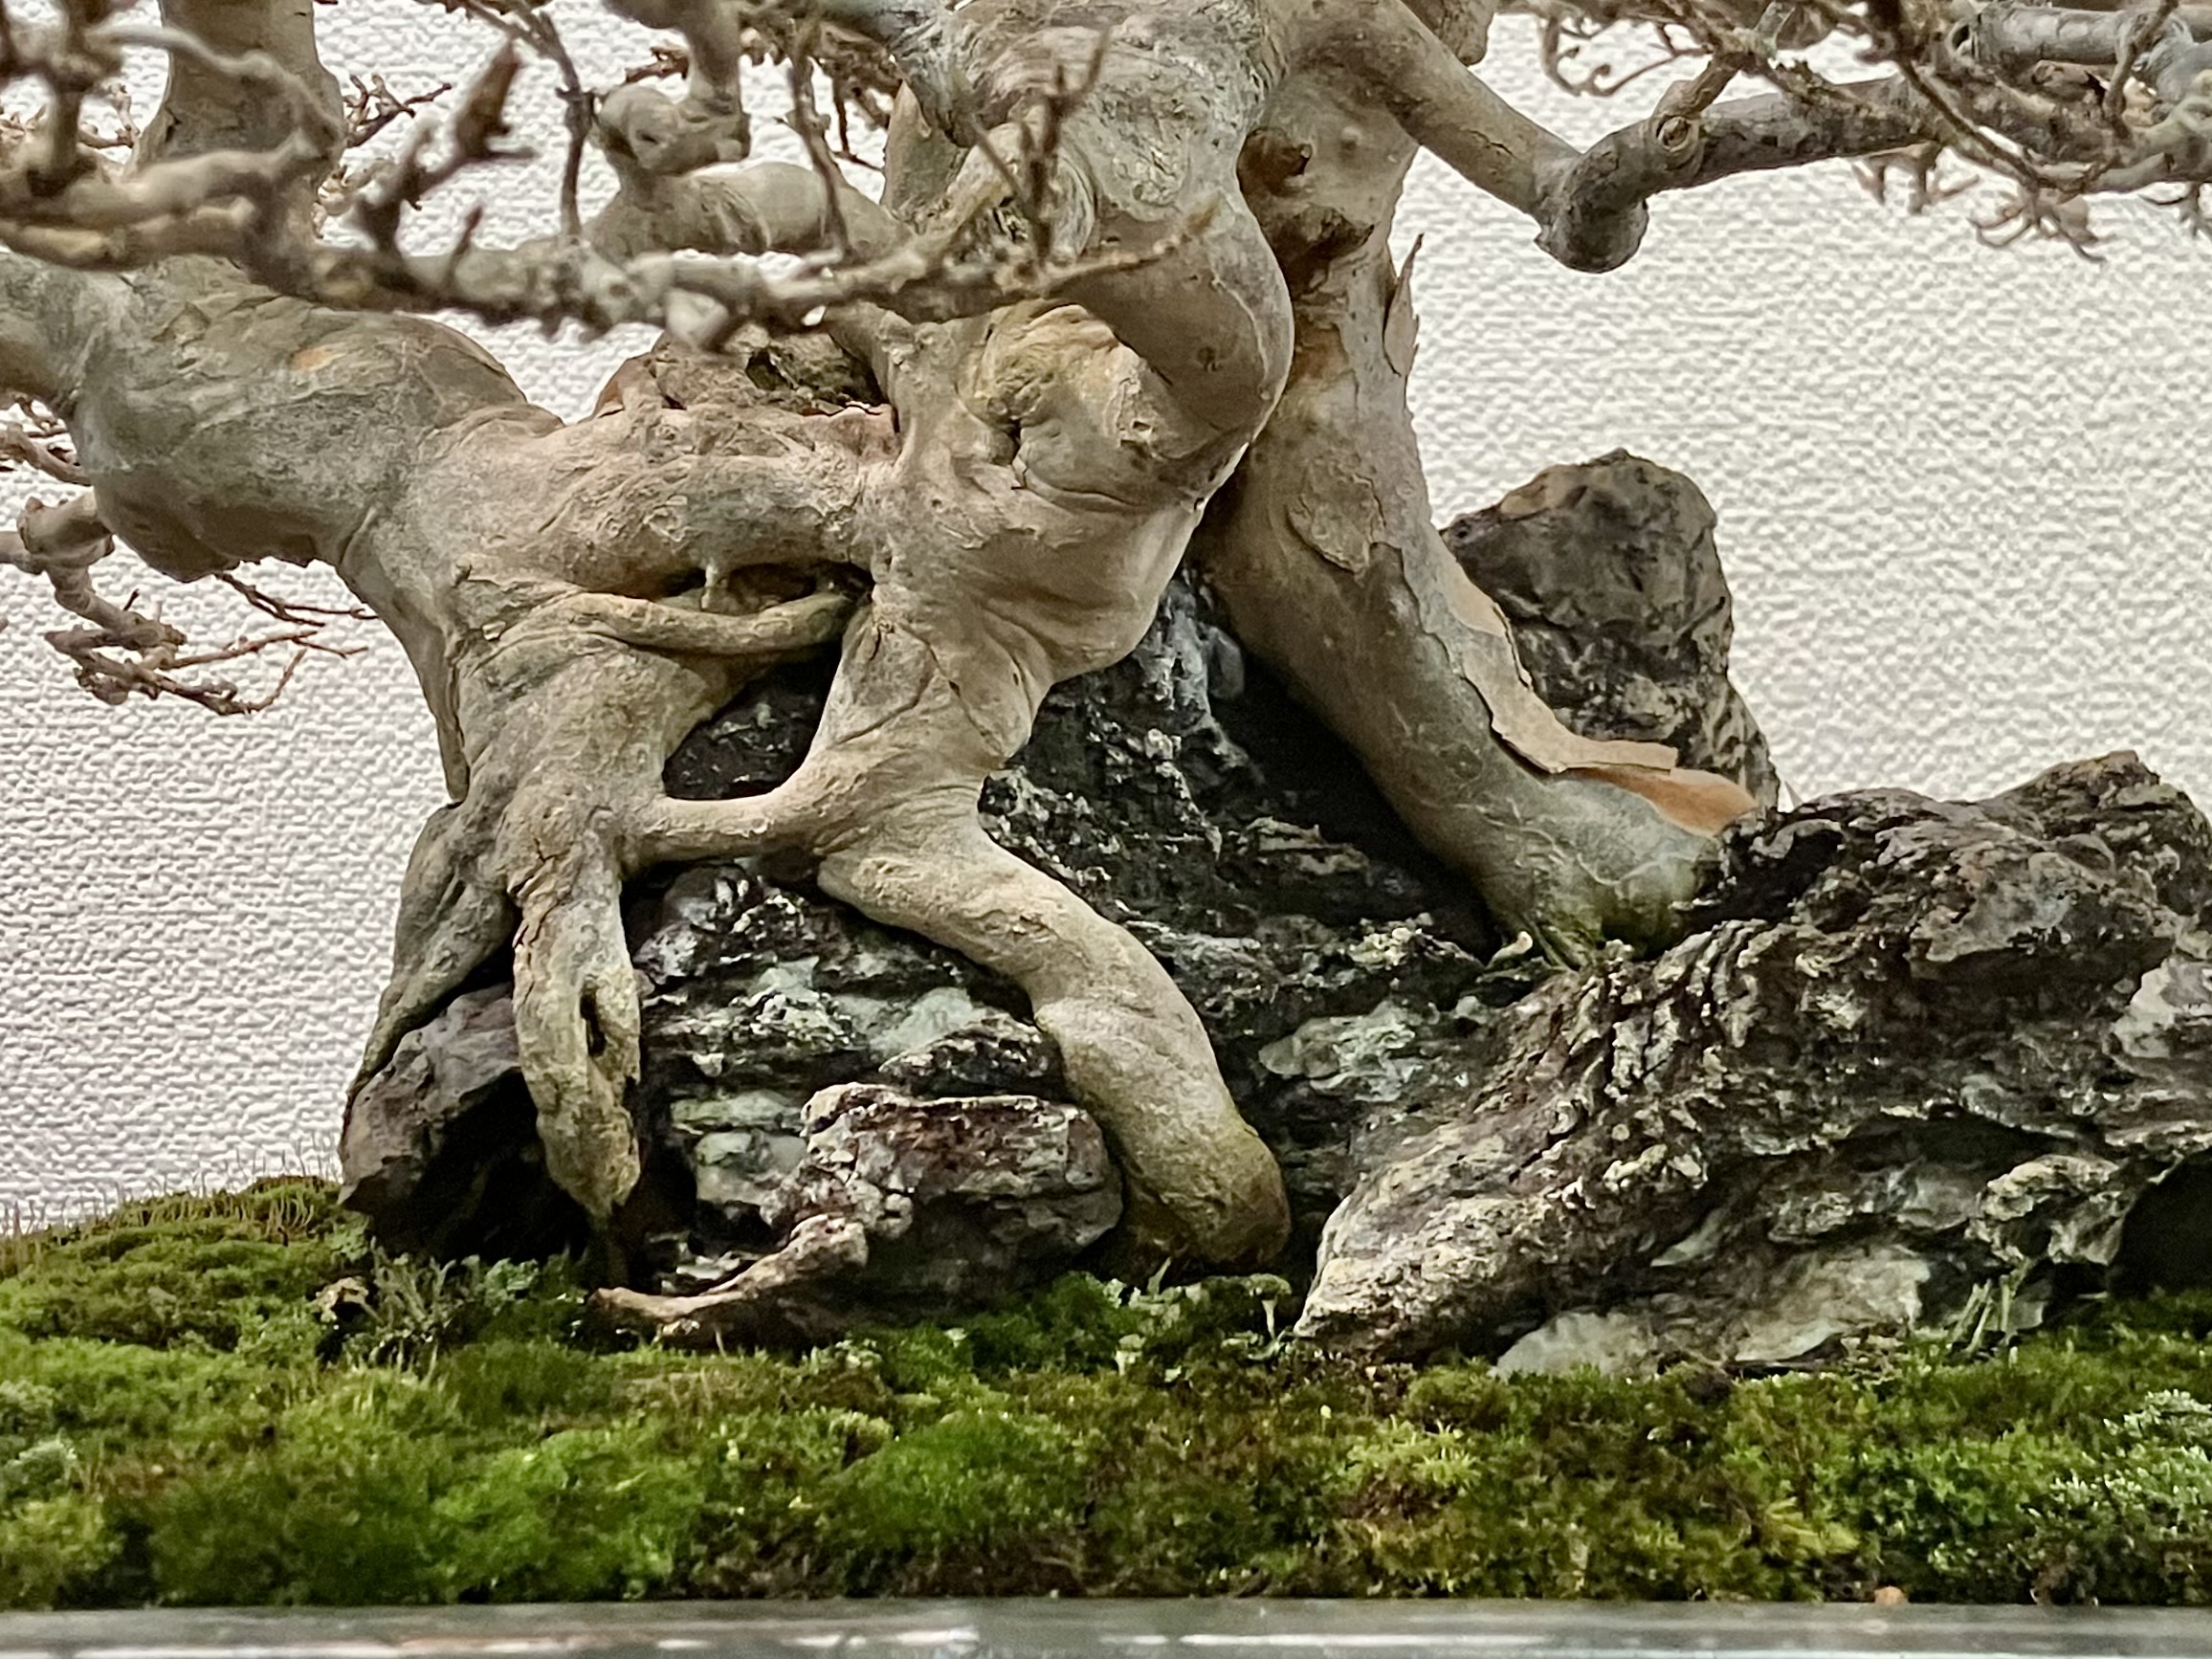
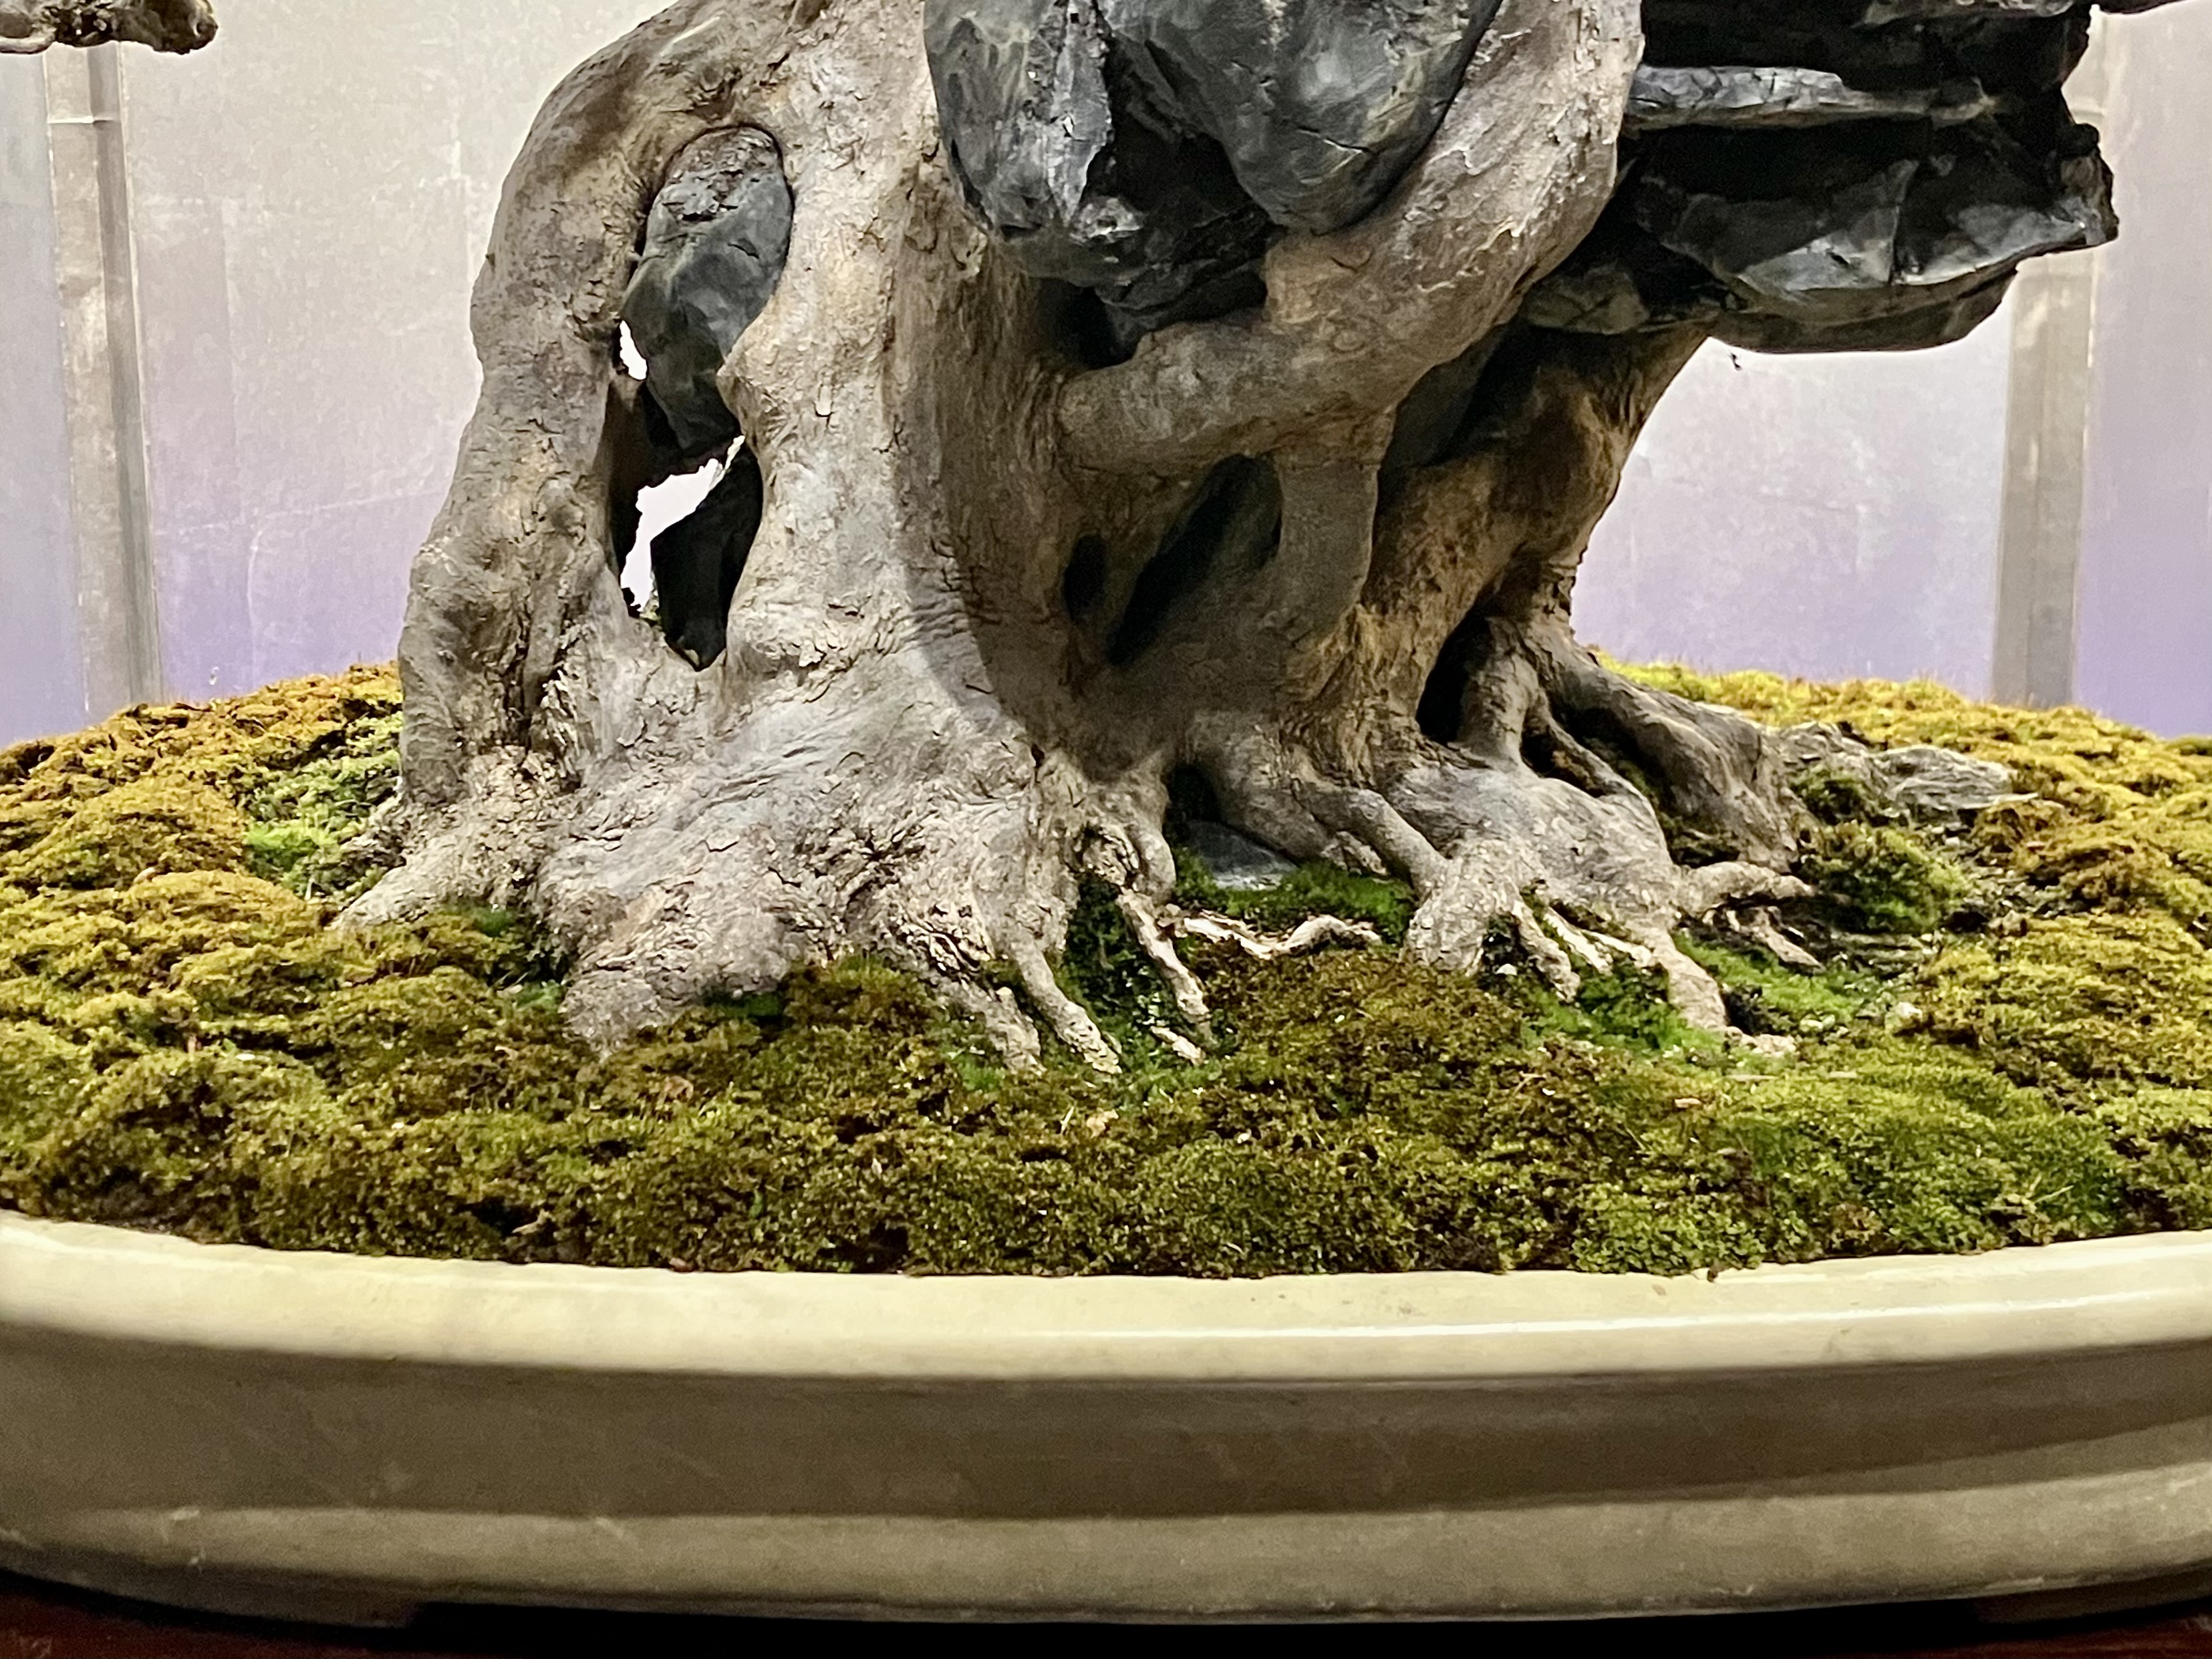
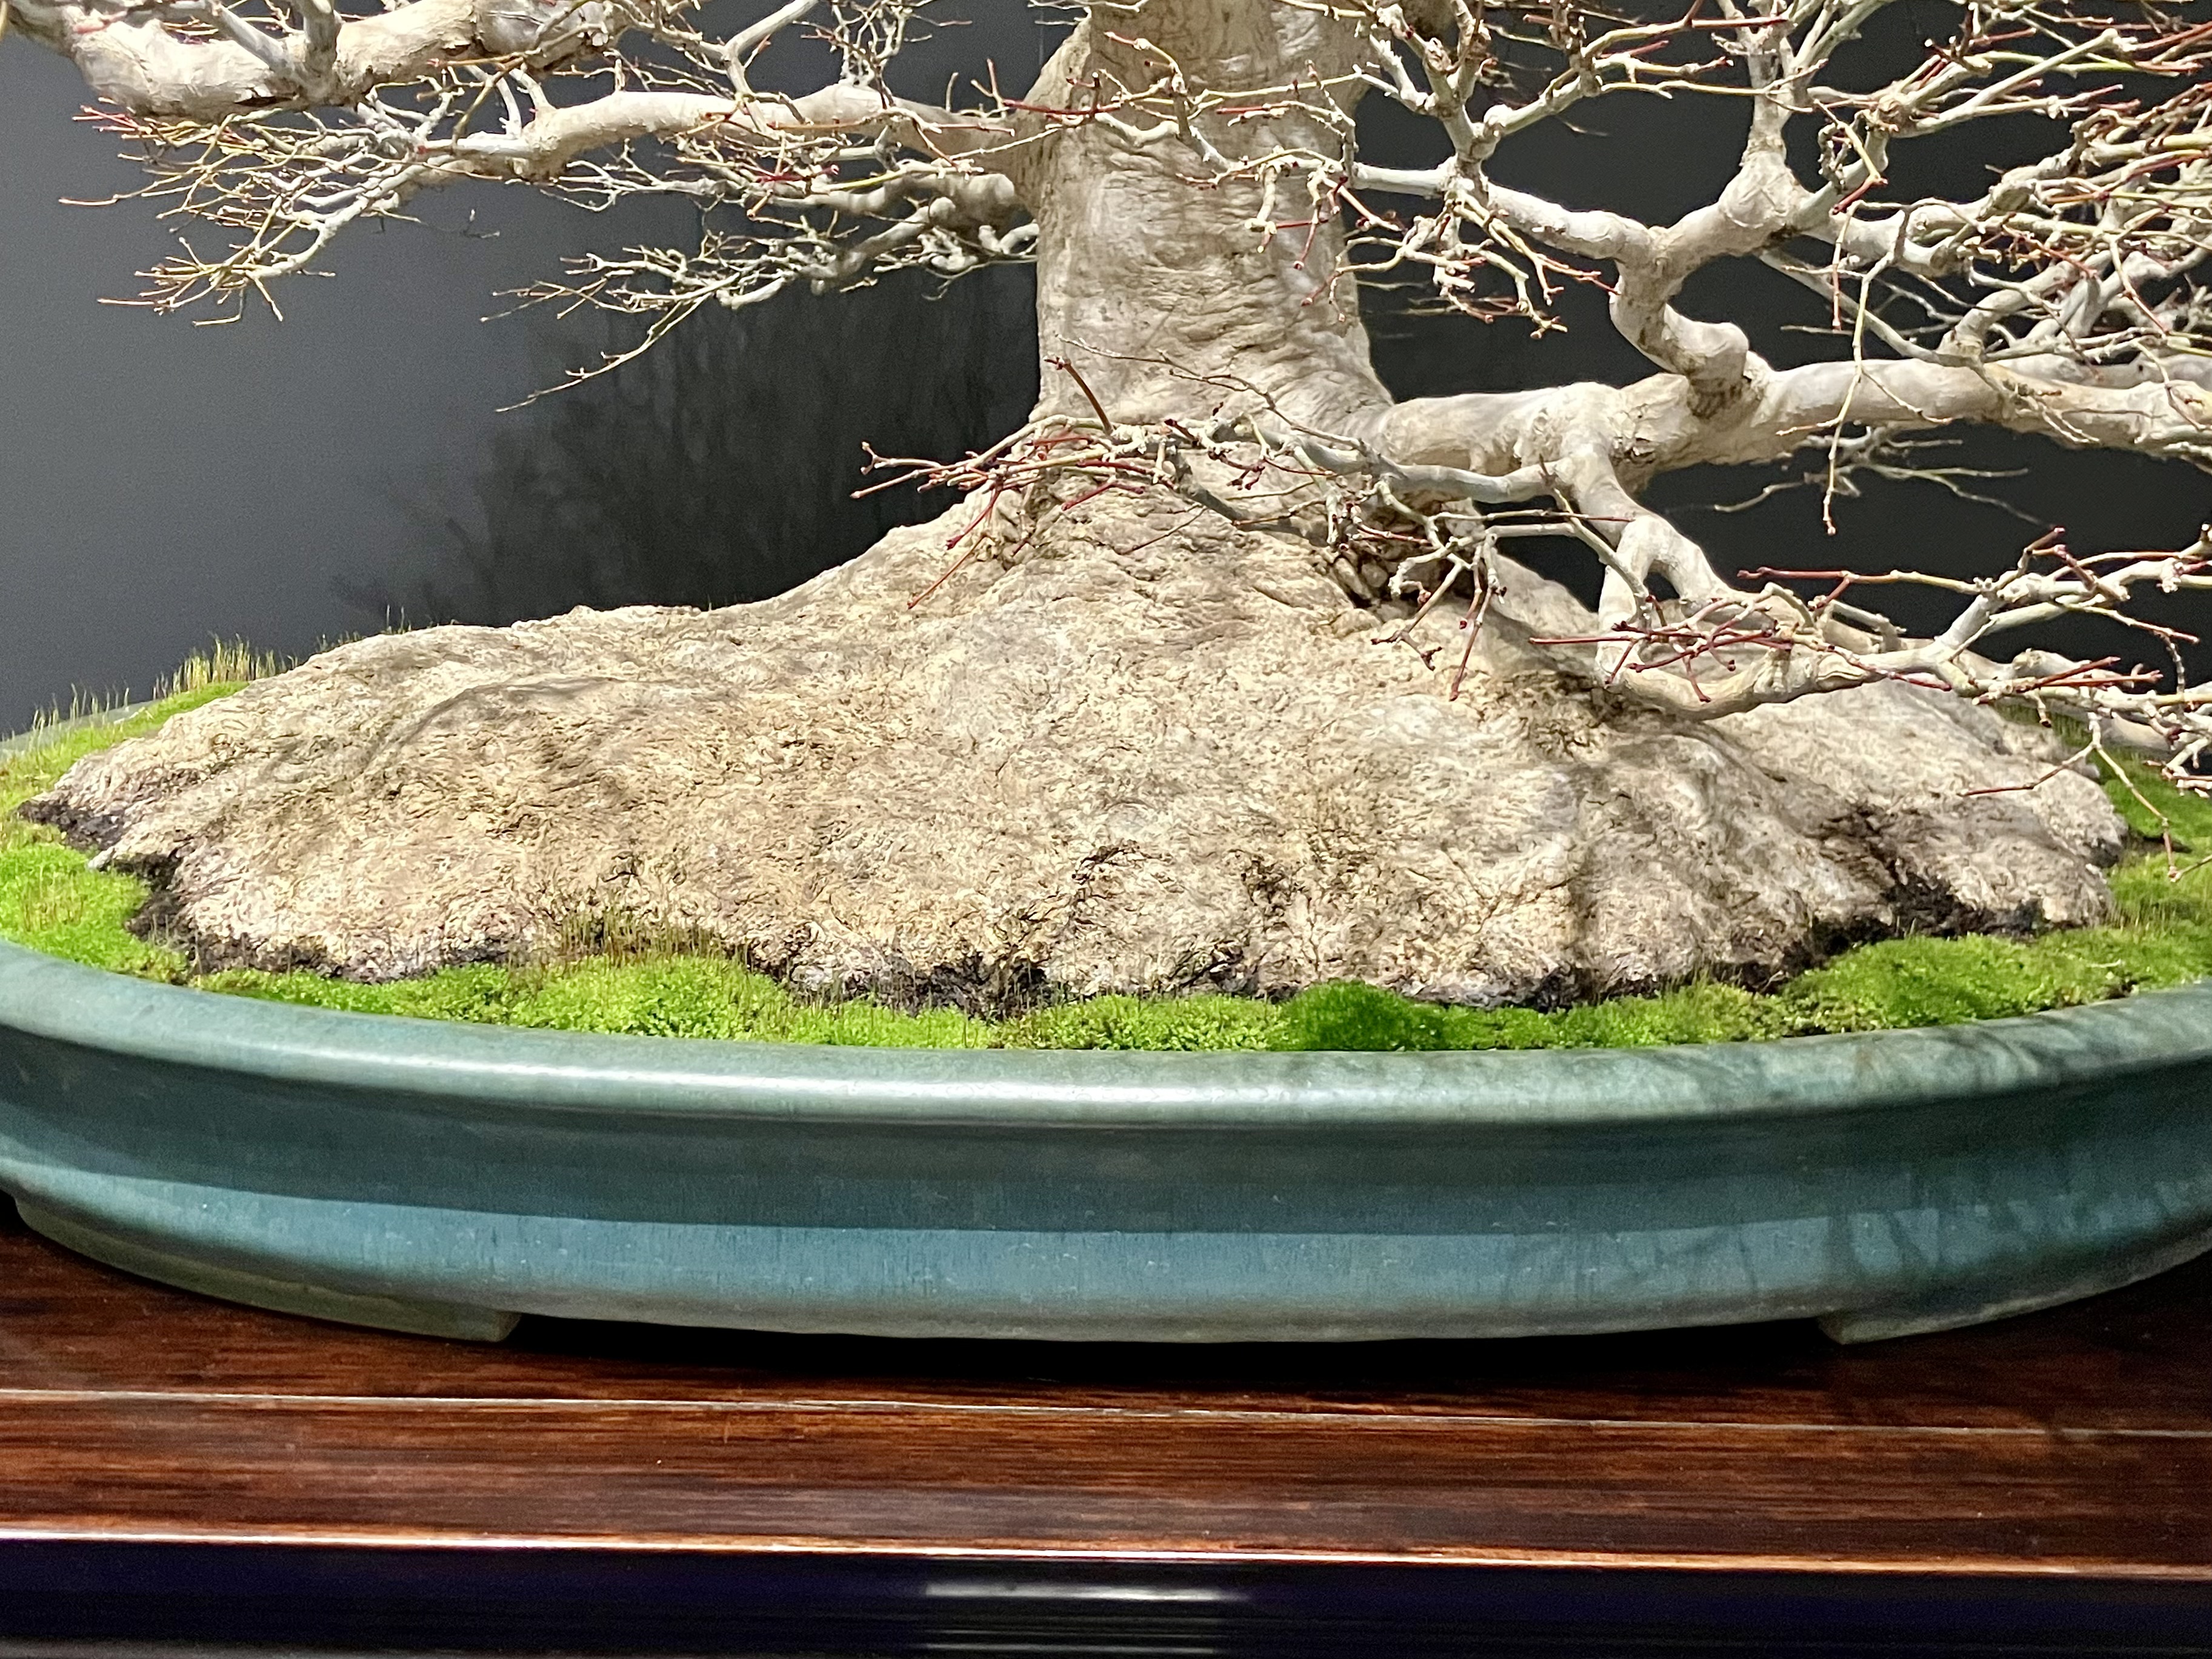
Another root-over-rock Trident but with a more mature root structure.
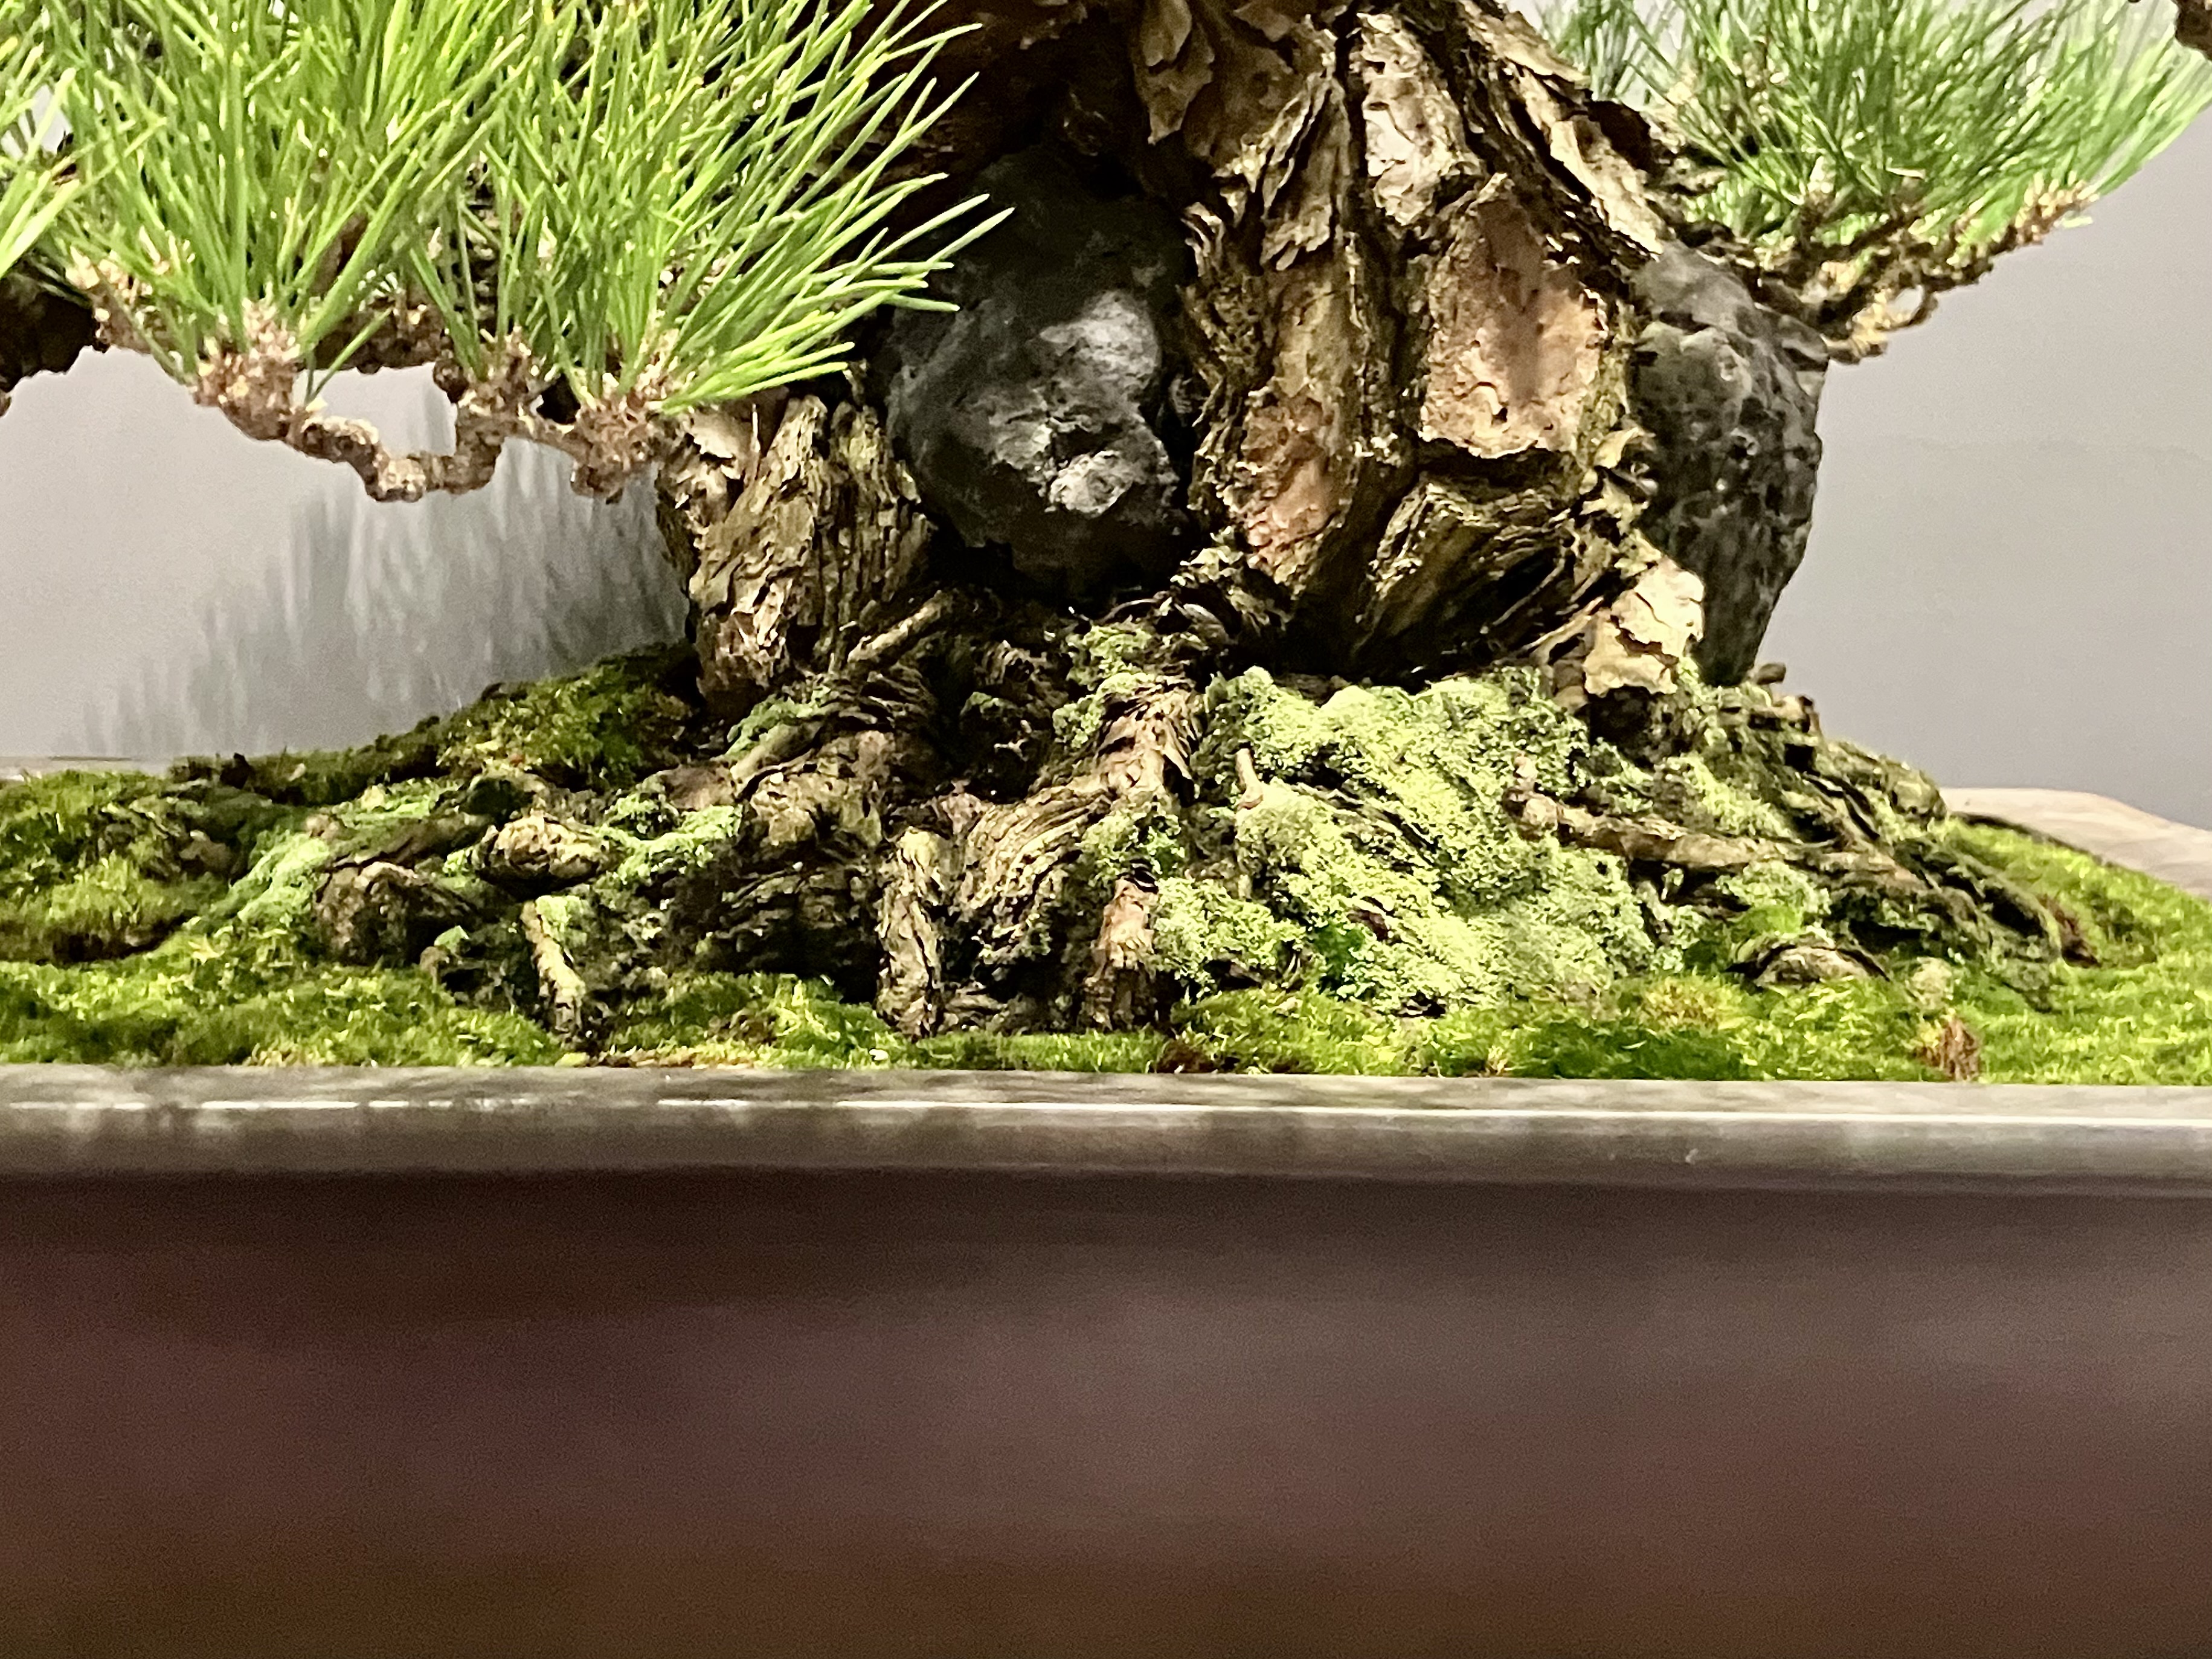
A Pine with a respectable nebari. Also a root over rock. Nebari tends to be minimal on root over rock plantings.
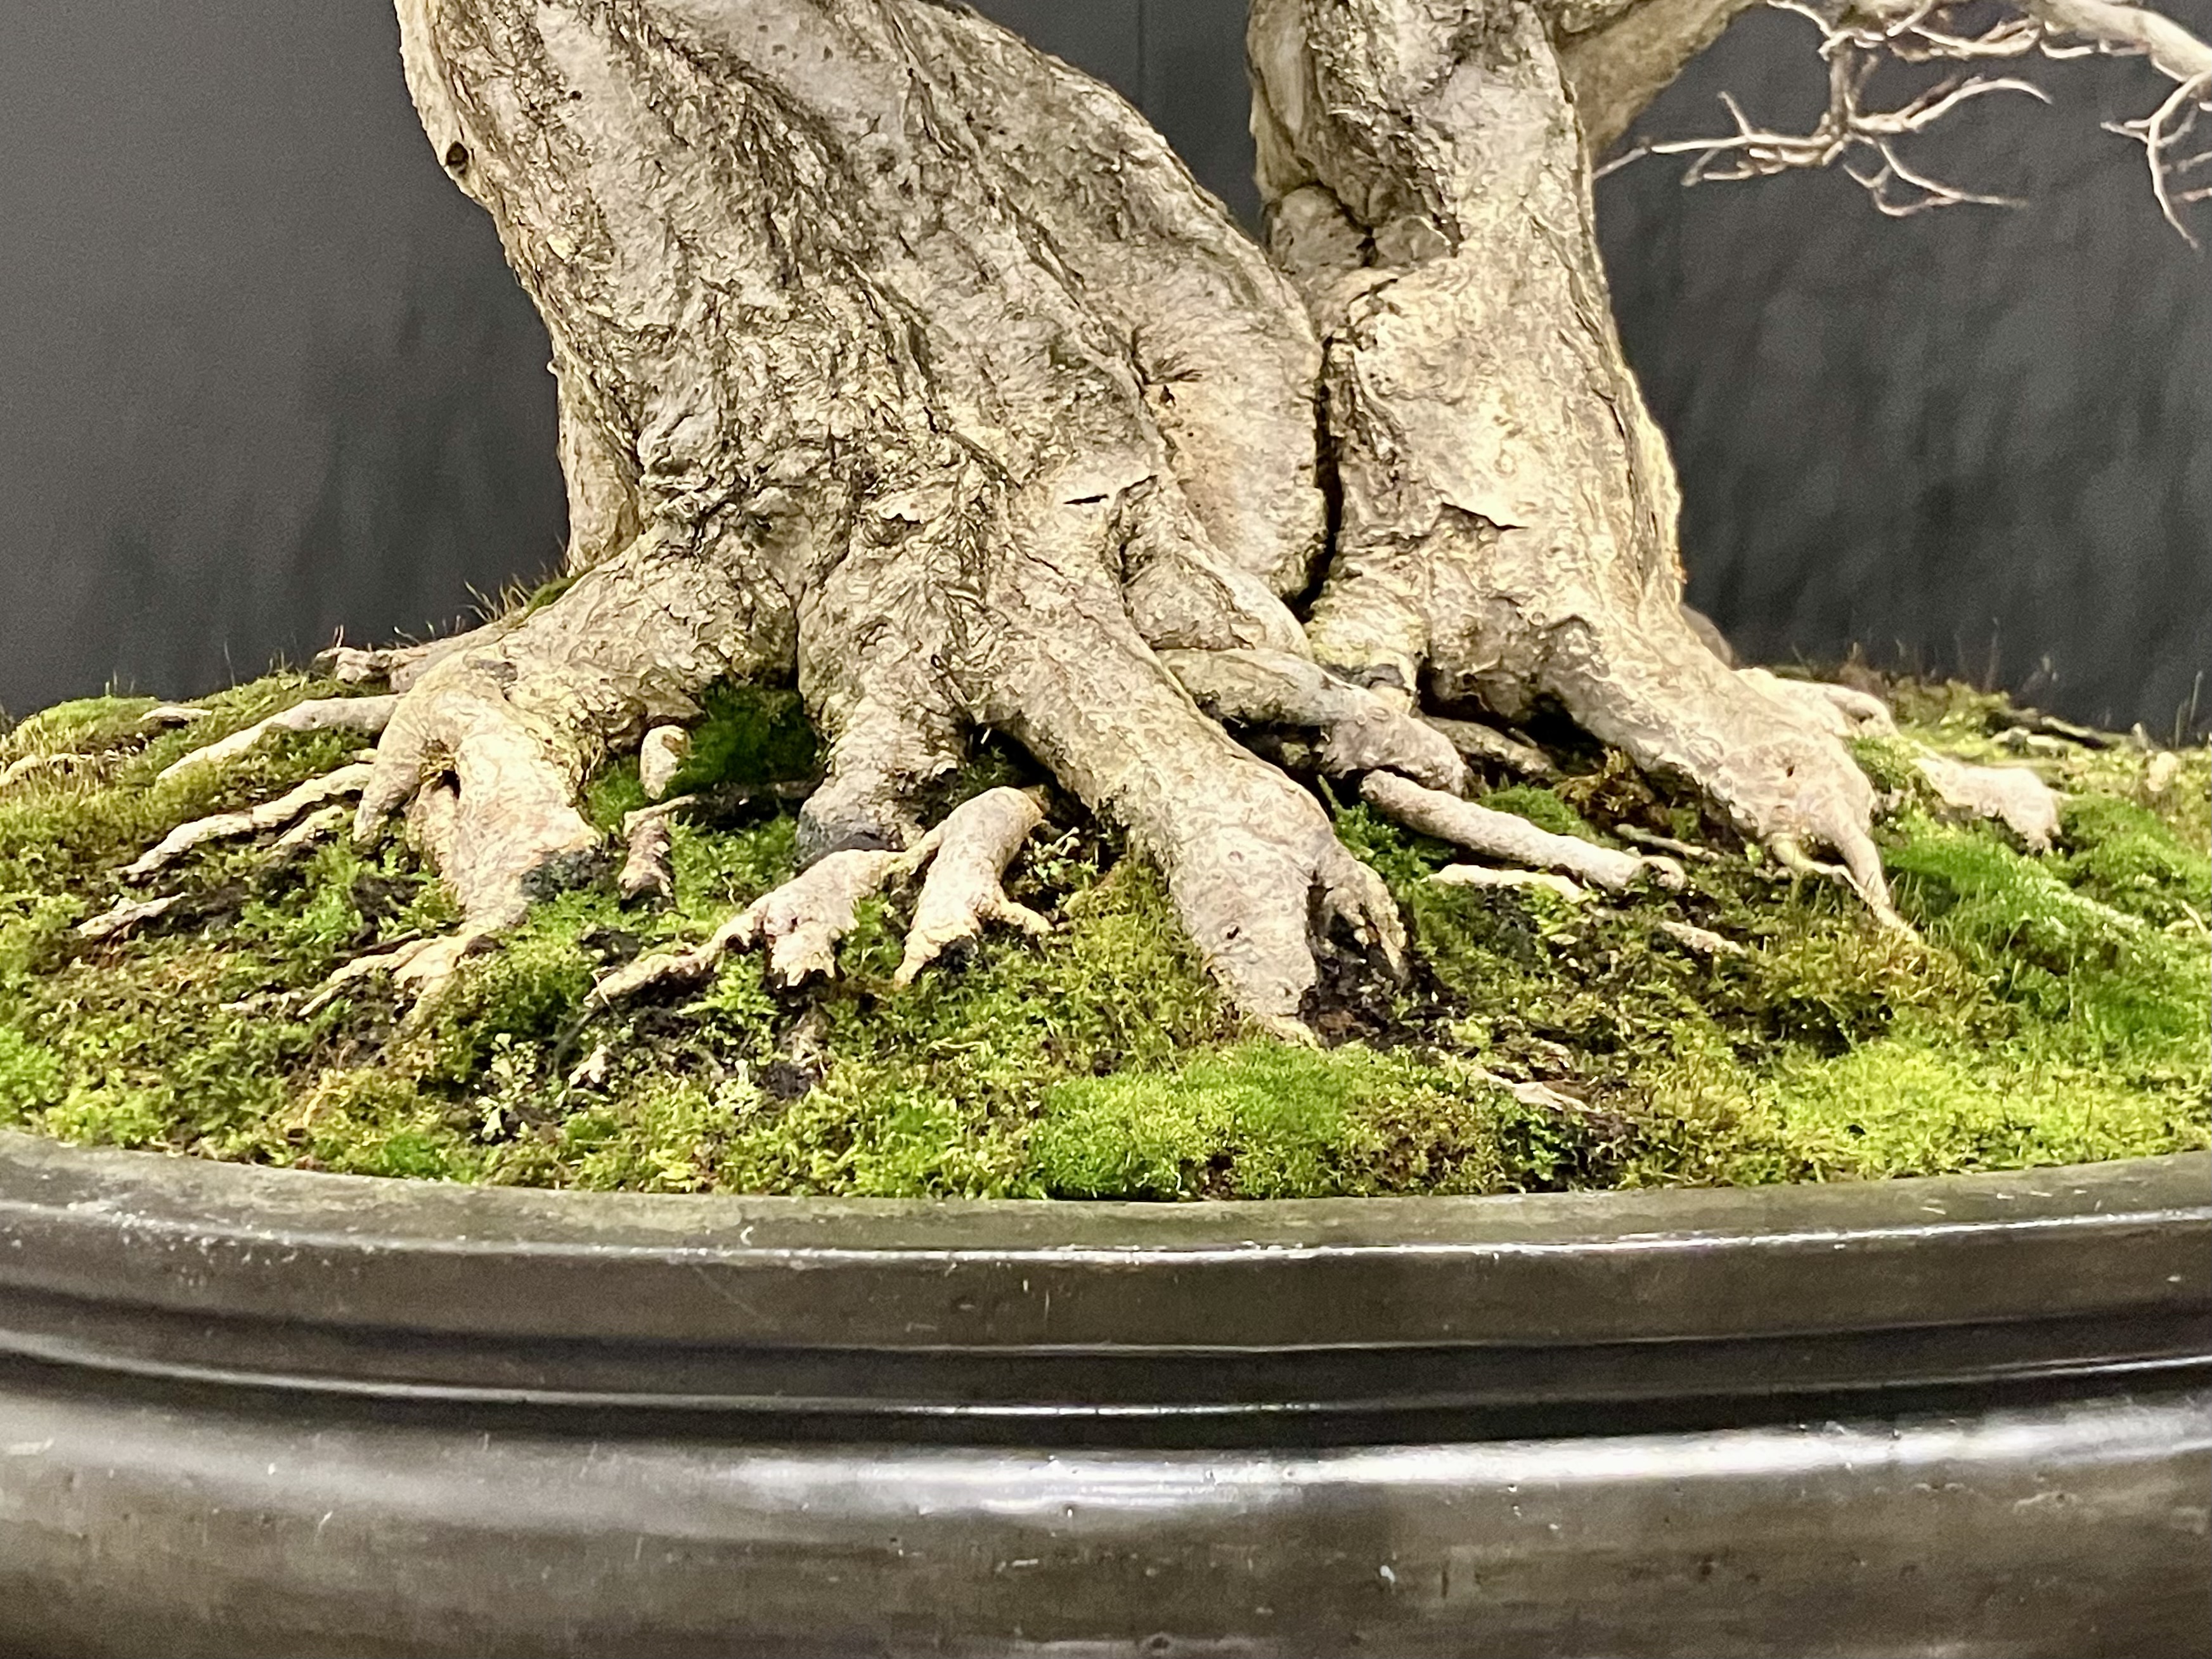
A Hornbeam with an average nebari. Or, rather, a good one for a Hornbeam. Elm is another plant often reluctant to fuse roots into a broader nebari. I think rather than forcing it’s nice to accept this reality. Root grafts would not disappear as well on a Hornbeam as on a Maple, the wound would last a long time. So you don’t see many attempts at it.
Another Japanese Maple with a grafted nebari. It looks like the foot of a snail to me. About ready to slither off to the next stand. Would be wonderful to have in the backyard. But the mollusk vibe might be hard to shake.
Hope the creator isn’t reading this.
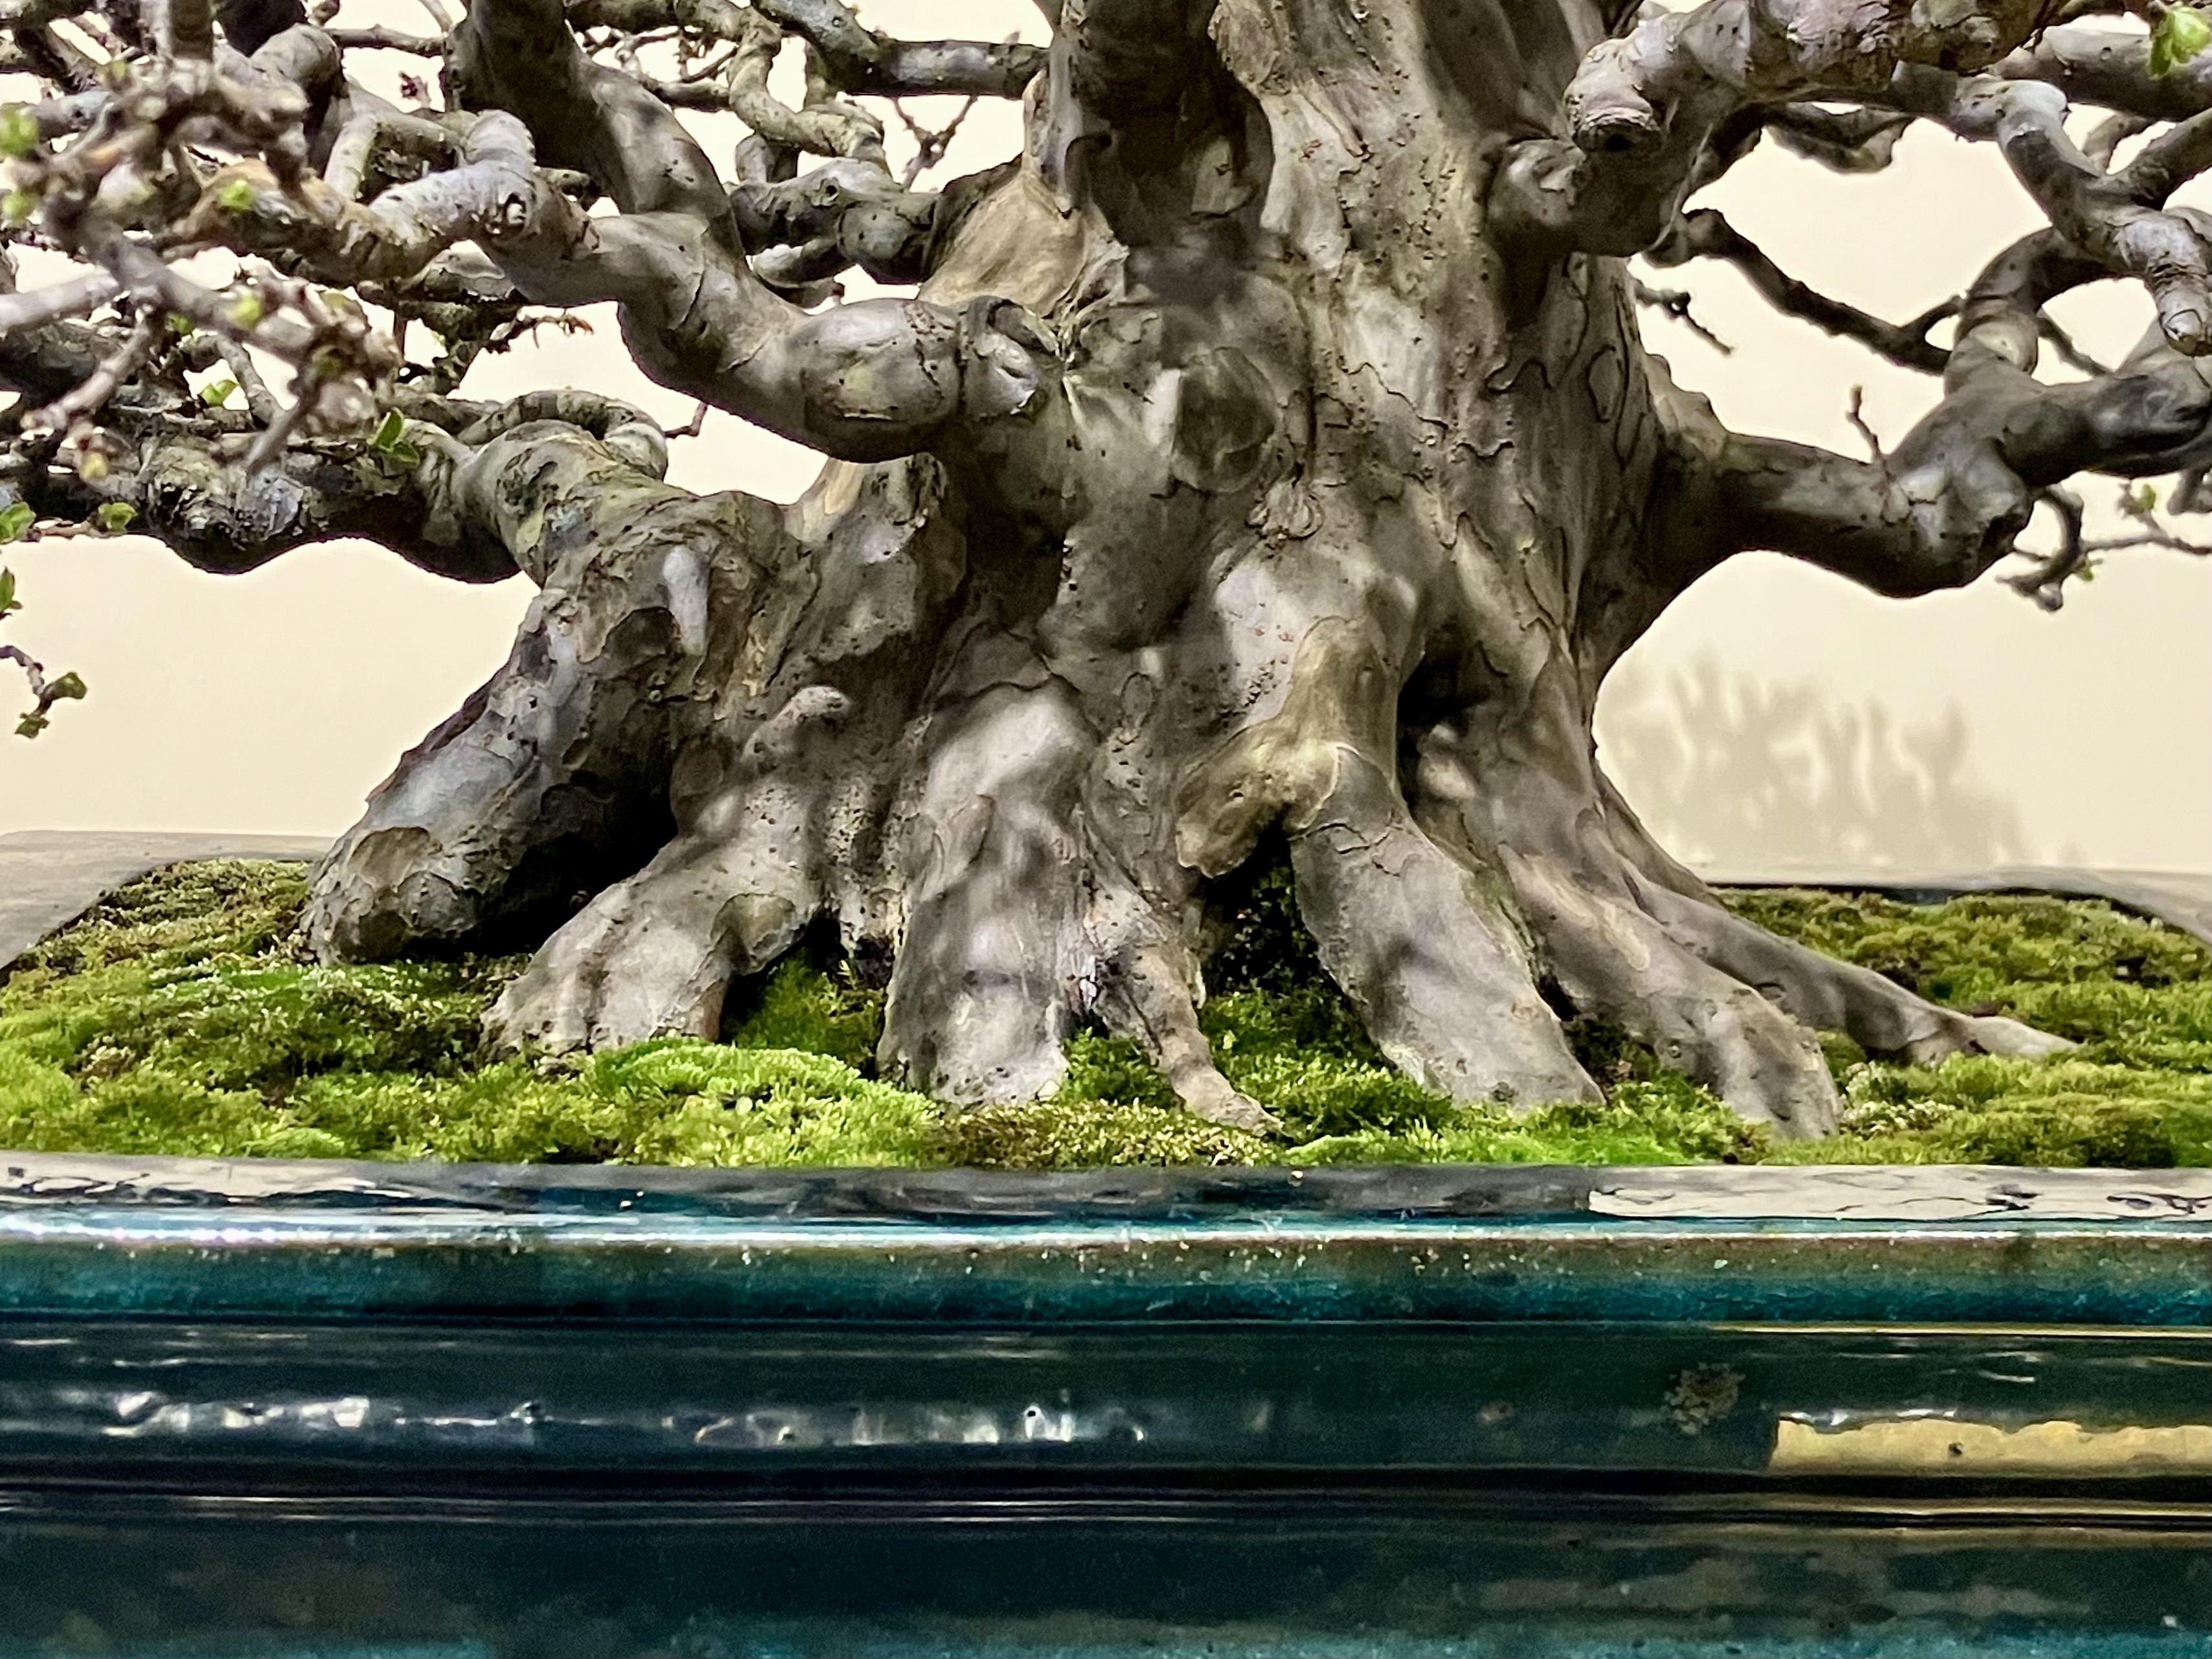
A Chinese Quince. Possibly grown in the ground or a growing bed for a time. Root fingers like this are often the result of that sort of strong growth. Chinese Quince, Hornbeam, and Azalea are examples of plants which have much better nebari if grown in a pot. There’s more fine definition in the nebari structure, more in scale with the tree. Not unlike fine twigging versus coarse.
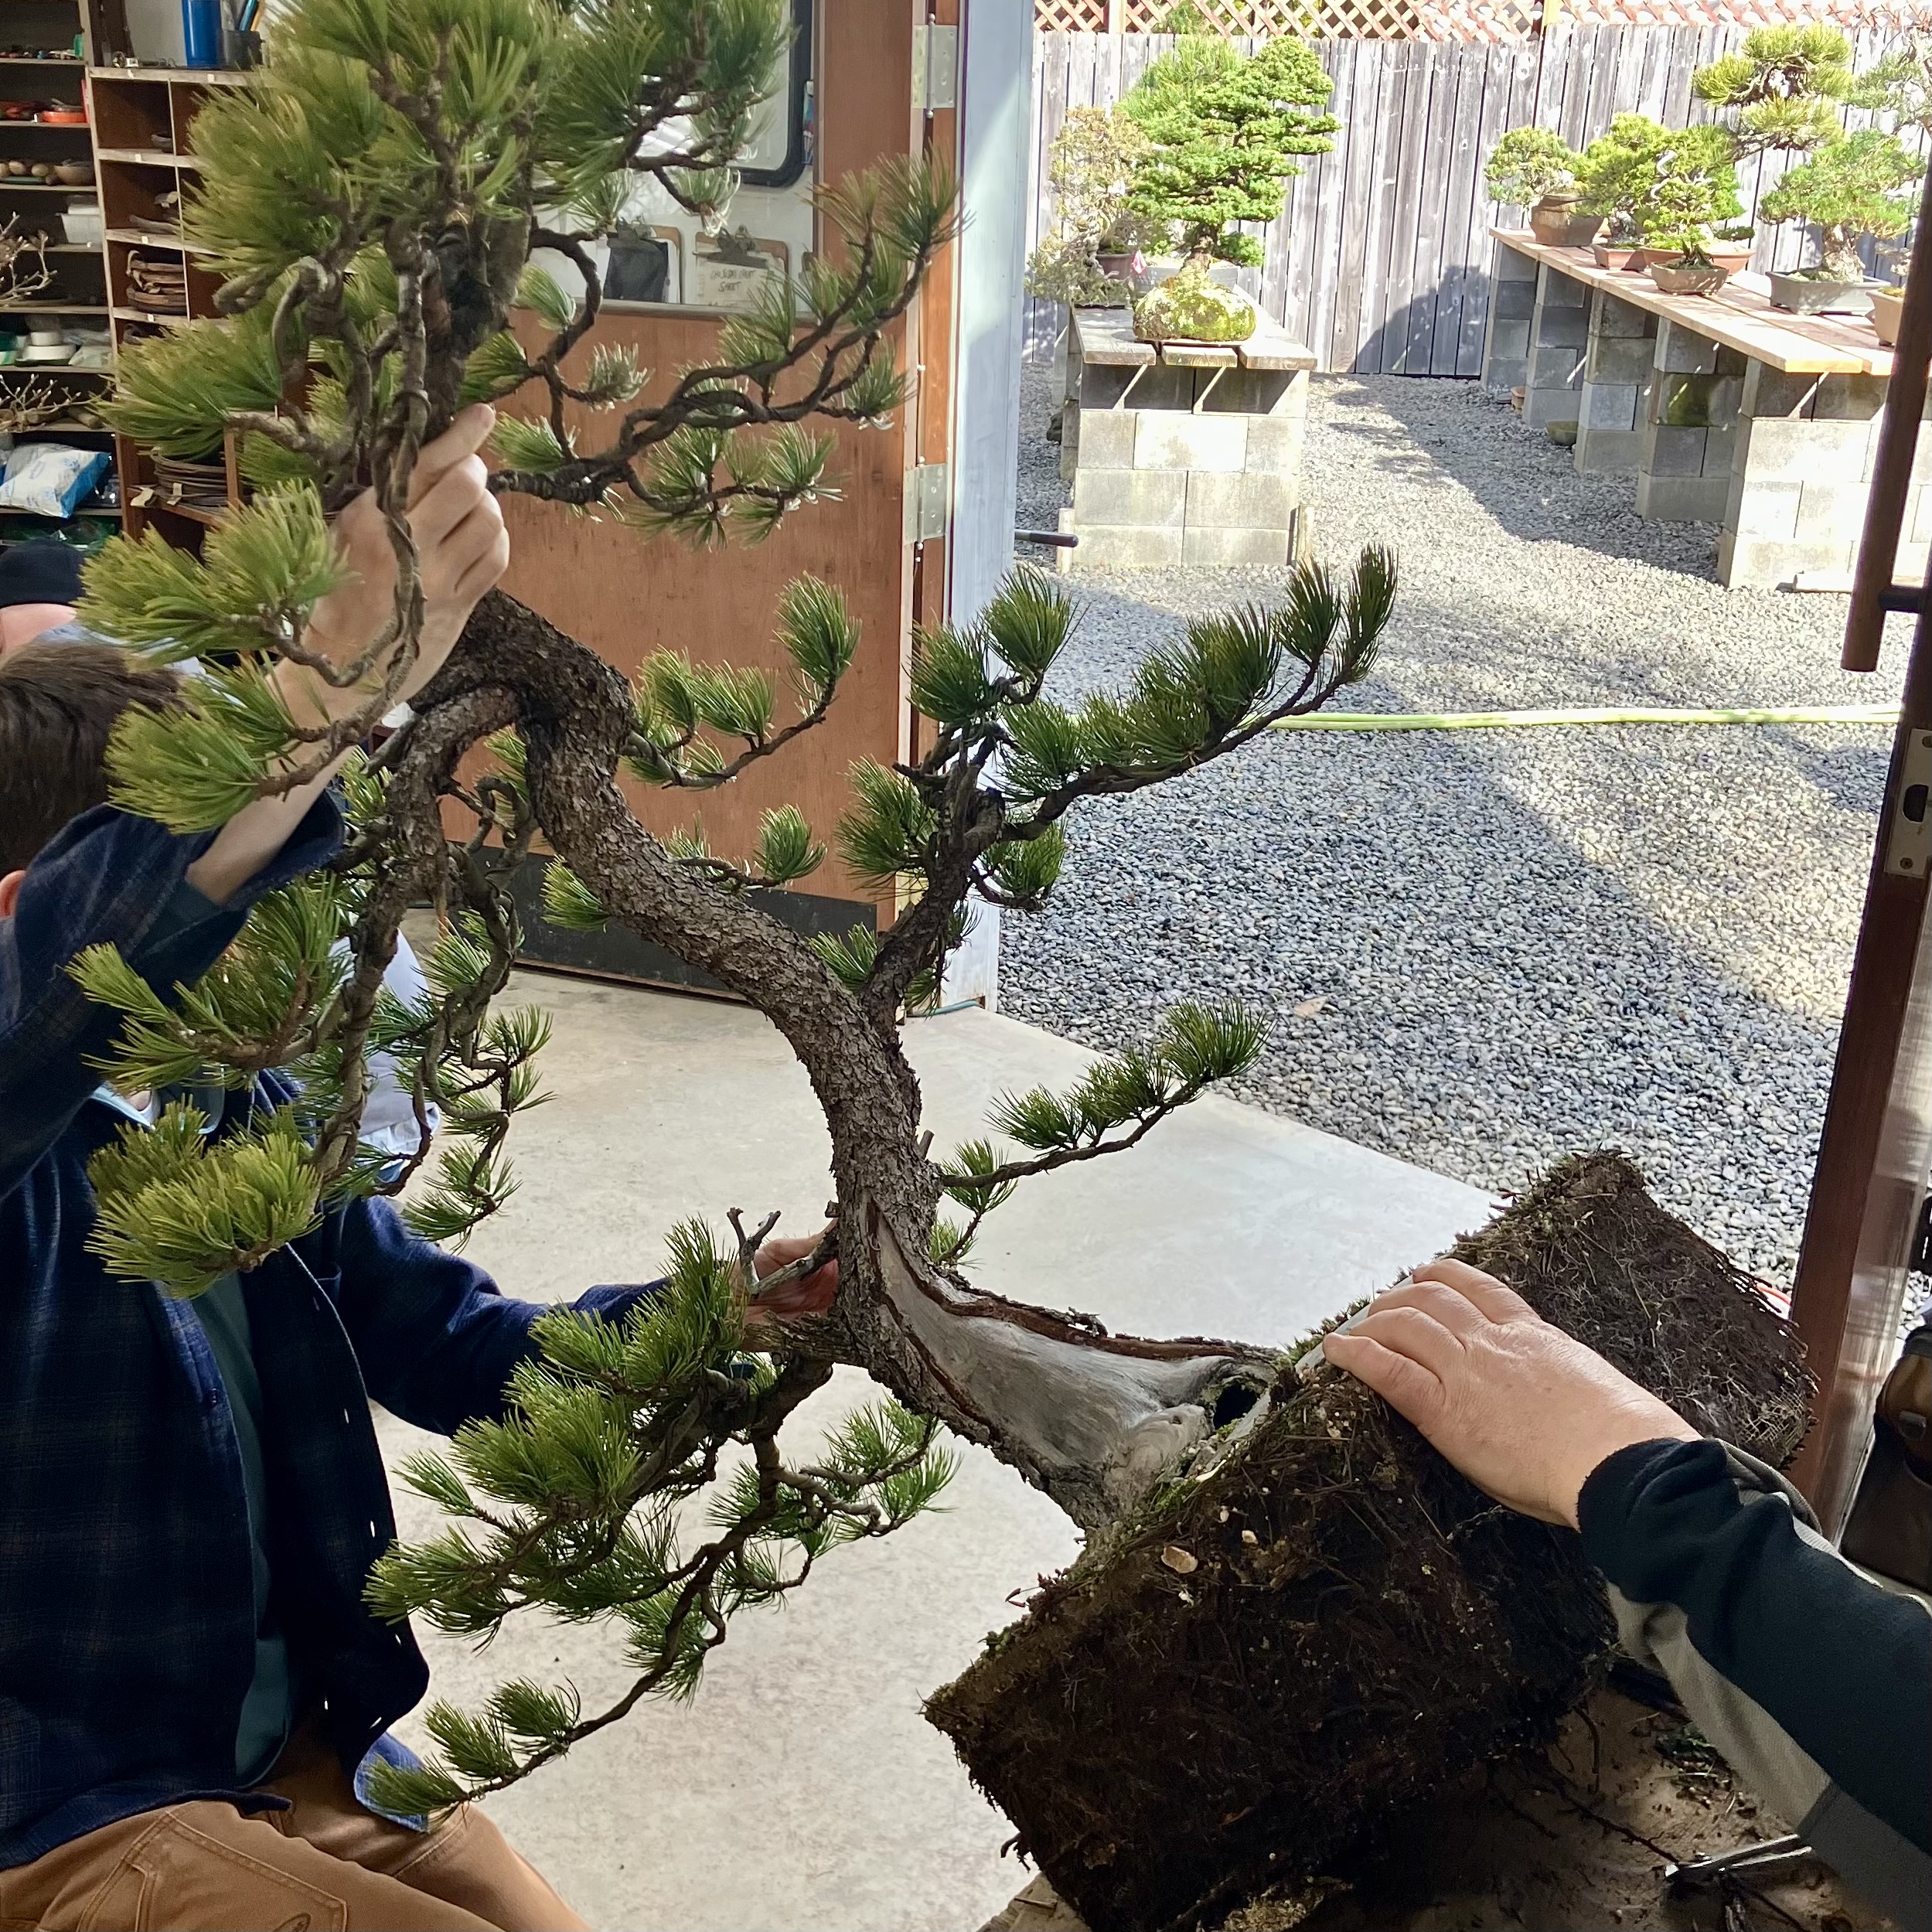
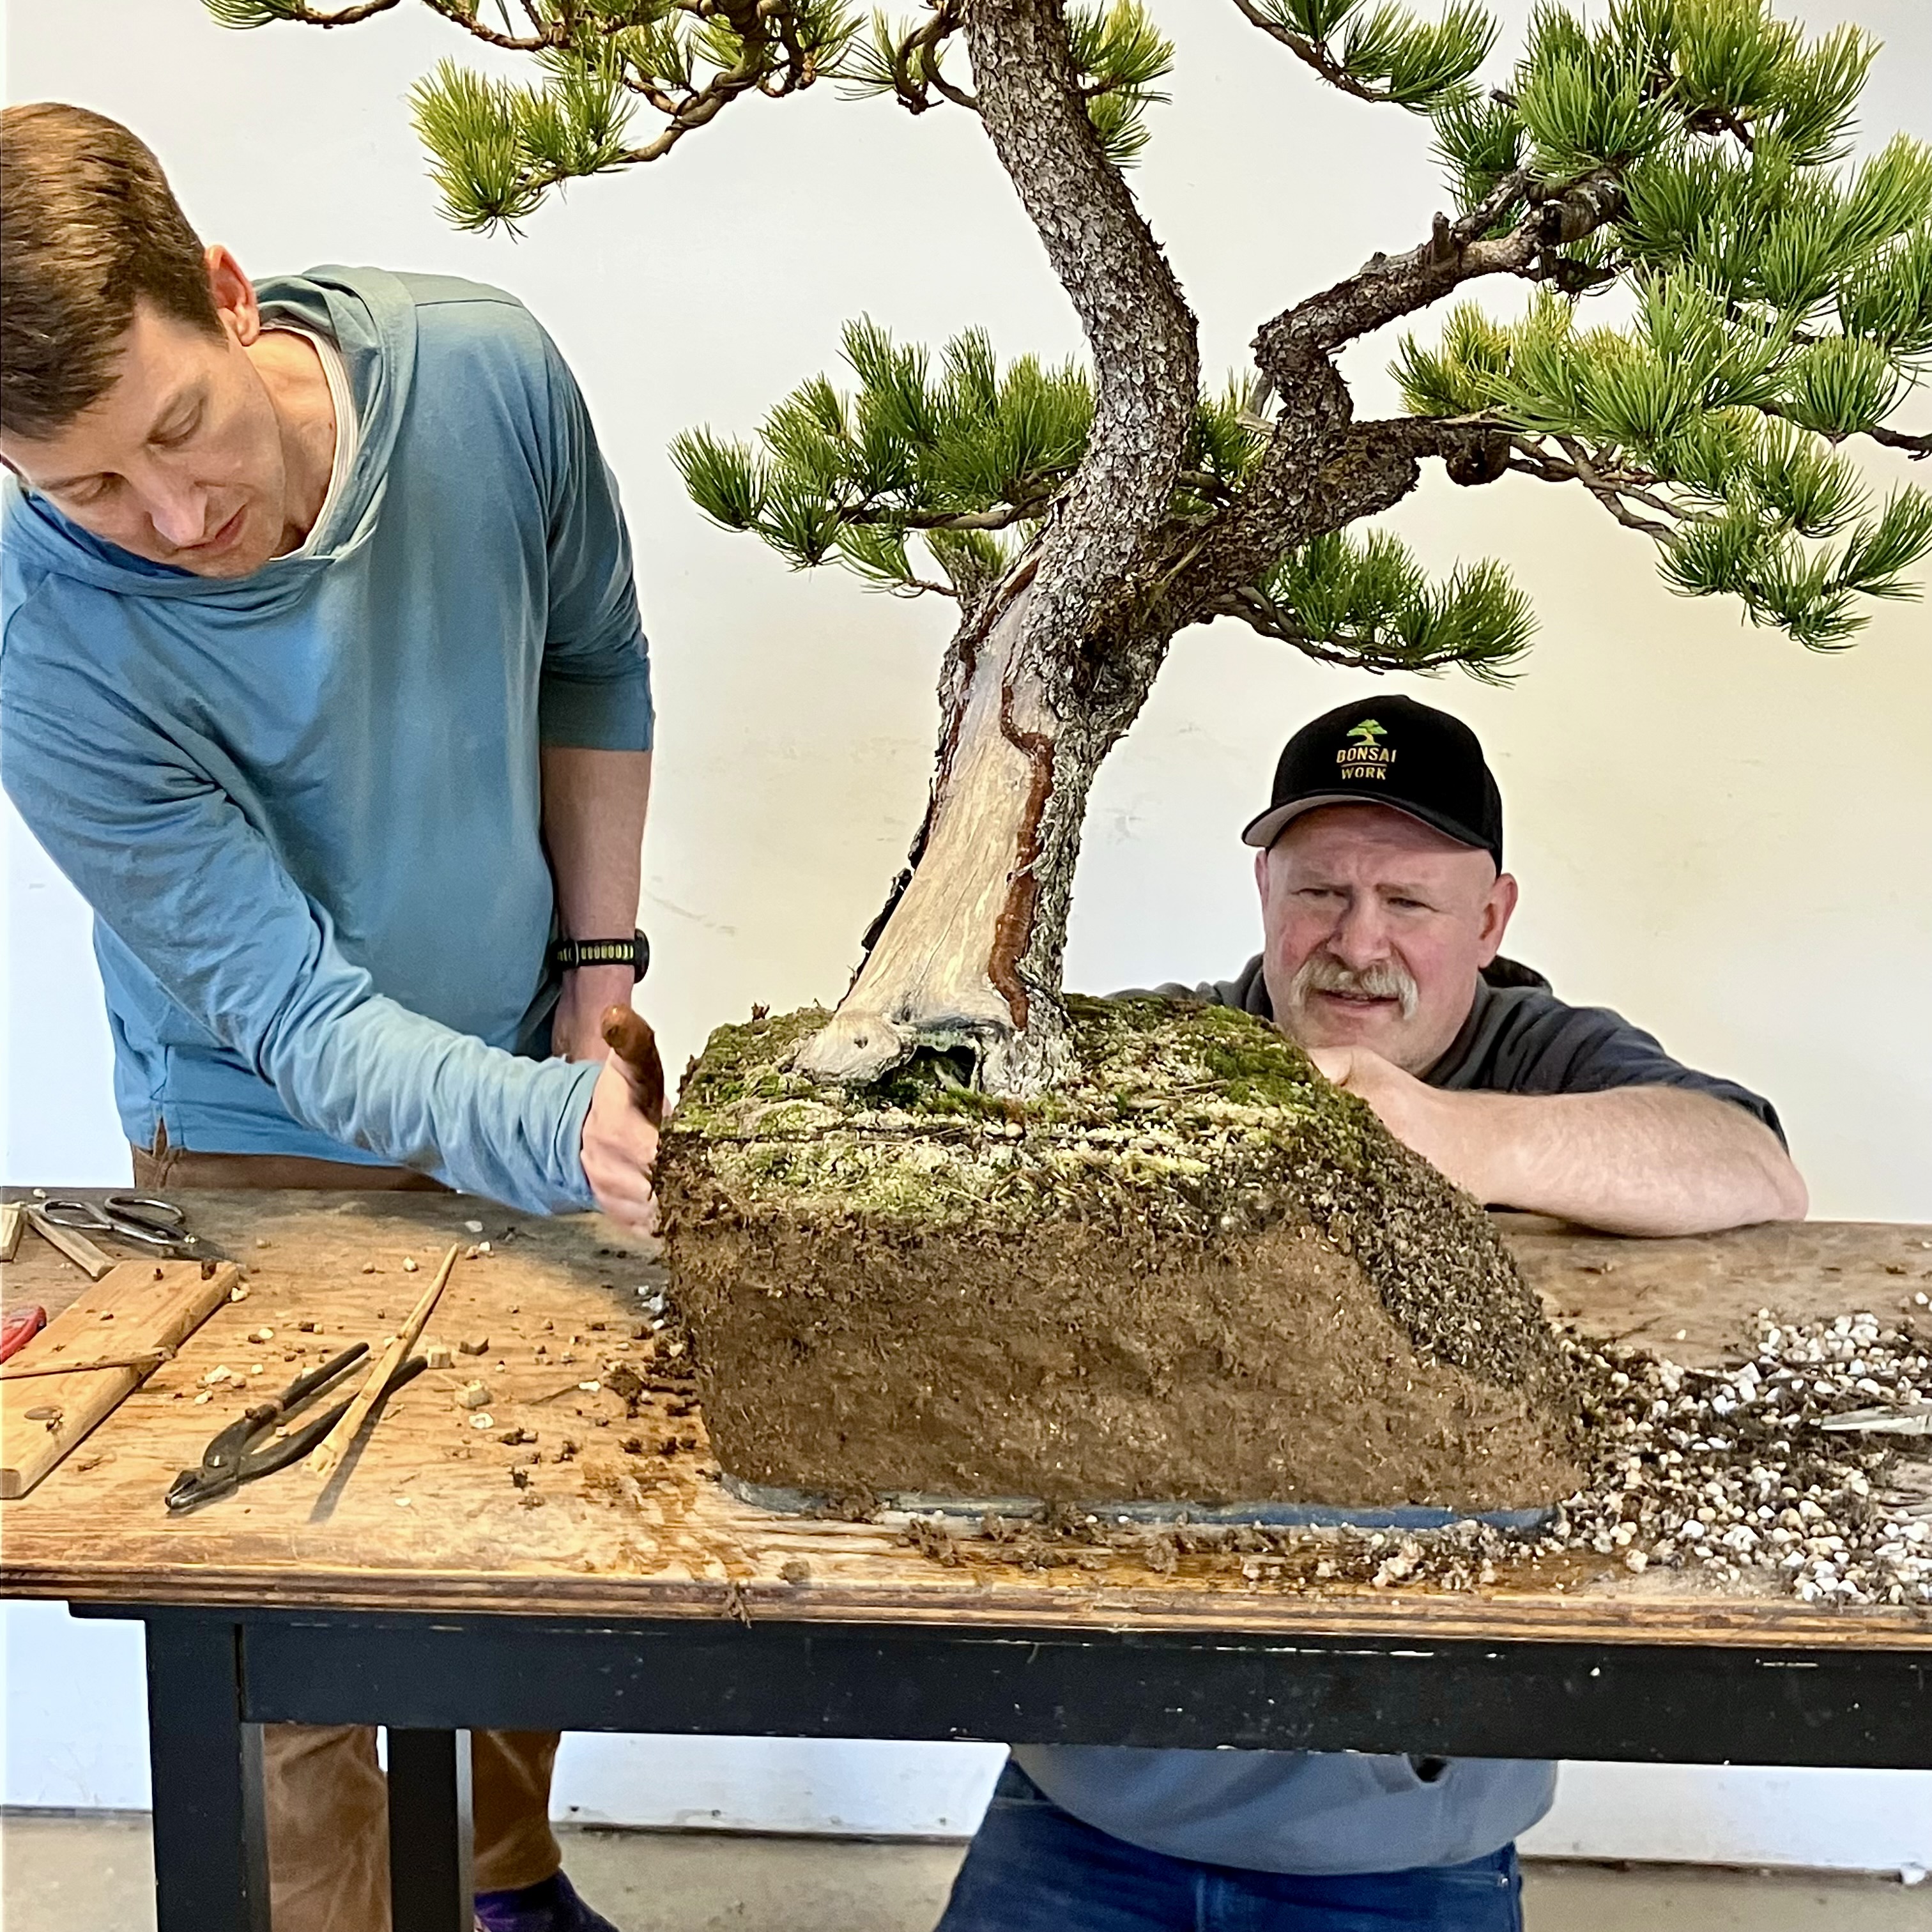
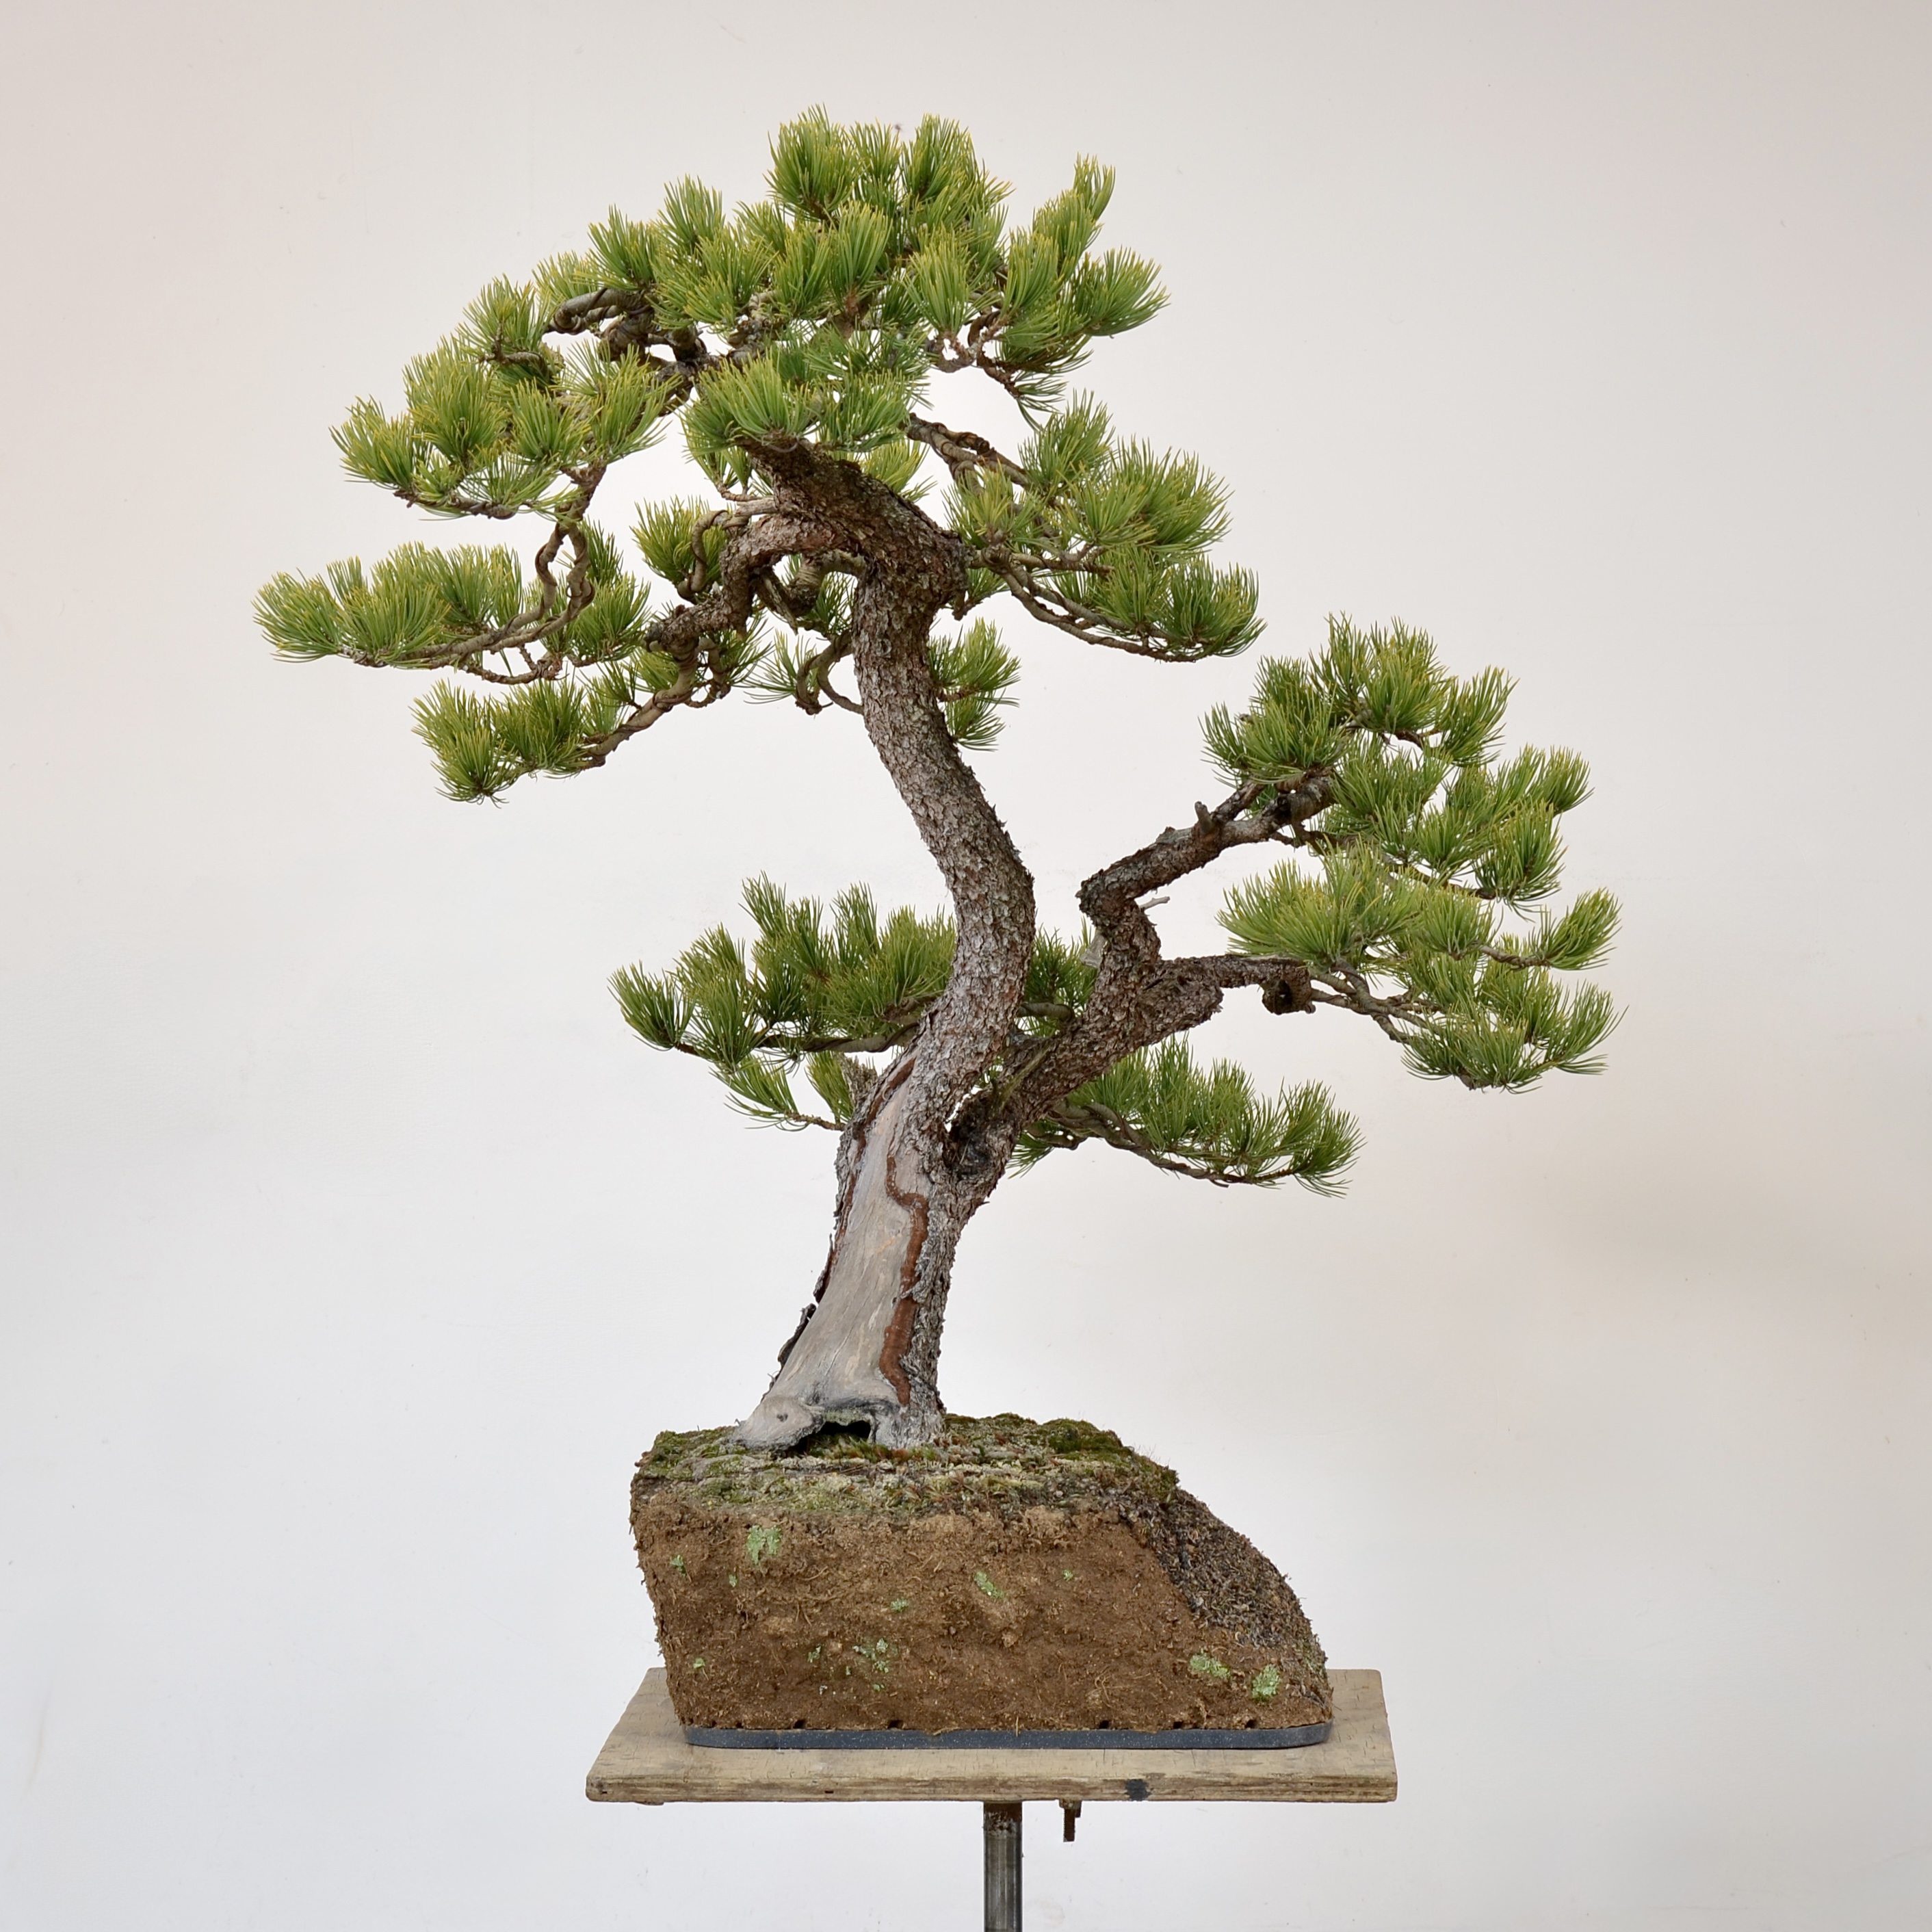
I collected this Limber Pine with Steve Varland and Dan Wiederrecht about a decade ago. It looked younger than the delicious, half-deadwood trees on the slopes nearby. Then a couple years ago bark started to peel in the front and—delight of delights—the whole front had died, leaving a swath of shari.
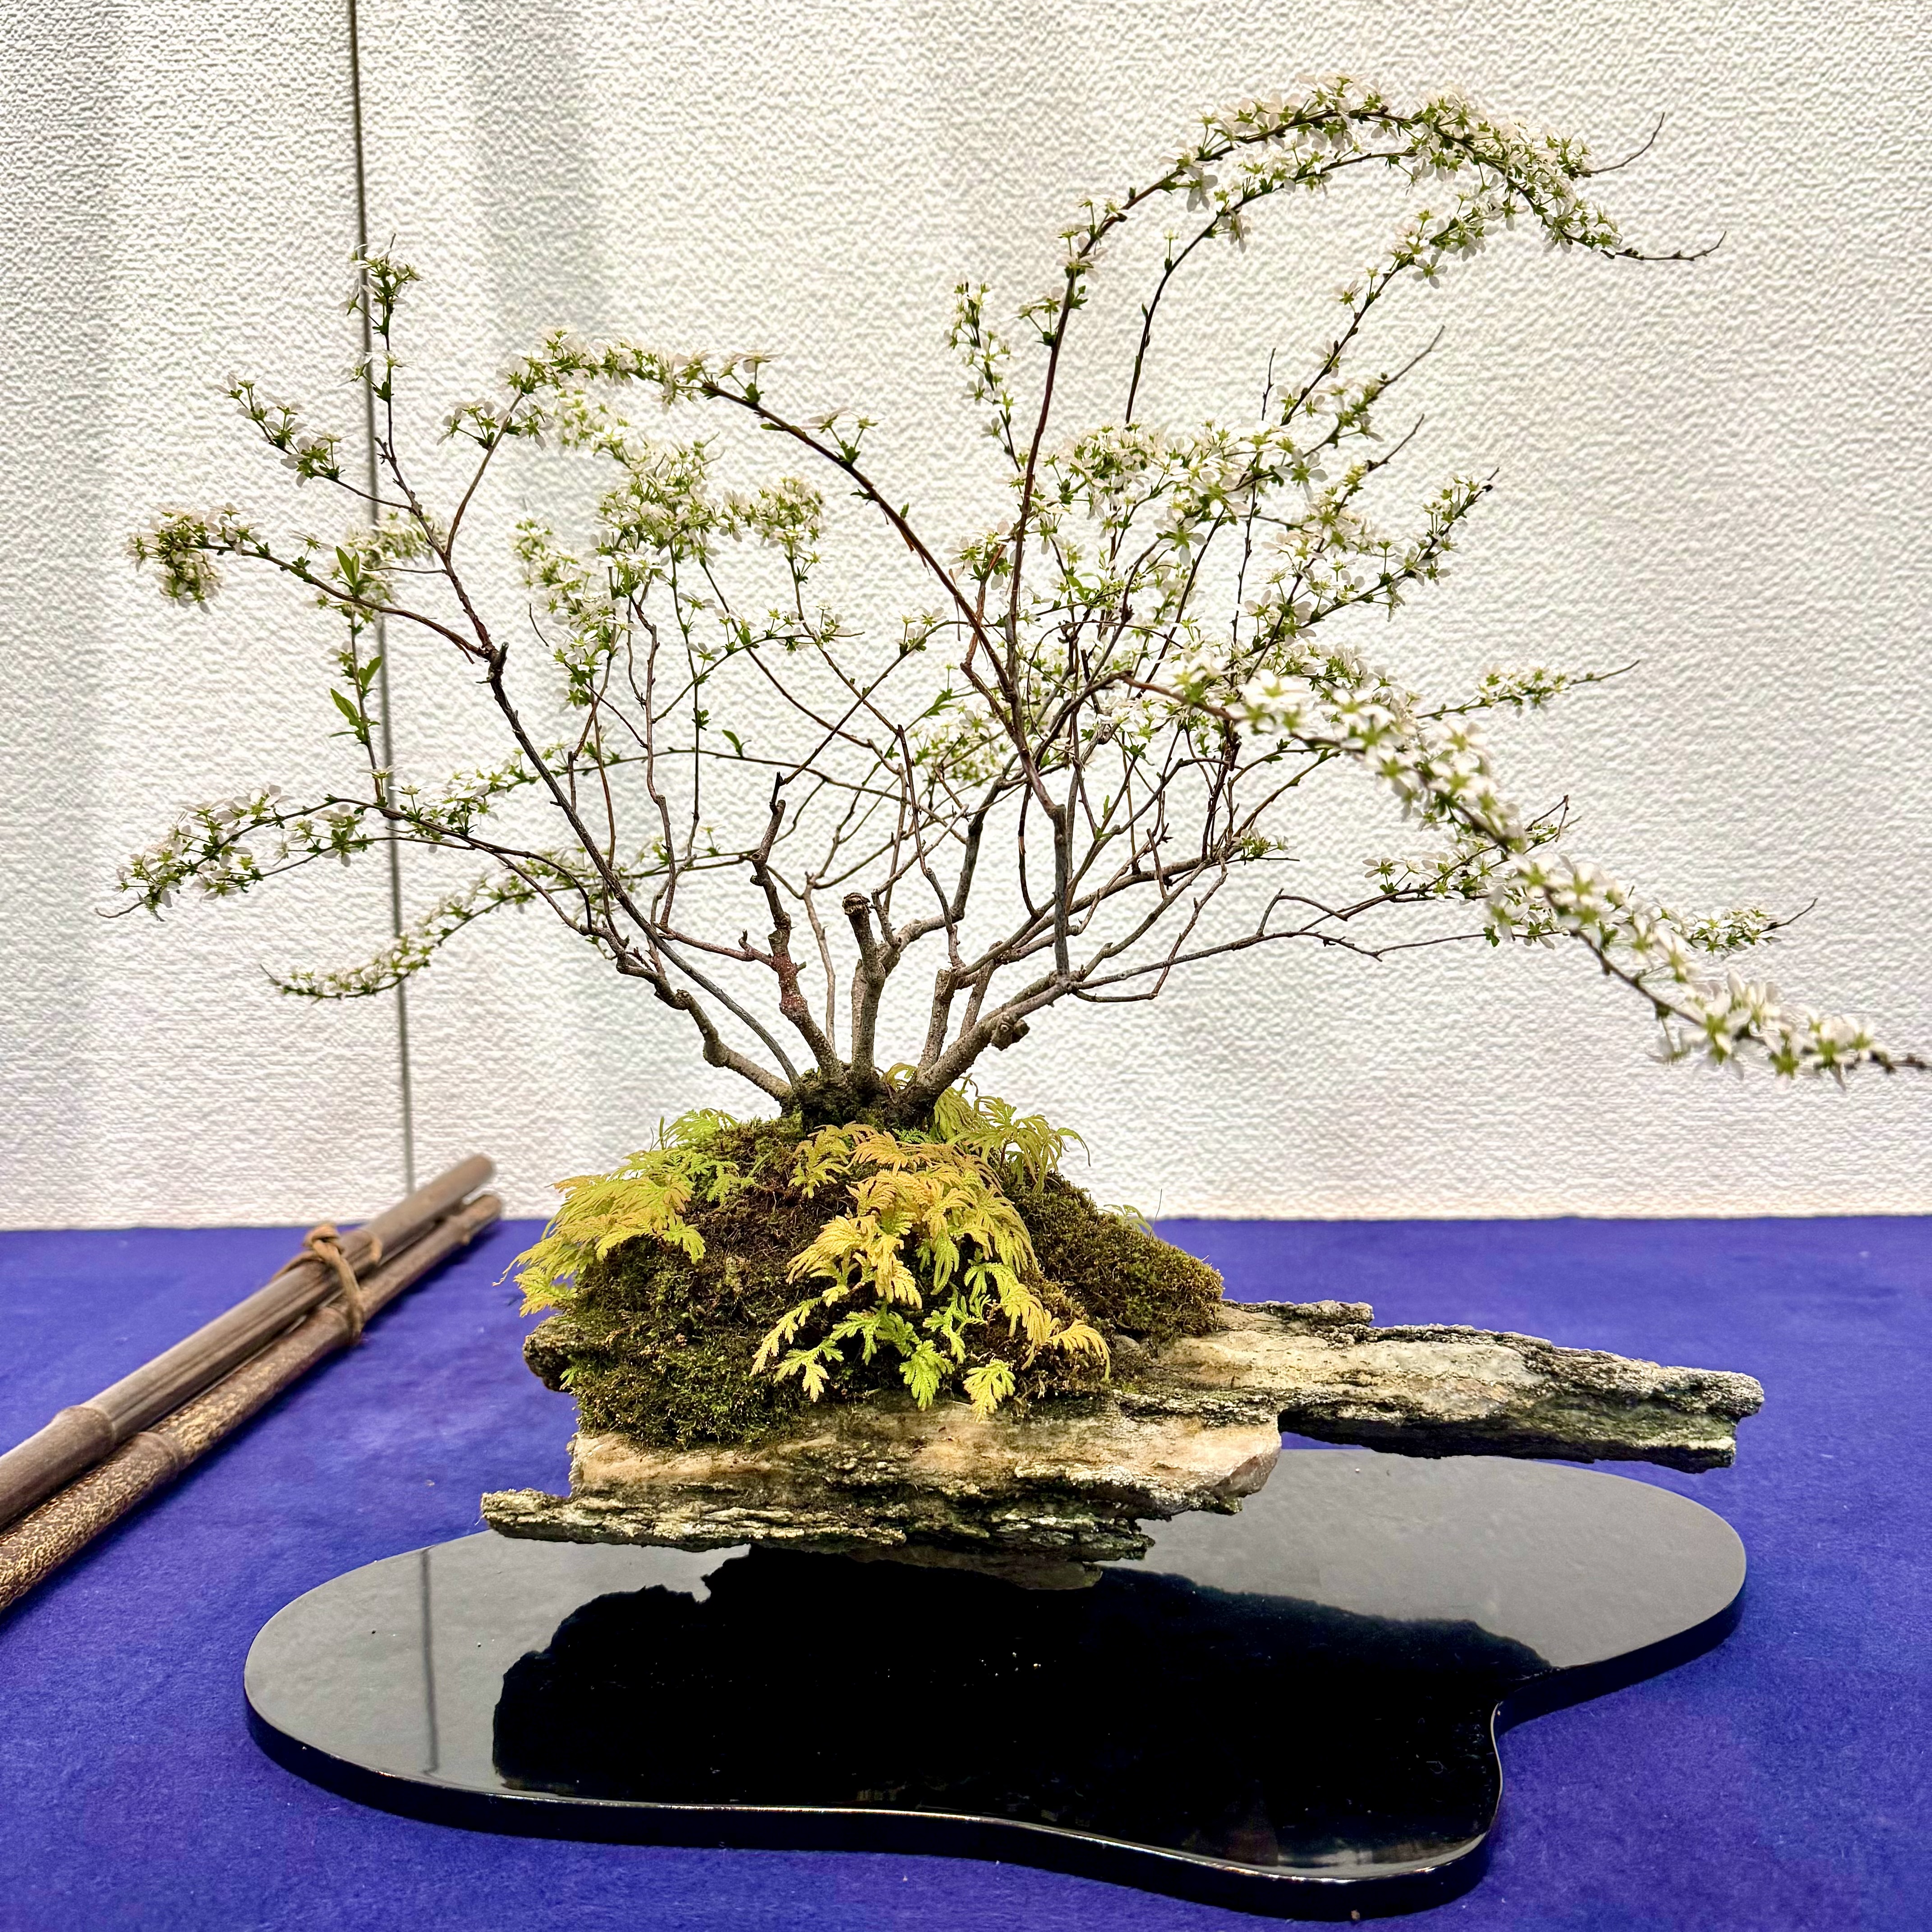
Last week we potted this tree for the first time. In the Seasonal class we failed to find a suitable pot, so it went on a slab.
For years I’ve made slab plantings with juicy, organic root masses. I’ve wanted to try a root mass that suggested the shape and volume of a typical pot, so here’s our effort at that. A block of roots and soil that hints at a harder material.
Here’s the Limber Pine being prepared for its slab adventure.
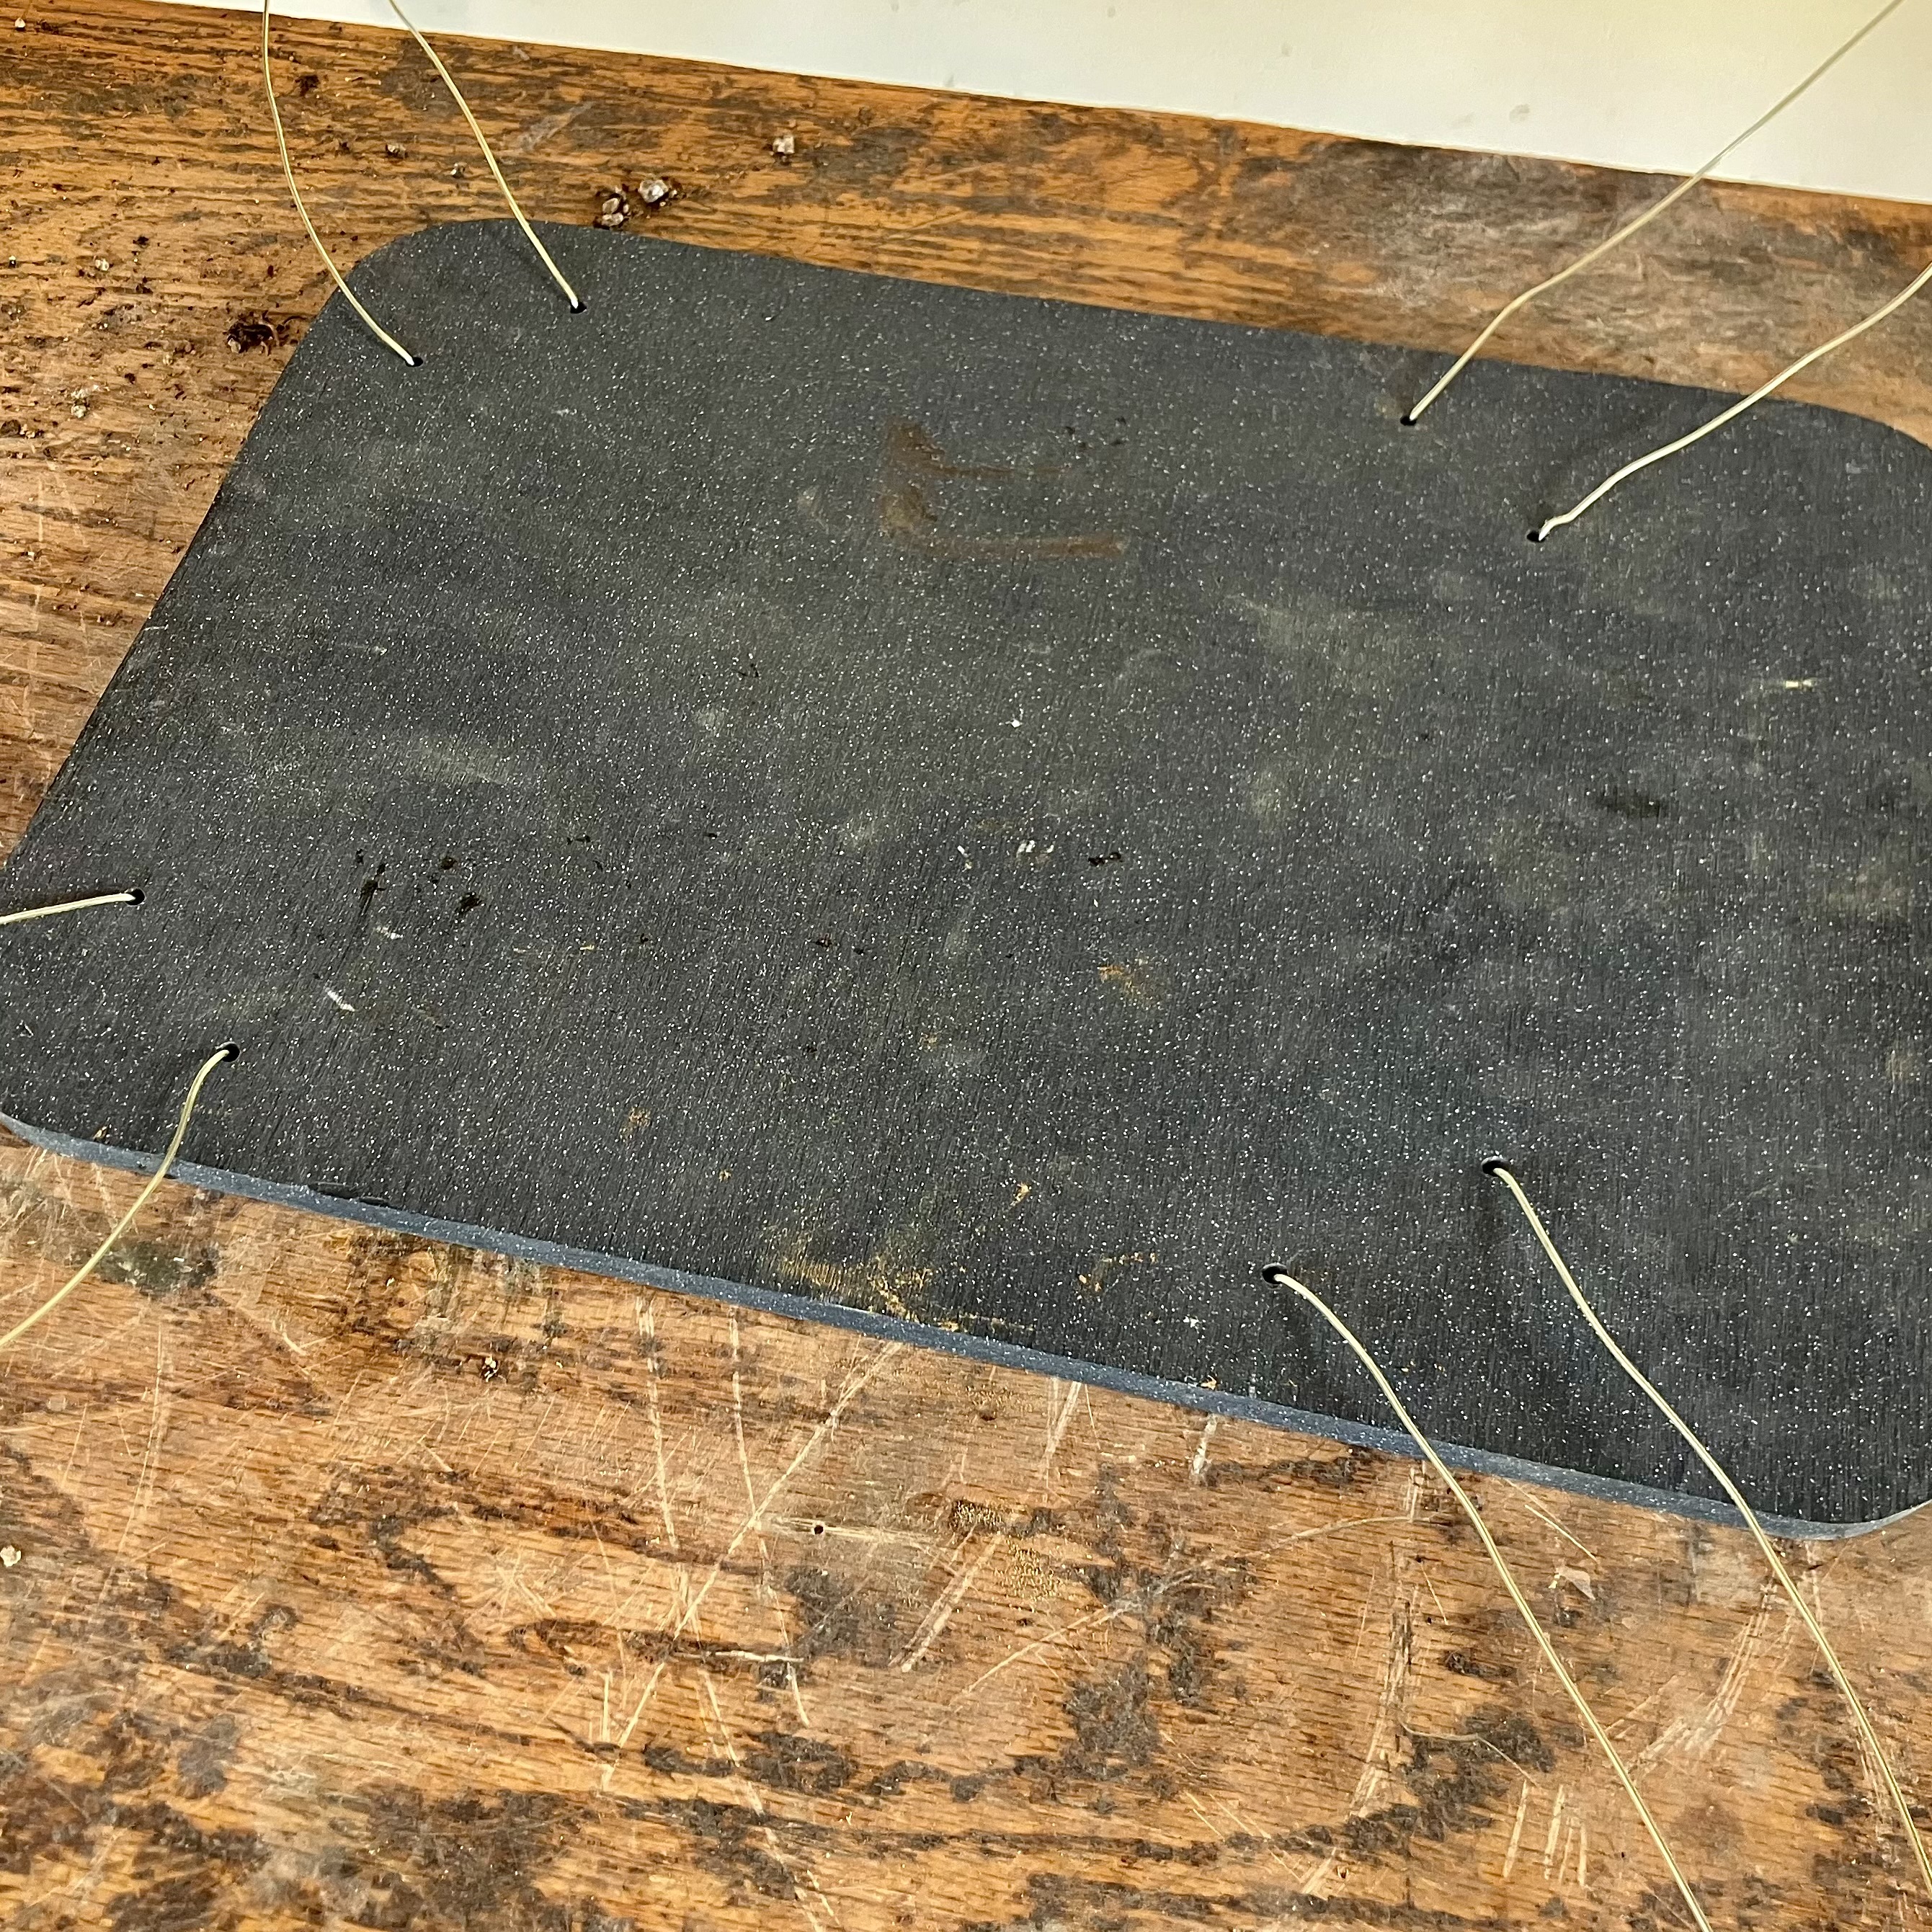
Our Corian slab ready for the rootball, cut to a soft rectangle. The bottom has grooves cut between the wiring holes so it sits flat. No need for drainage holes as the water will just go sideways.
The root ball prepared with stout bamboo stakes in four corners to be used as tie-downs.
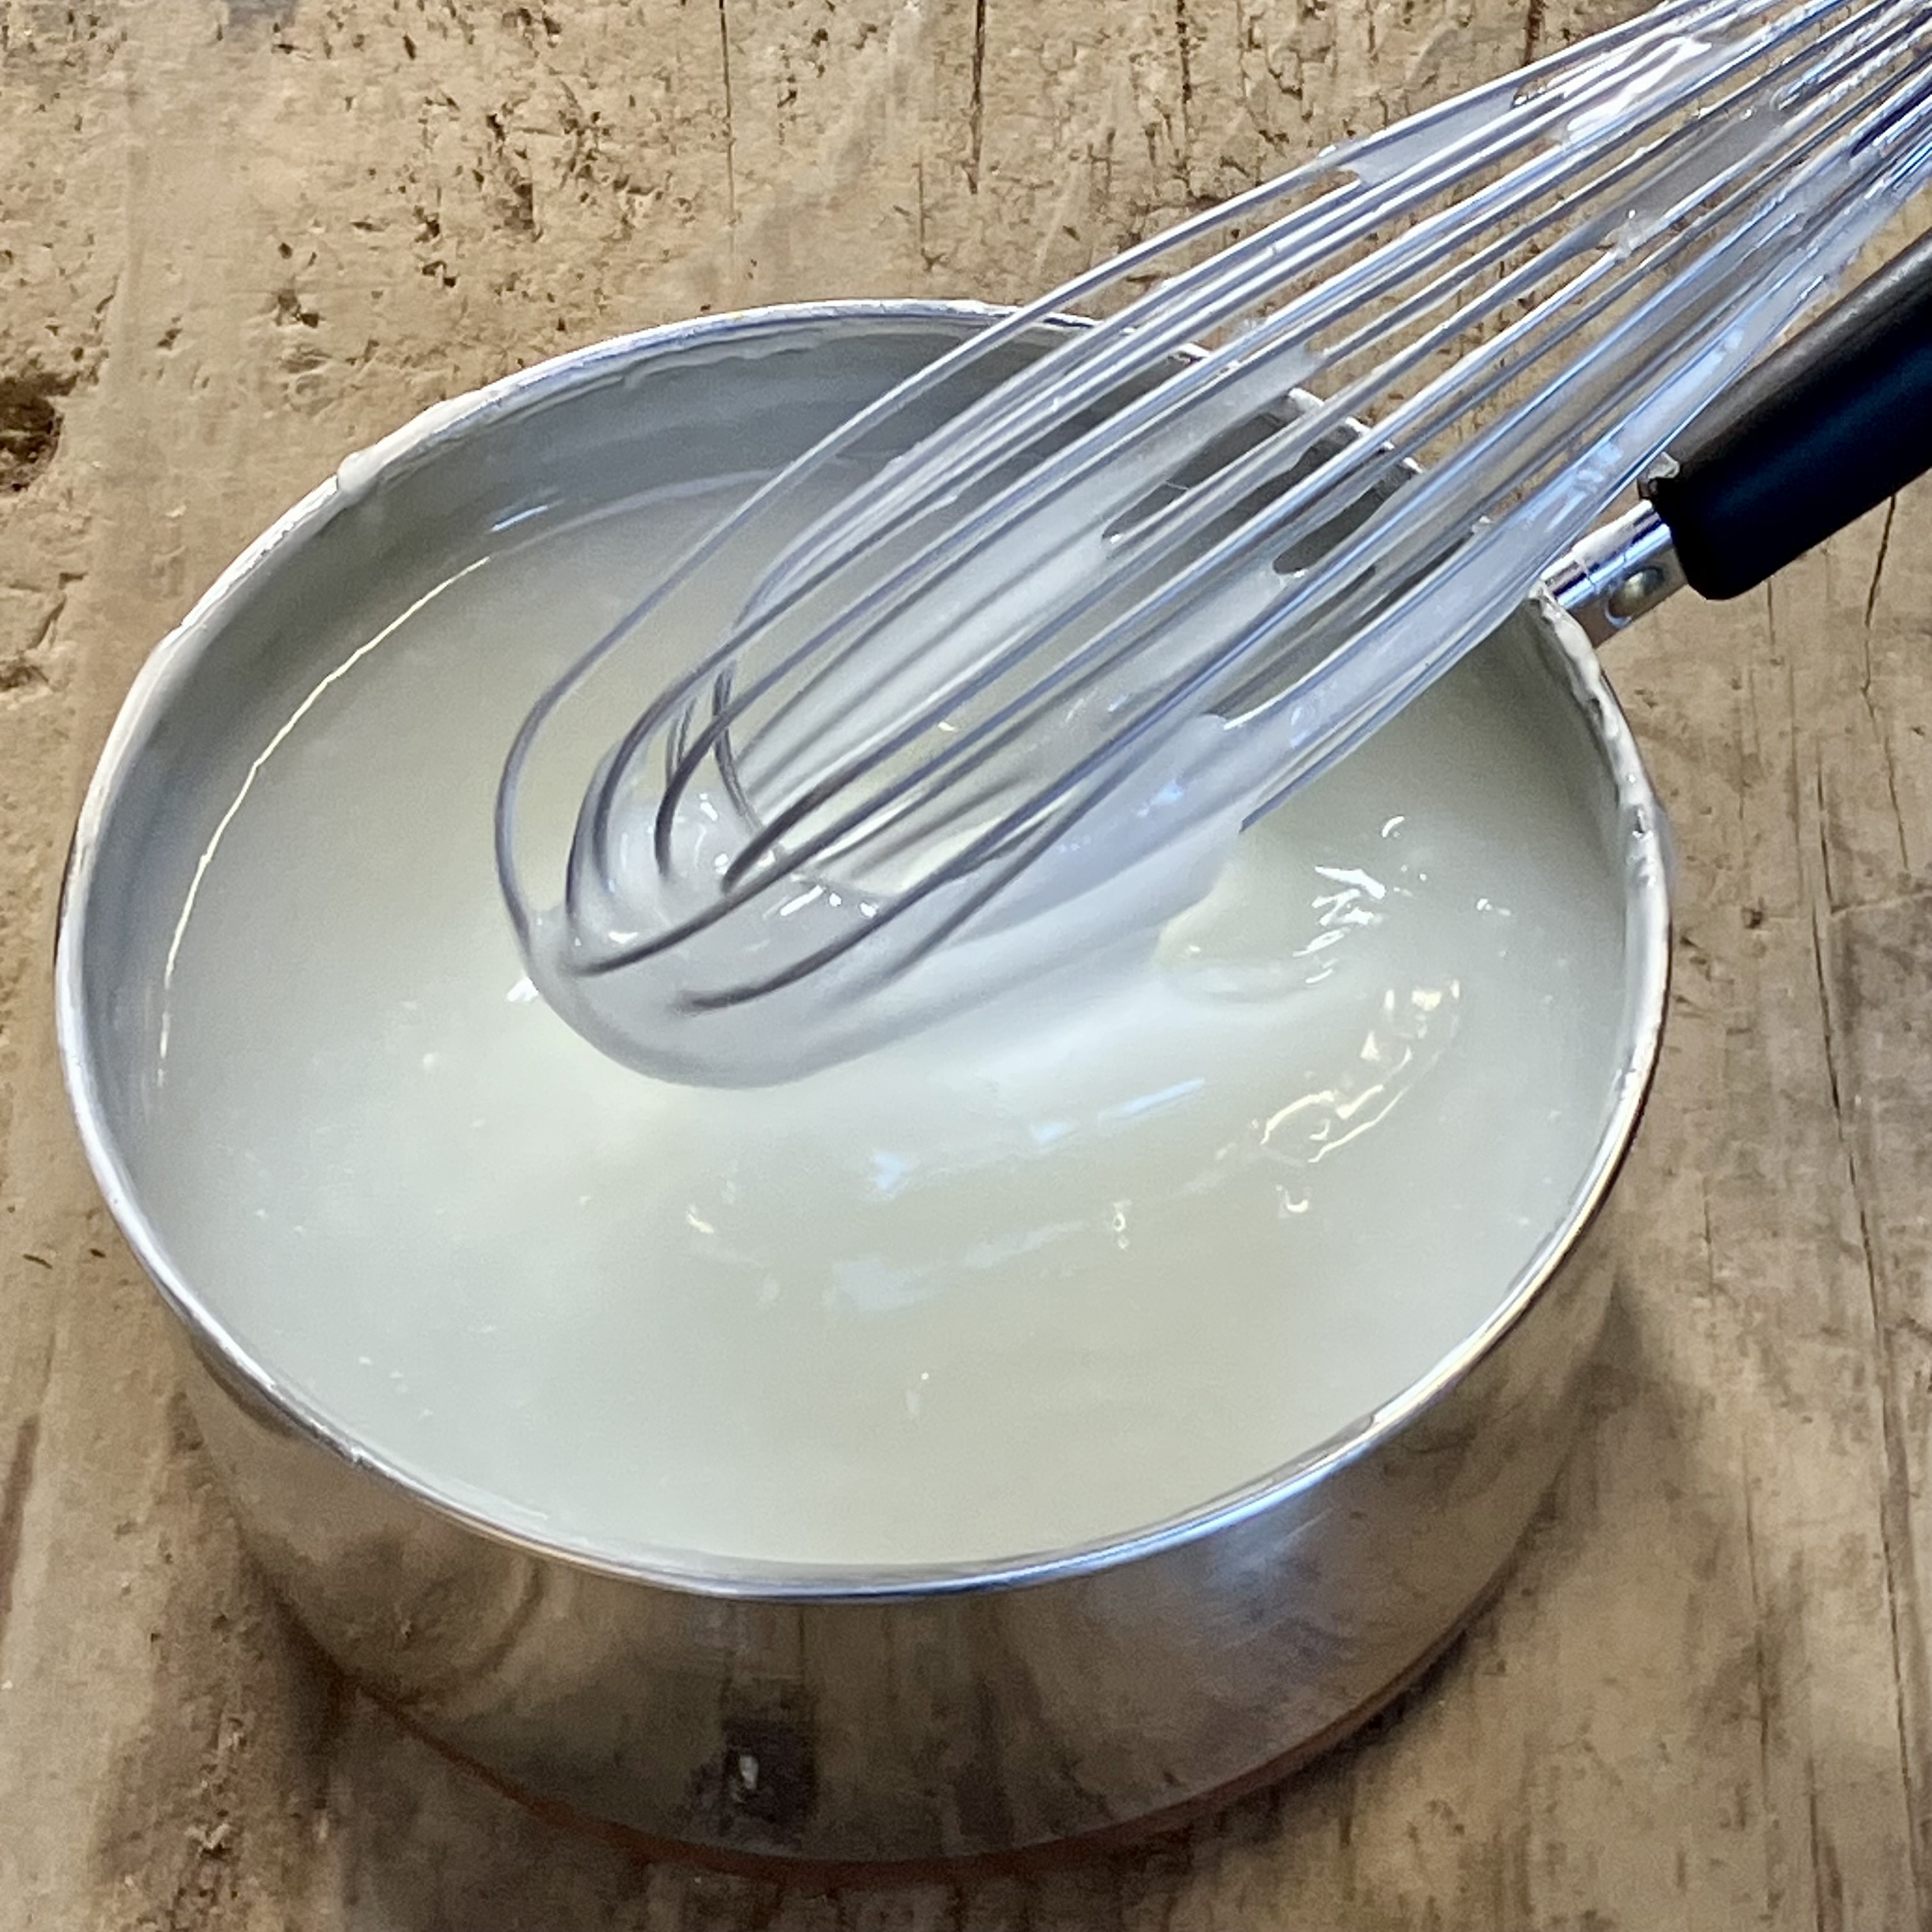
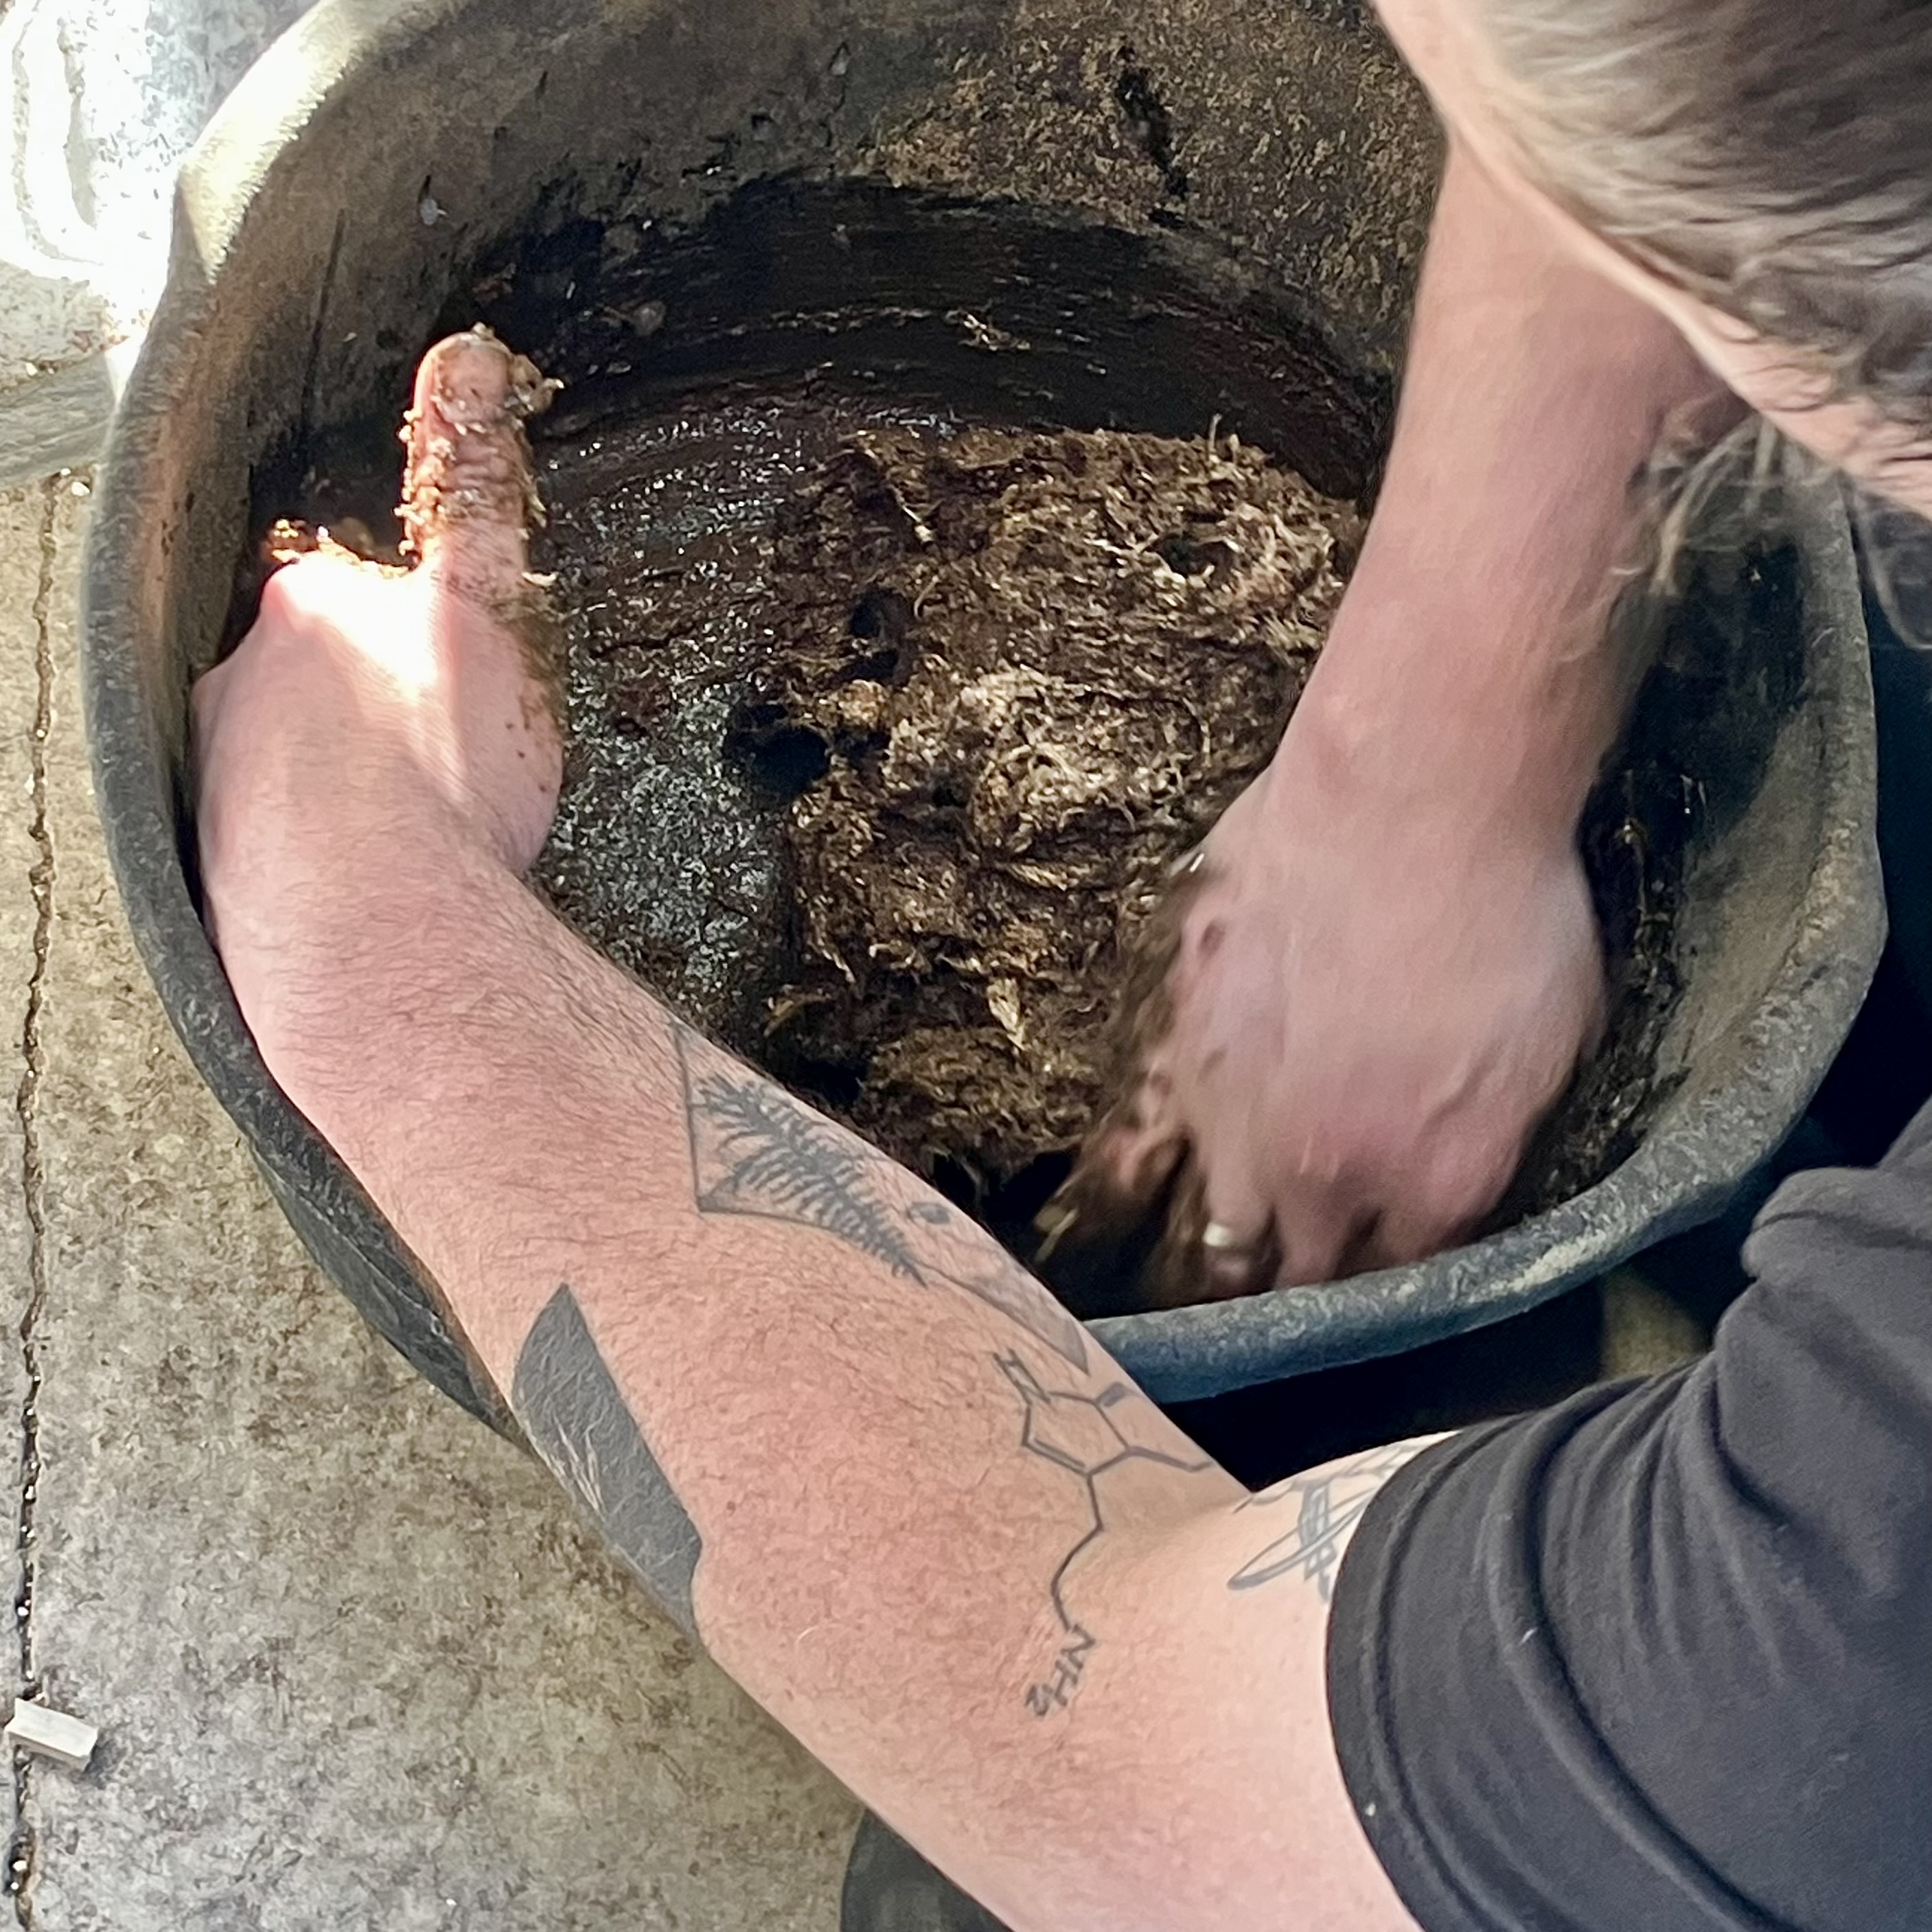
Gelatinous cooked corn starch helps firm up our muck. We use 1/3 corn starch, 1/3 long-fibered (unshredded) orchid moss, and 1/3 akadama dust. Sometimes more corn starch is needed for a sticky mass that doesn’t crack when you squish it.
Mixing the muck.
Ted and Chad work the ball. Chad’s hat is clever: bonsai overwork.
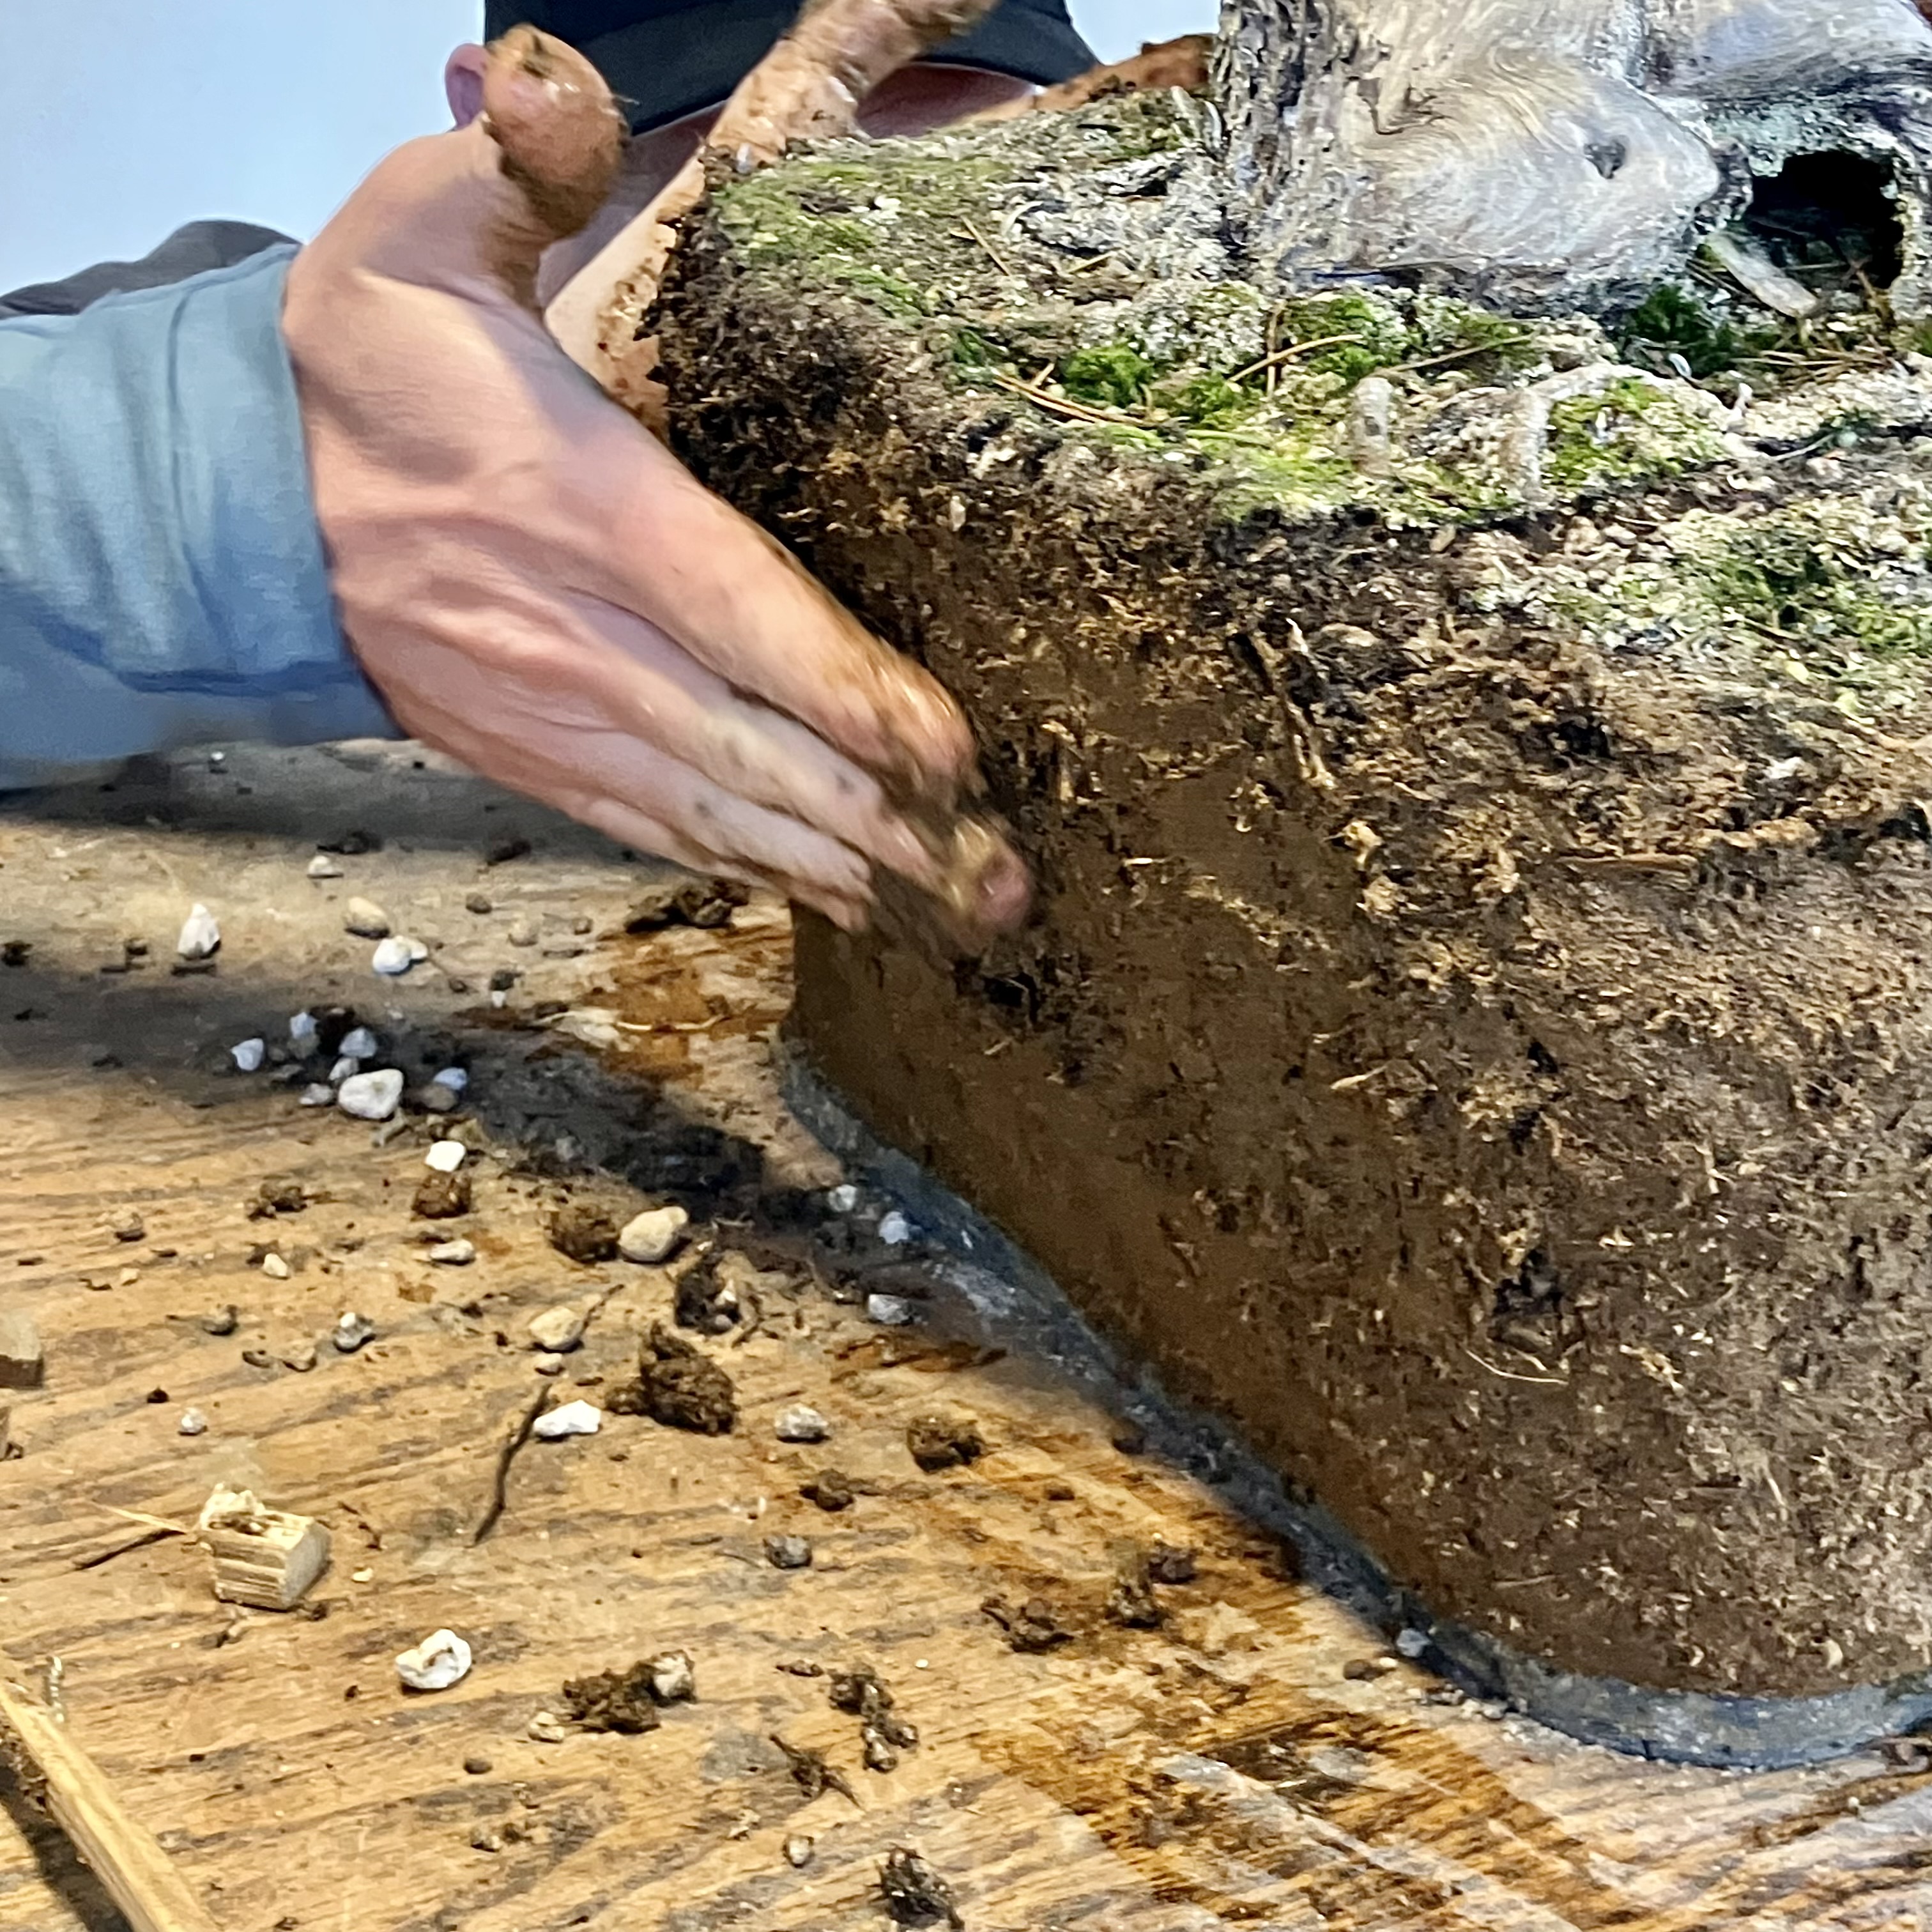
The bottom has a muck wall about 1” thick. Above that is the root mass where we spread on a watered-down muck like a slurry over the cut ends of the fine roots.
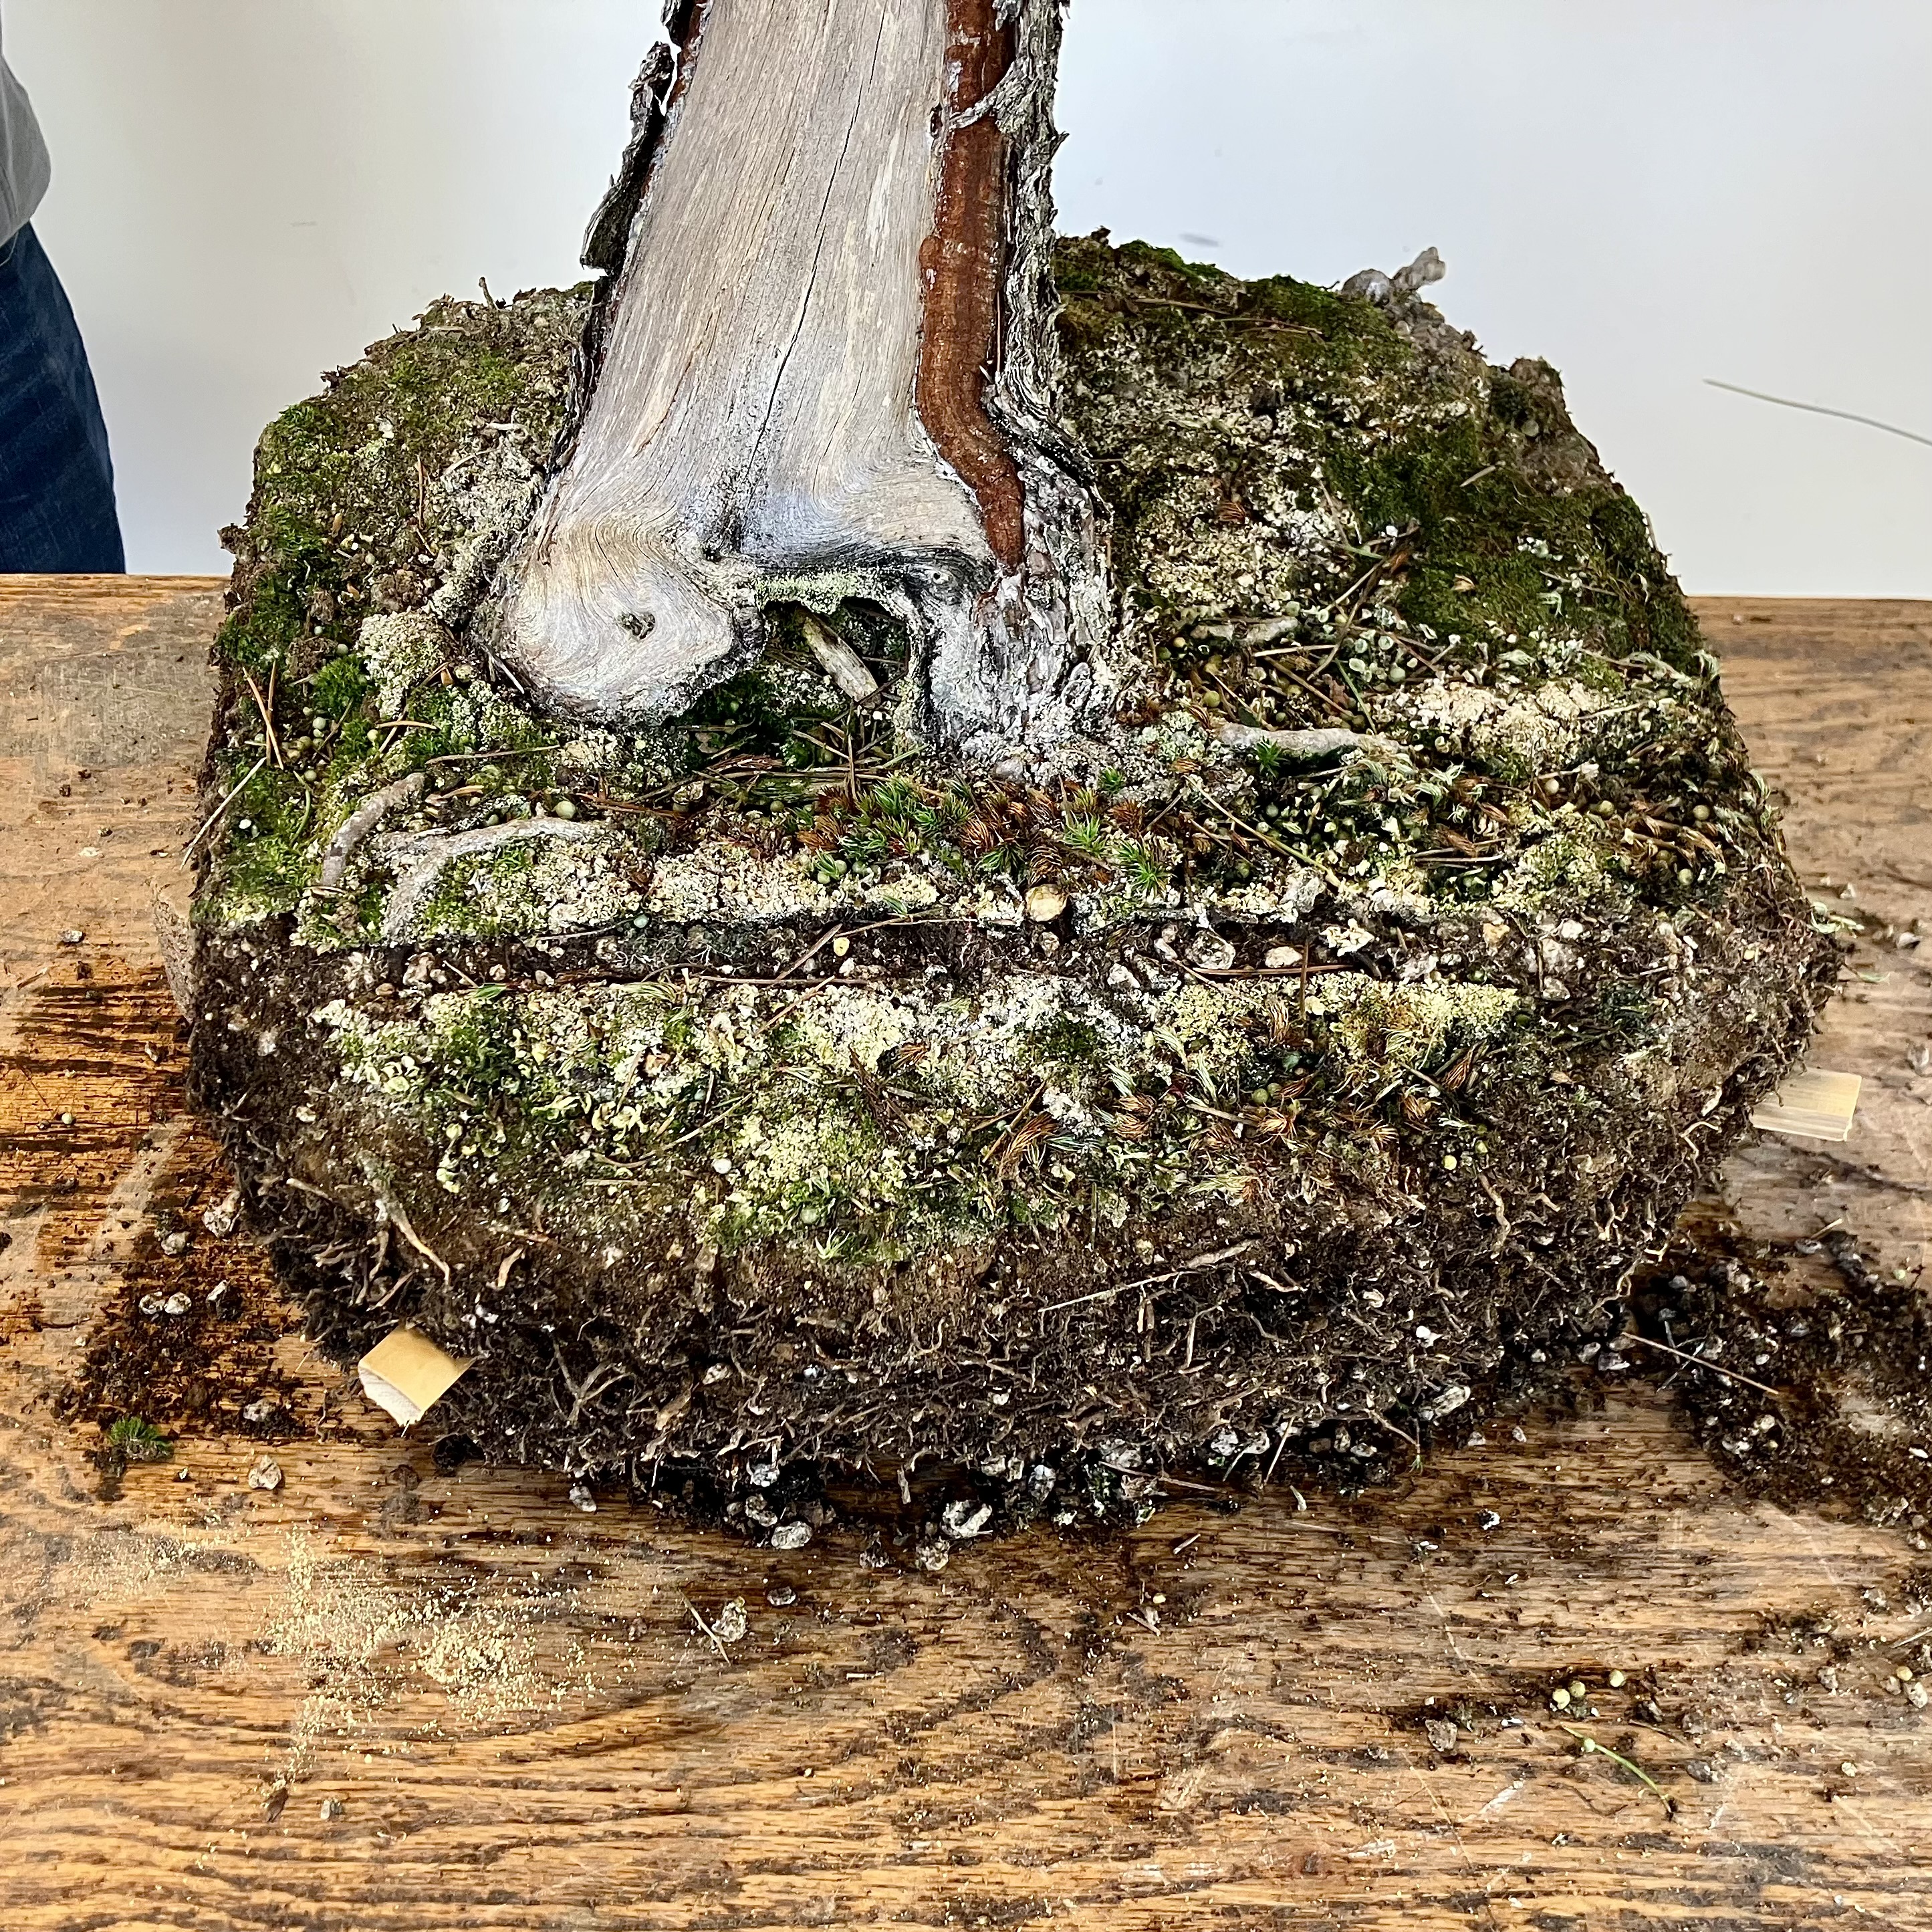
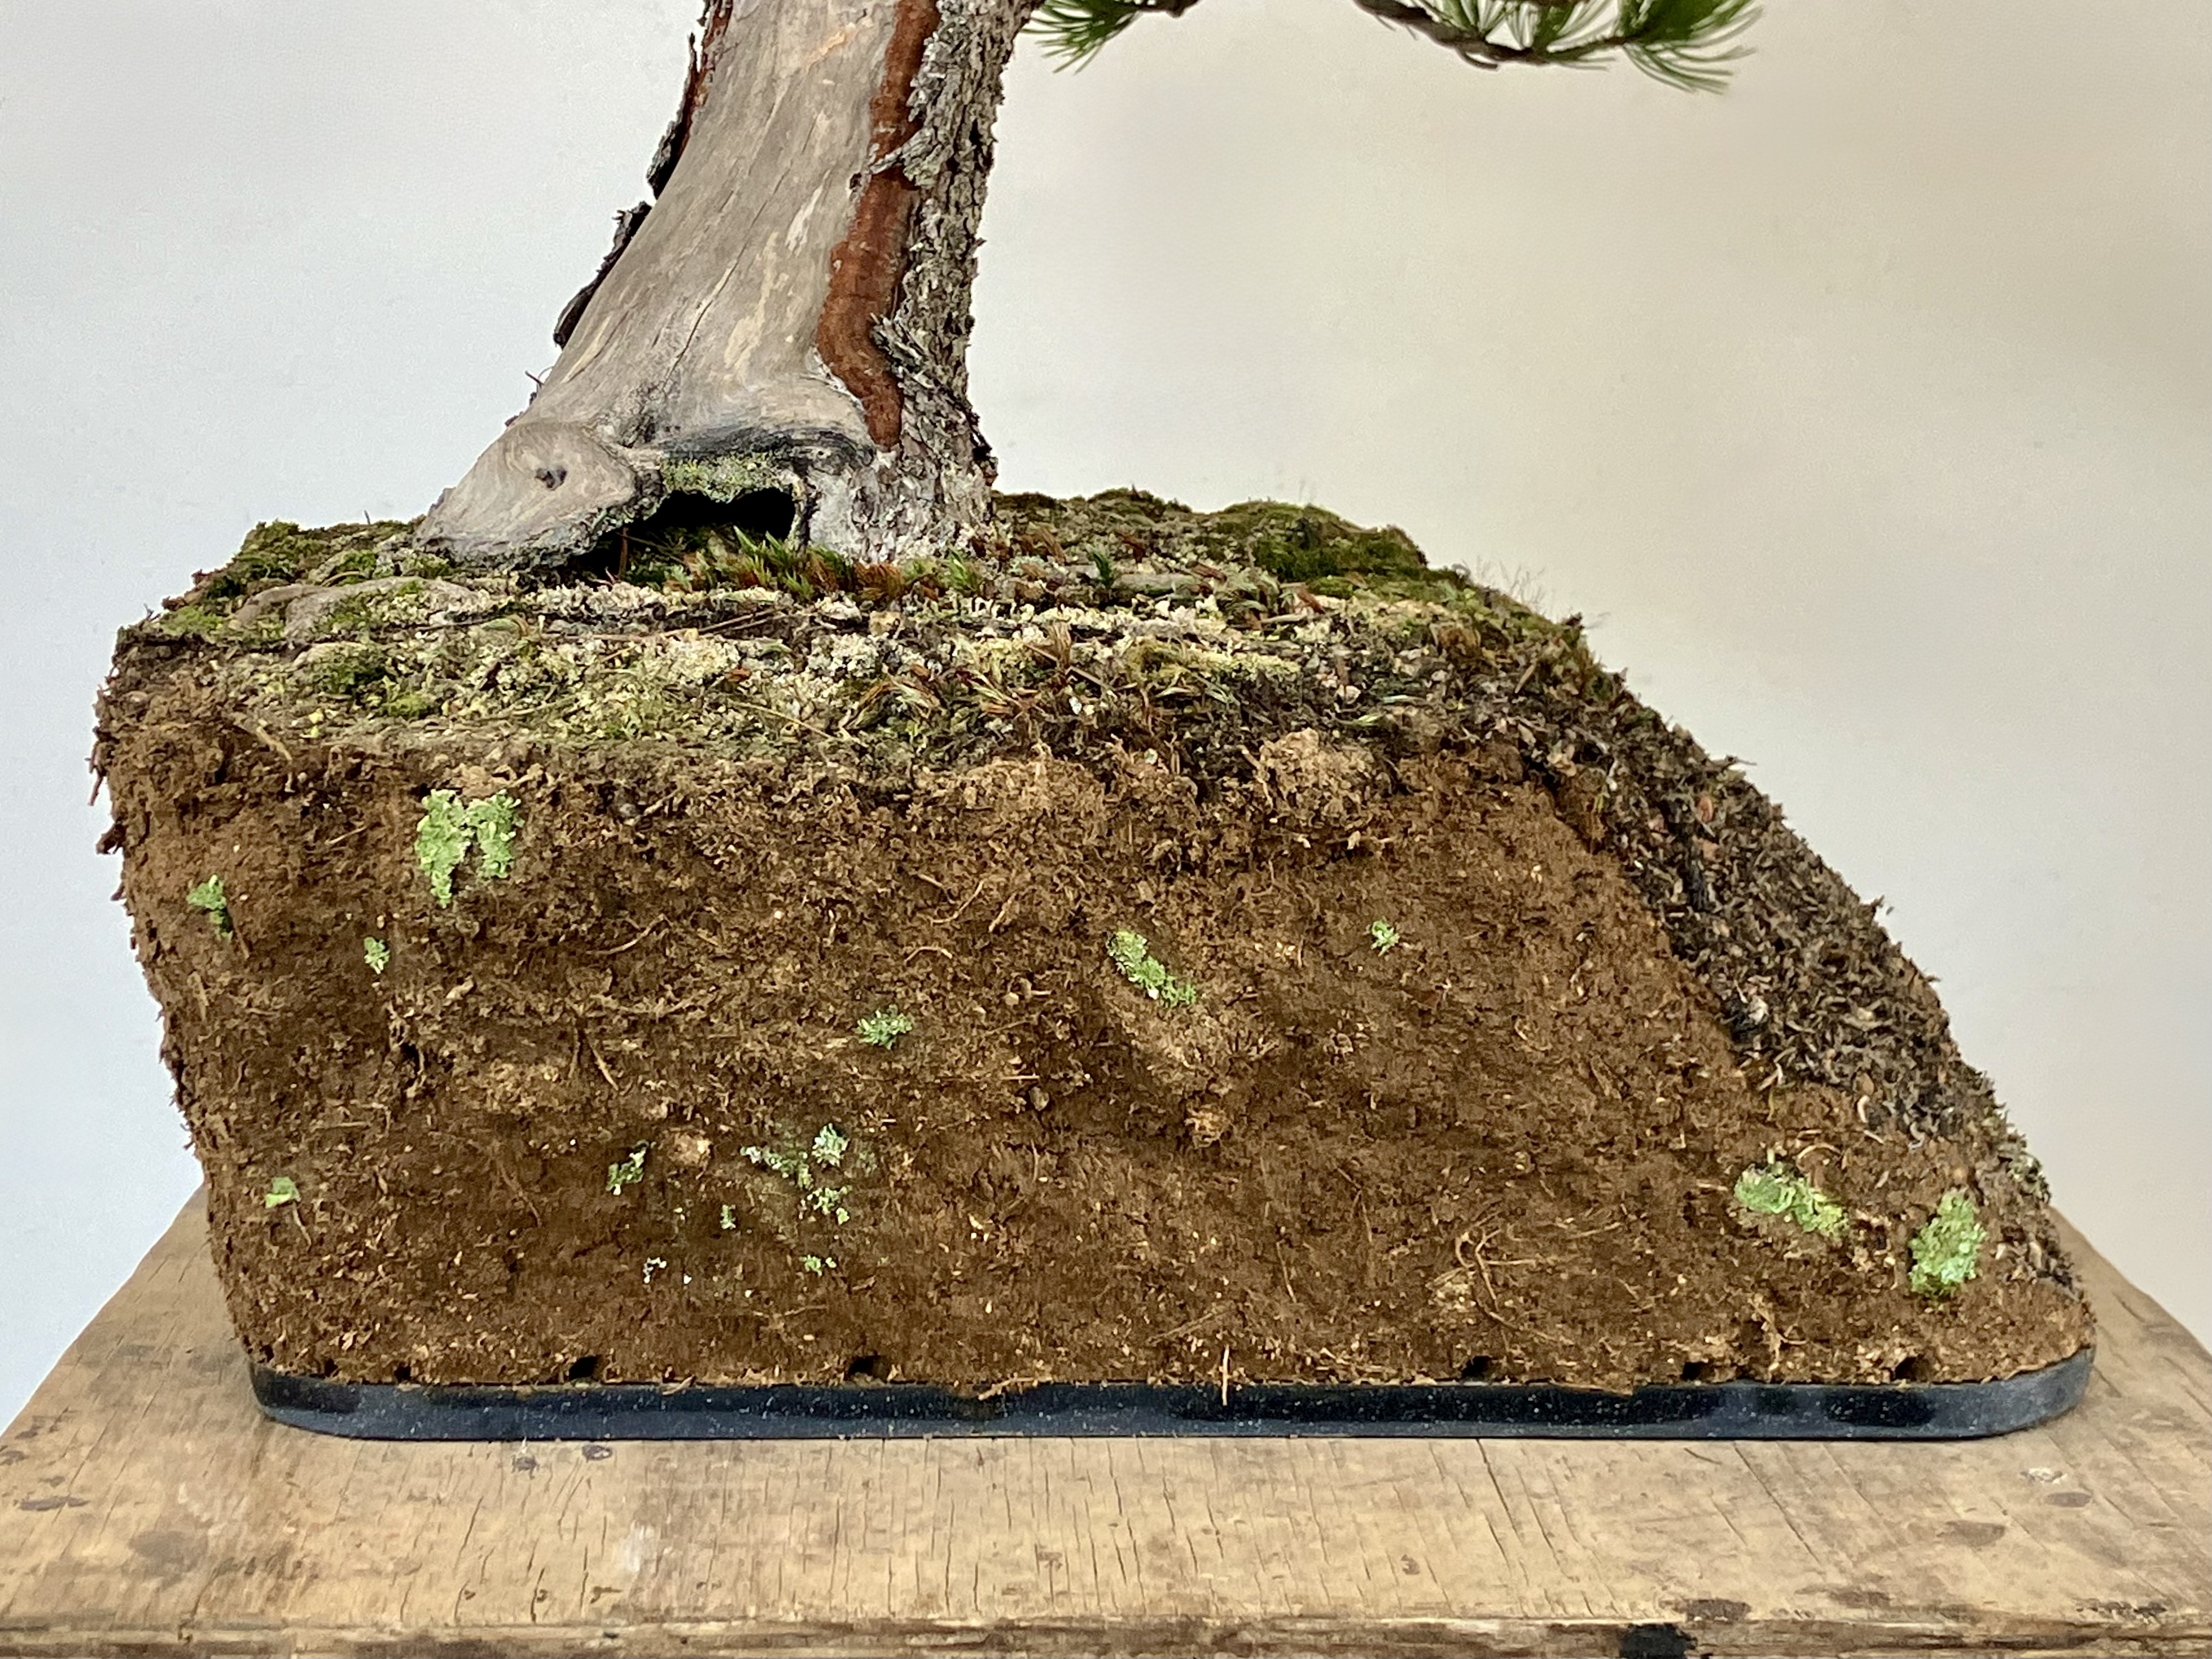
The finished slab planting. A few lichens adorn it to jumpstart the colonization of the new surface. Holes were punched in the bottom edge so when it’s watered, we don’t get a blowout of the muck wall from a gallon of water seeking escape. Had that once. Moss and lichen will cover the holes in a year or two, but once roots grow into the muck the protective job of those holes is finished.
The slope to the right has no muck on top, just soil with sphagnum over it for better water penetration.
Here’s the finished piece. It’s not like a pot. But it has some clean lines and a pot-like mass. The slopes might suggest movement and direction with a flow to the right.
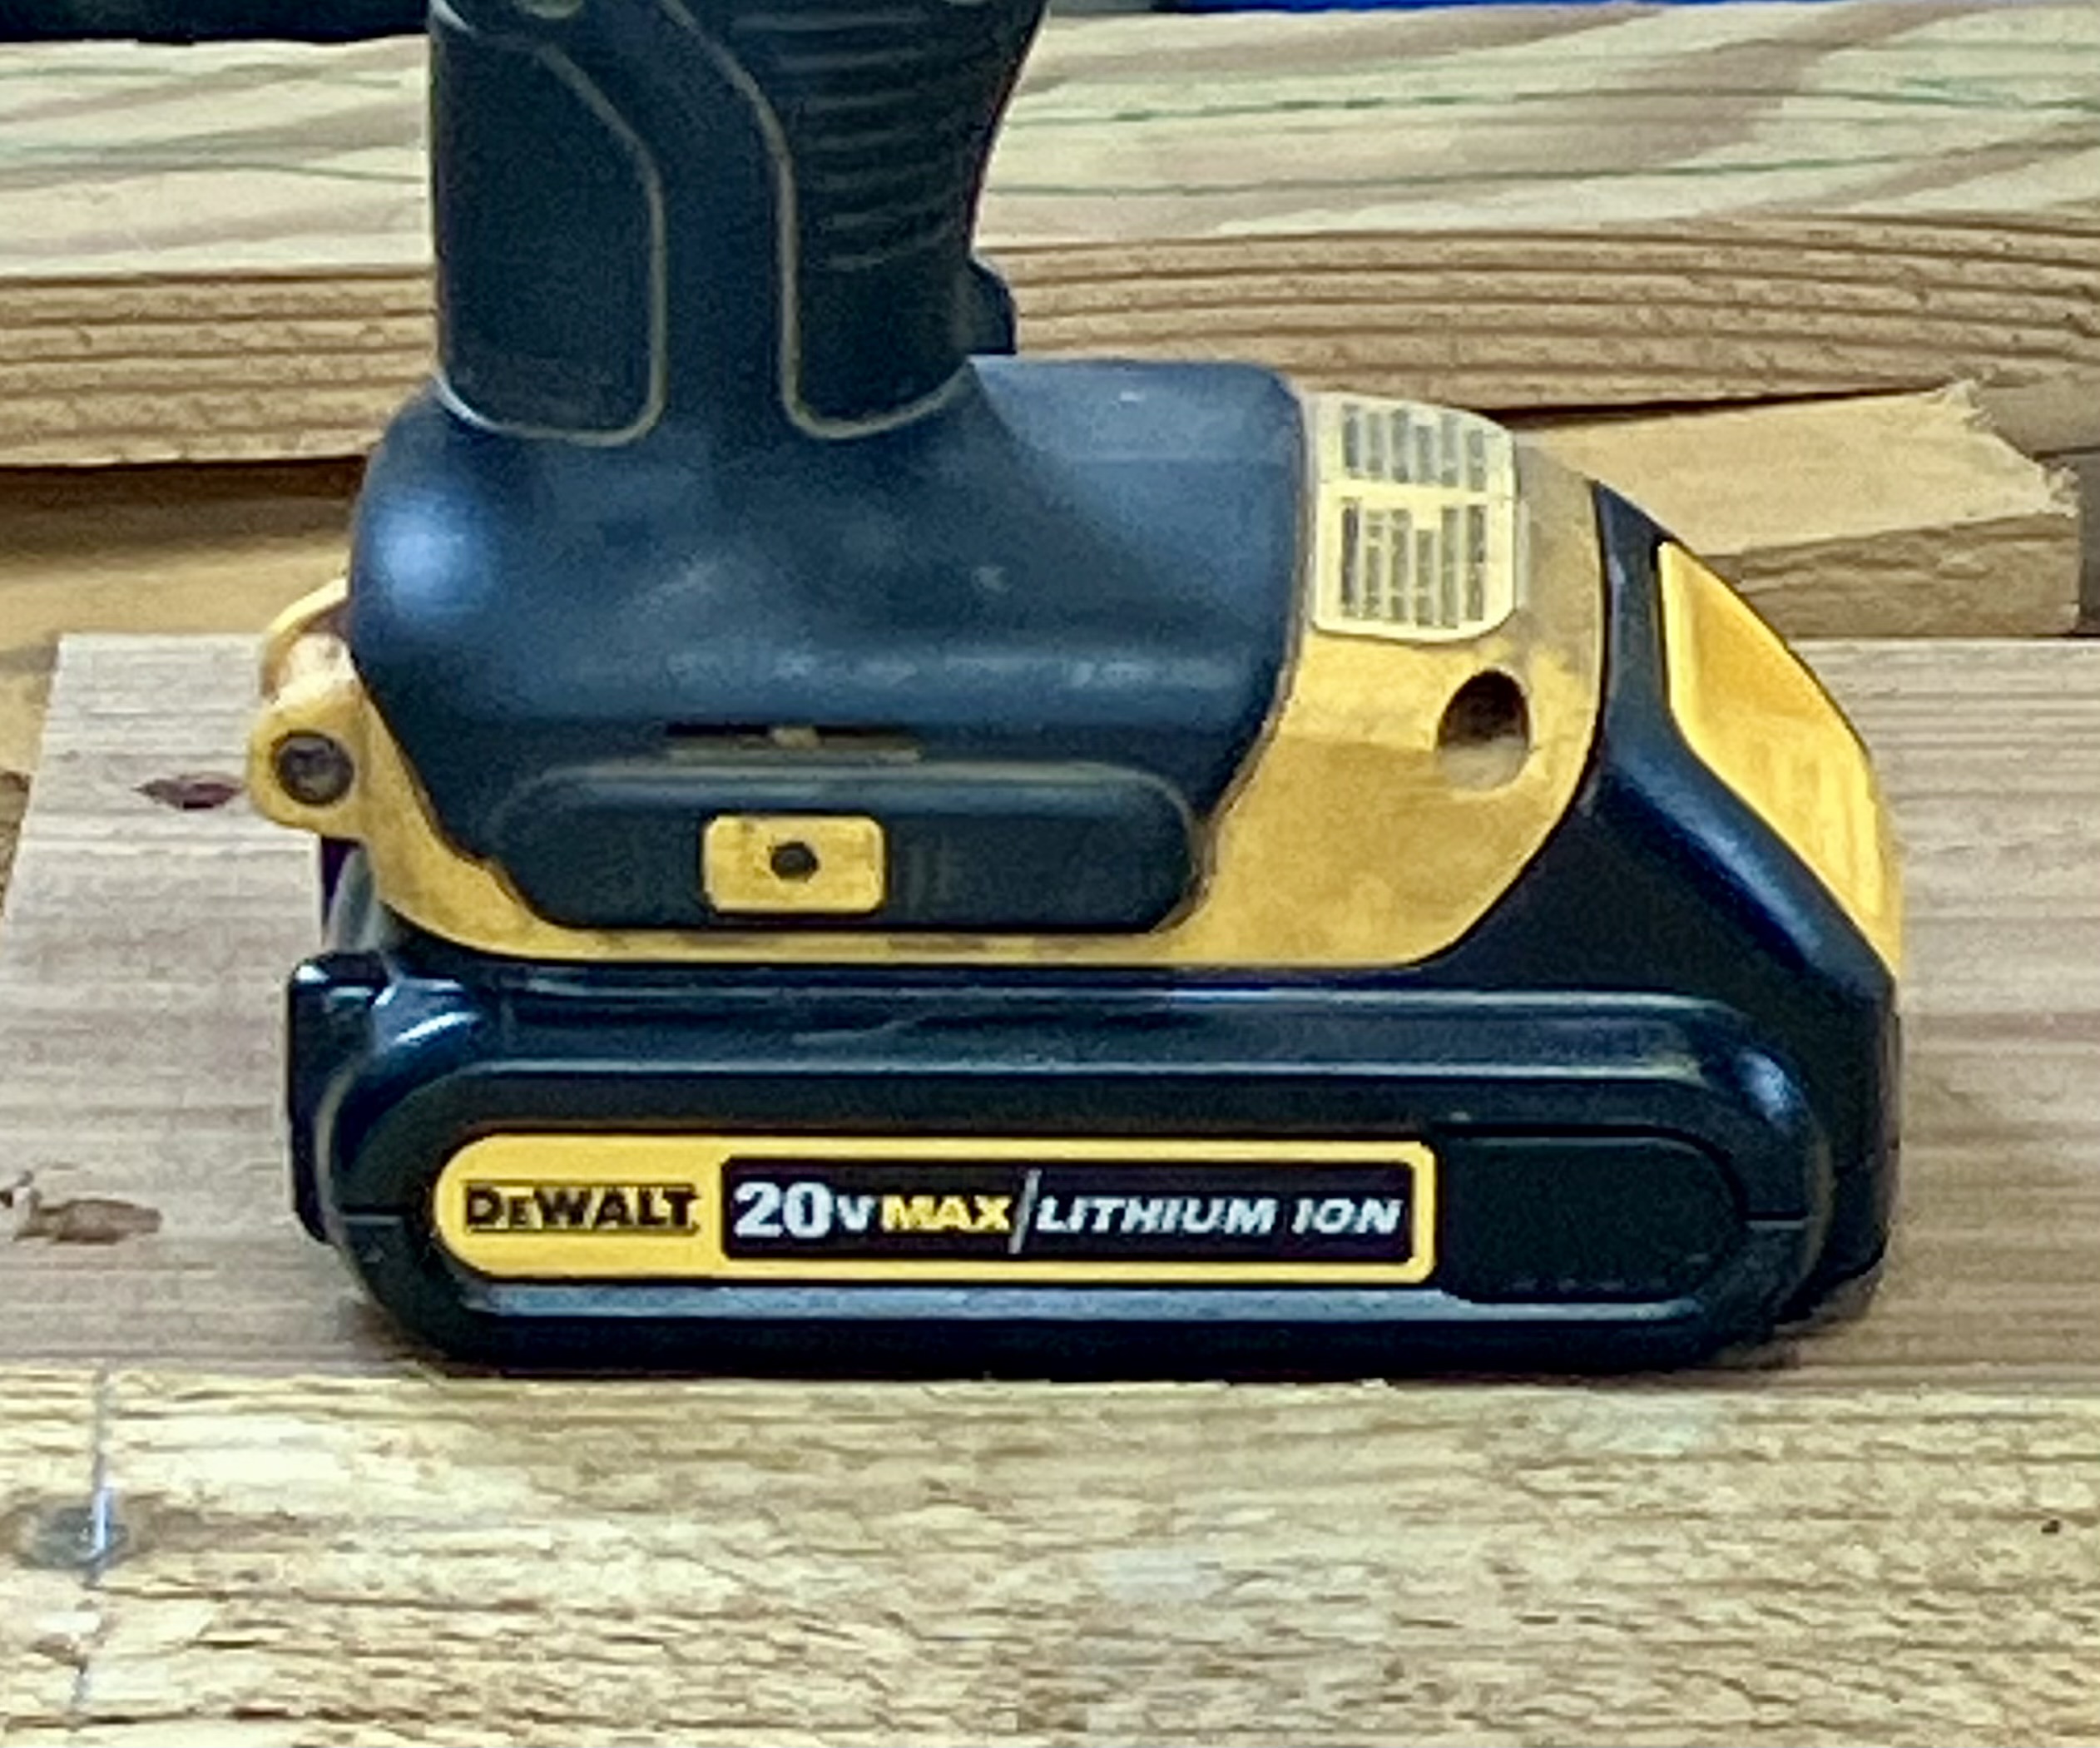
Inspiration? I didn’t notice the similarity of this DeWalt battery pack until several days later. Hard to claim inspiration if you don’t remember seeing it, though the mind is a funny thing.
For those who can’t get enough words about trees, here are a selection of books you might enjoy.
These books cover a wide arc of tree storytelling, from their lives in nature to how we interact with them. They are not about bonsai, but rather might illuminate why bonsai captivate us.
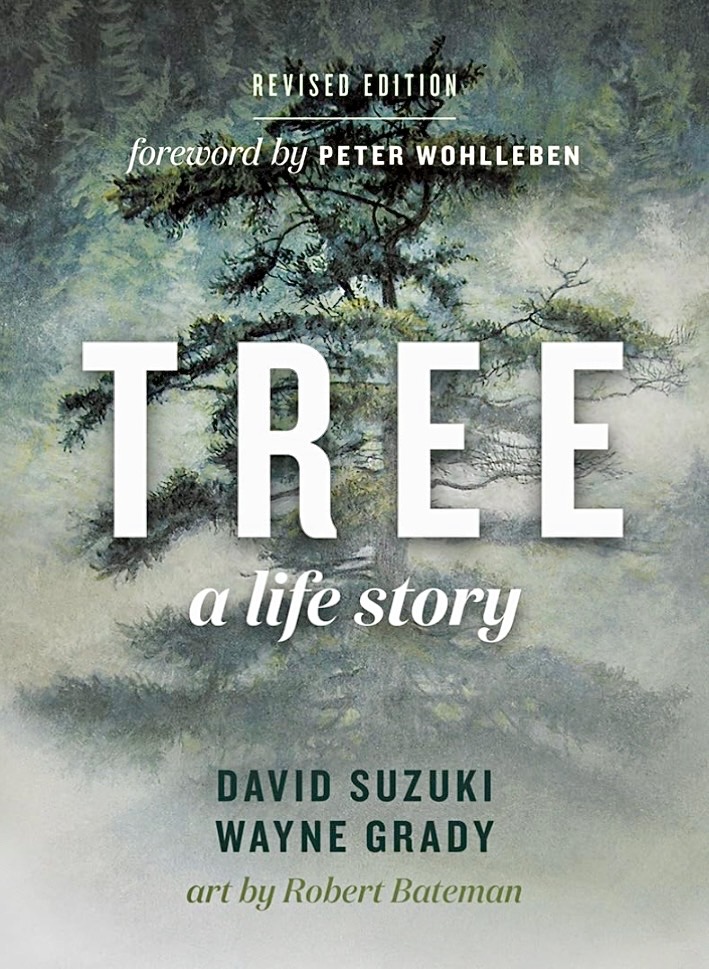
Tree: A Life Story— A penetrating view through the lens and experience of an ecologist, David Suzuki, this tree biography takes a Douglas Fir from seedling to toppling over at great age. Suzuki leads us on a macro and micro journey through the Fir’s lifespan and how it changes and is changed by the biotic life around it. You learn as much about the nitrogen cycle, carpenter ants, and the haunting similarity of chlorophyll and blood as about the tree. A small treasure.
The Overstory: A Novel— No fewer than five people have gifted or suggested this book to me, and I’ve done about the same for others. A reviewer wrote, “…trees…are both the stealth protagonists and the beating, fine-grained heart of this strange, marvelous book.” It’s a Pulitzer Prize winner, a generational effort, and, if you have the emotional bandwidth for a deep dive of several generations of people and their lives with trees, worth it. A delicious set of stories.
In Trees: An Exploration— Due to be released on April 7, 2026 (pre-ordering has begun), Robert Moor’s book has already received strong reviews from Kirkus, Publisher’s Weekly, and dignitaries from natural history circles. From the top of a sequoia filming a documentary with David Attenborough to a tree full of chimpanzees, this investigative romp wonders what a tree is from the vantage of science, history, and philosophy. Moor interviewed me for an article in The New Yorker about bonsai, and I’m personally looking forward to this one.
I’ll offer another short book list again soon. Feel free to suggest your favorite “bonsai-adjacent” books in the comments.
This week, an assortment of puzzlers from this spring’s repots, with comments.
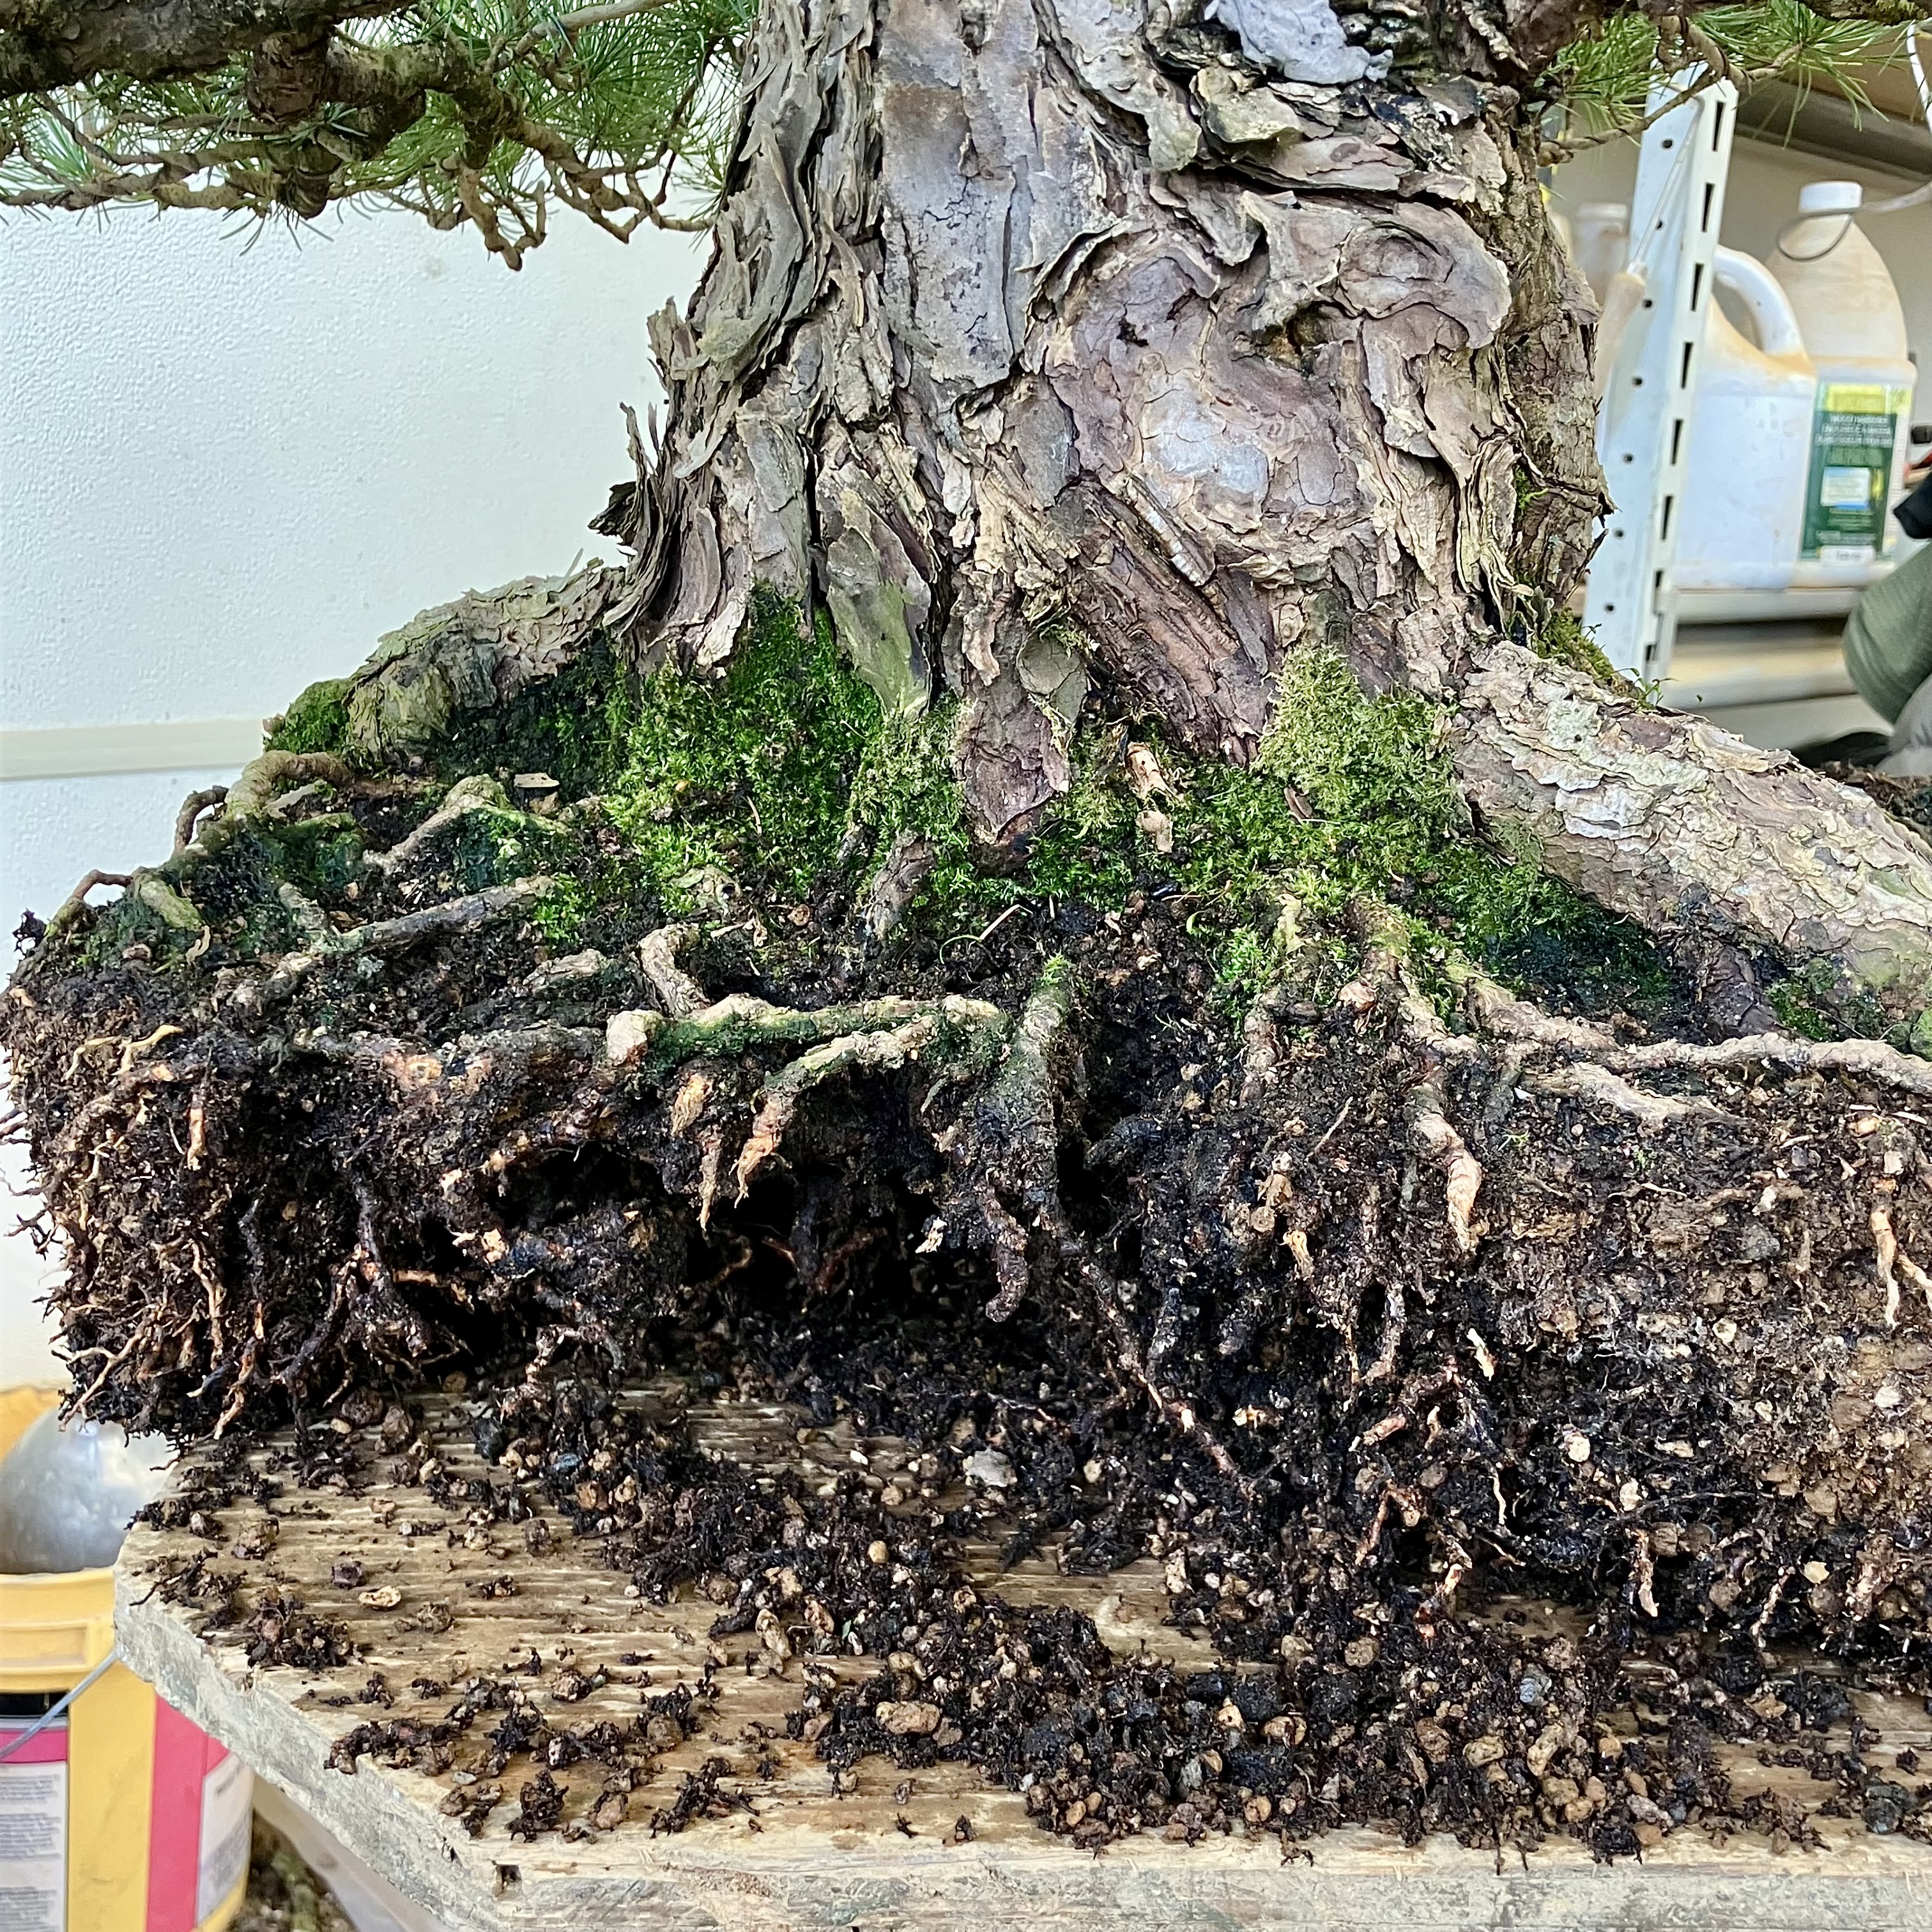
A Japanese Beech with an unfortunate root system. Chunks of roots have died, identified by being black, unlike the living ones, which are light brown. Spraying with water helps see which is which. Then cut away the black areas until you see healthy tissue.
Here is a Japanese White Pine with a similar issue. One possible reason for a pocket of root death is that the tree dried out completely, causing root death in areas, then was watered as usual, and then rot sets in. Correction is the same as with the Beech. It is easy to get air pockets when removing big chunks of the root mass like this, so have large mounds of new soil wherever there is a hole under the root mass before settling the tree in, and take more time chopsticking in soil. Having a “porthole” through the nebari helps drop soil in.
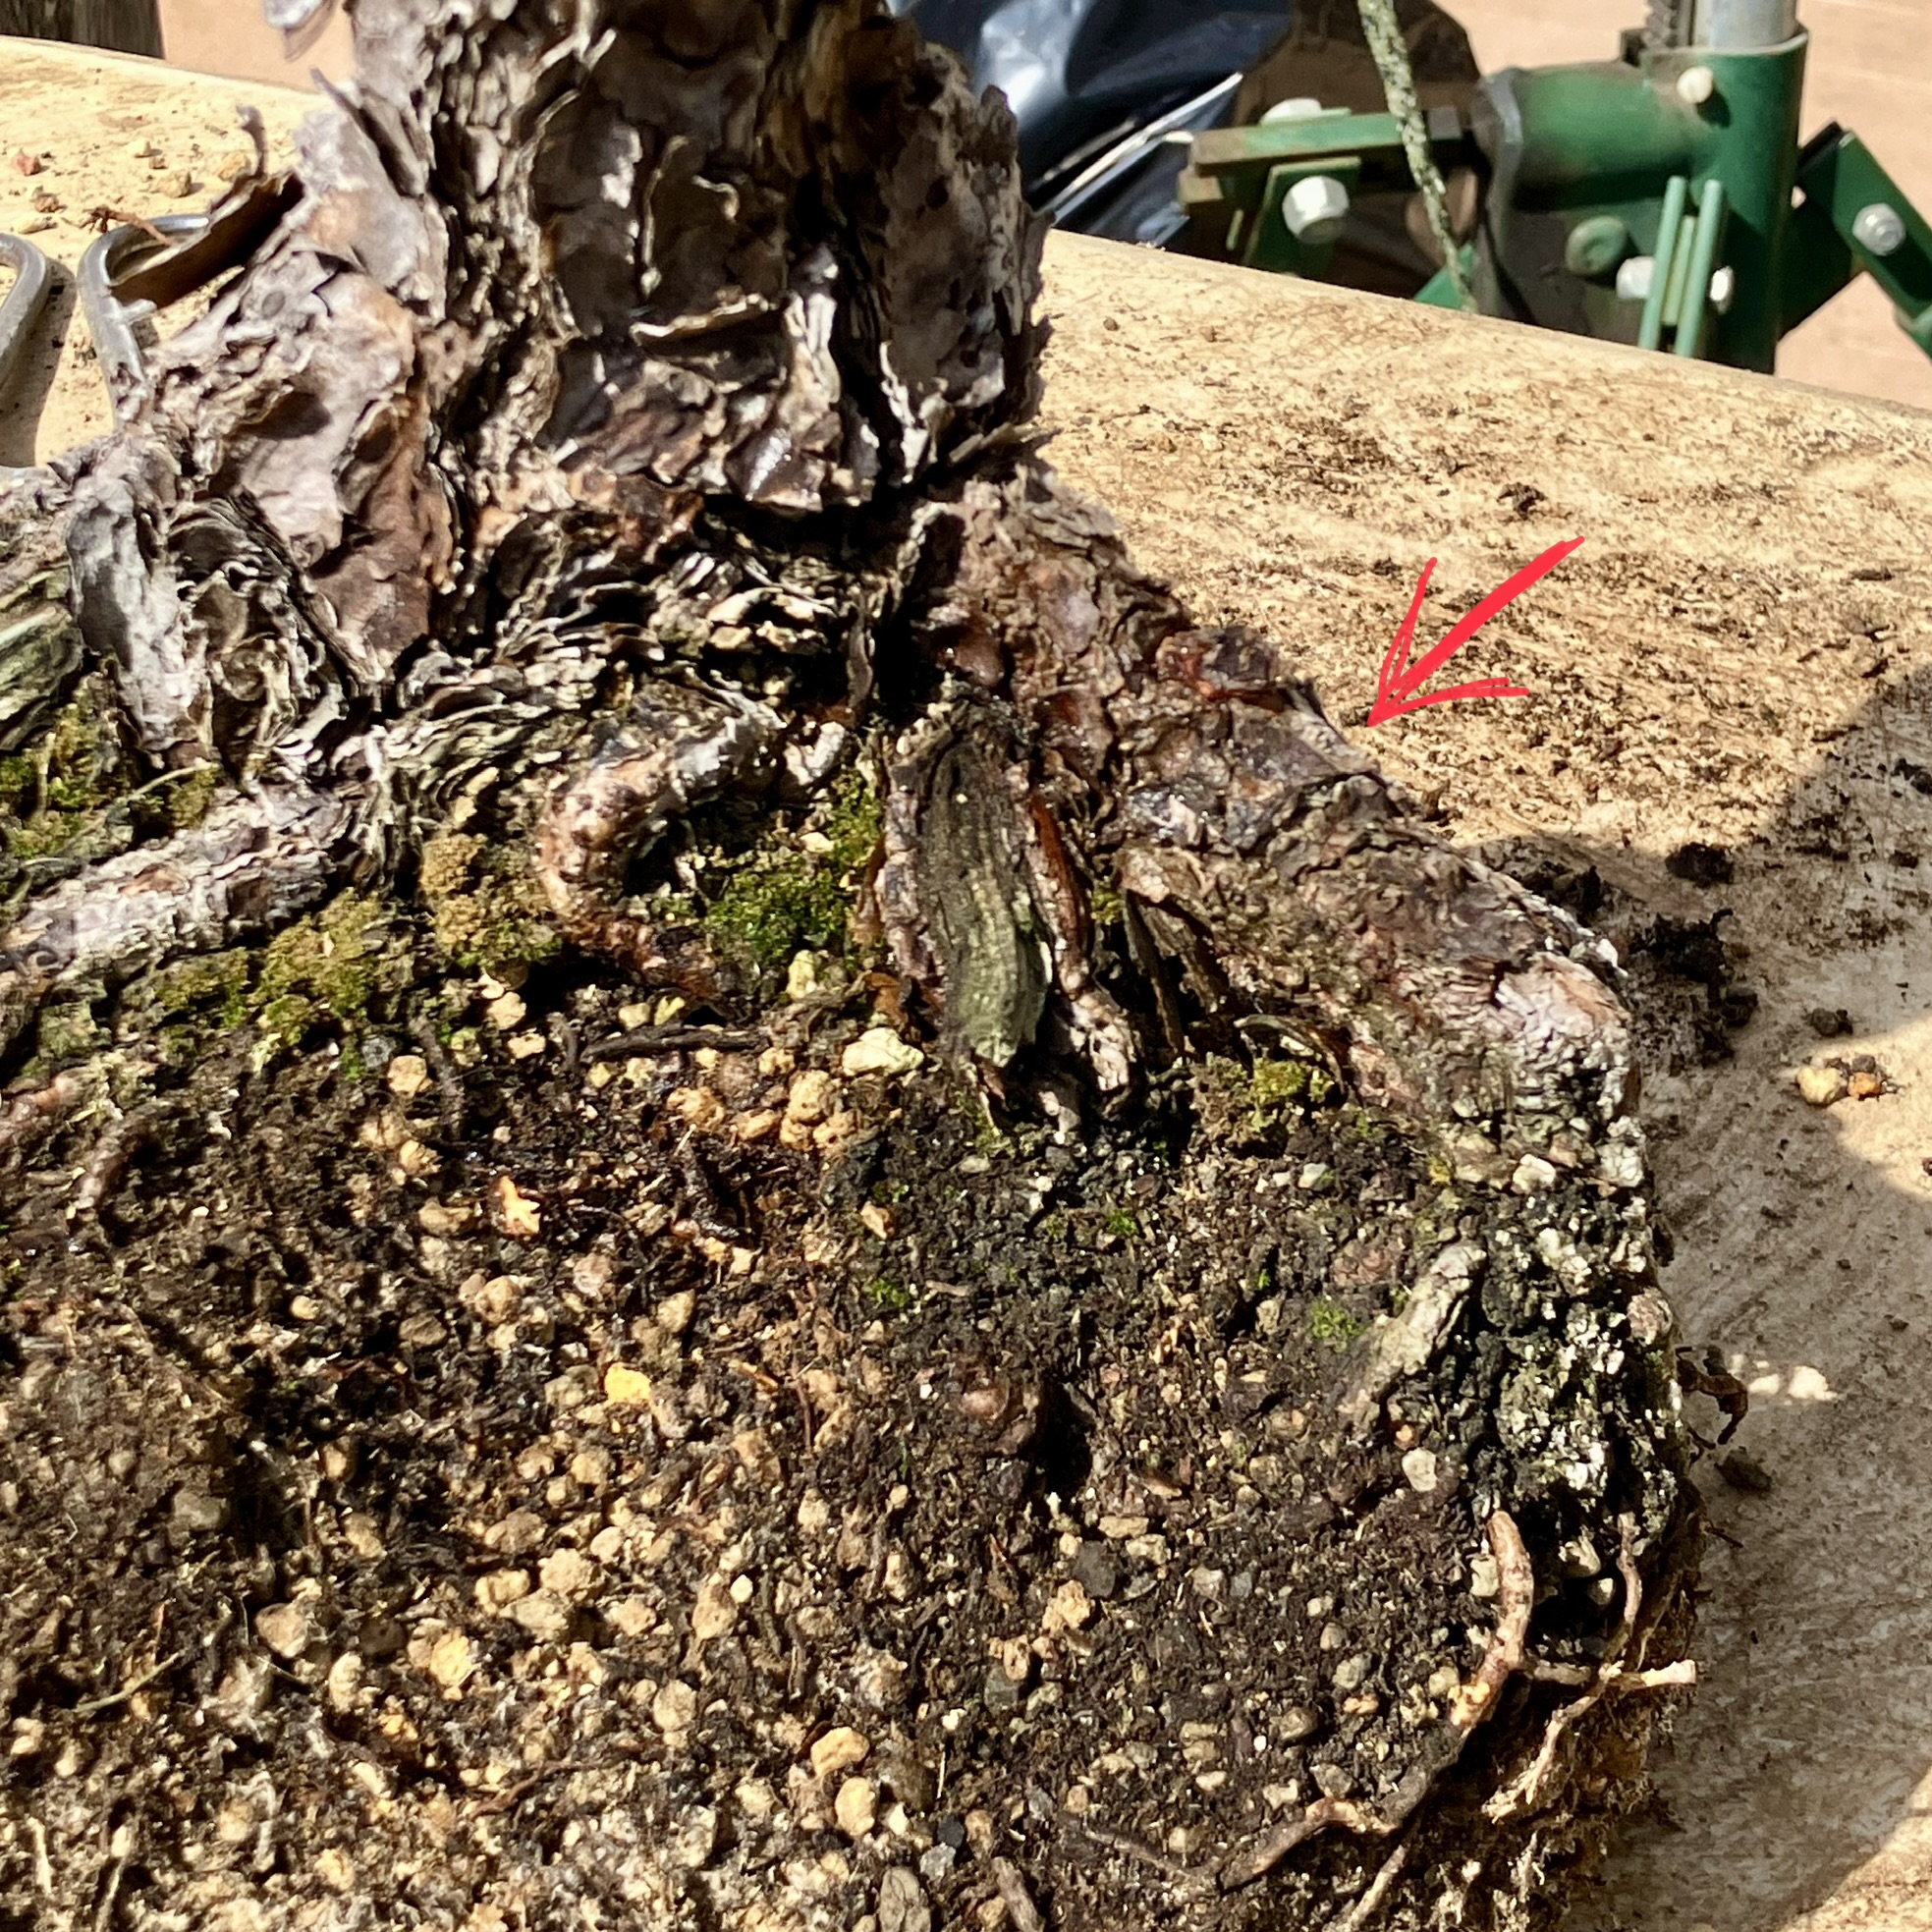
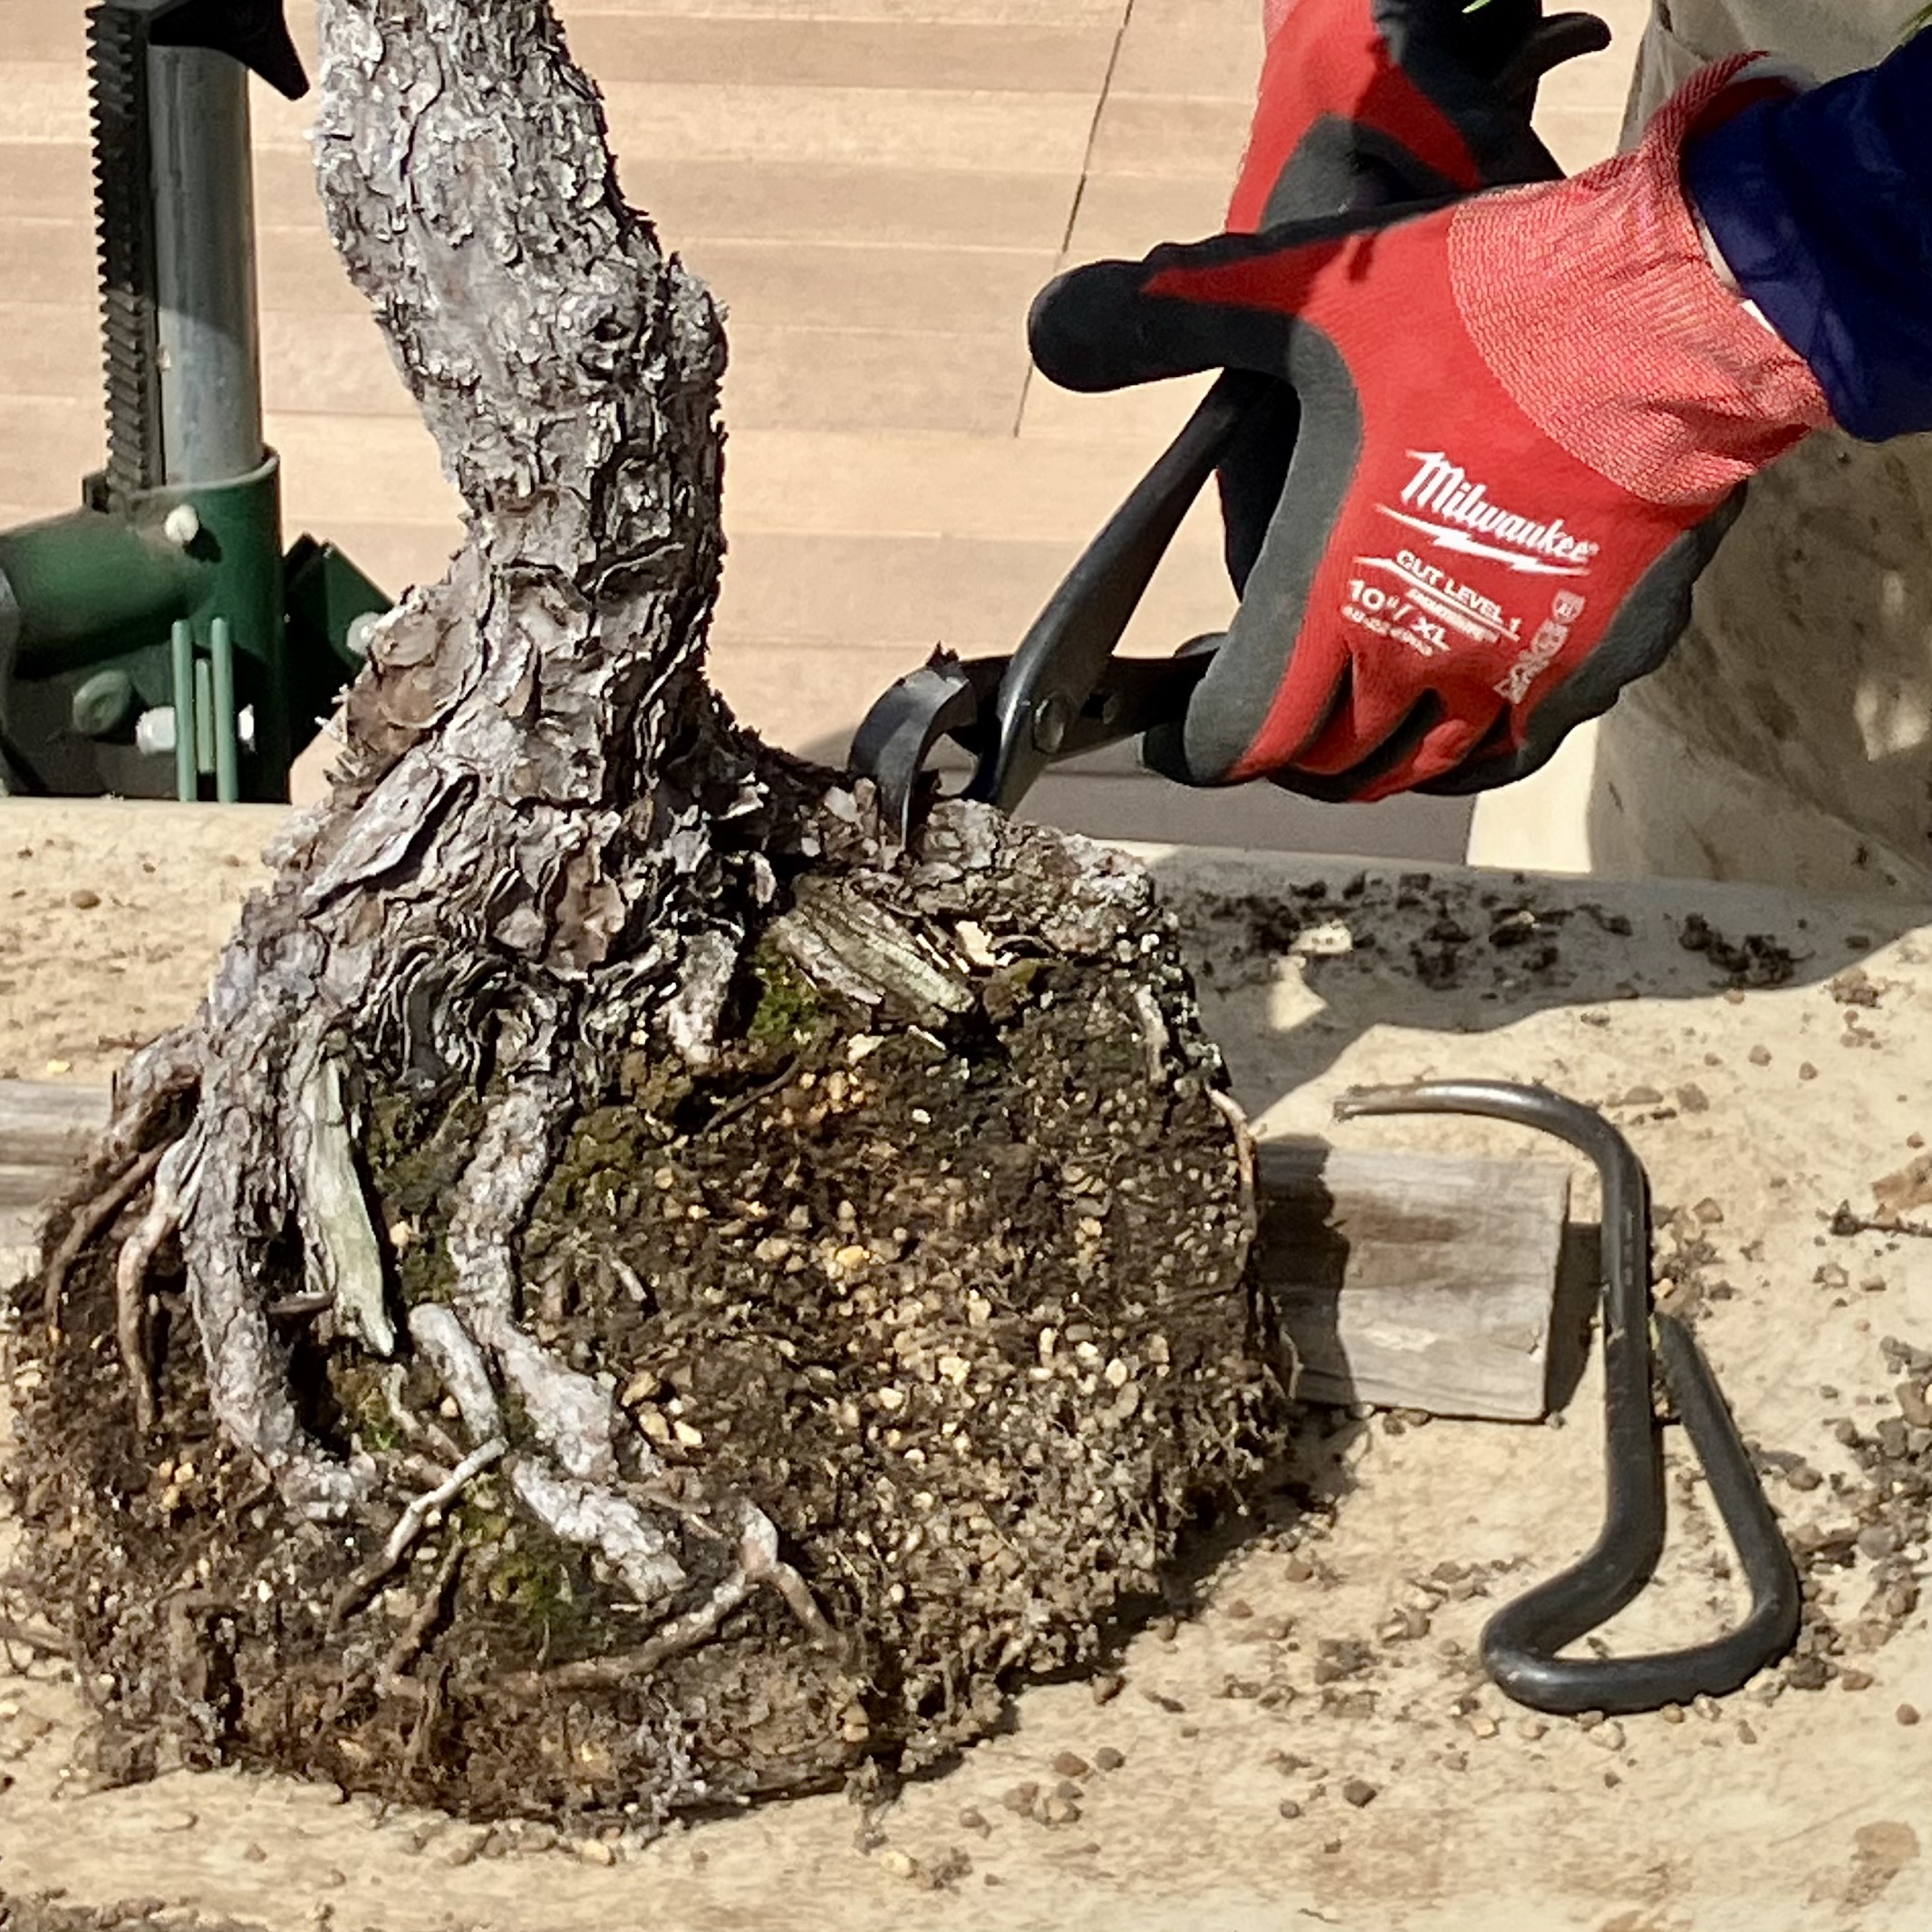
This one is an aesthetic decision—removing a high, ugly root on a Japanese Black Pine.
Cutting off the root.
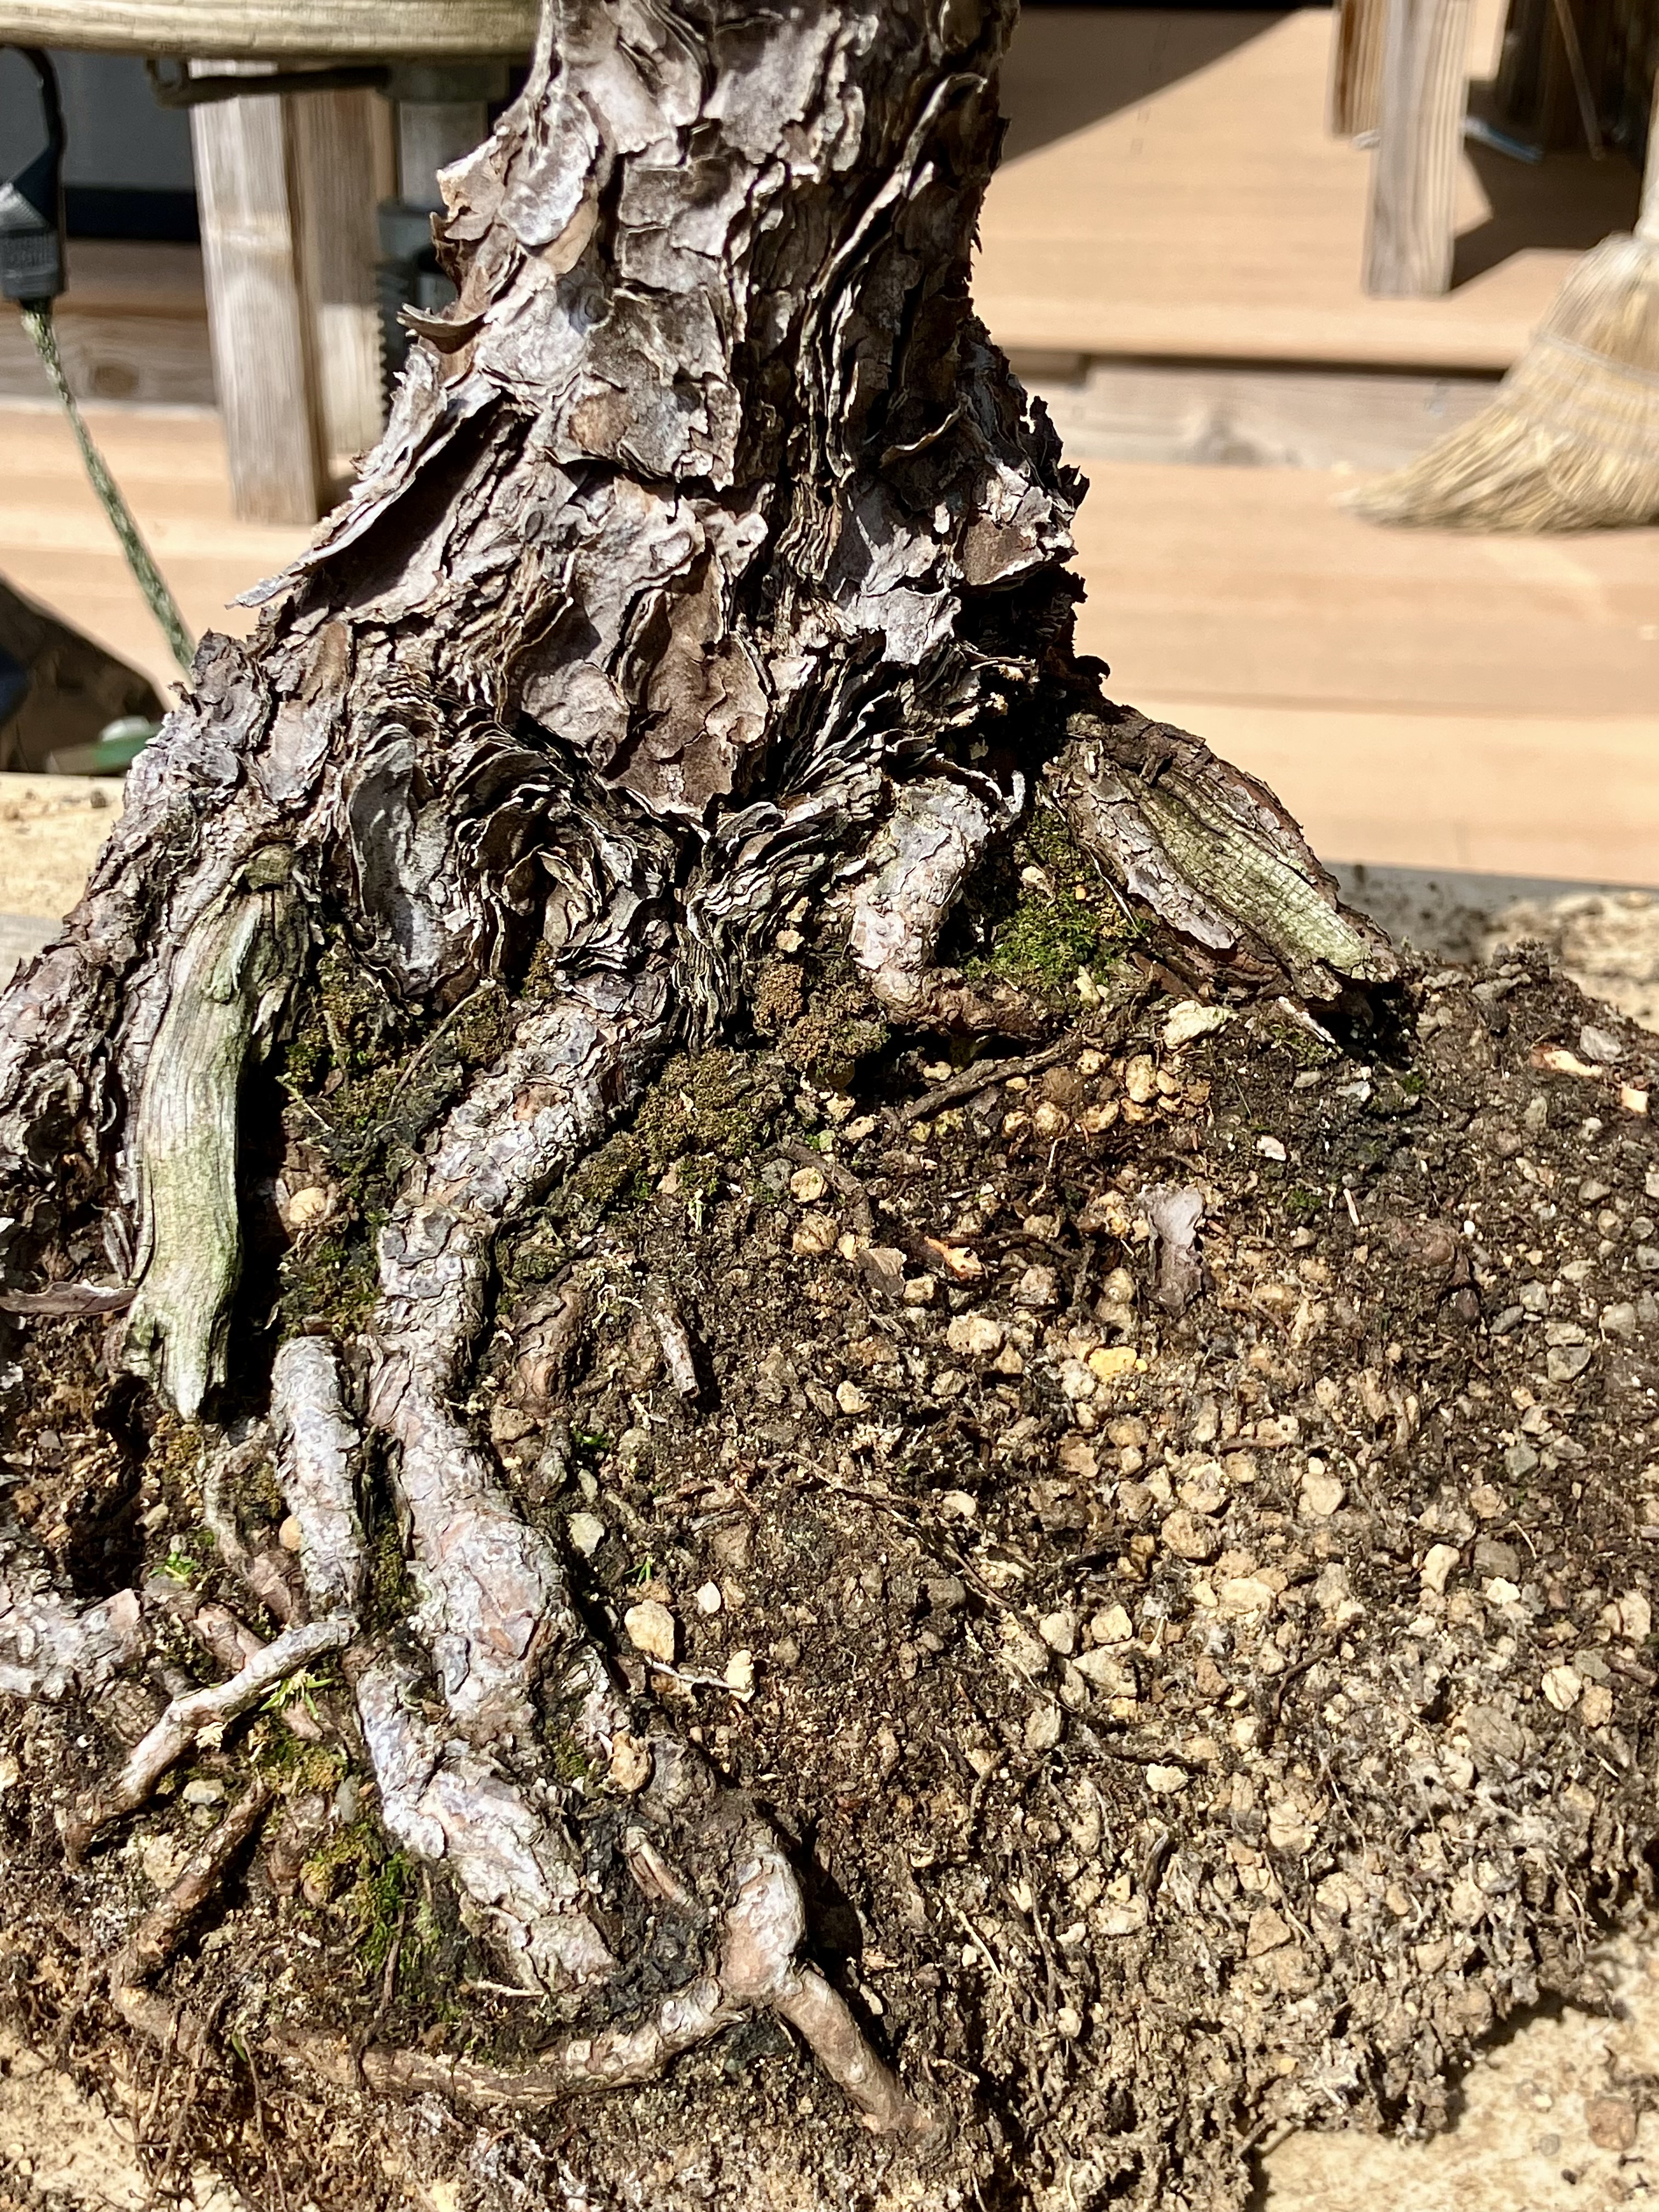
Root removed, leaving one with some shari on it just below, which slopes into the soil better.
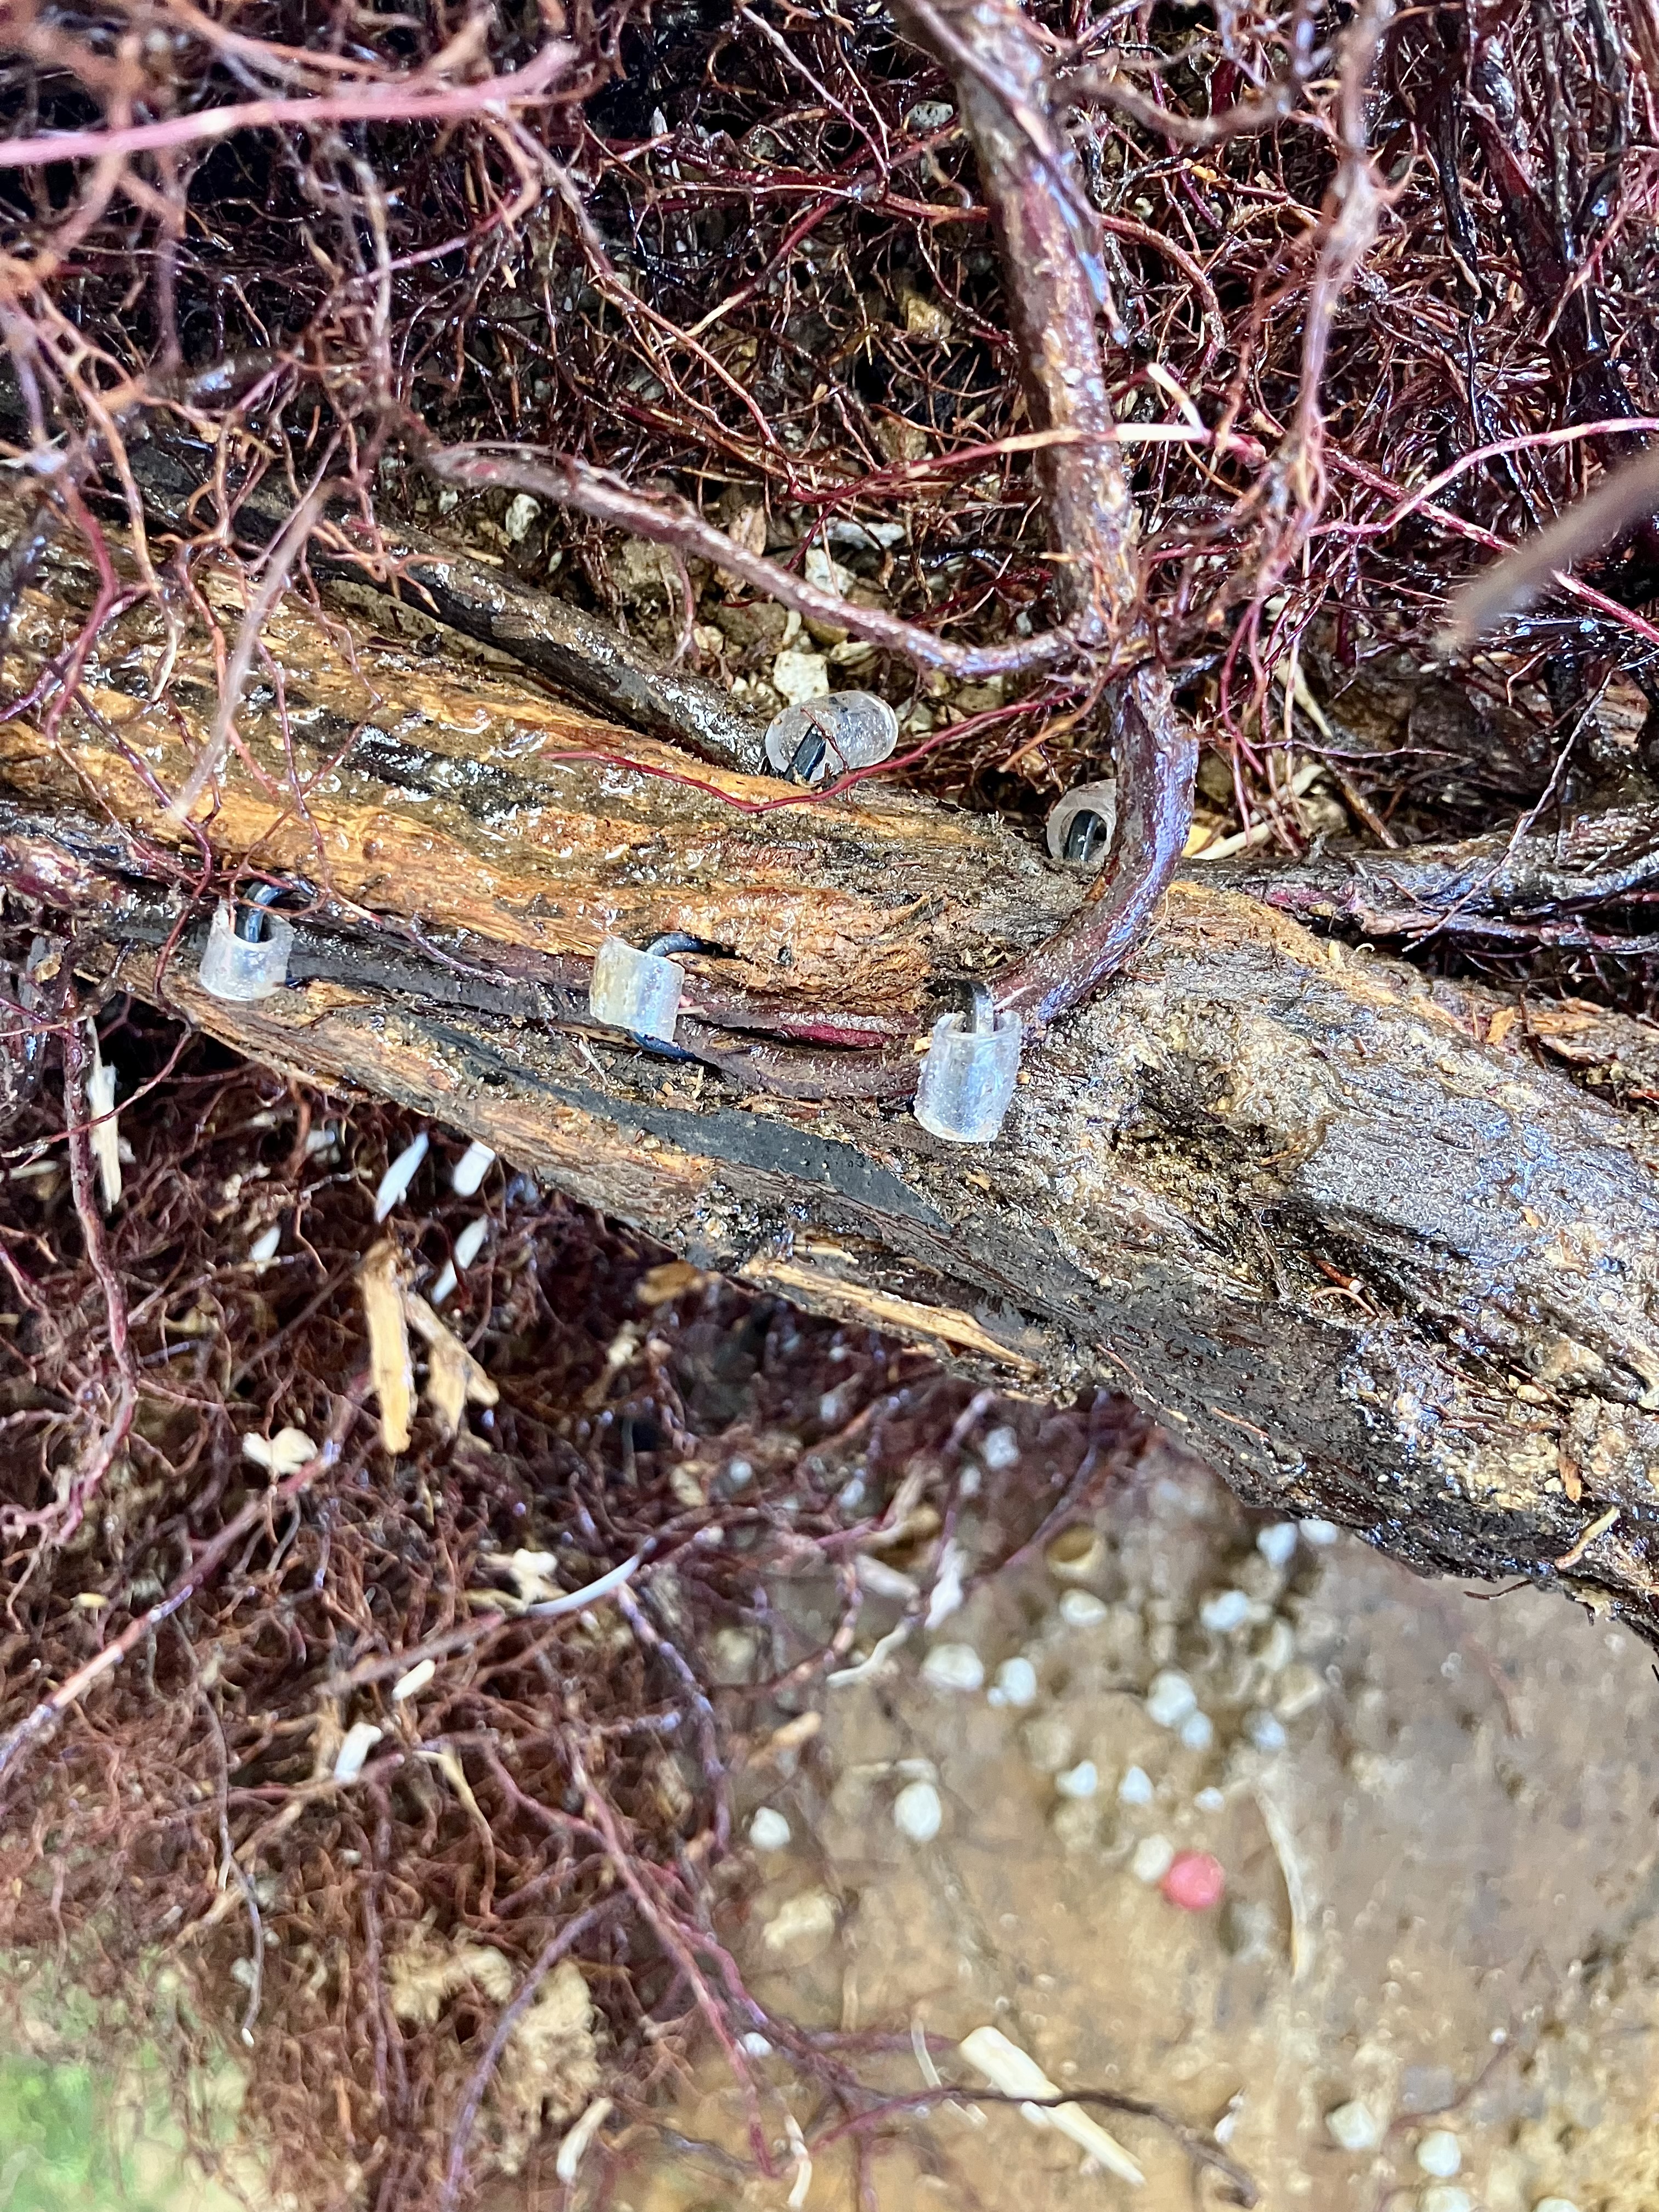
Approach grafting roots on a Rocky Mountain Juniper. This technique is not used much to get better juniper nebari, but rather to shorten an uninteresting trunk to the area it starts to get jazzy. U-pins with protective rubber hold 1/4” roots into grooves cut in the live vein.
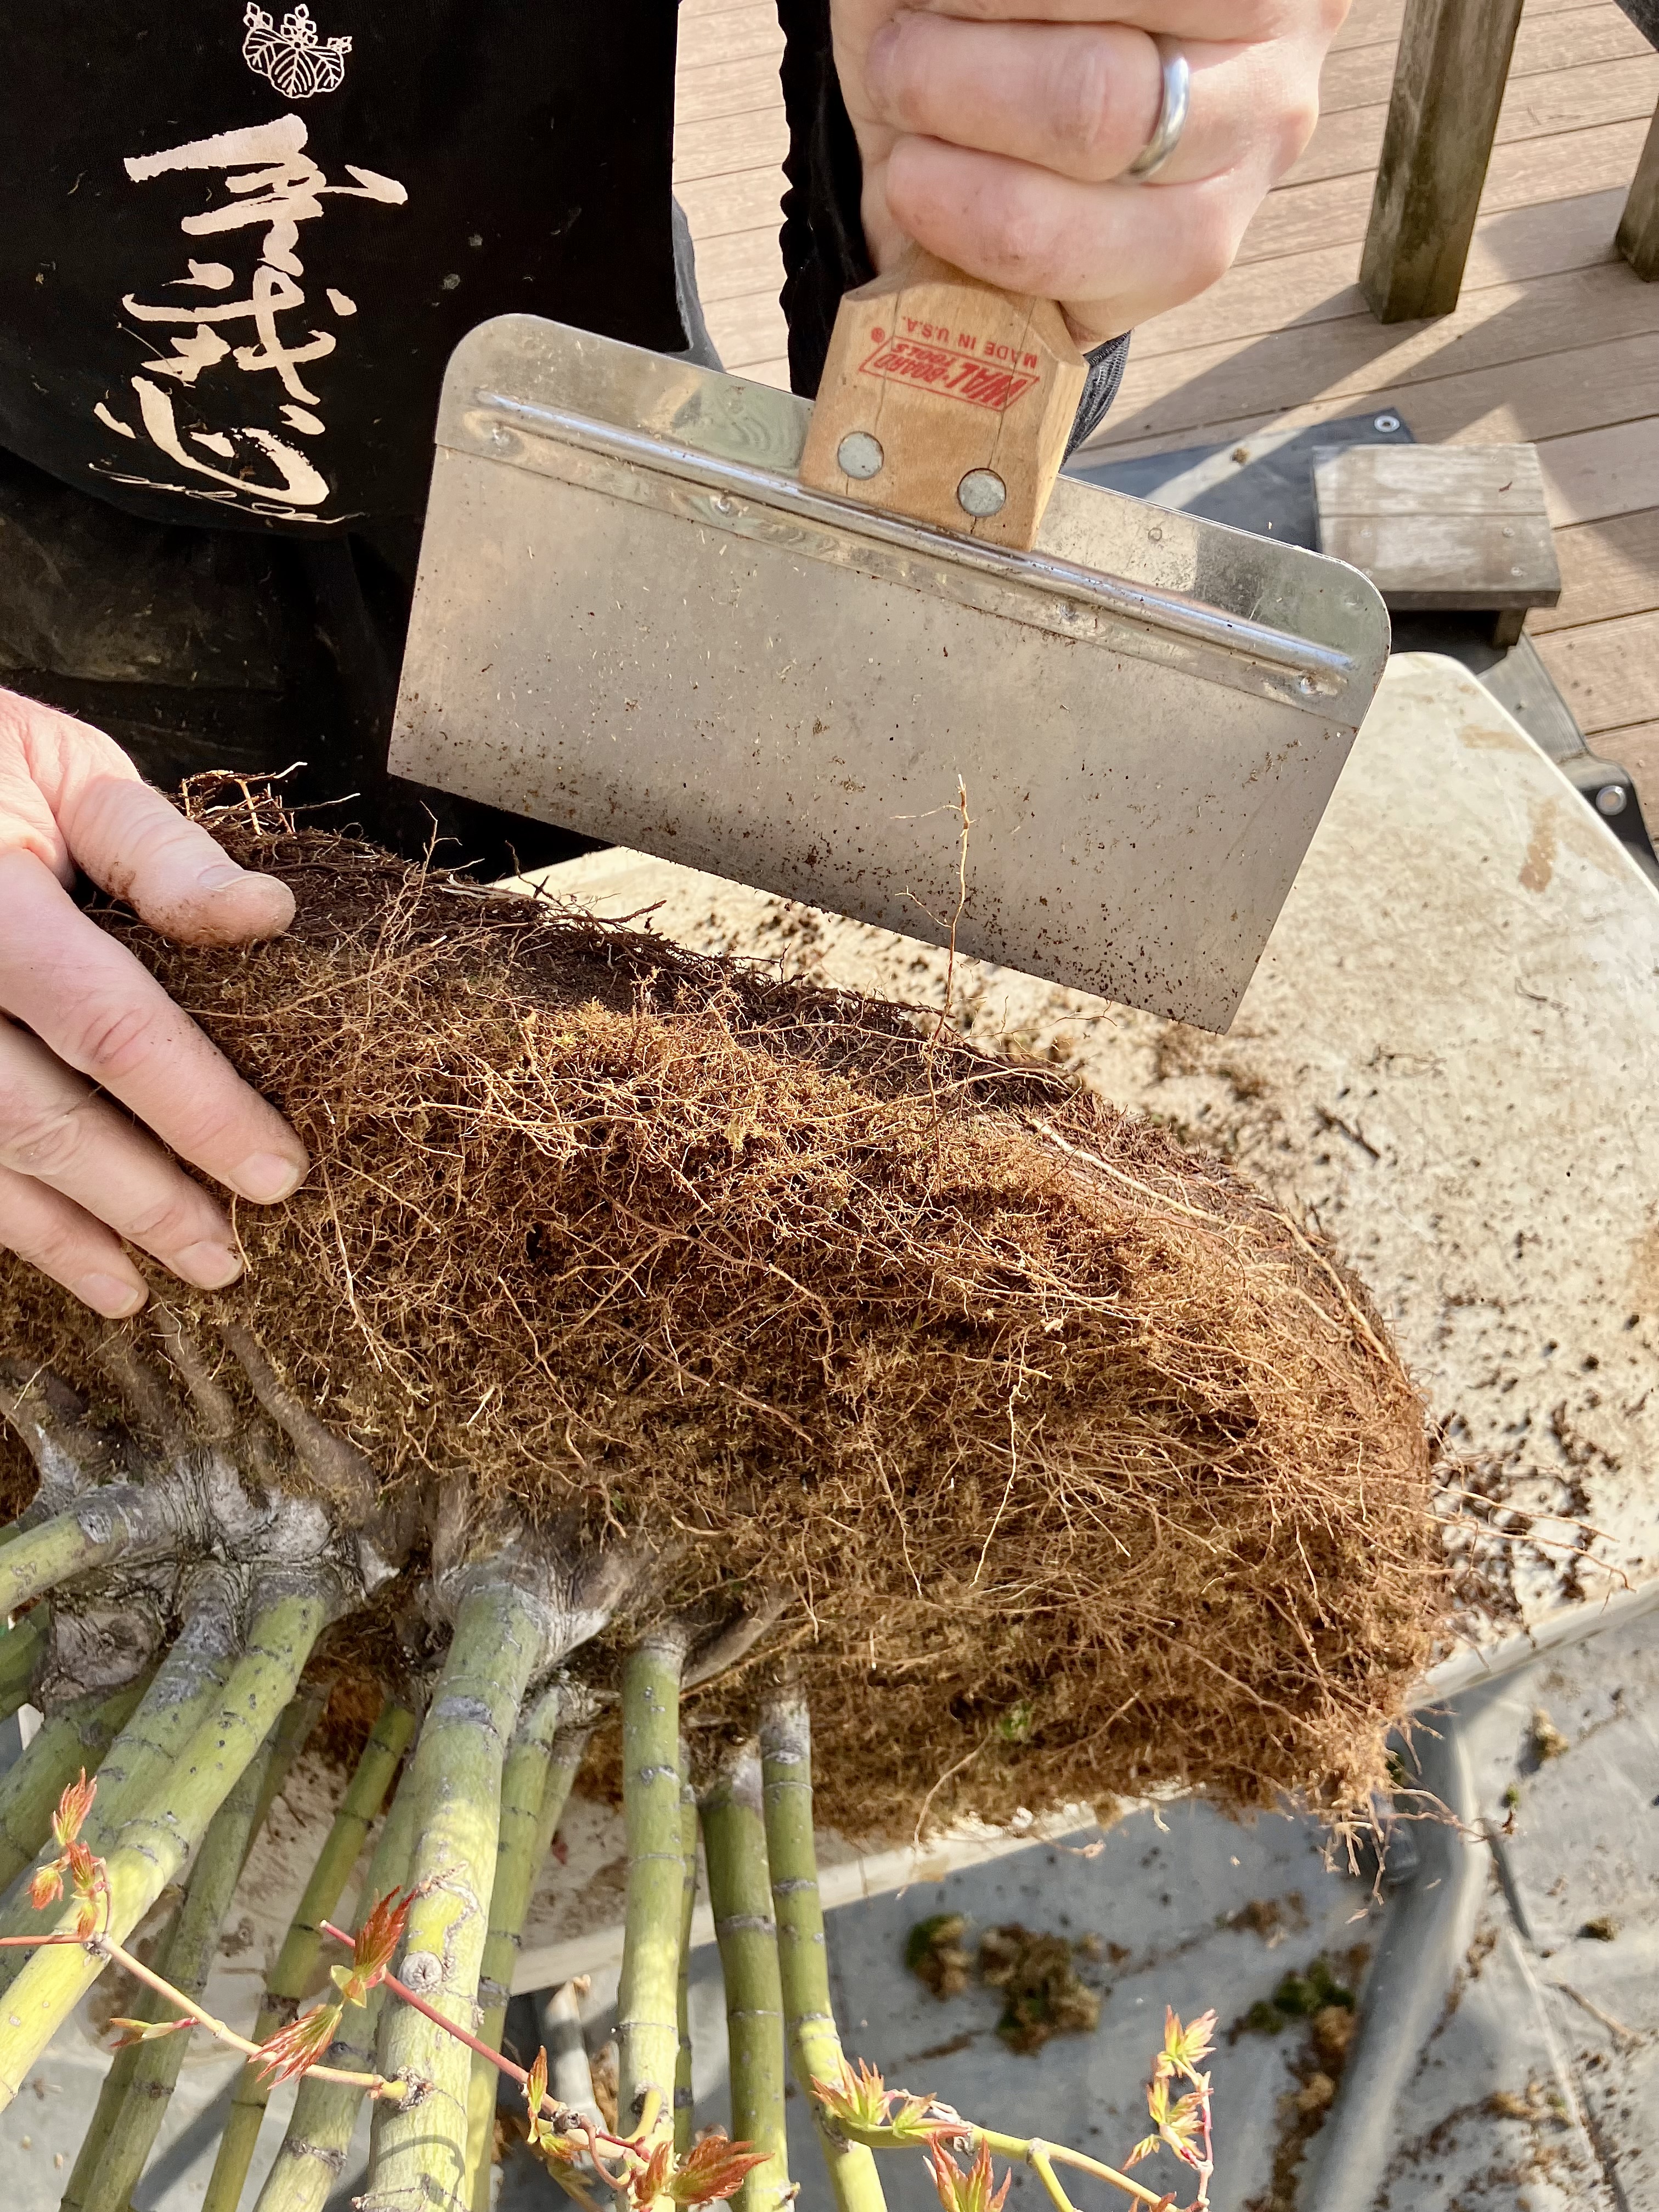
A sharp, stainless steel spatula used in a stab-it-kill-it repetitive chopping motion is handy for removing the bottom snarl of roots on trees like this Japanese Maple.
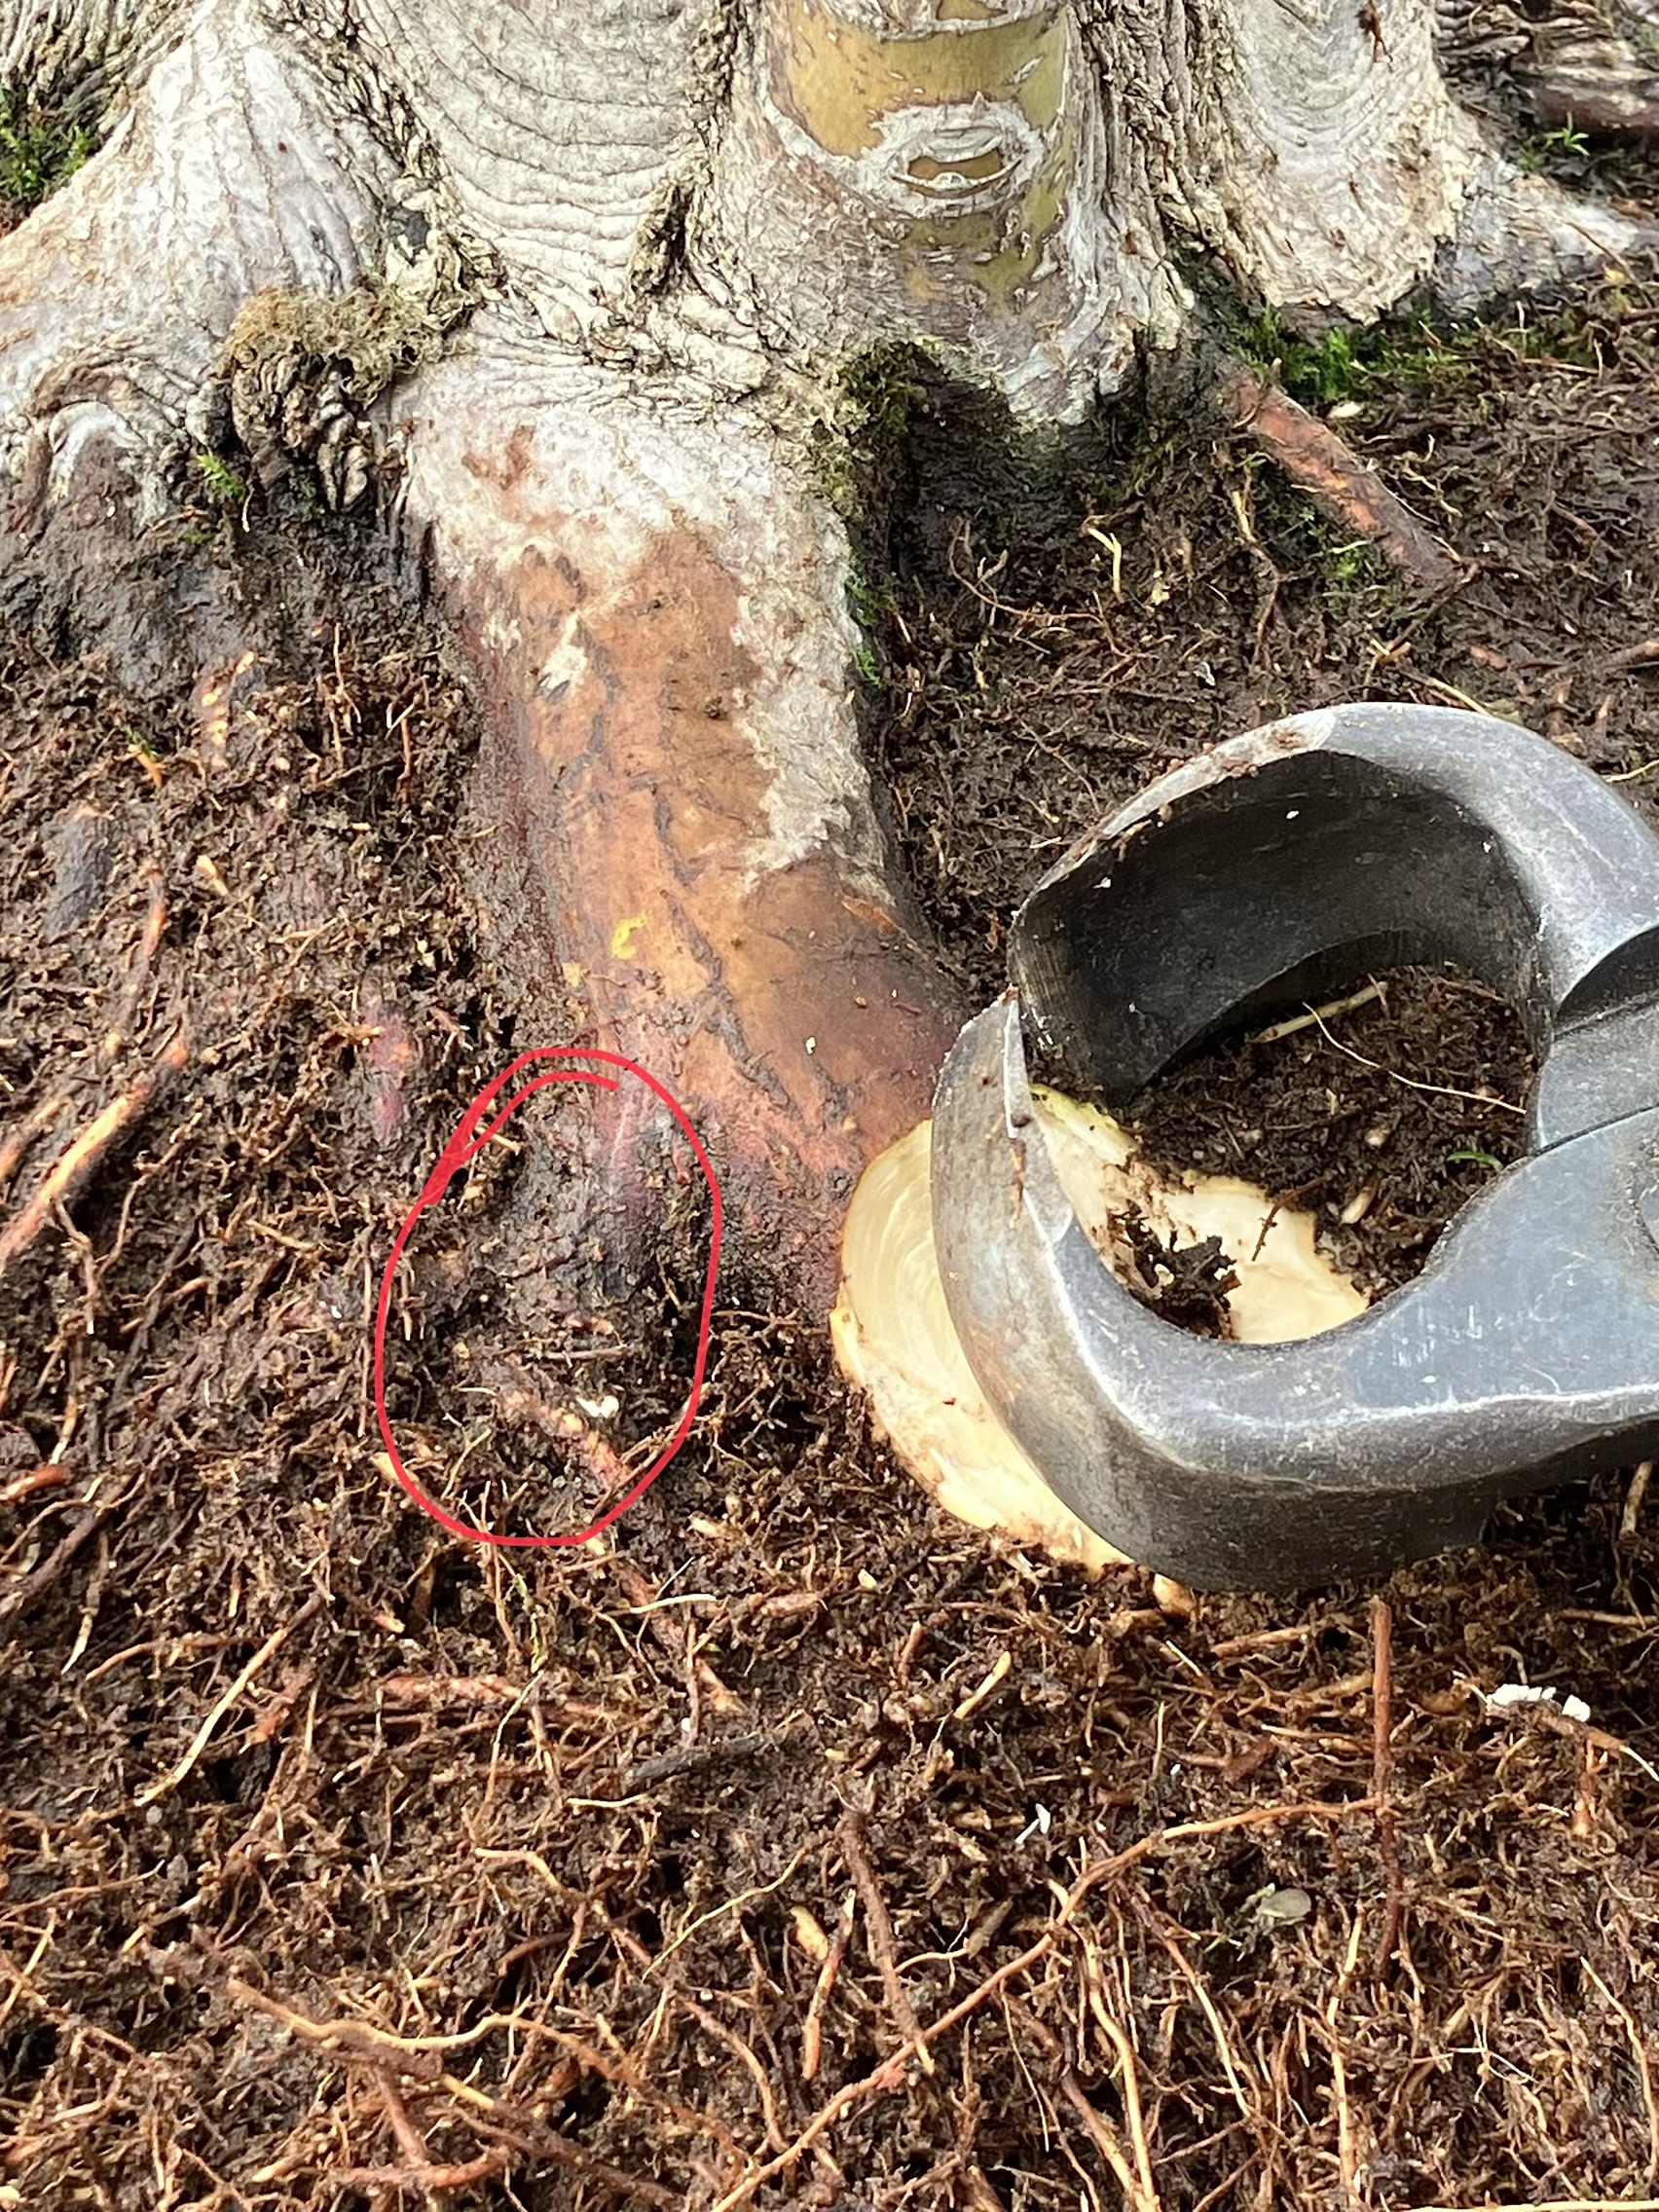
An over-large and over-long surface root on a Japanese Maple is shortened. Red circle indicates a side root of some size that will take over.
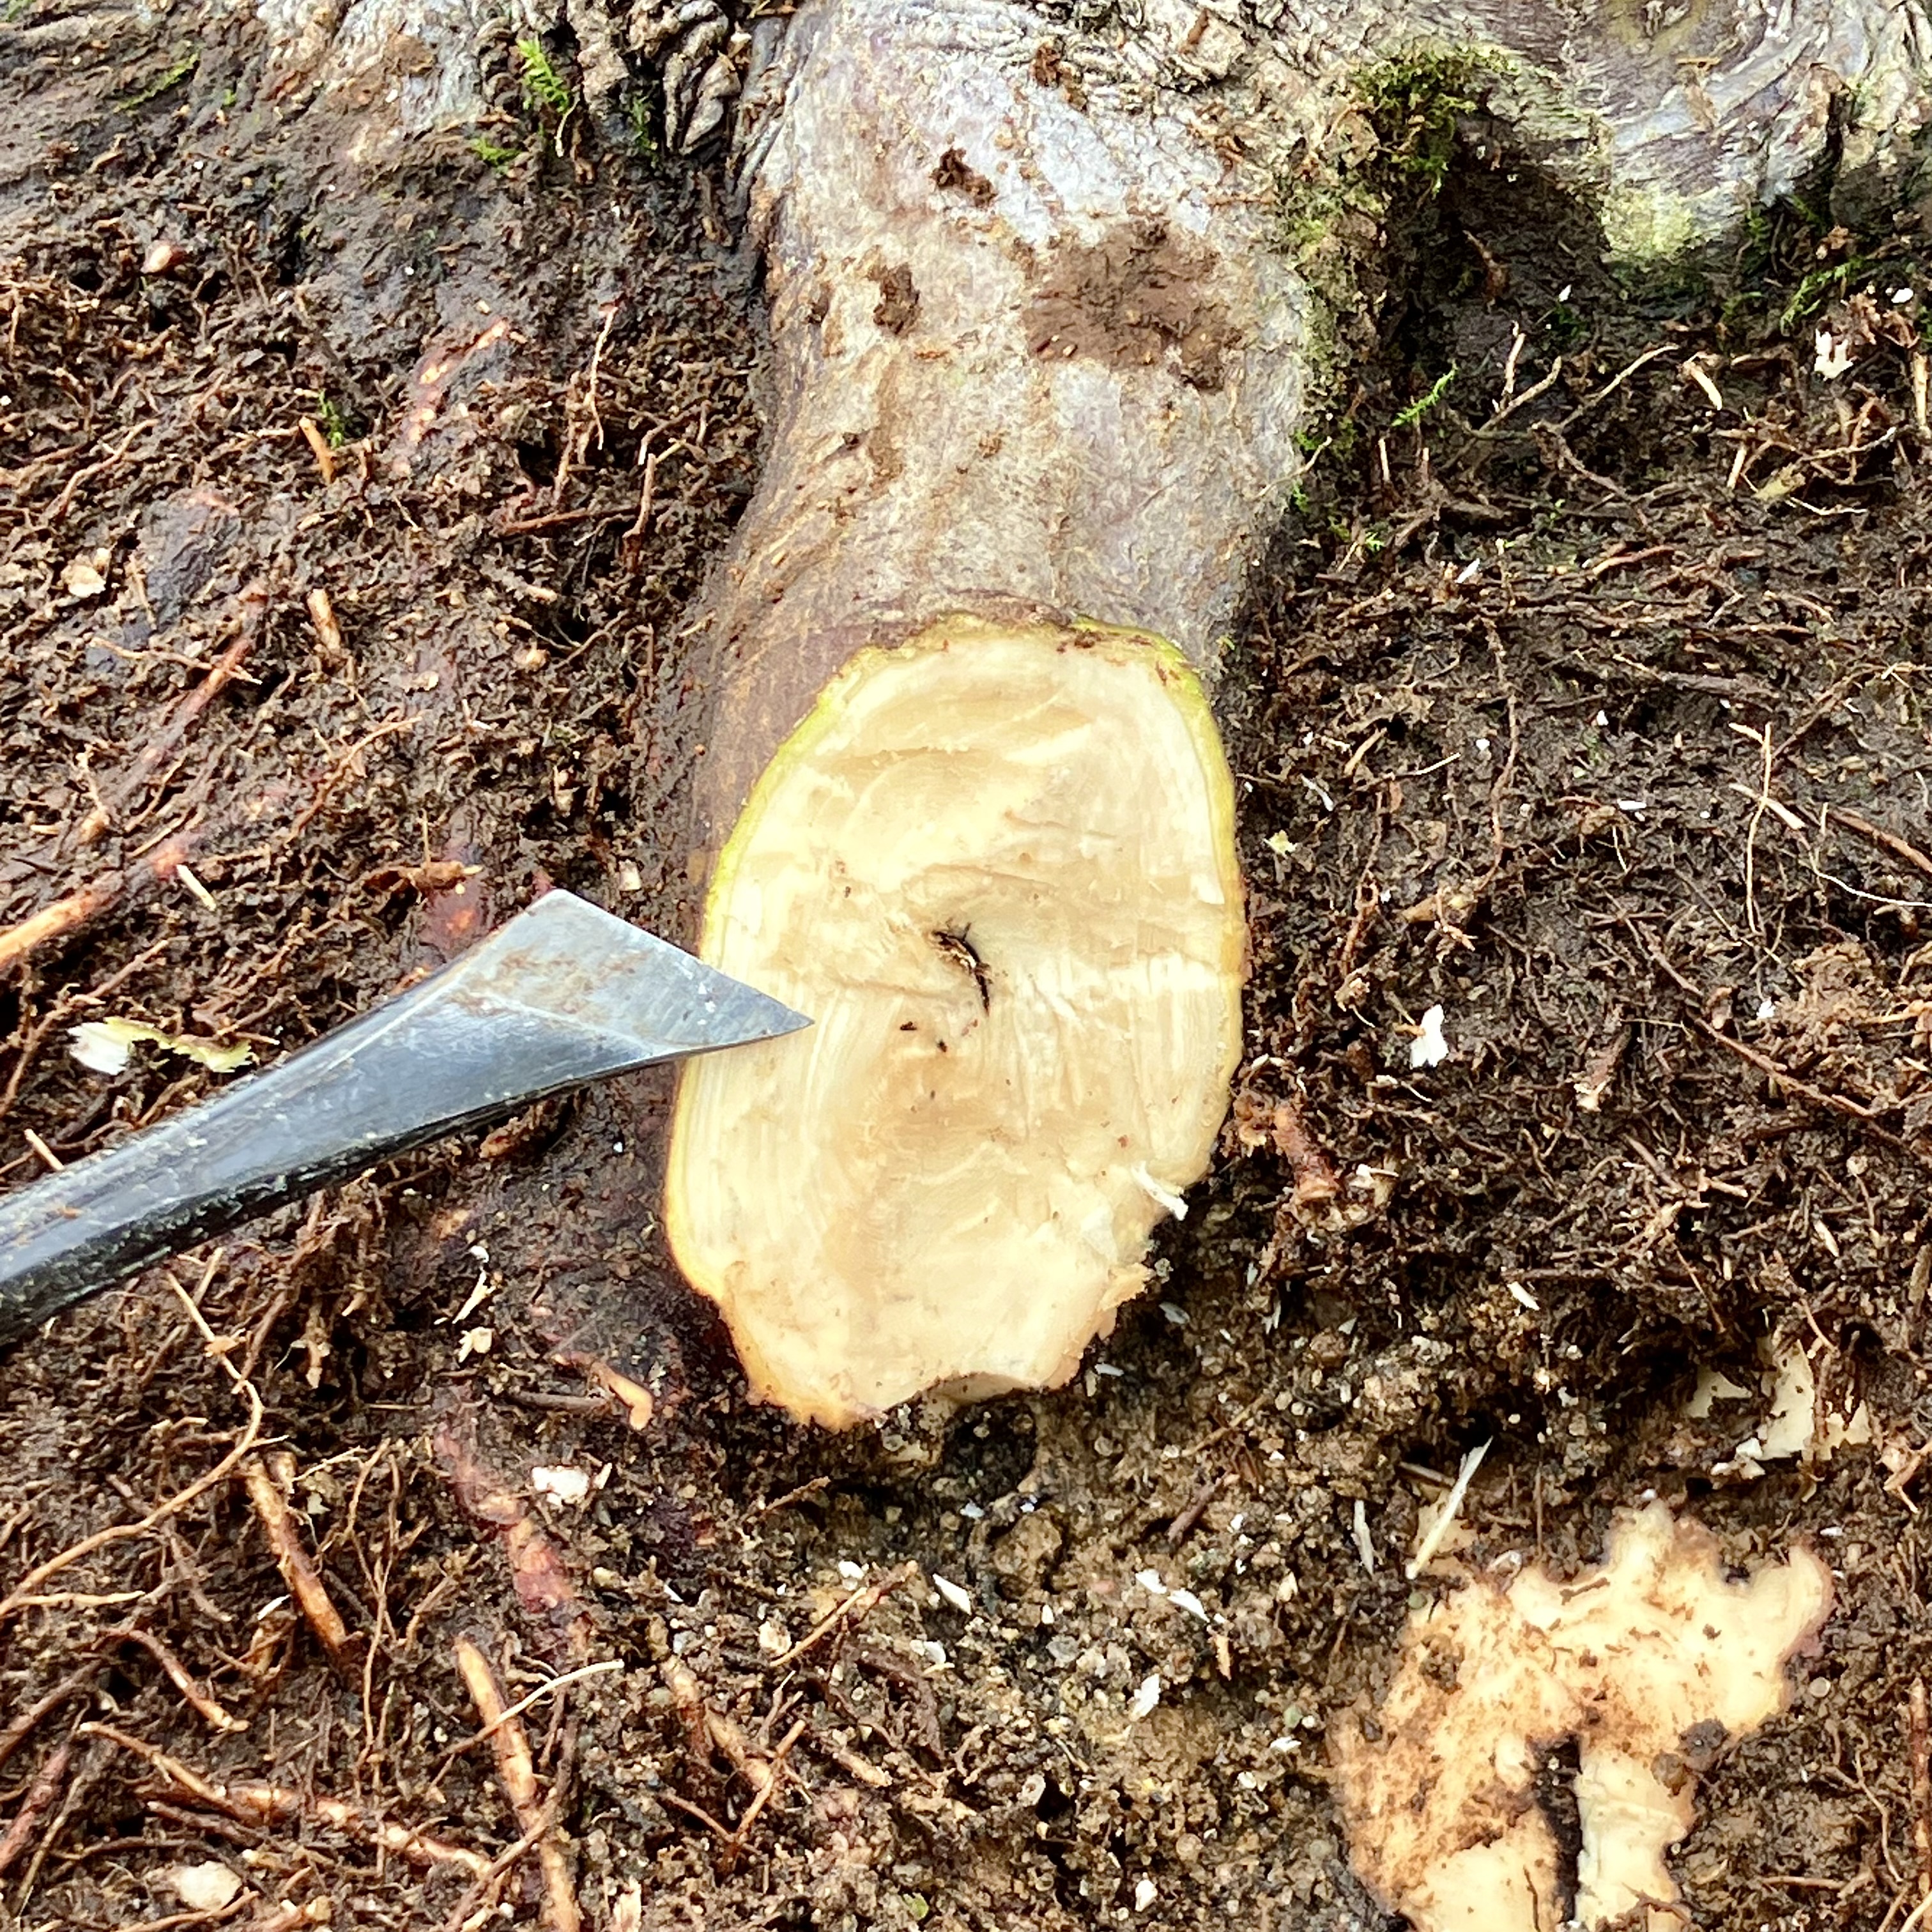
After whittling back with a ball cutter, the wound is smoothed with a chisel. Good idea to sterilize and seal wounds on Japanese Maple due to some of the diseases that can enter wounds on this species.
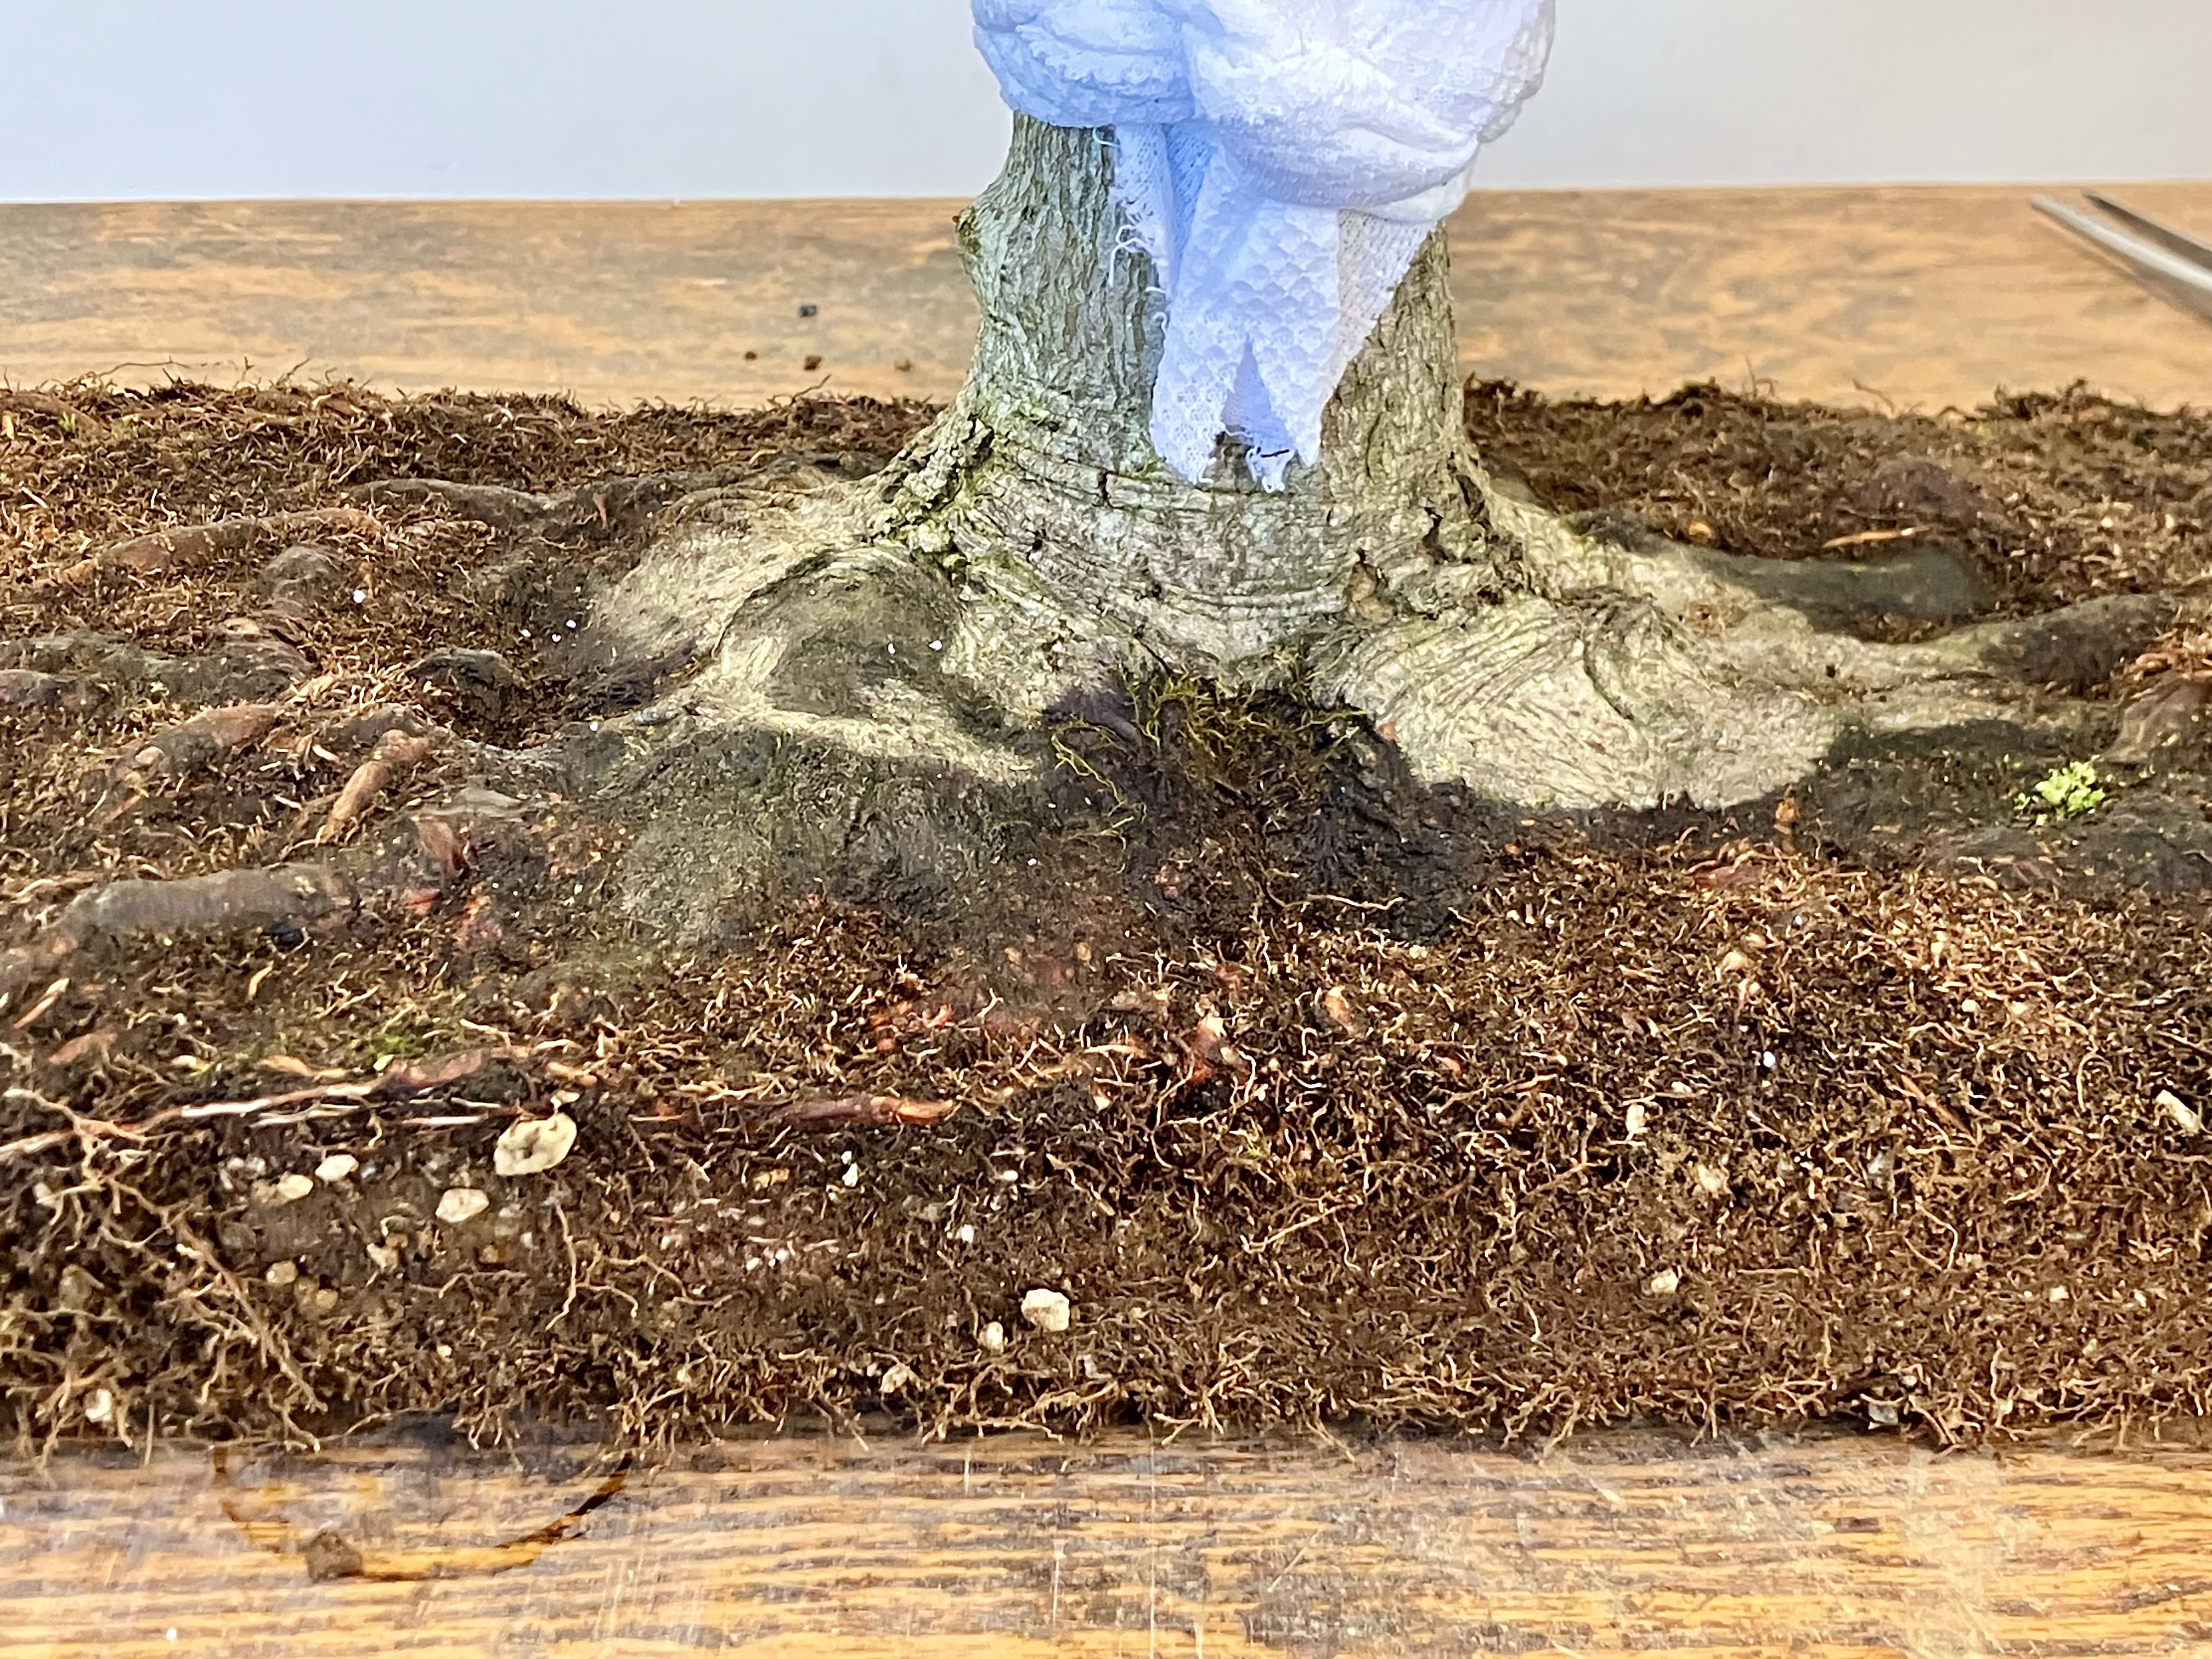
A Red Maple that came out of a narrow, rectangular pot. The nebari of this tree has been squoozed on the front and back and needed more room. White cloth is to keep the trunk clean while grabbing.
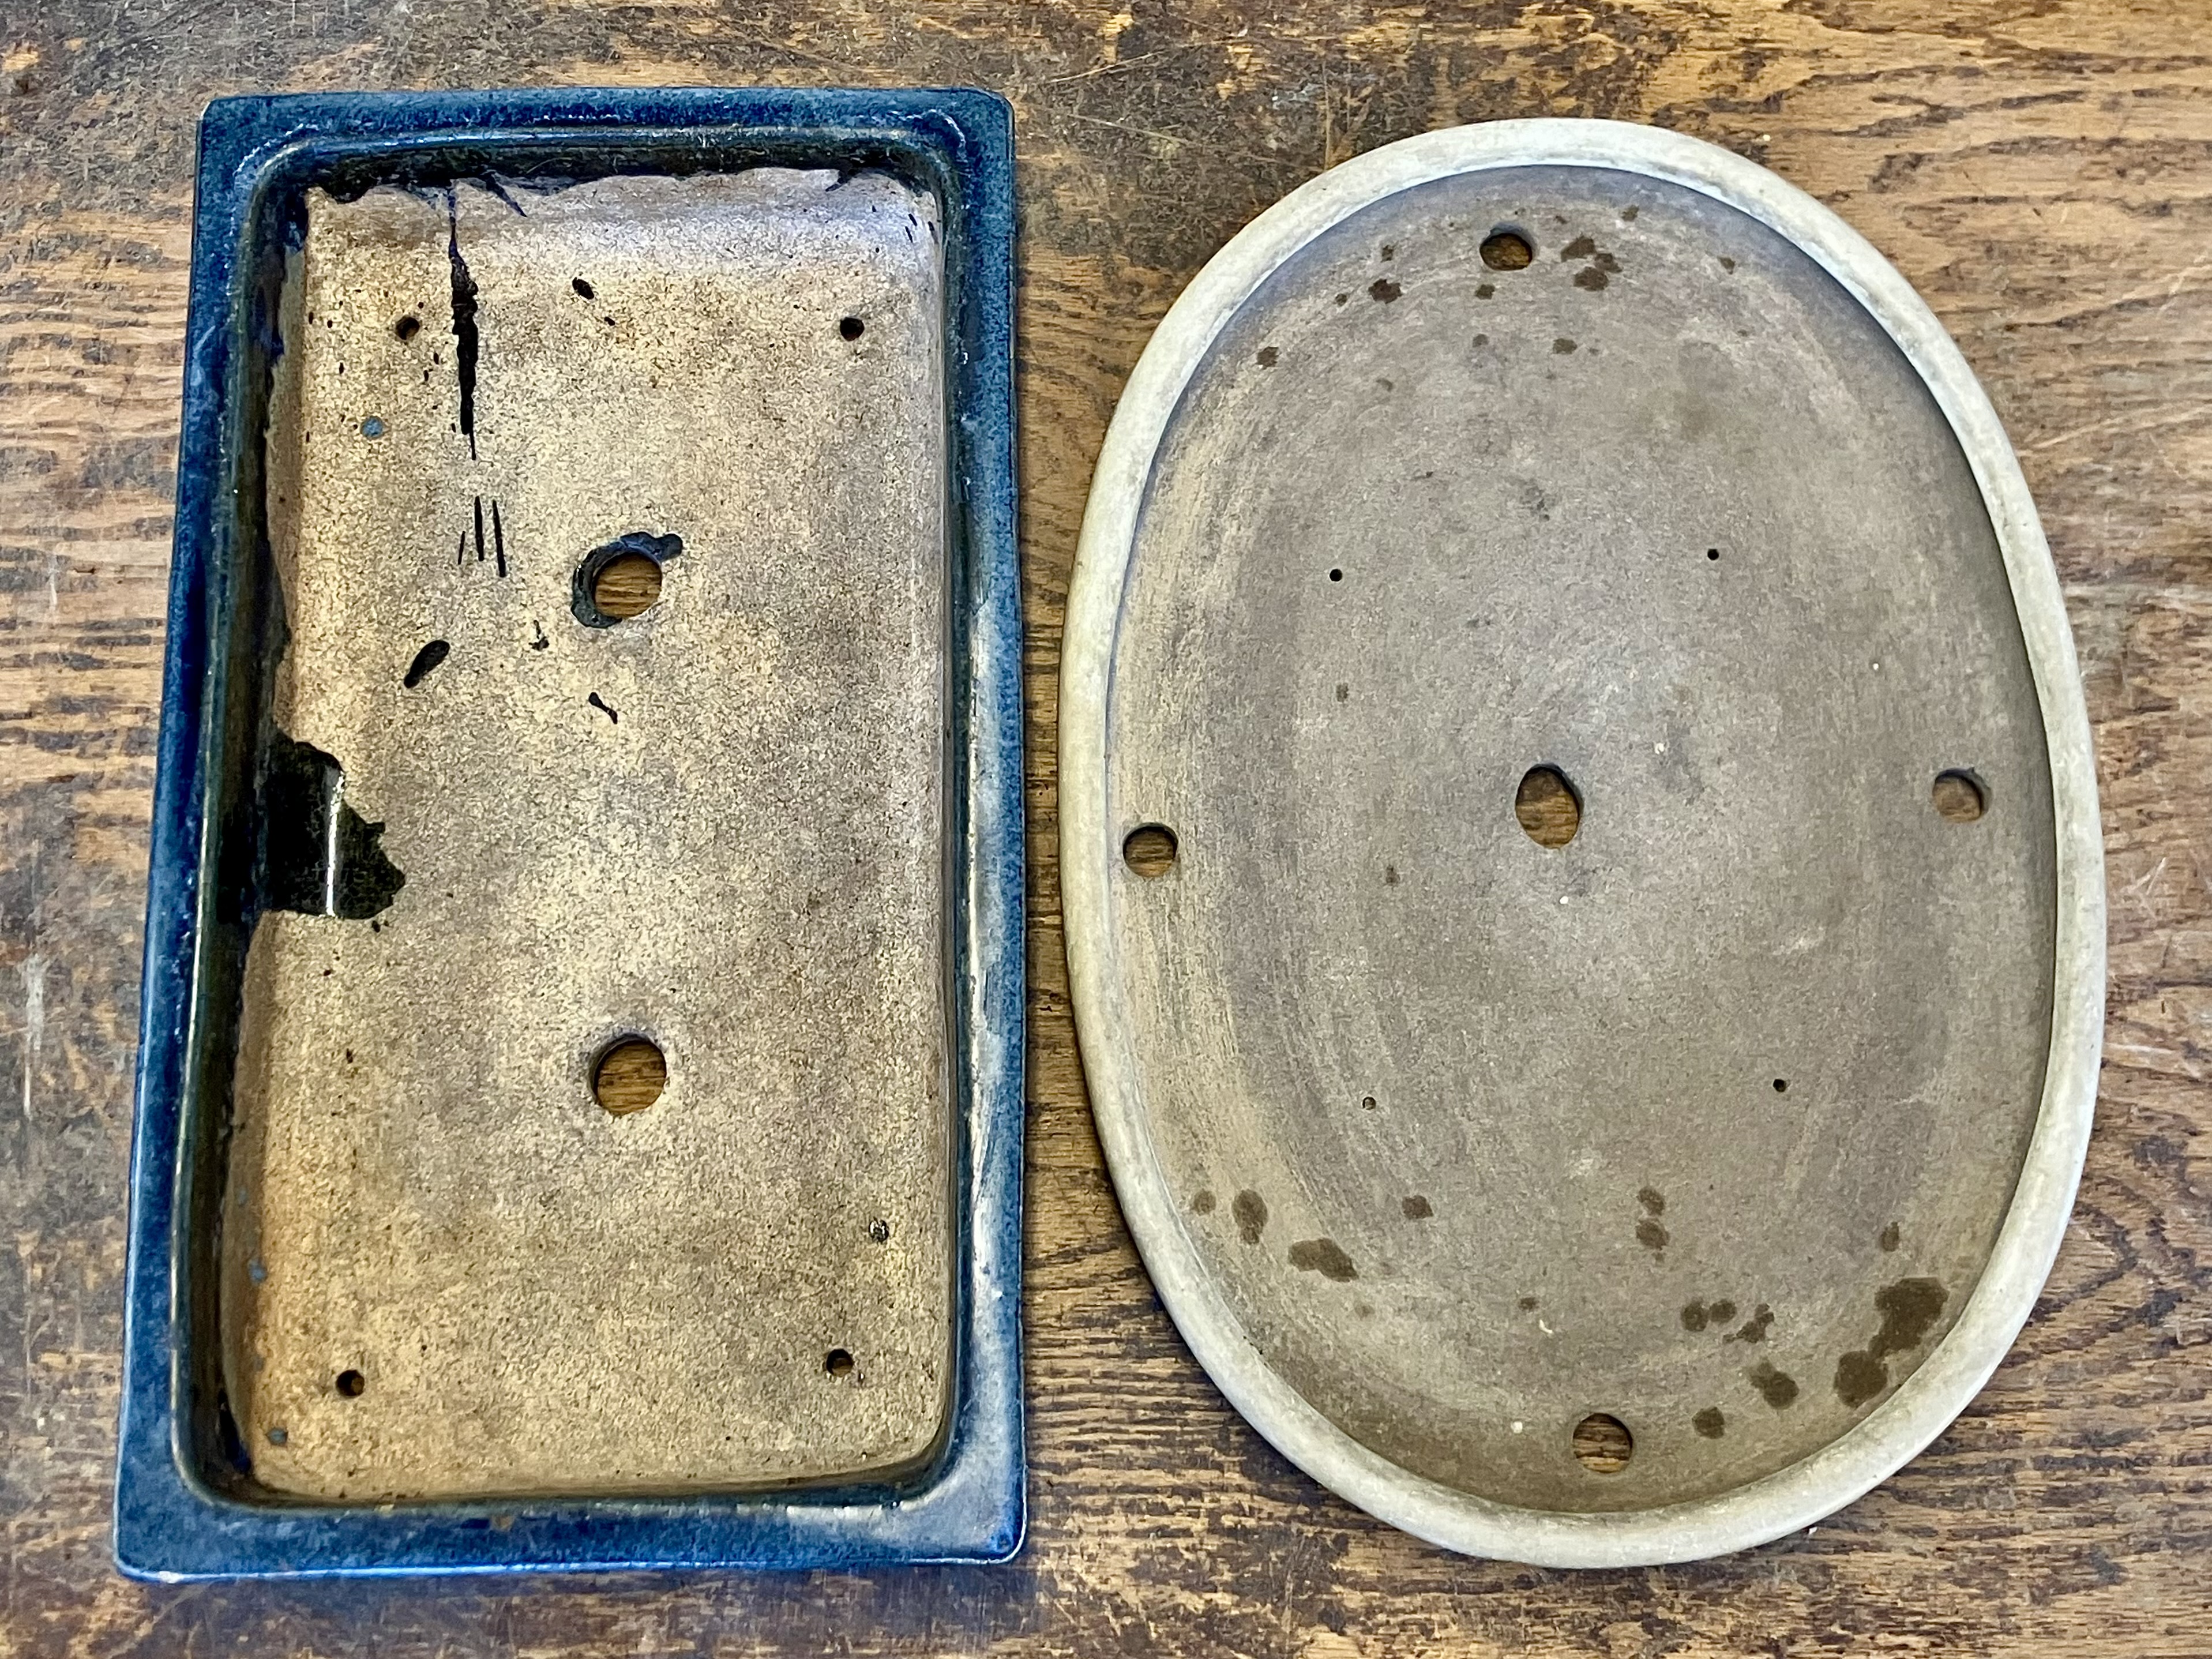
On the left, the pot the Maple came out of. On the right, the one it might go into.
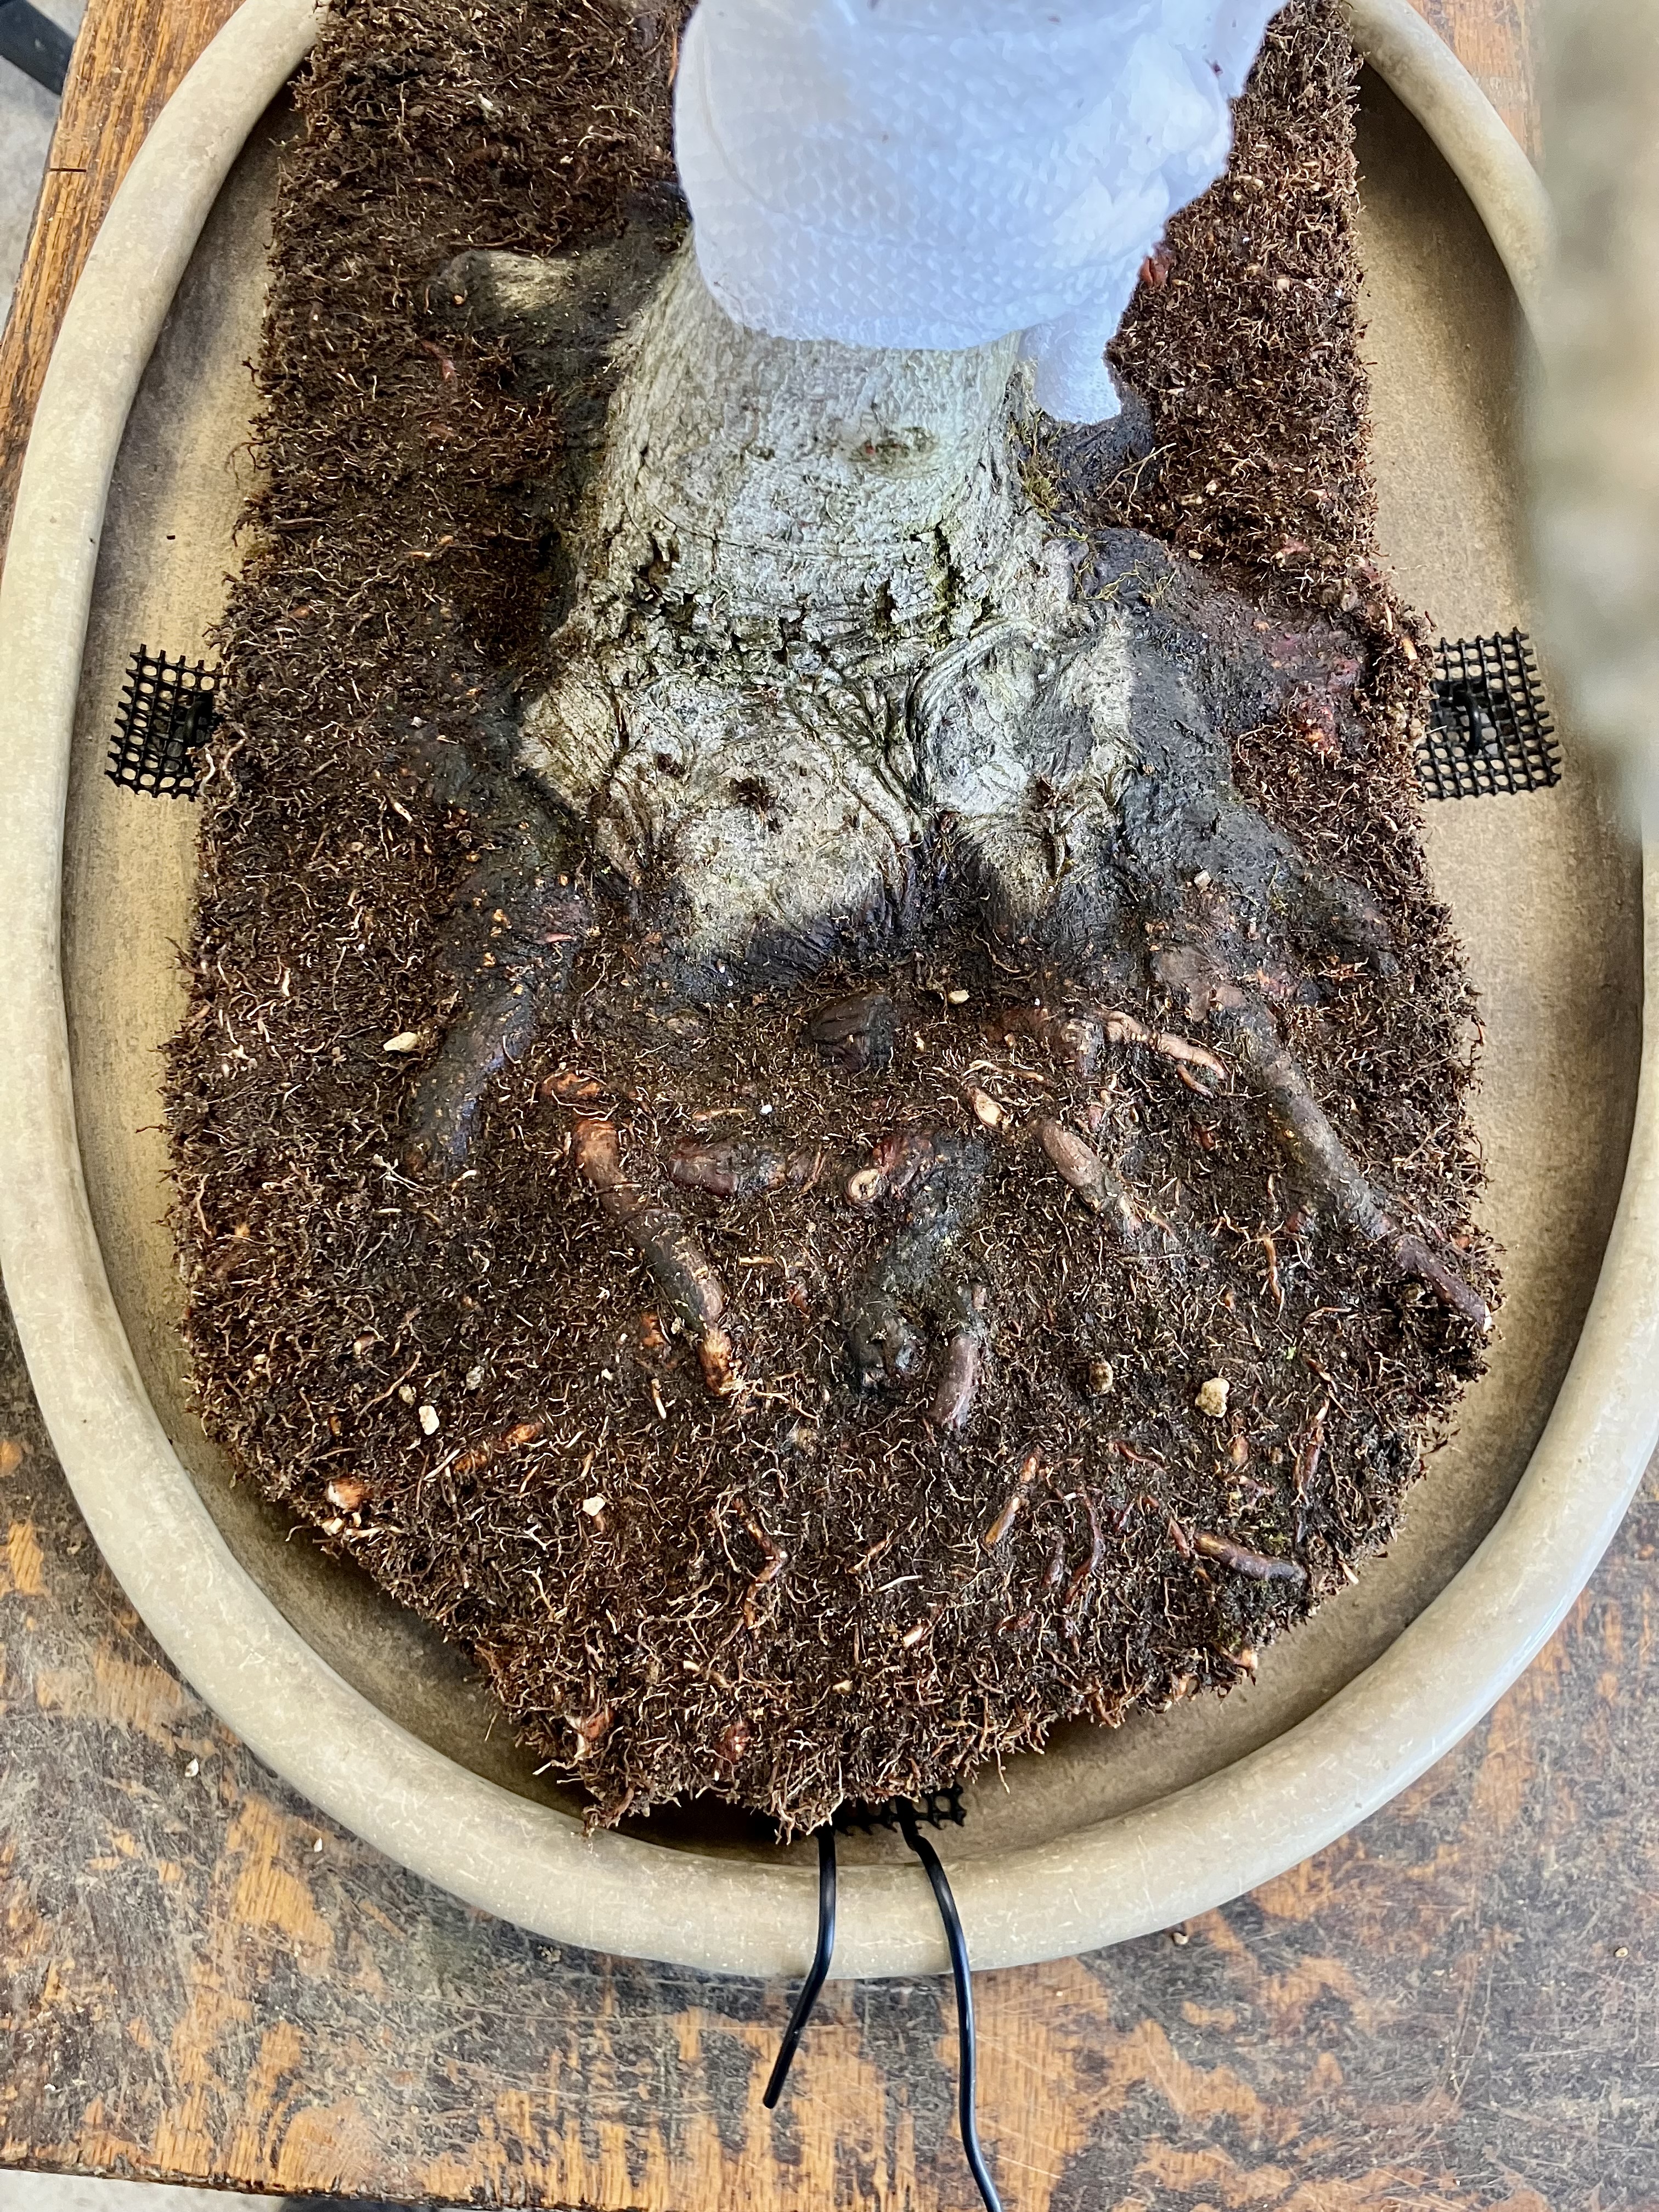
In this pot there is more room for the front and back roots. Another reason to choose a pot is for better root spread.
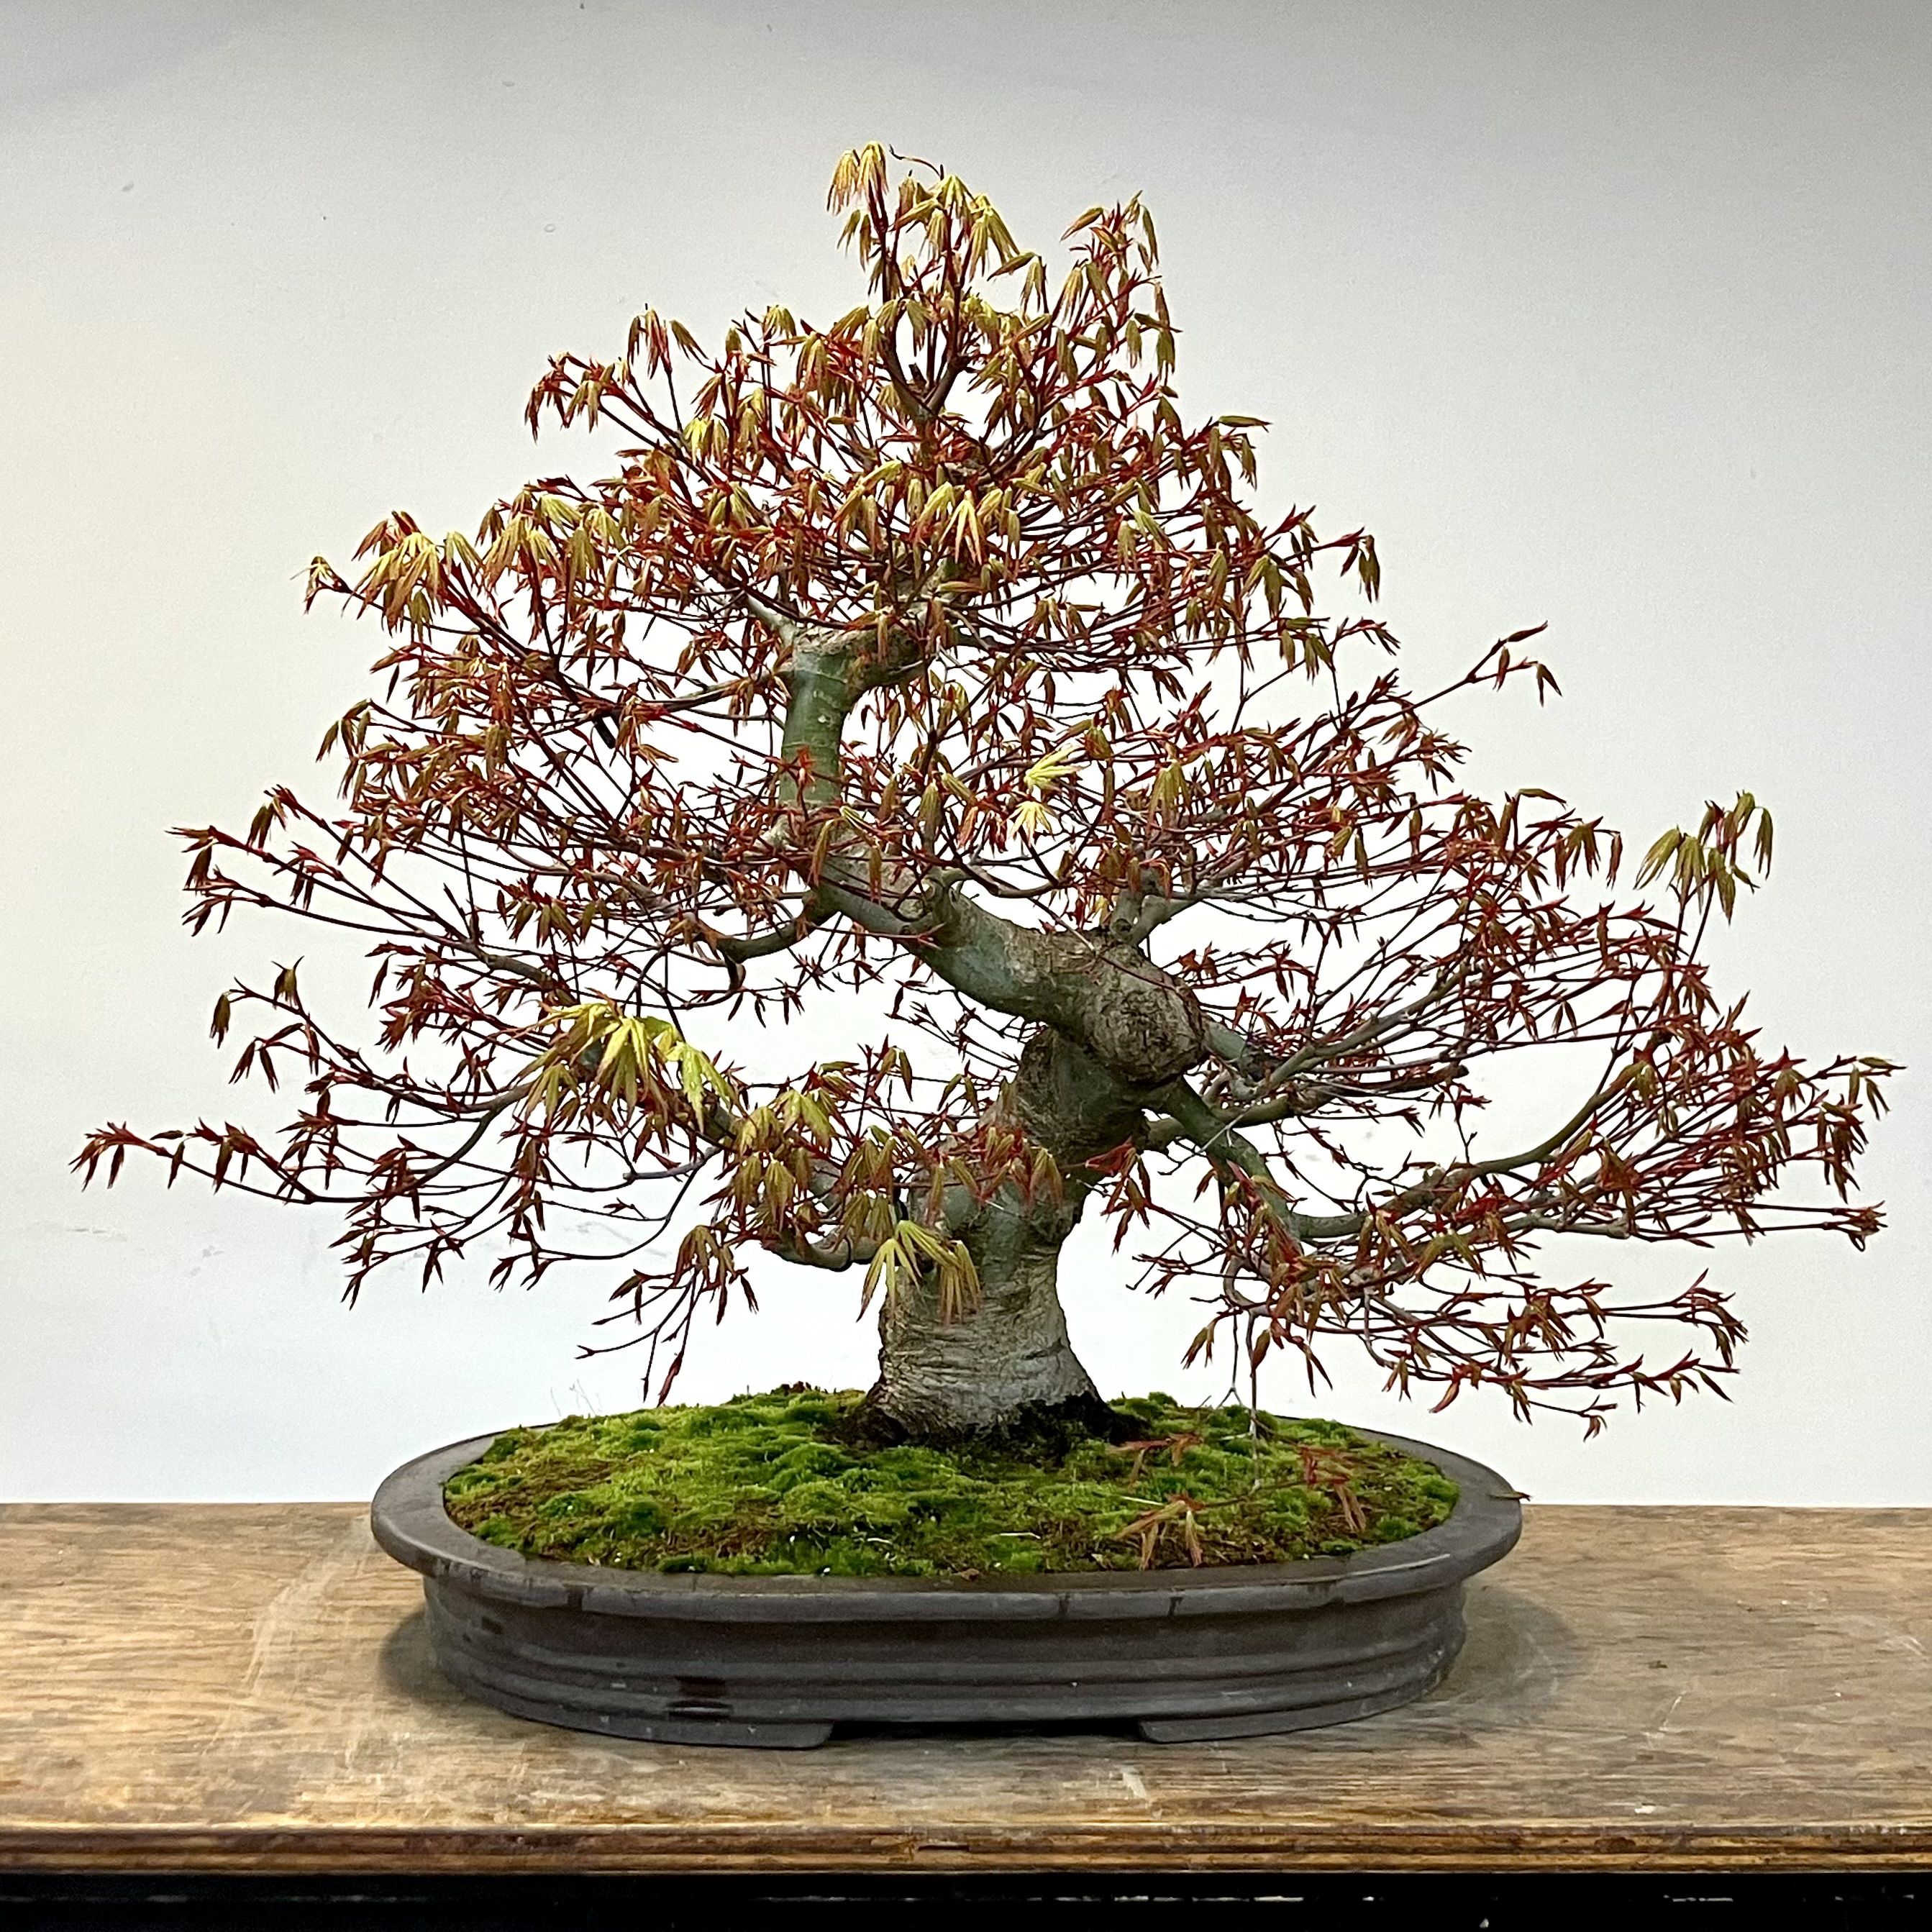
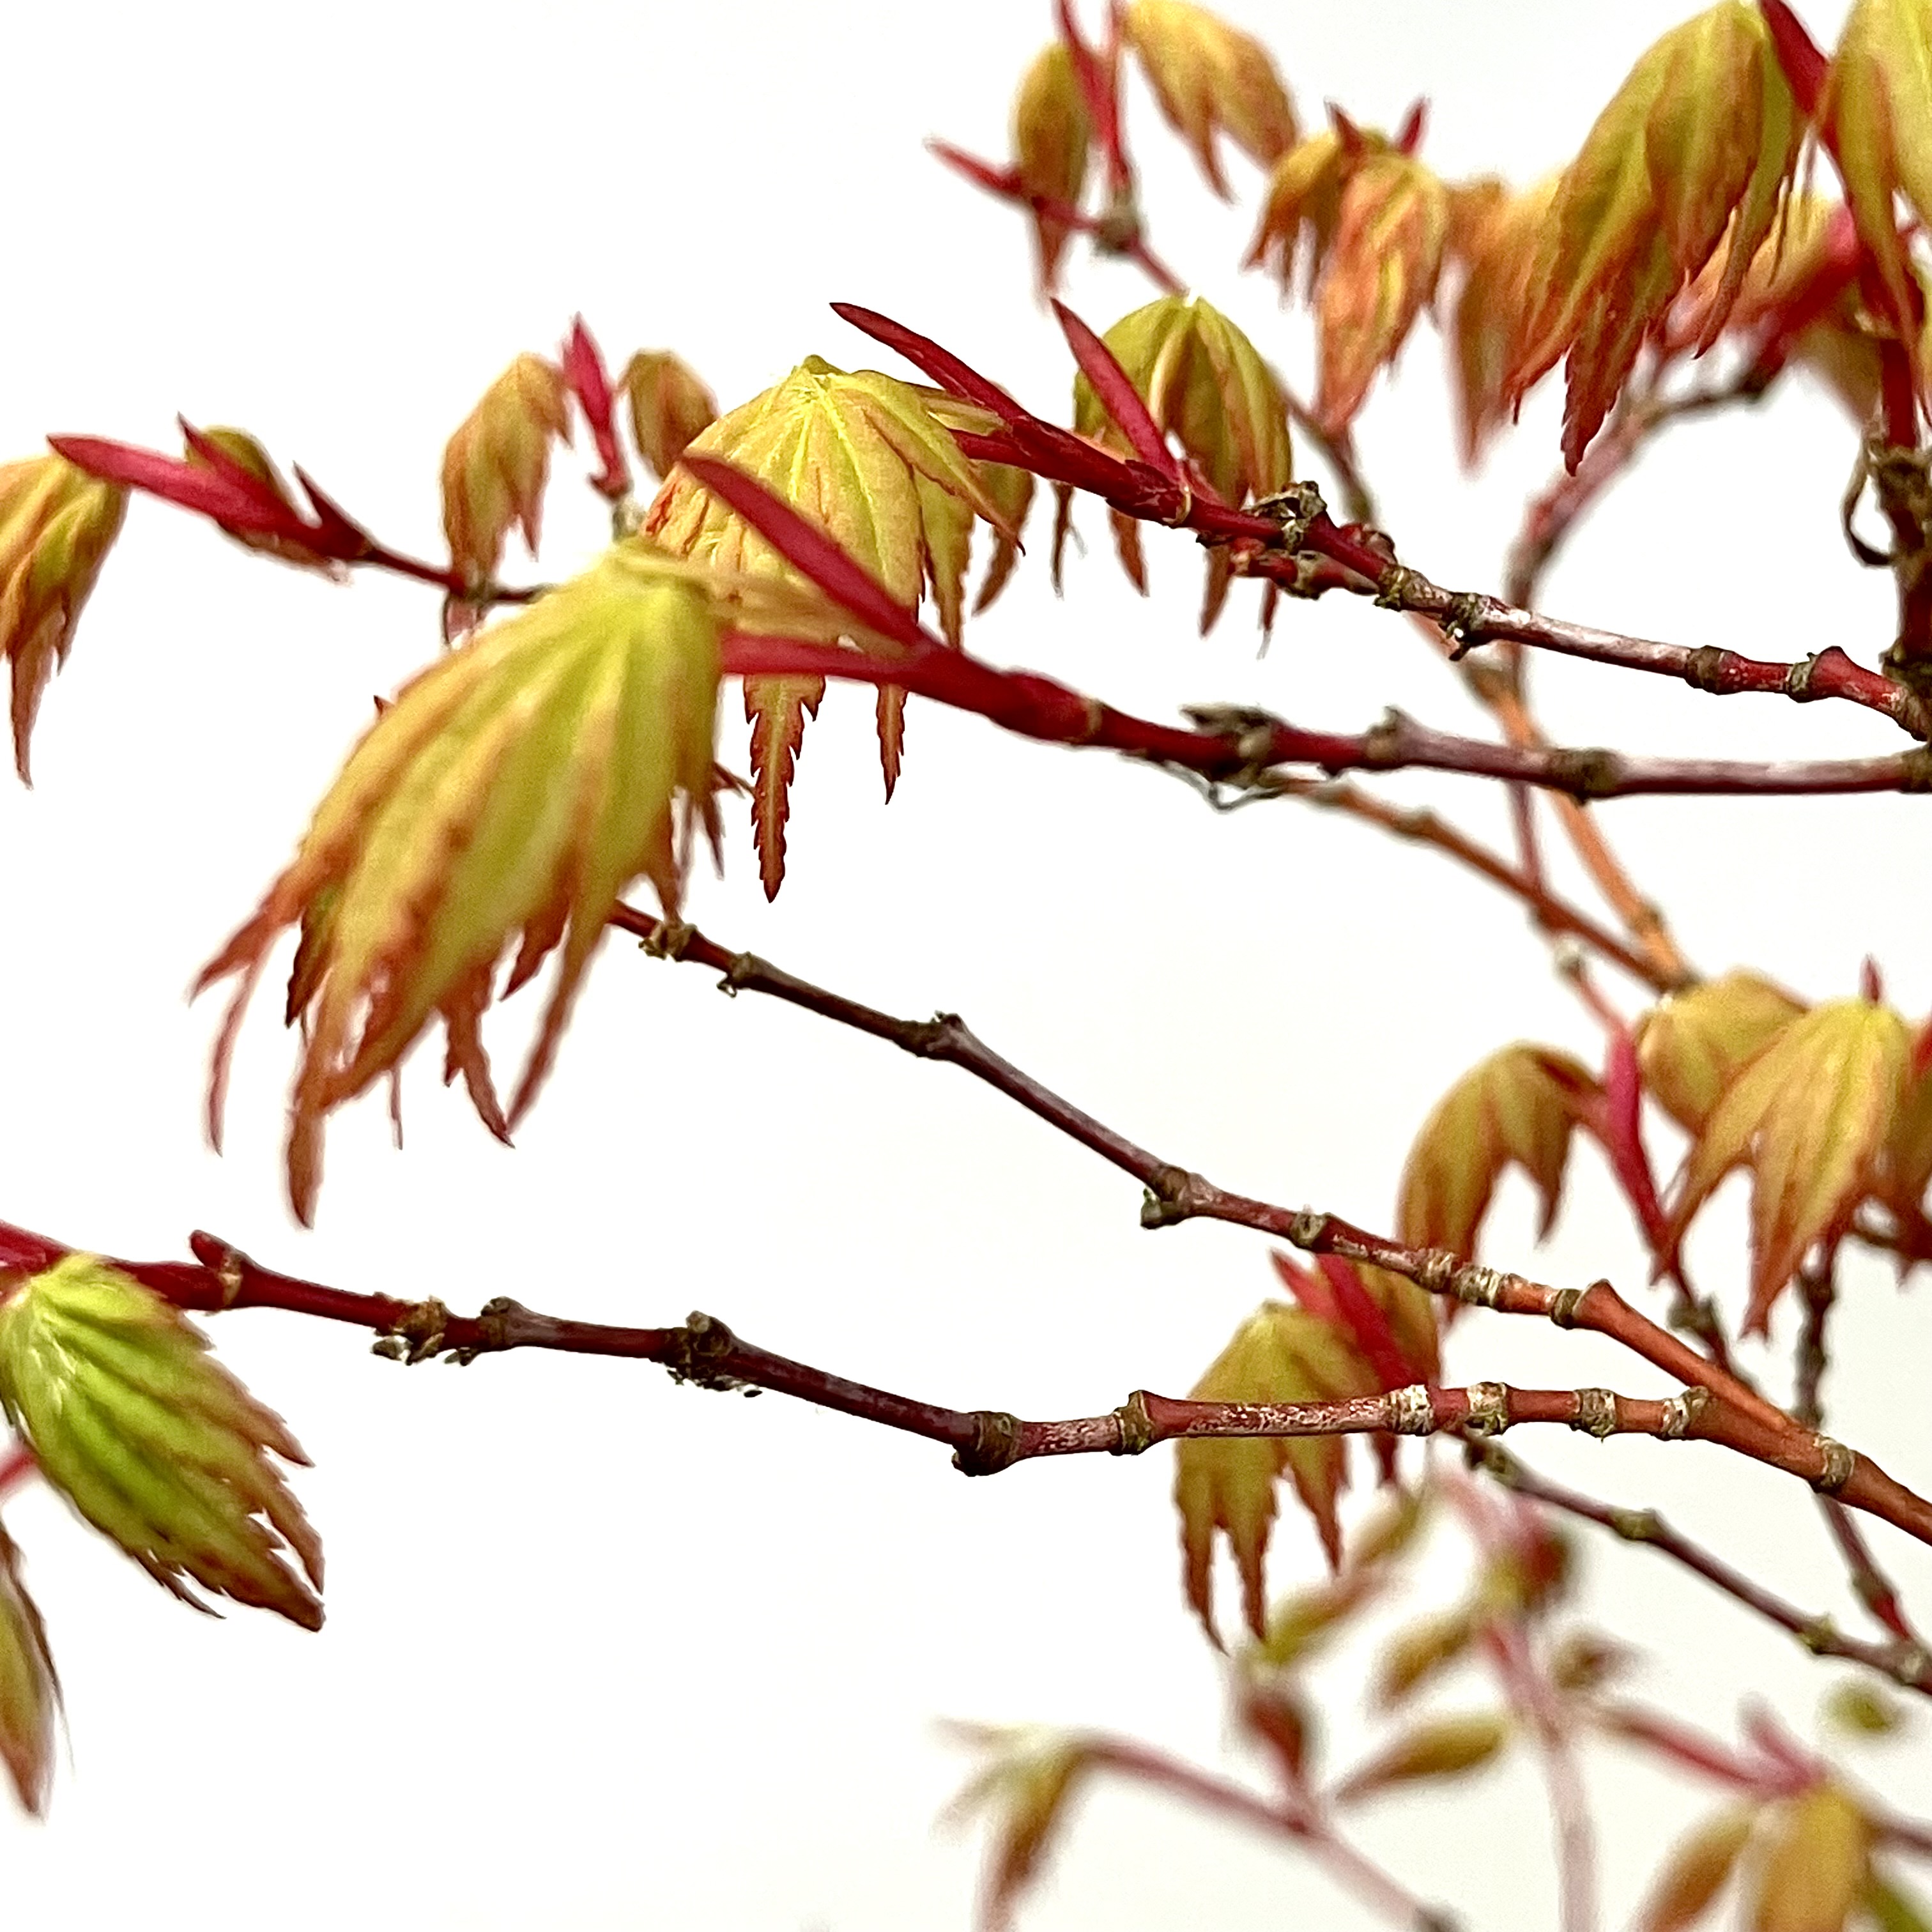
This 20-year old Japanese Maple has never been pinched. Freely grown, a maple will have a coarse shoot structure, but this early period of no pinching develops the trunk and branches and roots.
Pinching a maple when young stunts development.
This Japanese Maple might be pinched this year. The branching is past tertiary and has good structure.
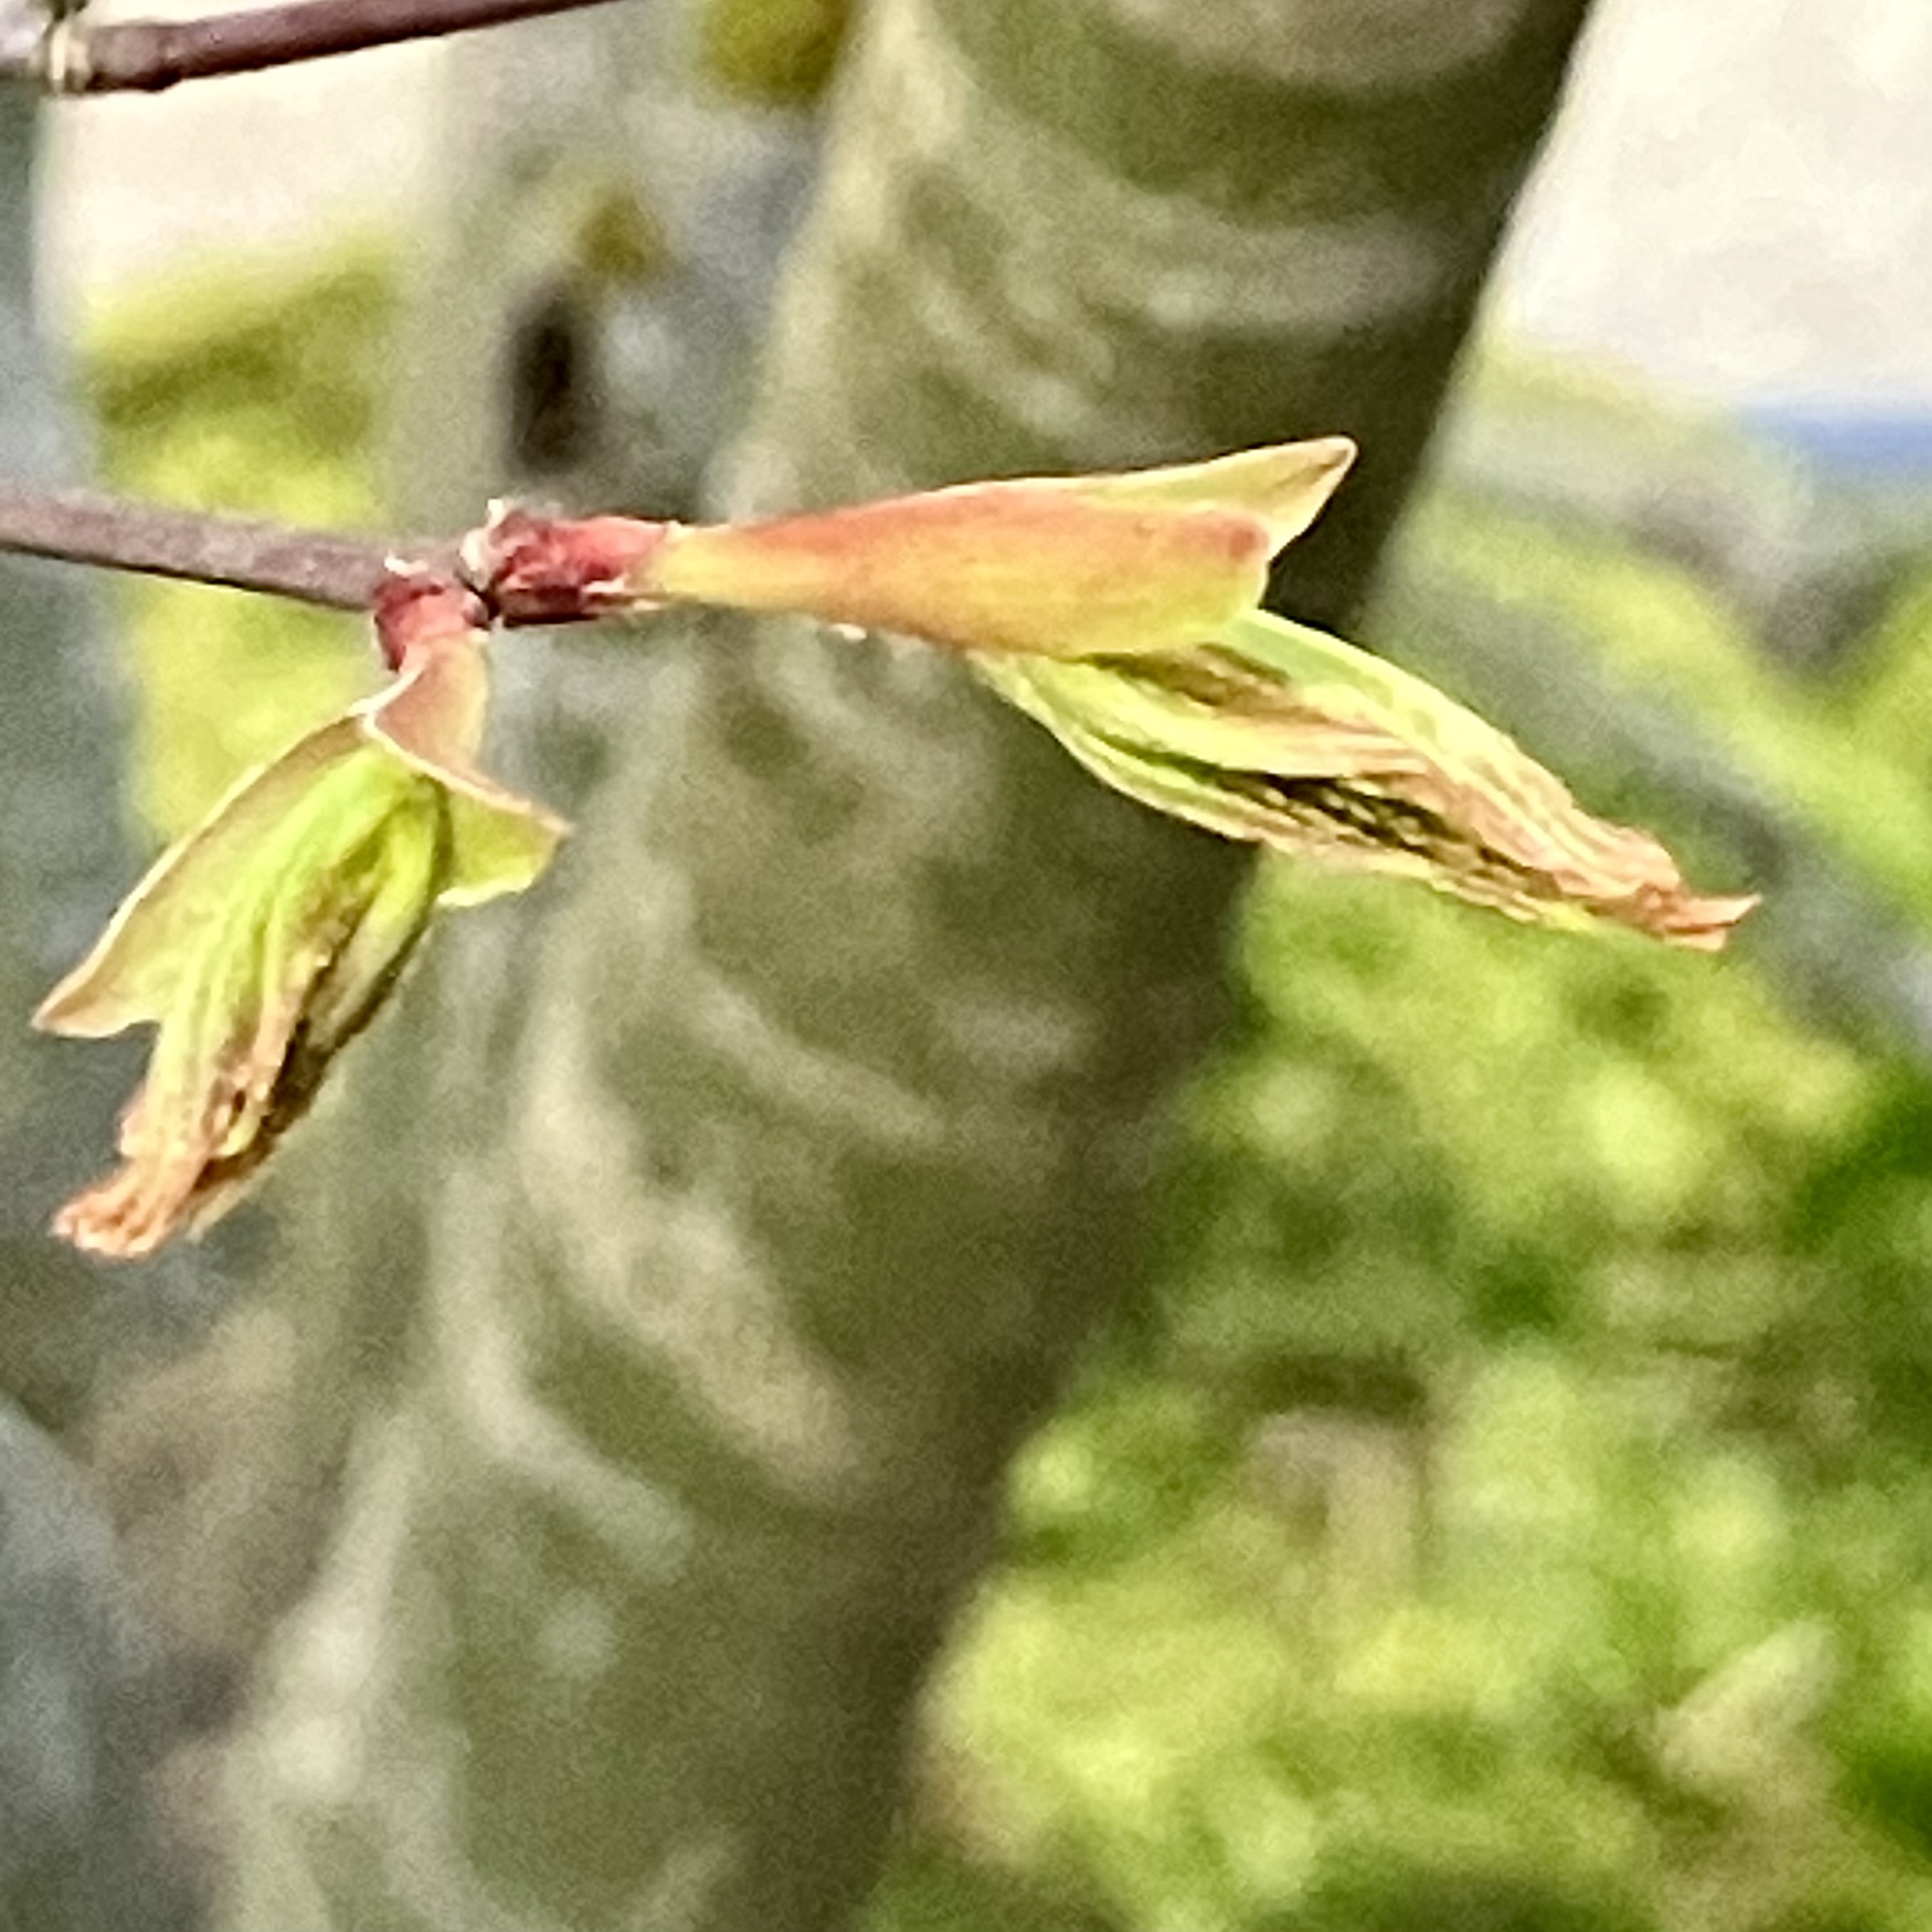
A Japanese Maple shoot about a day away from opening its first leaves.
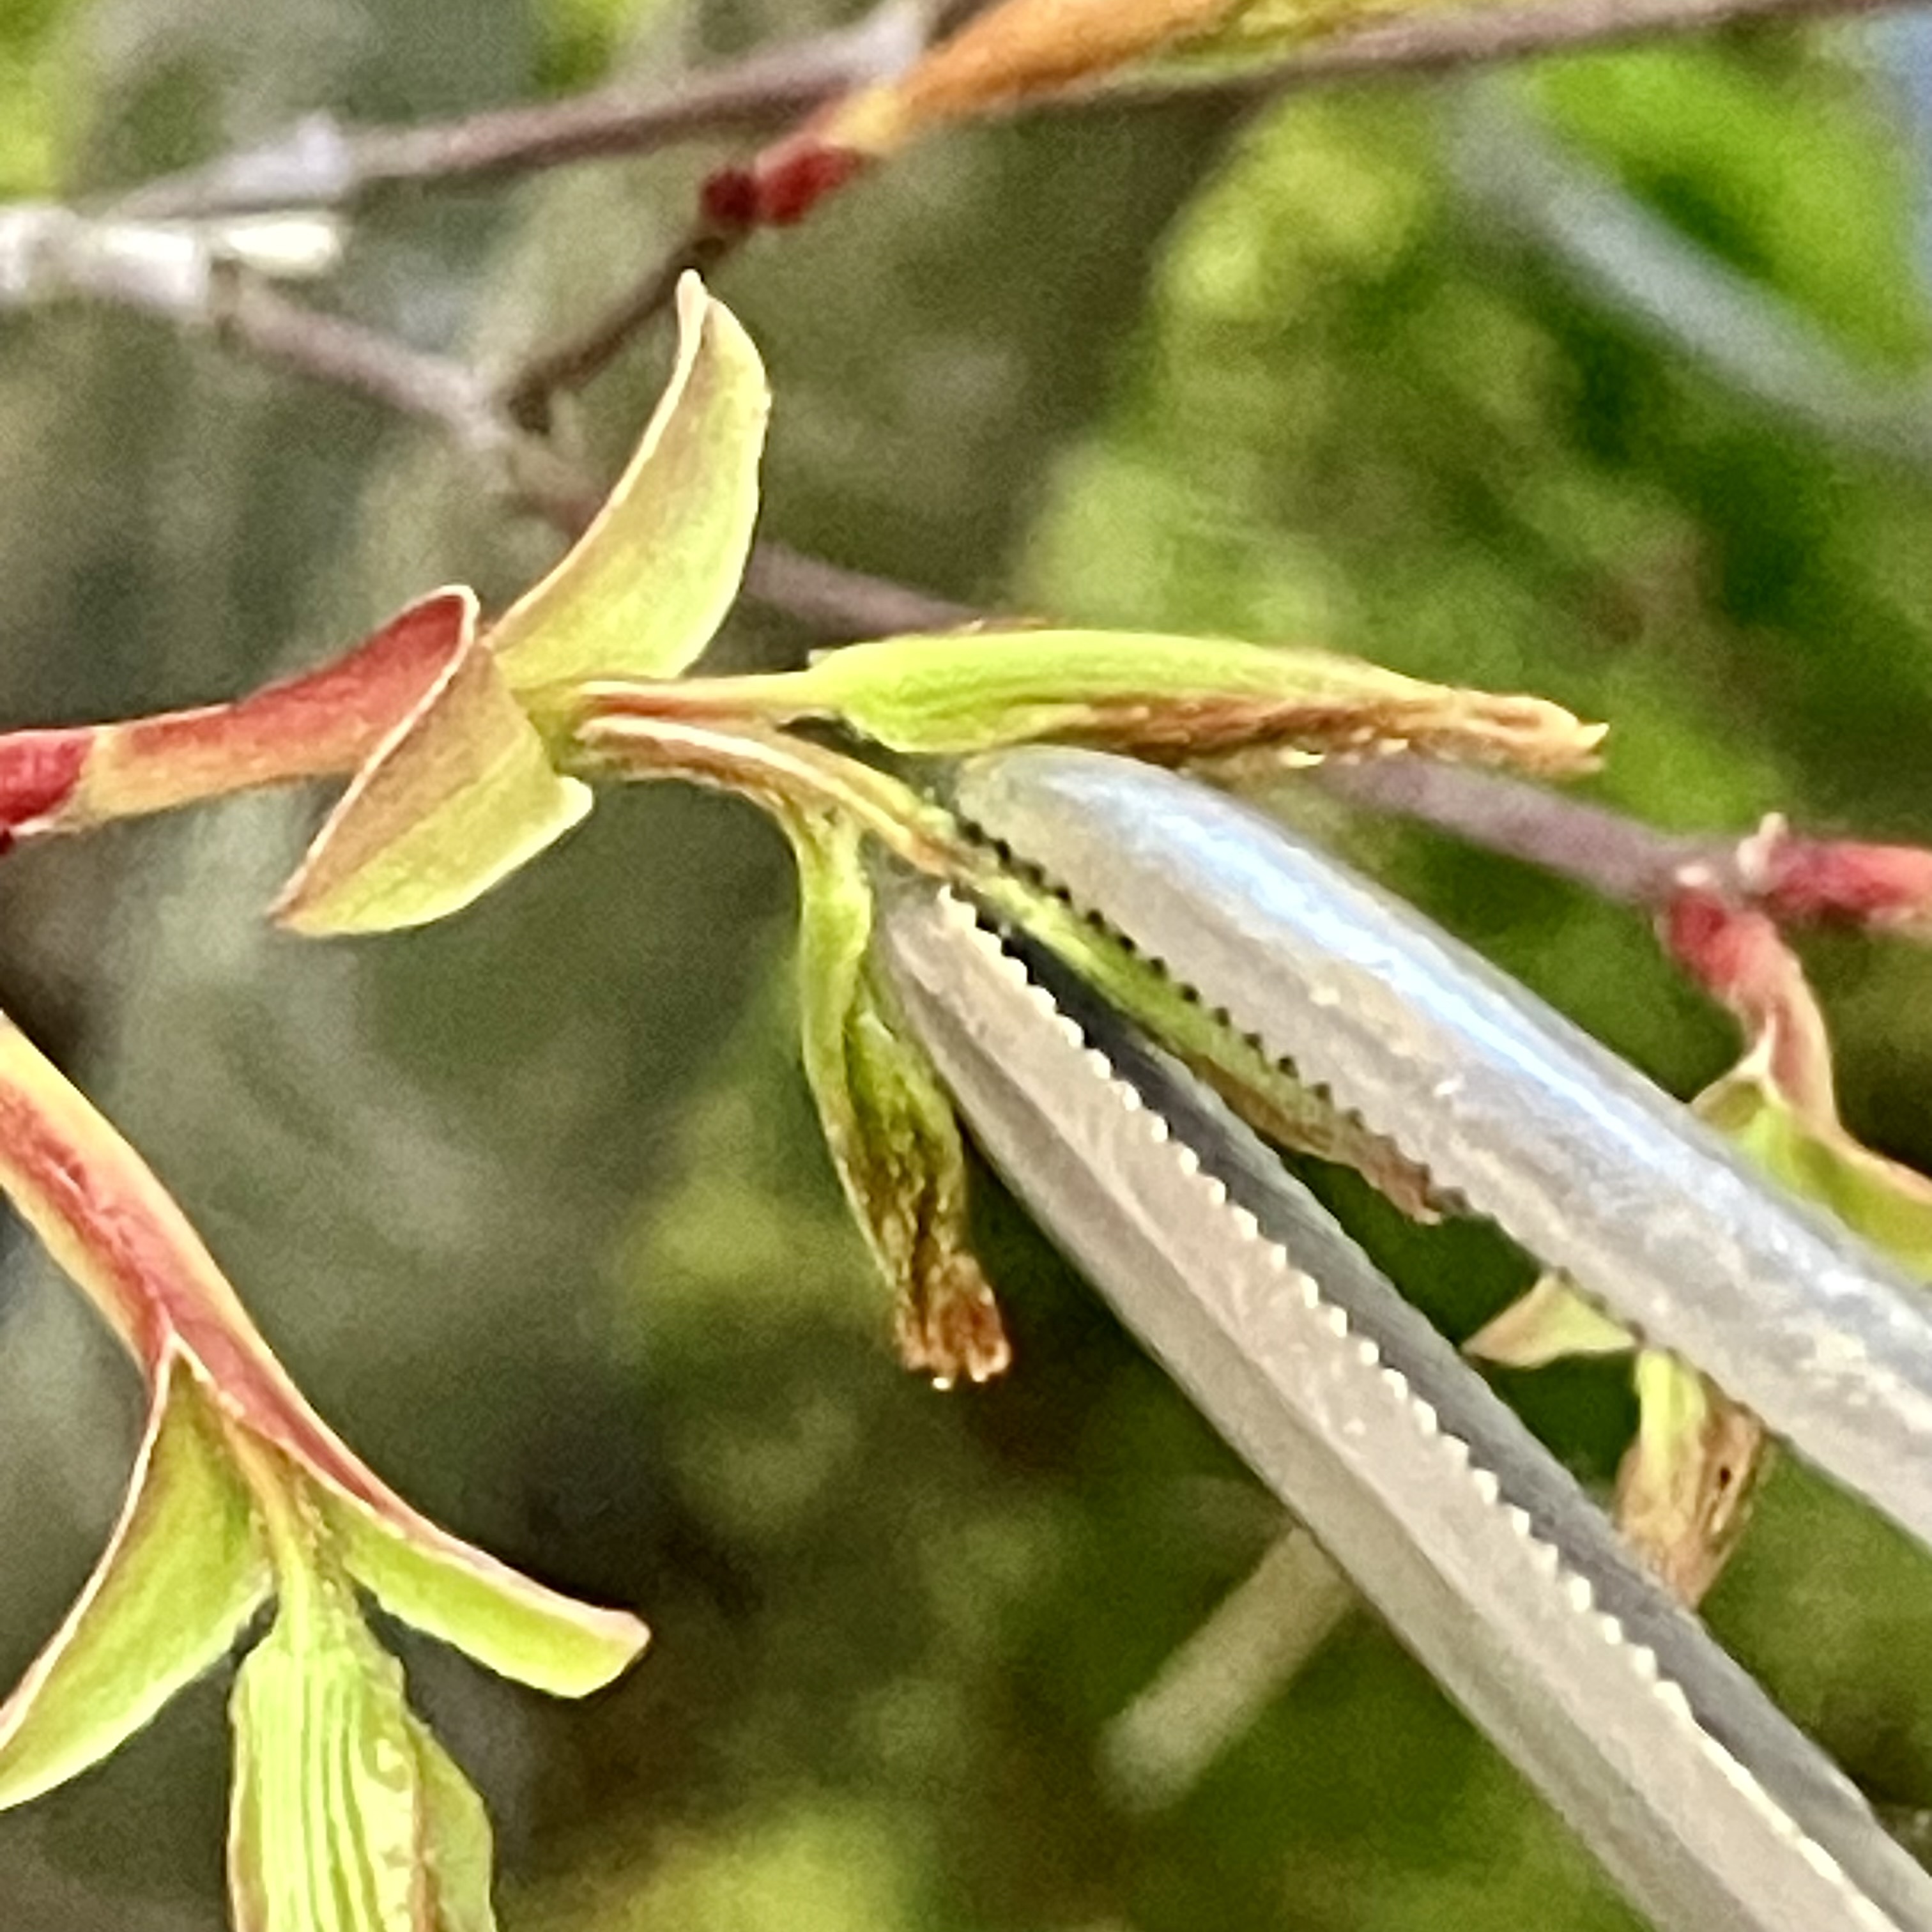
Push the first pair of leaves apart with a tweezer, grab the interior shoot, and pull off. If you catch it right here, the internode will be shorter.
This is some of the first bonsai work we do after spring repotting.
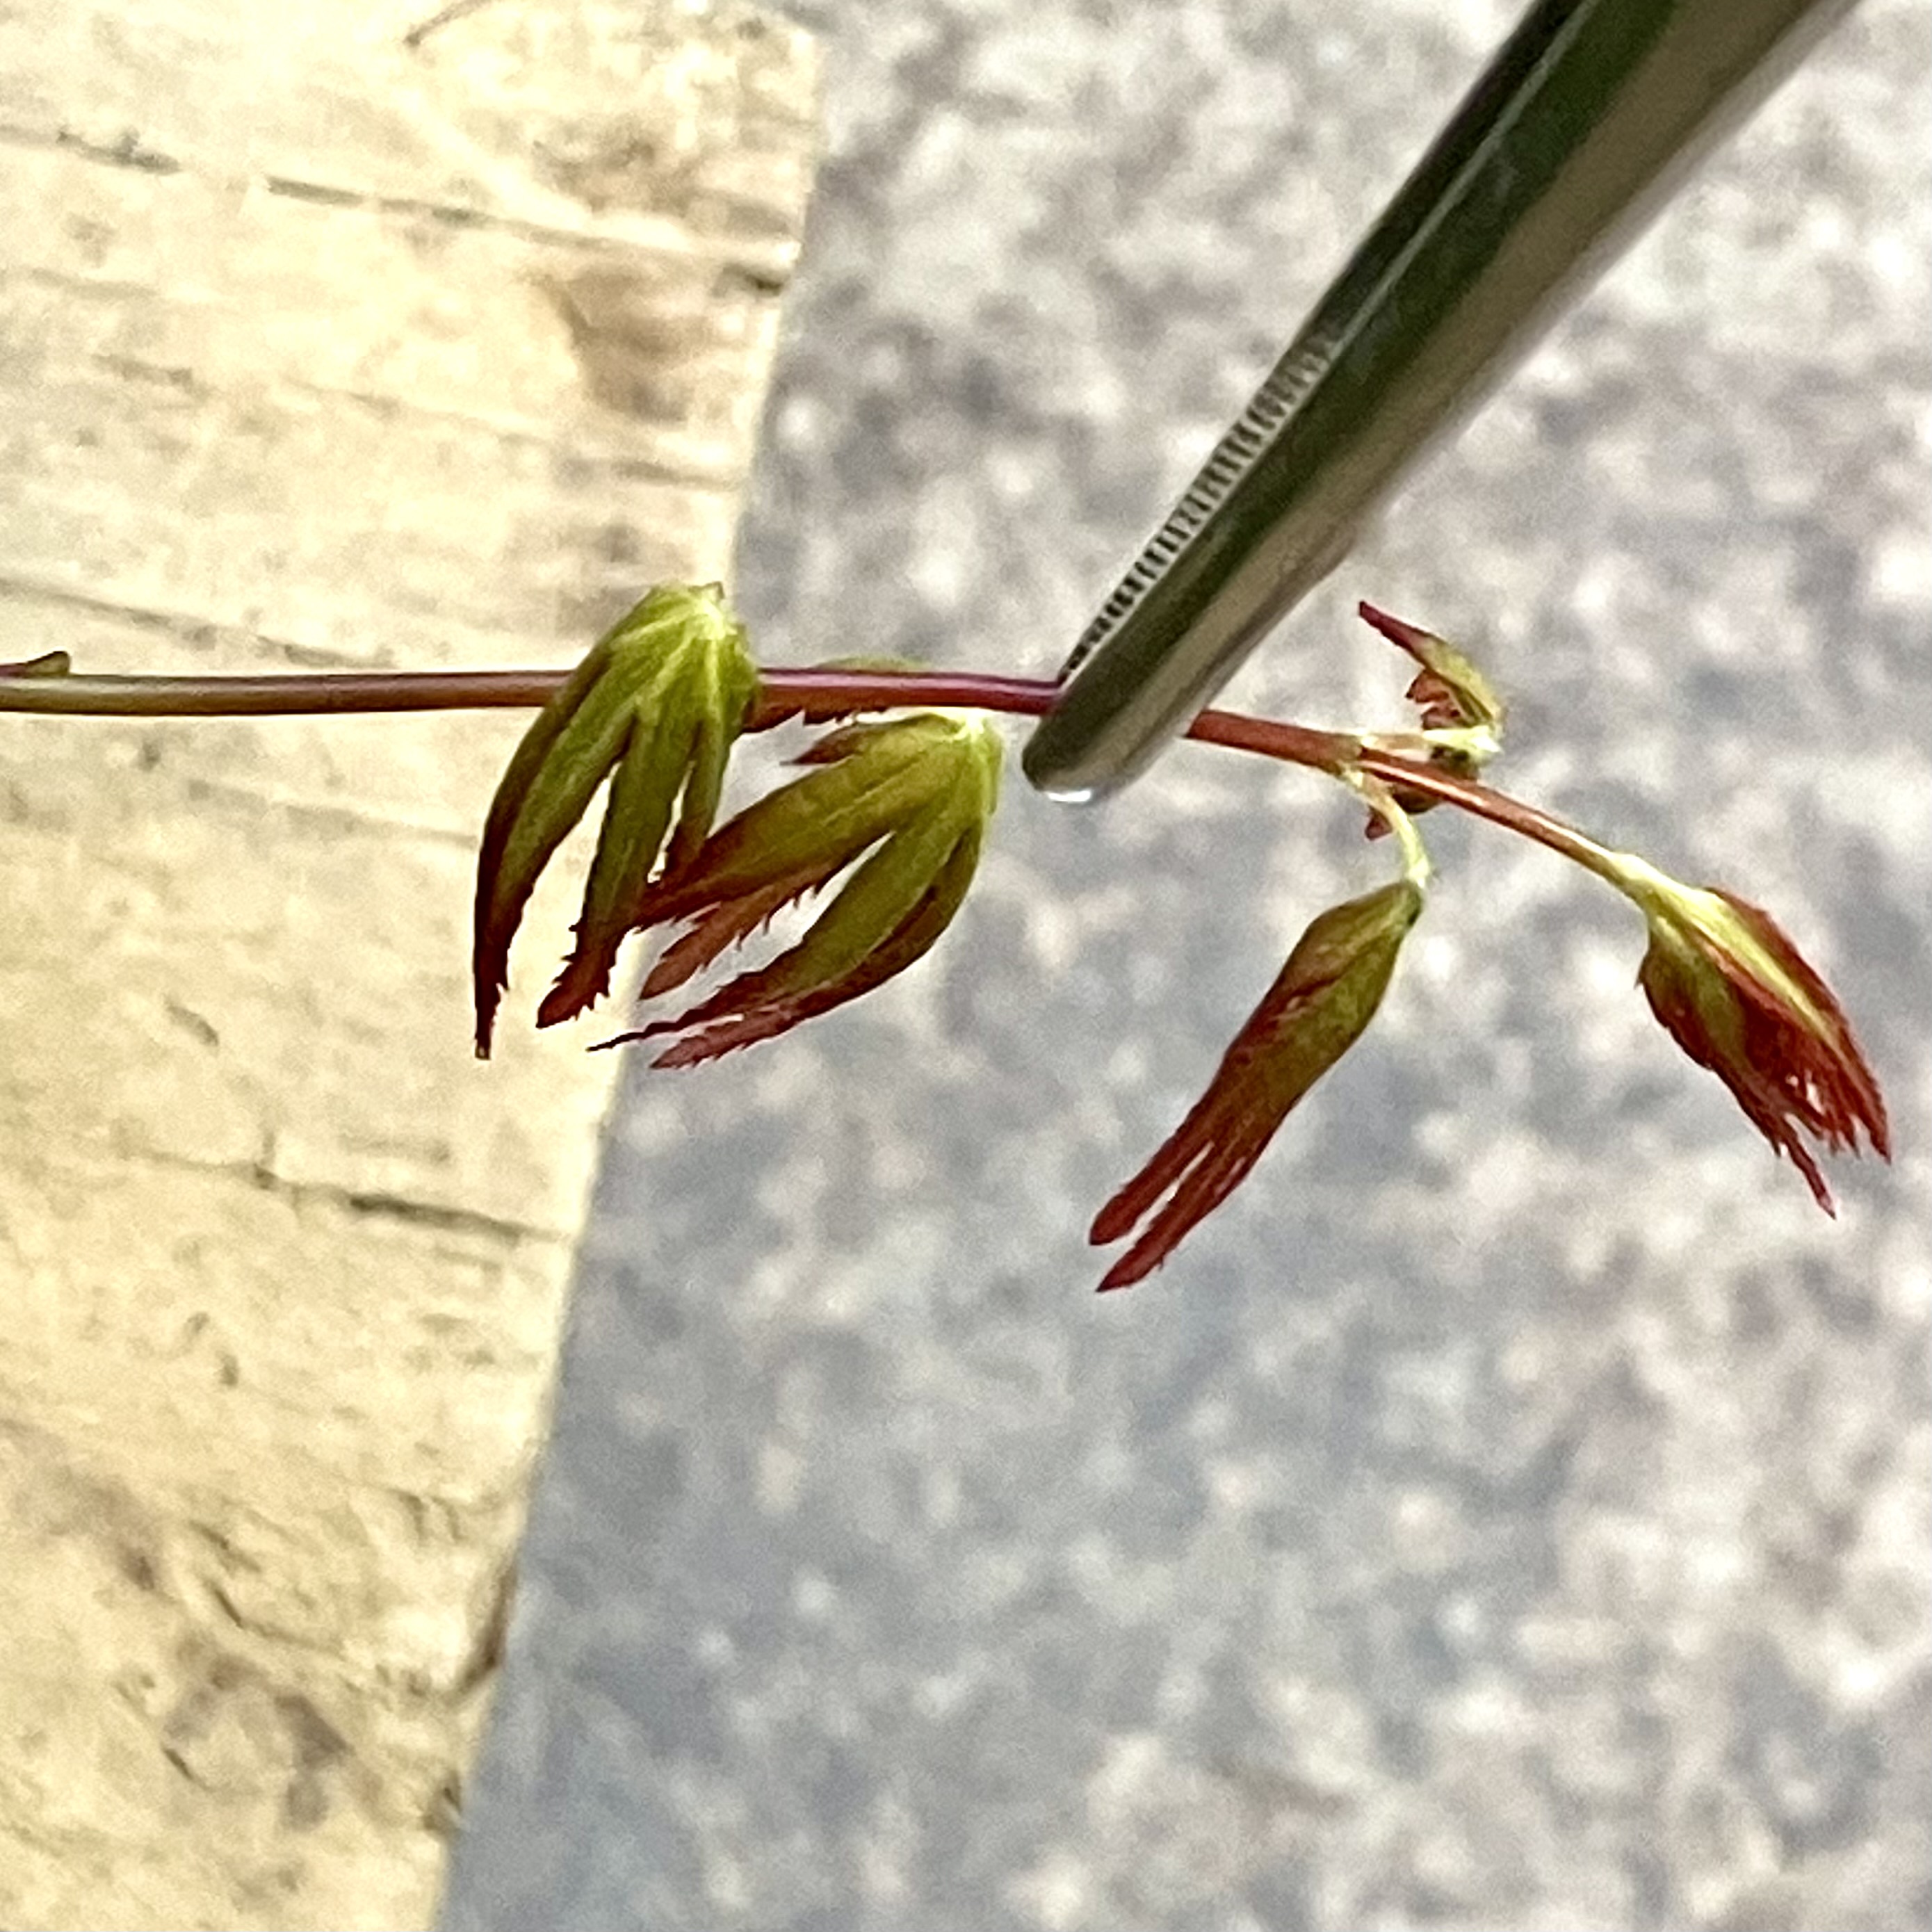
This shoot has elongated several days past ideal, though it should still be pinched to the first set of leaves. As this is a single flush plant when mature, we get one chance a year to shorten the internode.
A note of patience:
When first pinching a specimen, it will likely have a thicker twig. This translates to a couple years where even if you pinch, it will have a longer internode. Keep at it and you can get a thin twig, with a short internode. This offers the delicacy Japanese Maples are known for.
A maple following years of pinching. Notice the thin twigs and short internodes.
There is a point at which pinching goes the other way. The first pair of leaves open to no shoot inside. If that goes on, those branches may die back. No shoots elongating is our clue to fertilize more.
When should we start pinching?
Some will pot-grow their Japanese Maples 10-30 years before pinching. There are also those who prefer a stronger tree and never pinch—a possible direction for those in stressful climates for Japanese Maple: hot and dry with little winter cold. This is likely to stress them and leaving longer shoots may be best.
In some situations pinching is useful to rein in this coltish species, especially for small specimens like shohin.
Many find Japanese Maple a tough, forgiving plant. Pinching is maybe best thought of as optional, and applied dependent on goals.
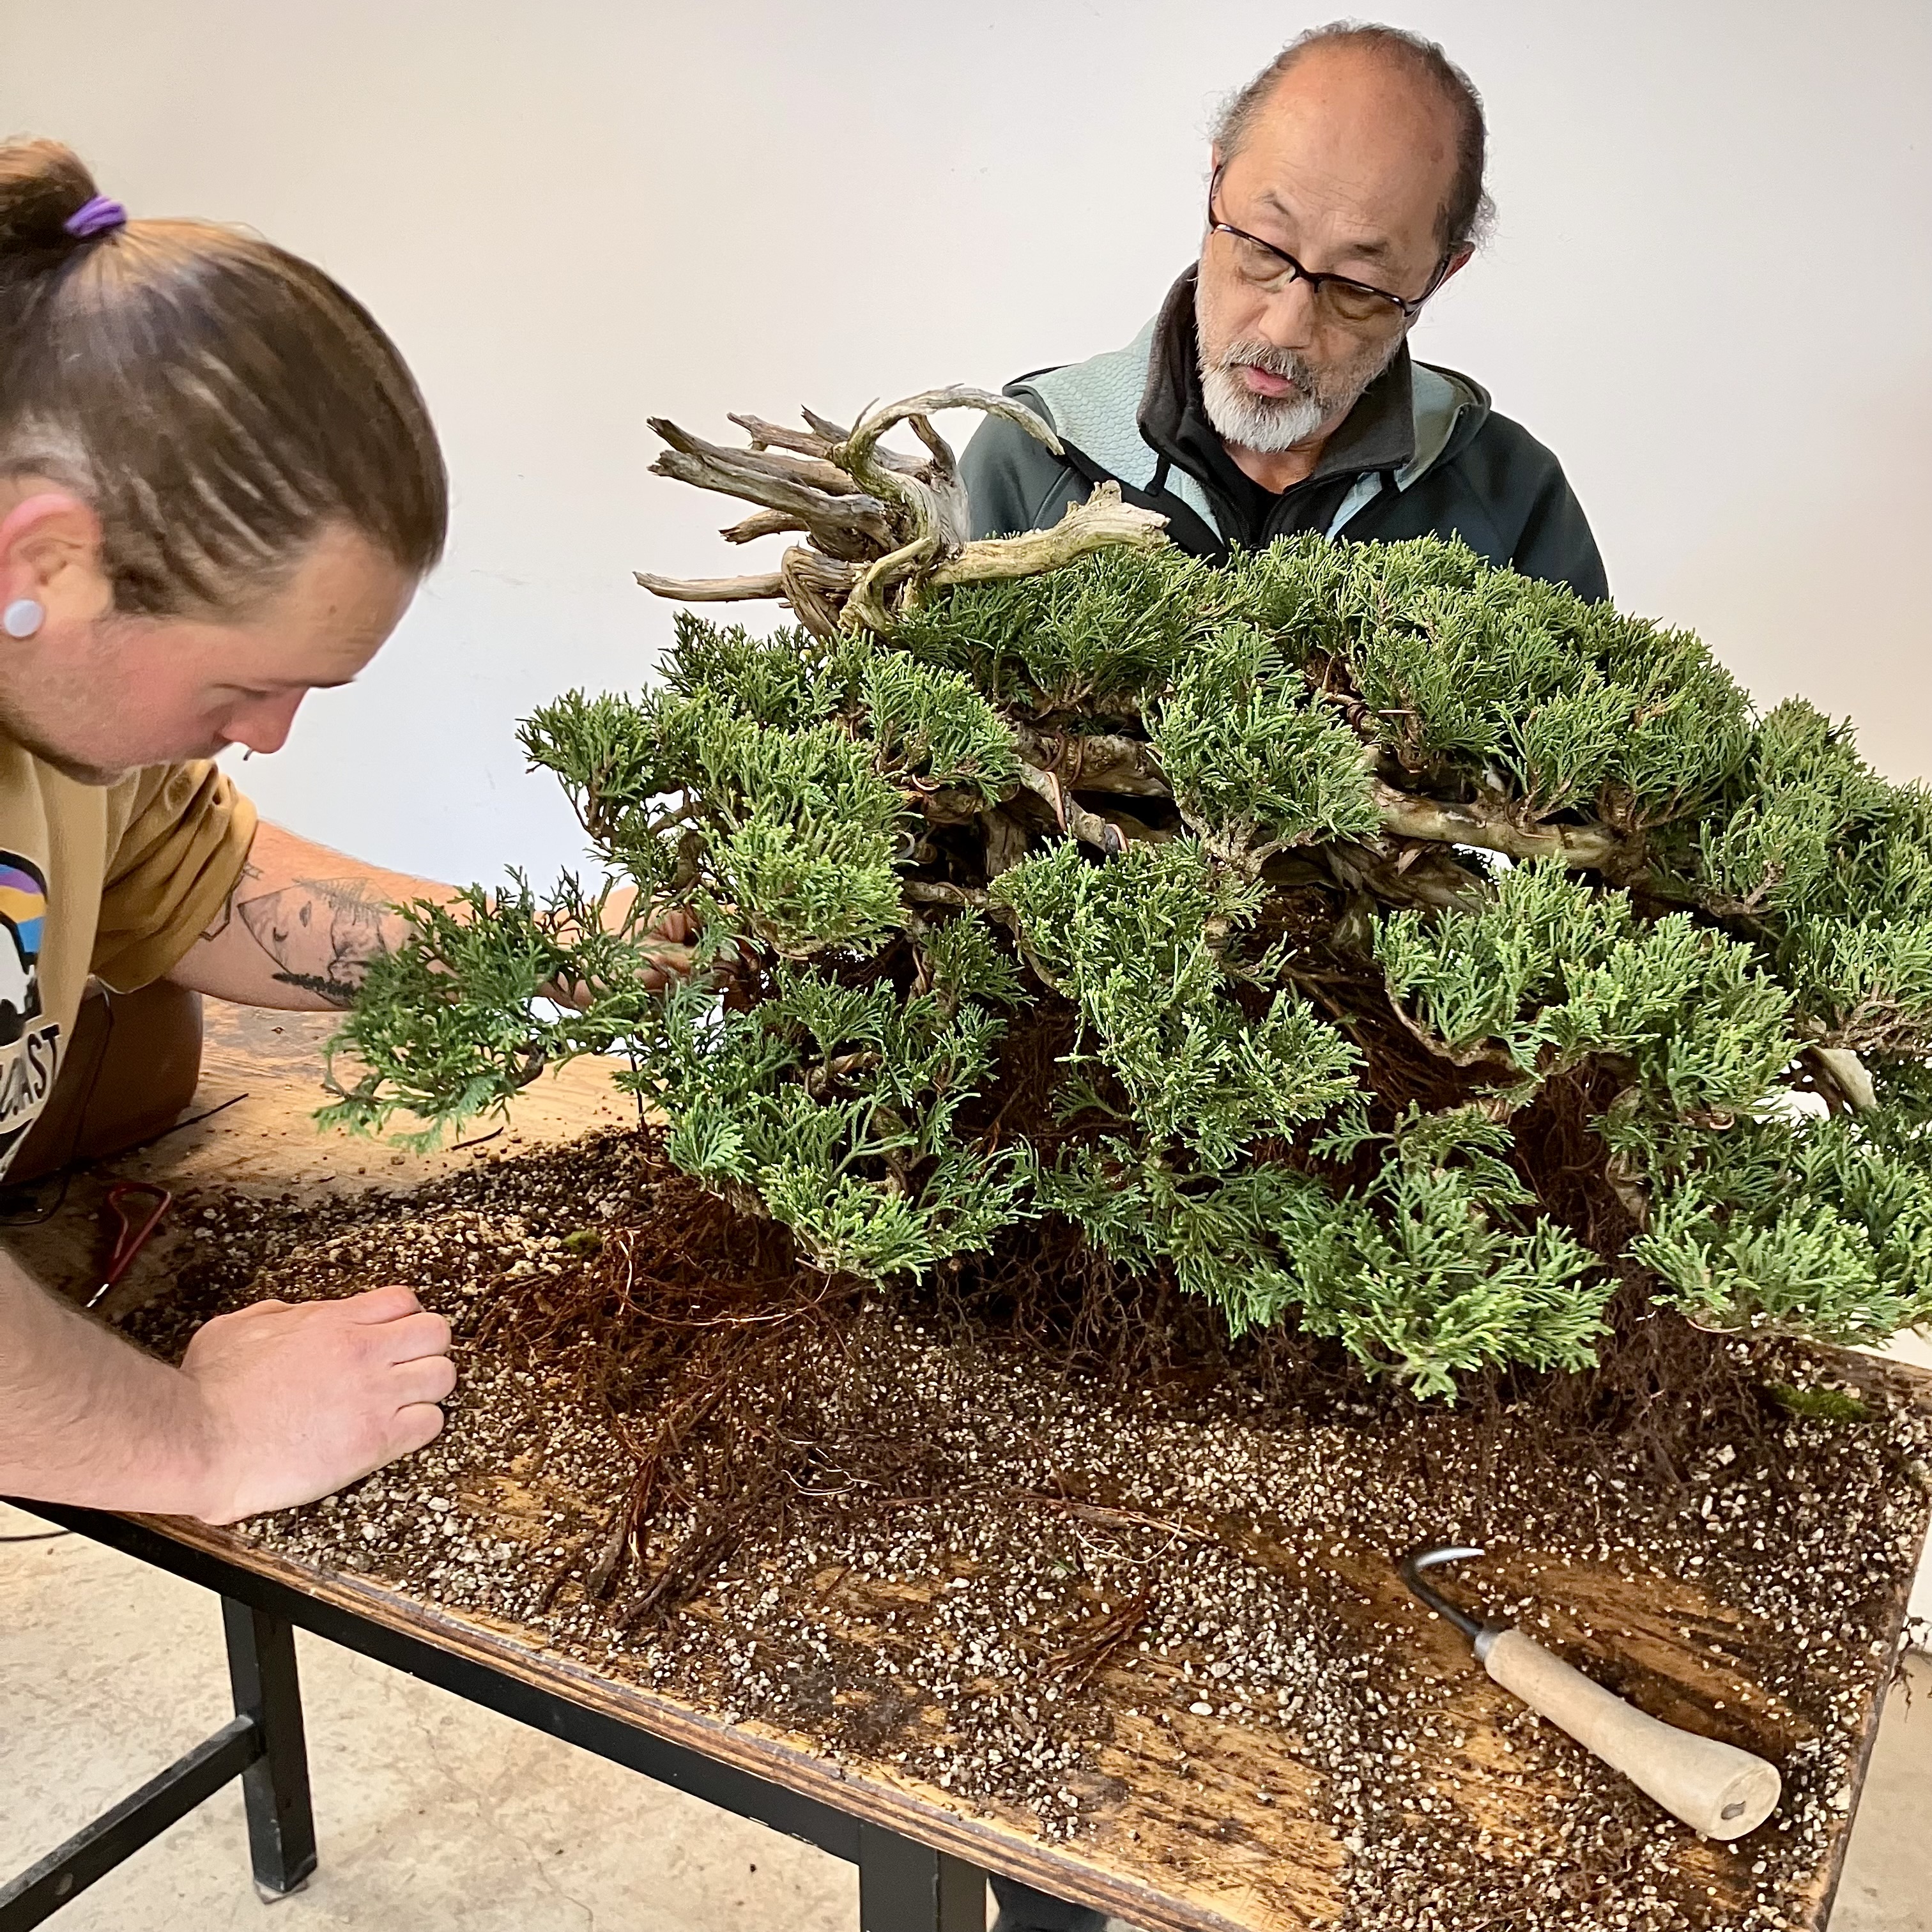
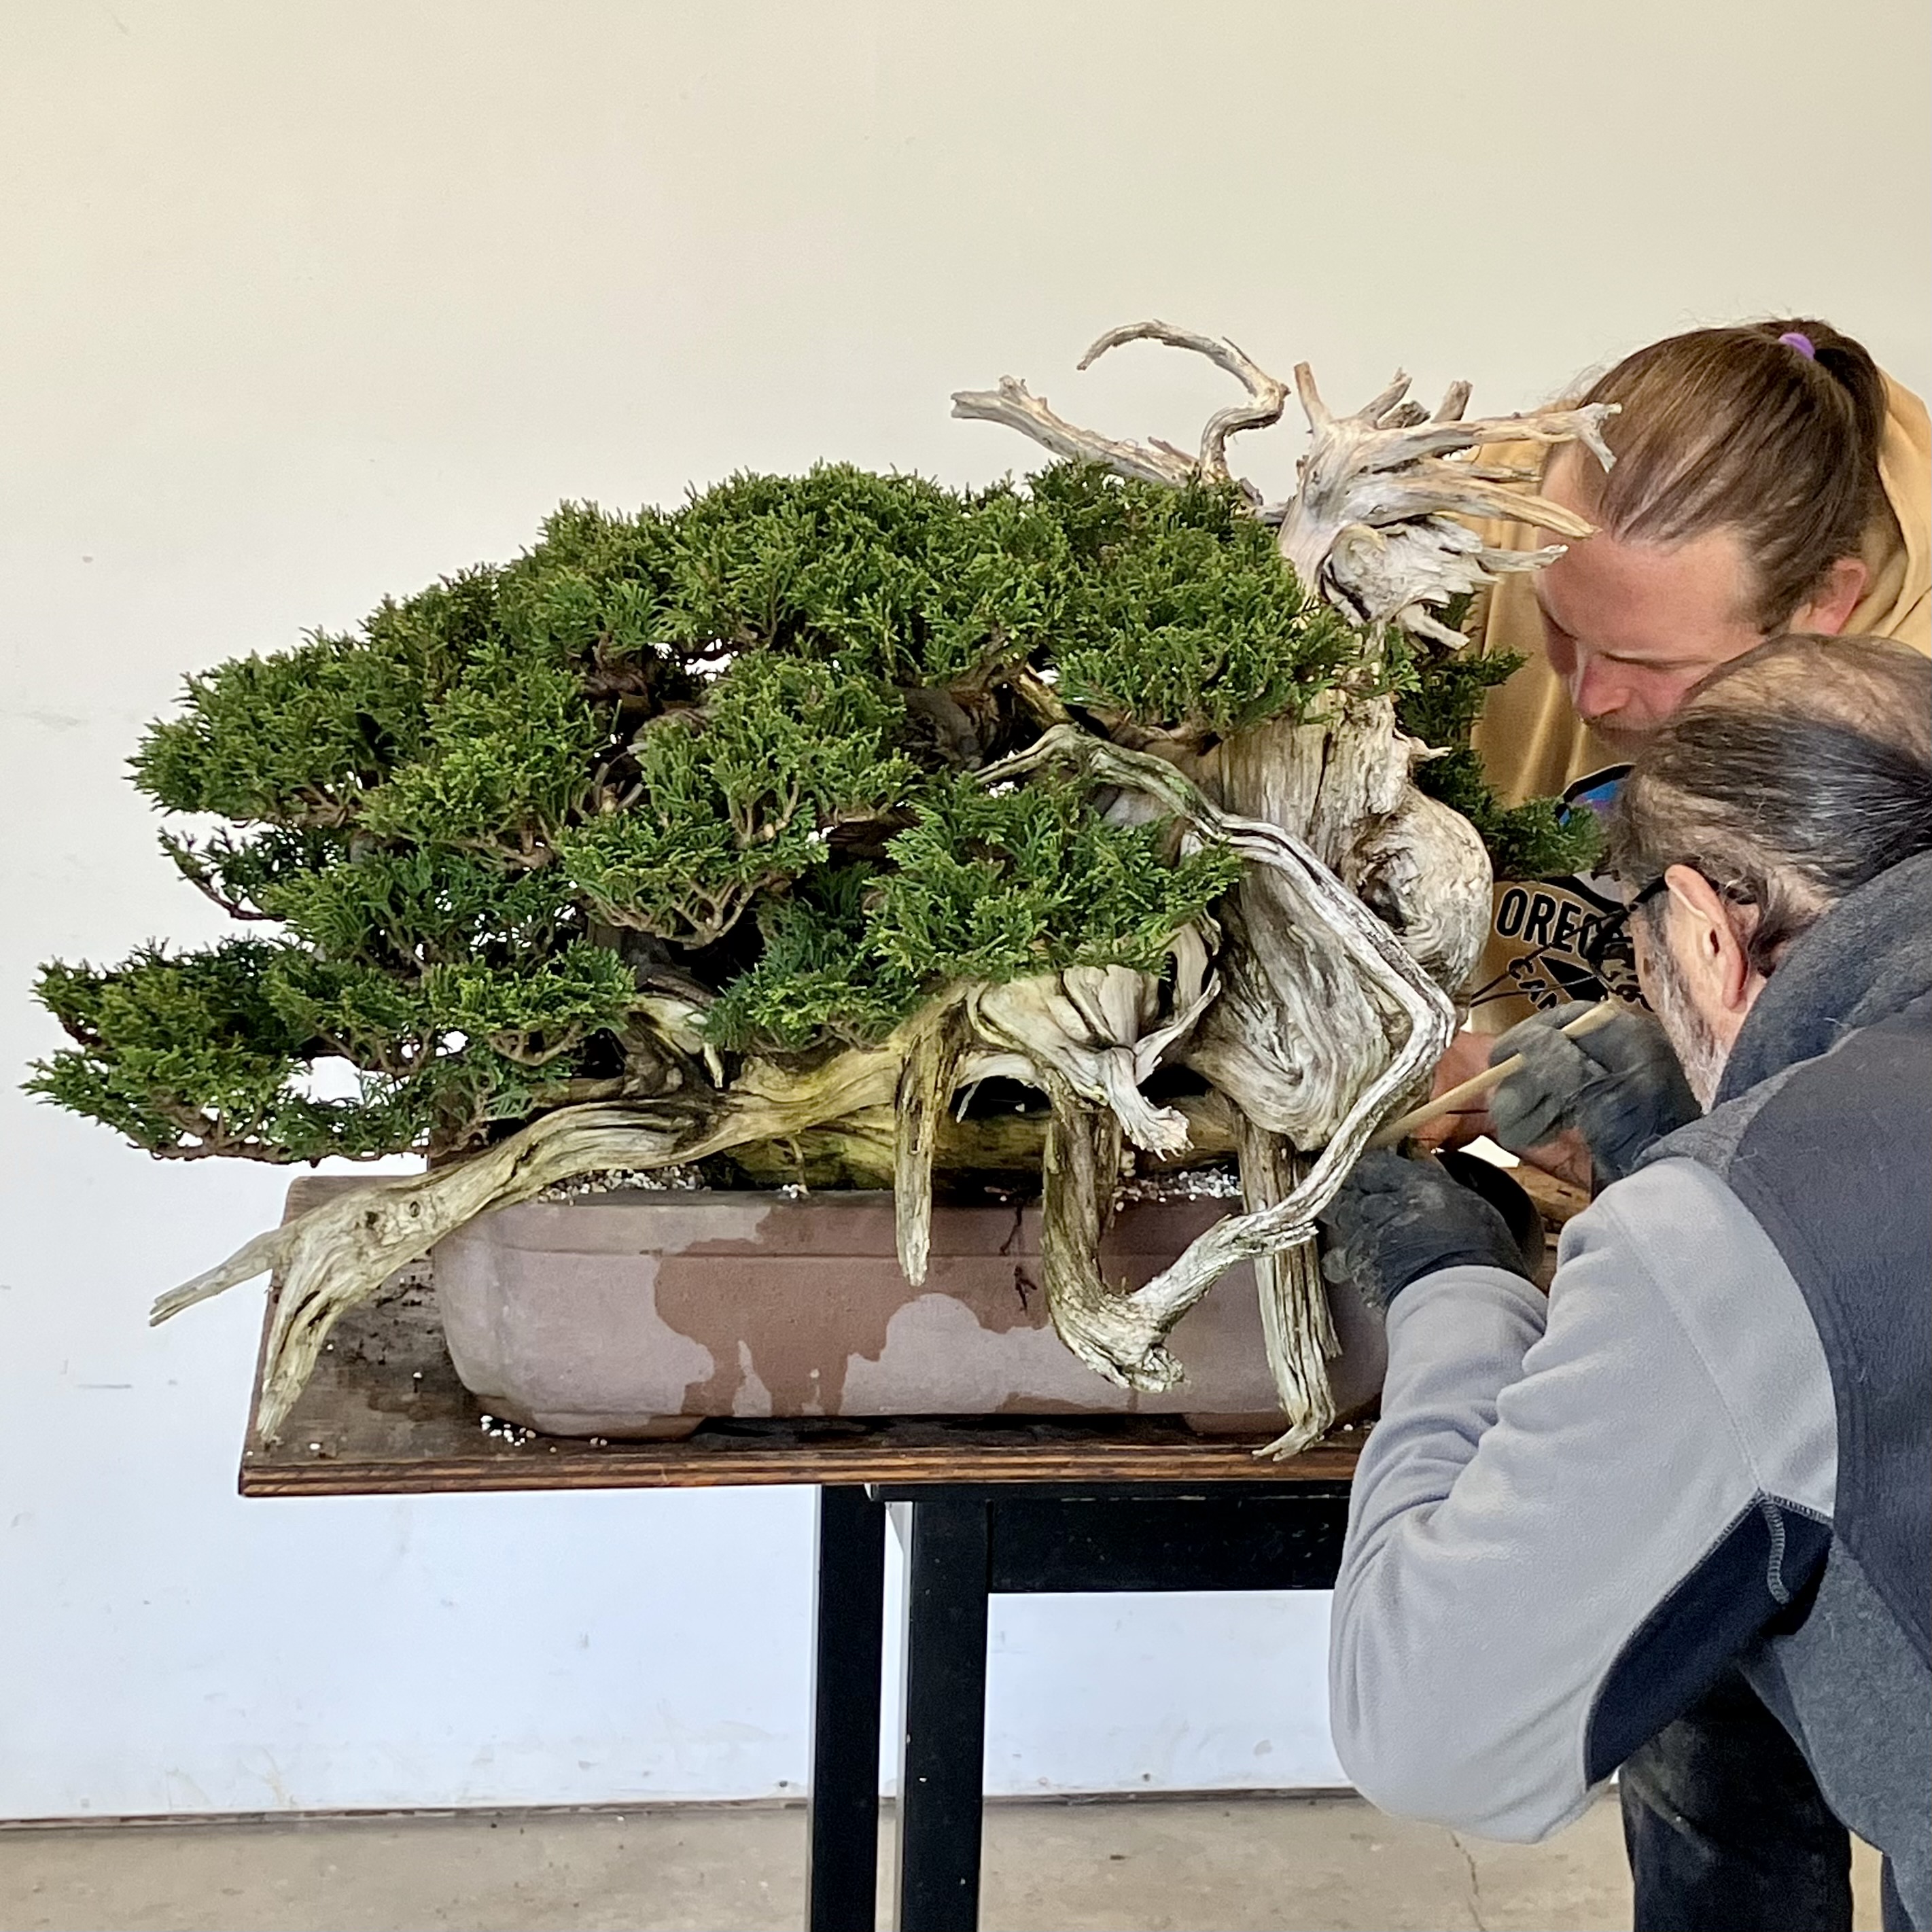
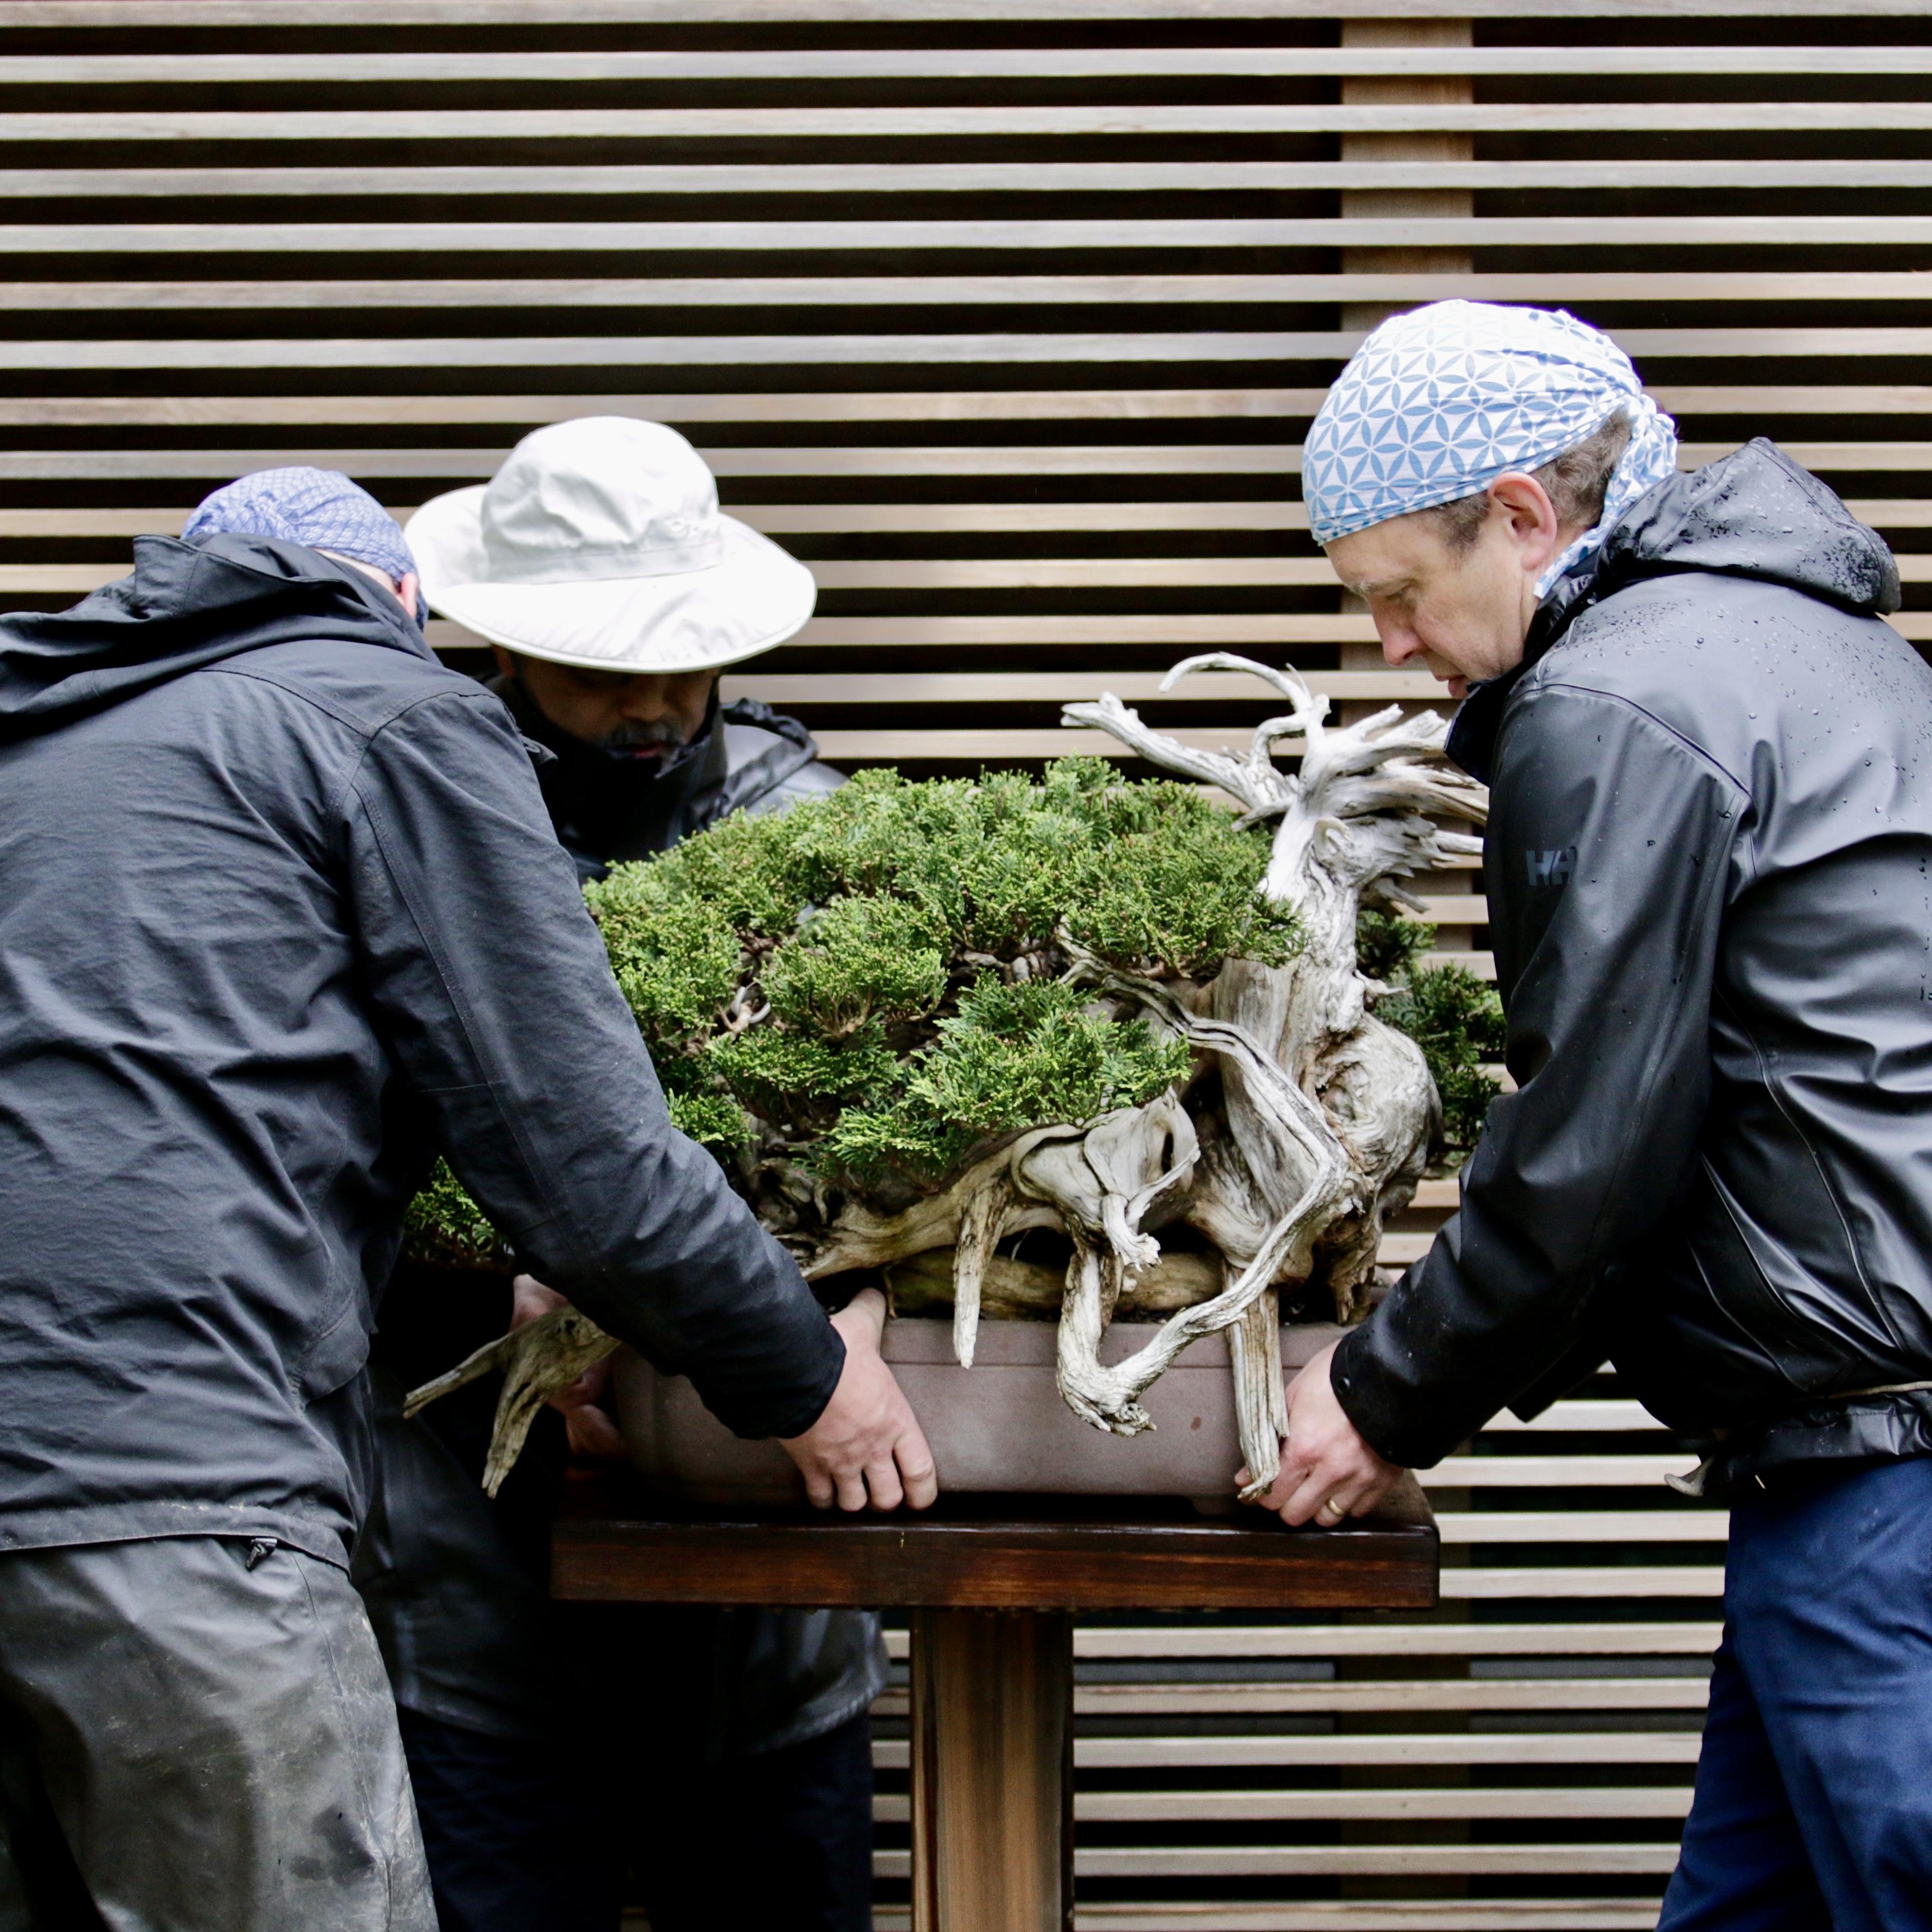
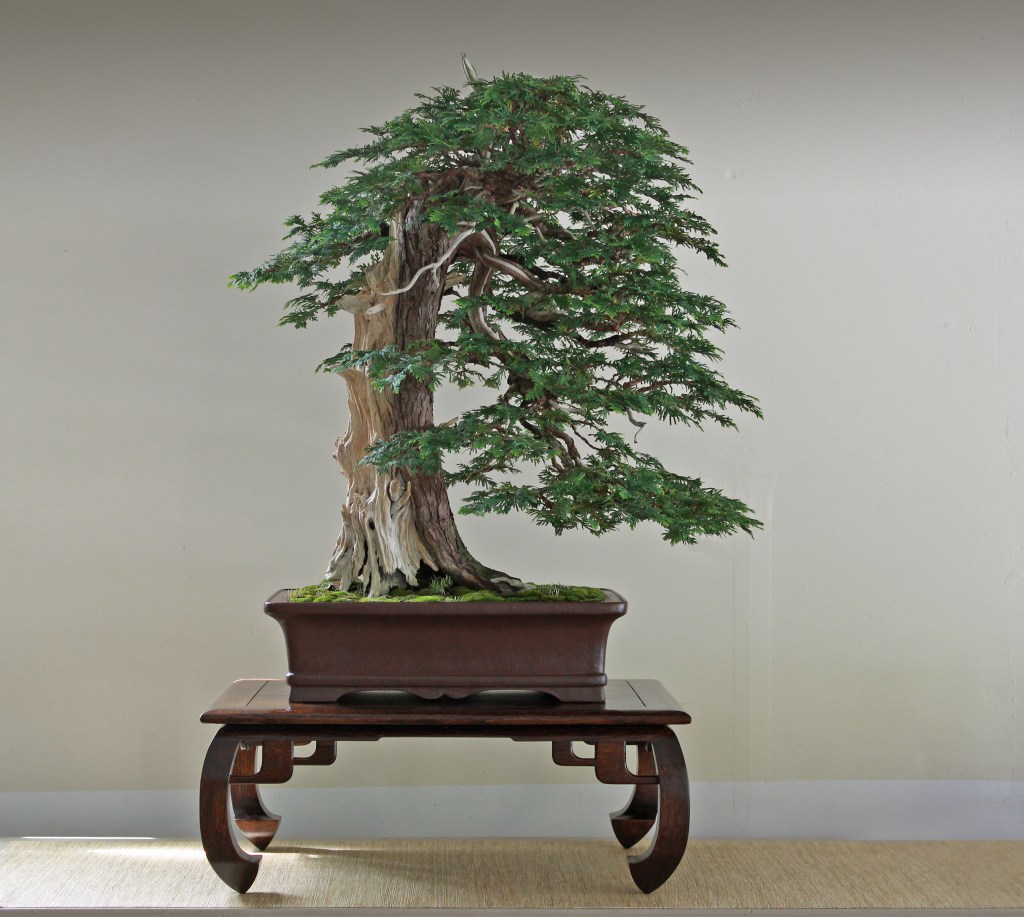
This collected Yellow Cedar, Callitropsis nootkatensis, came from Vancouver Island, BC. We designed it six years ago, and in the following photo essay we transfer it from a box to a pot, and adjust the branches.
Patch and Masaki removed the Yellow Cedar from the box and began exploring the root mass. We hoped it might fit in a pot we had, but didn’t know if its large base of deadwood and living tissue would allow that. We went slow and with a backup plan.
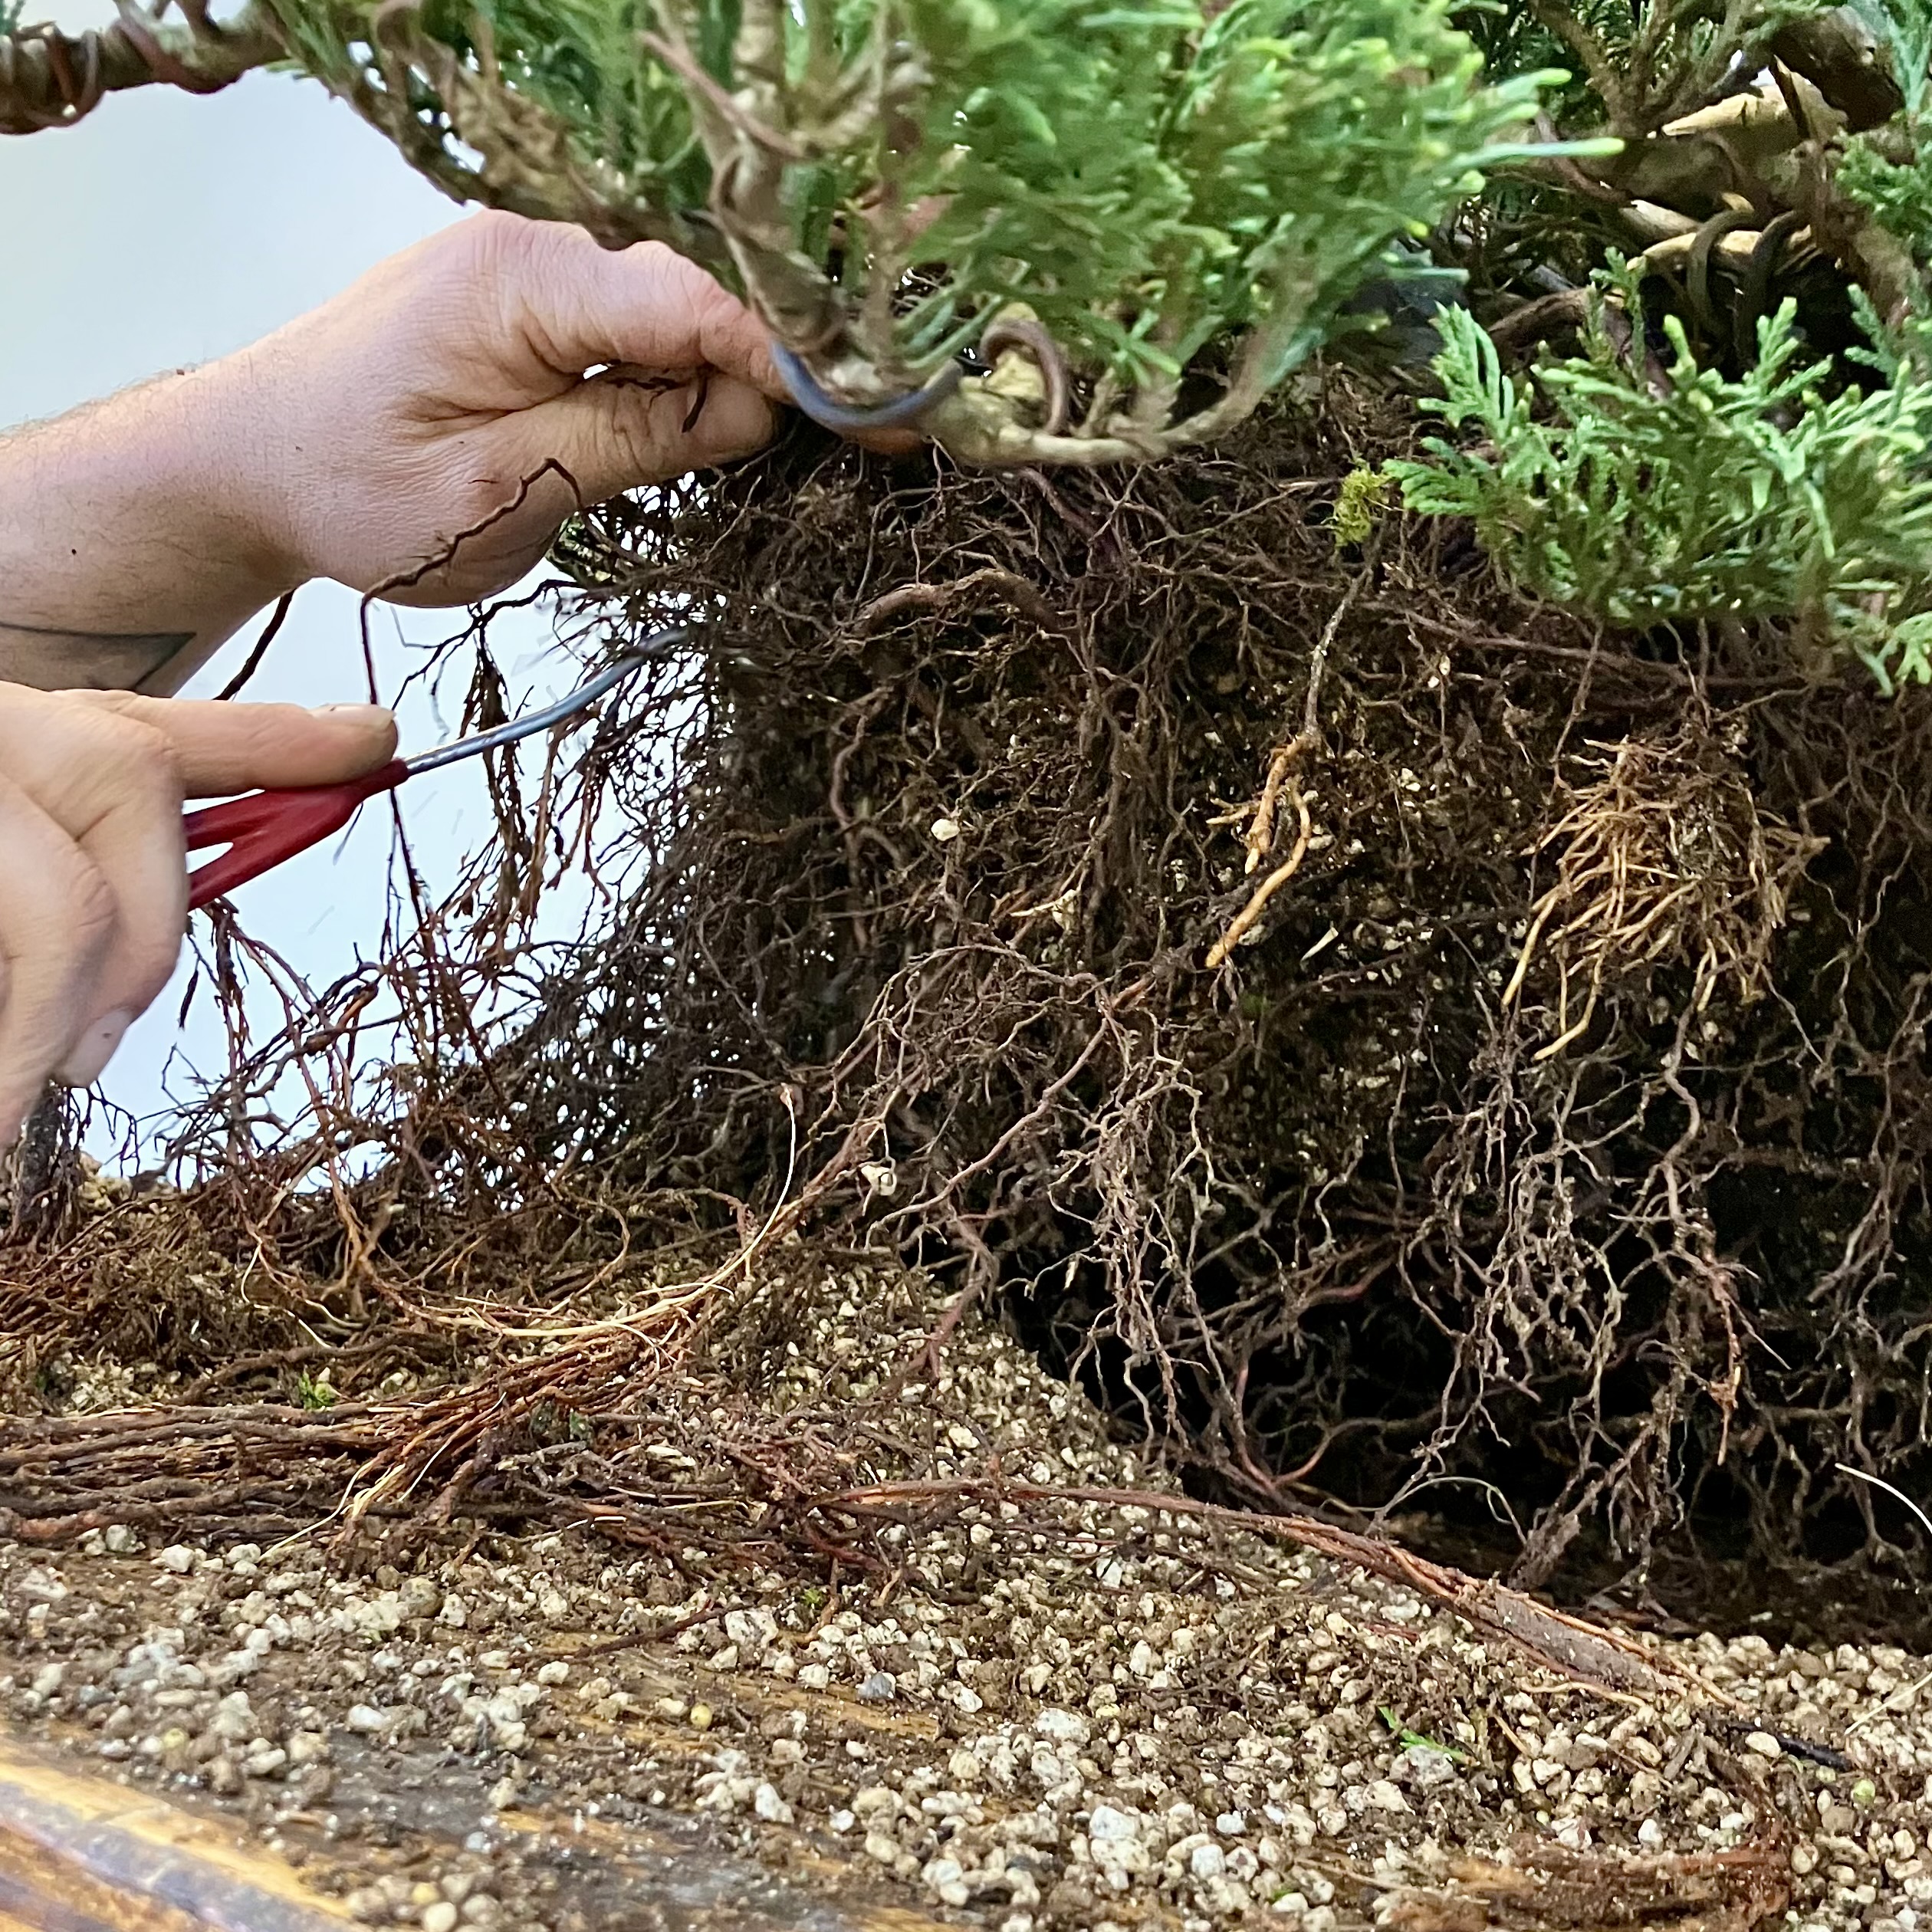
A root hook assisted bringing in the sides.
One of the challenges with this specimen was the inclination forward to present the front. At about a 75 degree tip, a large portion of the rear root ball would become a high root sail. Patch works away at that back area to lower it.
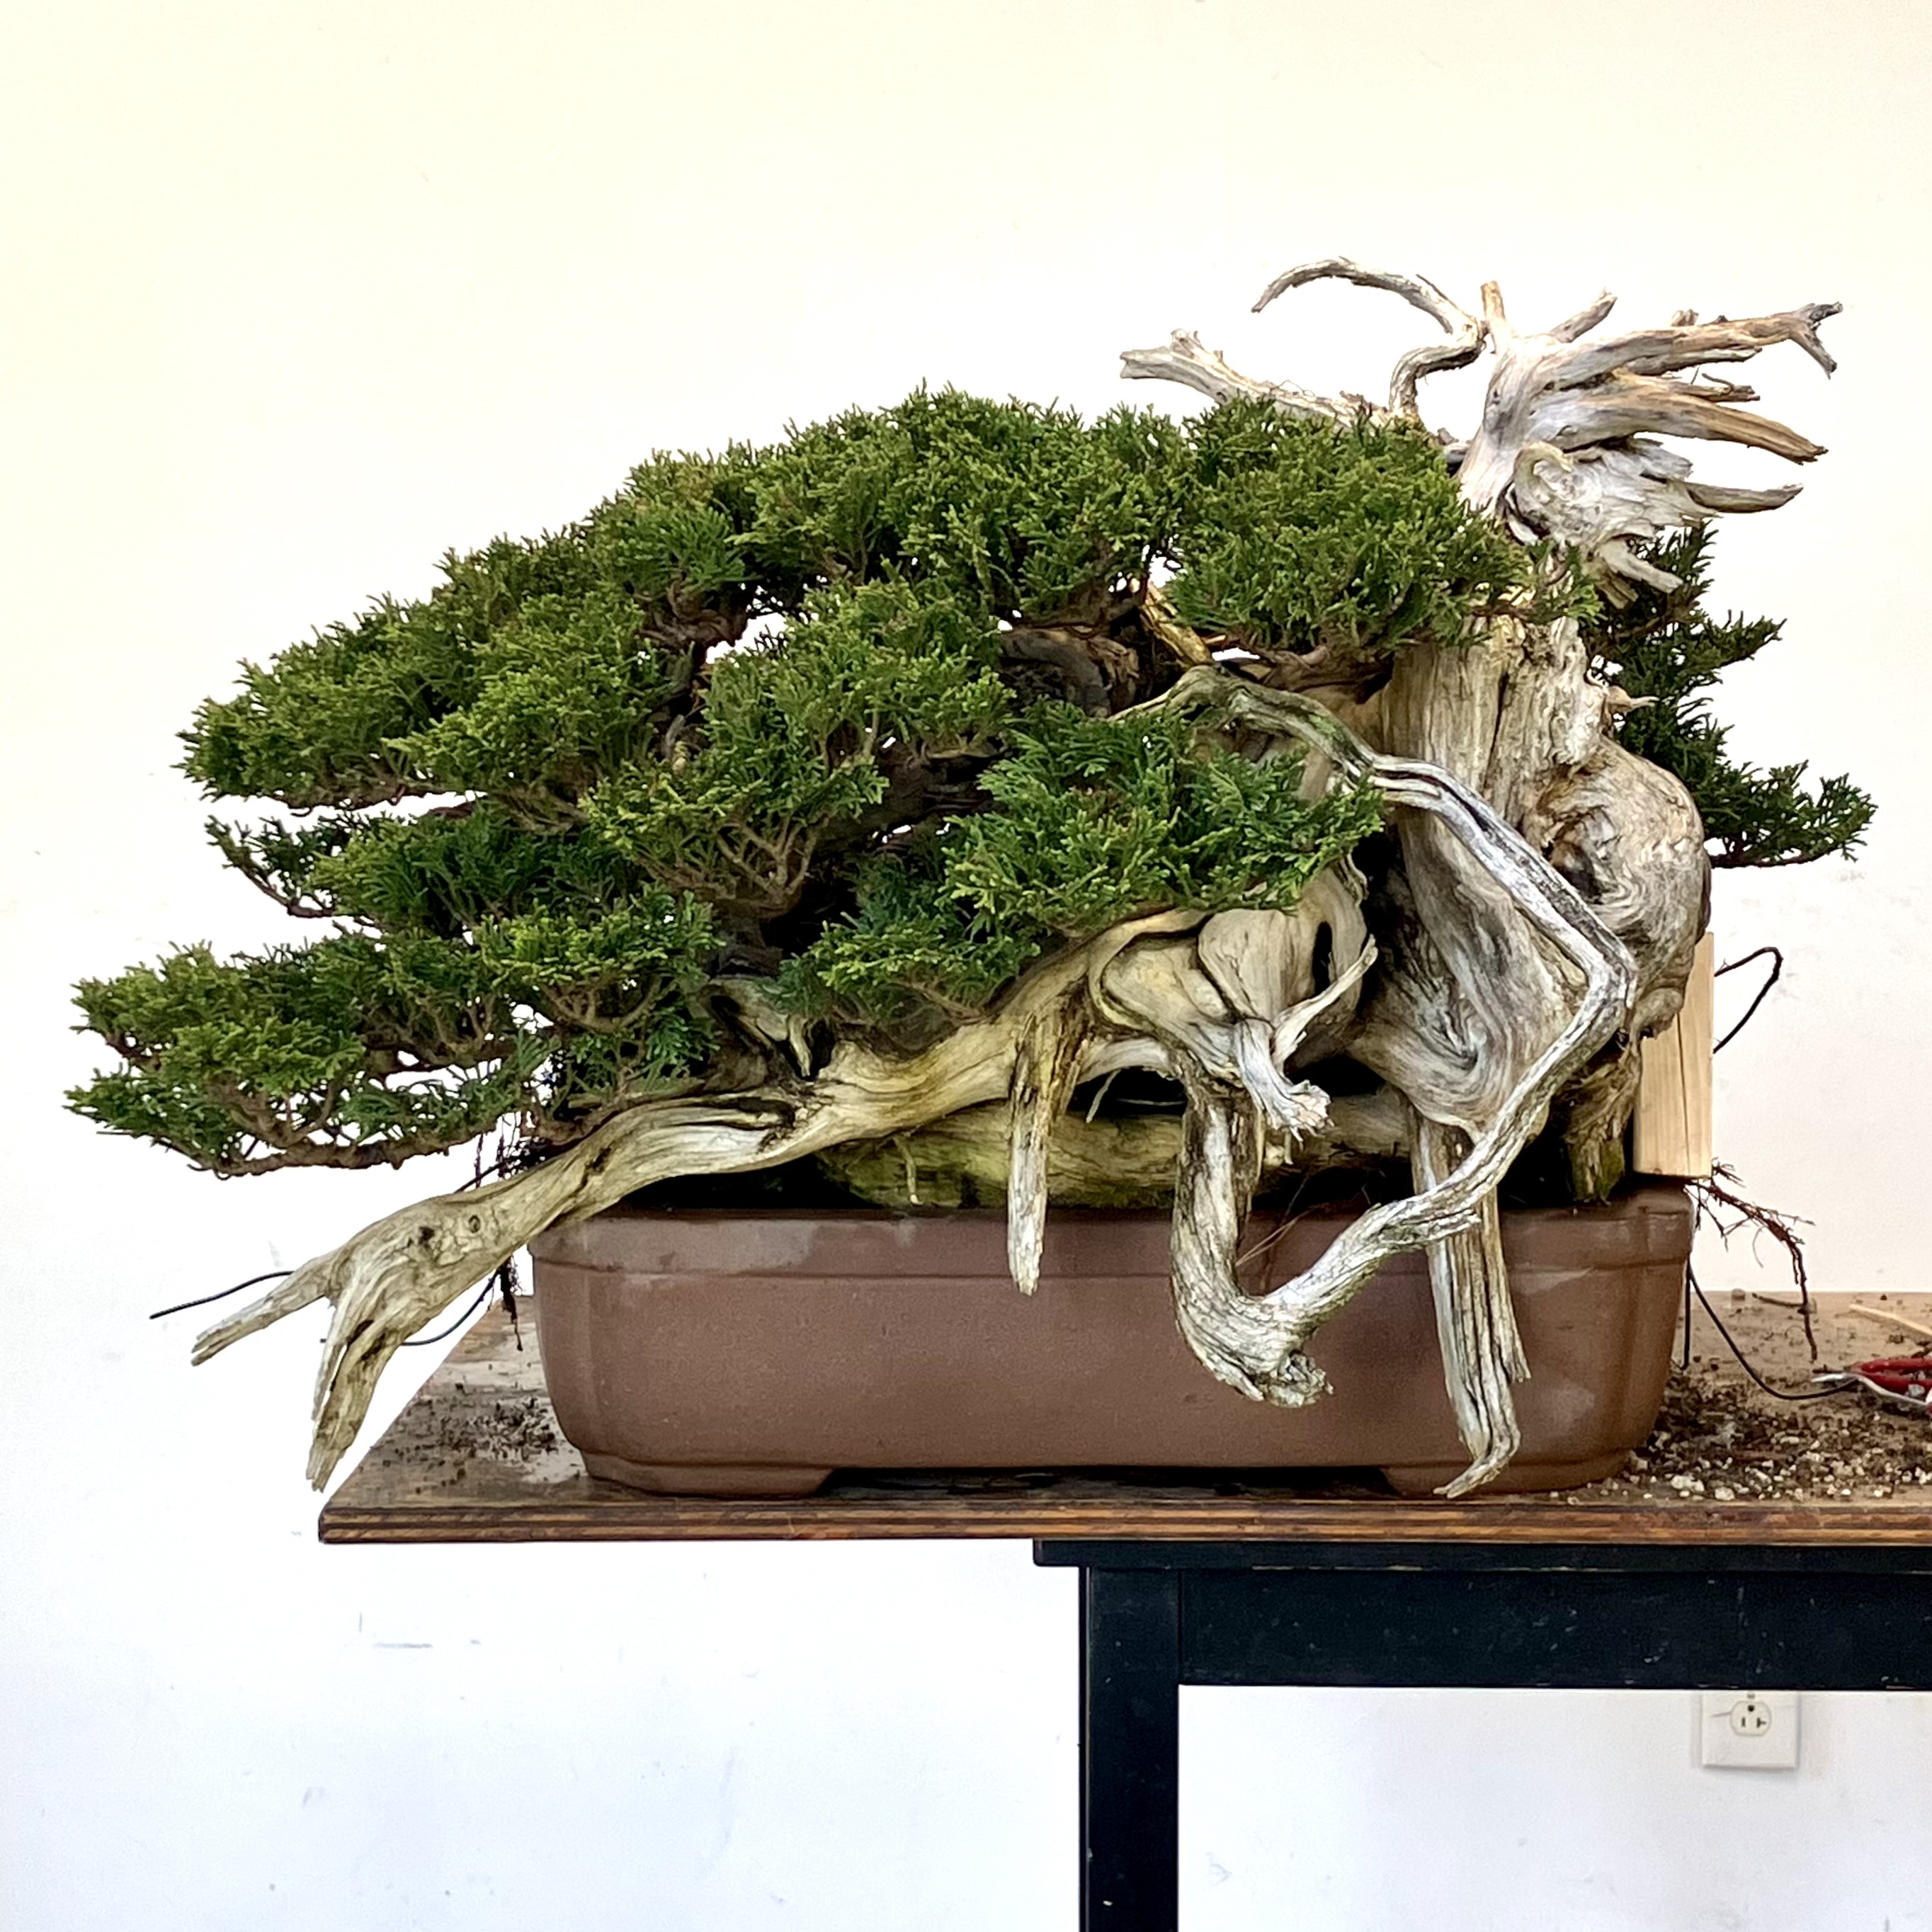
The rough set to check fit. A block of 2×2 to the right temporarily braces against the deadwood for this strong forward tip.
For a while I considered a slab for this one, but worried the hanging deadwood in front would make that presentation problematic—at least, without a tall mound. Luckily the pot we had slipped around the low, long deadwood like a shoe around a foot, and over which the frontal jin had enough height to hang.
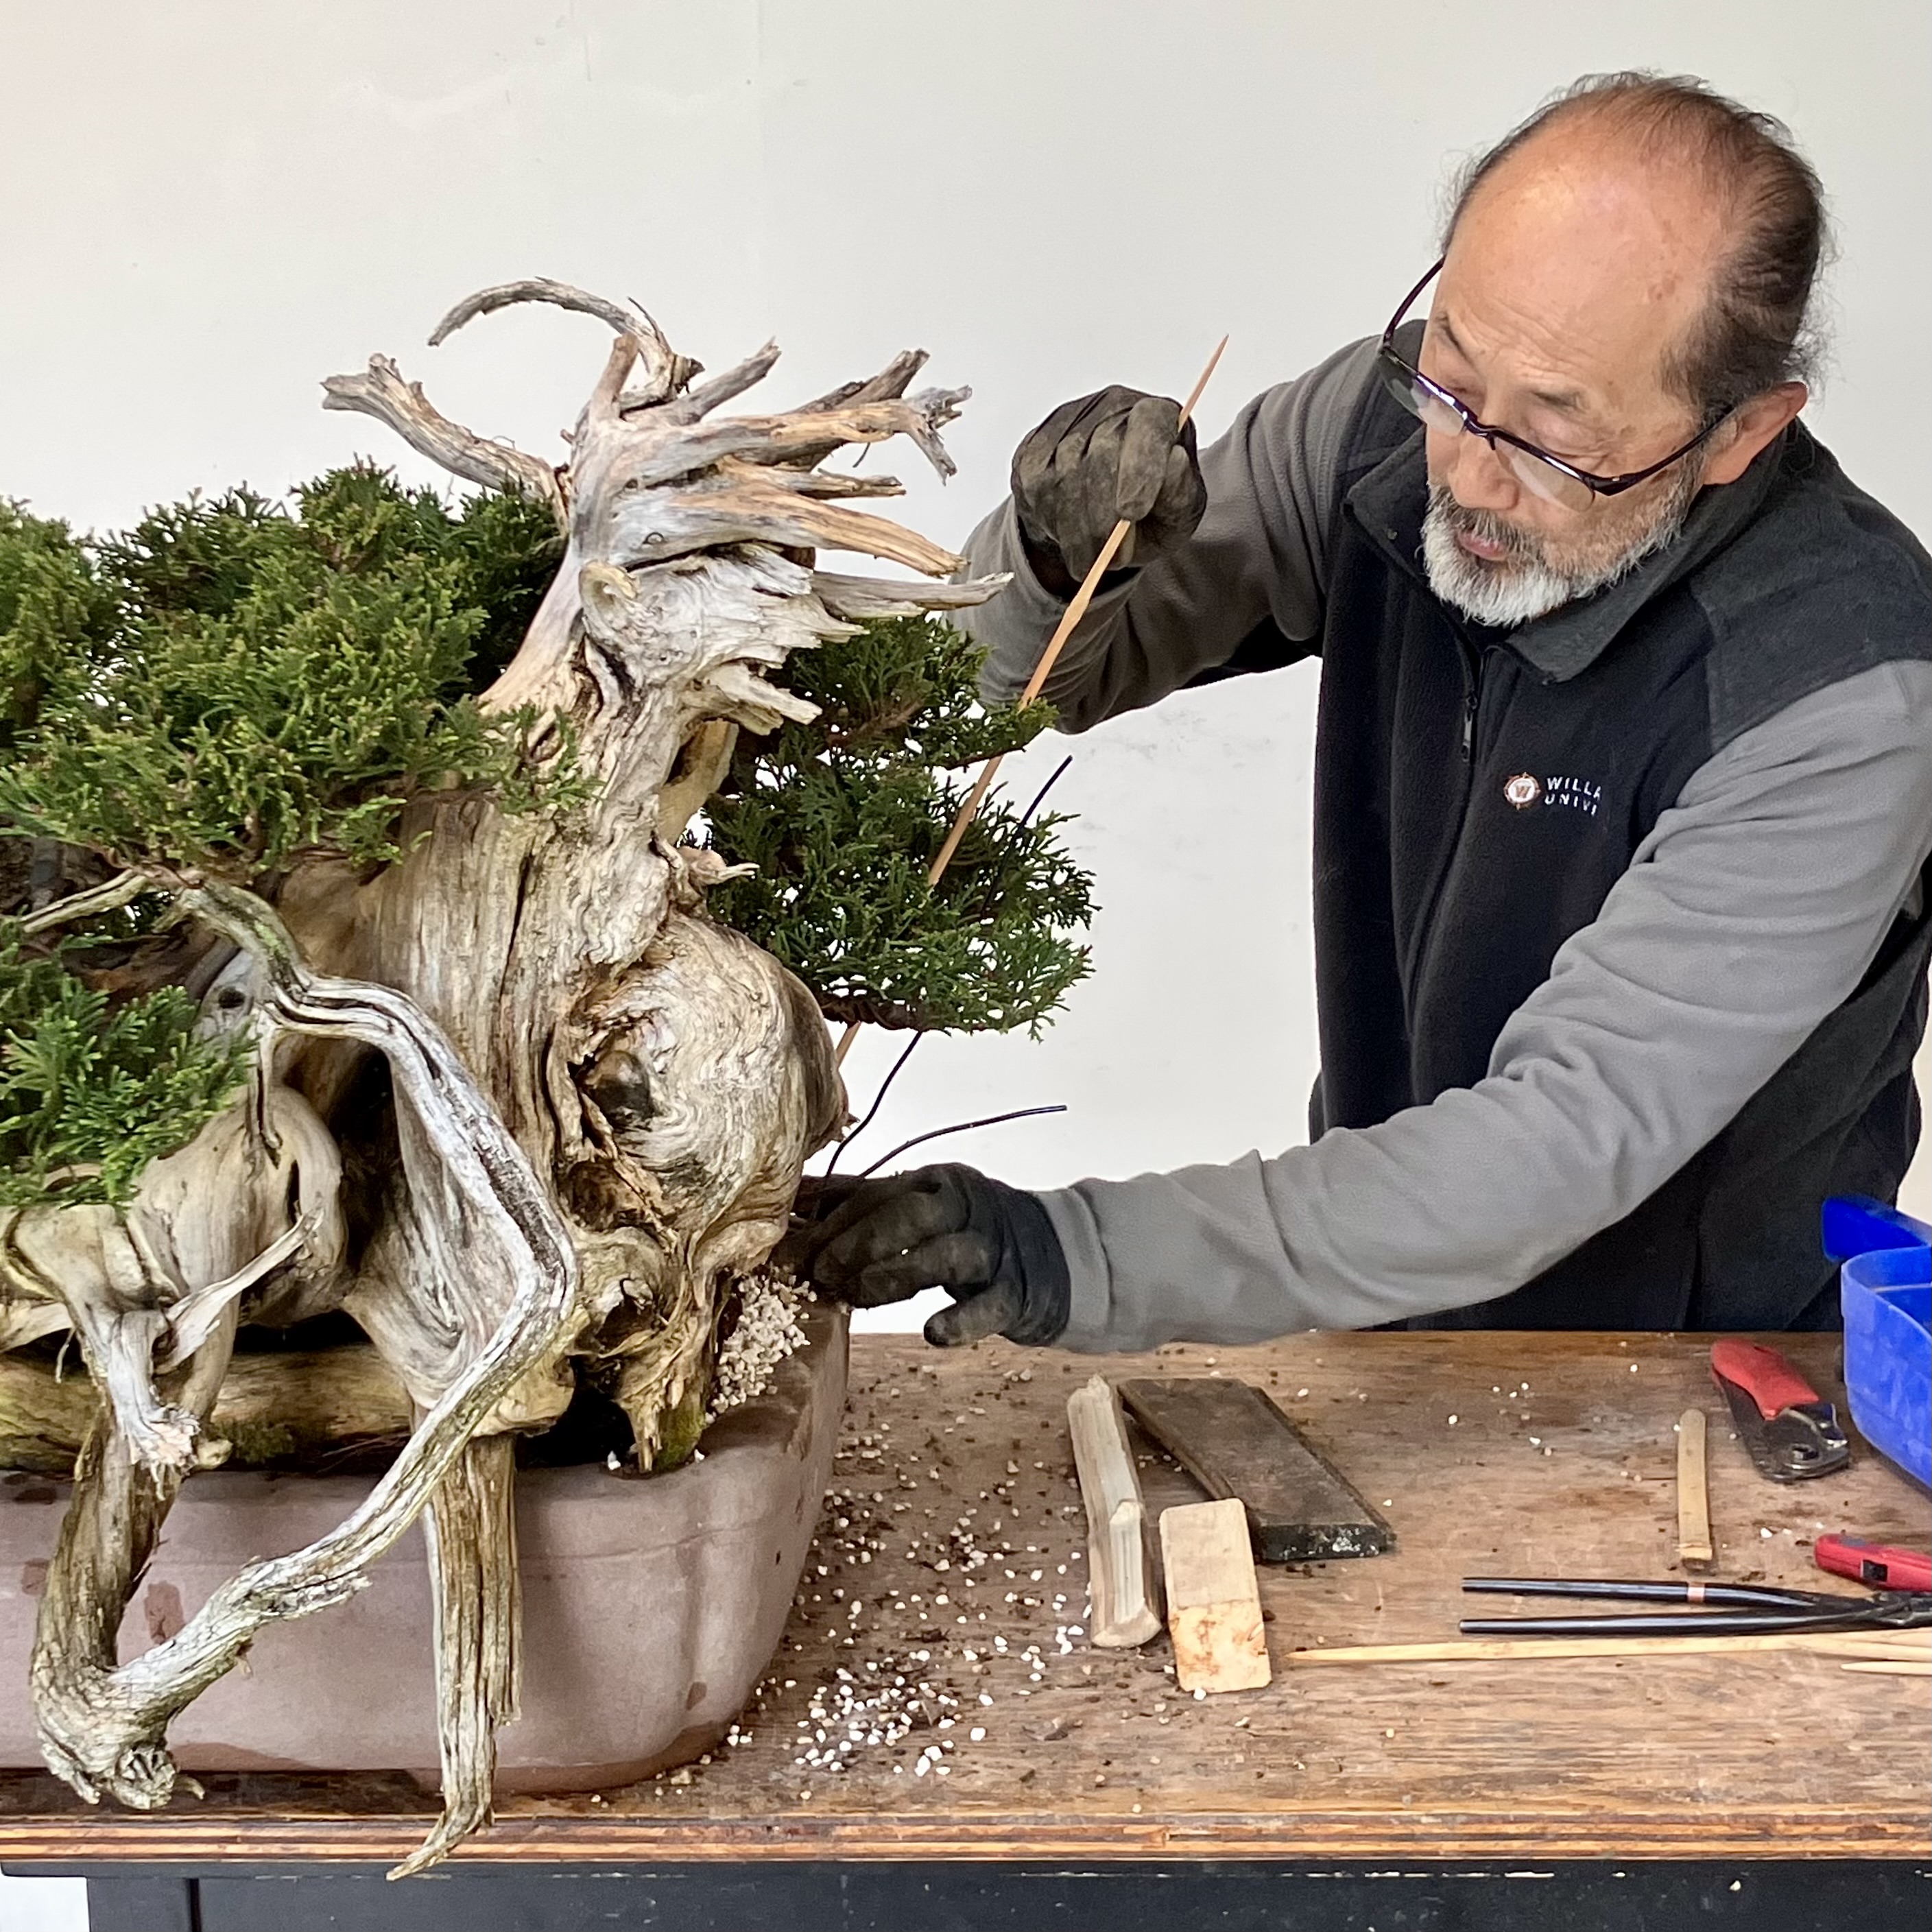
Masaki works a very long chopstick, which helps protect the foliage as he does his sewing action. Note that he’s flipped it point side up—not a textbook move—but in areas where you are sure there are no fine roots, the blunt end can help push soil underneath areas and into holes. With tighter root masses, with more fine root, or with moist soil, it is better to use the sharp end.
Like any tool, having the right one defines the game—it helps to have long chopsticks, short ones, thick ones, and skinny ones on hand. Timber bamboo with its many dimensions of length and thickness is used to make these. A great way to play with an hour.
Already the foliage has a cupped finger-like presentation, not unlike old needle juniper or hinoki bonsai, though we’ve only pinched this tree for six years. Unlike junipers, Yellow Cedar can be pinched without weakening the plant.
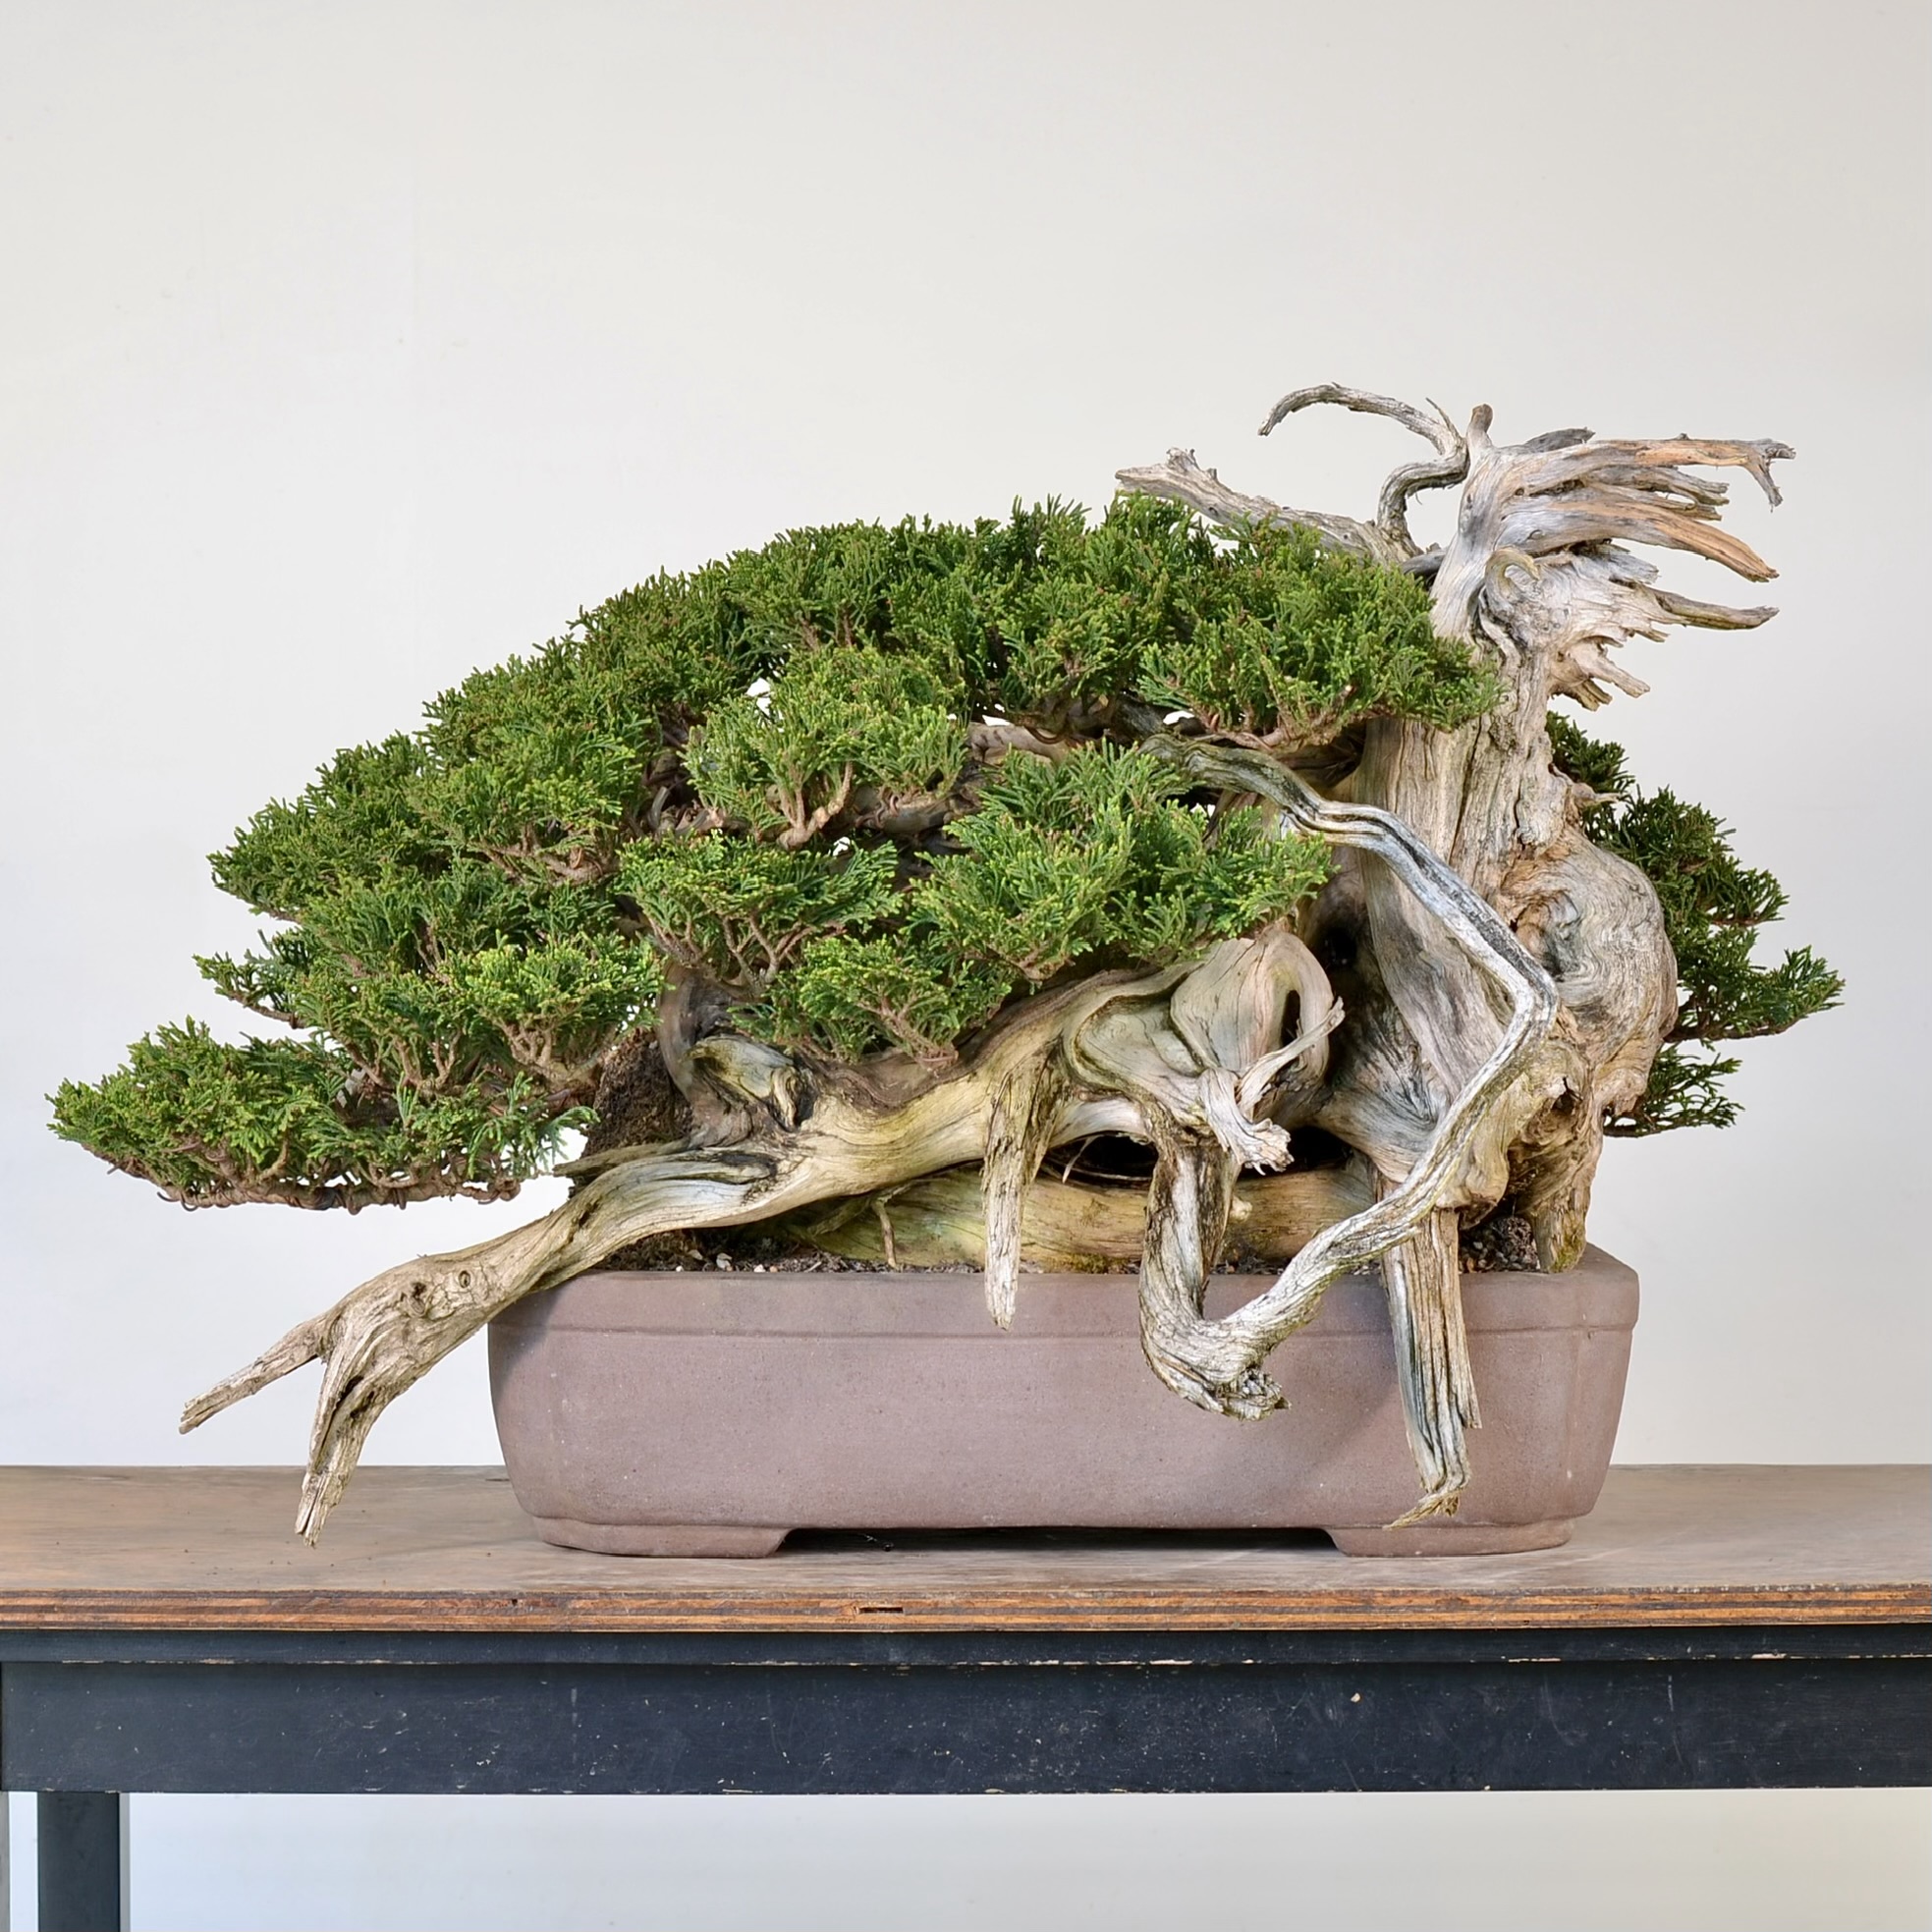
As it looks in early April 2026, after touching up branch placement. Interesting species for its quick foliage density achieved through 2x a year pinching.
For a brief look at what we started with…
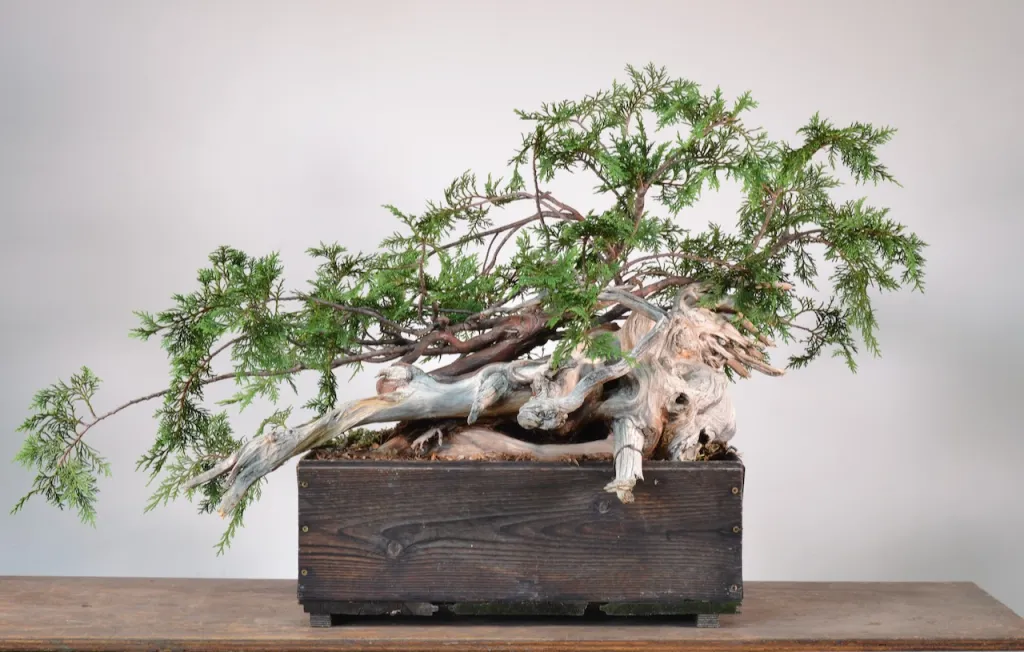
Here is the raw tree in a box in 2020. Anton Nijhuis collected the specimen in British Columbia and said it had been sitting in his garden a few years and no one wanted it. Yellow Cedar is a newish species for bonsai—certainly new to me at the time—so I took it.
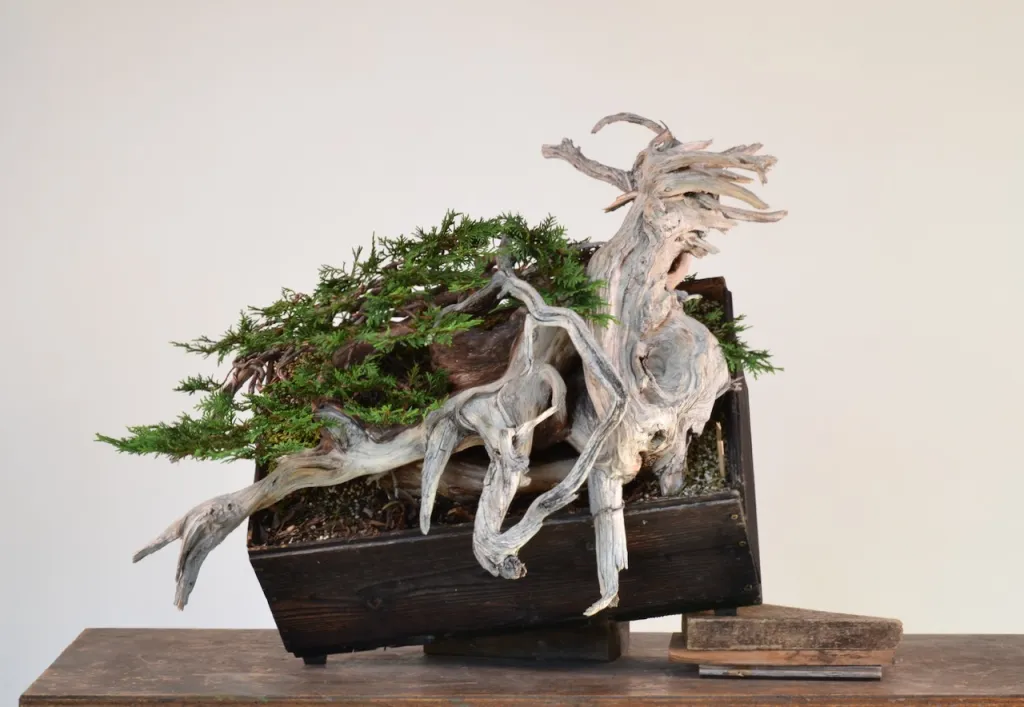
This is after the styling session in 2020. The wild snags of deadwood on this side (there’s none on the other) made for a simple front choice. We left the tree at this rakish inclination for six years while pinching it, and, distracted by other projects, finally got to potting it this spring.
A note on the species name. Yellow Cedar is a curiosity, including, apparently, to taxonomists. Since 1824 the genus has bobbled back and forth between Cupressus and Chamaecyparis. At the time this tree was styled, in 2020, Cupressus nootkatensis was its name, considered a cypress. Now it goes by Callitropsis nootkatensis.
April 2026 Bulletin Board:
Some big news! Mr. Shinji Suzuki is coming to the Portland Art Museum on Sunday, July 19. He’ll also be presenting that week at our local bonsai group, the Bonsai Society Of Portland, and I’ll share more as plans firm up. Here’s some deets for the museum event: The Way of Bonsai
This is an edited post from 2016 on a topic I get asked a lot—deciding whether to break or decandle a pine.
For starters, let’s define decandling and breaking—
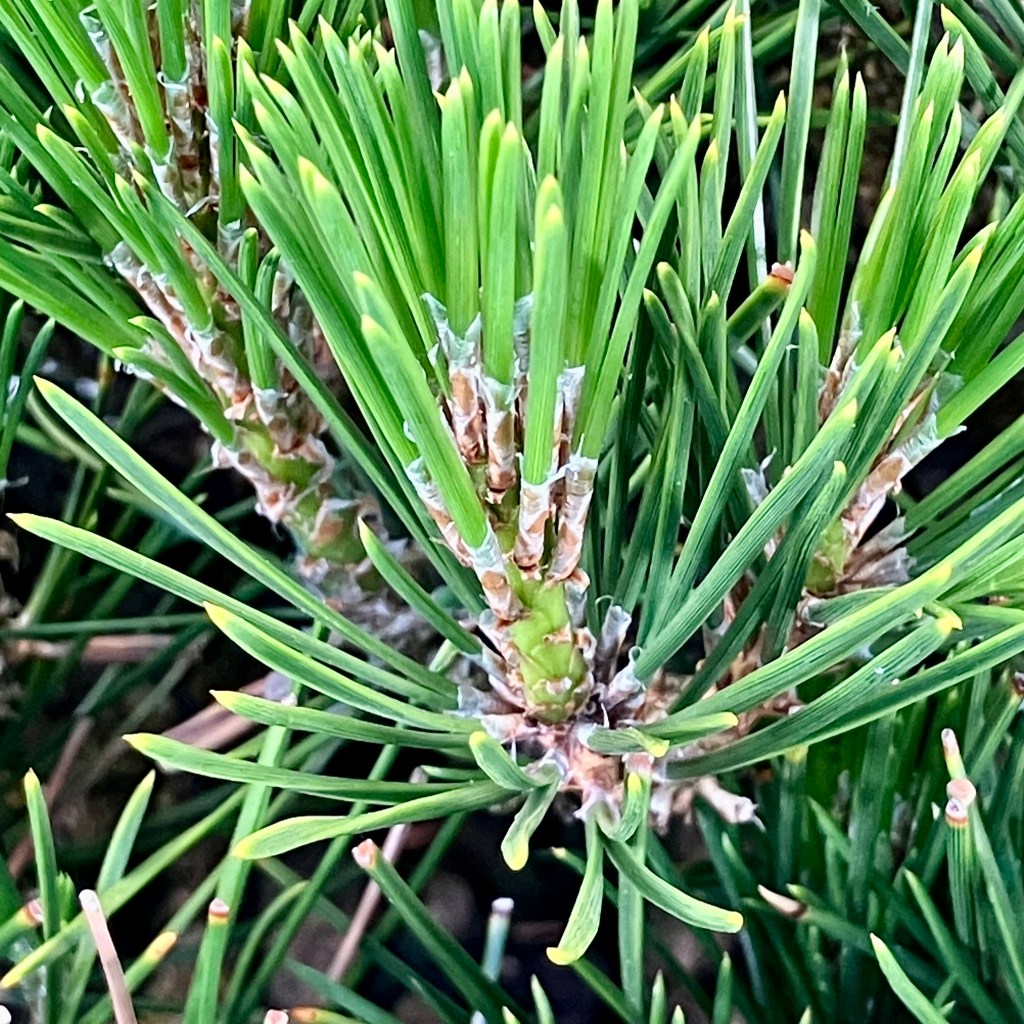
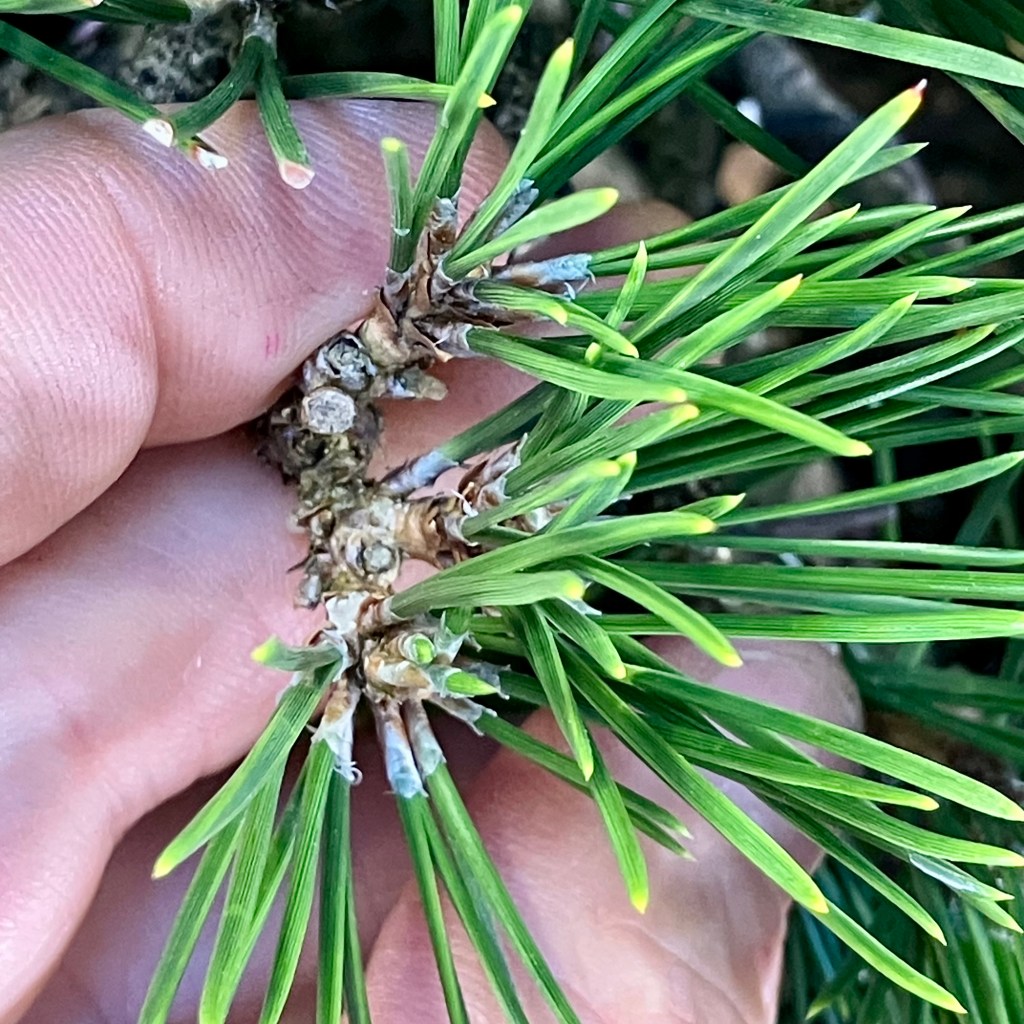
Breaking (or pinching) means taking part of the shoot off, usually with fingers, as the shoot is extending in early to mid-spring, and before the needles have come out.
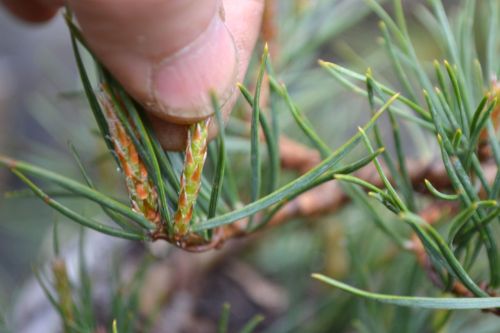
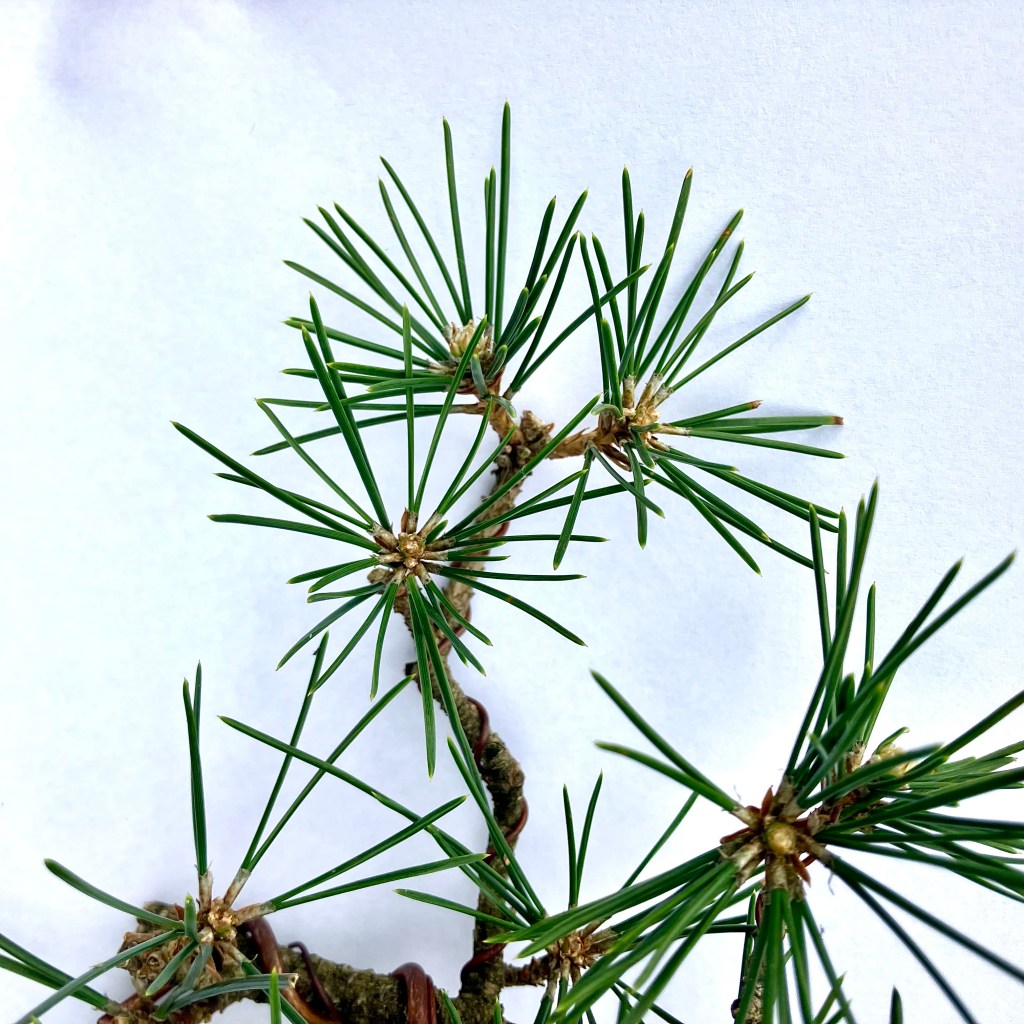
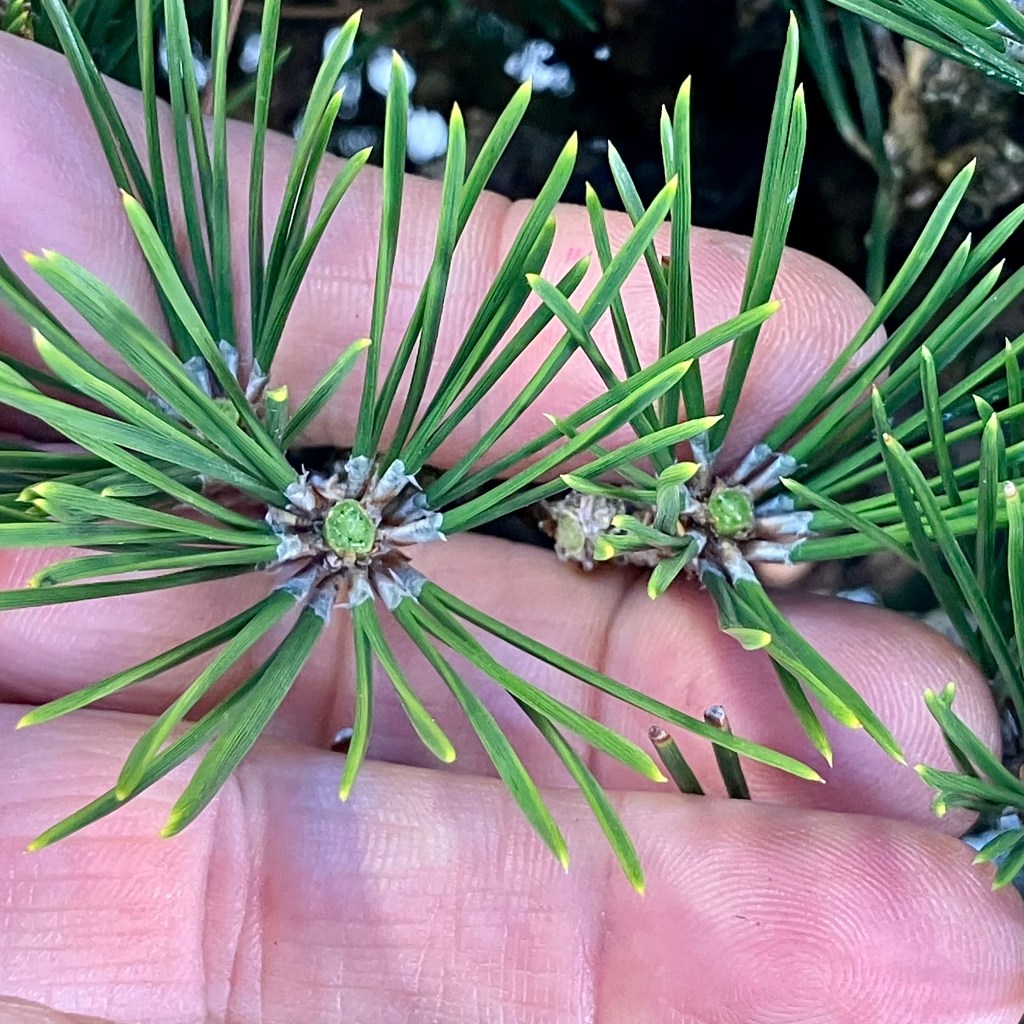
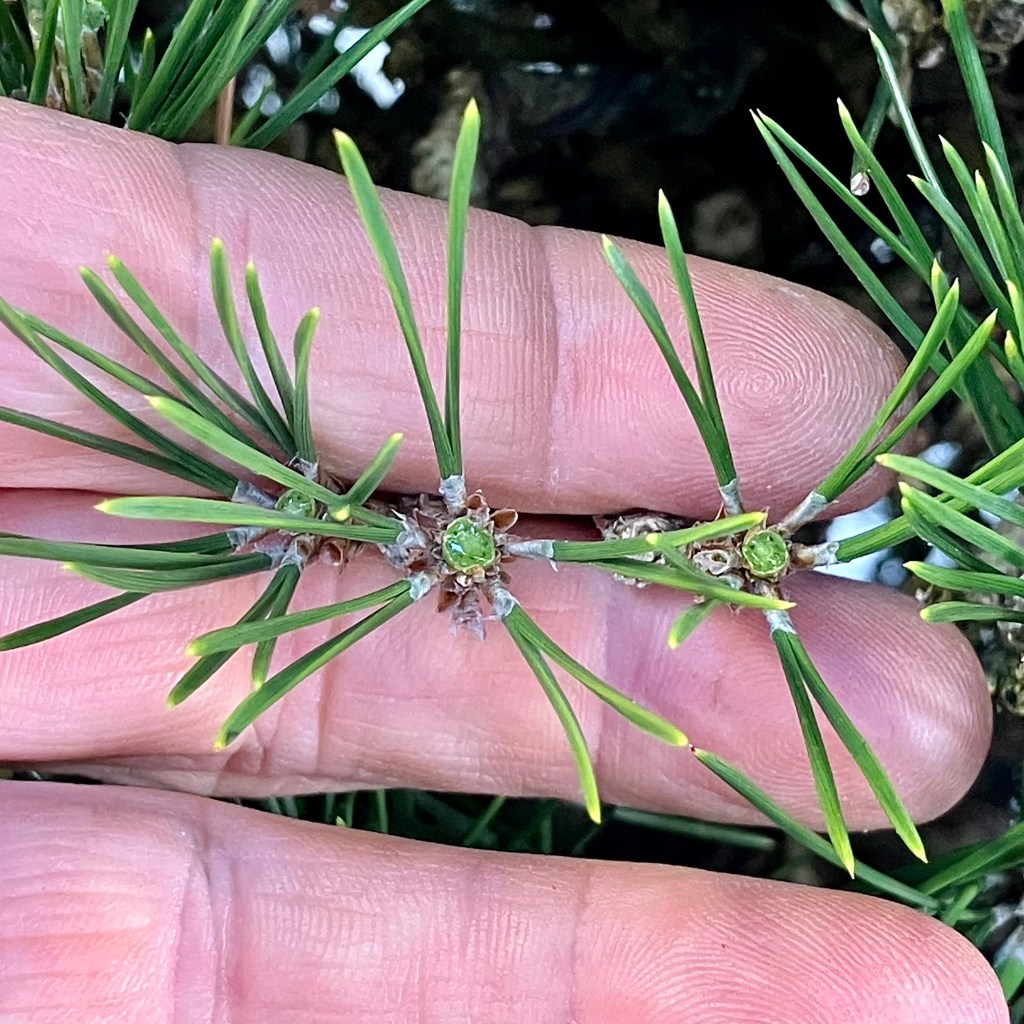
Scots Pine candles at the ideal time to break them.
With the fleshy part of the fingers, bend the candle and break it off. Decide which candle to break according to its strength: take more off the stronger ones. Less off weaker. And leave the weakest alone.
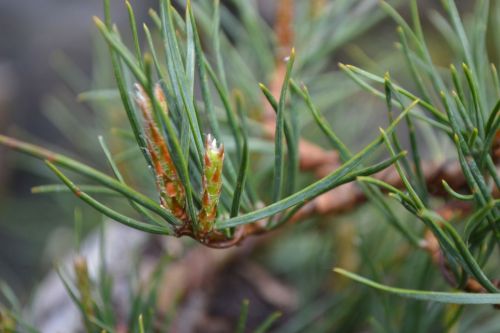
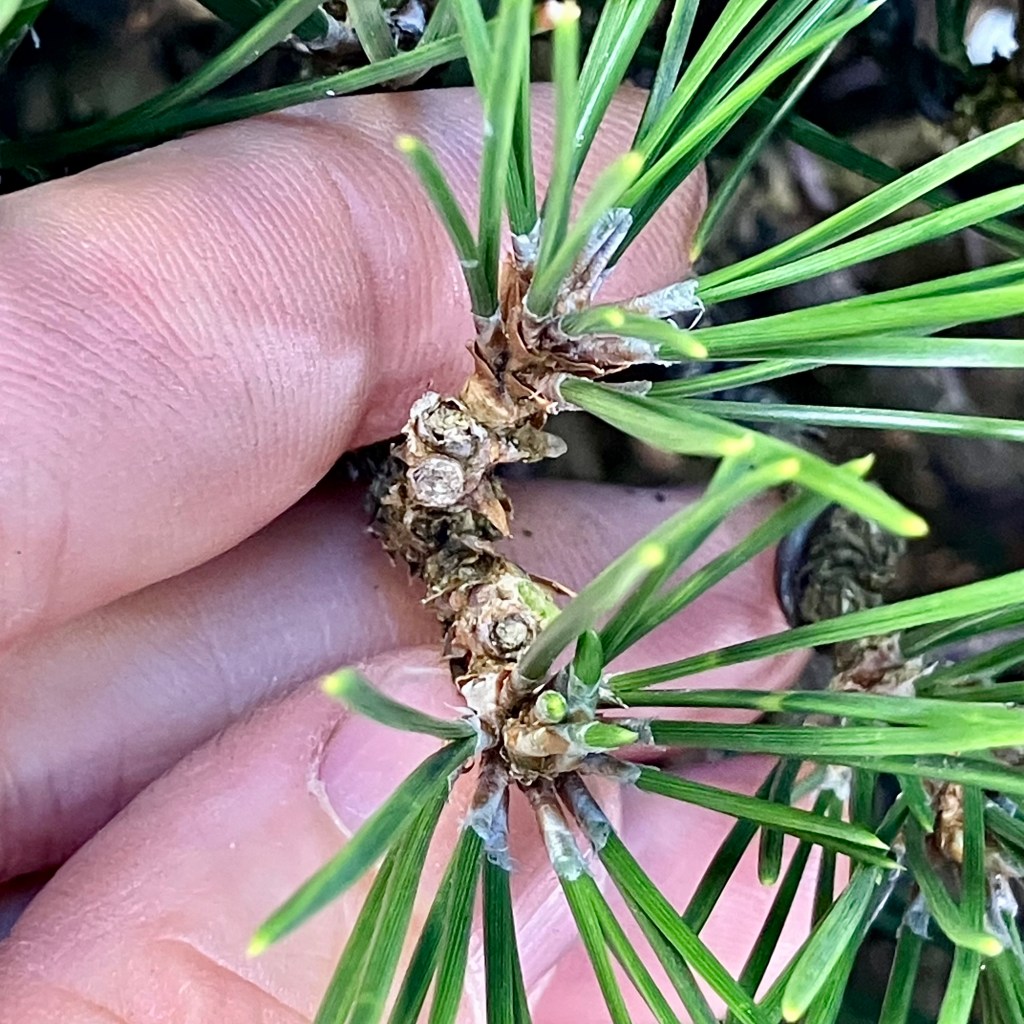
Right candle broken approximately in half. Very important: be sure you don’t have a “neck” below where you’ve broken it, a section where no needles will come out. Scots Pine have almost no neck, but with other species, like Japanese White Pine, that neck can be half the candle length.
Left candle broken.
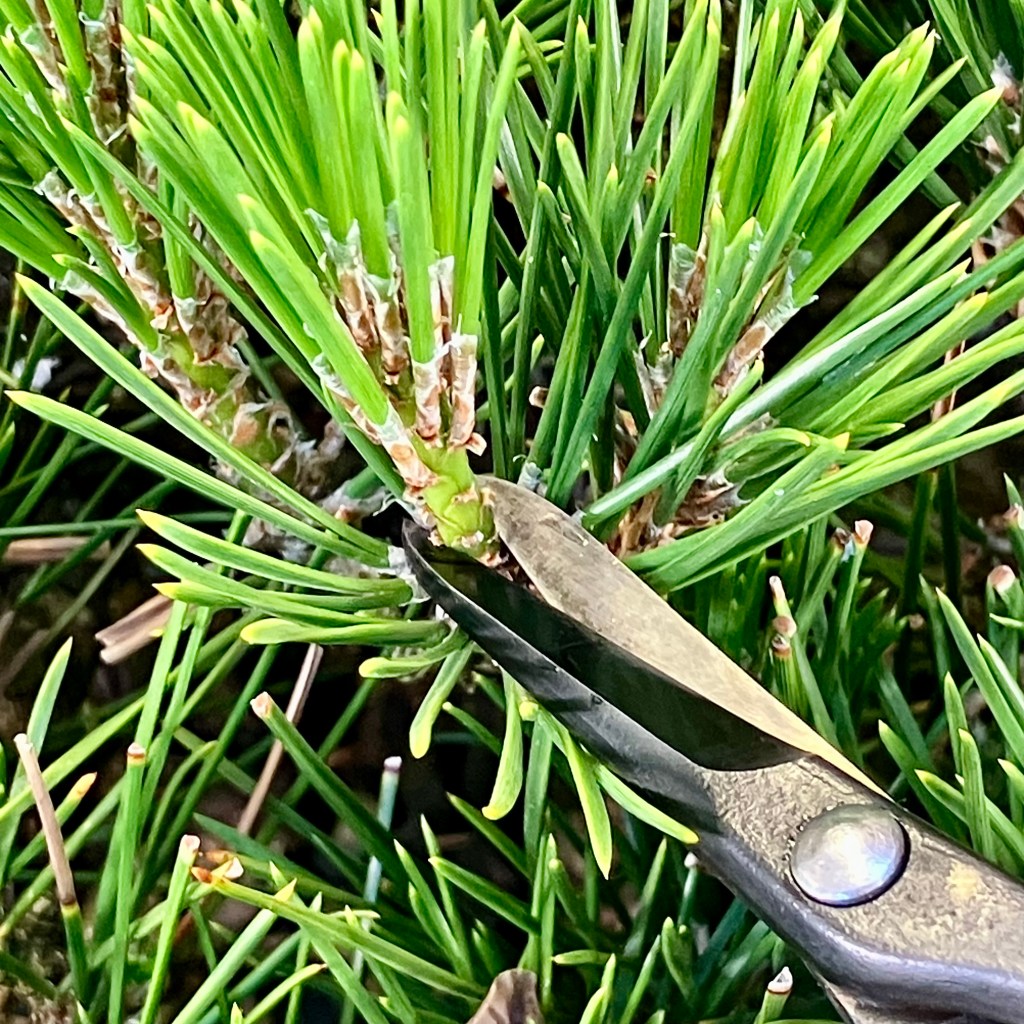
Decandling means cutting off the entire pine candle off in late spring. This is a later technique, and often the new needles have come out already.
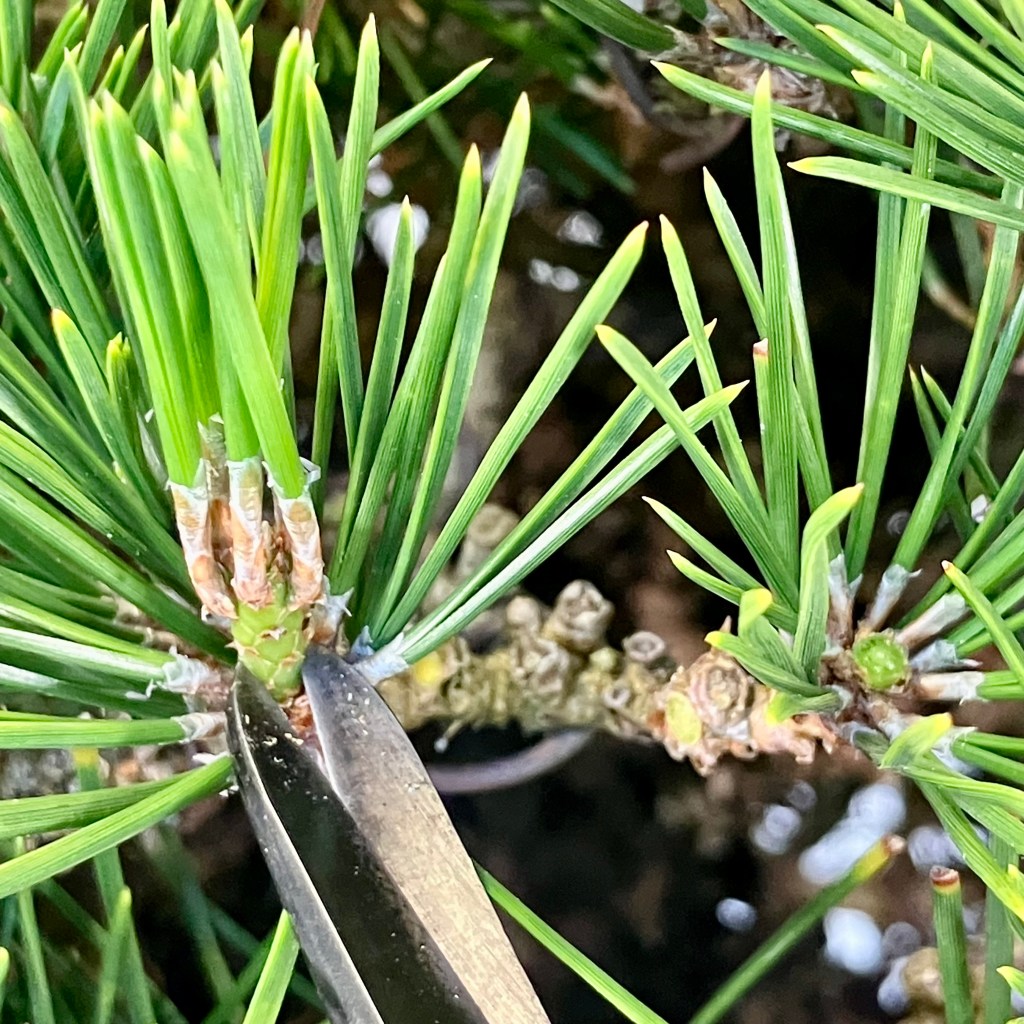
Japanese Black Pine before decandling. (This photo is more than a month early for decandling—usually this shoot would have its needles out.)
With a sharp bud scissors, the candle is cut off at the base.
Notice the small candles at the base. These must also be cut. We’re trying to “reset the spring” by decandling, and so everything must be cut.
Both maintenance techniques are good—one isn’t cooler than another, we simply apply them to different pines. And both are generally used on older, established bonsai, not young stock.
Which species for what technique?
Single flush pines—such as Japanese White, Lodgepole, Shore, Scots, Limber—should be pinched
Multiple flush pines—such as Japanese Black and Japanese Red—should be decandled
What happens when we break candles?
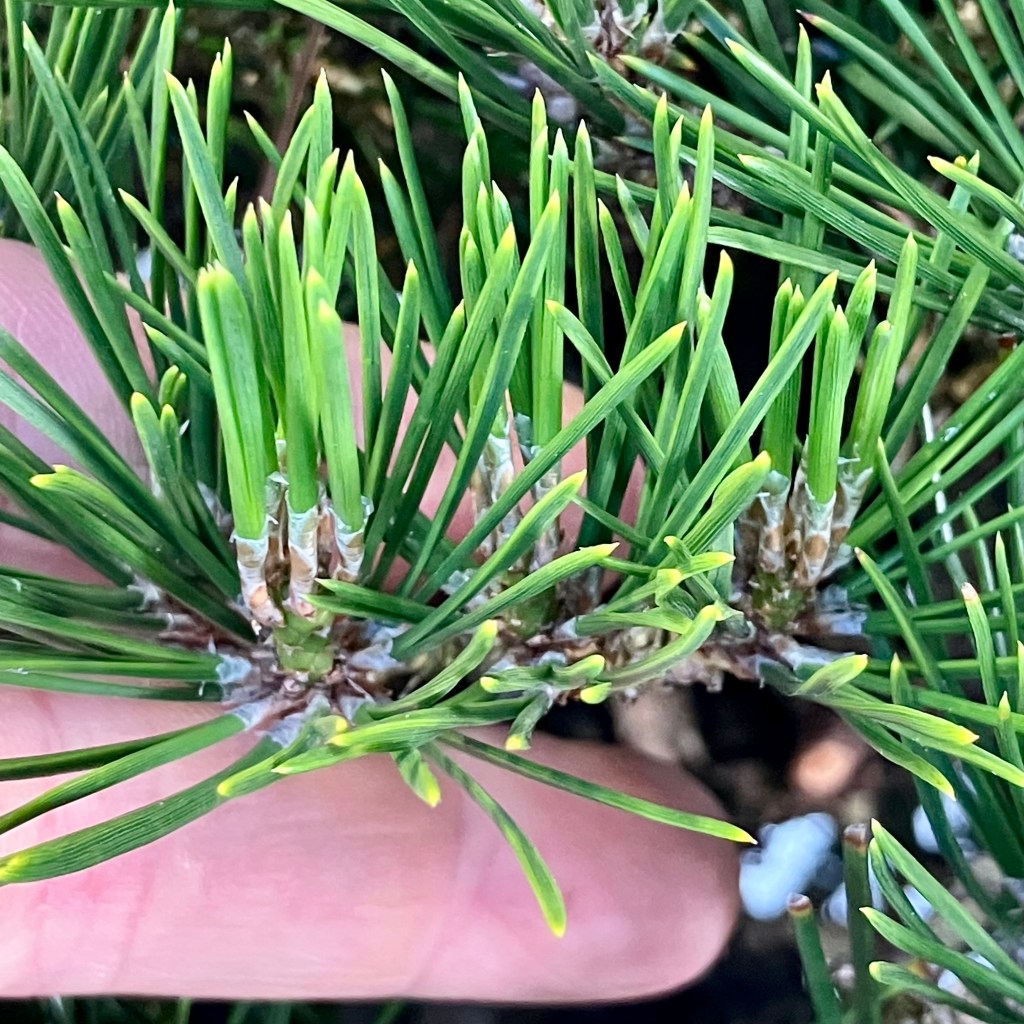
With this early spring technique, needles that remain on the shoot continue to grow
the pinched shoot is weakened while other, non-pinched shoots are strengthened
over the summer buds set near the end of the pinched shoot, often between sets of needles, which then elongate the next spring
What happens when we decandle?
With this late spring technique, new shoots arise from the cut site, growing through the summer, with needles coming out and maturing in the early fall
resets the spring and balances shoot energy
gives a shortened growth cycle, which results in shorter needles
What happens if we decandle the wrong pine?
Older single flush pines lack the energy to grow twice a year
if we decandle a Japanese White pine, or a Lodgepole pine, or any other in that weaker group, it will grow buds that summer that don’t open up
that means we just created a summer that didn’t produce any needles, and we’ve just weakened our pine
April 2026 Bulletin Board:
Errata: Mr. Shinji Suzuki is not presenting at the Portland Japanese Garden, but at the Portland Art Museum on July 19. Apologies for the confusion. The PJG is hosting his visit. Tickets are selling fast! Here’s some deets for the museum event: The Way of Bonsai
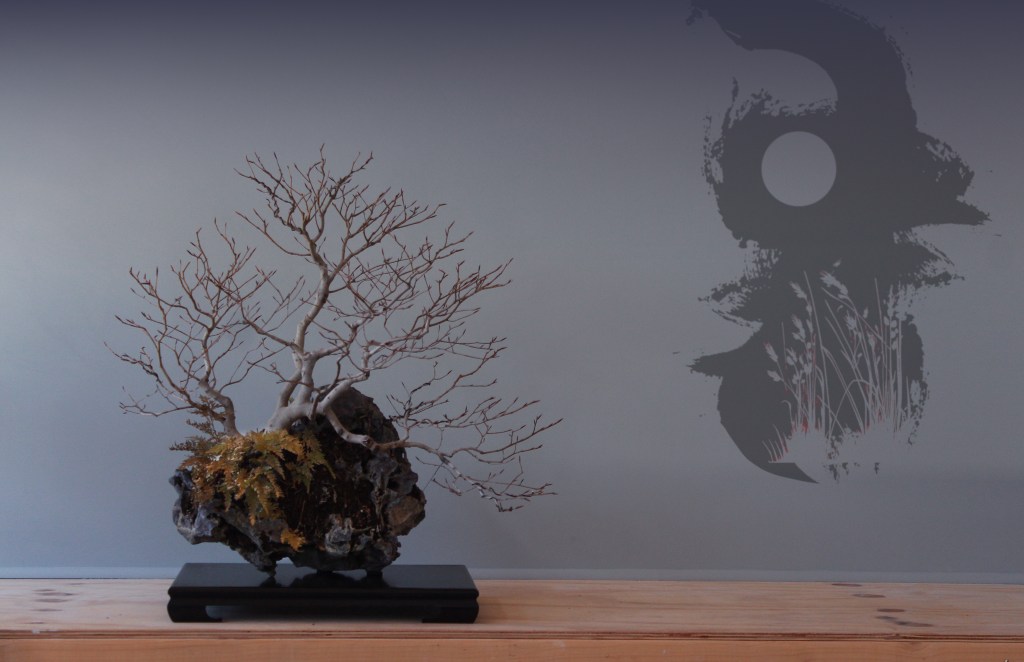
A couple weeks ago I posted about a Yellow Cedar, and got a few comments which said it wasn’t integrated. Which is a great critique. Because it isn’t. And I teach integration.
Let’s use this Cedar as a sacrificial example, and compare it to others that are well-integrated. And then I’ll explain why I’ve not integrated this one.
But first let’s set the board, and talk about balance versus integration.
A balanced tree has an organization where foliage on one side of the trunk is “negated” by a similar weight foliage on the other. Because of this parity in weighting, the tree doesn’t visually fall over. A leaning tree without a balance branch going in the opposite direction often feels like it will fall over.
A well-balanced tree. Even though the key branch on the lower left is significant and carries a heft of visual weight, the moyogi doesn’t feel like it’s going to fall over. Sufficient foliage—and trunk weight—on the right side prevents this. (Photo courtesy Bonsai Empire)
Another asymmetrical and yet well-balanced tree. The branches on either side of the tree “negate” one another.
An integrated tree is one where the foliage and the trunk and deadwood, especially jin, are one unit. Think of it as mochikomi north above the pot. The foliage snakes through the deadwood to make it look unified. In bonsai we applaud this as good design.
This quirky juniper is an example of good integration, displayed at last year’s Taikan-ten. The foliage is interconnected with the jin. It mingles. (Photo courtesy Bonsai Empire)
A non-integrated tree looks like two trees. There’s the deadwood, and then there’s the living stuff.
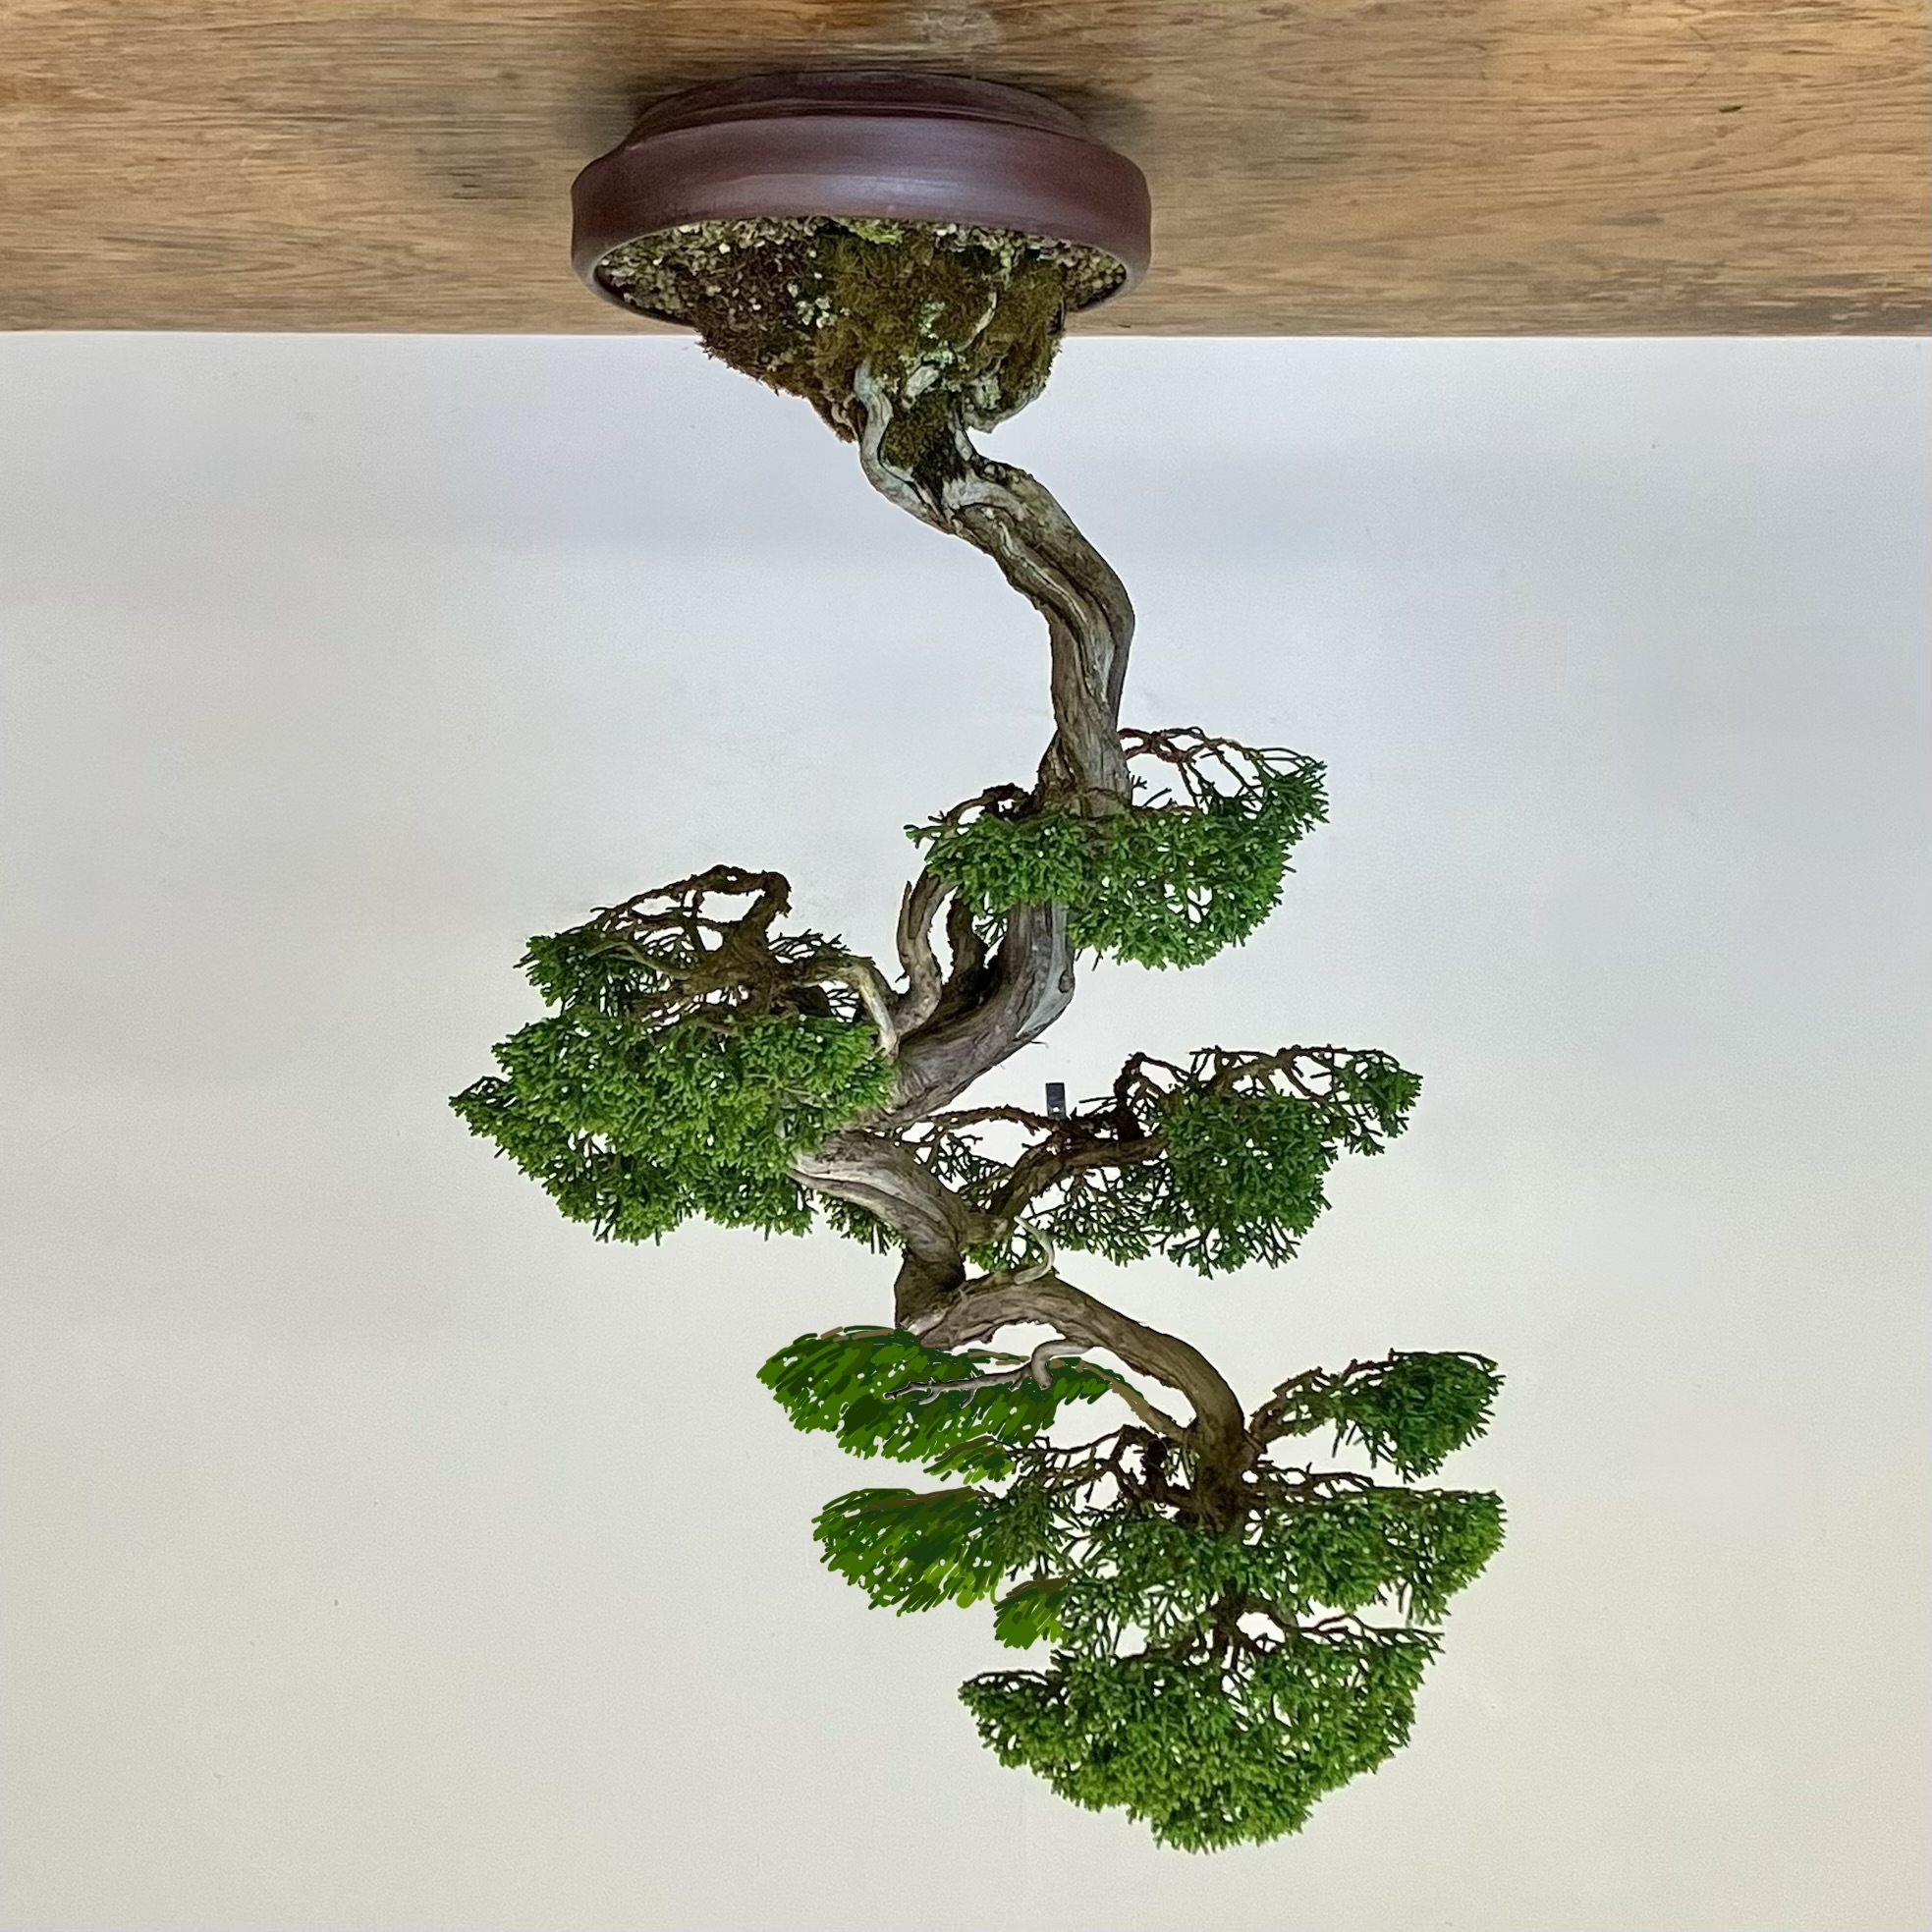
Another well-integrated tree, shown at this year’s Kokufu-ten.
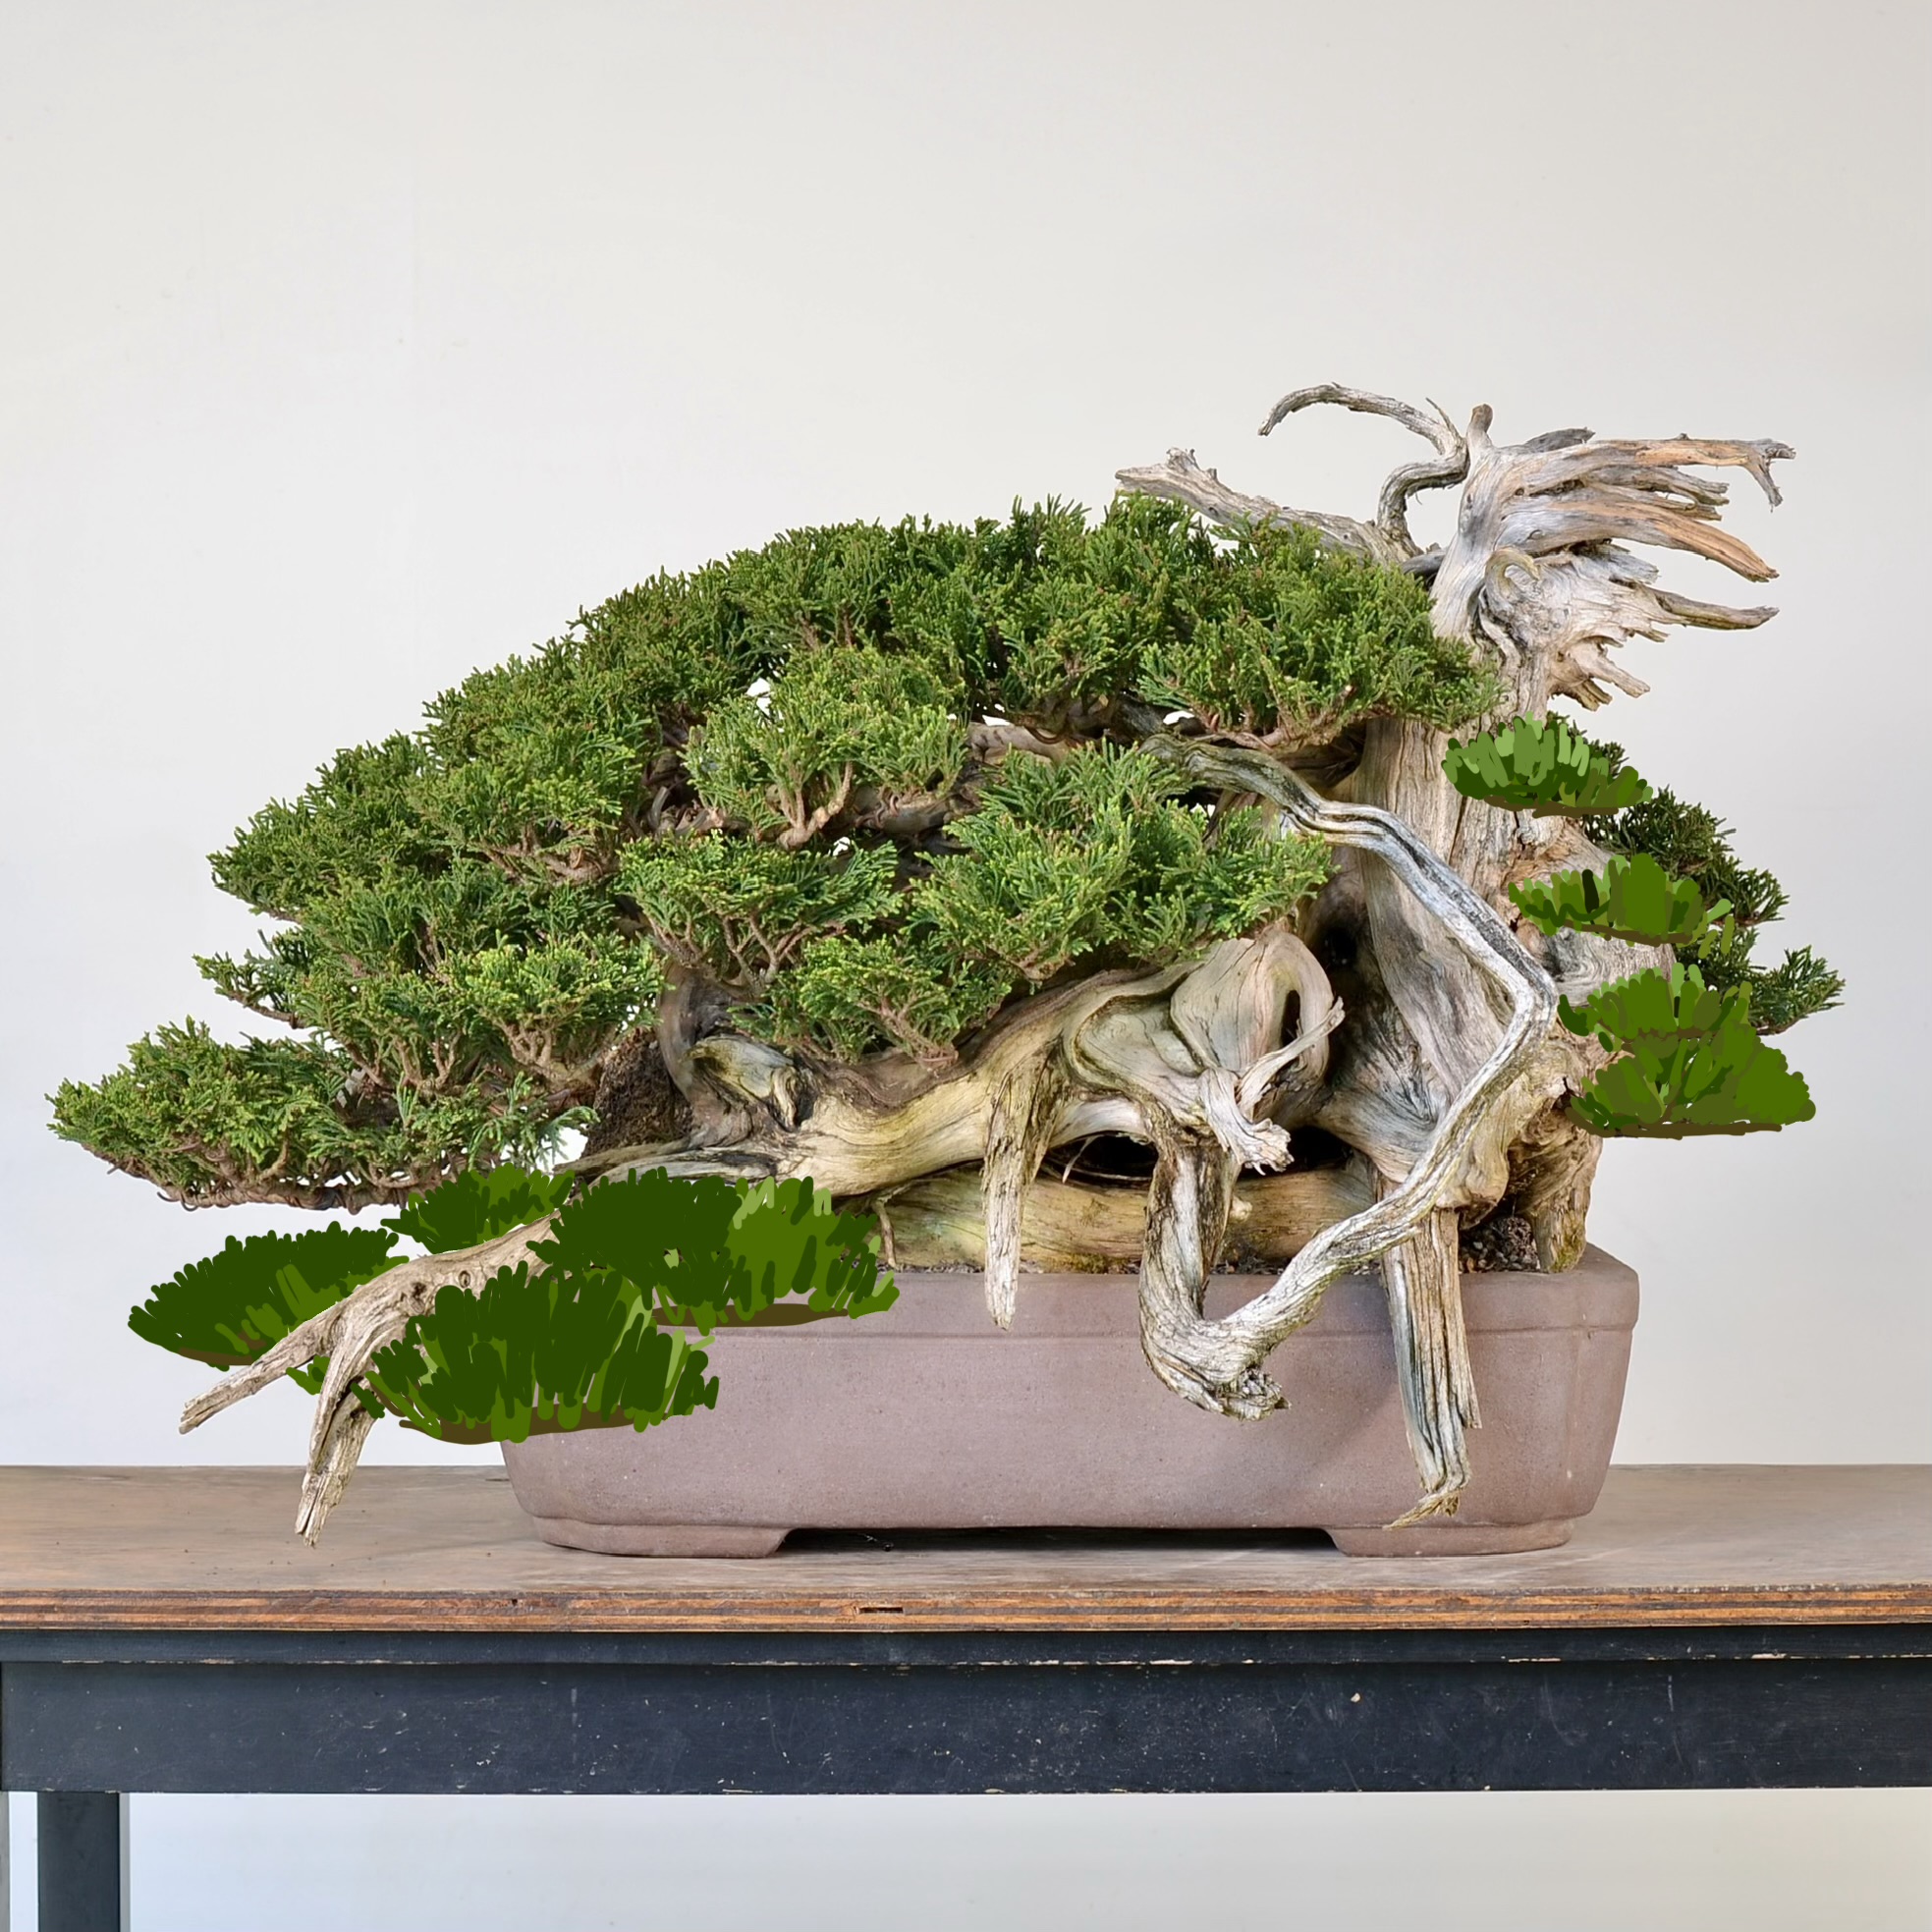
Let’s return to our sacrificial example, the Yellow Cedar. The foliage on top doesn’t integrate with the deadwood below. By normal bonsai standards, this sucks.
So those who thought this Yellow Cedar isn’t integrated are right (and some were former students, yay! Makes me proud.)
This digital redo is closer to what we expect from integrated design. The foliage cups the deadwood, as if accepting it. Any sensible bonsai artist would choose this design.
But here’s something to think about: integration is a construct. It can happen in nature, but it’s not a given. We like it in bonsai because the parts interrelate. In most cases, integration is a good arrow in your quiver as it makes cohesive bonsai.
Now let me share why I am not eager to integrate this tree. It isn’t to gleefully buck a guideline, but because my inspiration for it led to the non-integrated option.
In Oregon I often go to the coast to study plants in that environment. There I see trees and shrubs with a top layer of flattish foliage, and a lot of dead branches below that have died off in the dense shadow. Shore Pine and Spruce do this in wind hedges at the Oregon coast. You can also see this in areas with a heavy snow load. The contrast between living and dead is stark, not unlike shari and a live vein.
This tree, with deadwood that dangles below the rest of the tree, seemed like a good specimen to explore that.
Incidentally, the Yellow Cedar is on display this spring at the Portland Japanese Garden, should you wish to fight your way through the strong winds and snow drifts to see it…
Keith Jarrett arrived in Koln, Germany to discover the grand piano he’d requested for his concert wasn’t there. By mistake, a baby grand sat on stage at the opera house, in a condition a lot worse than just out of tune. The pedals didn’t work. And it had poor bass and a tinny upper register.
He refused to play. And the 1975 concert was sold out.
Jarrett had driven 350 miles in five hours from Zurich, in excruciating back pain that had made him lose the last few nights of sleep, to arrive at this musical impasse.
The organizer—a 18-year old promoter, Vera Brandes—begged him to reconsider, saying all these people have come to hear you play. Please play for them.
Reluctantly, he agreed.
The resulting concert to 1,300 people, where Jarrett played in the middle keys to avoid the damaged upper and lower registers, and where he often stood up and pounded on the keys to produce enough volume, is regarded as one of the greatest jazz recordings of all time, and is the best selling piano album. It’s 66 minutes long in four improvised parts, and it’s sold almost 4 million copies.
What happened here?
For Jarrett, he couldn’t do what he’d prepared to do. In an improvised art, he had to go even further into improvisation. The tools themselves had to be reimagined: the broken piano. His damaged body.
What came out of it isn’t wholly jazz. It’s hard to peg.
We often have trouble thinking of bonsai outside its tradition. Without the whole thing, it’s nothing. Then, some might consider tradition an obstacle to expression. I don’t see that, but I do think it might be too complete. For some expressions.
Expression in art is usually enhanced when limitation of some sort is embraced. Or an obstacle overcome.
If you took only a part of bonsai tradition, and did something with what remained, you might create your own limitation. And you might make something really cool. You’re still using tradition, just not all of it. You’re truly using it. As a springboard to something else.
Jarrett combined jazz with a half a piano and created something wholly new. So what could you do with a tree? And half a tradition?
Image links to Part II of Jarrett’s 1975 Koln concert.
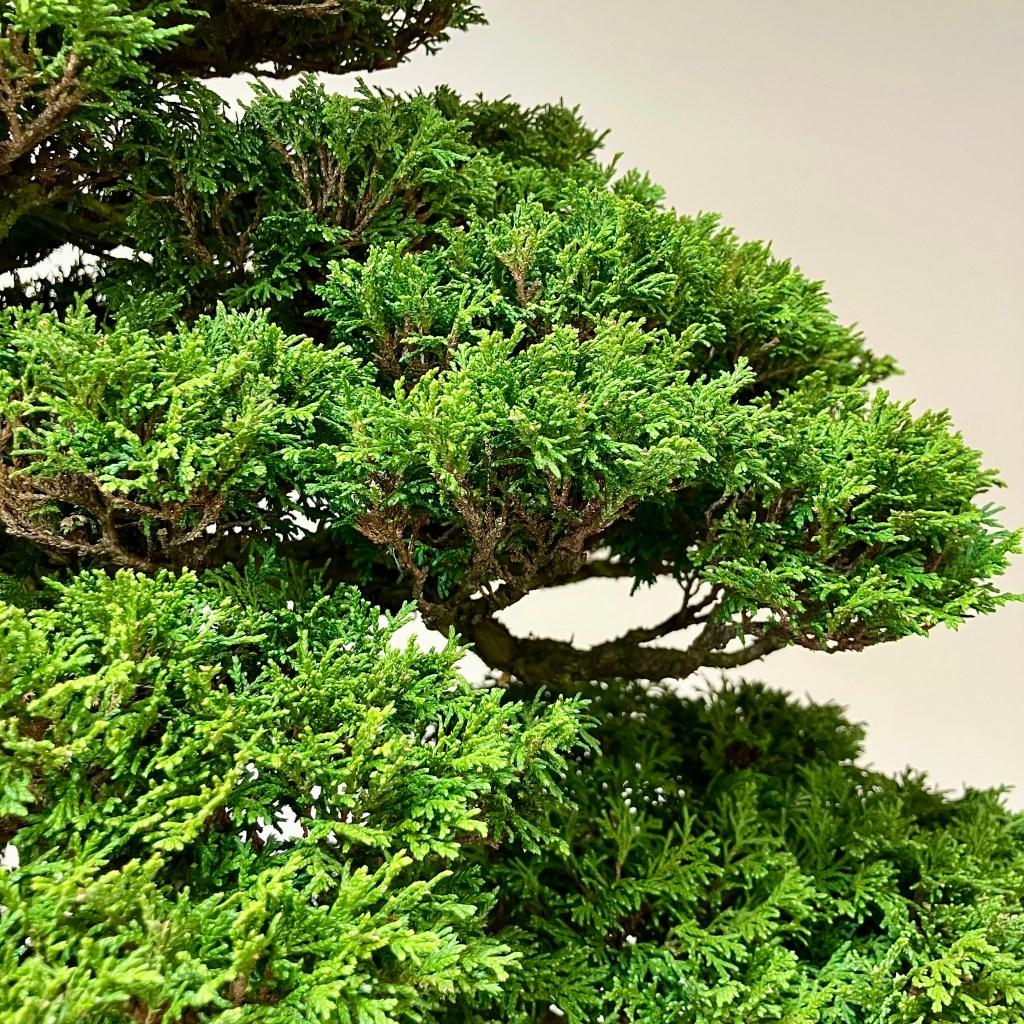
You may find the soft “clouds” of mature juniper foliage pleasant.
Eventually this gets out of hand and we have a big thundercloud of foliage obliterating the structure of the tree. Which you may have spent a lot of effort wiring and setting.
At this juncture some retooling is in order.
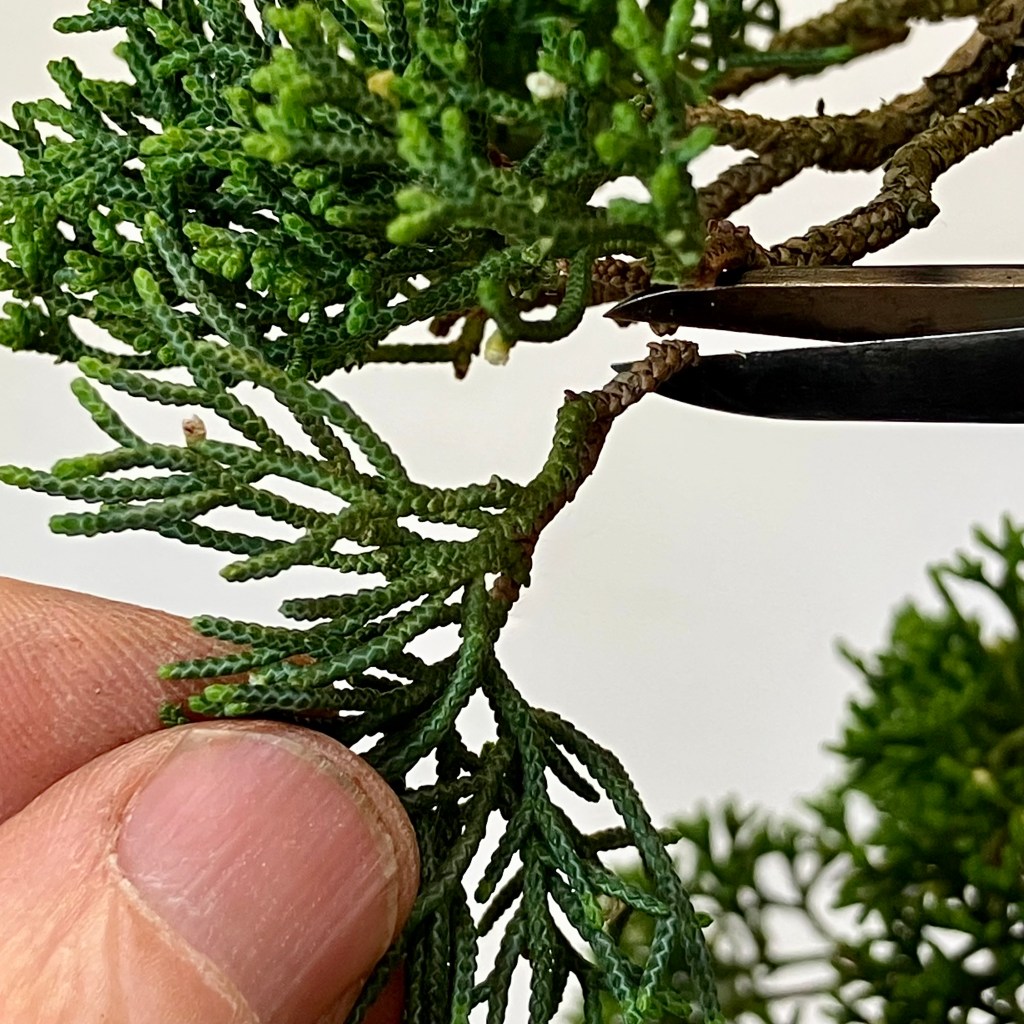
This juniper has outgrown its shape and could use redefining. This is a mature tree, meaning it has no pointy shoots charging off, rather, all the growth is slow and from small tips.
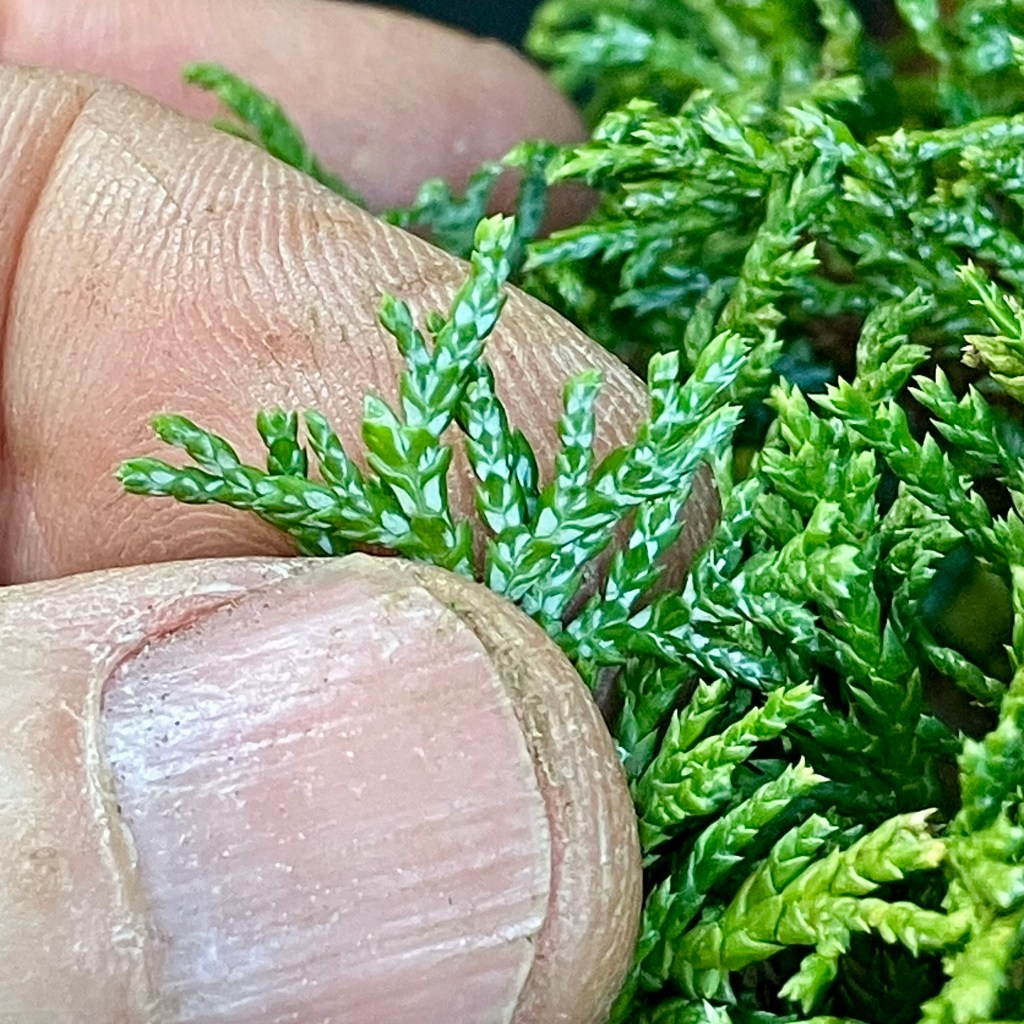
First step, find the larger dangling shoots that are woody (brown at the base) and cut off with scissors. Maybe 10% of this redo was by scissors.
Next, use the fleshy part of your fingertips to PULL off the part of the shoot that dangles below the horizontal. Green shoots pull off easily. About 90% of this reset was by pulling.
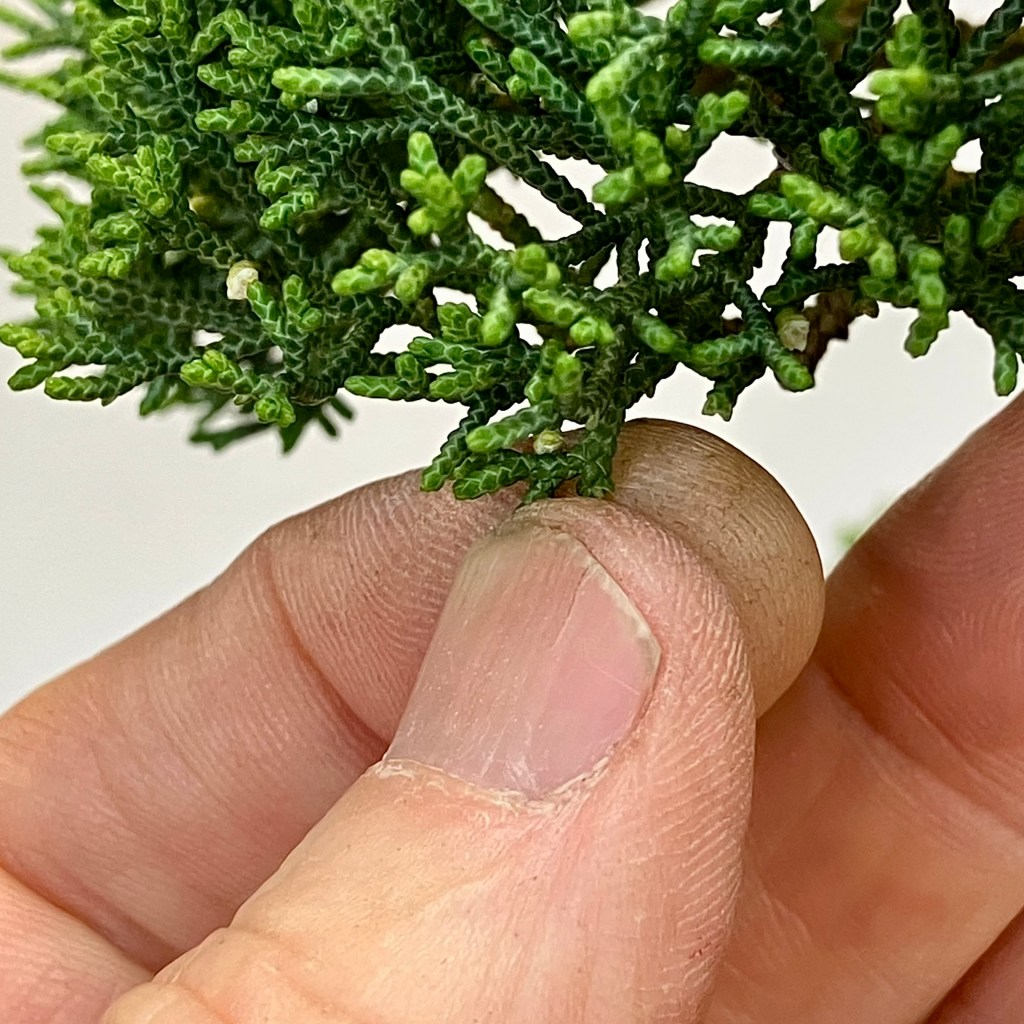
A pad of foliage with shoots that dangle below the horizontal, which are small enough to be pulled off.
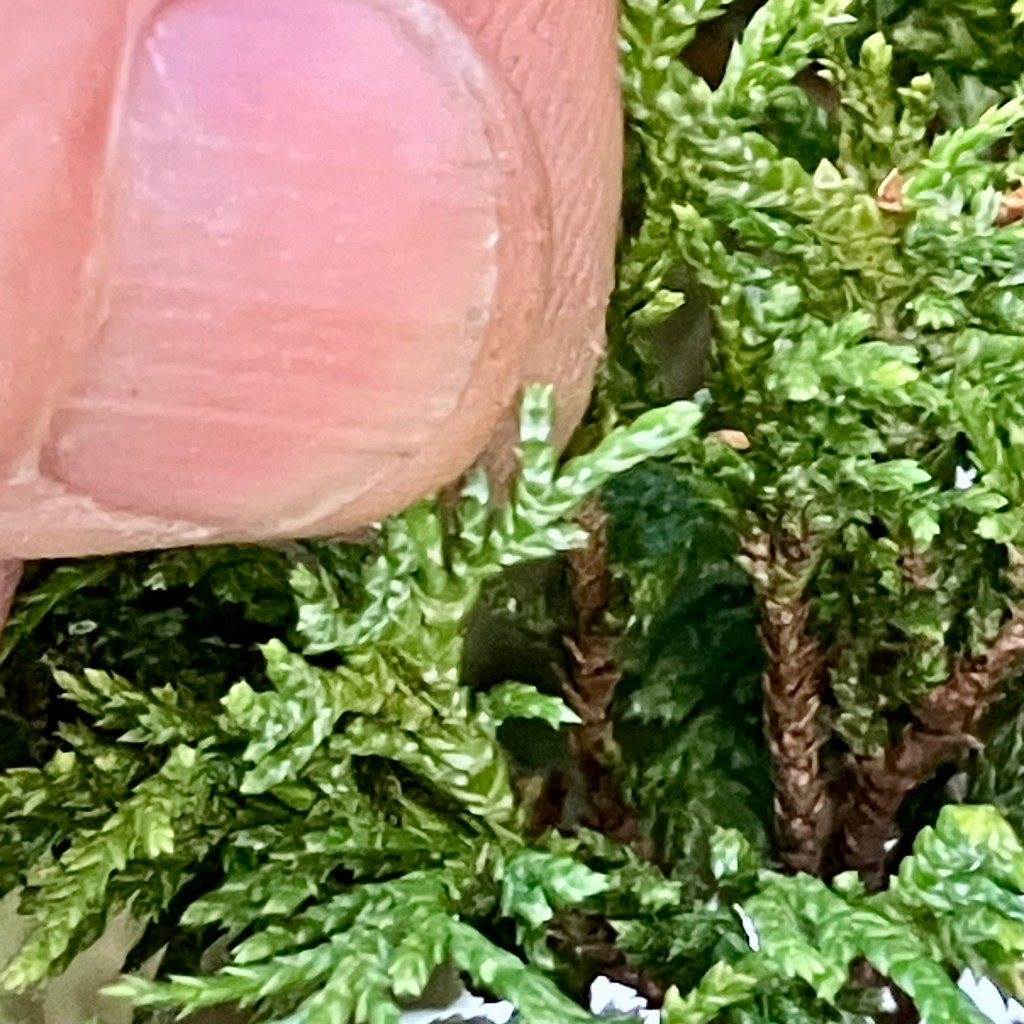
After pulling off the dangling shoots.
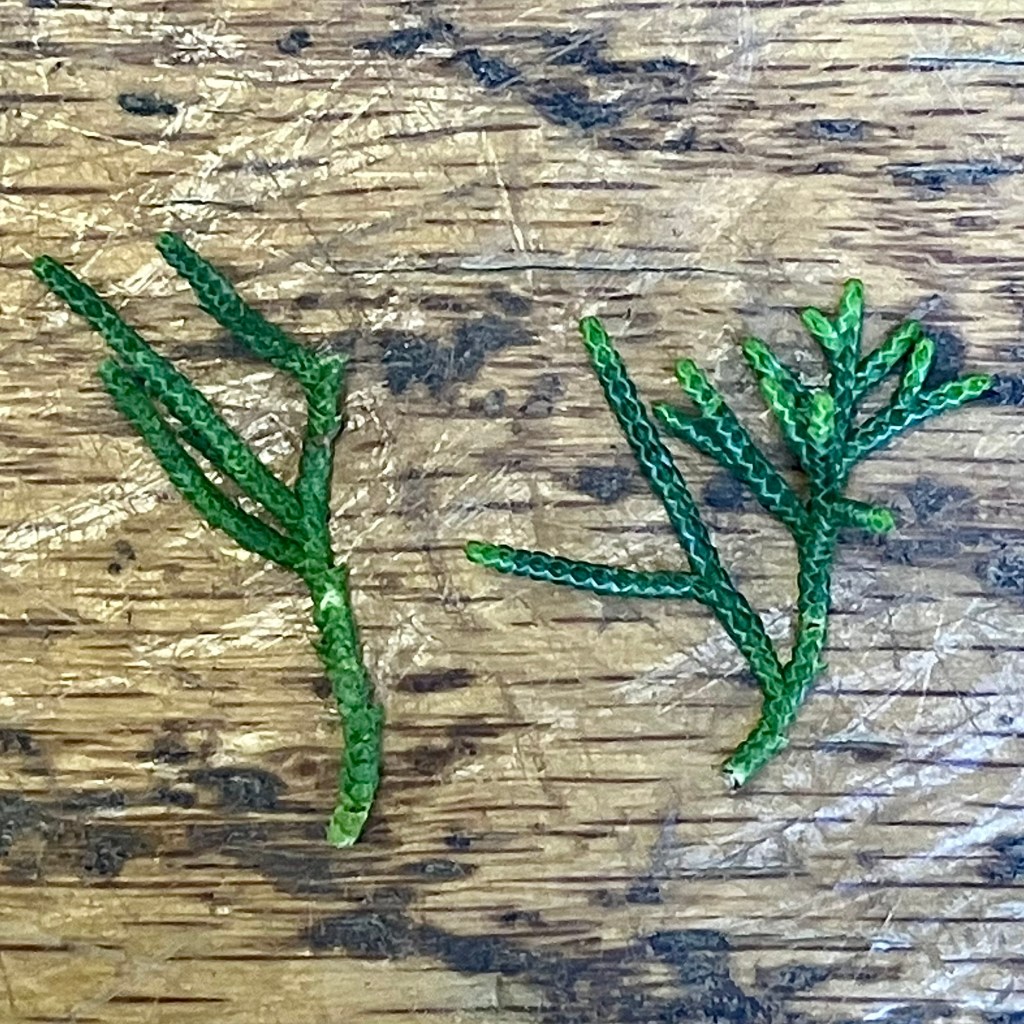
Now we’ll thin what remains. Open up the pad to find the older shoots. These are further back along the branchlets, and tend to look like the one on the left: still alive, but without growing tips. Pull off these inactive shoots. Shoots that look like the one on the right may remain, as they are bright green and growing. They are the future of the branch.
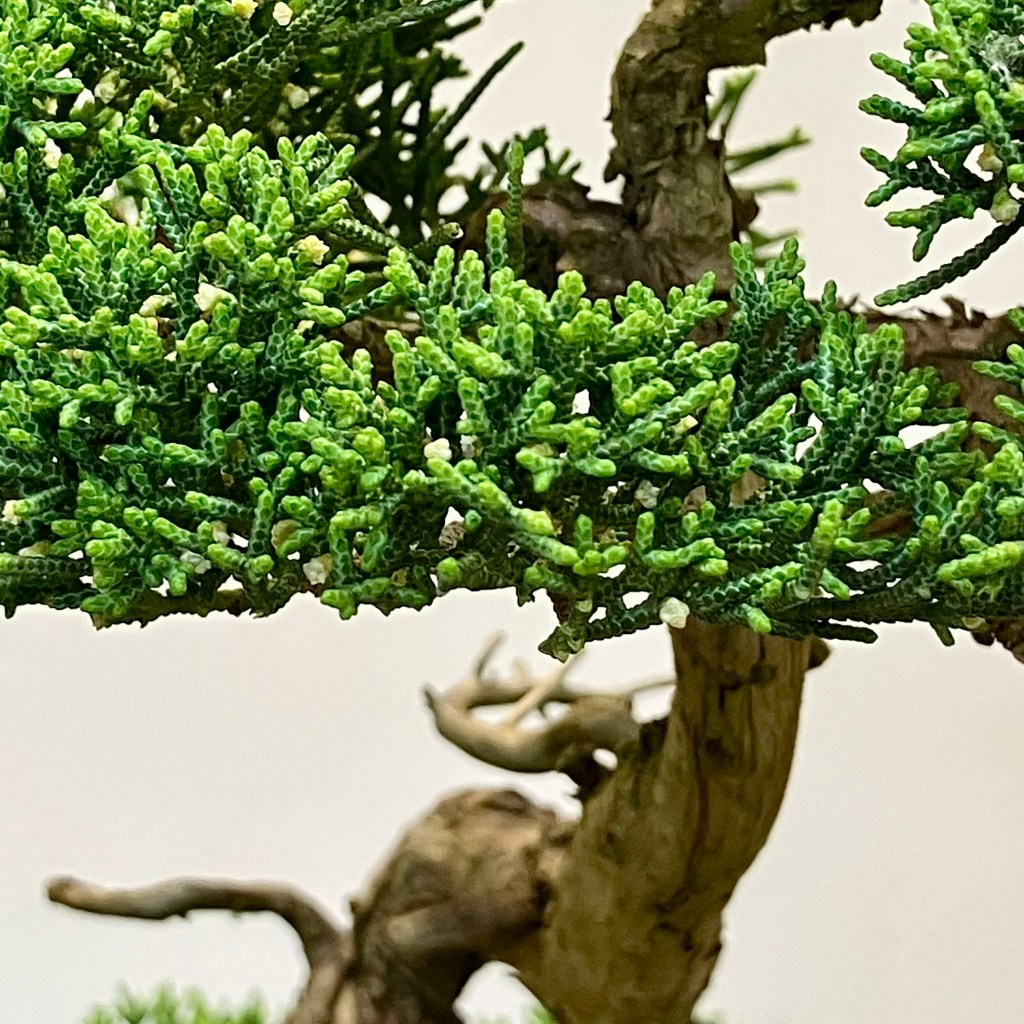
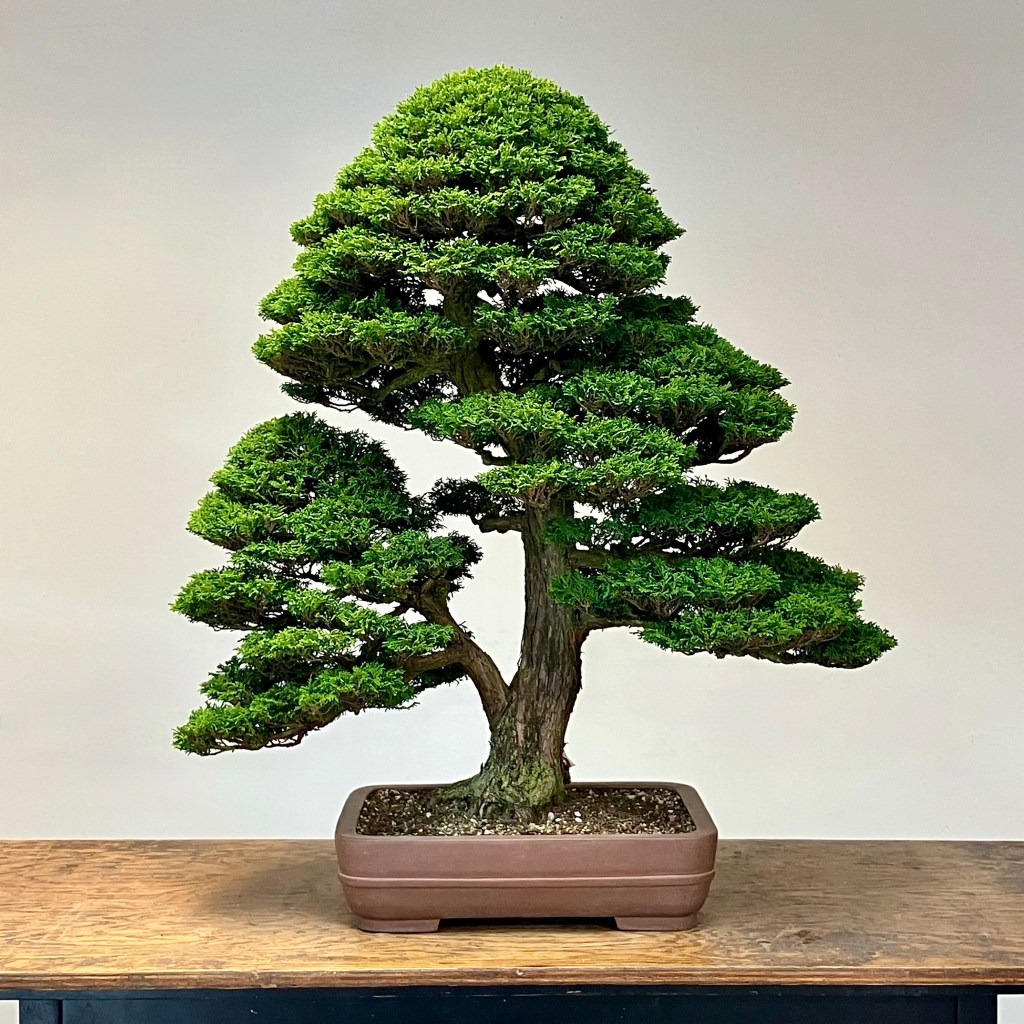
At the end of the rework, the tree has recovered the openness and clarity in the branch structure and twig structure. None of this was done by wiring or repositioning, just by trimming and pulling.
Larger, older shoots were cut off, with the smaller shoots pulled off leaving clean undersides and a thinner, more airy pad. Notice that no pinching of the remaining growing tips was done.
Depending on how fast the tree is growing, this sprucing up can be done once or twice a year.
If you like drawing, you may have tried to draw a family member from a photo, and then you may know how hard it is to find a likeness. You finish it, and the nose, eyes, and eyebrows are all in their proper places, but Aunt Jane it is not.
We all have a basic idea of what a face looks like. They don’t have fingers or legs hanging off them, or pizza, usually. A face has ears. A nose. And eyes and maybe surrounded by hair. And we know what all that looks like, so we draw what we know rather than what our eyes tell us.
But then, curiously, if you were to take a photo of Aunt Jane, and flip it over, and then try to copy it, it will likely look a lot more like Jane.
Why?
Well, we’ve broken what we know a face looks like—the pre-conceived symbols of a face—and are instead drawing the relationships between the elements. So our rendering becomes much more accurate. When we turn it over, we may well have Jane.
You may know how taking a photo of a bonsai can be a great study aid to seeing what is wrong with the design. But we can also do an Aunt Jane flip.
A flipped photo can more clearly highlight a tuft of foliage coming off the crown that we hadn’t seen.
Or, we see the key branch is much too long, sticking out like sore thumb.
Or, the branches on one side don’t balance the ones on the left.
Flipping a bonsai photo can help find these details of balance because we’re not “seeing” the bonsai as a bonsai any more. We’re just looking at details.
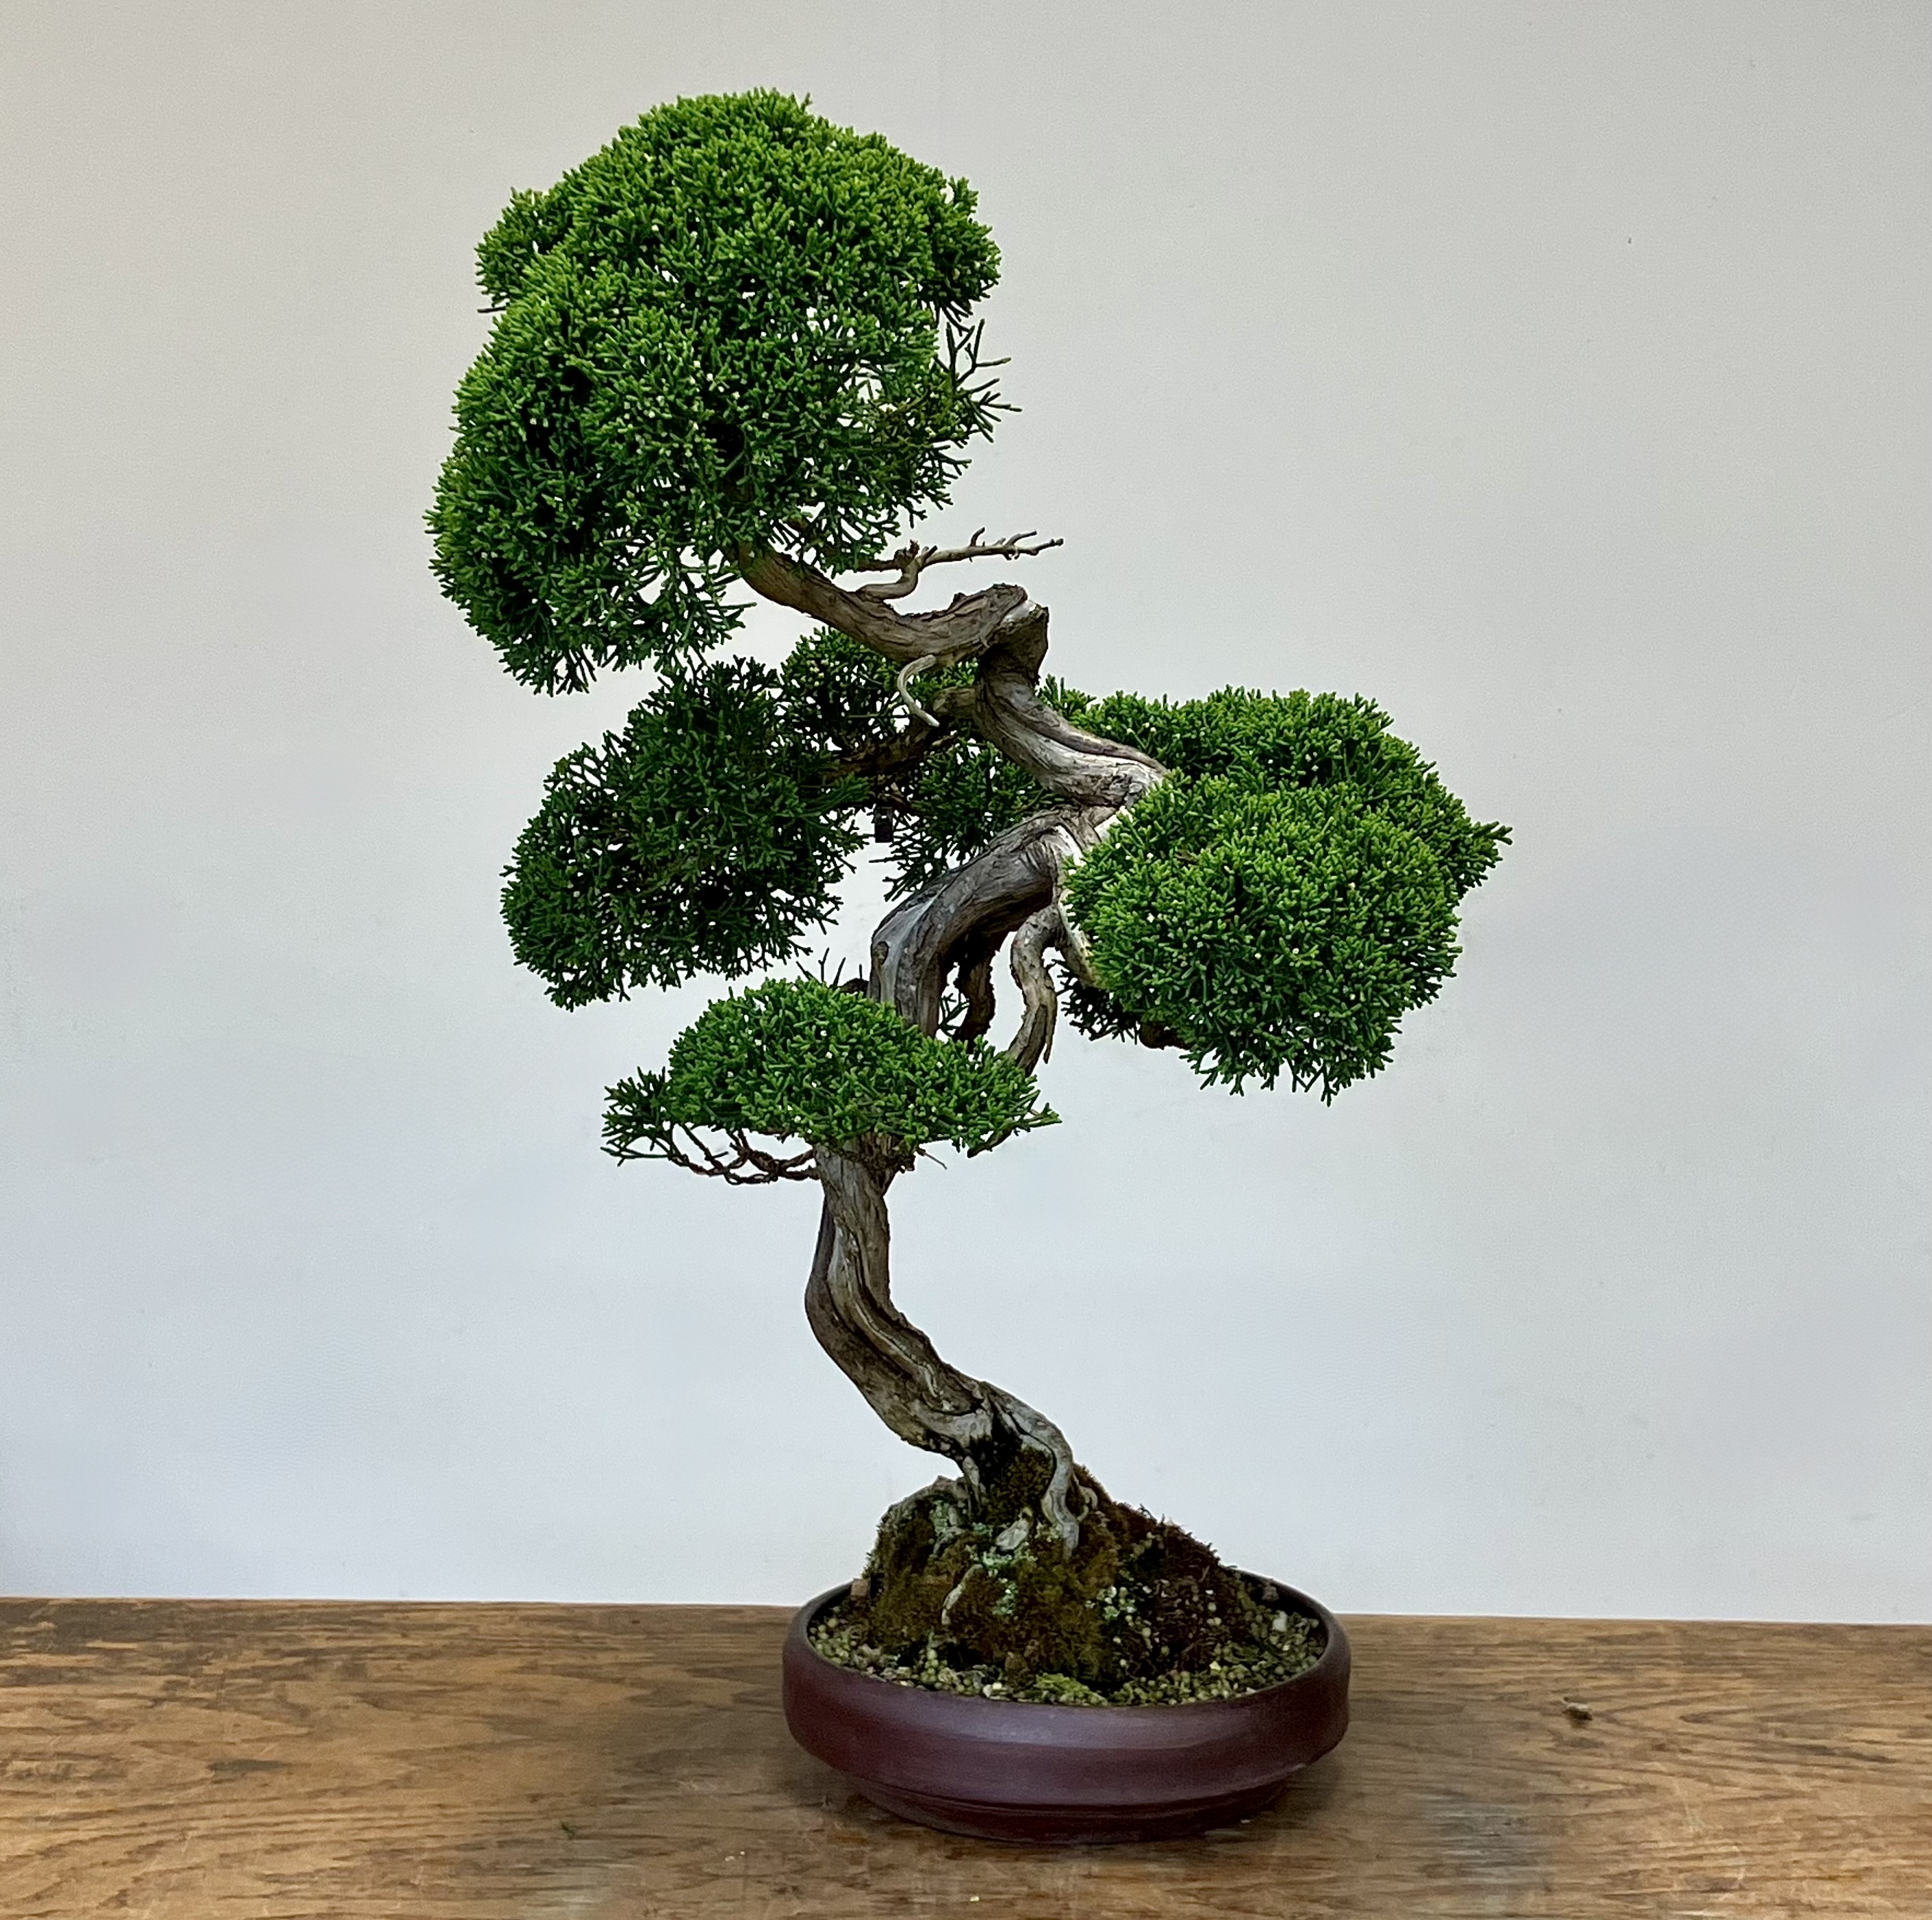
Here’s the juniper from last week’s post. We repotted it at this new inclination to give it a jaunty leaning-tree look. And in so doing we mucked up the balance.
Balance can be hard to see. I know I repeat this point often here, but this is an asymmetrical art form—it’s not a totem pole, with bisymmetrical faces and animal heads. Bonsai has another layer of difficulty built into it, asymmetry. Which makes balance—the distribution of visual weight—really tricky.
Let’s say the balance of this juniper is eluding us.
So let’s Aunt Jane it. Same image, inverted. It no longer looks like a bonsai. Maybe the first photo didn’t either, but now, perhaps, we can see where the problem is.
We have a “hole” where the red circle is. Something looks funny there—we don’t have to name it, we just need to see it.
Taking a pixel pen (or fertilizer), we can make some foliage there.
Now when the tree is inverted it’s still a leaning tree, but there’s some counterbalance on that right side.
Of course you might have preferred the dangerously exciting lean of that first image.
But, it’s an example of how one might use an inverted photo, a template from which you can plan an improved design.
Two things of encouragement:
Flipping a photo can train you, so you can then see an unbalanced tree when its right in front of you
It’s easy to flip an image on a smartphone
And a camera-less tip: tipping your head to the side while working on a tree can give a “snapshot.” It’s a lot like flipping a photo in that it “breaks” what we think we know
A couple weeks back I did a post about cleaning up Junipers. In short, with a Juniper you cut any over-long shoots, pull off dangling shoots below the horizontal, and then pull off old shoots in the interior. But we shouldn’t pinch the living tips that remain.
Tsukumo Cypress is a good comparison tree. It looks similar, so you’d think the technique is the same, but it isn’t.
With a Tsukumo you do all the Juniper technique plus pinch the tops of the pads. This is truly a pinch-maintained tree.
Here’s our unworked tree. This is a big specimen—most Tsukumo are tiny, but this is a 2’ tree. And it’s shaggy, the perfect time to pinch it.
Tsukumo is best pinched when the shoots are 1”. It should be left alone until shoots are that long. Constant, nervous pinching of anything that grows outside the ideal shape ends with an exhausted tree. They have to grow.
Same set of pads after pinching. Much like the Juniper, the bottoms are cleaned up, and the interiors thinned, BUT, the tops of the Cypress pads are also pinched. (That would be naughty with a Juniper. Their usual reaction to this is to throw out juvenile foliage, which indicates annoyance.)
Long shoot ready for pinching.
Same shoot after pinching.
Very small tips may be pinched on Tsukumo.
Sometimes you see this after pinching—a white spike—which is wood exposed when the green stuff is stripped off. In this instance, the shoot is too thick and hardened off to pinch. It is better cut with a scissors.
Tsukumo after clean-up. Nothing else was done, so the clean-up has exposed the past work. A few improvements might be made in the branch placements. It needs a more significant back branch, for instance, to give it depth. Maybe something for another post.
This week, I’m delighted to turn over the blog to Sergio Cuan. Sergio is one of my favorite bonsai artists. He also did all the sick illustrations in Bonsai Heresy. Since working on that project together, many have asked what Sergio’s background was, and I barely knew myself, saying, “Well, I think he worked for Nickelodeon.” Which left a lot out. Here’s Sergio to answer the rest for himself:
At the age of three, with a piece of chalk in hand and a budding artistic inclination, I remember scribbling wildly on my grandmother’s living room walls. My grandmother was delighted and even encouraged me—gasp!—to color on her walls regularly.
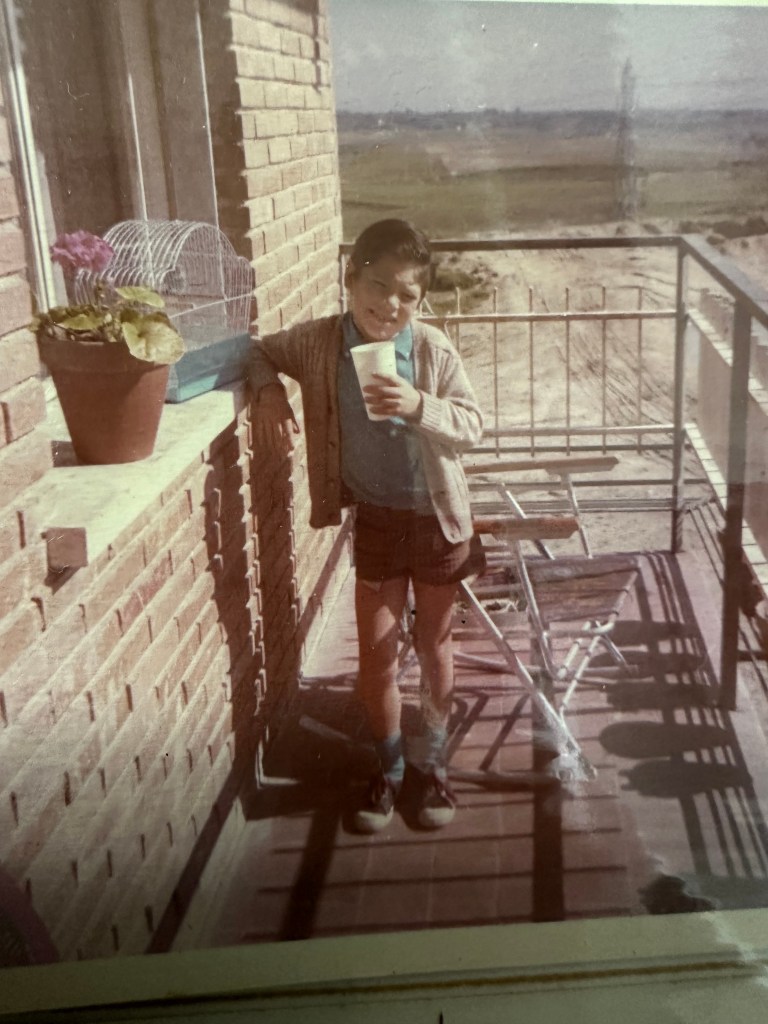
And here’s where my story begins. I was born in Havana, Cuba under a communist regime. My parents entered a lottery-based system to obtain a visa from the Cuban government, and they were granted one to leave the country and go to Spain, albeit with nothing but the clothes on our backs. I was about 5 years old, and I remember my mother growing flowers in the balcony of our tiny apartment in Madrid. I became instantly fascinated with plants.
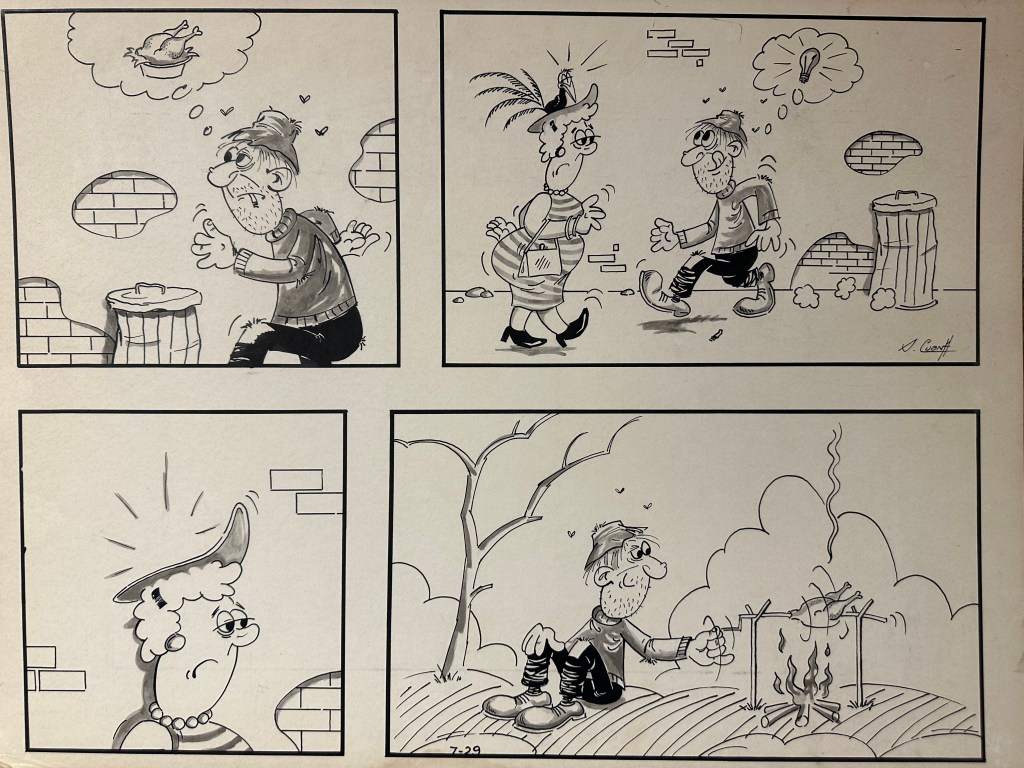
Plants continued to be a fascinating subject and I began to earnestly pursue that and painting. Art class was my favorite subject in school. I enjoyed copying drawings by the old masters such as Dominique Ingres, Holbein and Durer. I taught myself how to paint in oils, and also greatly enjoyed writing and illustrating my own comic books. In short, I was smitten with art!
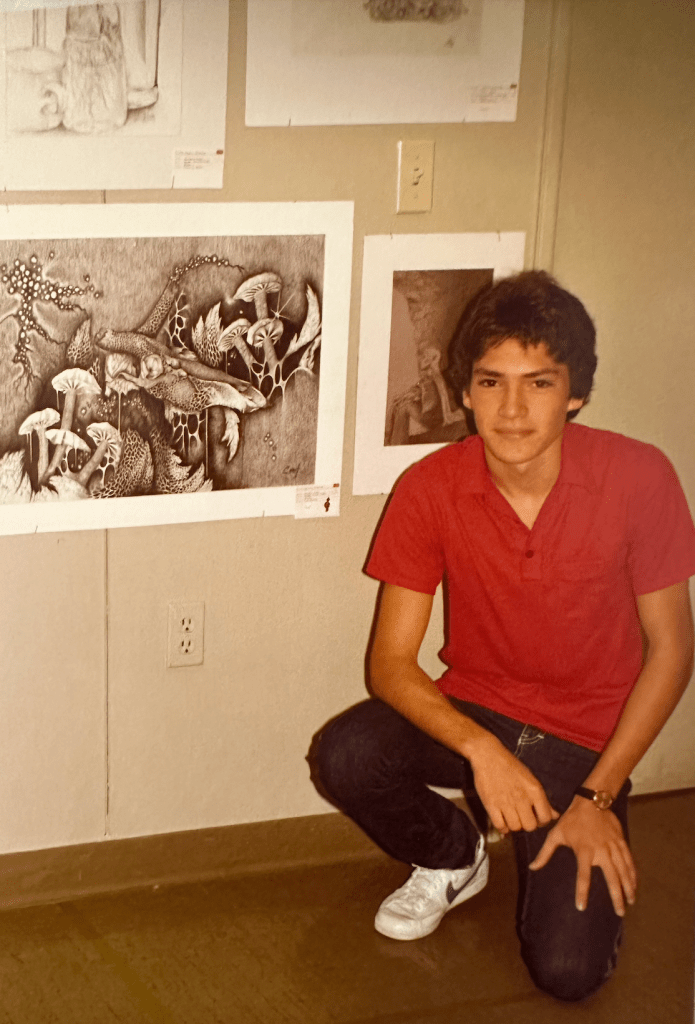
After 11 years living in Spain and in search of a better future, my parents made the difficult decision to move to the United States. As a teenager knowing barely any English, I was full of wonder and trepidation all at once. As an awkward 13-year-old kid with acne, the culture shock was seismic! Through those difficult times, horticulture and art were my refuge.
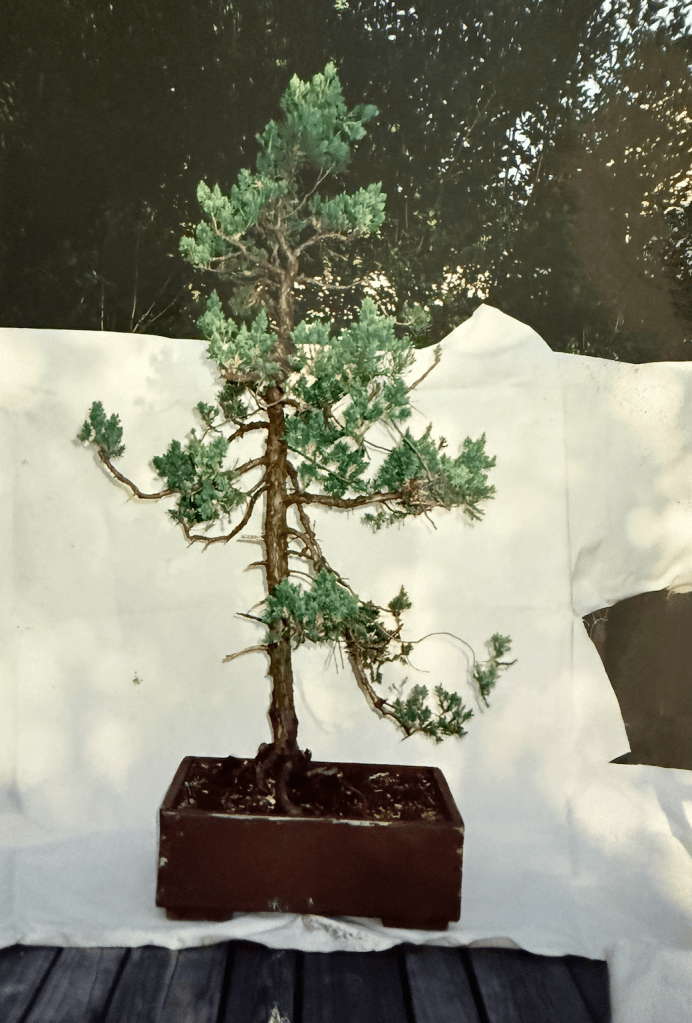
On my 15th birthday and now living in Miami, my parents gave me a bonsai tree, a procumbens juniper. It was what we call “mallsai”… yeah, one of those! And this was pre-Karate Kid. But this little juniper was a thing of wonder to me! I followed the instructions it came with religiously, misting it often, a humidity tray of course, and made sure to grow it indoors. And, as fate would have it…I killed the plant. Surprised? It was a valuable teaching moment for this budding bonsai enthusiast.
The 1980’s came rolling in like a freight train: a decade of excess, Michael Jackson, the end of the Cold War and, yes, no internet! By this time, I had moved to New York City to attend art school at Pratt Institute in Brooklyn.
After abandoning bonsai for a few years, the bug nudged me once again. As I was thinking about purchasing a juniper at a brick-and-mortar bonsai store in Manhattan, the sales lady said to me, “you do realize that bonsai is not a plant, but an art form, and your juniper will be required to be outdoors?” I gasped…the horror! How can a precious bonsai need to be outdoors? But I remembered the lesson I learned way back when I was 15, trying to grow my first bonsai.
Not only did my newly purchased juniper live, but it thrived outdoors! Armed with little to no bonsai information at the time (remember no internet!) I continued to trudge my way through the fascinating world of bonsai with some success and a bit of failure…okay, a LOT of failure!
The years passed, I painted murals in Manhattan posh clubs, designed window displays for Bloomingdale’s, and even worked as a toy designer for the fast-food industry’s kids’ meals. An Art Director friend then reached out to me who was looking for an illustrator. This was for Nickelodeon, which at the time was, next to Disney, the most highly-rated television network for kids. I became their first full-time, in-house artist working for their consumer products division. My long career there evolved from illustration work to brand development, to advertising and finally hotel and theme park branding and design.
With a growing family and rising through the ranks at Nickelodeon, it was tough for me to pursue bonsai with any degree of commitment. Bonsai became a pastime often put on the sidelines. It felt more like I was simply growing trees in pots rather than anything that may have been remotely considered “artistic.”
It was now the mid-nineties, and I joined the Bergen Bonsai Club in New Jersey. The information I was given at the time was by today’s standards very “old school” but nevertheless helpful. I gradually became aware of some of the greats in American bonsai such as John Naka, Bill Valavanis, Chase Rosade, Boon Manakitivipart and Suthin Sukosolvisit.
By the middle of “the early aughts”, artists and professionals such as Michael Hagedorn and Ryan Neil, joined later by Bjorn Bjorholm, came into the American bonsai scene. What I saw them doing and what they made possible, with new ideas and new ways of approaching bonsai, was a transformative experience for me.
After almost three decades at Nickelodeon, it was time for a change, so I made the decision to turn my bonsai passion into a professional pursuit. To be sure, I miss those crazy Kids’ Choice Awards parties, getting slimed, and the slew of incredibly fun, talented people. But today I am very grateful to have the privilege of working as a full-time bonsai professional. Ironically, little has changed. I am still an artist who happens to work now with plants rather than paint and brush. I am hopeful that in some way I can make a meaningful contribution to the world of bonsai. And as Patrick Star from SpongeBob says… “The inner machinations of my mind are an enigma.”
It’s Japanese Black Pine decandling time again. Or it might be, depending on where you are. It is where I am, the Pacific Northwest, where we’re finishing up decandling this week.
The decandling date will differ according to where you live, which is determined by latitude. Here in Portland, Oregon we cut end of May / beginning of June, while in Los Angeles it would be closer to July 4th. There’s a longer growing season down there, and as decandling “resets the spring,” so to speak, you want to time your cuts accordingly, as that will determine the regrowth needle length.
Decandling assumes good sun and enough warmth. In shade, or regions with cool summers, Black Pines are often better grown as single-flush pines. They should be fertilized well in the spring and in the fall to do this intense shoot removal, with a short break for 4-6 weeks after decandling in summer, to get short shoots. After that, begin fertilizing again for the needles.
A lot has been written about Black Pine decandling—and I highly recommend the many pine posts on Jonas Dupuich’s Bonsai Tonight blog for more.
In this post, after an overview of a common technique, we dive into a couple puzzling situations you may encounter on a developed Black Pine.
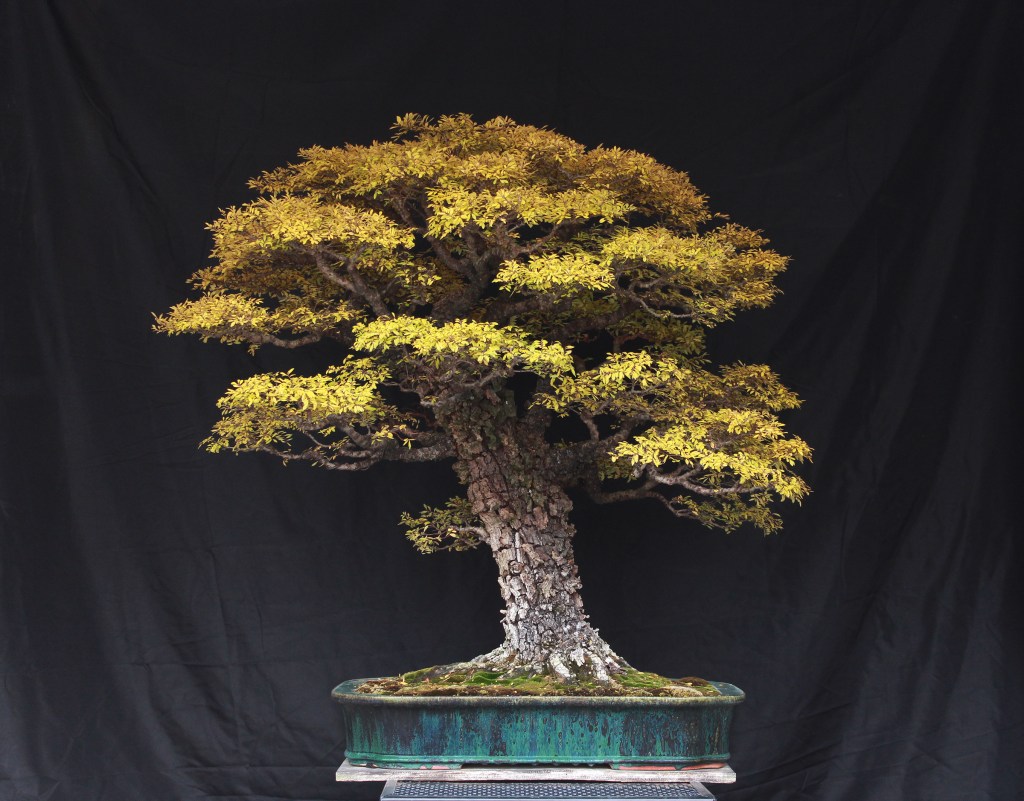
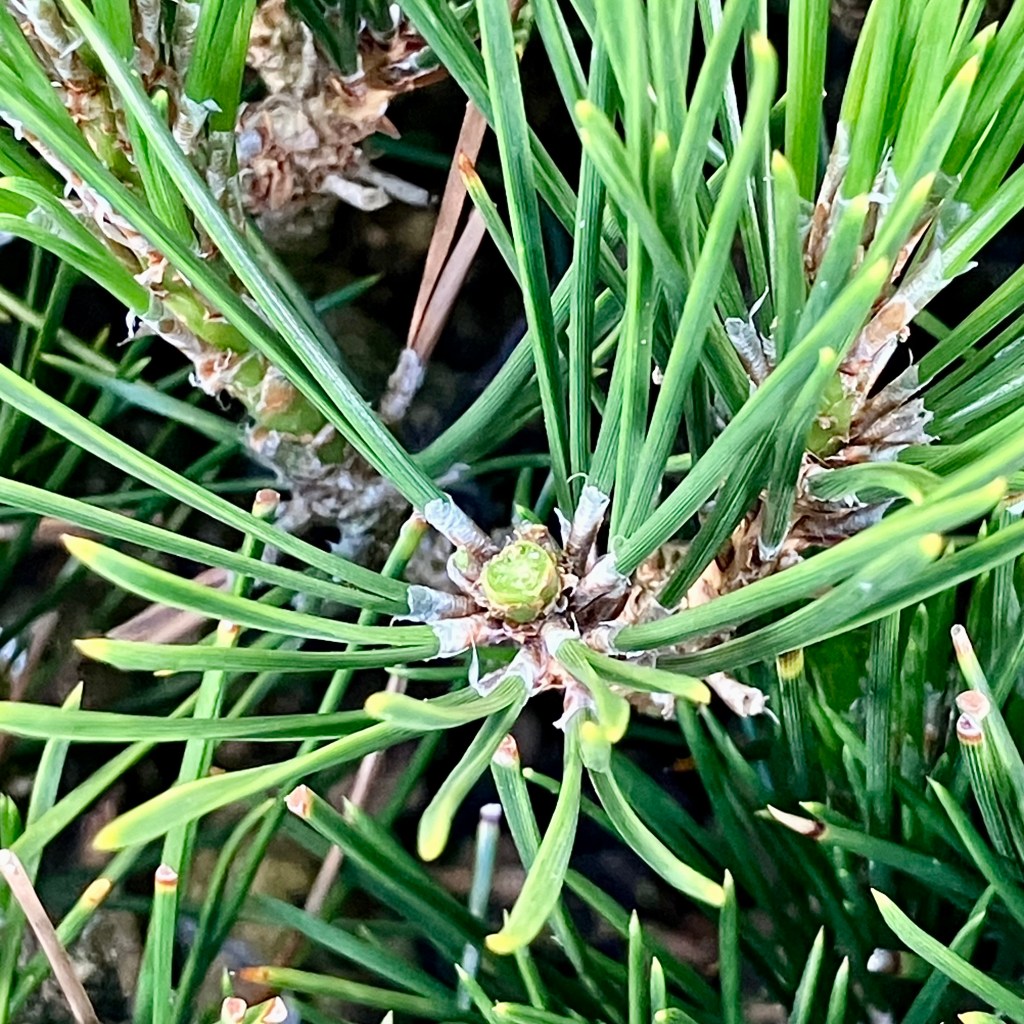
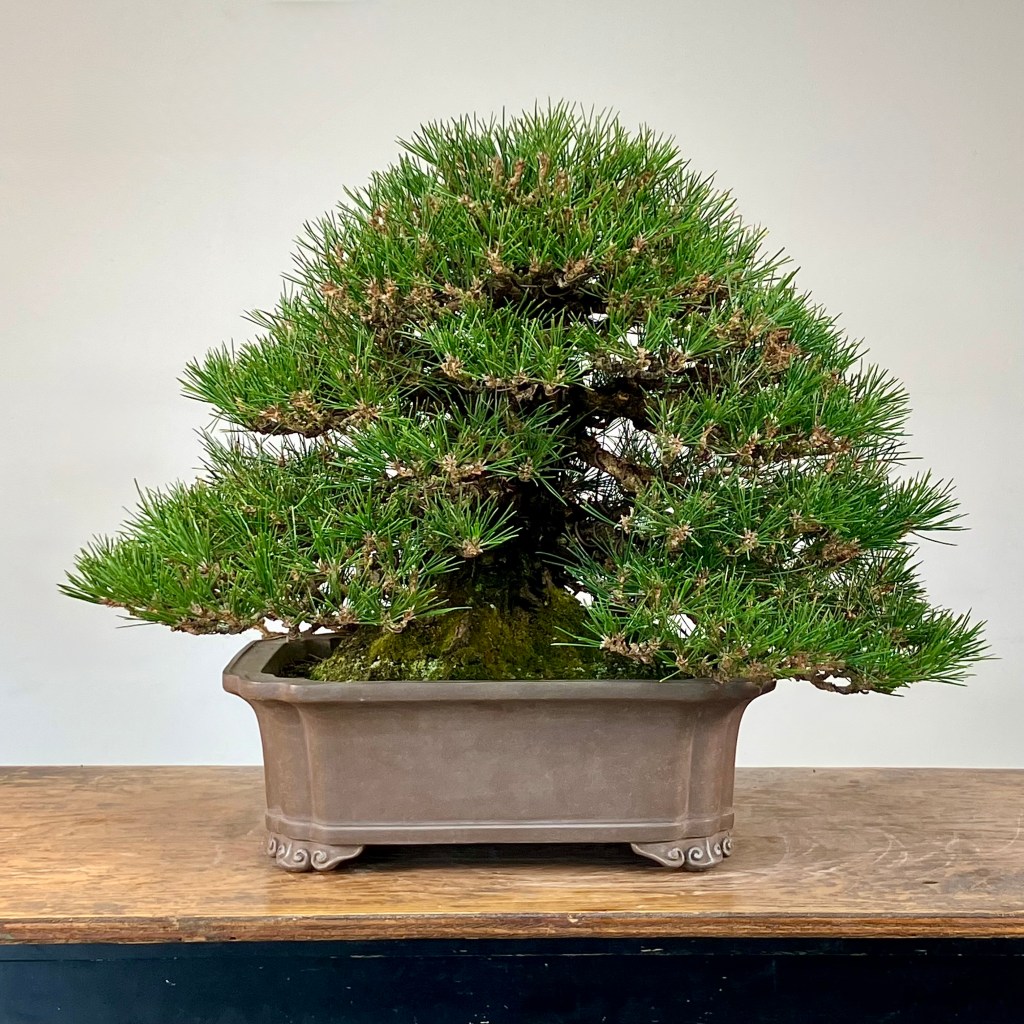
Here is our Japanese Black Pine, Pinus thunbergii, before decandling. It’s an older pine, with a lot of density. Today we’ll talk about how to manage that density.
For an overview of a common decandling technique, identify those candles large enough to cut off. This one is of medium strength, and may be cut. Smaller ones may also be cut, but leave very small ones.
In decandling the whole shoot is cut off (do not do this on single flush pines, like a Scots Pine or Japanese White Pine). Then some needles are pulled off.
We leave a stub, if the candle is strong enough, which serves as an energy drain on the shoot, making smaller regrowth. With strong candles, leave a longer stub, and weaker candles a shorter one.
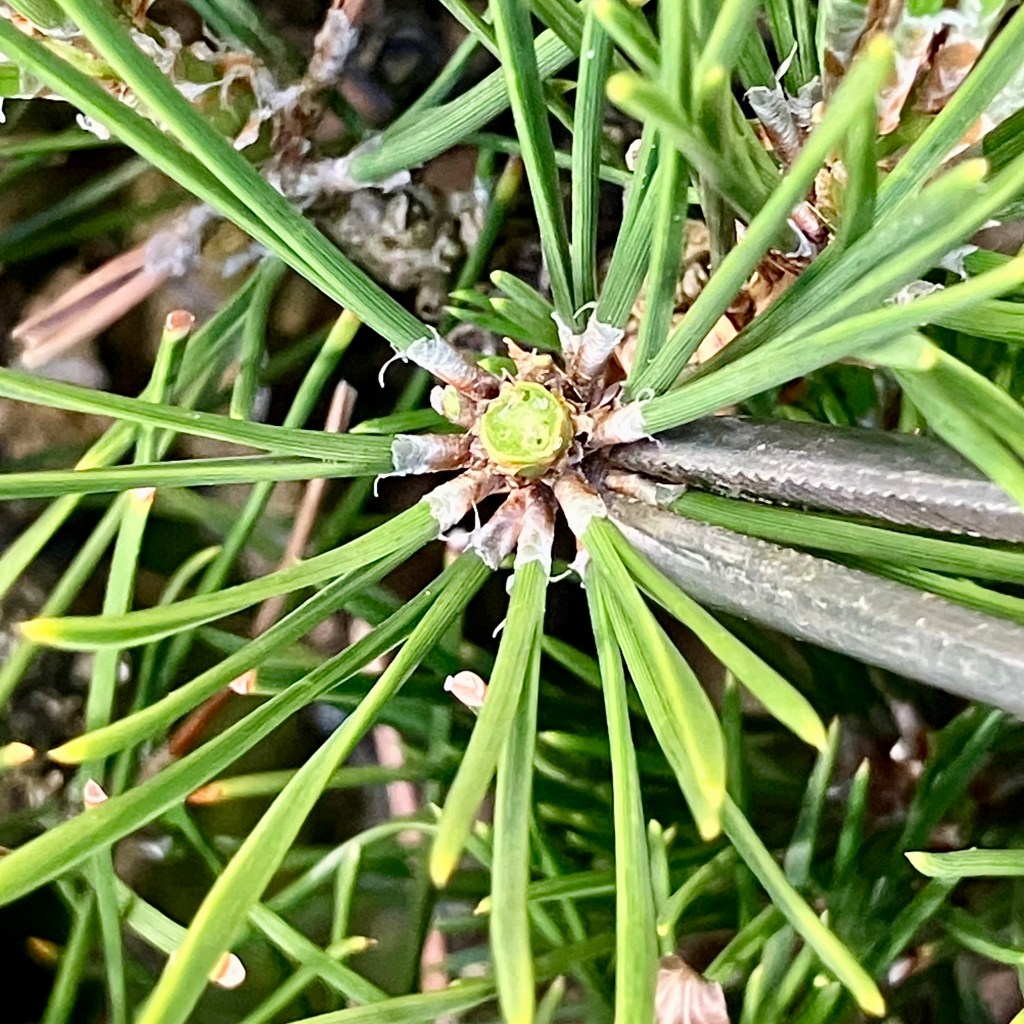
The candle cut off. A small stub remains.
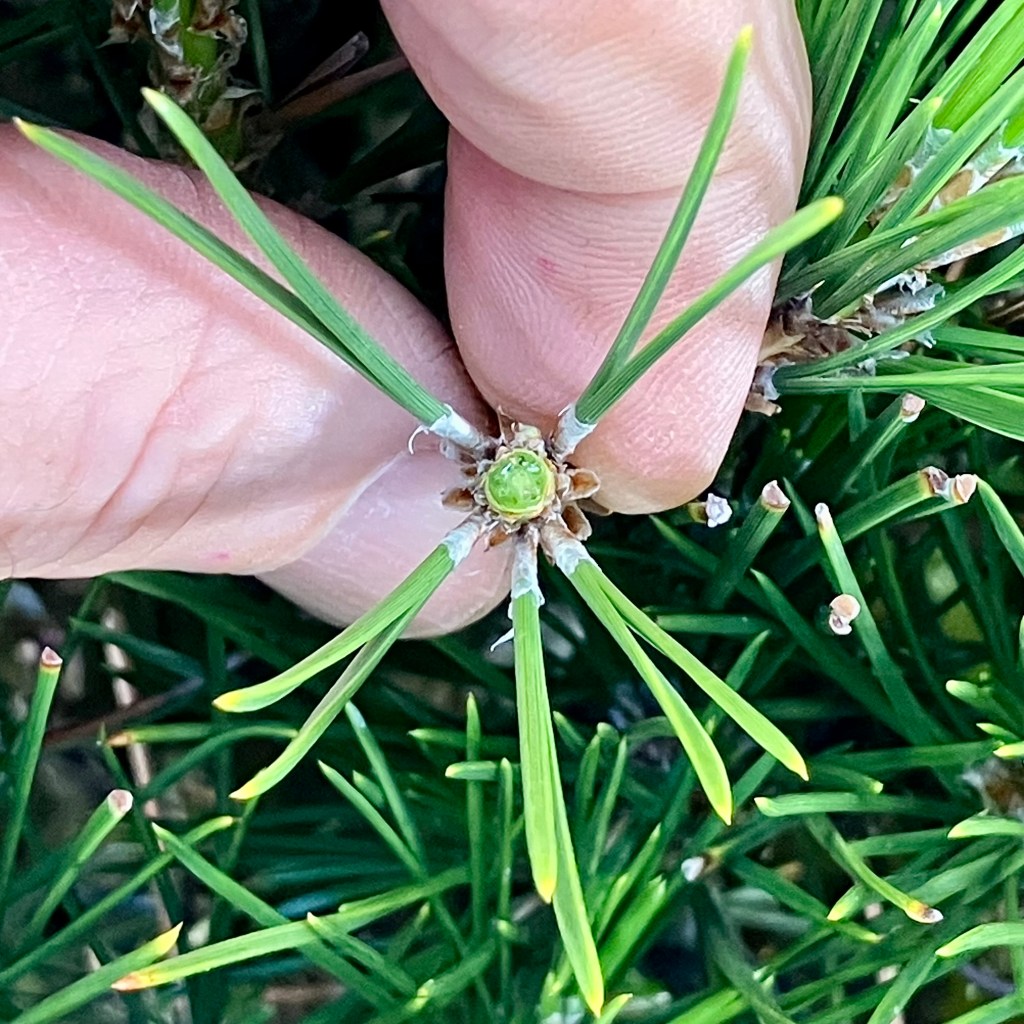
Next, needles are pulled. Start with those further down the shoot, leaving those near the cut site.
Try to leave a star pattern. This shoot is at the top of the tree, and this is an average number of needles left there, 5 pairs. On the middle branches you might leave 6 pairs of needles. On the bottom, 7 pairs. This needle variance is a typical method of combating the apical dominance of Japanese Black Pine.
If you have a loose plant, like this one, with only a few branches and shoots, follow the above set of photos for the normal technique. But don’t pull off so many needles. Maybe leave 10 pairs.
Let’s get deeper in the weeds with the denser pine. For here it gets tricky. What about adjacent shoots? Here there are three small shoots. None are strong enough to decandle. Only one, the lower one, is even making a candle this year. To strengthen this area, and to keep the density the same as the rest of the tree, something has to go.
The middle shoot is cut off, leaving more energy and space for the remaining two. To strengthen the shoots no needles are pulled.
This is one of the harder things to put into practice: though we want ramification, on a mature tree, you end up cutting off shoots in order to make room and to have enough energy for the next set.
Another complicated area. Four shoots. They are all strong enough to decandle, but it’s too busy. There’s no space for regrowth. Also, these candles are at the lower limit of the size you can decandle and expect regrowth, and cutting all of them often results in one or two not growing any summer candle at all, or all getting weaker.
Space constraints + energy constraints = something gets trimmed off.
The middle shoot was cut off to clear some space. The candle on the right was cut. Now another candle is being cut.
Some prefer to pull needles first, though I find it easier to find which needles to pull after the candle is gone.
Almost done with this set of shoots.
Same set of shoots after needle pulling. I left a few more pairs of needles on the far left shoot as it was weaker.
It’s simplified, yes? On a mature tree you build ramification slowly, if at all.
The pine after decandling and needle pulling.
To put all this another way: A potted Black Pine can only maintain a certain number of shoots with the energy to be decandled, so there is no infinite ramification potential.
It’s a bit bittersweet: we do a lot of work and then cut off half of what we did the season before.
But not to end this post on a low note. For we’ve achieved a lot of things by decandling. We make ramification. Short needles. And we strengthen weaker interior shoots, which would otherwise die.
Yet an often missed goal is short shoots. Decandling gives us intense compaction on this long-needled pine, in whatever needle length we want. Depending on when we cut the candle.
But one last thought there—too short a needle can be a liability on a Black Pine. It can weaken the tree. The above tree is 18” high. The needles are 1.5” long, which is the shortest length for a tree of this size to keep it happy. If they were less than an inch (which might be OK on a shohin) I’d cut the candles about 10 days earlier to get more needle length.
June 2026 Bulletin Board:
Alert! Mr. Shinji Suzuki’s presentation on July 19th, 2026 at the Portland Art Museum is close to selling out. It’s a 400-seat hall, and is shaping up to be a smashing event. If you want to join us, here’s some deets: The Way of Bonsai

 Ezo Spruce. Only a few spruce in this year’s show.
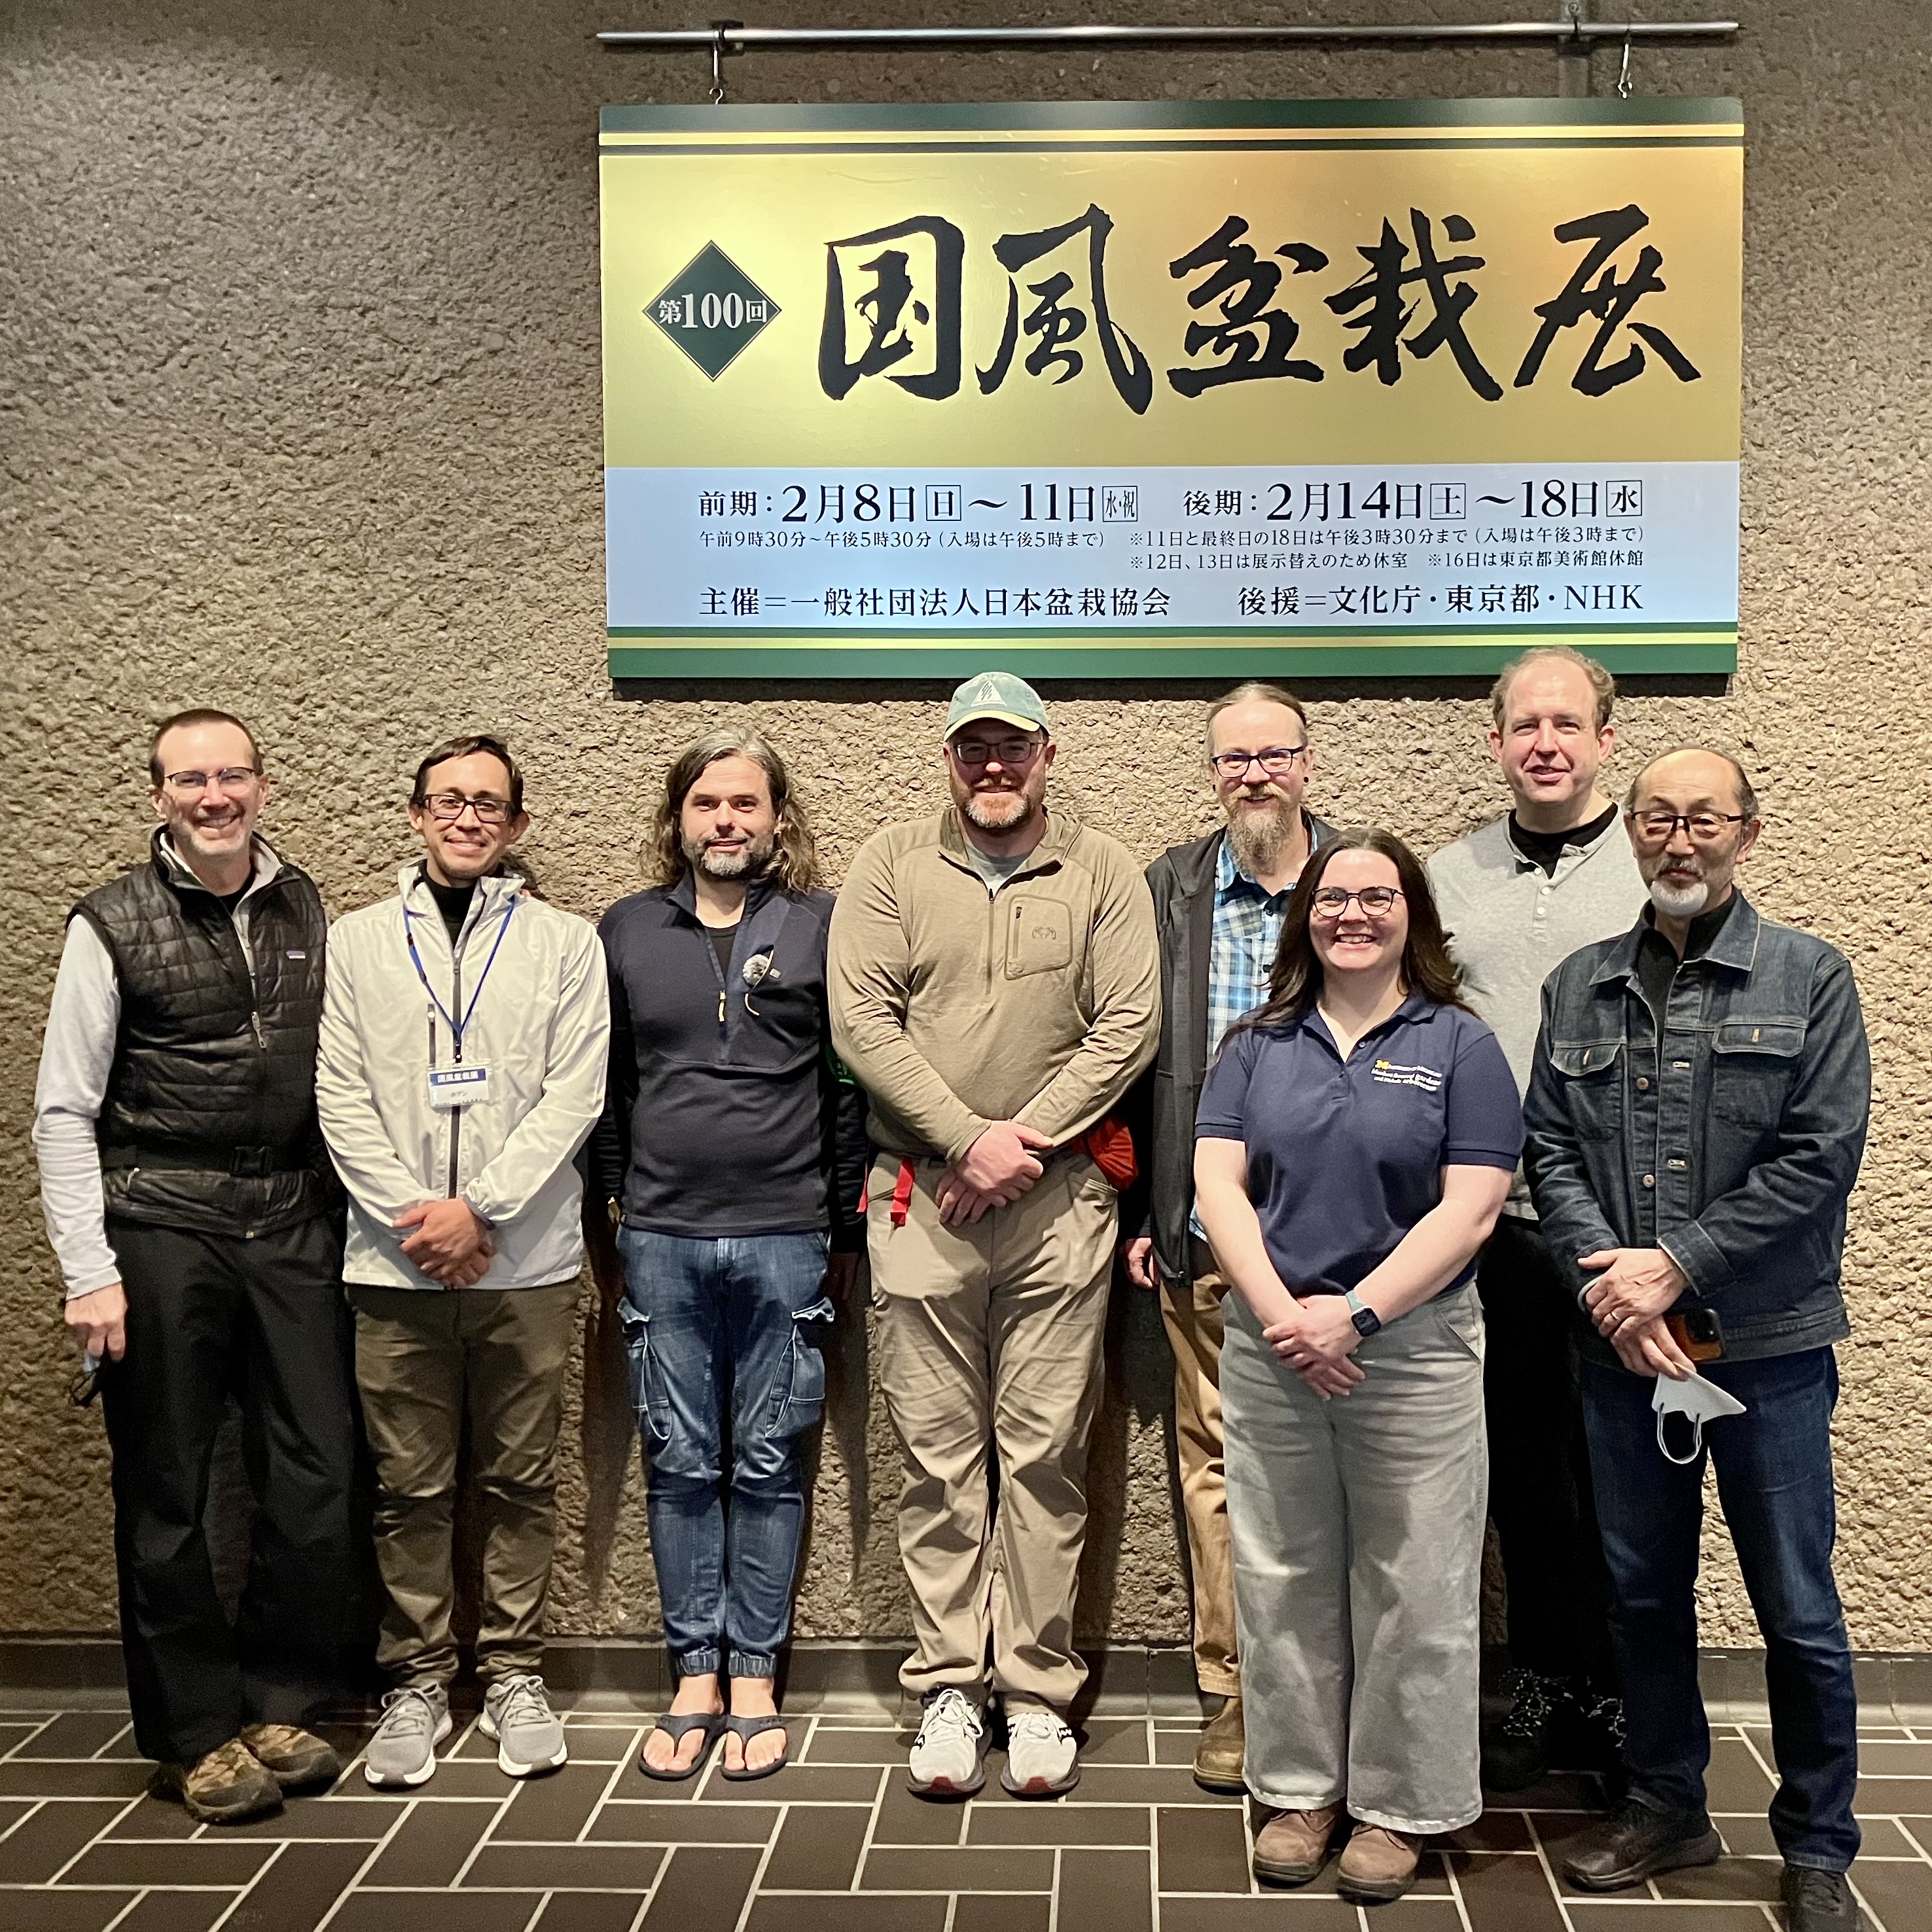


 Root removed, leaving one with some shari on it just below, which slopes into the soil better.