❌

Normal view

Received before yesterday Shumi no Bonsai

Ground layering an Acer Shishigashira

28 April 2023 at 16:16

A few years ago I bought a small batch of Acer Palmatum Shishigashiras and Deshojo from a grower in the Netherlands. They were all small plants recently grafted on regular palmatum rootstock. Last year I repotted them into larger containers so the trunks could thicken up.

Now it’s time to see if I can ground layer them so the ugly graft won’t be a problem anymore and hopefully we get a nice nebari.

I’m doing a test on one of them this year. If it works out ok I’ll do the rest of them next year.

Here’s the volunteer:

Notice the section where the shishigashira part is grafted on regular palmatum rootstock. This junction will always be visible.

So first thing I did was taking off the bark with a sharp knife where I want the new roots to grow. Always be sure that you take off enough bark so the wound won’t callus over. The roots will sprout (hopefully) above the part where the bark was taken off.

Next thing I removed all of the cambium layer so the nutrition flow from the roots to the leaves is interrupted and the tree will be forced to grow new roots above the wound.

When this is done I cut the bottom out of a small nursery container so it could be placed around the trunk.

Last thing to do is to take some sphagnum moss, make it wet and fill the small nursery container with it. Make sure there’s a good layer of wet moss above the wound so the roots can start growing in a moist environment.

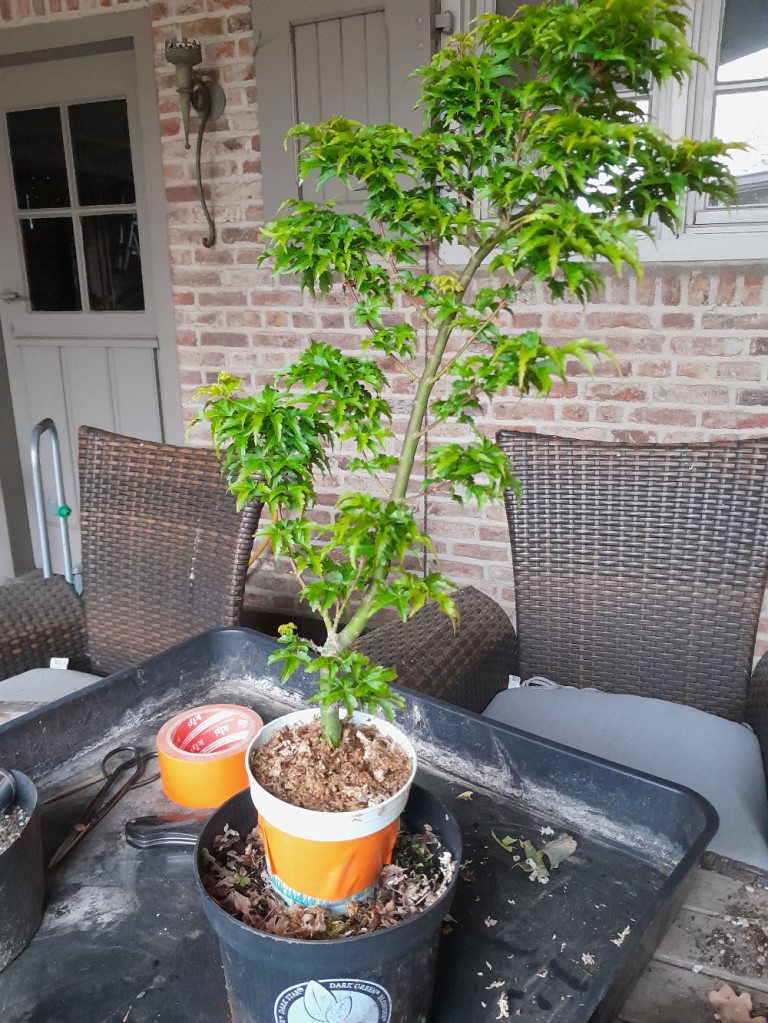
acer shishigashira air layer

Normally the new roots should have grown by september and it’s possible to remove the air layer. I usually wait until repotting season in early spring to remove the air (ground) layer. More on this next year πŸ˜‰

Ground layering an Acer Shishigashira – removing the ground layer

6 March 2024 at 19:53

So this is a follow-up post from the one I did 10 months ago where I started a ground layer on an Acer Shishigashira.

Today it was time to remove the ground layer from the original rootball. The buds were starting to swell so the timing was right.

Here’s how the tree looked before I started working on it today:

Despite having the ground layer happening the tree grew pretty good this year.
As you can see the buds are starting to swell:

I removed both ofthe pots from the tree. Where I put the little pot for the layer, roots are clearly visible, so that’s a good sign πŸ™‚
(to be honest, I checked if roots actually emerged above the cut that I made before removing the pot just to be sure the whole thing worked)

Lots of roots in the little pot!

Cheap as I am I will re-use the ground layer pot for the next one I will do.

Time to get out the big toys now. I used some big pruning scissors to cut the ground layer from the original rootball .

After removing the sphagnum moss the new roots became visible. The root spread was pretty good, I removed a few that were in the way of others that were better placed.

The new roots seen from above and below:

Now it was time to put the tree in a container, I made sure the roots were spread out evenly and horizontally for a better nebari.

All that remained was to fill the rest of the pot with some soil and water it thouroughly.

The tree is now on it’s own roots and not grafted on the acer palmatum root stock anymore. It will remain in this container for 2 years so it can recover the 1st year and get some strong growth next year. After that maybe a wooden growbox for some years.

To be continued….

Ground layering an Acer Shishigashira – removing the ground layer

6 March 2024 at 19:53

So this is a follow-up post from the one I did 10 months ago where I started a ground layer on an Acer Shishigashira.

Today it was time to remove the ground layer from the original rootball. The buds were starting to swell so the timing was right.

Here’s how the tree looked before I started working on it today:

Despite having the ground layer happening the tree grew pretty good this year.
As you can see the buds are starting to swell:

I removed both ofthe pots from the tree. Where I put the little pot for the layer, roots are clearly visible, so that’s a good sign πŸ™‚
(to be honest, I checked if roots actually emerged above the cut that I made before removing the pot just to be sure the whole thing worked)

Lots of roots in the little pot!

Cheap as I am I will re-use the ground layer pot for the next one I will do.

Time to get out the big toys now. I used some big pruning scissors to cut the ground layer from the original rootball .

After removing the sphagnum moss the new roots became visible. The root spread was pretty good, I removed a few that were in the way of others that were better placed.

The new roots seen from above and below:

Now it was time to put the tree in a container, I made sure the roots were spread out evenly and horizontally for a better nebari.

All that remained was to fill the rest of the pot with some soil and water it thouroughly.

The tree is now on it’s own roots and not grafted on the acer palmatum root stock anymore. It will remain in this container for 2 years so it can recover the 1st year and get some strong growth next year. After that maybe a wooden growbox for some years.

To be continued….

❌