About 4 years ago I started this project where I cut off the weird looking roots entirely from a Ficus I bought at the local grocery store. Here’s how that was done.
Today I repotted the tree in it’s first bonsai pot.
This is how the wannabe Ficus bonsai looked after 4 years in it’s training pot that had gotten too small.
The branches have thickened nicely over the years.
I prepared a rivetted drum pot I once bought from the lovely people at Willow Bonsai all the way from South Africa.
Once the tree was removed from the training pot the roots got combed out and some thick roots got pruned.
A nice set of fine roots had formed at the base of the tree.
Then the tree went into the pot and the rest speaks for itself.
Looks a lot better now.
The base of the tree widened significantly due to the growth of all those new roots. And it will continue to do that the next years I hope.
2,5 year ago I repotted some 2 year old Japanese Maple seedlings into a wooden growbox. Now at the end of 3 growing seasons in that box I wanted to show you how they’re doing.
Here’s the original post from when they were repotted.
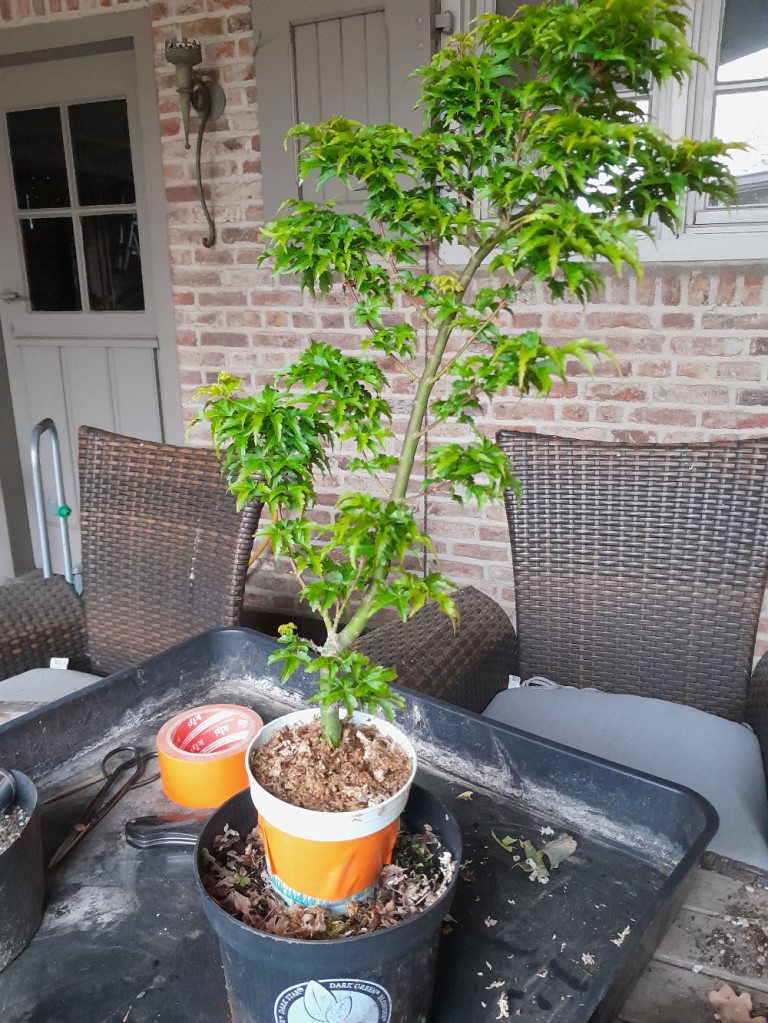
The first one, #2 to make it easy, I did some cutbacks on 2 years ago so it only grew to 1,5m or 5ft but it has some nice potential in the lower part of the trunk so a big cutback will happen next year in spring after the first growth has hardened off.
As you can see the lower part has some nice movement in it so it will probably be turned into a smaller size tree.
Next up is #3, This one grew up to 2,5m or 8ft 2inch tall.
This one will be a formal upright tree in the midsize format probably. The trunk is amost as thick as the coke bottle. But still al long way to go…
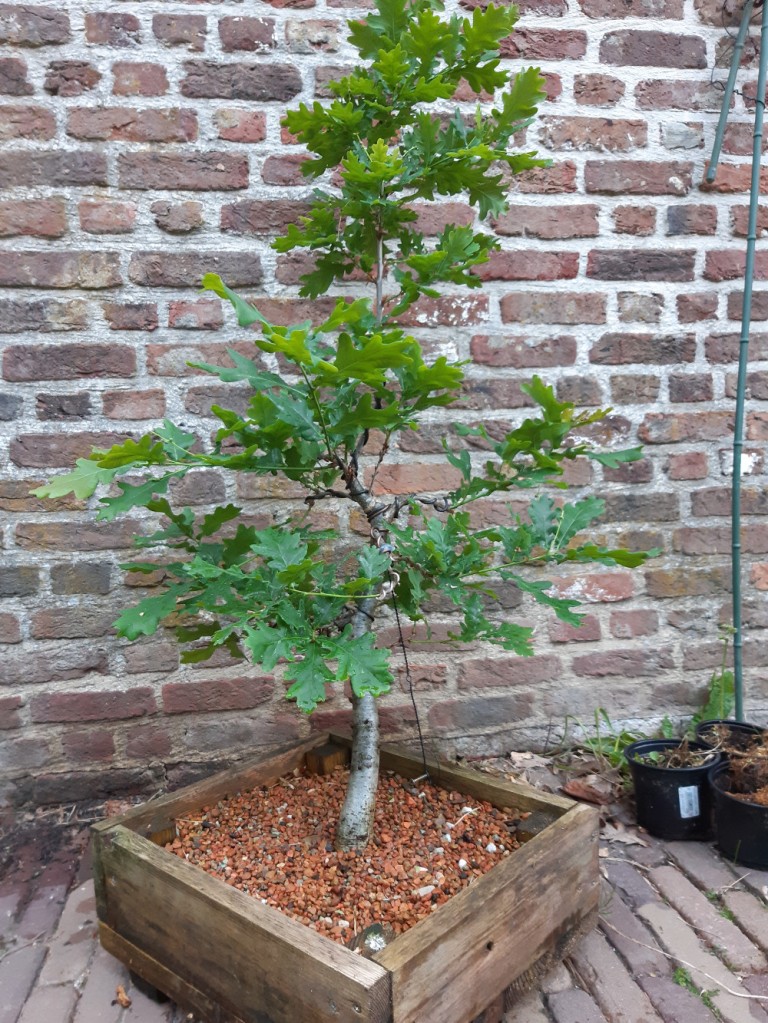
1.5 years ago I repotted one of the young English oaks I collected 4 years ago in a wooden growbox. It had developped a lot of fine roots in the bonsai soil I used for it.
Here’s how it looked like at the end of winter 2021.
After getting it out of the nursery container I could see an abundance of fine roots.
After trimming the bottom 2/3th of the roots this is what I had left.
The future Quercus Robur bonsai tree then got placed into a wooden growbox.
About 3 months later new shoots started to shoot from the trimmed branches and trunk. So I let it grow freely until the end of the year.
At the end of the 2021 I wired the new shoots and in spring of this year the tree was growing vigorously. Right after the next picture was taken I unwired the tree again.
This year I even got my first batch of acorns!
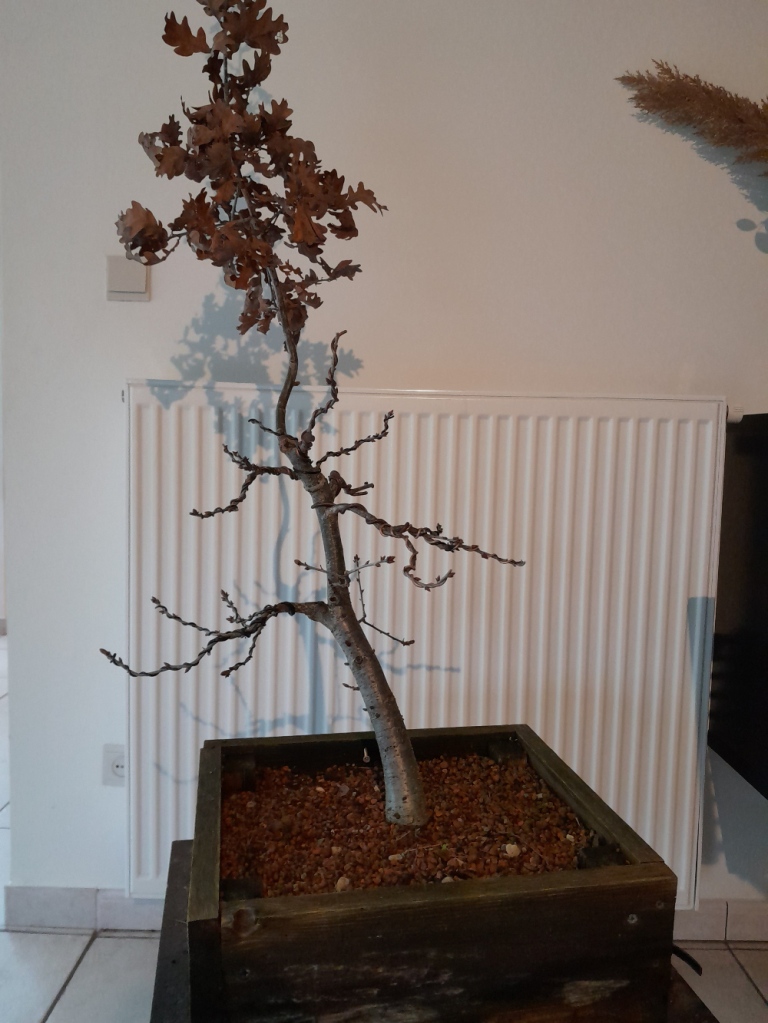
So today, 23rd of december 2022 I put the tree on my turntable and took off the leaves. The new growth got wired again. Notice I left a sacrifice branch, the one where I didn’t remove the leaves, that will come off at the end of next year. Until then it can help thicken the trunk a little more.
Last day of 2022 here. Time for the “end of the year” update on my Japanese Black Pine from seed project that I started back in 2018. The entire project progression can be seen here.
From the 150+ seedlings I started with I have 13 left. 8 in pond baskets/nursery containers and 5 growing in the ground. I sold all the rest over the past years.
Here are the ones that I have left in pond baskets/nursery containers:
#1 the Neagari project (exposed roots)
#2 Shohin candidate 1
#3 Shohin candidate 2
#4 Shohin candidate 3
#5 Shohin candidate 4
#6 Shohin candidate 5
#7 Shohin candidate 6
#8 Root-over-Rock (rock collected in the Austrian Alpes)
Well, it looks like I forgot to update about this batch for 3 years.
A lot has happened since then, I’ll just say it as it is, only 2 survived. I repotted them into bigger pots 2 years ago and for some reason all but 2 died. 1 was a broomstyle candidate and the other one was the little multi-trunk that struggled to survive the year before. I guess it’s will to live has only grow stronger.
Funny thing is that the broomstyle one that survived spent the entire year after repotting without leaves before leafing out the next spring. The other trees turned brown and dried out while this one stayed green but without leaves.
Anyway, here are a few pics of the 3 year old trees right after repotting and before dying.
The multi-trunk:
The broomstyle one that would survive:
The other ones that didn’t make it unfortunately:
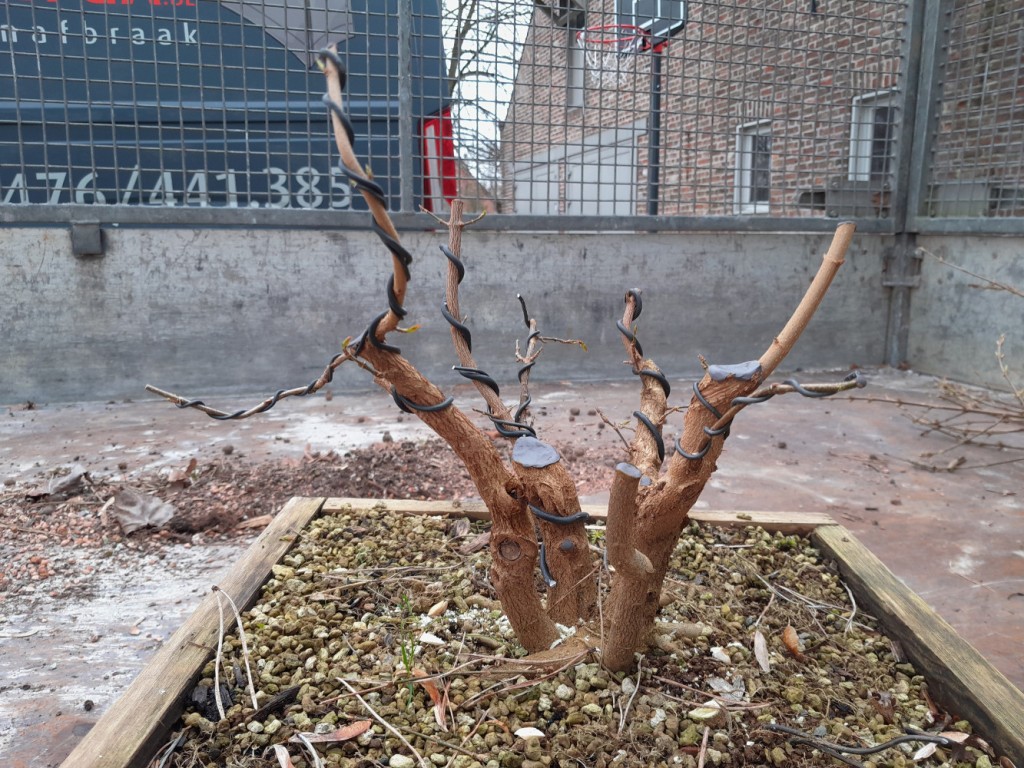
So today I gave the 2 survivors a haircut, I already cut off the sacrifice branch of the broomstyle one and pruned it’s branches before taking the picture. I know my picture taking skills aren’t improving either
Broomy and Multi:
Broomy before wiring the main branches:
Broomy after wiring and cleaning up some old wounds:
In a few months I will ground layer the broomstyle one to get a better nebari.
Multi-trunk grew well for 2 years so it has a 1 year lead on it’s brother who stayed without leaves for over a year.
Multi before wiring and pruning:
Multi after wiring and pruning:
As always pictures don’t do these trees justice but you get the general idea.
2 Years ago I started some cuttings from my Acer Arakawa bonsai. I used material from branches that I cut during it’s 1st styling. Here’s a picture of my arakawa, unfortunately I don’t have any pictures from the cuttings that I took.
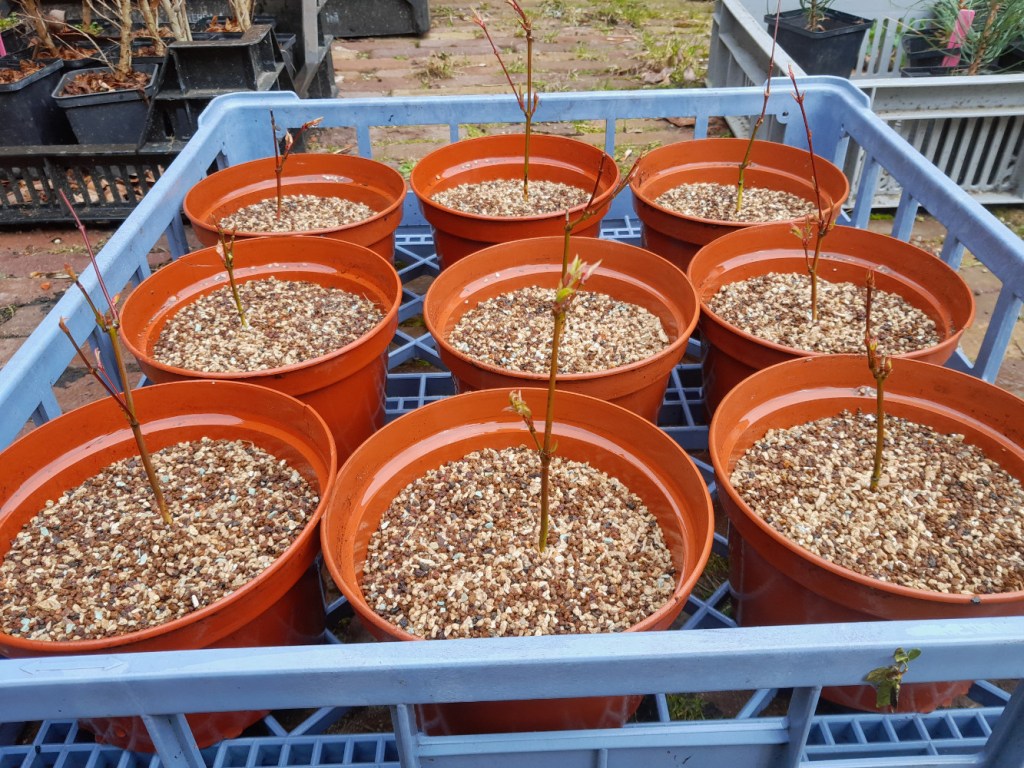
So now almost 2 years later it was time to put the acer arakawa cuttings that rooted into their own pot. I started with 20 or so and 9 develloped roots, not a bad ratio. The medium I used to root them in was pure perlite.
The batch that had to be repotted:
When I tried to remove the first one I noticed that I had used a fine screen mesh to cover the bottom of the propagation tray which caused the young roots to grow right trough the mesh. So it would take some surgery to remove the roots safely without damaging them.
A cutting with the roots grown through the screen mesh:
After cutting of a small piece of mesh I had to remove the last bit very carefully.
So after performing some delicate surgery I managed to get all the roots out relatively undamaged. The root spread on all but 1 of the was pretty decent.
So now it’s time to pot them up in their new container. Again I used some screen mesh to cover the bottom of the pots. The roots that will grow through it now I will be able to just cut off with the next repot.
I used a mixture (akadama, pumice, lava, zeolyte) of the smallest sieved bonsai soil that I got when sieving my bonsai substrate. I’m not using this for other purposes but for this application it will do just fine.
After potting them up I watered all of them extensively and now it’s just wait and see if they survive. Since it’s going to be freezing in the next few nights I will keep them inside (cold room) for now.
3 years ago I ground-layered an Acer Buergerianum that I put in a wooden growbox 4 years ago. Since that last post I kind of neglected the tree for almost 3 years. It just sat there in a corner of my garden getting watered together with the rest of the trees.
The plan was to remove the ground layer last year but for some reason that didn’t happen.
Today I finally found the time to see what had happened in those 3 years.
Ofcourse I forgot to take a picture before I started removing the screen mesh but anyway, here’s a picture right after I removed the screen mesh. It looks like some new roots grew…
Let’s look a little closer…
After removing the wooden growbox it’s obvious I can’t use it again, bottom was pretty rotten, just the way it should be.
After combing out most of the soil and cutting back the roots a great new nebari appeared, this was beyond my expectations. Like always the picture doesn’t do the real thing justice.
After potting up the tree it looked 10 times better than before. Now it’s time to start working the branches, but first I’ll let the poor thing recover for a while.
This is a fun project that I started 4 years ago. The progress can be watched here.
Since the plan is to keep the tree in it’s wooden growbox for 1 more year I figured it was a good idea to give it one more big cutback and let it grow freely for another year after that.
Before the work started the tree looked like this:
It grew really well last year.
After cutting back to the new leaders I ended up with this result:
View from above:
After some wiring and applying cut paste to the wounds the tree is ready to go into spring.
Now that the main trunk lines have been set I can repot it next year and start working on the branches.
A few years ago I bought a small batch of Acer Palmatum Shishigashiras and Deshojo from a grower in the Netherlands. They were all small plants recently grafted on regular palmatum rootstock. Last year I repotted them into larger containers so the trunks could thicken up.
Now it’s time to see if I can ground layer them so the ugly graft won’t be a problem anymore and hopefully we get a nice nebari.
I’m doing a test on one of them this year. If it works out ok I’ll do the rest of them next year.
Here’s the volunteer:
Notice the section where the shishigashira part is grafted on regular palmatum rootstock. This junction will always be visible.
So first thing I did was taking off the bark with a sharp knife where I want the new roots to grow. Always be sure that you take off enough bark so the wound won’t callus over. The roots will sprout (hopefully) above the part where the bark was taken off.
Next thing I removed all of the cambium layer so the nutrition flow from the roots to the leaves is interrupted and the tree will be forced to grow new roots above the wound.
When this is done I cut the bottom out of a small nursery container so it could be placed around the trunk.
Last thing to do is to take some sphagnum moss, make it wet and fill the small nursery container with it. Make sure there’s a good layer of wet moss above the wound so the roots can start growing in a moist environment.
Normally the new roots should have grown by september and it’s possible to remove the air layer. I usually wait until repotting season in early spring to remove the air (ground) layer. More on this next year
After talking to Jonas Dupuich from Bonsai Tonight and watching this awesome decandeling video from Eric Schrader I finally had the courage to make the first big cuts on some of my Japanese Black Pines that I’ve been growing from seed. They’re in their 6th year now.
The first one is my main candidate for a contest that’s running on BonsaiNut.
Here’s the last pic of the tree at full height.
Then the first cut came… 4 Years of growth gone in 1 second.
What is left over is what I was aiming at for the last 6 years. I also decandeled the new growth of this year and even a little of last year’s growth.
The second victim of today was my neagari or exposed root project.
And the same treatment for this one, away with the sacrifice branch and candles!
The last one for today was going to be a very tiny one in the end. I already positioned my concave cutter as you can see.
After decandeling not much of the original tree is left.
View from above.
Now it’s waiting for new buds to pop up on the branches that I decandeled.
I still have a few other trees left but I won’t be making big cuts on them this year, they can grow for at least another year. I will be decandeling the lowest branches.
Today it was time to remove the ground layer from the original rootball. The buds were starting to swell so the timing was right.
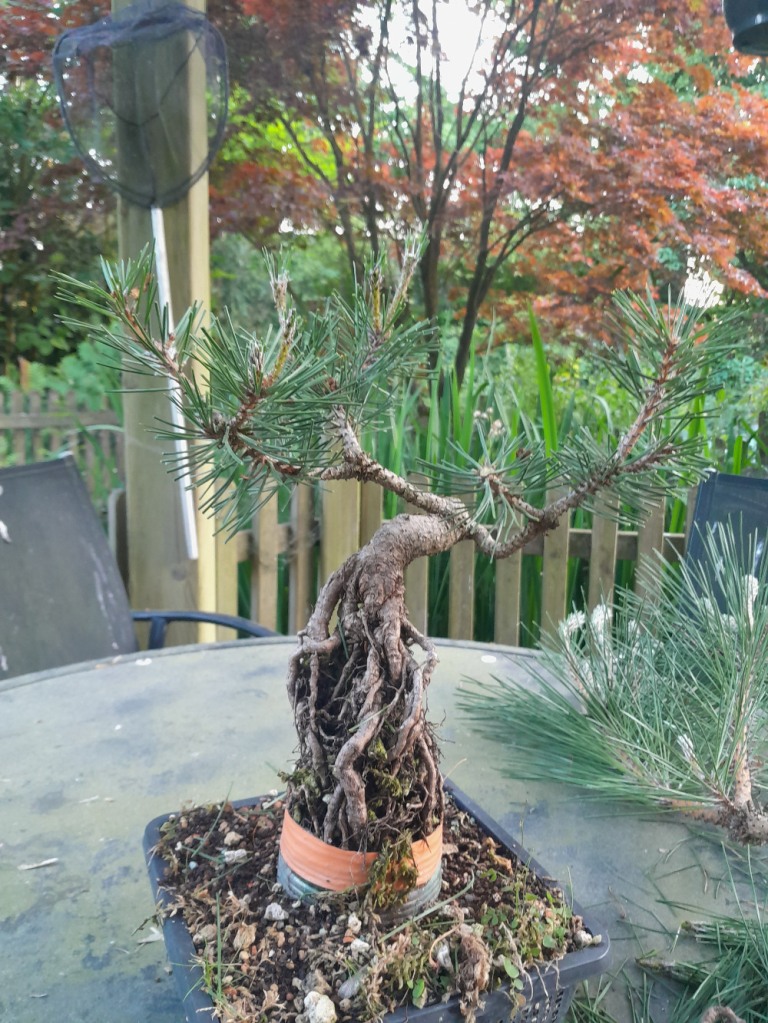
Here’s how the tree looked before I started working on it today:
Despite having the ground layer happening the tree grew pretty good this year. As you can see the buds are starting to swell:
I removed both ofthe pots from the tree. Where I put the little pot for the layer, roots are clearly visible, so that’s a good sign (to be honest, I checked if roots actually emerged above the cut that I made before removing the pot just to be sure the whole thing worked)
Lots of roots in the little pot!
Cheap as I am I will re-use the ground layer pot for the next one I will do.
Time to get out the big toys now. I used some big pruning scissors to cut the ground layer from the original rootball .
After removing the sphagnum moss the new roots became visible. The root spread was pretty good, I removed a few that were in the way of others that were better placed.
The new roots seen from above and below:
Now it was time to put the tree in a container, I made sure the roots were spread out evenly and horizontally for a better nebari.
All that remained was to fill the rest of the pot with some soil and water it thouroughly.
The tree is now on it’s own roots and not grafted on the acer palmatum root stock anymore. It will remain in this container for 2 years so it can recover the 1st year and get some strong growth next year. After that maybe a wooden growbox for some years.
Today it was time to remove the ground layer from the original rootball. The buds were starting to swell so the timing was right.
Here’s how the tree looked before I started working on it today:
Despite having the ground layer happening the tree grew pretty good this year. As you can see the buds are starting to swell:
I removed both ofthe pots from the tree. Where I put the little pot for the layer, roots are clearly visible, so that’s a good sign (to be honest, I checked if roots actually emerged above the cut that I made before removing the pot just to be sure the whole thing worked)
Lots of roots in the little pot!
Cheap as I am I will re-use the ground layer pot for the next one I will do.
Time to get out the big toys now. I used some big pruning scissors to cut the ground layer from the original rootball .
After removing the sphagnum moss the new roots became visible. The root spread was pretty good, I removed a few that were in the way of others that were better placed.
The new roots seen from above and below:
Now it was time to put the tree in a container, I made sure the roots were spread out evenly and horizontally for a better nebari.
All that remained was to fill the rest of the pot with some soil and water it thouroughly.
The tree is now on it’s own roots and not grafted on the acer palmatum root stock anymore. It will remain in this container for 2 years so it can recover the 1st year and get some strong growth next year. After that maybe a wooden growbox for some years.
So I was planning to repot my exposed roots style Pinus Thunberghii into a bonsai pot. I had 3 pot candidates. Not sure if I picked the right one but anyway, I picked one today
Here’s the tree after I pruned a few branches away before the repot.
The tree pots that I had to choose from where these ones:
The round one and the skull pot are pots made by Zoran Slavkovic. The natural rock looking one was made by Ginkgohatás pottery.
After combing out the roots I tried to fit the tree in all the pots.
This would be a winner if the pot was just a little bigger.
Not bad either, but the pot looks a bit too big this time.
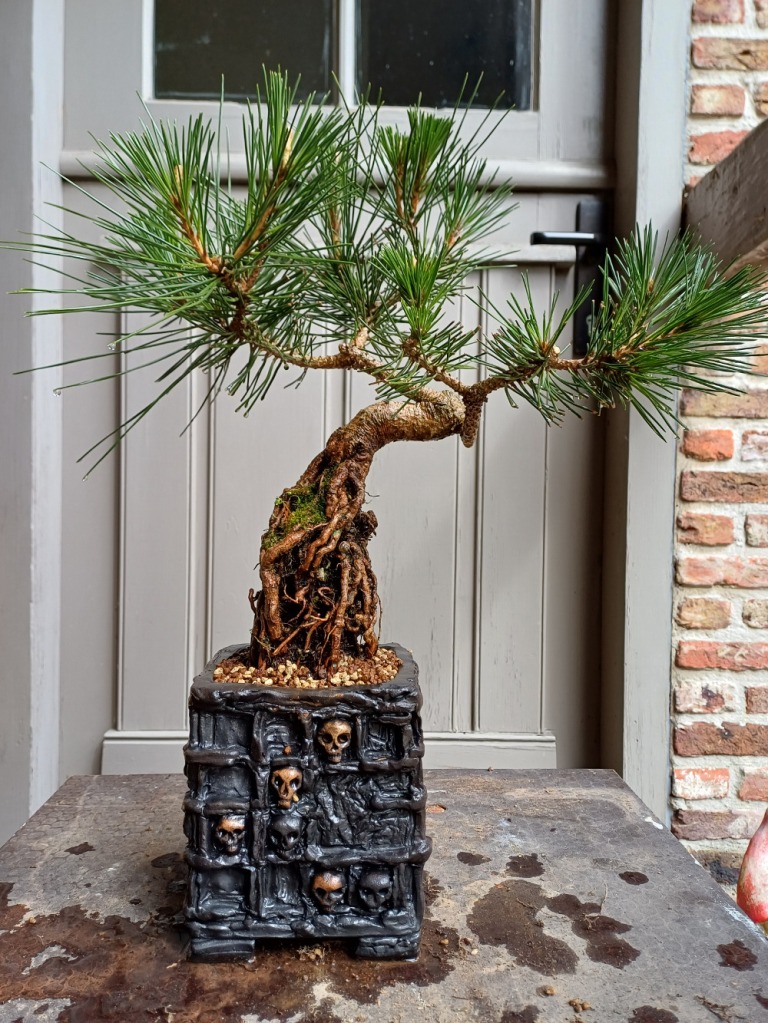
After loosening the roots a bit more the tree fits this pot and there should be enough space for new roots to grow. For now it’s good enough.
Let’s tie the tree nice and steady in the pot and fill everything with bonsai soil making sure there are no air pockets left between the roots.
A little close-up of the exposed roots.
There even was a visitor that survived the repotting
Now the tree can grow freely for the first few months, maybe in june I’ll do some decandeling but that’s yet to be seen.
So I was planning to repot my exposed roots style Pinus Thunberghii into a bonsai pot. I had 3 pot candidates. Not sure if I picked the right one but anyway, I picked one today
Here’s the tree after I pruned a few branches away before the repot.
The tree pots that I had to choose from where these ones:
The round one and the skull pot are pots made by Zoran Slavkovic. The natural rock looking one was made by Ginkgohatás pottery.
After combing out the roots I tried to fit the tree in all the pots.
This would be a winner if the pot was just a little bigger.
Not bad either, but the pot looks a bit too big this time.
After loosening the roots a bit more the tree fits this pot and there should be enough space for new roots to grow. For now it’s good enough.
Let’s tie the tree nice and steady in the pot and fill everything with bonsai soil making sure there are no air pockets left between the roots.
A little close-up of the exposed roots.
There even was a visitor that survived the repotting
Now the tree can grow freely for the first few months, maybe in june I’ll do some decandeling but that’s yet to be seen.
3 Years ago I started a batch of Japanese Red Pines or Pinus Densiflora from seed. Unfortunately I didn’t have pics of them until now.
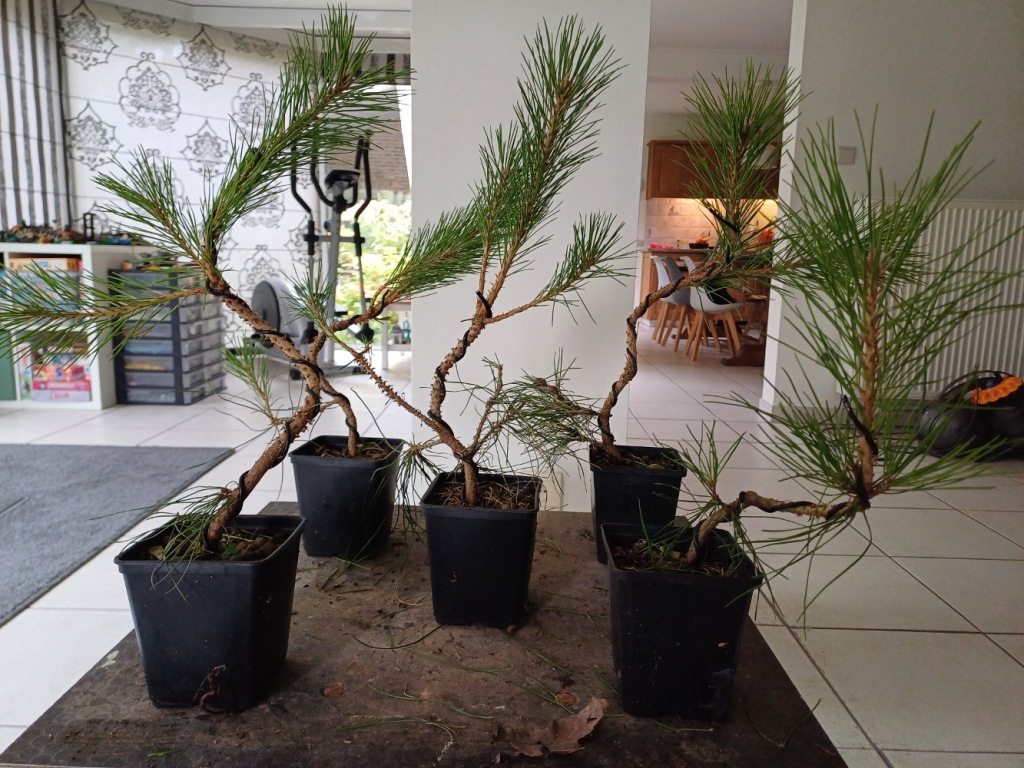
I started out with 40 but sold most of them and kept the 5 most promising ones. Since Japanese Red Pines (JRP) are very suited for making literati bonsai I decided to go that way.
Here’s how they looked after growing freely for the first 3 years.
For easy wiring I removed the 2 and 3 year old needles first. After that I wired the trunk all the way up to this years new shoots and put some interesting bends in the trunks.
It’s important to do this while they are young because it’s much easier and safer to make these kind of bends now.
Here’s how they look now.
Now they can grow until the beginning of next year and hopefuly they get their second flush this year. Next spring I’ll repot them into pond baskets so they have a bit more space for the roots to develop.
3 Years ago I started a batch of Japanese Red Pines or Pinus Densiflora from seed. Unfortunately I didn’t have pics of them until now.
I started out with 40 but sold most of them and kept the 5 most promising ones. Since Japanese Red Pines (JRP) are very suited for making literati bonsai I decided to go that way.
Here’s how they looked after growing freely for the first 3 years.
For easy wiring I removed the 2 and 3 year old needles first. After that I wired the trunk all the way up to this years new shoots and put some interesting bends in the trunks.
It’s important to do this while they are young because it’s much easier and safer to make these kind of bends now.
Here’s how they look now.
Now they can grow until the beginning of next year and hopefuly they get their second flush this year. Next spring I’ll repot them into pond baskets so they have a bit more space for the roots to develop.
Last weekend Sakka Kyookai Europe held it’s bi-annual bonsai exhibition in a castle in the beautiful old town of Soave in Italy. Myself and a few other members of Kei Bonsai Kai (Belgium) attended the meeting and we took 4 trees with us to put on display there. Some of the best trees from Italy, Switzerland, Austria and Belgium made this show really great. (Too bad I’m not a professional photographer.)
The Venue:
Soave, Verona Italy with the castle in the background.The entrance of the Sakka Ten
Now 5 years into the development of the tree I thought it was time to make yet another post about turning a sappling into a somewhat presentable bonsai.
Somewhere along the way I entered a little contest on Bonsai Nut, world’s leading bonsai forum. The idea of this contest was to take an undeveloped tree native to your environment and grow it out towards great bonsainess as much as possible in a period of 5 years. At the end of those 5 years the tree has to be presented in a bonsai pot made by a local bonsai potter.
So that’s why the tree below is already in a bonsai pot.
Anyway, let’s have a look at what happend in the last 3 years.
The picture above shows how the tree looked at the end of 2023. The picture below show how it looked after I removed the leaves and cut off the sacrificial branch.
In spring 2024 the tree was repotted in a nanban bonsai pot made by Black Pigeon Pottery in Belgium. The reason I repotted it 2 years before the end of the contest is that the tree could settle in the pot the first year and then grow some more ramification the year after.
A nice looking nanban pot all prepared and ready to put the tree in.
Once the future Quercus Robur bonsai was pulled from the wooden growbox a very nice root system showed itself. I must have done something right. After trimming the roots so it would fit in the bonsai pot it looked like shown in the picture above.
Below is a close-up of the roots.
Next step was putting the tree in the pot and securing it so it wouldn’t move in the pot and break of the new roots that way.
Et voila! Adding some moss to the freshly repotted tree helps with protecting the surface and roots. Just keep the birds away from it.
So that was spring 2024. Now let’s jump to today, the end of 2025. The tree did good in the bonsai pot and gained some ramification. Although far from being a bonsai it is showing some good progress.
Above the English oak bonsai as it looks now (December 2025). As always the picture doesn’t show how the tree looks in 3D which is way better than you can see here, but you have an idea now.
Below is a closer look of the lower part of the trunk and nebari.
I took some pictures for the contest while it’s still in the small nanban bonsai pot but in spring I will repot it in a slightly larger pot so the tree can gain some more strength and grow out a bit more vigorously.