Normal view

Received before yesterday Graham Potter | Kaizen Bonsai Blog

Bonsai Repotting Adventures

12 March 2024 at 16:50

Bonsai Repotting Adventures

This time of year we are always insanely busy. It gets to the stage where we judge our output each day by weight rather than order numbers. A bad day is currently about 500kg of goods but we have shipped over 1200kg on our better days this year. For an old man and his son-in-law that’s a lot of graft. Currently work has ground to a crawl as we have been let down by a supplier and so I thought I would take the opportunity to share some of my most recent Bonsai Repotting Adventures.

Regular visitors to this blog might have noticed that for 14 years i’ve spent this time of year ranting and raving about why I think most folk are re-potting bonsai both too early and too often. Whilst I realise this is good for our business it’s far from ideal for bonsai and there are many things much more important than the few quid we earn supplying ‘Bonsai Soil Products‘ to our lovely customers. Rather than spend my time fussing over what everyone else may or may not be doing I thought I would share some of my own recent bonsai re-potting adventures.

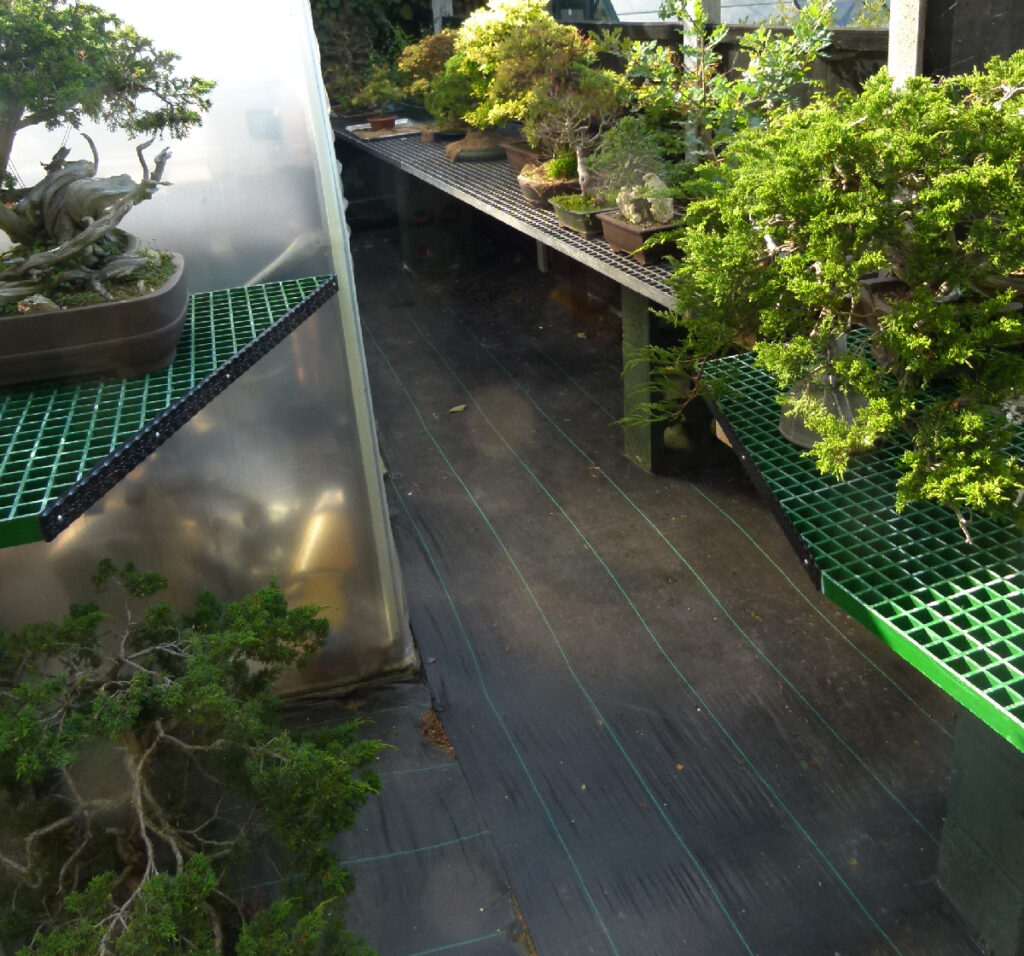
We have had an incredibly mild winter and that’s a GOOD thing by and large. 2023 was one of the worst years for cultivating bonsai that a can remember and I have a LOT of those behind me these days. As in most years I have filled my greenhouse with a huge number and variety of trees, primarily for protection from wet. A long mild wet British winter can be very detrimental to bonsai in a number of ways. Whilst most folk are worried about root rot and the like most hardy varieties in good condition can deal with wet feet. My own concern is more related to the degradation of deadwood and bark quality. A dry winter under cover makes a massive difference to these oft overlooked elements. Protection from howling north-easterly onshore winds that affect us out here on the east coast is also very important especially to finely ramified trees like elm varieties.

The downside of putting plants inside is that they will begin growing much sooner than those left outside. This can cause problems when temperatures begin to rise. A couple of days ago my greenhouse hit 25 degrees Celsius whilst outside it was 9. This means plants flush much earlier but once early summer gets here indoor temperatures are too high for some species like maples. A sunny day in May can easily see the mercury blast over 50C whilst it’s barely 15C outside. As soon as my trees buds begin to open they go outside unless my intention is to keep them in for the entire growing season. These things can get complicated but used wisely a greenhouse can add several weeks to our meagre growing season.

There is a simple rule to follow that ensures optimum timing for re-potting bonsai. I covered that in some detail in an earlier post When To Repot Bonsai.

These days I have largely stopped trading bonsai trees and concentrate on doing my own work and my own bonsai. Everything’s always for sale apparently but you’ll have to speak to Catherine about that 😉 Previously we were just pouring trees out the door and to a greater extent my bonsai activities became little more than a job running a production line. To some extent I lost my soul doing that but now it’s stopped and thanks to some hard work with my mentor Kevin Willson i’m back doing my own thing, not just producing a commodity to sell and I like it.

So, here are a few images of trees I have worked in the last week with hints and tips I thought ya’ll might like to see…..

Japanese Maple

First up a Japanese maple I bought a year ago. Whenever I bring in a new tree I leave it alone for the first season to get a measure of it’s vigour and general condition before I go blundering in unsighted. This little guy was unusually almost too vigorous as can be seen by the ugly coarse growth. This tree needs slowing down a bit which almost never happens especially in such a small pot.

The great thing about Japanese bonsai is that you get a good root system and a nice well prepared flat base to the trunk which makes repotting a doddle. As it turned out this tree was mostly planted in massive coarse Lapillo. A very bad choice in this case for such a small shallow pot where it can hinder fine root ramification and reduce root volume. The grains were mostly the size of marbles and above.

Now planted in pure Akadama graded to about 4mm and with the old soil cleaned right back onto the trunk base this tree should gradually come back into a sensible equilibrium. In time work can begin in developing appropriate ramification and refinement. There’s many years to go on this journey.

Japanese maple I bought a year ago.

Japanese maple I bought a year ago.

Japanese maple bonsai cleaned out and root pruned.

Japanese trees tend to have beautiful flat trunk bases because the folk that produce them know what they are doing.

Repotting bonsai like this is a joy!

A good water and then I have to wait until summer before work can continue on this one.

Korean Hornbeam

This lovely old tree came from a collection I bought a few years ago. It sold instantly and the new owner put it in this large plastic pot. These hornbeams grow very slowly in Blighty and restoring one like this is the work of many years. Repotting is not something that needs doing very often but when this tree came back to me last year I decided to clean it out to and make sure I have the most vibrant root system possible. A little prune, a little wire and a bag of our Premium Bonsai Compost No1 along with an old Chinese pot guaranteed to wind up somebody and we’re good to go.

Korean hornbeam in restoration.

Field Elm

Imported from Italy back when such things were easy. This big lump was a cheap and cheerful buy I intended to flip quickly. When it arrived in a plastic tub it had almost no branches. Last year I repotted and cut the base of the trunk nice and flat. A year later it was lifting itself out of the pot. In order to keep elm developing quickly I tend to repot every year simply because these trees make so much root and if they get pot bound they have a habit of dropping branches in my experience.

Italian field elm in for some TLC.

Root growth after 1 year, it’s solid.

Experimental soil mix.

Flat base thanks to previous surgery.

A reciprocating saw makes light work of reducing the roots. This took about a quarter hour.

I don’t have a front for this yet and no styling work has been done.

Anyone want to choose a side?

Dwarf Japanese Maple

Japanese maple tend to be one of the first trees to break cover at the end of winter and of those some of the first will be the dwarf forms like katsura or in this case what I assume it kiyohime. This tree came from a collection I bought a year ago. It looks to me like this is one branch of what was a larger tree once upon a time. Kiyohime are basally dominant and when not cared for correctly often the tops die out in whole or part. I can’t say that’s what happened here but I would wager a hefty sum it did. There was a lot of die back when it turned up.

Not repotted in decades the first job is to get it out of that pot. A rubber mallet was pressed into service and just before I worked up a sweat it all parted company. Once out I found an interesting hack to ensure the pot was not going to become waterlogged, it did come from the north-west. Either that or someone was trying hard to save a bit of soil.

The tree was planted either in John Innes No2 or garden soil. Hard to say but at least it cleaned out easily enough. I did spend some time last season giving this little tree some TLC and it’s vigour improved significantly so a drastic root prune this year is safe enough to complete. Now in a new more appropriate training pot this will grow like a weed this year. A big pot is not always a good idea and in this case a smaller pot full of vibrant root will produce better results than that other big blue fence post.

Japanese maple, likely kiyohime. Not repotted for decades.

Perfect timing for a repot. A week later it was in full leaf.

Interesting use of a little pond basket. Anyone like to hazard a guess what it’s doing there?

Garden soil / John Innes was de riguere in the 1980s.

In 2024 we have better soil options for bonsai cultivation.

Not 100% cleaned but most of this lump is solid wood.

Far from bonsai but at least it has a chance now and hopefully the die back will stop.

Chinese Elm

I make no secret about my love of Chinese elm, one of the finest deciduous species in bonsai. Trees like this one (less the rock etc’) are actually sold as bonsai in this country but they are very far from that being an appropriate moniker. However I have proven again and again just how quickly they can be developed into significant bonsai. So I put this one on/in this water worn limestone. I know it’s currently shit but I did make this one out of an identical type of elm about 6 years ago.

A bargain bin elm and 6 years of skillage.

I know right! We’ll come back to this one at a later date.

Privet Cutting

This silly bit of privet stump clutters up my bench and has done for a long time now. I really can’t be assed to style it so it gets the hedge treatment. For those of you that follow my work this may be familiar from the daft video I did a while back.

No doubt i’ll regret this little pot come summer but for now this odd little stump displays a certain character.

English Elm

Ulmus procera are everywhere, easy to find and collect. Over the years I have had hundreds and hundreds of these beautiful elms. However I have never seen one quite as nuts as this one. I gave it a first style last year and murdered the roots but it grew happily all summer. Now allied with the crappiest pot I could find. Not one for the purists….. like I care!

Privet Bonsai

Over the last 35 years I have owned literally hundreds of privets and a lot of them have gone on to become well know and important bonsai. Trouble is I never kept one for myself. I blagged this one from the garden of a mate a few years ago as a bare stump we jacked out of his hedge. It was potted properly about 4-5 years ago when the base was cut dead flat. To be honest I could not really figure out what to do with it and was too busy and preoccupied to care so it languished outside in a corner whilst the deadwood rotted away (that’s a good thing).

So recently I thought it was time to buck up my ideas and sort it out. I intended to make a video of the work but by the time I figured out what to do we were too busy so it’ll have to wait. I have been looking at this for years now and just could not solve the puzzle. In the end I photographed it from every angle. Then with a little chemical help from my friend Jack Daniels and a good herf the answer fell into my lap whilst flicking through those images. I can’t recommend substance abuse as a bonafide bonsai technique but we all have to walk our own path despite what anyone thinks.

Because I have neglected the tree for a long time now repotting was extremely overdue. In general privets should be repotted every year because they make so much root and sulk badly when pot bound. I got fed up trying to water this last summer and so a repot just had to be done. However the rootball was so compacted even a reciprocating saw was not going to sort this one out so I turned to my special root pruner.

Maybe I can shoot my movie in the autumn. In the meantime I would welcome your opinions. Answers on a postcard as they used to say. It won’t change my mind, I already know what this tree will become but it’s interesting to know what ya’ll think.

Privet overdue for styling but most bonsai benefit from us leaving them alone.

At one time this was the ‘front’. Sometimes we have to leave our ideas at the door and bring an open mind. At least 4-5 years since it was last repotted.

Absolutely solid root mass. There’s no way to rake this out in the conventional way.

Root pruning the easy way. I do know what lies beneath so this is perfectly safe, quick and fun.

Bonsai root pruning sorted!

Anyone need a door mat?

Ready to go back in it’s pot.

Work completed, this is the other side. We’ll come back to this one later in the year.

The post Bonsai Repotting Adventures appeared first on Graham Potter | Kaizen Bonsai Blog.

Lime Sulphur – A Miracle Solution

29 January 2025 at 11:22

Most people involved in bonsai for any period of time will likely be familiar with Lime Sulphur. It’s that grubby little bottle of stinky red stuff in the bottom of your tool bag that’s used to preserve and colour deadwood and dissolve little paintbrushes. Doing that particular chore is on nobody’s wish list. BUT did you know that little bottle contains a miracle solution that can significantly raise your bonsai game? Lime sulphur has a huge number of uses and solves a significant number of pernicious problems faced by growers. From pest control to fertiliser, Lime Sulphur is remarkable. So, please give me a few minutes and let’s learn something!

Lime Sulphur - A Miracle Solution

Lime Sulphur – A Miracle Solution – Eradicant, disinfectant & fertiliser! Who knew?


What is Lime Sulphur?

There are a lot of ‘old wives tales’ out there concerning Lime Sulphur. Forget all that, let’s take a look at the facts.

Lime Sulphur is a red liquid with a distinctive rotten egg smell that’s soluble in water. Lime sulphur is used primarily to control pests and disease in horticulture. It’s a saturated aqueous solution of calcium polysulphides, and its use is accepted and approved in organic cultivation in both the UK and EU. Lime sulphur is made by reacting together sulphur and lime in water.

Lime Sulphur - A Miracle Solution

Lime Sulphur is a red liquid with a distinctive rotten egg smell that’s soluble in water.

Lime sulphur is alkaline with a typical pH of 10.5-11.5 so it’s considered caustic or corrosive, to put that into perspective, it’s alkalinity is somewhere between milk of magnesia at pH10.5 and many household cleaners that have a pH between 11-13. It has to be handled very carefully due to fumes that are hazardous but beyond that it’s a fairly safe product to use.


A Fascinating History.

Lime sulphur is believed to be the earliest synthetic (man made) chemical used as a pesticide sometime around the 1840s in France to control grape vine powdery mildew, which had been introduced from the USA in 1845 and reduced wine production by 80%. In 1886 it was first used in California to control San Jose scale and peach leaf curl.

Lime Sulphur - A Miracle Solution

Today many chemicals have been banned, folk are discovering many of the old ways again. Old timers knew a thing or two!

Commencing around 1904, commercial suppliers began to manufacture lime sulphur; prior to that time, growers were expected to manufacture their own. By the 1920s essentially all commercial orchards in western countries were protected by regular spraying with lime sulphur. However by the 1940s, lime sulphur began to be replaced by synthetic fungicides which risked less damage to the crop’s foliage. With hindsight we know that was something of a mistake. Now many of those chemicals have been banned folk are discovering many of the old ways again. Lime sulphur is an effective, safe and sustainable product when used correctly and wisely.

Lime Sulphur – How It Works.

Lime Sulphur is an agent of eradication, a substance that destroys a parasitic organism or infection at the point of contact (i.e. not systemic) and has been used in horticulture for centuries due to its fungicidal and insecticidal properties. Lime Sulphur is highly effective against a range of pests and diseases, making it a valuable tool in the arsenal of growers.

Lime sulphur breaks down after it’s applied, releasing valuable plant nutrients. The sulphur dioxide is the main element that’s toxic to insects and fungi, and it eradicates them through direct contact or through fumigation which can work from a slight distance. In simple terms sulphur is absorbed by insects and it interferes with their ability to create energy, it also releases hydrogen sulphide gas (smells of rotten egg) which poisons them. It is toxic to insects and mites due to hydrogen sulphide formed through reaction of the polysulphide components with water and carbon dioxide, or put more simply, lime sulphur reacts with the atmosphere to produce hydrogen sulphide which poisons the pests.

A short time after application lime sulphur breaks down into it’s constituent parts of lime and sulphur. The hydrogen sulphide quickly dissipates and what’s left are two extremely valuable plant nutrients in the form of ……lime and sulphur. More on that later.

Lime Sulphur can be used in the UK and EU as a fungicide, insecticide and miticide. This includes organic crops. As covered in EU Regulations (EC) No 889/2008.

Is Lime Sulphur Safe to Use?

In a word…..no. However all manner of everyday products aren’t safe either but used correctly the dangers are minimal. There’s a tin of Brasso in the office, it’s great for cleaning metals but were I to drink it or pour it into my ear daily it’s almost certainly hazardous to my health. Same with bleach, fertilisers, fuels, glue and even some food products, my dad recons my home made hot sauce is extremely dangerous! We live in the age of overbearing ‘health & safety’ rules which might lead one to believe even being in the same building as a chemical could be injurious. We need to be sensible, take suitable precautions and all will be well.

If lime sulphur were 100% safe it would be useless. Taking simple precautions will ensure complete safety for the user whilst successfully achieving the desired result. It has to be handled very carefully due to fumes that are hazardous. But, Lime Sulphur is an extremely effective tool for pest and disease management and presents minimum risk to the user.

Lime Sulphur - A Miracle Solution

Lime Sulphur is safe to use but do take appropriate safety measures. 🙂

It is essential that you follow the proper safety precautions listed on the label when using Lime Sulphur, including wearing protective gloves, goggles, and a FFP3 type B filter mask. As part of its action, Lime Sulphur releases hydrogen sulphide gas which smells of rotten eggs and is hazardous to humans. So only use in well ventilated areas.

A few hours after application Lime Sulphur will be fully reacted and is no longer hazardous. It actually converts into plant-available nutrients (calcium and sulphur). As Lime Sulphur has a non-residual action, and is composed of simple chemicals, it can be used in organic growing and has no detrimental long term environmental impact.

Lime sulphur should be kept well away from the aquatic environment, children, animals and anything else you do not want to kill. When spraying always work outside and try to stand upwind to avoid being covered in overspray or breathing vapours. Spray yourself then walk in the house and the consequences may well be dire if your other half is home! Fortunately lime sulphur washes out of clothes easily but skin contamination may take a day or two to dissipate completely.

Whilst it feels redundant to point out the following I have seen folk do all of these things. Keep lime sulphur off your skin or it’ll smell for a couple of days which is both embarrassing and detrimental to marital harmony. Keep out of your eyes, splashes will sting like hell, irrigate with lots of clean water. Avoid exposure to fumes, these can sting eyes and should not be inhaled. Do not rinse used brushes in your tea or drink. Lime sulphur, being alkaline would react with stomach acid releasing that sulphur dioxide and could end in a Mr Creosote type scenario.

Lime sulphur reacts with strong acids. NEVER MIX WITH ANYTHING OTHER THAN CLEAN TAP WATER.

Due to its high sulphur content, Lime Sulphur has a strong odour but this quickly disperses. When using in glasshouses or covered areas, ensure adequate ventilation. Store in a cool dry place, away from heat and free from freezing. Keep sealed in it’s original container and secured away from unauthorised users, children, wildlife and pets. STORE AWAY FROM ACIDS.

Always source Lime Sulphur from a reputable supplier. Home made products are just too variable to be considered safe especially when treating expensive bonsai trees. Just don’t take the risk on a cheap bottle your mate whipped up in his backyard or you found on an auction site.

Good Lime sulphur can last for up to five years if stored properly in a quality container, but it’s best to use it within two years. Use diluted solutions immediately. An old, out of date or contaminated product may be suitable for painting onto bonsai deadwood but do not use for treating plant P&D (pest & disease).

So, enough of all this health and safety, what can Lime Sulphur actually do?

Pest and Disease Control with Lime Sulphur

Most bonsai folk will be familiar with the use of lime sulphur to winter wash. Winter washing is the process of spraying dormant leafless trees in late winter to eradicate fungi and pests that may be hiding in the bark and branches. These often emerge as the weather warms up and cause problems. However as I mentioned at the top, lime sulphur has a lot more to offer.

Lime sulphur can be used to control a range of fungal diseases including Black Spot, Powdery Mildew, Peach Leaf Curl, Rust, Shot Hole and most root zone fungal rots. Lime sulphur can also be used to control most insect infestations including Vine weevils, Scale insects, Mites, Saw fly larvae and Caterpillars, Spider mites and Spiders, Aphids, Thrips, Leatherjackets and most anything else that walks or crawls.

Lime sulphur is generally considered safe for bees so long as direct contact is avoided. Avoid contact with bees by spraying during the dormant season or when it’s too cold (typically below 12 Celsius) for bees to be flying. When application is required during the growing season take precautions to avoid bee contact for 24 hours by putting sprayed plants into a closed greenhouse overnight or covering with horticultural fleece. Once the spray has completely dried on the plant it will be safe for bees. Avoid spraying when plants are in flower, it’ll achieve very little and will also discolour and spoil blooms. Never spray Lime Sulphur when it’s hot.

In bonsai Lime sulphur is primarily used as a treatment for the preservation of deadwood. This is achieved thanks to the deposition of sulphur deposits which prevent fungal growth that causes rot. The whitening effect is a secondary benefit resulting from the residual lime within the solution. Lime has good disinfectant properties and will destroy many bacteria and fungi.

How To Use Lime Sulphur –

Preserving Bonsai Deadwood

A simple task but as always there are some tricks of the trade that will significantly improve results. For this task Lime sulphur is used neat, decant from the bottle and don’t put dirty solution back into the bottle or it will contaminate the remainder.

Lime Sulphur is best applied to dried/seasoned and oxidised wood. Recently carved green wood is best left for a year to dry out completely before the first application. Applying to freshly cut wood gives the solution almost no chance to penetrate the surface because of moisture or sap still present. In time the residual lime will begin to flake.

Preserve bonsai deadwood at least once a year, or ideally twice, once in autumn before the winter wet arrives and again in mid-summer when the wood should typically be at its driest (internally) thus ensuring good penetration into the surface.

Applying lime sulphur is simple. All you have to do is very lightly damp the woods surface with a mist spray of water and then apply sparingly with a brush. Don’t apply to wood whose surface is completely dry as it will endeavour to just bounce off. Once finished you will need to allow the product to dry naturally in a protected spot for 24 hours. This ensures the sulphur fully penetrates the wood before rain has a chance to carry it away. Once weathered the wood will become whiter and look very natural.

To learn more about preserving bonsai deadwood see Graham’s article – Preserving Bonsai Deadwood

Winter Washing With Lime Sulphur

Winter washing will significantly help in the control of many fungal and pest problems later in the growing season. Issues like peach leaf curl (seen on many fruiting varieties like blackthorn), elm leaf and other forms of gall and powdery and sooty mildew as often seen on oaks cannot be treated once symptoms are visible. Often visible effects are consequential symptoms of an already active disease or pest. Using Lime Sulphur during the cold weather before pathogens become active is extremely effective.

Lime Sulphur - A Miracle Solution

Don’t use Lime Sulphur for this type of winter washing!

Winter washing is generally associated with deciduous trees, particularly fruiting varieties but the technique is extremely effective at controlling problems suffered by evergreen varieties too. Over the years I have had personal experience of stubborn pest issues like sooty mildews, scale insects and other pernicious pests that, ultimately were all eradicated permanently by winter washing with Lime Sulphur.

Winter washing is a simple and safe process that requires spraying plants with diluted Lime Sulphur. However some precautions have to be taken to make the process safe and effective. First up, personal safety as mentioned above. An old overcoat, hat and hanky around the face might have been ok for your grandad but let’s up our game a little folk. I have been in serious trouble at home for stinking the house out and spent nights on the sofa.

In the UK winter washing is typically done around late February time. Washing too early may reduce the effectiveness. We want to wash as close to spring as we can but too late can cause problems for embryonic leaves as bud scales crack open. If that happens it’s too late and the opportunity has passed. Timing will vary according to local conditions and being a little too early is better than missing the chance by waiting too long.

Use a horticultural pressure spraying device to apply Lime Sulphur winter wash. A trigger spray will not produce an even and effective cover. It only takes a small spot of untreated bark to allow pests to survive. Use a fine misting spray and cover every part of the plant by spraying from above, beneath and both sides, including any deadwood or jin. Spray until the bark is evenly wet but avoid too much run off. Winter washing solution is stronger than that used for soil treatment so try to avoid too much solution running into the rootball though a little will not cause any problem.

Lime sulphur can temporarily discolour or stain some types of pot used in bonsai. Unglazed pots are particularly at risk but many older valuable and antique pots can be marked or permanently stained. Personally I use an old large bath towel that’s slightly damp. This is curled around the base of the trunk so it covers soil and pot in one go prior to spraying.

Evergreen plants are treated in much the same way though I personally tend to avoid soaking the entire foliage. I have found spraying the trunk then spraying branches from beneath is sufficient. Hydrogen sulphide gas is effective at a little distance and the evergreen canopy of foliage will help to retain this for a very short period that seems to be sufficient to get the job done.

After winter washing is complete allow the plant to dry naturally. If rain is expected plants should be placed under cover, like an open greenhouse and allowed to dry. Once the plant is fully dry it will have a ghostly grey appearance, when you see this the plant is safe to place back outside this is typically about 24 hours. After a couple weeks of exposure to the elements the grey colour will magically vanish along with the pests.

Dilution rates for winter washing with Lime Sulphur –

  • Deciduous trees without leaves  –  Mix 30 ml of neat undiluted lime sulphur per litre of clean water. (1:33 solution)
  • Evergreen coniferous trees  –   Mix 20 ml of neat undiluted lime sulphur per litre of clean water. (1:50 solution)
  • Stronger solutions are possible but over the years I have found the above rates of dilution get the job done in almost every circumstance.

Vine Weevil Control Using Lime Sulphur

Vine weevils are literally everywhere these days. Personally I don’t loose any sleep over the little critters but I know a lot of folk do. I am constantly asked for a solution which up until now has entirely centred around the use of Provado whose availability seems patchy, there are a couple of other similar chemicals available. These are typically systemic action products that are extremely effective. However at £12-15 a pop this is going to cost a great deal to treat a half decent bonsai collection.

Lime Sulphur - A Miracle Solution

Mature vine weevil beetle are hard to control because they move around a lot.

Lime Sulphur - A Miracle Solution

Immature larvae develop within the confines of the soil so are easy to get at with Lime Sulphur treatments.

Many folk swear by vine weevil control using nematodes but seeing as I have no personal experience I’ll not run up that particular tree.

If you need a quick, cheap and 100% effective solution for controlling vine weevils and other soil borne pests from leather jackets to wire worms look no further than our little red bottle of Lime Sulphur. I must admit this freaked me out when I first heard it yonks ago but it works and it’s safe!

Vine weevils are small beetles that pose a threat to a wide range of ornamental plants, fruit trees, and vegetables. They are especially problematic during their larval stage, as the grubs feed on the roots of plants, causing significant damage and even death in severe cases (unlikely where trees are concerned). Adult vine weevils, characterised by their dark brown or black colour and distinctive “elephant snout” appearance, feed on leaves, leaving unsightly notches. Fortunately the beetles don’t fly, they walk, and they walk all over the place so controlling them is largely out of the question but the grubs stay put and are easy to get at.

So for vine weevil control using Lime Sulphur we are going to prepare a root drench for application when plants are fully dormant. First up we need to mix a solution of 25ml neat Lime Sulphur per litre of clean tap water (1:40 solution). Pour the diluted Lime Sulphur solution slowly and evenly over the infested soil (which needs to be a little on the wet side of damp prior to treatment) making sure to thoroughly wet the entire root zone. The solution works by releasing hydrogen sulphide gas which sterilises the soil, killing any vine weevil eggs, larvae, or adults present. It also helps in preventing fungal and bacterial diseases that can further weaken the plants.

Treatment in autumn should eradicate grubs and eggs laid over the previous summer. If your plants continue to suffer from Vine Weevil after two treatments, fortnights apart, you can increase the dose rate to 30 or 40 ml of Lime Sulphur per litre of tap water, however, the compost must be wet already, and sensitive or active plant roots may also be harmed by higher doses than this. There are a very few plants that are sensitive to sulphur, these should not be treated, do a little research ahead of time.

Root Drench Treatment Using Lime Sulphur

A root drench is often used to treat either pest or fungal problems hidden within the soil. Personally I have used this technique to control persistent pests like root aphid which can be a pernicious critter that severely weakens the plant it infests. This is also a useful technique to help get on top of hard to eradicate fungal problems like black spot, sooty and powdery mildews and the like. Many of these survive the winter via spores in the soil.

Use a simple solution of 15/20ml per litre of clean tap water and flood or dunk pots, again the soil needs to be a little damp to slightly wet prior to drench. Do this either in autumn once the weather turns cold or in late winter before dormancy breaks.

The best part of using Lime Sulphur for root protection? After a few hours, diluted Lime Sulphur will be fully reacted and is no longer hazardous. It actually converts into plant-available nutrients (calcium and sulphur). As Lime Sulphur has a non-residual action, and is composed of simple chemicals, it can be used in organic growing. Bonsai often suffer from a lack of sulphur which shows as yellowing of young foliage, often mistaken for a nitrogen deficiency.  Lime Sulphur will also combat over acidification of the root mass, a common problem in soft water areas or where large amounts of organic fertiliser are used over extended periods.

If using lime sulphur as a root drench bothers you, and it did me for some time I would recommend using a very weak solution at around 10ml per litre, this can be extremely efficient at preventing problems arising in the first place. This rate is also good for sterilising soil and killing pathogens if you are using any form of recycled soil or material coming from a compost heap or some such.

Scale Insect Treatment Using Lime Sulphur

By far the most difficult and problematic pest issue to afflict bonsai trees has to be scale insect (scale and mealy bug are in the same family). Often this nasty pest goes unnoticed. I remember a lad who came to a workshop a few years ago with a little tree and was telling me how it had amazing bark quality. He was crestfallen when I shew him that crusty appearance was in fact a complete and utter covering of scale unlike anything I have ever seen.

Lime Sulphur - A Miracle Solution

Scale insects that infect bonsai trees can be hard to eradicate but, Lime Sulphur works a treat.

Scale insects belong to the family Coccoidea and are known for their protective, scale-like coverings that shield them from predators and harsh environmental conditions. These tiny pests come in various shapes, sizes, and colours, but they all have one thing in common: they feed on plant sap. Scale insects attach themselves to the stems, foliage, and branches of plants, depriving them of vital nutrients and weakening their overall health.

These pernicious creatures do a lot of damage to most varieties used in bonsai from pines to maples. There seem to be some very specialised types of scale that are hard to recognise, like juniper scale that appears as tiny white spots among the foliage. I’m not here to discuss the unpleasant world of scale but other than physical removal with a brush and methylated spirit (effective to a degree) no commercial preparation I have found will even touch them but…….

If you need to control scale when they are inside their hard shells then a good option is to apply diluted Lime Sulphur. This will act as a fumigant. Lime Sulphur works all year round, so can be applied when the plant is dormant and so there is no risk of scorch damage to the leaves.

Lime Sulphur solution is extremely effective and fast working. It can entirely eradicate scale insect in 24 hours. As an example a while back I obtained an extremely old and mature specimen of Elaeagnus, a beautiful old Japanese tree. When it arrived I immediately noticed it was absolutely covered in tiny white scale insects, by my estimation they had been there for at least three growing seasons. I tried all summer to clean it up with limited success. Once February came around and in a little desperation I broke out the Lime Sulphur and the next day I washed the whole lot away with the hose. Two years later the tree is thriving and not a single scale has returned.

Lime Sulphur - A Miracle Solution

Elaeagnus is a favourite of scale insects.

Lime Sulphur - A Miracle Solution

From being absolutely covered in scale insect to entirely clean thanks to Lime Sulphur application over winter.

For the treating of scale insect across the dormant season dilute 30 to 40ml of neat Lime Sulphur per litre of clean tap water and spray using a heavy mist directly onto the insects which will almost always be on the underside of the branches. Spray the entire surface of the tree and allow to dry naturally for 24 hours.

When treating scale on evergreen trees I personally spray at the end of winter using 20ml of Lime sulphur to 1 litre of clean tap water. This it then sprayed, again with a heavy mist to cover the entire tree including the foliage. Repeat after 2 weeks if necessary.


General Pest Control Using Lime Sulphur

Lime sulphur is primarily used when plants are dormant as we have seen above but CAN be used as a growing season spray. If at any point you are unsure about the use of lime sulphur make a test by applying, as you intend to, on either a small less important similar plant, part of a larger plant or a few leaves growing on a plant in the garden. After a couple of days what you see is what you are likely to get. Always start using a weaker solution and increase the dilution rate for a subsequent application if required. Don’t be afraid to test but always try to use the weakest solution possible in order to get the required result.

Growing season applications can be made when leaves are present but should be applied in the evening when temperatures are cooler to avoid leaf burn. If it’s very warm don’t use lime sulphur. Avoid spraying soft young foliage of broadleaf trees. In general it’s safe to apply lime sulphur solution to conifer foliage so long as the solution is a weaker one and the foliage has been dampened with clean water. Don’t spray immature young foliage that has not fully matured and hardened off.

Before application give the plant a good covering spray with plain clean water. Then mix 10ml per litre of Lime Sulphur to 1 litre of clean water and apply using a fine misting sprayer to infected parts of your plants. Allow to dry naturally outside overnight, keep covered but well ventilated if rain is expected. Once dry return the plant to it’s normal place.

To avoid plant damage caused by lime-sulphur, DO NOT spray when:-
• temperatures exceed 20°C
• when soil is dry and plants are suffering from moisture stress.
• when freezing weather is expected.
• within 14 days of an oil/pesticide or fertiliser spray.

Disinfectant Use of Lime Sulphur

Lime sulphur is an extremely effective disinfectant for general nursery use. It can be used for everything from sterilising compost or previously used pots to sanitising benches and standing areas. Use a solution of 50ml per litre of clean tap water and spray to thoroughly soak surfaces. Soil sterilisation is best achieved by thoroughly soaking using a watering can, pots etc” can be dunked in a container of solution. Sterilised soil should be allowed to sit for a good few days before use.

Lime Sulphur As Bonsai Fertiliser

This is perhaps the most surprising use for Lime Sulphur in bonsai cultivation. The notion that because something smells bad it must be harmful is a modern one borne of our ultra-processed existence. Forget all that, smelly lime sulphur is extremely beneficial to plants as we have seen but FERTILISER! Really?

Bonsai that grow in tiny amounts of soil need to have nutrients added skilfully throughout the growing season. Many traditional and proprietary fertiliser products have little or no sulphur included or present. Up until the 1970s sulphur deficiencies were fairly rare. In the developed world, sulphur was common as dissolved sulphur dioxide; a pollutant from industrial processes. As industry cleaned up its act, and we have moved away from coal-fired power stations, the supply of sulphur nutrition from pollution has dramatically reduced and now needs to be added artificially.

In bonsai our use of largely inert aggregate products as growing media exasperate the sulphur issue. Organic matter can be a good source of sulphur for plants but this is short lived in our limited soil volumes. The widespread use of organic fertilisers like Green Dream,  Biogold or Rapeseed Pellets go a long way towards taking up the slack and supplying important nutrients but over time the cumulative effects can lead to over acidification of the soil. Most plants typically struggle to absorb nutrients from acidic soil and the lower the pH the harder it is.

Most nutrient deficiencies show as yellowing foliage making diagnosis difficult. A sulphur deficiency is a little unusual as it presents as noticeable yellowing of immature foliage. Yellowing is most commonly diagnosed as either nitrogen or iron deficiency but can just as easily be the result of sulphur being in short supply. Additionally if the plants soil has become overly acidic this quickly manifests in much the same way.

The solution is simple. Lime sulphur will quickly reduce the acidity of soil thanks to its lime content thus improving nutrient take up. It will also supply sulphur in a plant available form that’s quickly absorbed. Just add a teaspoon (5ml) or two to a watering can of clean water and apply to soil at any time throughout the growing season. The first application should be in spring as growth gets under way, another around mid summer and the final just before leaf fall and before frosts in autumn. This has the added benefit of keeping pests under control.

Obviously don’t apply lime sulphur to ericaceous plants like satsuki azaleas etc’. There is also no need to apply additional lime sulphur if you have recently used the product as a root drench. Remember you should NOT mix with other fertilisers, apply lime sulphur alone and only mixed into clean water.

In Conclusion – Lime Sulphur – A Miracle Solution

As we have seen Lime Sulphur is a simple, widely effective and safe solution to many of the problems encountered across the infinitely variable world of horticultural P&D control. It has no residual harmful presence in the environment and both elements, the lime and the sulphur are ultimately absorbed by plants as helpful, in bonsai often lacking, nutrients. The only real downside is the short lived smell. In my experience this is no worse than that experienced following the application of a good organic fertiliser and is of little consequence so long as it stays outside.

As with all chemicals Lime Sulphur should be respected, used responsibly and with appropriate safety measures. Diluted correctly and applied with care and forethought it’s an extremely good and effective answer to some very persistent pest issues. Clean up is easy with nothing more than warm soapy water required. Lime Sulphur is a simple, easy and extremely economical alternative to modern chemicals and has been proven over close on two hundred years.

Remember, if in doubt about Lime Sulphurs use begin with a weak solution. You can always test a few leaves or a less important plant just to satisfy oneself your plan is safe. Where application to foliage is required make sure the foliage is damp before spraying. Protect ceramic pots from contact with anything other that weak solutions and don’t use when the weather is too warm.

Finally use a good product from a reputable quality source. Store in a dark cool place protected from freezing and away from animals, kids and NOWHERE near any acids. Do not spray when bees are active and protect waterways from contamination in any form. Don’t drink it or rub it on your boils, absolutely keep it out of any small cuts and ones eyes and other orifices and all should be well.

Disclaimer.
All of the above advice is given freely in good faith based on my own experience using lime sulphur in my own UK garden based on over 35 years of bonsai cultivation. Techniques, dilution rates and timings may vary where you are and dependent upon the product you are using. Always follow manufacturers advice and familiarise yourself with local rules and regulations regarding the use of Lime Sulphur. We accept no responsibility for the actions or outcomes of anyone acting beyond our control.

The post Lime Sulphur – A Miracle Solution appeared first on Graham Potter | Kaizen Bonsai Blog.

Base Dressing Fertilisers & Bonsai

12 February 2025 at 11:56

Base Dressing Fertilisers & Bonsai

Way back when I started bonsai in those halcyon days just before the internet ruined most everything, after I had exhausted my local library, I stumbled into a local bonsai club. This had what might kindly be called a parochial attitude to our hobby. Very traditional in approach, were it not for the lack of impressive produce one could be forgiven for thinking it was a meeting of allotment holders. In fact many folk there were indeed allotment holders, me included eventually.

I remember vividly how entrenched ideas were and anything new, especially from a whipper-snapper like me (yes I was young once) caused much furrowing of collective brows. The debate around Akadama vs John Innes and grit eventually became quite aggravated but the one I loved most was the conflict over chemical vs organic fertilisers.

Back then gardeners had a lot less choice and with an almost complete lack of bonsai tree specific fertilisers our options were minimal. I remember that chicken manure in a dried pellet form was just becoming widely available at the fledgling ‘big sheds’ like the new B&Q mega stores that were popping up all over. Fish/blood & bone was another traditional “organic“, nasty stuff! On the other side of the equation there was Phostrogen, Miracle-gro and Tomorite.

We did have one enlightened individual that introduced me to the use of Rapeseed as fertiliser. This could easily be turned into ‘tea’, pellets or even applied in its raw state. I had seen it’s use in Japanese books but at the time no commercially prepared products were available here and besides I would NOT have been able to afford them.

I instantly understood the value of organics as fertiliser. Not only did they provide nutrients to the tree but they also supported invaluable bacterial and fungal activity within the soil and somehow it made perfect sense to me. Today I use 99% organic fertilisers across my garden wether for bonsai, my wife’s flower garden or veg’ and fruit growing.

I have to say that within our genteel pass-time still those two subjects are contentious. I don’t see the need for so much tribal conflict though. At the end of the day, if it works for you keep at it…. a la salud! Still, it’s in our nature to be tribal and fight and if that’s your thing ‘have at it‘.

At the end of the day it matters little what soil or fertilisers you use for growing bonsai. What matters is how you manage the whole process. Everyone seems to want a free draining ‘soil’ for bonsai but I have had a great deal of success using straight garden soil. One lovely old fellow I met had used nothing else for 30 years and when I got the chance to buy his collection I kept most of it personally because the trees were so good.

The soil bonsai are in matters less than how we manage it. Using sandy garden soil certainly reduces the need for watering in summer but then it does need careful management in a soggy British winter. Fertilisers are the same, included within an intricately structured care regimen most will supply what the plant needs. However….

Managing a bonsai tree is always going to be complicated if we want it to do more than just survive. There are infinite variables to consider and these constantly change. Maintaining optimum growing conditions all the time is impossible but we need to do the best we can. Fortunately most plants used for bonsai are tough and tolerant so that helps us. For instance if a tree gets a bit too much sun during the height of summer it might get a bit scorched but it’ll live.

Ultimately it’s a lot easier to use a modern bonsai soil mix and purpose designed fertilisers than it is to craft our skill of managing a plant and all the complications that come with it. Now I firmly believe refining our horticultural skill to that level has great benefit but it’s not for everyone and not everyone has the prerequisite skills to achieve success. So it’s good that nowadays we have lots of great products to help us out, make our bonsai better and free us up from the slavish devotions of fanatical horticultural discipline.

I came here to introduce the concept of ‘Base Dressing’. That is the process of adding a nutrient rich substance, in our case a prepared fertiliser to soil. This is a common practice in gardening. As I sit here tapping away at my keyboard fanatical gardeners and allotment holders across the country are busy digging in mountains of festering animal poo before the new season gets under way. This is a time honoured ritual and ensures a good crop from a hard worked garden.

So why don’t we use base dressing in bonsai cultivation? I’m sure some folk do but I was always lead to believe that fertiliser and a newly repotted tree should be treated in much the same way as a bathtub full of water and a toaster. As little contact as possible for the good of all concerned but why?

Last year we put out a little booklet containing my thoughts on fertilisers and bonsai cultivation. If you have read it you will know how fertilisers work and how they release nutrients, you will also know the golden rule, never fertilise a plant that’s not actively growing. There’s a lot of that information contained in the multitudes of old posts here if you search the archives, lots more is contained within the articles posted on our web site. I will try to get the booklet text up soon.

Fertilisers release nutrients in different ways. Refined chemicals tend to be a bit like an intravenous injection, they quickly dilute in water and are rapidly absorbed into the plant, often within minutes or a few hours. Organics however rely on fungi and bacteria to break them down and release the nutrients. Some poorly suited organics do both.

I have talked endlessly about reverse osmosis, what is commonly called fertiliser burn. This is when too much nutrient around the roots causes water and nutrients to be drawn out of the plant causing its water column to collapse. This typically manifests as wilting initially followed by browning or dropping leaves. In time twigs and branches can be lost and entire plants can quickly die. To see a similar result try sprinkling cucumber slices in a bowl with salt.

So if the golden rule is don’t feed a tree that’s not actively growing and knowing fertilisers can cause reverse osmosis why would we add fertiliser to the soil of a bonsai tree when repotting, especially as most trees are repotted at the end of the dormant season and therefore not actively growing?

First up bear in mind that a bonsai tree grows (very slowly) in a small amount of soil. Unlike your hanging baskets and grow bags that get composted at the end of the season bonsai trees need to be healthy for many decades. We have a very unique set of circumstances and so the horticulture used for bonsai is entirely different from that used for almost any other container cultivation.

An actively growing bonsai tree can be expected to strip out most of a soils inherent nutrient within a couple of weeks and our constant watering will do little to help. A growing plant needs tiny amounts of nutrient constantly therefore we need to have a drip, drip approach to fertiliser application and that’s easy to set up with organics. It’s not so easy with chemicals, it can be done but it needs constant monitoring.

There are largely two types of folk in bonsai. Those who are in a hurry, typically newbies, who believe they can push their trees to go faster by the copious and repeated application of fertilisers. Secondly we have those who don’t feed much at all, possibly because they believe it’s all ‘snake oil’ or commercial hokum. I once met a guy who only used water from his koi pond believing the nutrients (which grew copious amounts of blanket weed) were all the bonsai needed. After decades this particular theory was entirely disproven after I saw his poorly looking tree collection.

On the other hand I remember when I was landscape gardening I got hold of a large volume of lawn fertiliser/moss killer/weeder. One of those fucking wonder products that turn your crusty old mud patch full of divots and dog piss patches into a snooker table without any effort whatsoever. Used correctly that might be the case (not) however I gave a sack to my dad. Rather than read the instructions he dumped the whole 25kg onto his fairly big lawn in one go. Ten days later the grass had tuned to nasty black slime.

Getting it right with fertilisers is important whichever way you decide to go and base dressing is an important part of that. Modern bonsai soils are almost entirely devoid of nutrient, they are largely made up of processed aggregates which either have no inherent nutrients or the nutrients were destroyed in processing, firing, washing etc’. We like it that way because we gain control. It’s a bit like when I make cornbread. If I don’t get the preparation right when putting everything together what comes out of the oven won’t be right. In that example it’s no good blaming the oven.

Here at KB we spend more time getting soil right than anyone in the country, it’s always been my passion and today we move close to a thousand kilos of mix every day. This goes to folk growing everything from bonsai masterpieces to plants that eat animals and those growing plants in their wardrobes. We know it’s right so long as it’s used right.

What base dressing does is to light up our inert soil mixes. Unlike normal fertilisers those designed for base dressing in bonsai have been carefully crafted to bring maximum vitality and life to soil without excess NPK which can, as mentioned, cause damaging reverse osmosis. Those nutrients are not required in volume during the crucial period after re-potting. However micro nutrients are, particularly as new fine feeder roots emerge and need those nutrients to create new cells and tissue.

Base dressing also fires up the flora and fauna so crucial to building a dynamic ecosystem within our little pots. Continuing with my cooking analogy base dressing products for bonsai put the heat in the oven. No matter how careful we are in creating a good bonsai soil mix, without the fungi and bacteria required we’ll not be ‘cooking’ and nobody wants to eat raw cornbread batter.

I think part of the problem is where a base dressing product is referred to as a fertiliser which causes the confusion about not feeding newly repotted trees. Over the past several years I have been using base dressing products for all my repotted trees. It’s something I now consider essential at every repot across all the species I keep including deciduous and coniferous varieties. We now carry two primary products for base dressing and my extensive use of both has moved my bonsai forward significantly.

Green Dream™ Soil Source Natural Micro-Biological Soil Additive

There is an extensive explanation of this products use and benefits on the product description page of our web site (click text above for link).

Green Dream™ Soil Source Natural Micro-Biological Soil Additive

Green Dream™ Soil Source Natural Micro-Biological Soil Additive

Green Dream™ Soil Source is a product that we have developed over the last few years. This is a groundbreaking microbial soil additive product unlike anything else available that is simply added to your chosen soil mix or growing media at repotting time. The product, which on the face of it looks like our Green Dream Original product (small dry crumbs), is packed with beneficial micro-organisms like Trichoderma harzianum which are very well documented as being supremely beneficial to the cultivation of plants and the development of roots in horticulture.

Over several years we added this unique new product to well in excess of four hundred repotted plants at various stages of bonsai development. The results were surprising to say the least. Every plant has thrived, regardless of the growing media or species involved, every plant started growing much earlier than normal and much more strongly and once good growth was underway we noticed a significant improvement in the plants uptake of nutrients from fertilizers with improved growth rate, foliage colour and robust appearance. Over the summer period we also saw a dramatic reduction in problems with pest and disease reducing our use of chemical sprays by over 75%.

Biogold Classic Motohi Premium Organic Bonsai Base Dressing Fertiliser

The original fertiliser from the renowned Japanese BioGold range. There is an extensive explanation of this products use and benefits on the product description page of our web site (click text above for link).

Biogold Classic Motohi Premium Organic Bonsai Base Dressing Fertiliser

Biogold Classic Motohi Premium Organic Bonsai Base Dressing Fertiliser

“The origins of Bio Gold date back to around 1970. Toshio Tsubaki, a doctor of agriculture who was heavily involved in the product’s development, had been researching microorganisms related to plant growth for over 10 years. However, the discovery of effective microorganisms did not go as expected, and during the days of struggle, he met Kazuo Yamaguchi (then Professor Emeritus at Ibaraki University), an authority on applied microbiology, through a book.

From there, the two began joint research, and in 1983, they finally discovered the bacteria (microorganisms) that became the source of Bio Gold. It was a product that allowed plants and soil microorganisms to draw out each other’s strengths, improving the soil environment and promoting strong plant growth. Bio Gold was developed to take advantage of the functions of these microorganisms and make it easy for anyone to use.

The natural activator that would become Bio Gold was born. This product was later improved and evolved into “Classic Base Fertilizer” and “Bio Gold Vital.”  First released 1986 and in continual production ever since.

This is a solid, organic, slow release base dressing fertiliser. Ideal in autumn and at the time of repotting all bonsai. It creates and nourishes vital roots which are very important for plant growth. Because it is carefully matured over time, using a unique fermentation method, there is no need to worry about damaging plant roots.

Besides the above it’s also possible to add products to your soil mix that are not referred to as fertilisers but contain high levels of nutrient that takes longer to release. These provide a base level of nutrition, often for several months. This is a very useful technique, particularly when dealing with poorly trees. My own personal favourite is….

Green Dream™ – Seaweed Meal – Soil Conditioner & Fertiliser

Green Dream™ - Seaweed Meal - Soil Conditioner & Fertiliser

Green Dream™ – Seaweed Meal – Soil Conditioner & Fertiliser

100% pure sustainable dried British seaweed meal (ascophyllum nodosum). A natural organic plant feed and soil conditioner packed with nutrients. Safely encourages and sustains growth and vitality in all plants from seedlings to ancient trees. Improves pest resistance, soil bio-activity, fertility, water and nutrient holding capacity. Broad spectrum nutrients that are released to the plant slowly over a whole growing season.

To Sum Up…

Personally I highly recommend base dressing when repotting bonsai. It’s something I now do as a matter of course for all my trees. A good modern soil mix with organic base dressing coupled with the use of quality organic fertilisers throughout the growing season and careful watering is a combination that’s hard to beat.

When you grow bonsai in a crappy climate like the one we have to endure here in GB every little advantage must be sought out in order to get the best results and base dressing is an oft overlooked, proven and time honoured technique that needs to be universally adopted. Give base dressing a go this repotting season!

Graham Potter

The post Base Dressing Fertilisers & Bonsai appeared first on Graham Potter | Kaizen Bonsai Blog.

❌