Normal view

Received before yesterday John Hanby Bonsai

Kevin’s Satsuki Azalea

6 September 2022 at 16:51
This Satsuki Azalea was brought to a recent open workshop. As you can see the tree has suffered in the past. It has lost its original dense foliage areas and the branches that remain are very ‘leggy’.
Since Kevin acquired the tree he has managed to restore its vigour and you can see that new vibrant growth is emerging all over the tree.
This tree is typical of many azaleas from Japan in that it has an impressive trunk with good taper and a substantial base. An ideal bonsai subject.
Usually when students bring a ‘leggy’ azalea to class with lots of dead inner fine branches it is often too risky to do the drastic pruning required because you are worried the tree is too weak and not strong enough to recover. On this occasion the new growth was so strong and extensive that I could confidently take the tree back to a basic structure from which we can now rebuild and restore the tree to its former glory.

Frank’s Trident maple stump

1 October 2022 at 15:32

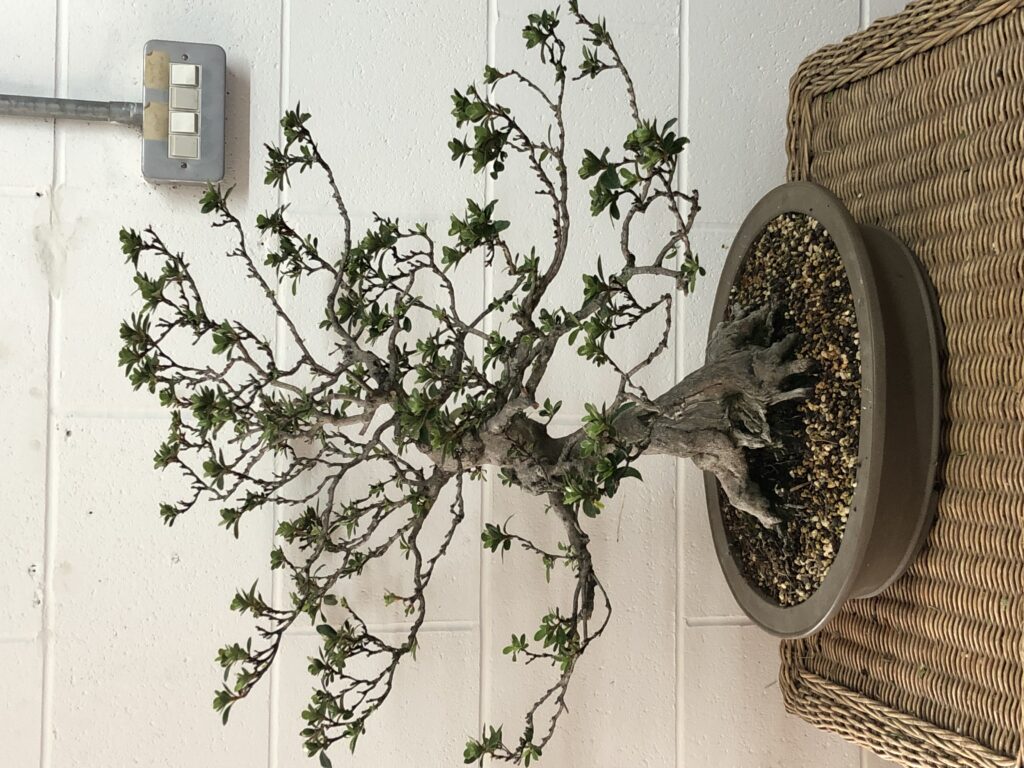
It has been quite a journey with this tree and I have been happy to be involved and helping Frank whenever the tree has been brought to a workshop. At long last we are beginning to arrive at our destination.

April 2010 – This Trident maple was going nowhere so Frank decided to air layer the three trunks off and this was done with great success.
October 2014 – The tree had been allowed to grow again and was trying to get back to where we started!
I was not prepared to let this happen so I had to take appropriate action. A first branch selection was made.
June 2016 – The tree was back for another pruning.
After pruning and at least it looks a bit more convincing with some leaves on.
April 2017 – The tree is just so strong and bounces back really well.
The repeated growth spurts enables us to select and start to develop new branches which will make up the structure of the tree.
July 2017 – Trident maples are one of the best to work with for bonsai because they are capable of more than one flush of growth each season.
Some low branches are allowed to continue to grow to increase their girth.
May 2018 – Notice how the tree is getting bushier as we have more and more shoots growing.
Once again a selection is made and only specific branches are allowed to continue growing.
May 2019 – The tree has been allowed to grow for longer too help it get over the repot into a smaller pot.
July 2021 – All the time we are keeping the tree healthy and vigorous promoting strong growth and extensive back budding.
At last you can start to see some density in the image and an outline of what the finished stocky shohin image will look like.
May 2022 – The tree is a picture of health!
After yet another pruning.
September 2022 – A second flush of growth but now the first signs of autumn are here.
A final pruning before the leaves start to fall.

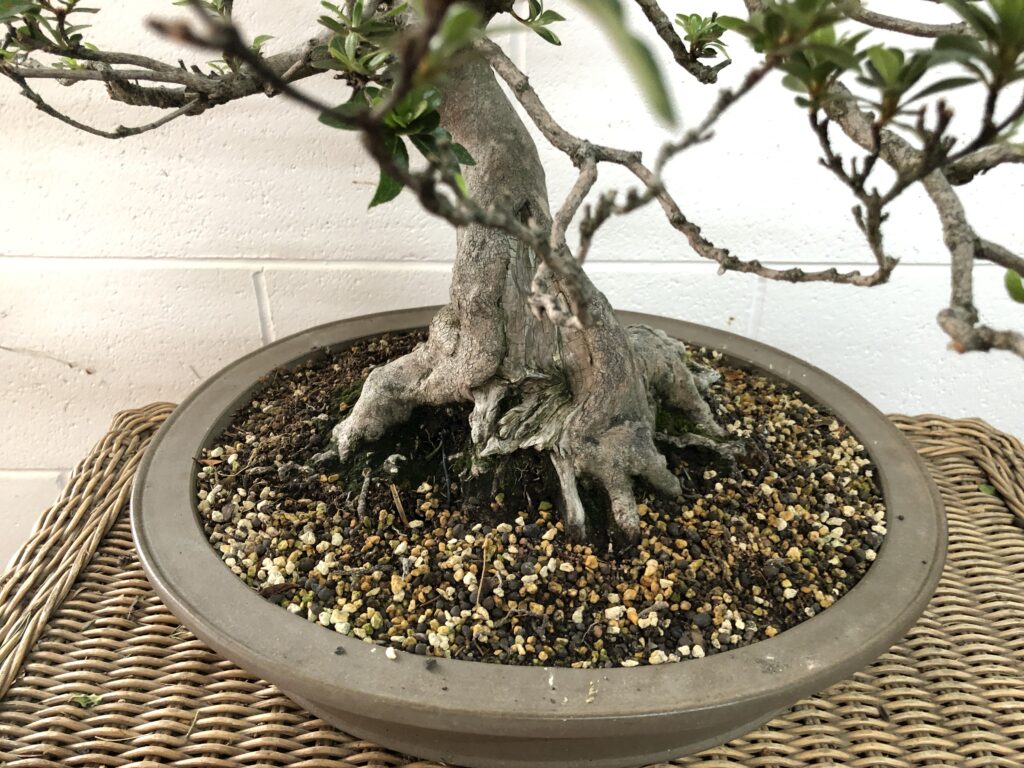
Its taken a long time to get to where we are today with this tree but it now bares no resemblance to what we started with. The successful air layers at the beginning of the project were really a bonus. The tree is now on the verge of reaching its full potential as a small powerful bonsai with an impressive stout trunk complemented by a rounded mature canopy.

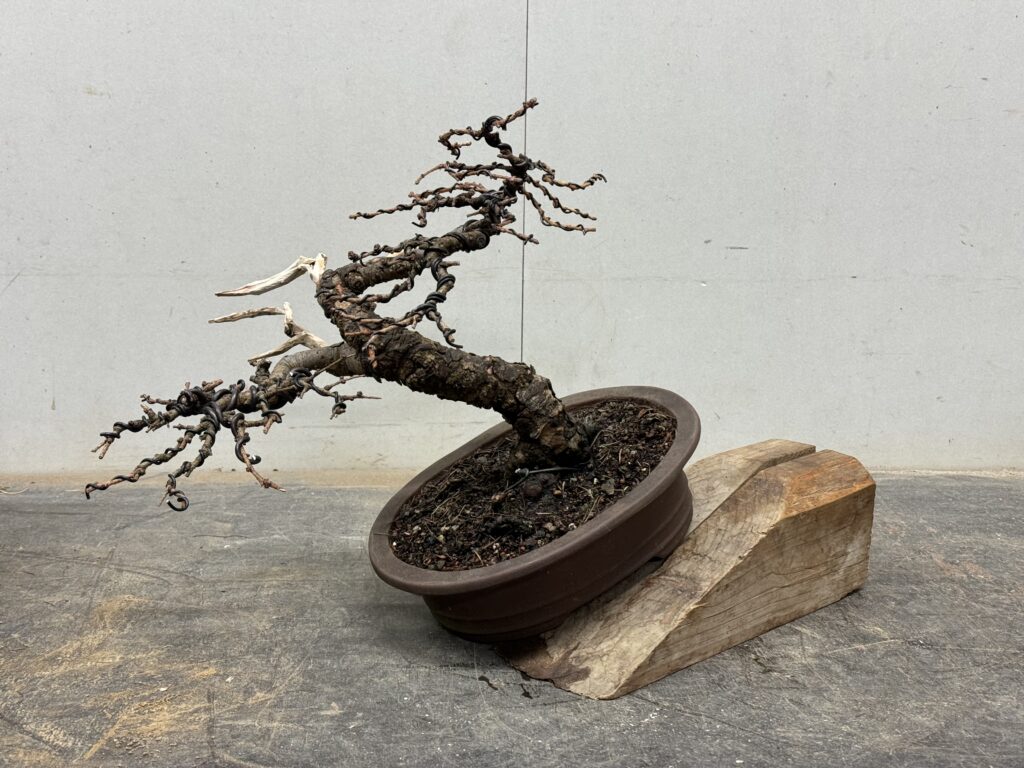
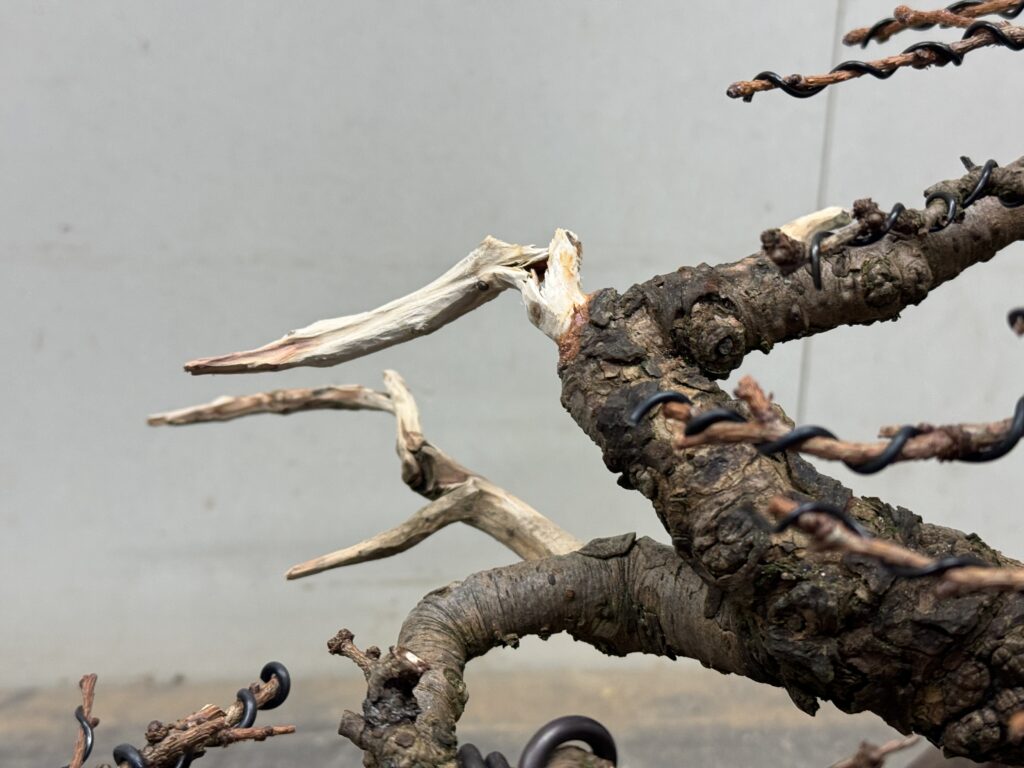
The scars from the air layers are callousing well but can now be hollowed out to enhance the image of a really old ancient tree.

All the time we maintained the trees strong health and vigour concentrating on selecting and growing branches. These were then allowed to thicken before we started looking at refinement and compacting the image.

This hobby never fails to deliver immense satisfaction when you are successful in creating something special out of nothing!

John’s Juniper – Now we can see the tree!

3 January 2023 at 16:44
December 2021 – The existing wiring is inadequate and needs to be removed. For a shohin size tree the branches are too long in their present format.
September 2022 – Looking a good colour and ready for rewiring.
The tree viewed from the rear. You can see how strong it is but also how leggy the branches are.
November 2022 – The main branches are wired.
Just a bit of manipulation to the main branches and the tree is already looking more compact. Now for the wiring to the thinner branches.
What a difference! The foliage at last looks in proportion to the trunk and we now have the image of a very powerful shohin juniper bonsai.

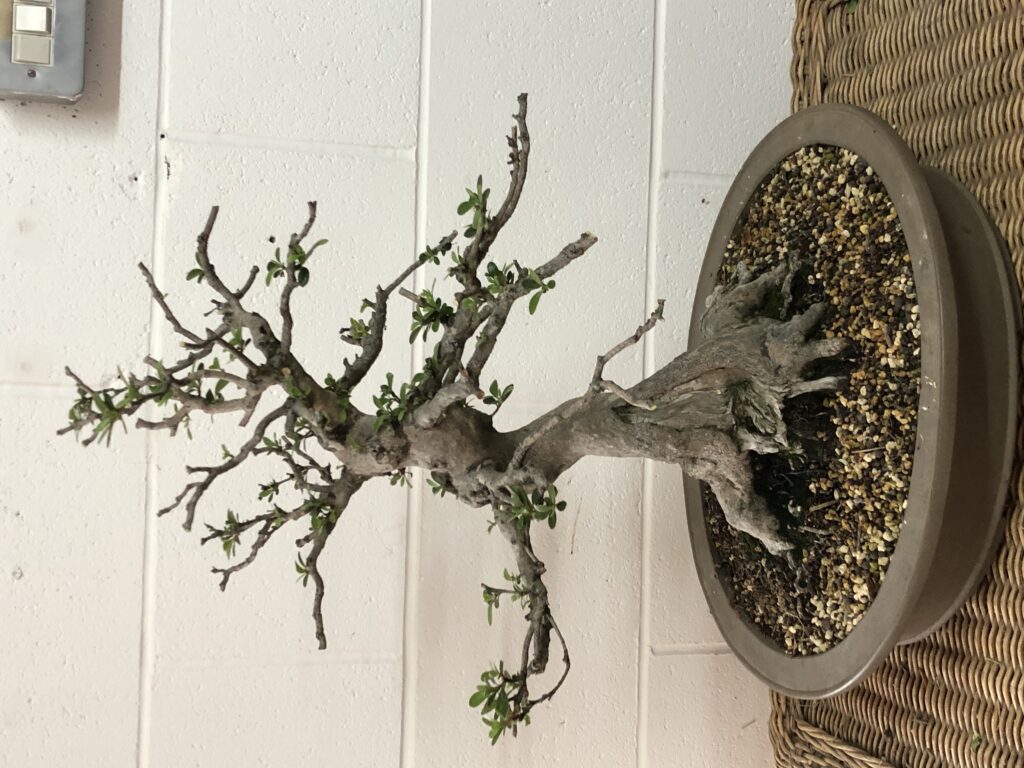
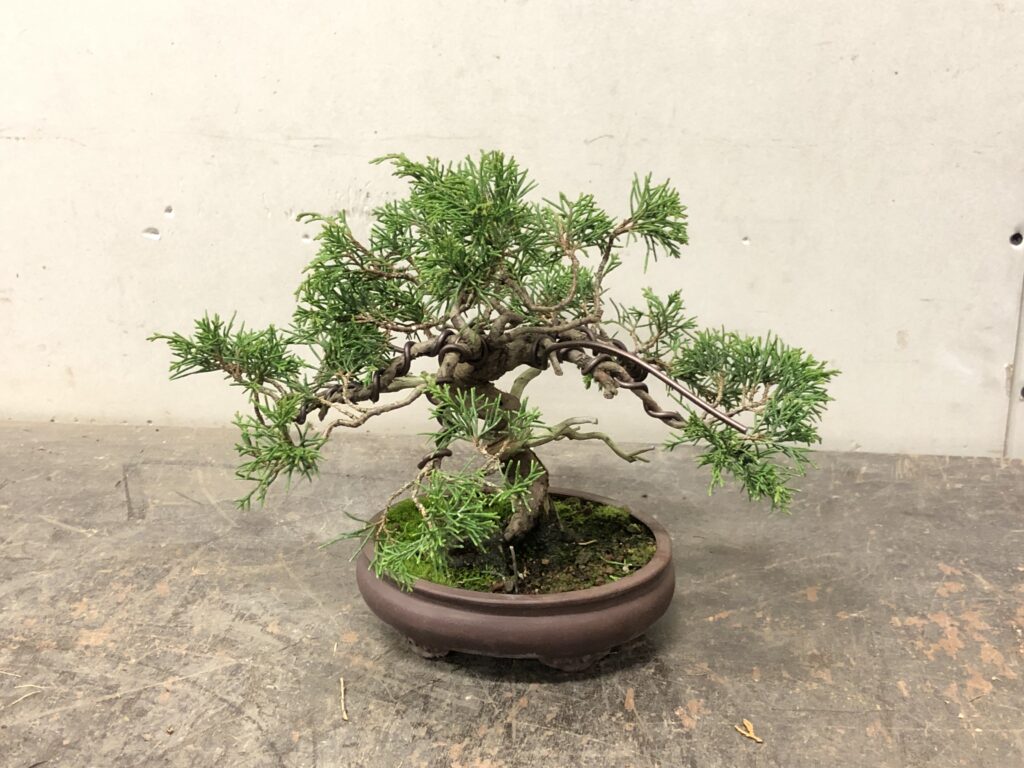
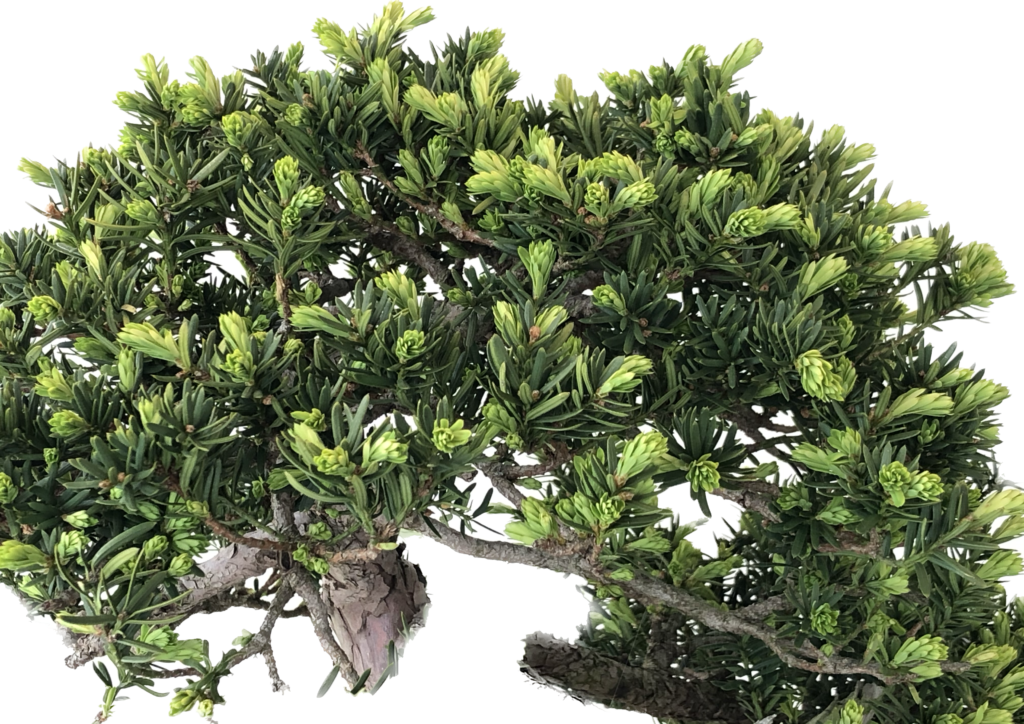
We now just need to let the tree grow and recover from the work we have undertaken. Once we have strong extended growth then we can start to prune the canopy and make the foliage mass even more compact. My student John is doing a good job with this tree and hopefully is now beginning to see the reward for all his hard work.

Rob’s Juniper with amazing deadwood.

1 February 2023 at 15:36
November 2016 – My first encounter with the tree. Interesting deadwood but the foliage is just so far away from the trunk. We needed to just let the tree grow to try and force growth nearer the trunk.
The natural deadwood is amazing. It is very difficult to determine whether this is in fact a natural tree or an old “tanuki”. The two elements are firmly attached together and follow very close natural lines.
April 2022 – Well the tree has certainly put some growth on and is in good condition.
A view from the other side.
The tree after a branch selection and thinning out of foliage.
September 2022 – The selected branches have grown well and the unwanted branches have been made into deadwood.
November 2022 – Rob had wired the tree including longitudinal wires and raffia on the main trunk as I had envisaged some tight bending. We then discussed the possibility of removing the live section completely and attaching a young Juniper Ittogawa to the deadwood.
January 2023 – The tree had been left with me to sort out. I studied my stock of Juniper Ittogawa looking for a suitable tree to attach to the deadwood. The tricky part was determining where I would attach it to make it look convincing.
The tree seen from the other side. After much deliberation and taking into account the excellent work Rob had done in getting the existing living section to this stage I decided to see what I could do with the wired branches. If I could create a reasonable image with what we have we could try and develop this further knowing that we could still always revert to plan B using the Ittogawa if we were unhappy with the result.
This was the image I managed to create from what we had. When the tree is next repotted it would be tilted slightly towards the right to bring the apex more over the deadwood.
The view from the other side. This turned out much better than I expected and Rob was happy with the result too.

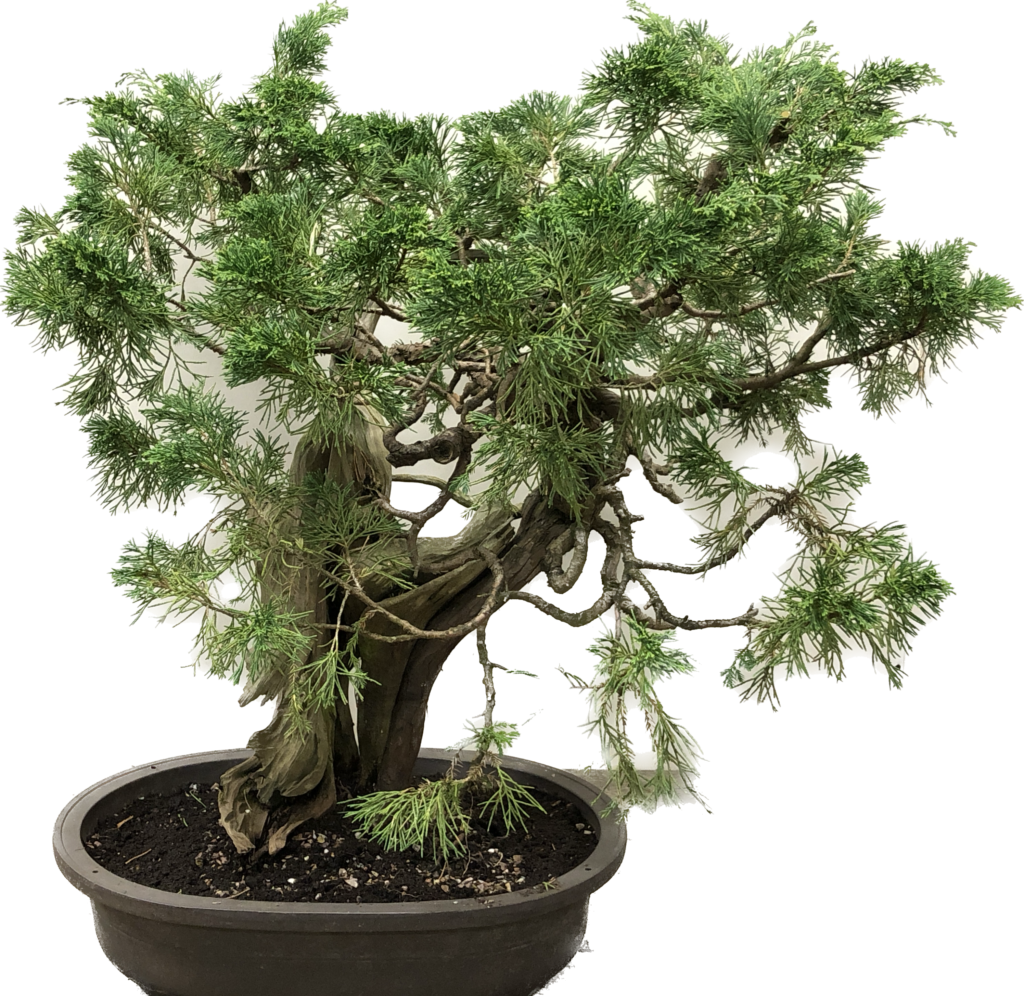
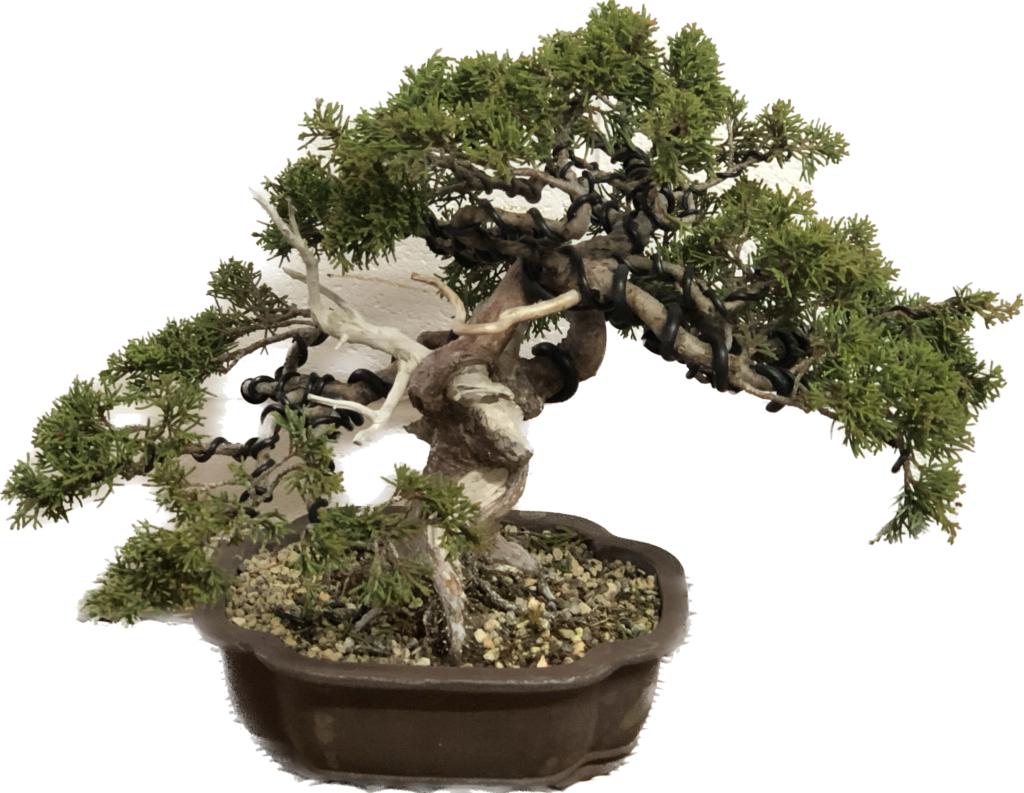
We will now persevere with the foliage to try and get it denser and more compact. At least we now have a good foliage canopy to match the impressive deadwood. There is potential here to create a really good tree.

I will keep you posted and if we do feel the need to resort to plan B I will follow it up with photographs and explanations.

For now let’s just enjoy the tree we have!

Junipers recently brought to classes for styling

10 February 2023 at 12:19
This Juniper is an air layer but the trunk and branches are just so long and spindly.
Now with a much more compact design in scale with the trunk and giving the impression of a tree of greater age.
The existing canopy is too wide for the thickness of the trunk and the orientation needs changing.
The canopy is now in much greater harmony with the thickness and character of the trunk.
The twisting shari and live veins are really impressive.
Another small juniper that has lost its way with untidy elongated foliage.
A much more pleasing compact silhouette.

The story of a Japanese Yew (Part One)

25 February 2023 at 18:51

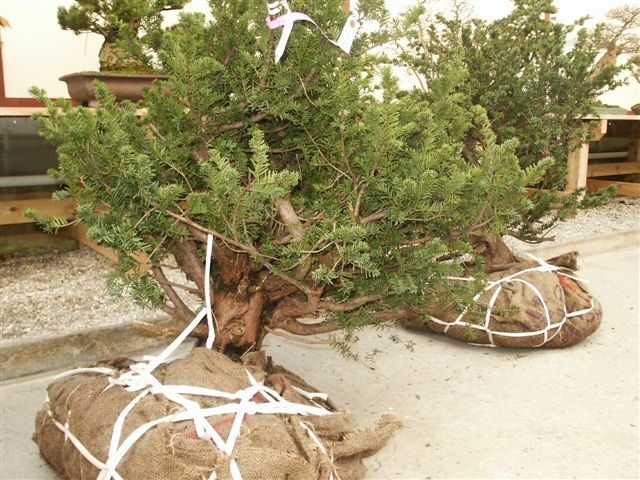
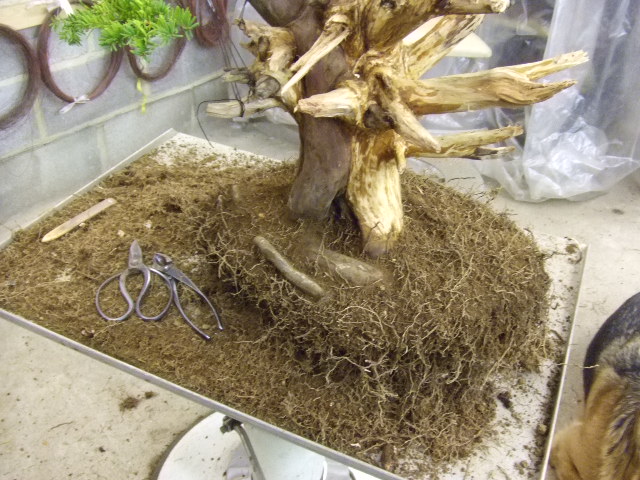
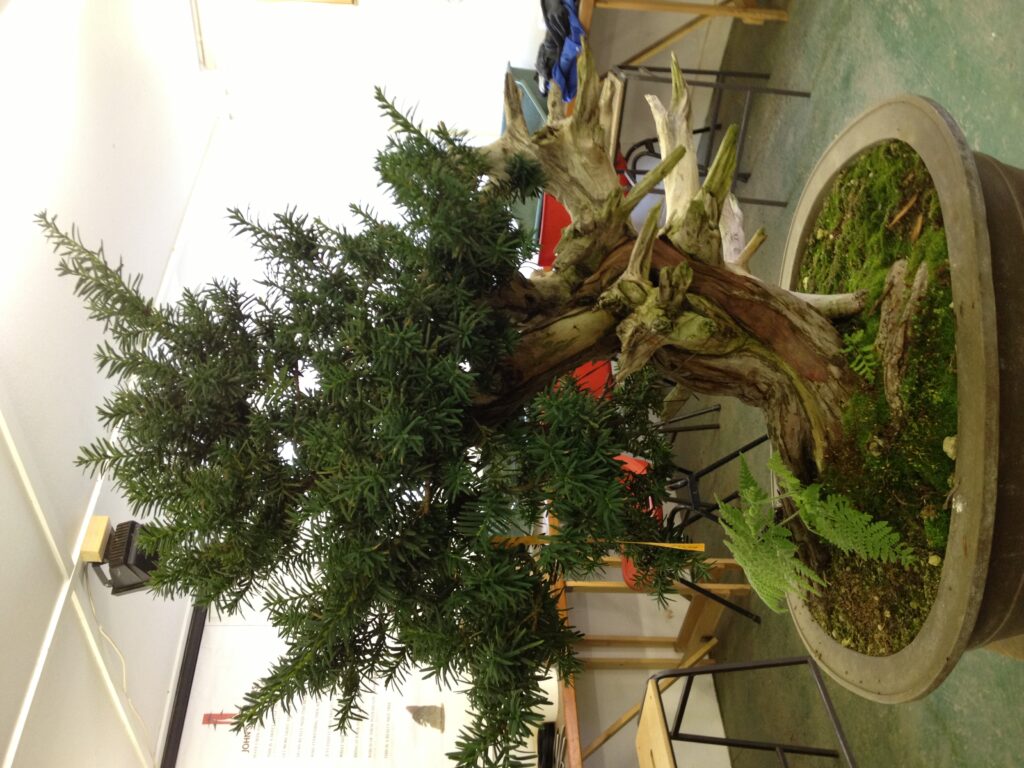
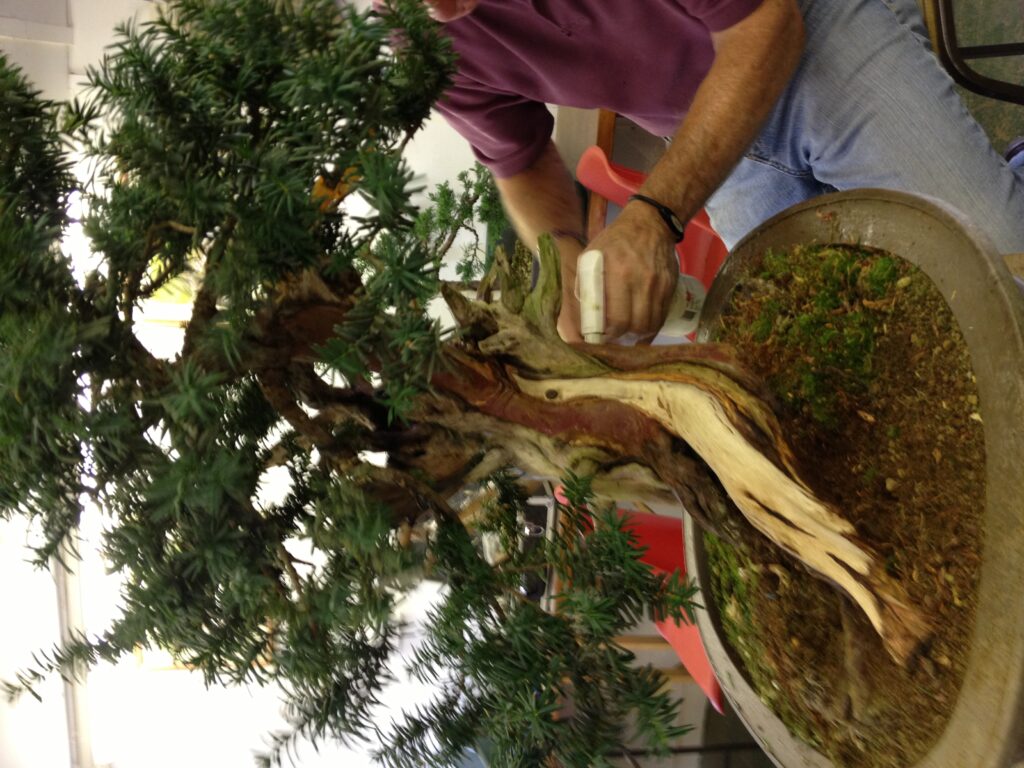
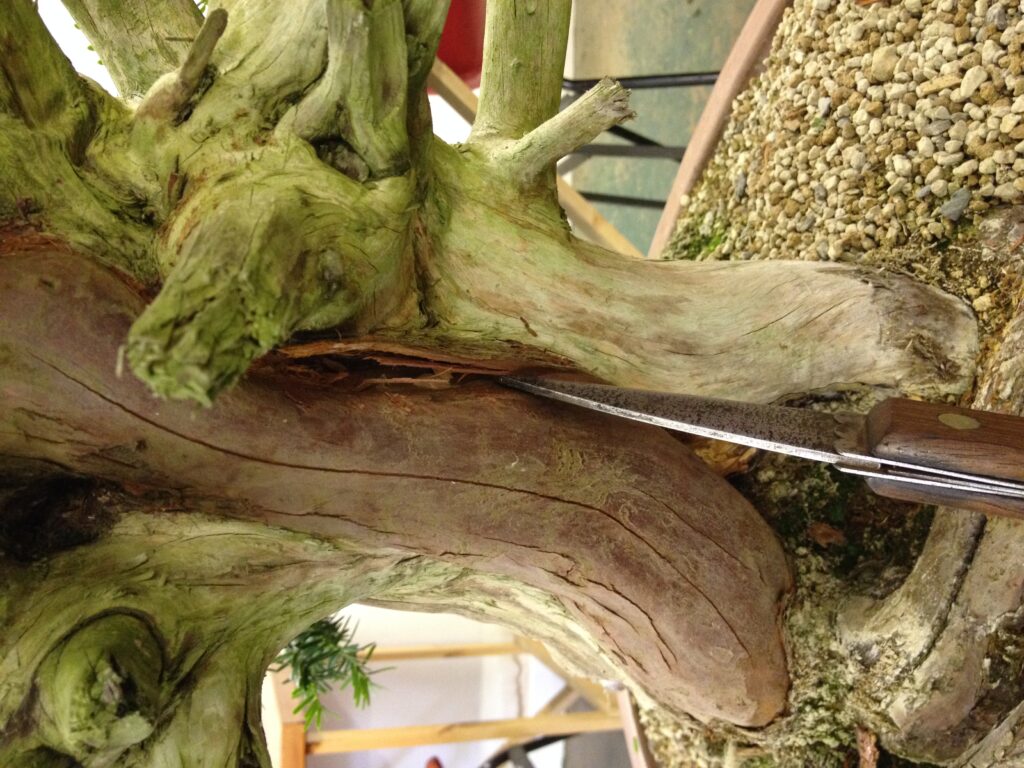
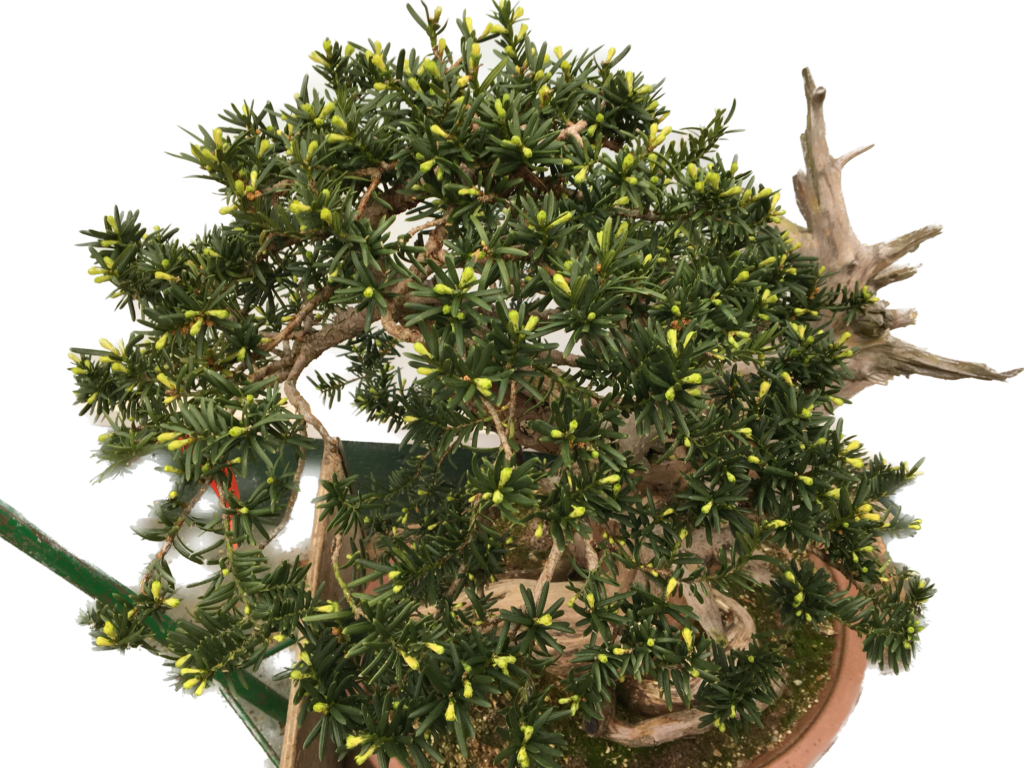
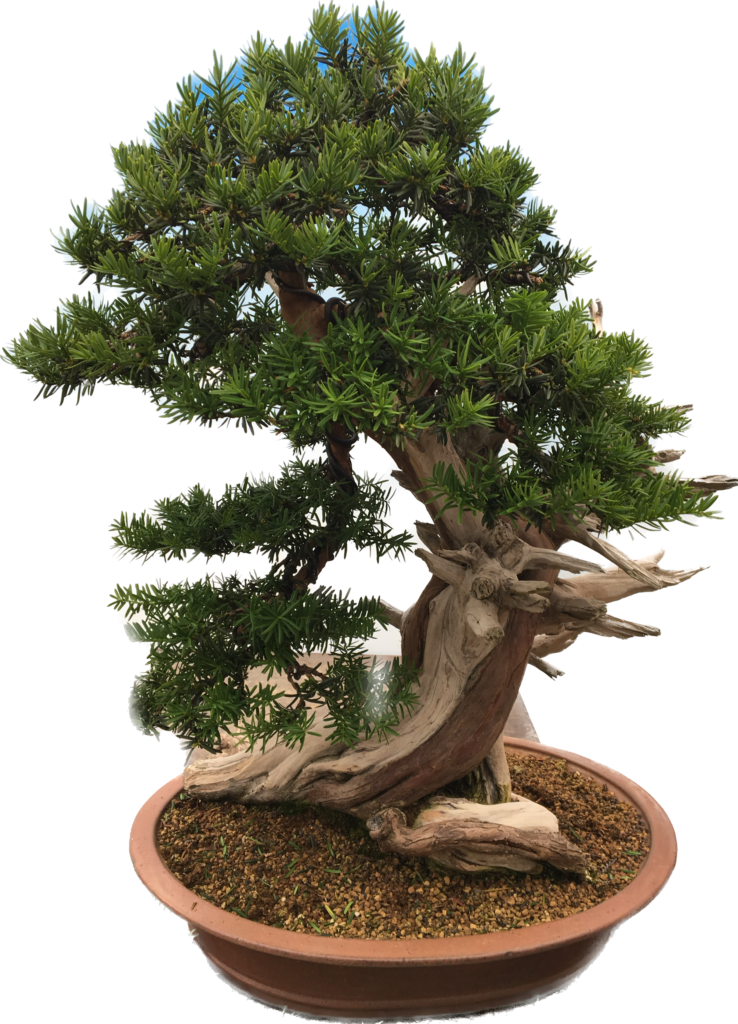
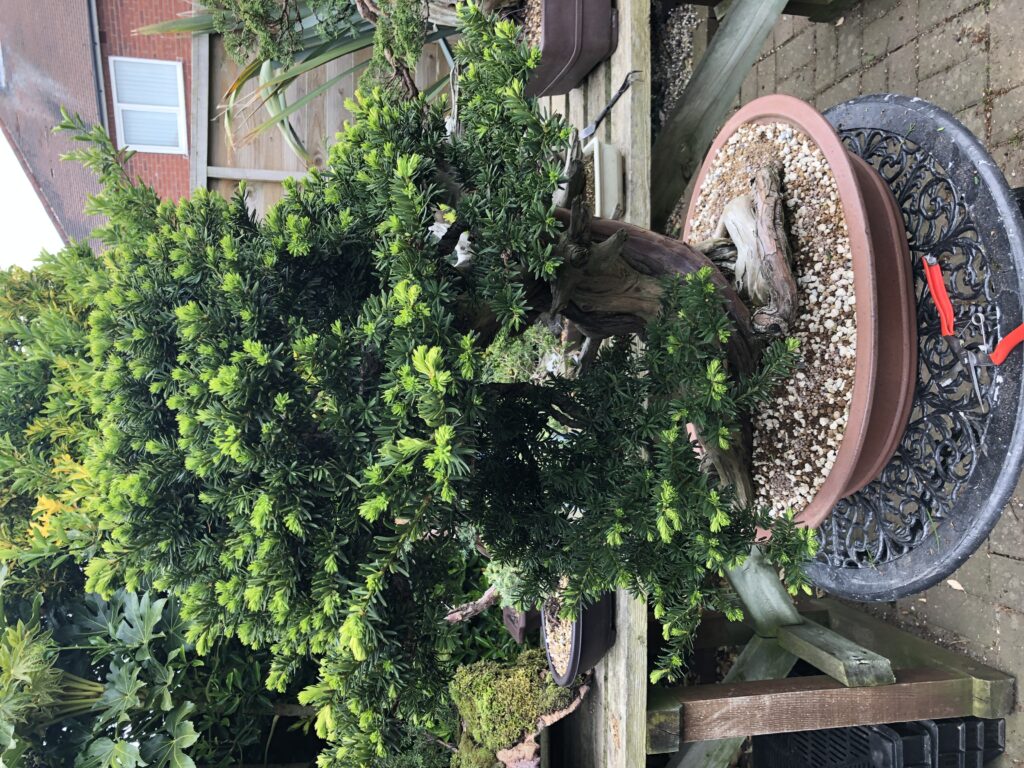
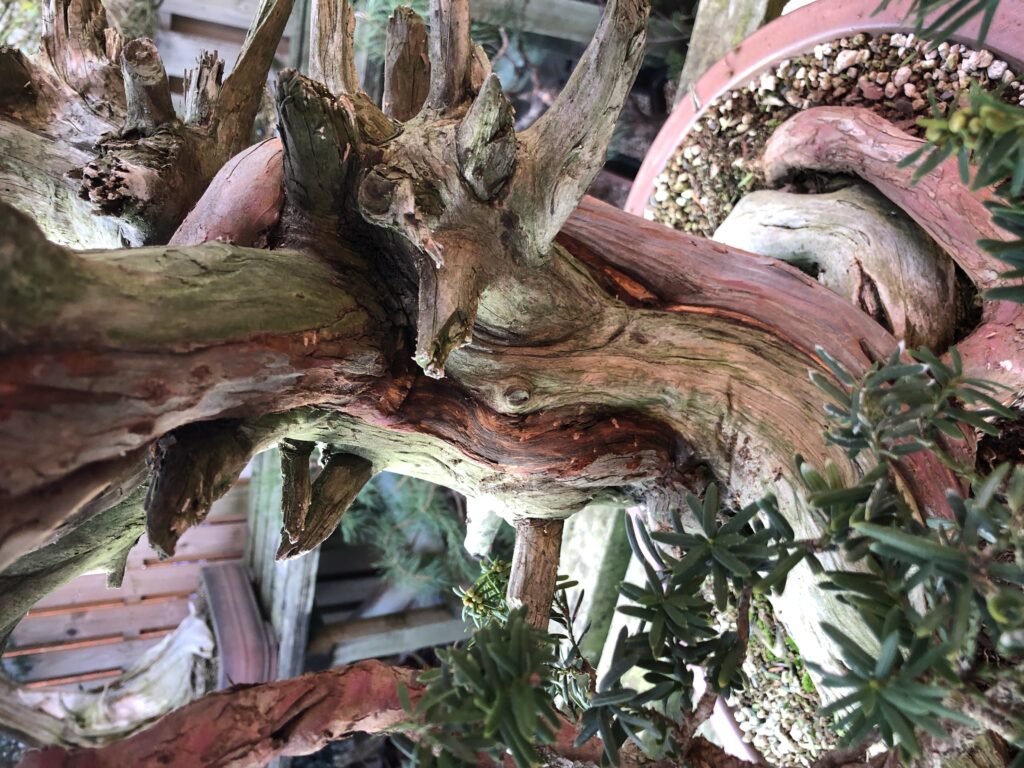
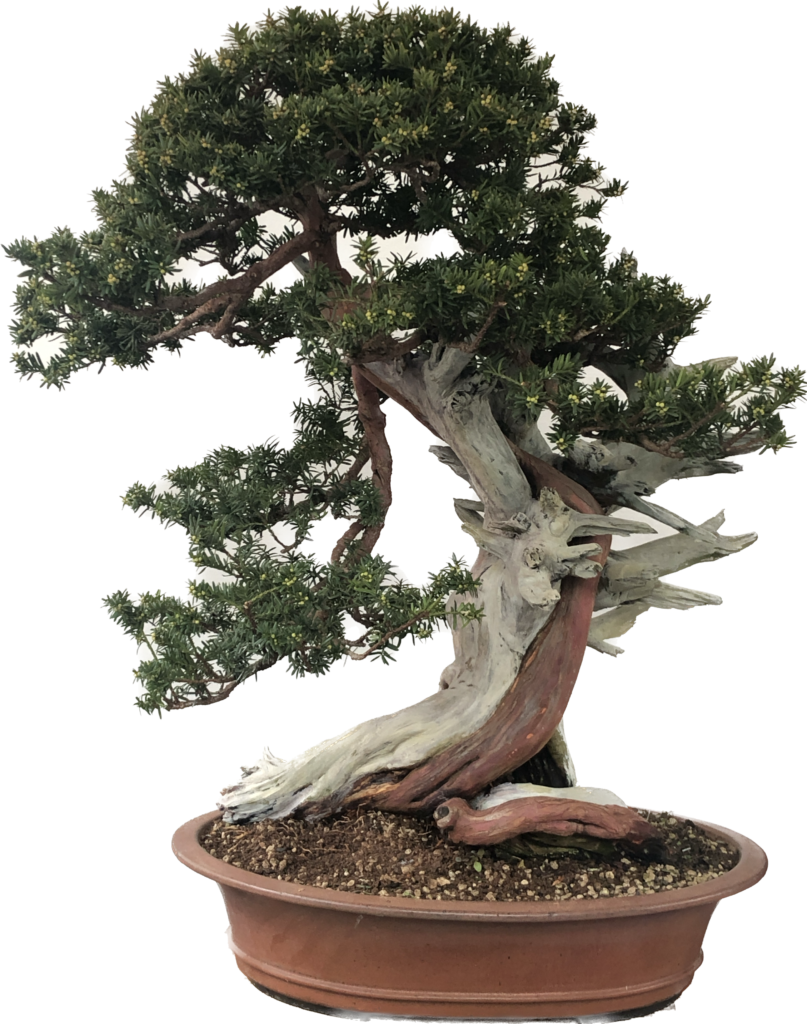
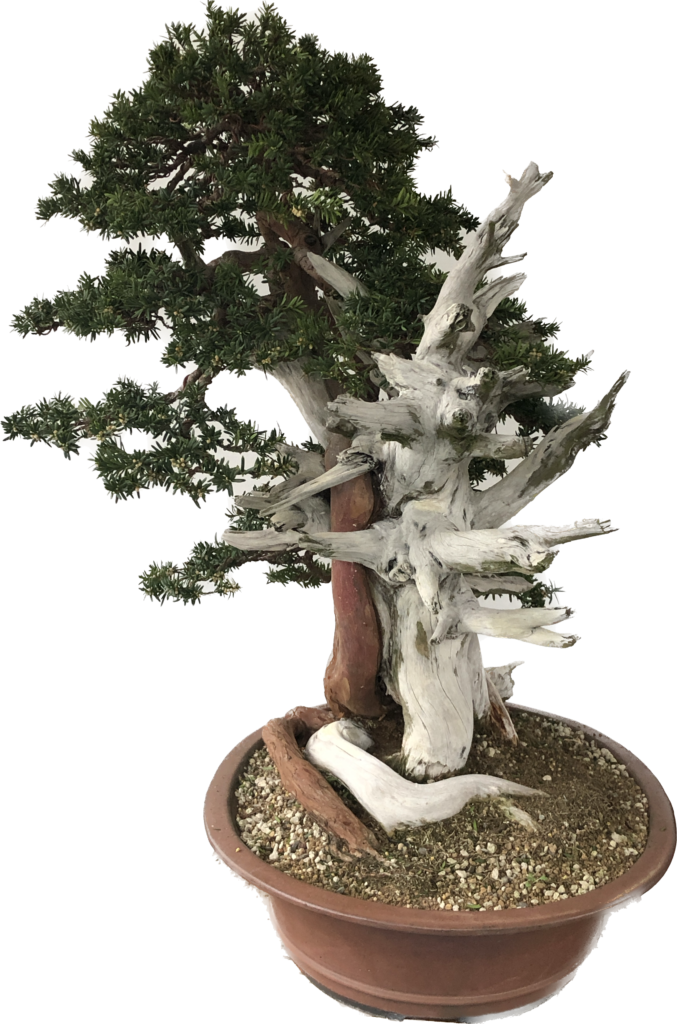
This is the story of a Japanese Yew (Taxus Cuspidata). I think I have told this story once before in my blog but for this new version I have unearthed some previously unseen early photographs whilst the story is brought up to date to a recent styling in February 2023.

January 2005 – The tree arrives from Japan somewhat unceremoniously wrapped in a hessian sack. There were four trees in the batch and I bought two of them.
February 2010 – The tree had been standing for sale on the nursery and despite a lot of interest remained unsold. It looked impressive but maybe people were unsure how to get the tree out of the raw material.
The numerous branches made the tree very complex. I decided to use this tree for one of my demo days in February 2010 to carry out its initial styling.
Sometimes you just need to have a closer look!
Basically I decided to remove the foliage areas edged in red and create the entire tree from the large first branch on the left.
It certainly looks different and now there is a lot of deadwood to create.
I marked out the edges of the live veins feeding the remaining live branch.
I then left my brilliant assistants Len and Derek to strip off the bark and create the deadwood.
A tree never had so much attention lavished on it!
The Remaining live branches were wired ready for positioning. So long ago I look more like Harry Potter here!!
The tree at the end of the demo after this first styling and propped up to show what the new planting angle will look like.

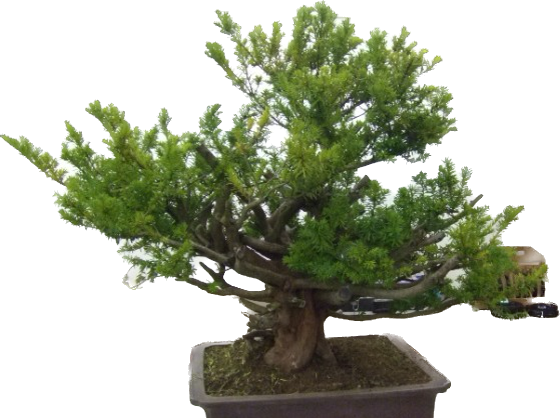
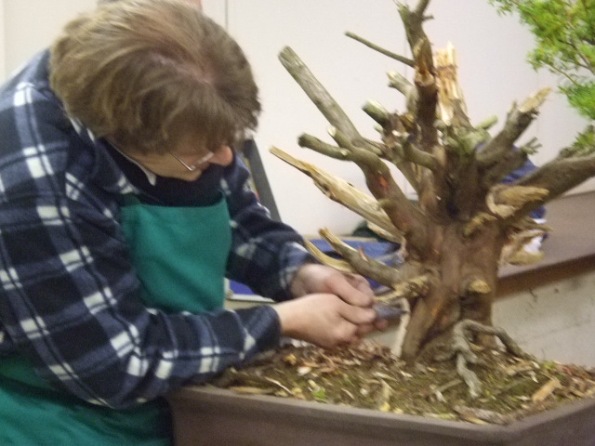
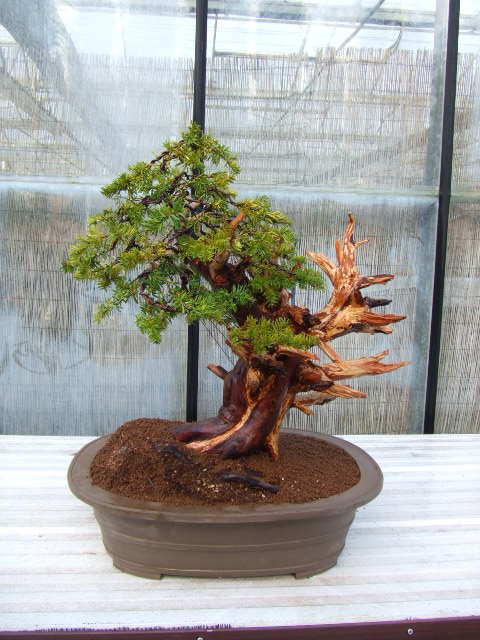
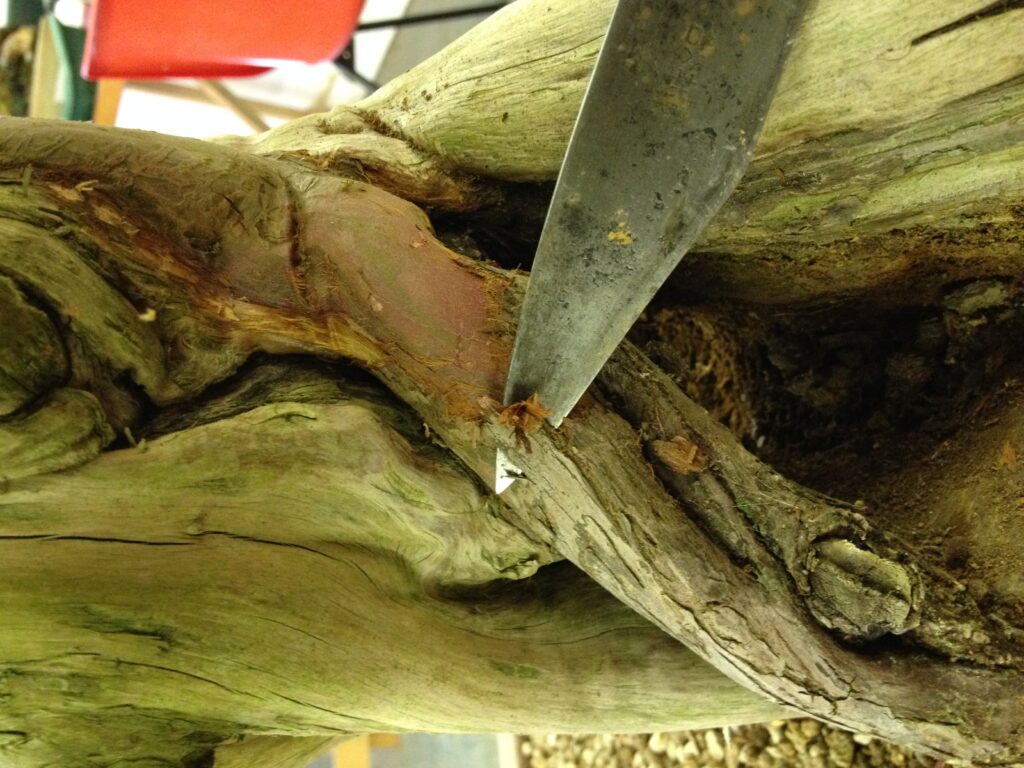
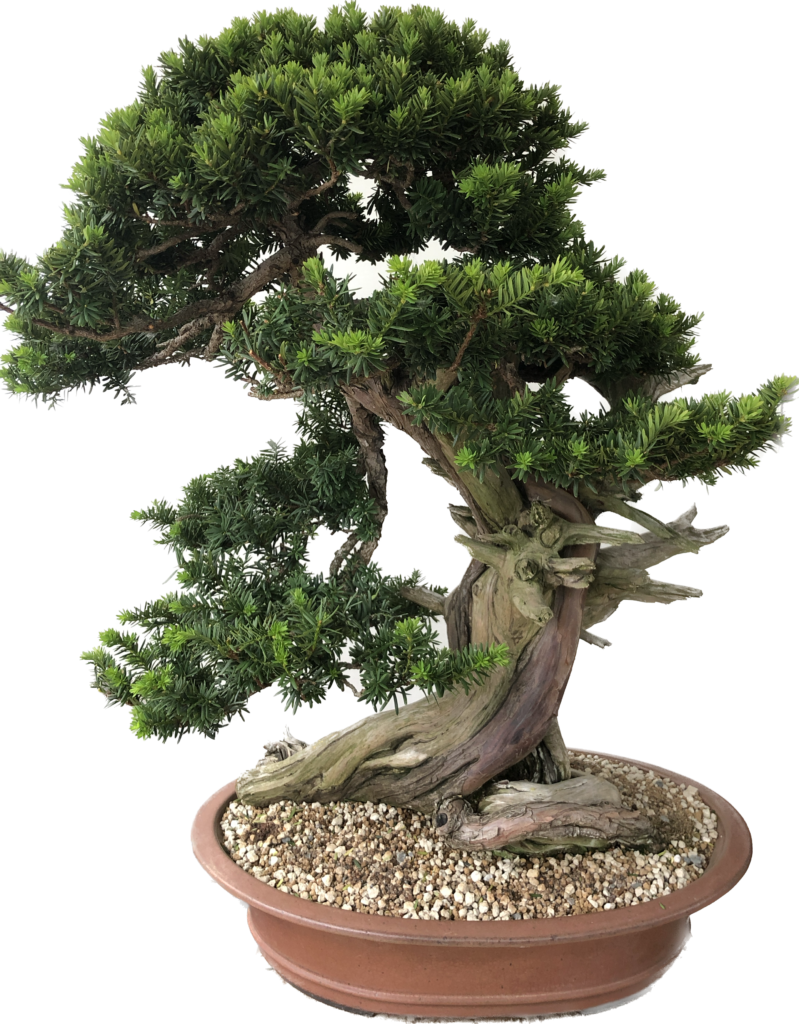
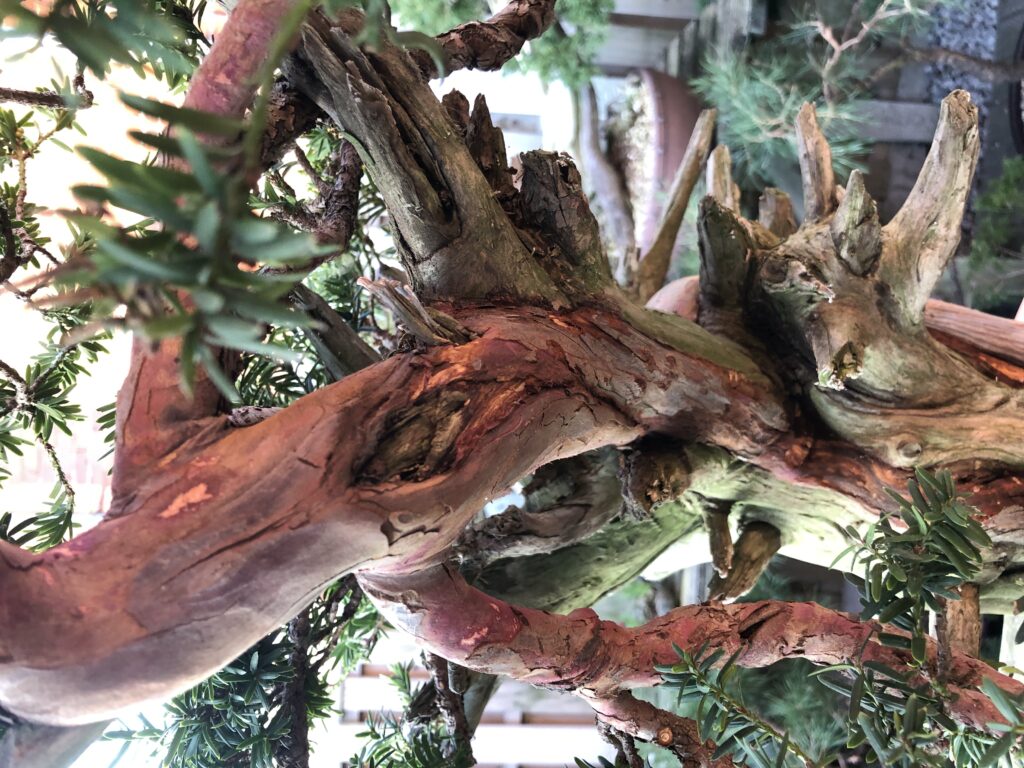
Quite a transformation and now with just two live veins feeding the remaining live foliage. The deadwood was made using hand tools only and looked really convincing considering it was newly created.

Keep an eye on the website for part two to catch up on the further development of this remarkable tree.

The story of a Japanese Yew (Part two)

10 March 2023 at 14:37
March 2010 – Following the tree’s first styling in February I decided to carry out a repotting and set the tree at its new correct planting angle.
The tree has a dense fibrous rootball typical of the species.
The tree happy in a new pot with the planting angle adjusted. The protruding original rootball to the left will gradually be reduced and eliminated.
A view from the other side, the back of the tree.
February 2013 – The tree stands now with no wire on and the protruding rootball has been completely removed.
September 2013 – The tree has grown well, complete with self generated accent plant!
A chance to look at the live veins in more detail. The main vein has become so strong, narrower, more rounded and standing proud of the trunk. The upper left section of the vein has become redundant, died back and is completely flat.
The area cleaned up and the dead section removed creating a wider shari.
A section of the other vein to the right of the chalk line had also died back.
The bark can be safely removed. The interplay between the two live veins and the extensive shari areas becomes even more dynamic.
April 2014 – After another wiring and styling new growth begins to emerge.

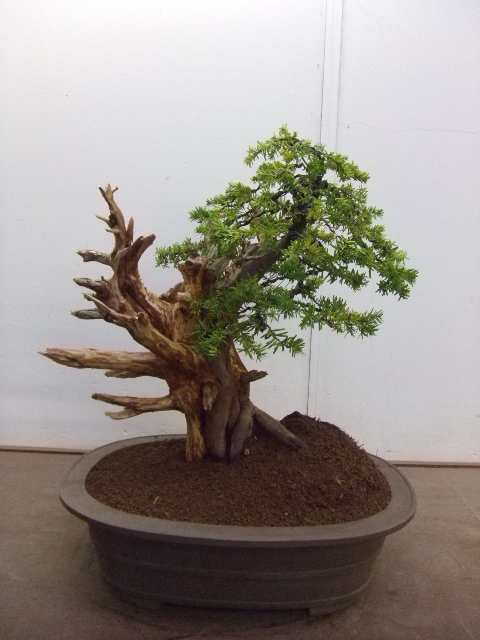
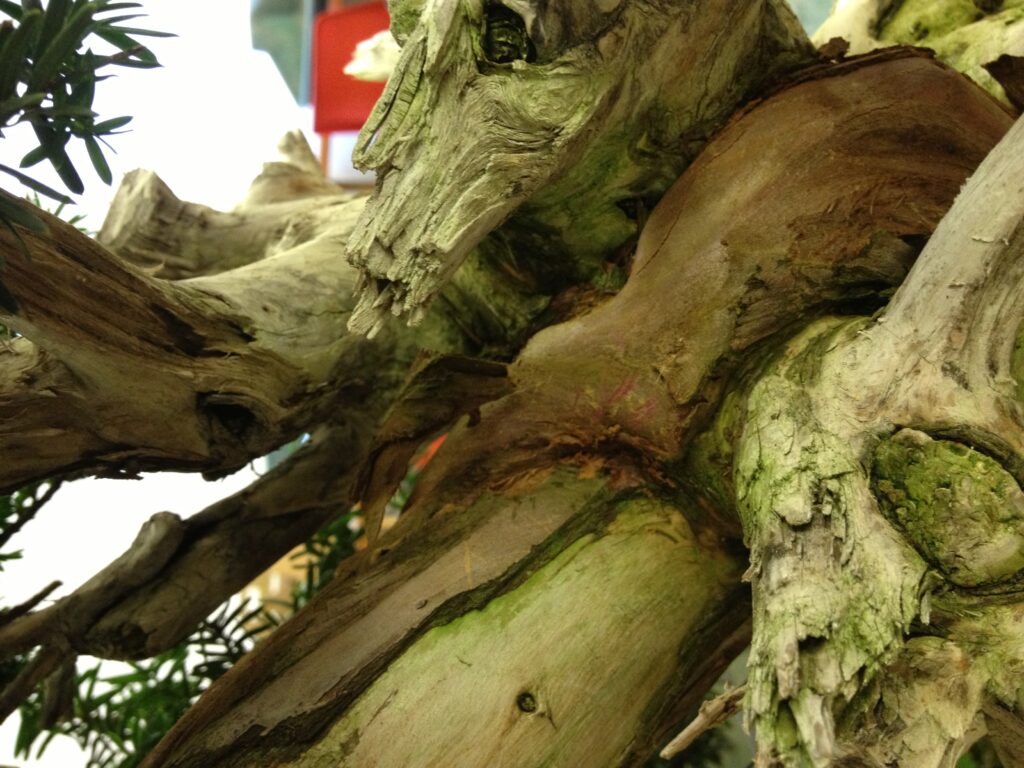
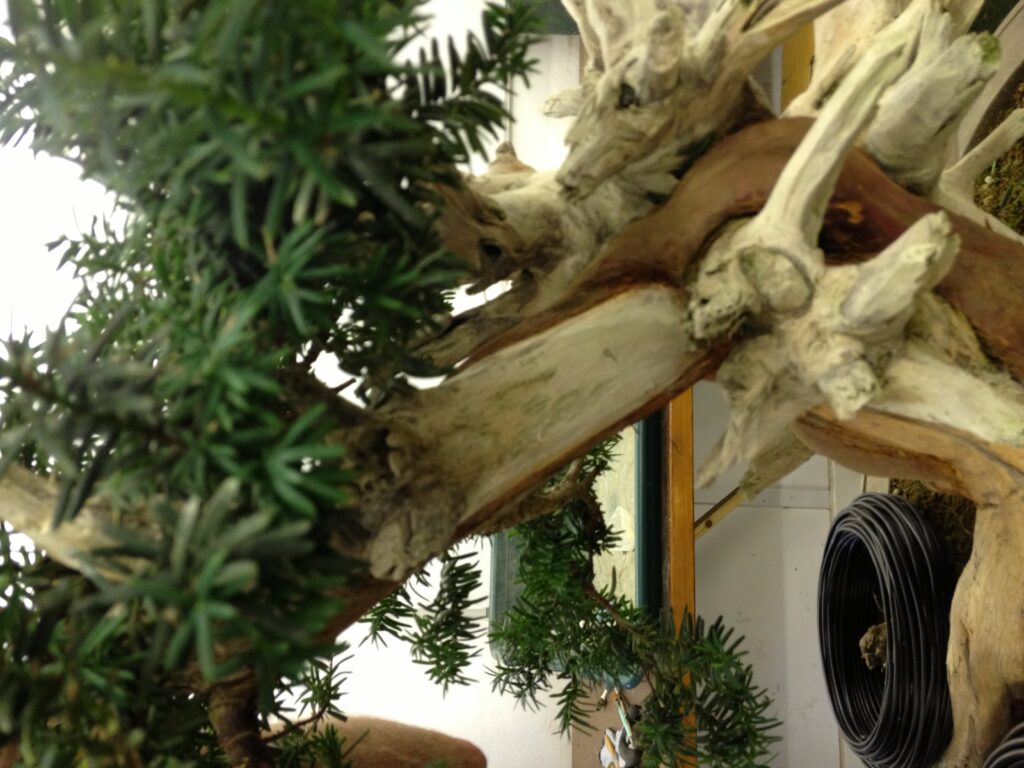
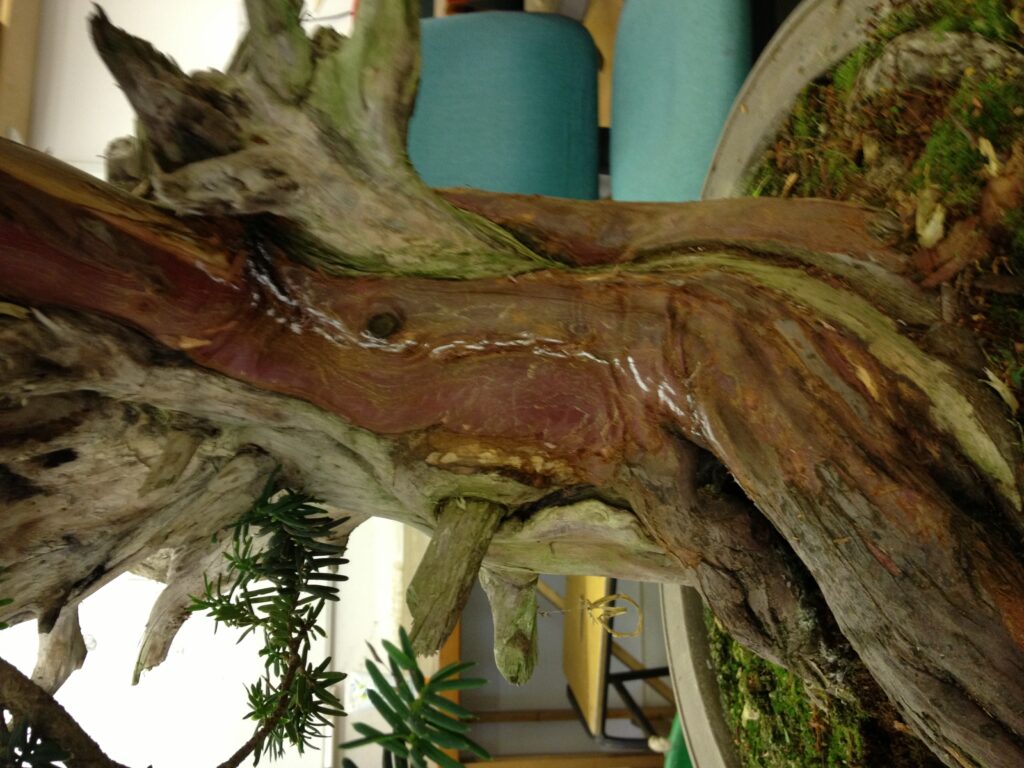
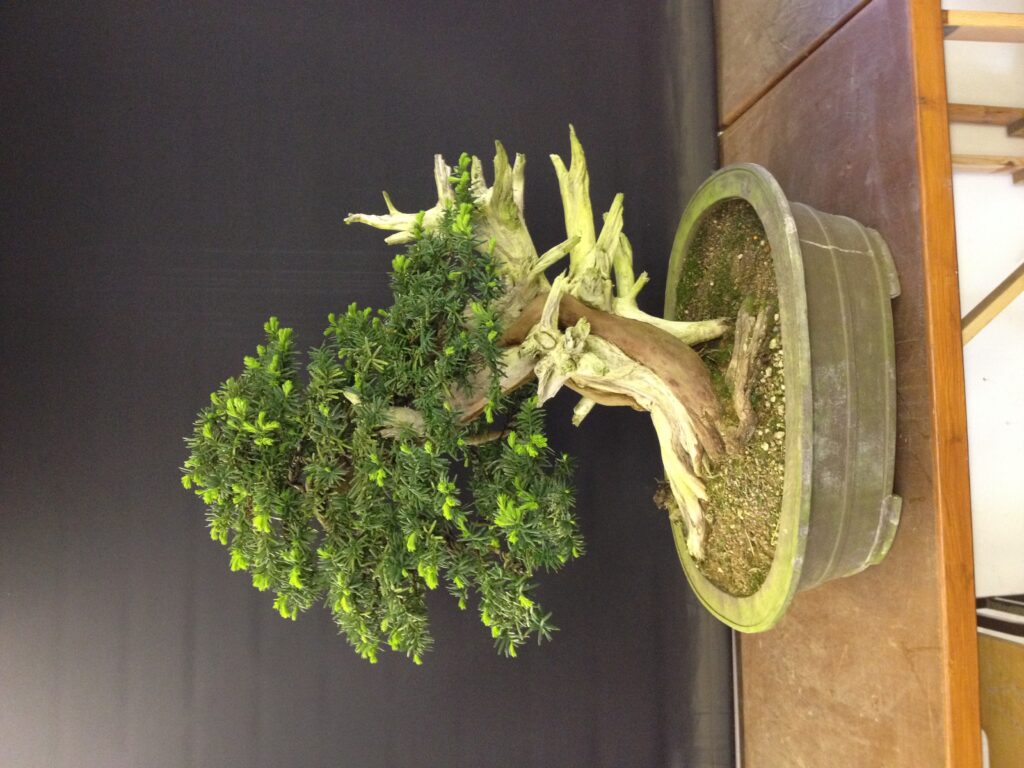
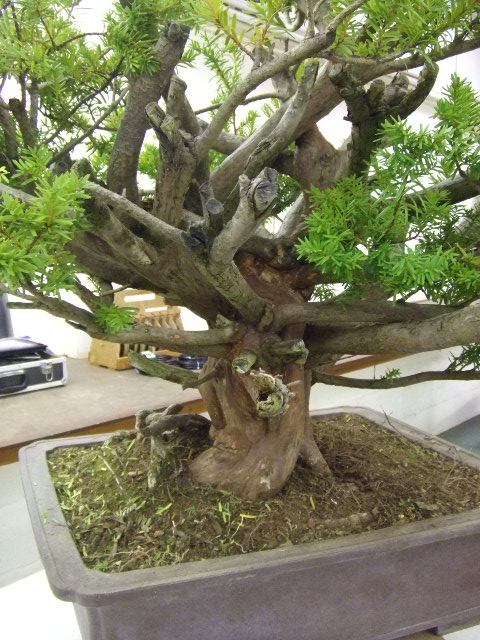
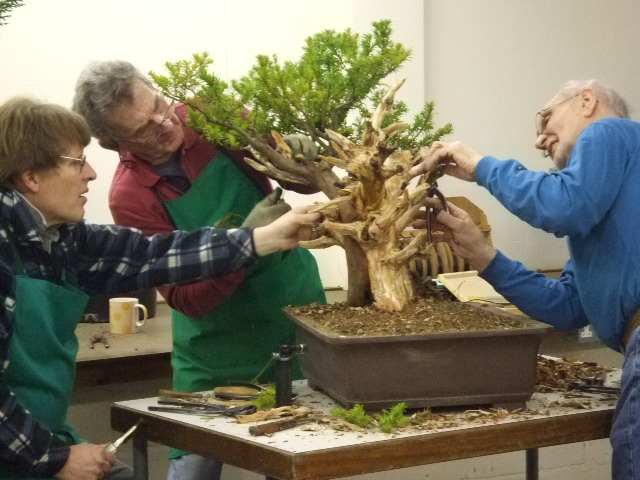
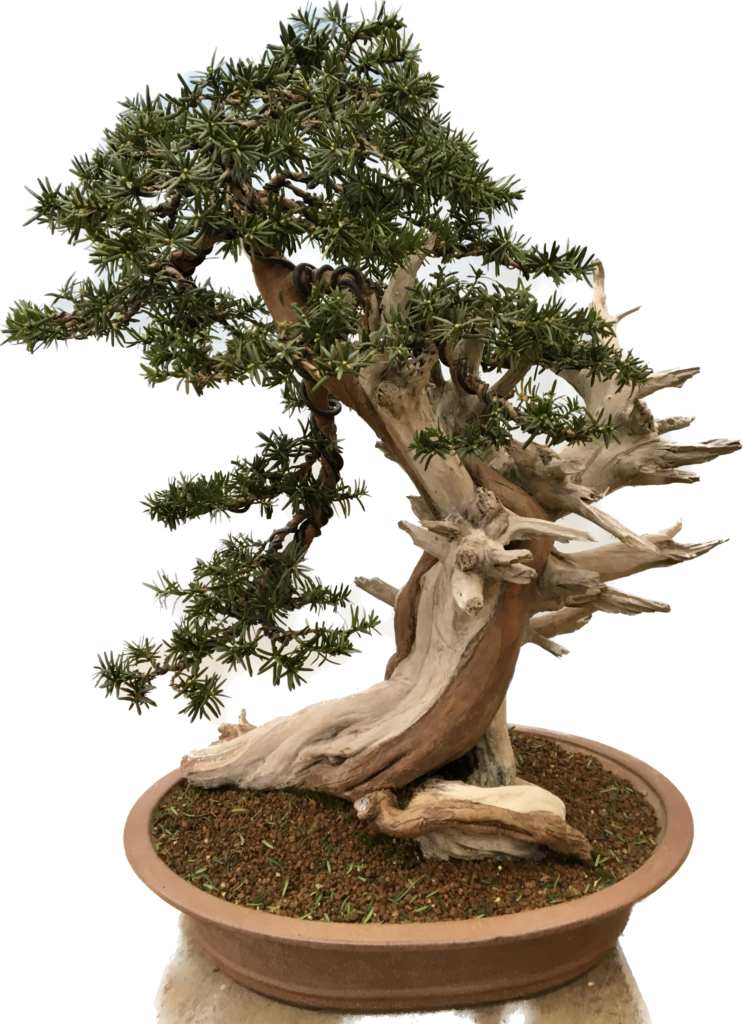
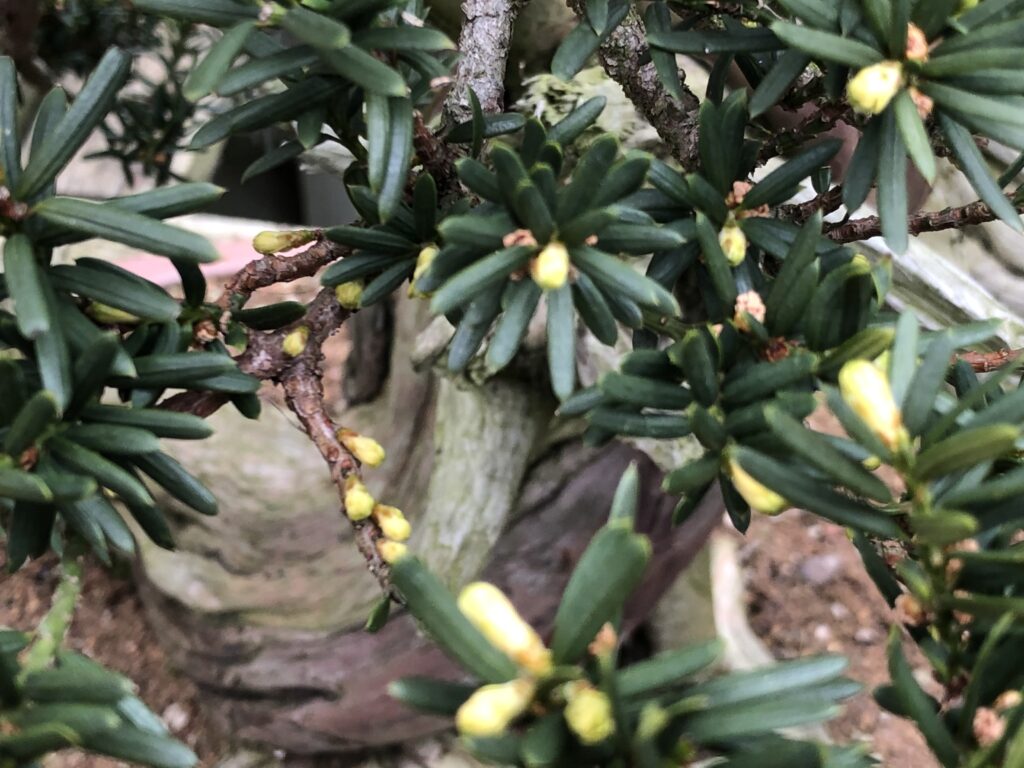
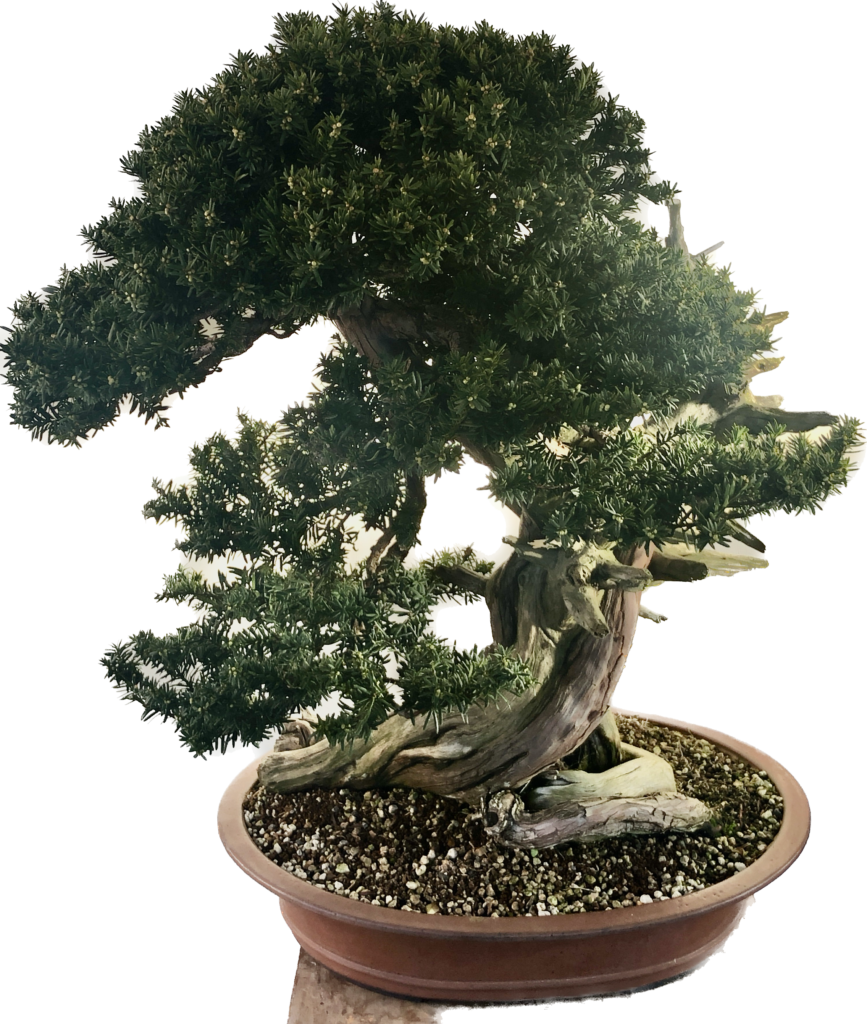
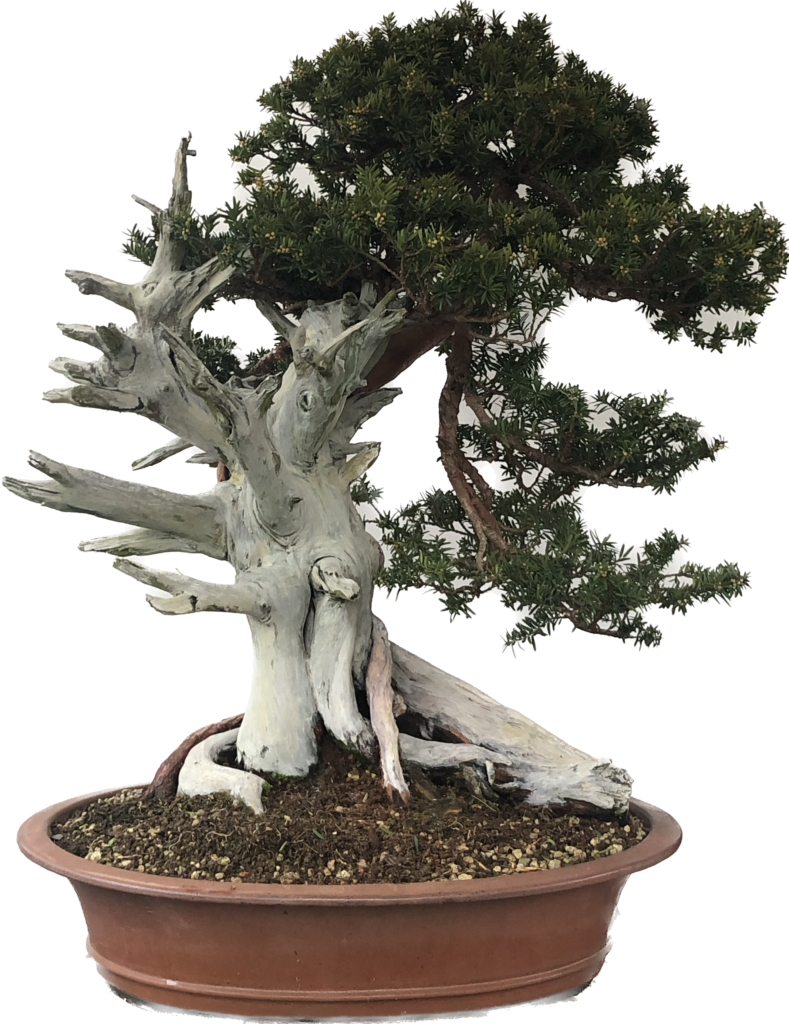
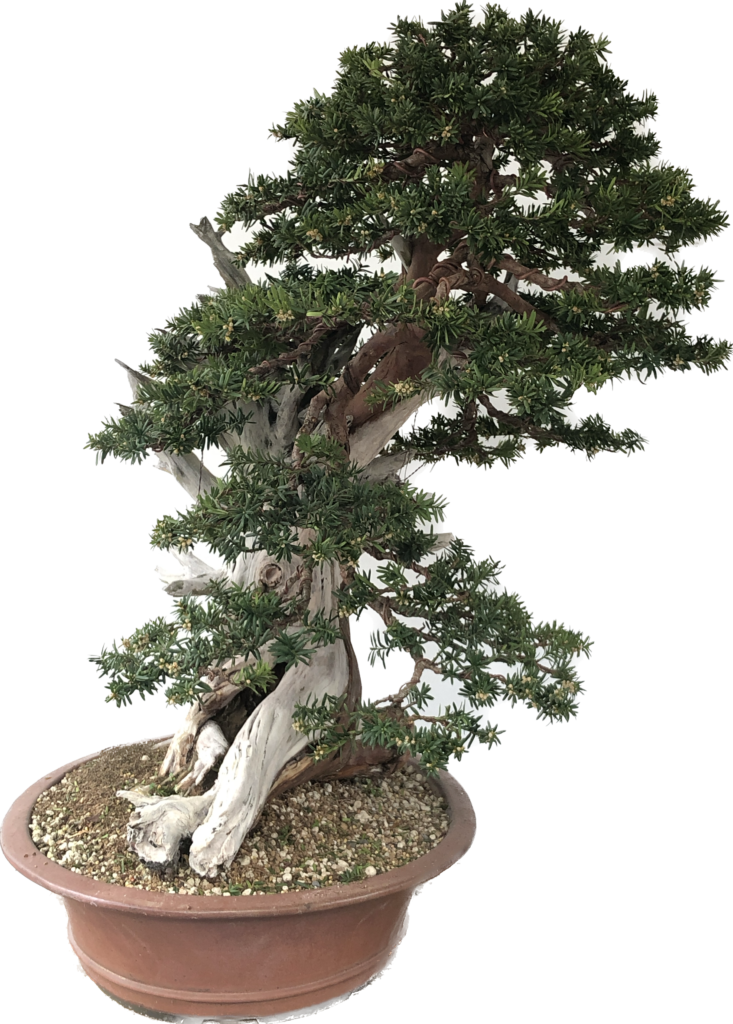
The tree continues to develop and make good progress but at the tree’s own pace. In extending the deadwood areas and reducing the live veins I follow the tree. The tree has initiated this process rather than me trying to impose changes just for the sake of it.

The story of this tree will be continued in the next instalment on my website.

The story of a Japanese Yew (Part three)

26 June 2023 at 17:28
August 2014 – The new growth is clearly visible.
Old bark between the live vein and the dead shari needs to be removed.
It’s easy to get behind the bark with a knife.
Old bark can be removed from the upper surfaces too.
The veins are becoming totally rounded standing proud on the trunk enhancing the maturity and character of the tree.
The centre of the trunk is now hollow too.
March 2017 – The tree had spent time on the sales benches and now stands without wire
There is a sparseness about the foliage but the tree is budding well.
June 2017 – The new growth is strong
March 2018 – After another wiring and styling.
May 2018 – And the new growth is ready for pinching
After the pinching work had been completed.
June 2018 – Before summer pruning.
After the summer pruning.
March 2020 – The tree continues to bud back well
April 2020 – Density is improving.
Time for more pinching work.
April 2022 – The tree is now looking really strong and healthy…..ready for the next wiring and styling.

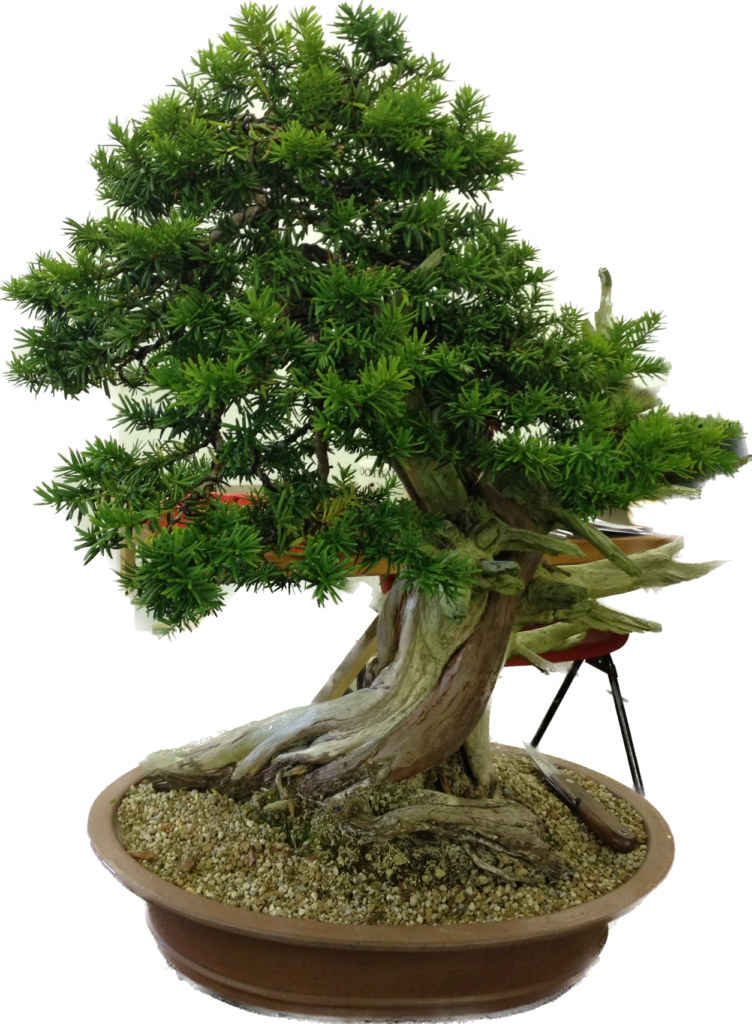
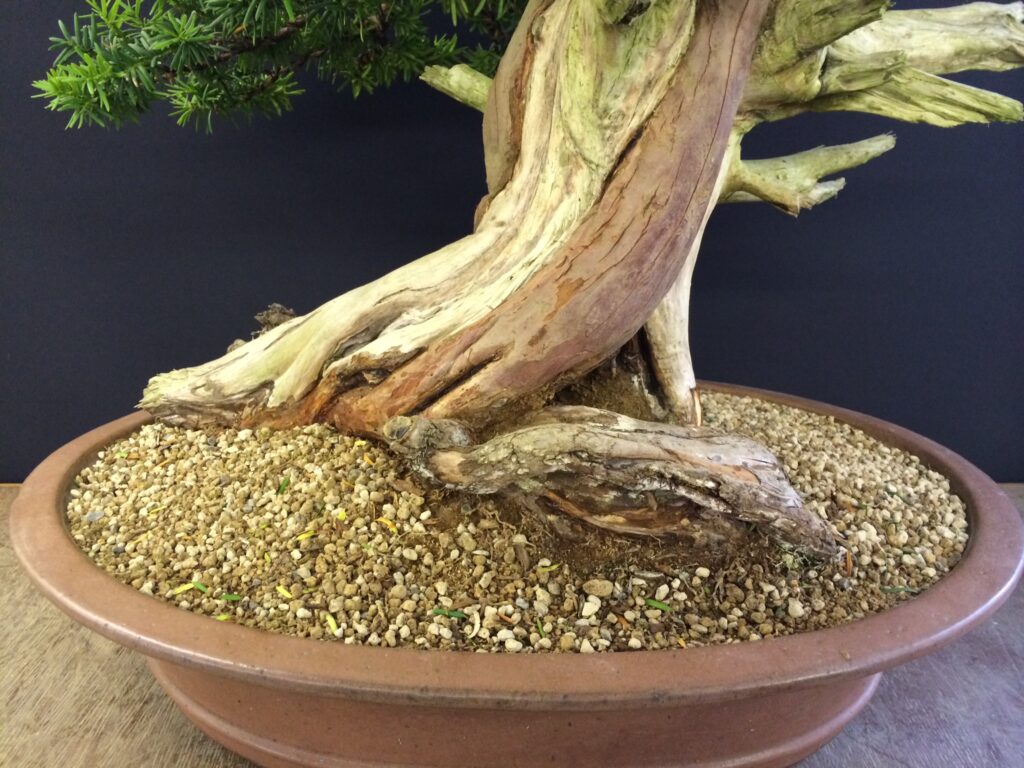
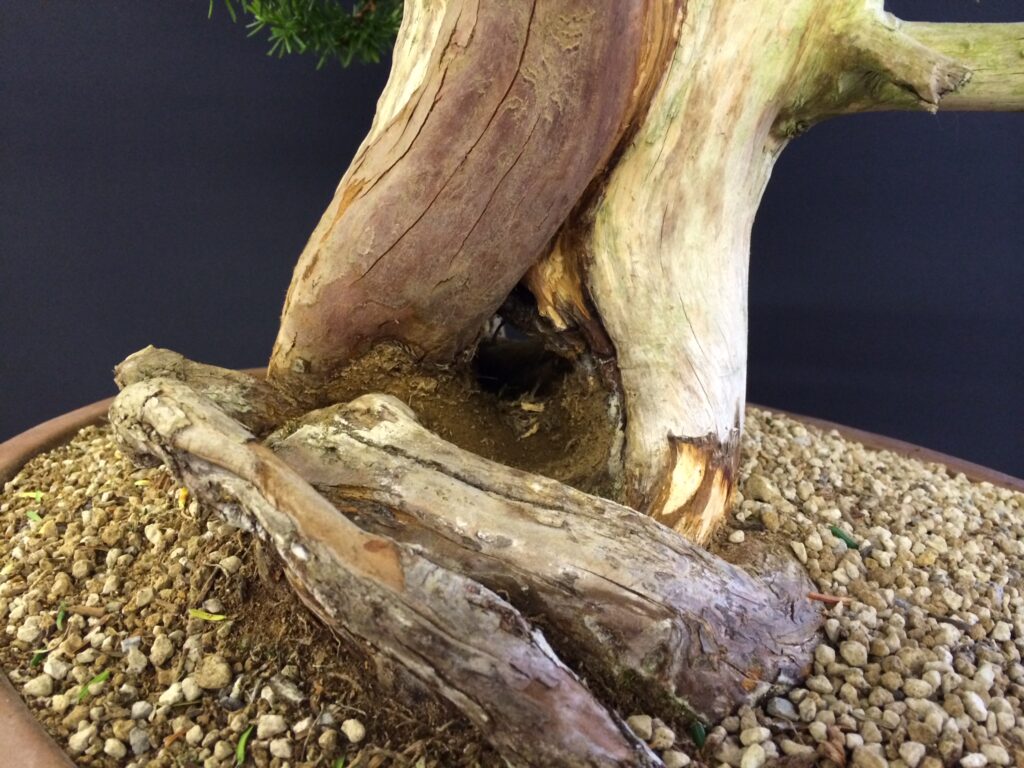
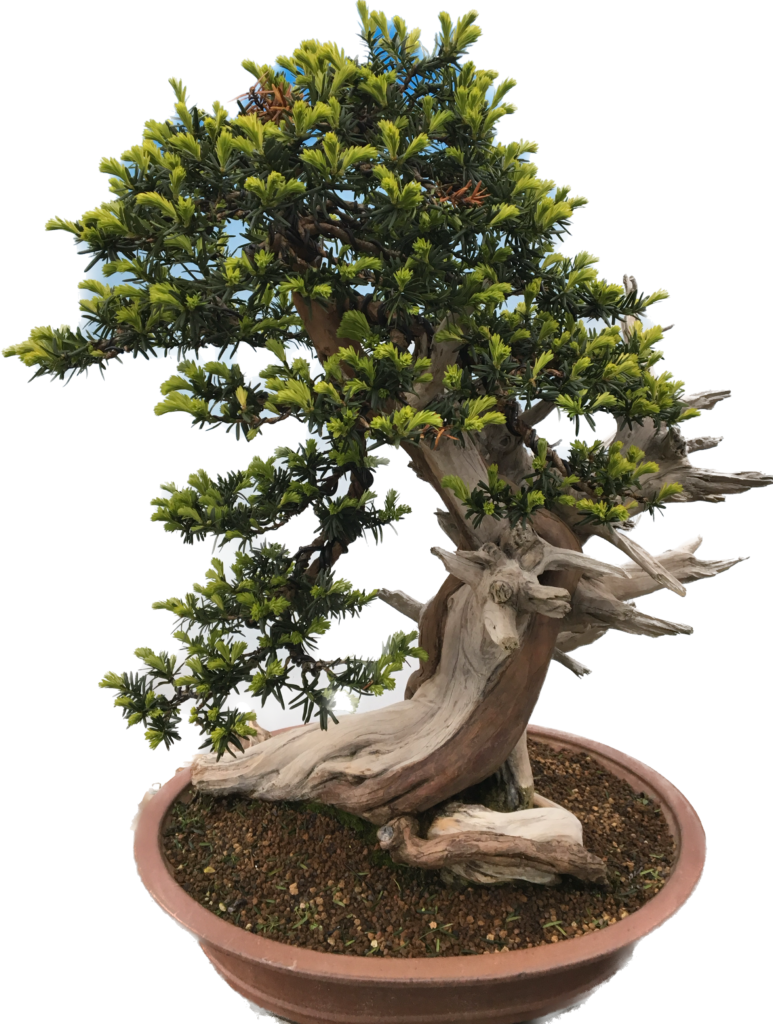
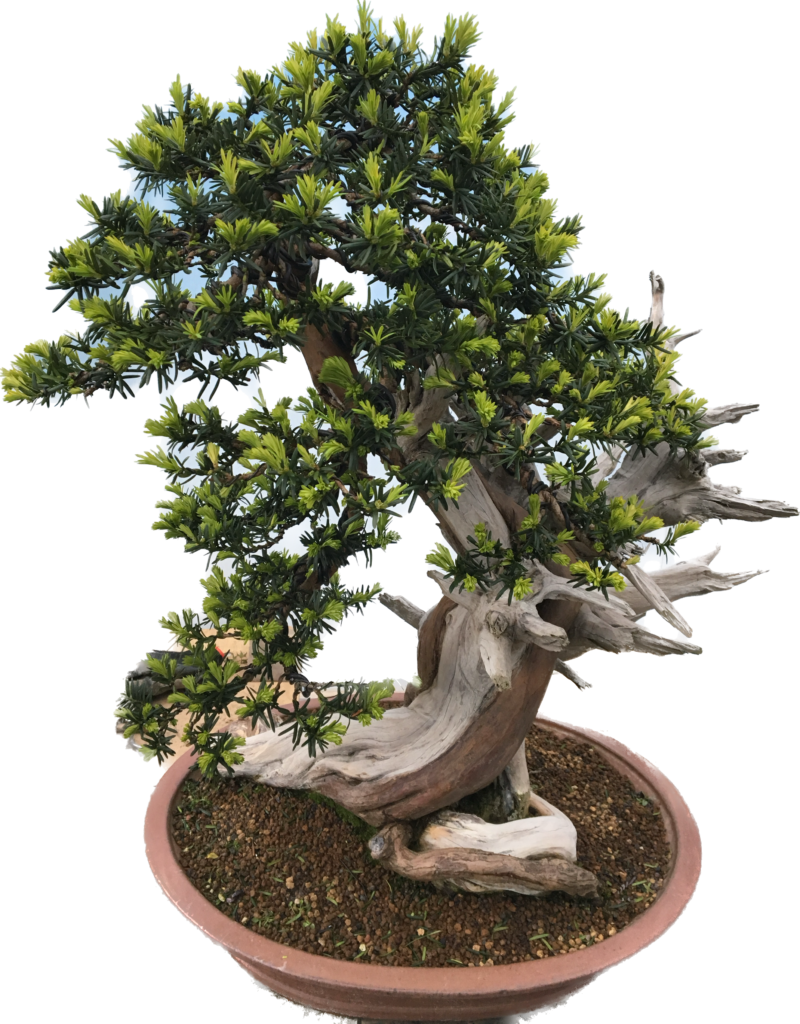
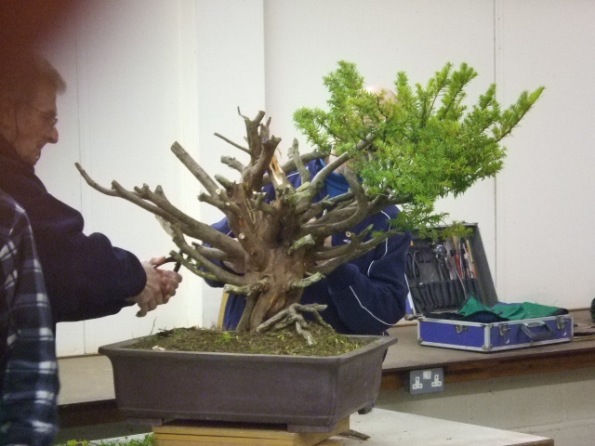
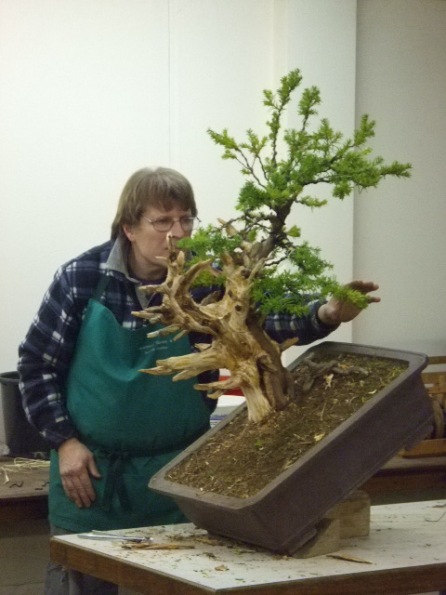
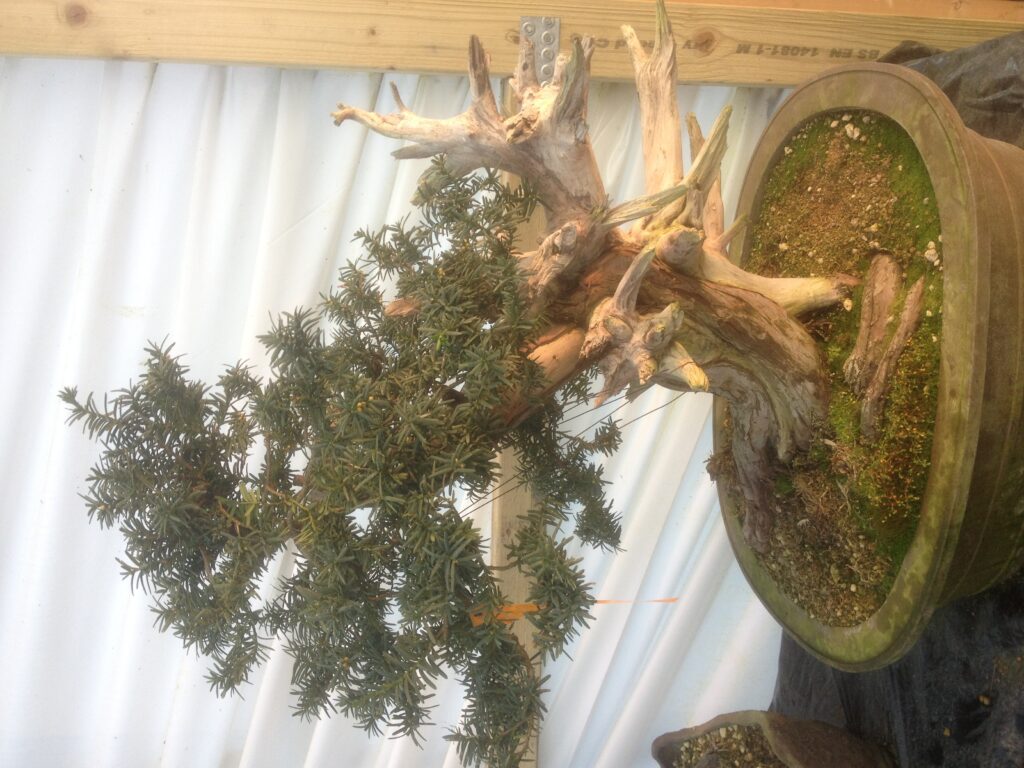
The final part of this series will bring us right up to date with the latest styling carried out at the beginning of 2023.

The story of a Japanese Yew (Part four)

8 July 2023 at 10:58
May 2022 – The tree is vibrant, strong and healthy. The basic shape is visible but now somewhat unkempt and overgrown.
January 2023 – The tree is brought inside ready for a complete overhaul.
Old needles are removed. Shoots are selected and thinned out.
Work begins on cleaning the live veins and the deadwood areas.
The secondary thin live vein in the centre of the picture is no longer being used by the tree. The bark will be removed and it will be incorporated into the deadwood.
Old cut off roots will be carved and hollowed to create a more natural appearance.
After the work had been completed and lime sulphur applied.
February 2023 – Preparation work completed and now the tree is ready for a total wiring including most of the smaller fine twigs. Most of the main heavy branches are set in place and will not need to be wired.
A view from the rear of the tree prior to wiring. The old root coming straight down from the now redundant live vein and crossing the other roots will be shortened in due course and made into a small jin.
After wiring the entire tree using Japanese copper wire this was the waste material I had left. Economising in the amount of wire you waste is all down to technique and experience.
The tree after wiring and styling with potentially a slight change of angle to the front
A view from the right side.
A view from the left side.
A view from the rear of the tree.
January 2005 the picture taken immediately on his arrival from Japan.

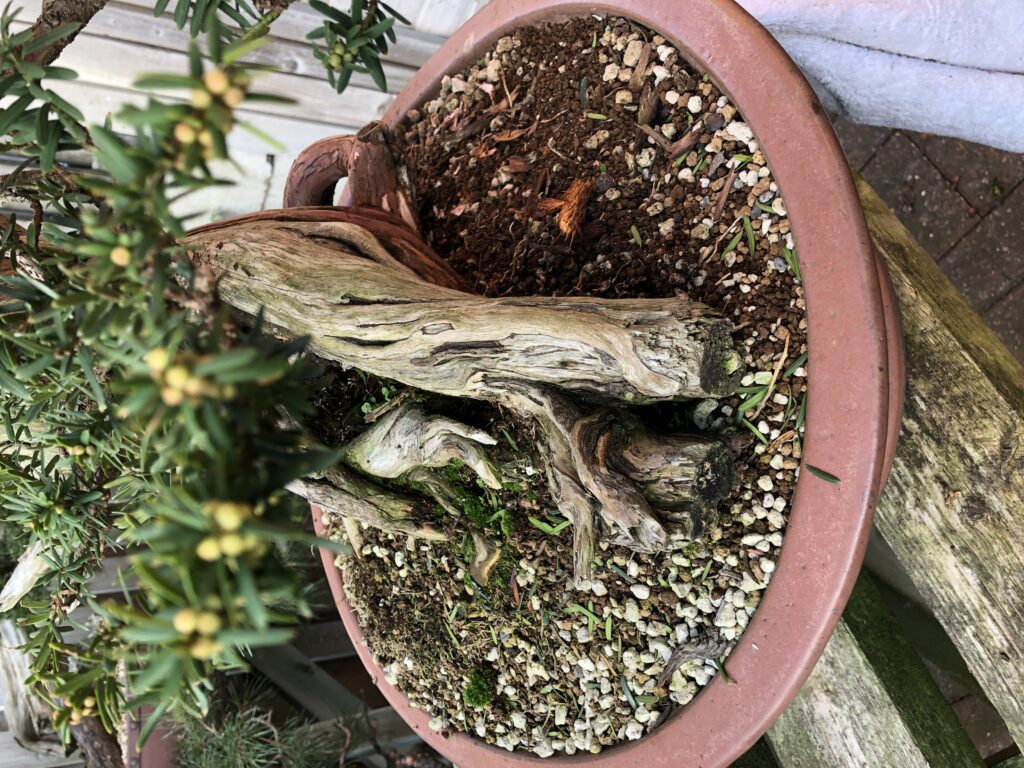
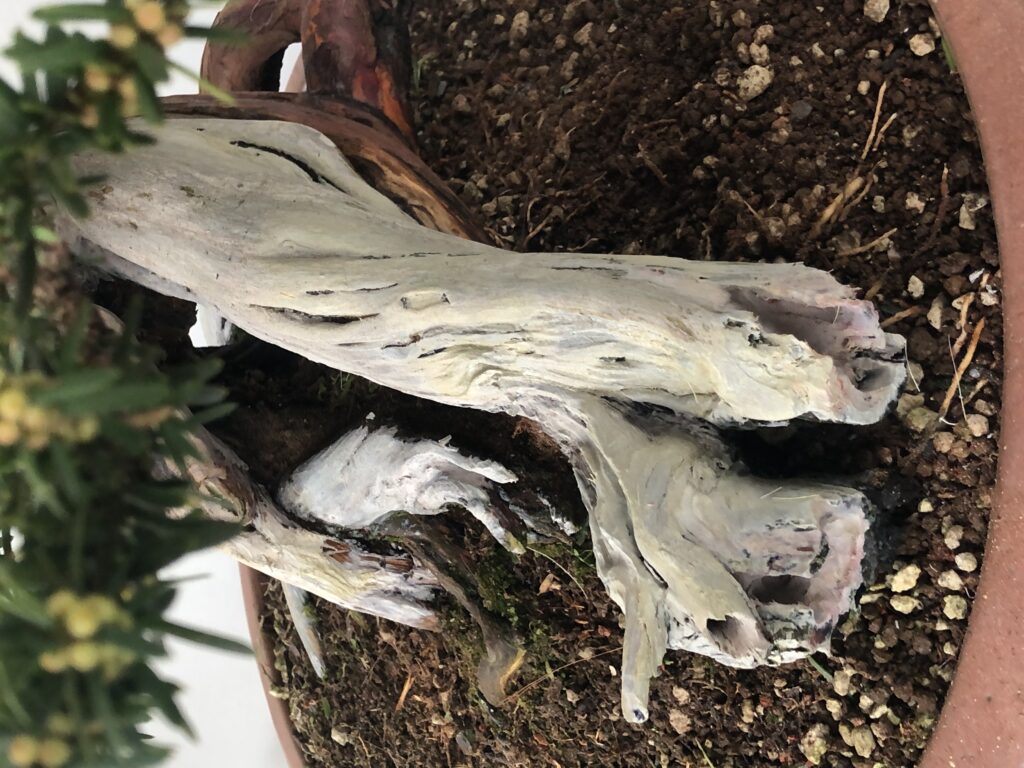
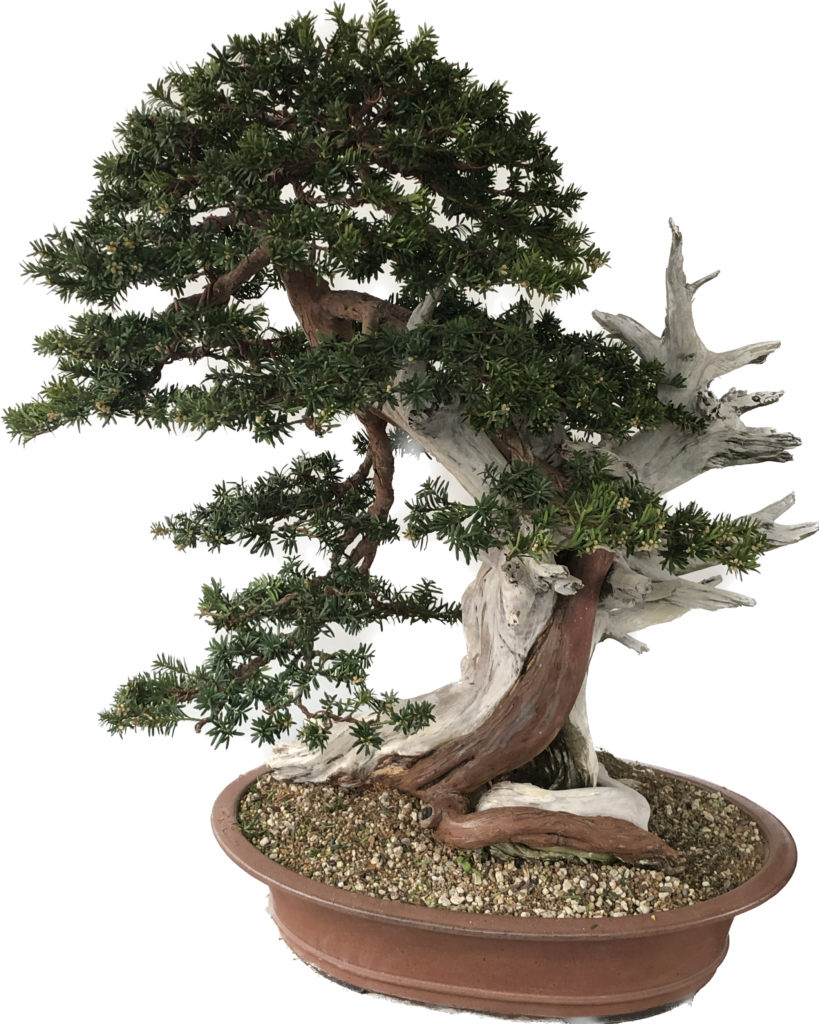
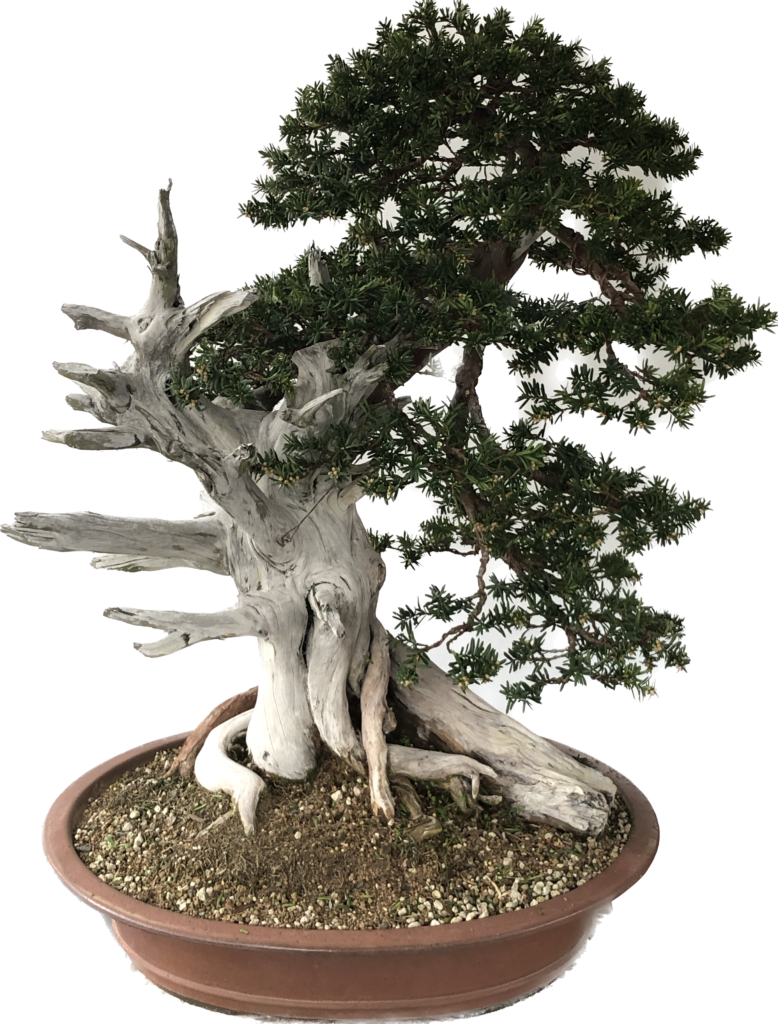
I hope you have enjoyed the story of this yew tree and our journey together. I always knew there was a good tree in that hessian sack that arrived from Japan. It was a case of careful consideration, patience and working together with nature until finally his soul could be released.

Some recent visitors to classes……

9 November 2023 at 16:09
Before – an octopus like leggy juniper
After – now much more compact and organised.
Before – This larch is just losing its needles and retains the seasons new growth.
After – Just a little bit of pruning to restore order and refine the image.
Before – Chamaecyparis Boulevard nursery stock.
After – Pruned to form the basic structure of a tree with scope now for some wiring.
Before – Juniper Ittogawa wired and ready for tweaking.
After – a more compact mature image.
Before – This small shohin juniper is becoming too large
After – Removing the lower branch brings the tree back into scale and in tune with the pot.

Carrying out some private work at a clients home.

18 November 2023 at 11:04

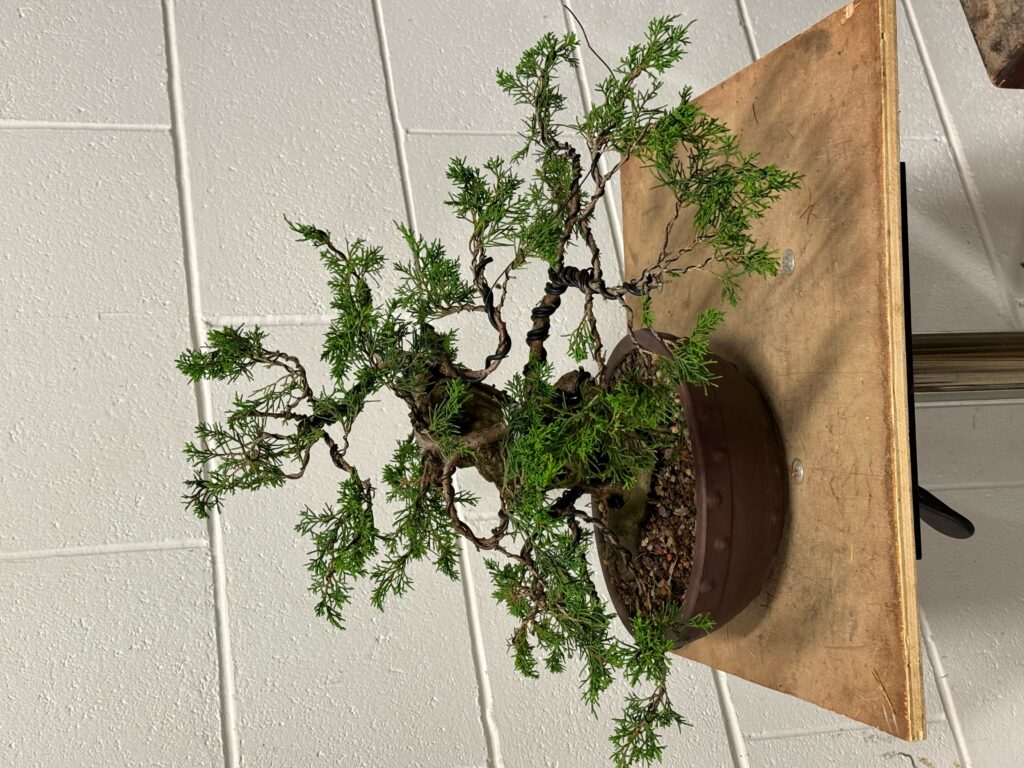
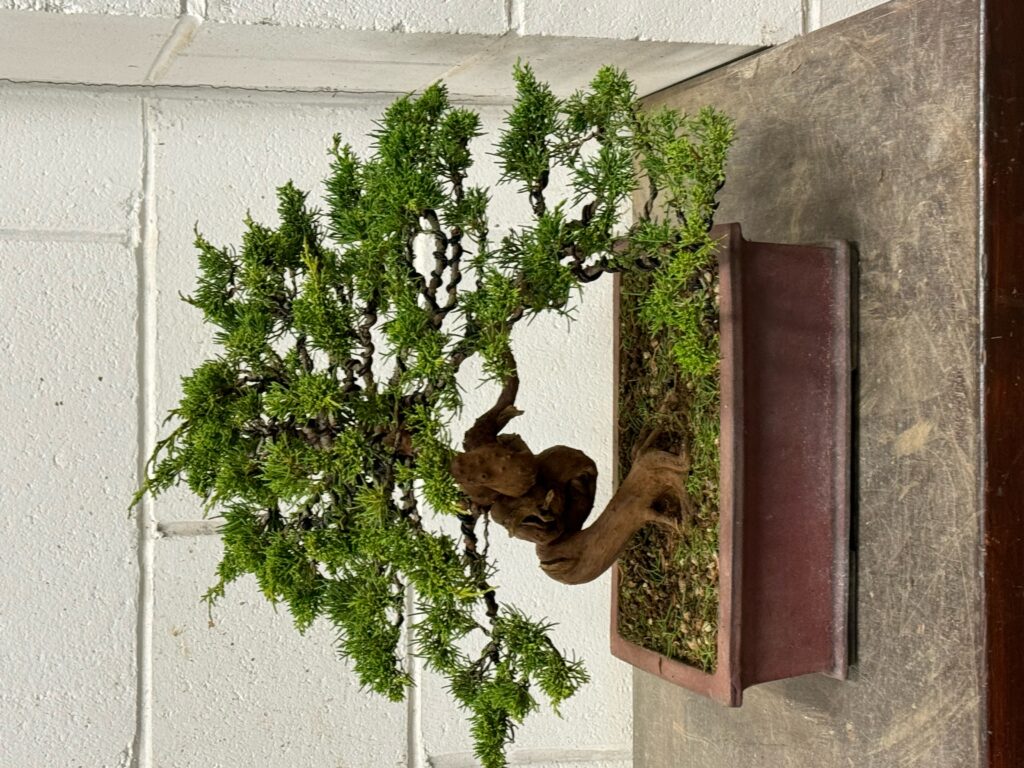
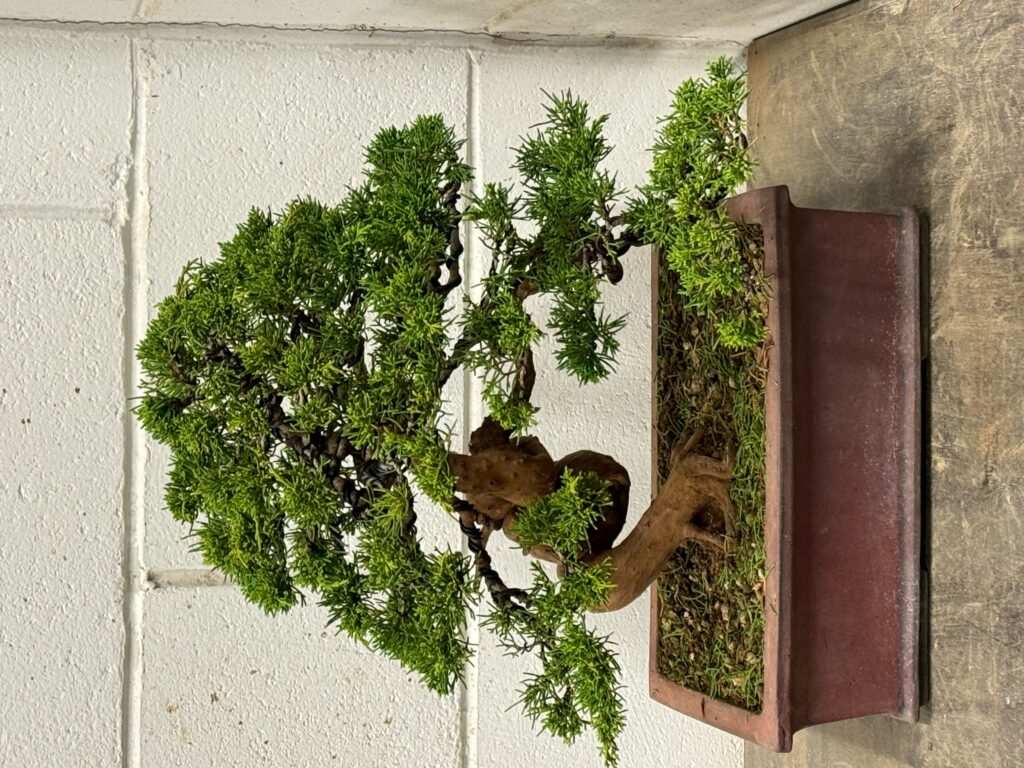
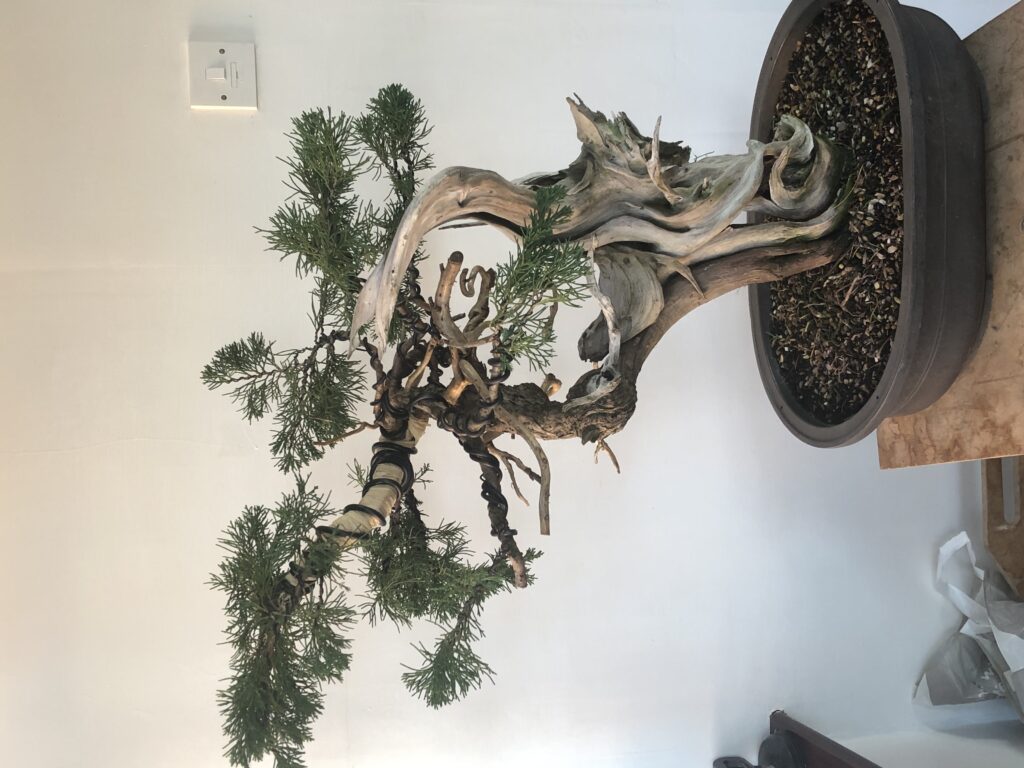
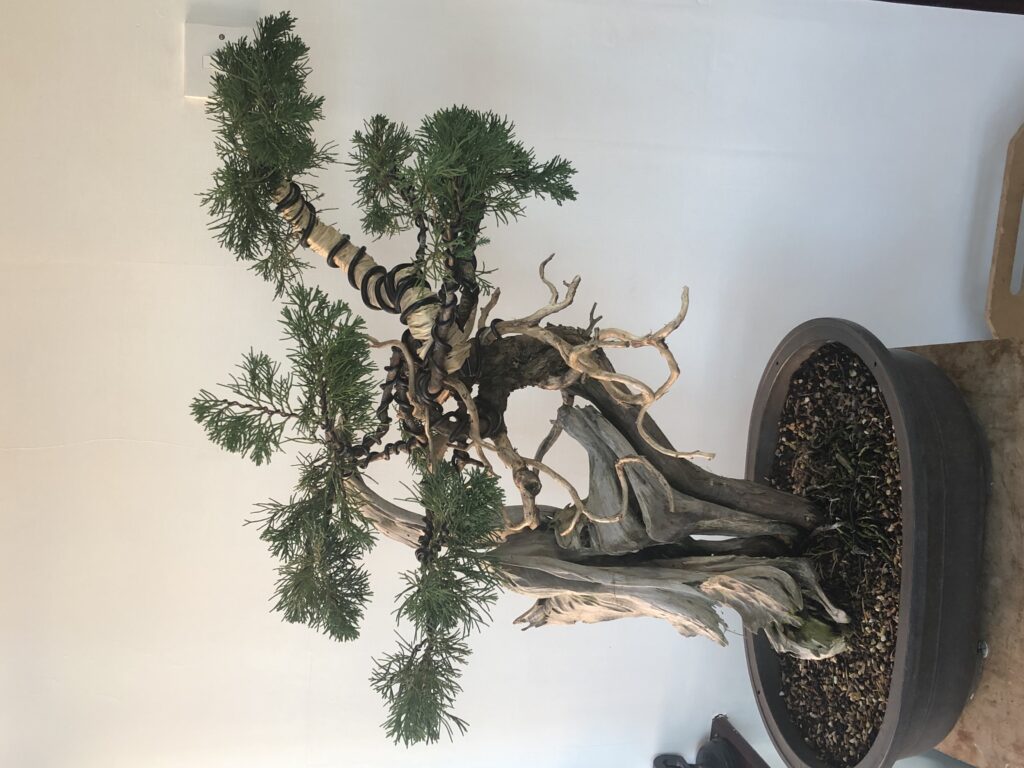
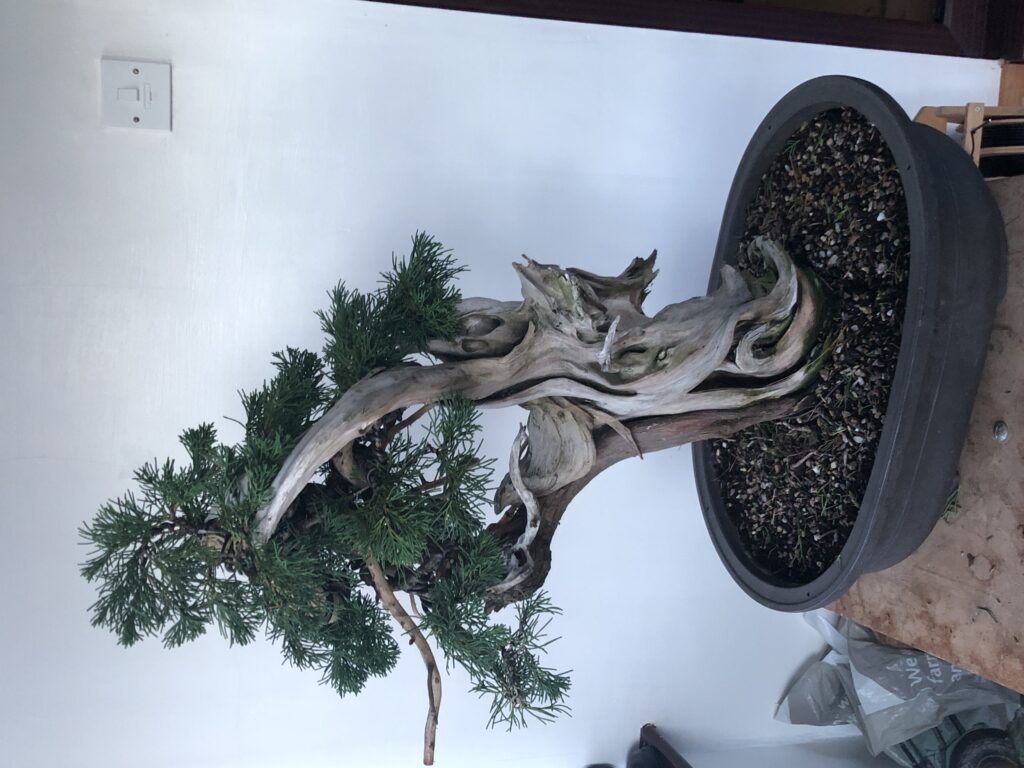
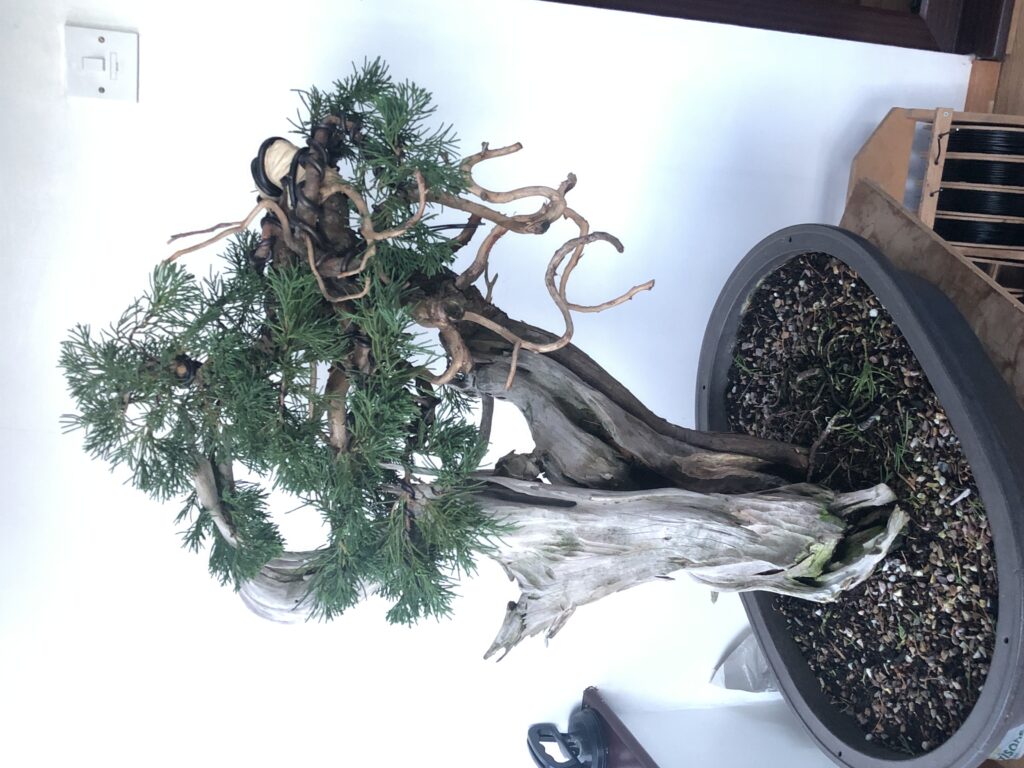
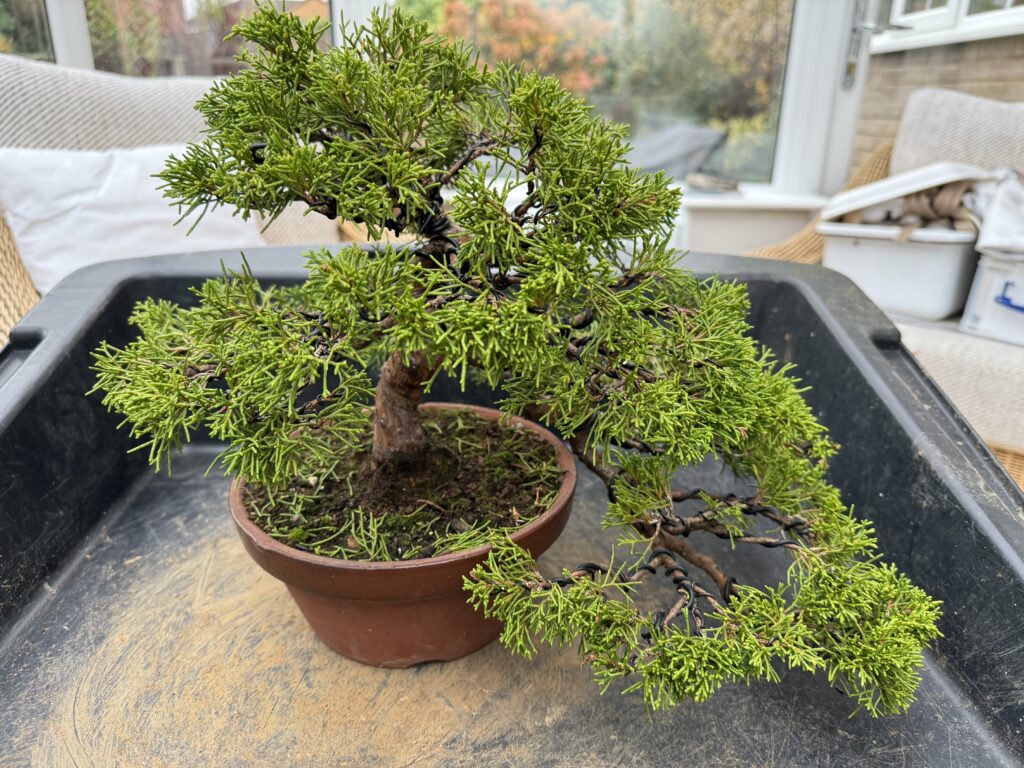
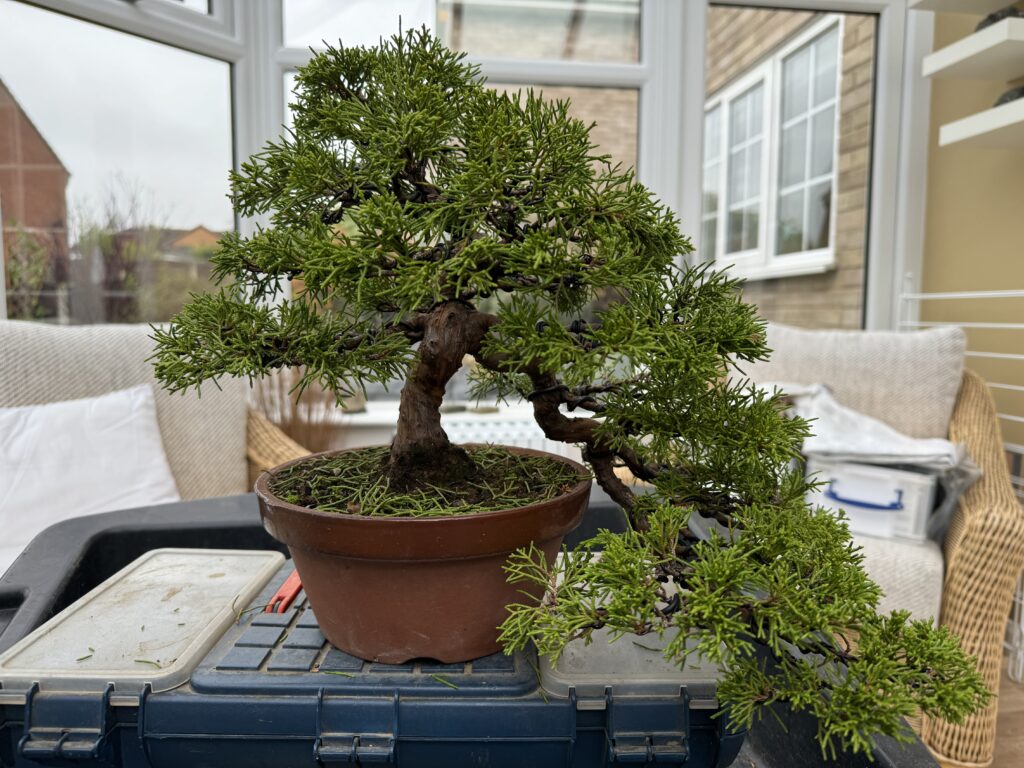
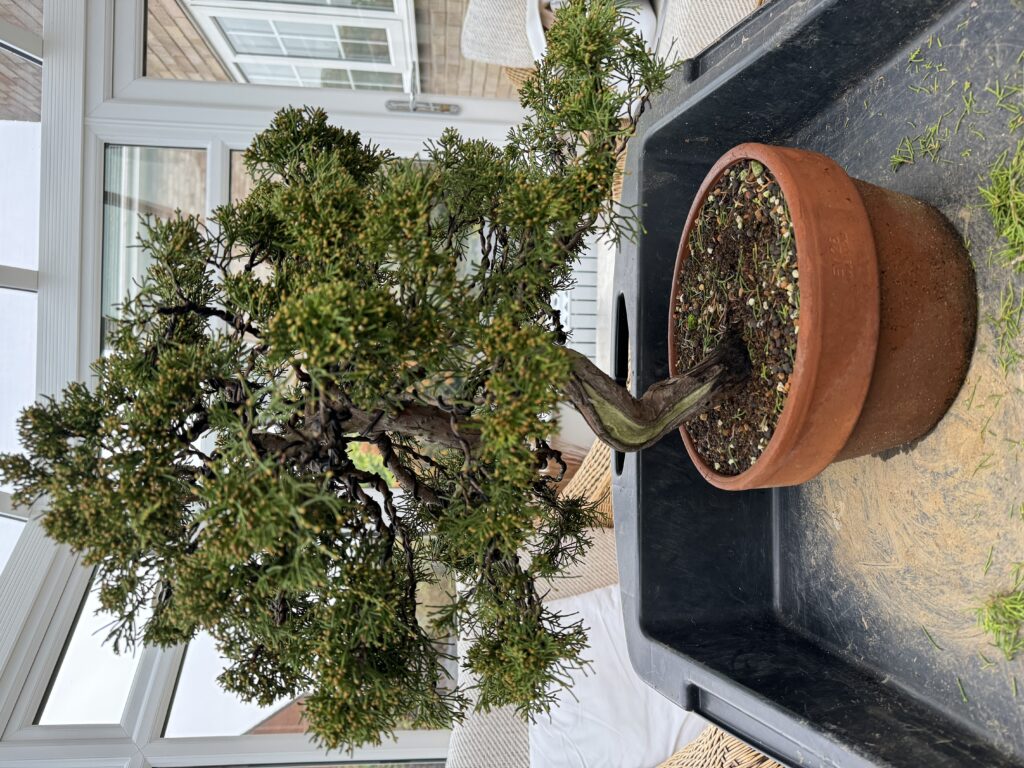
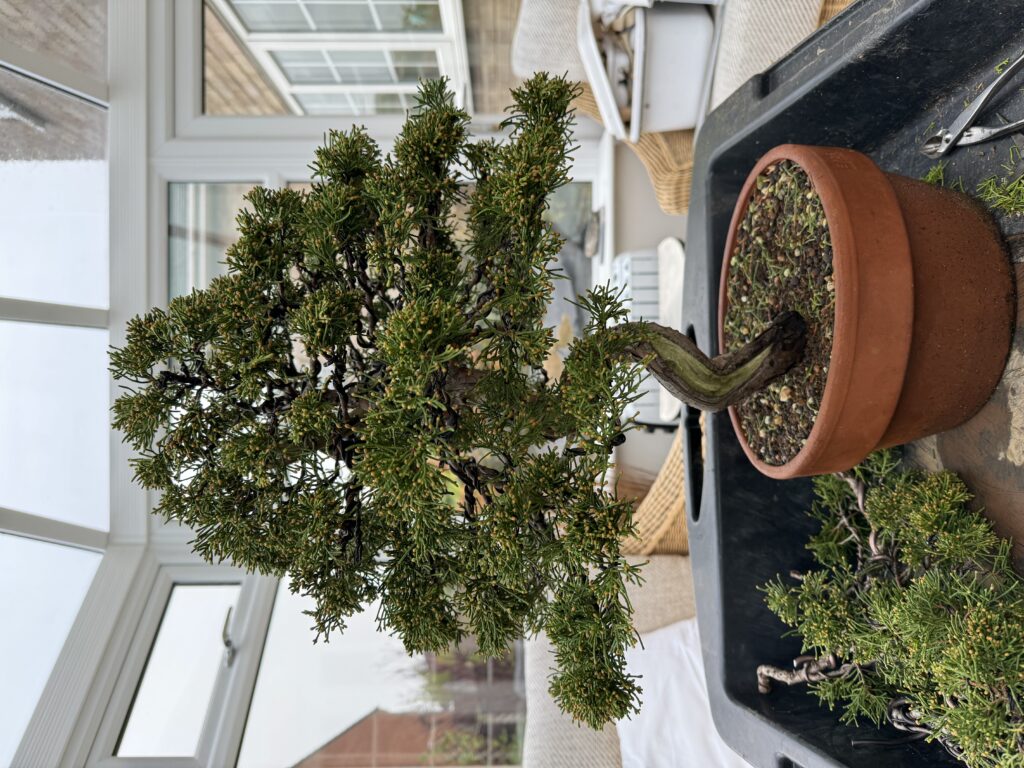
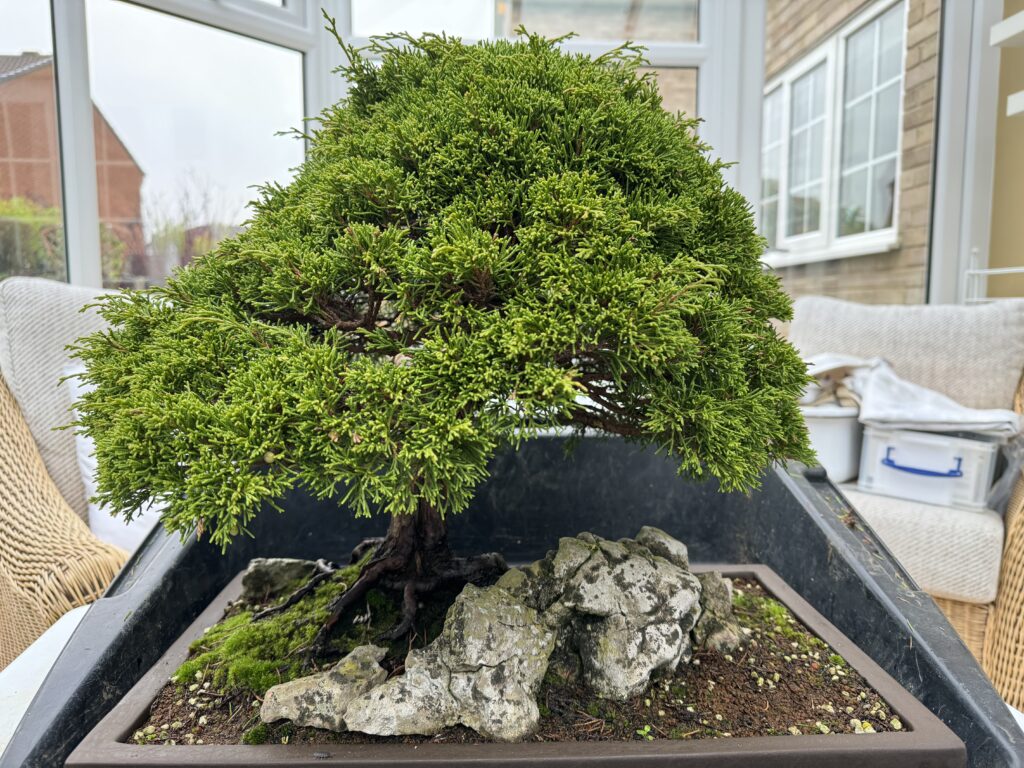
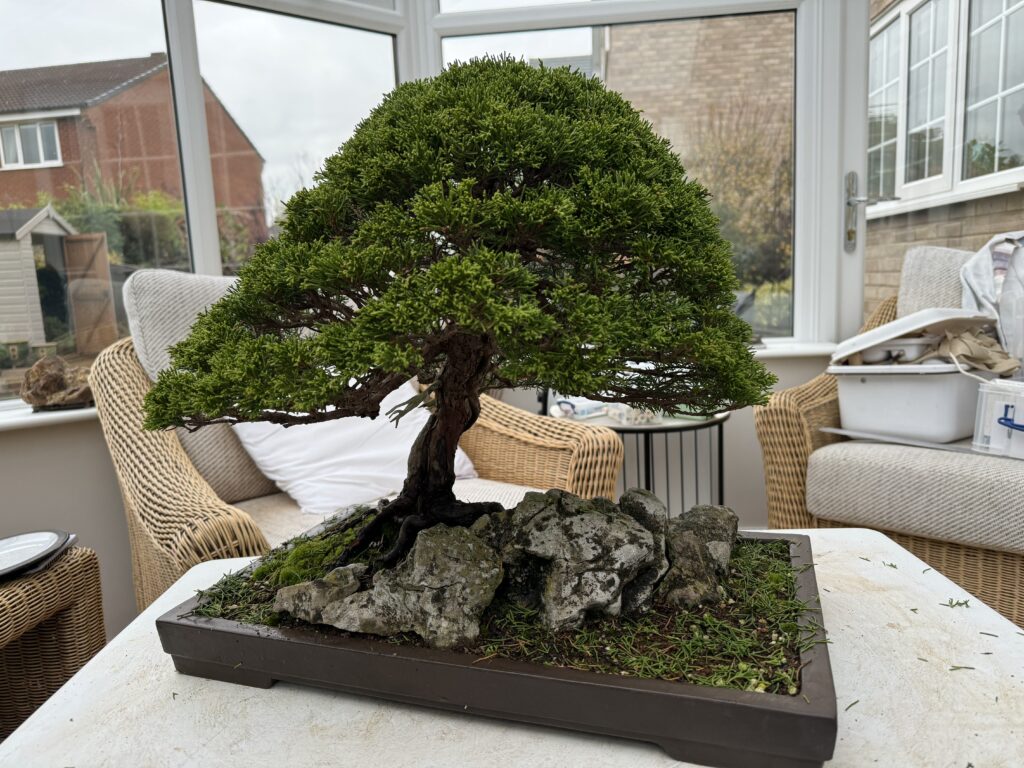
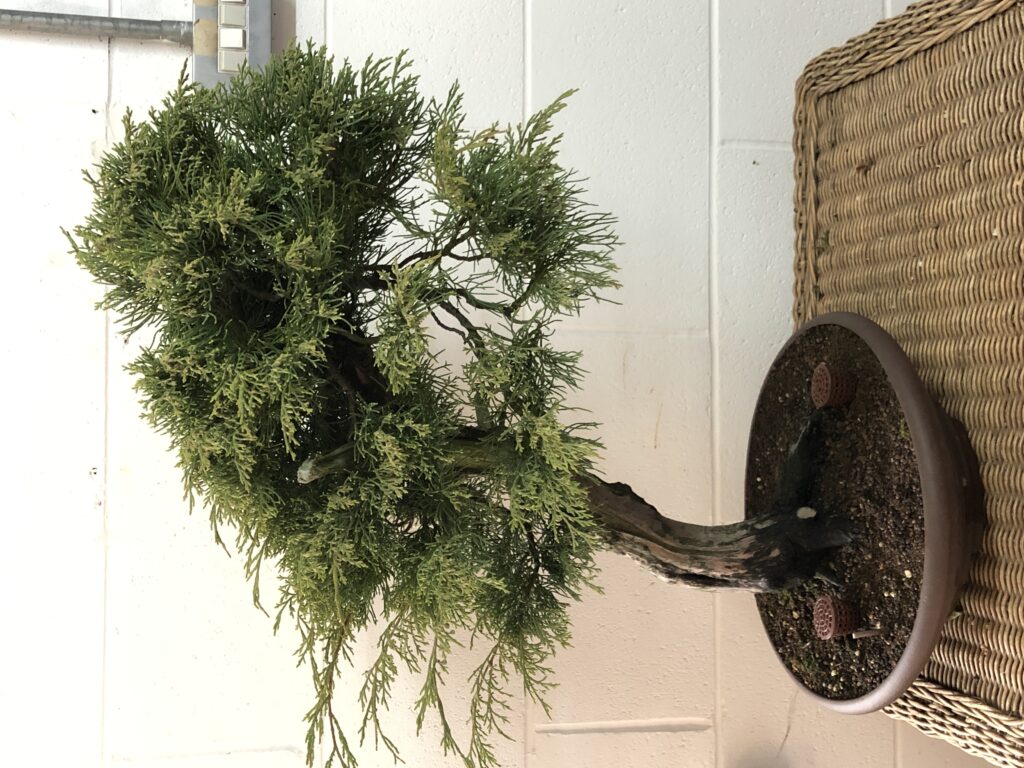
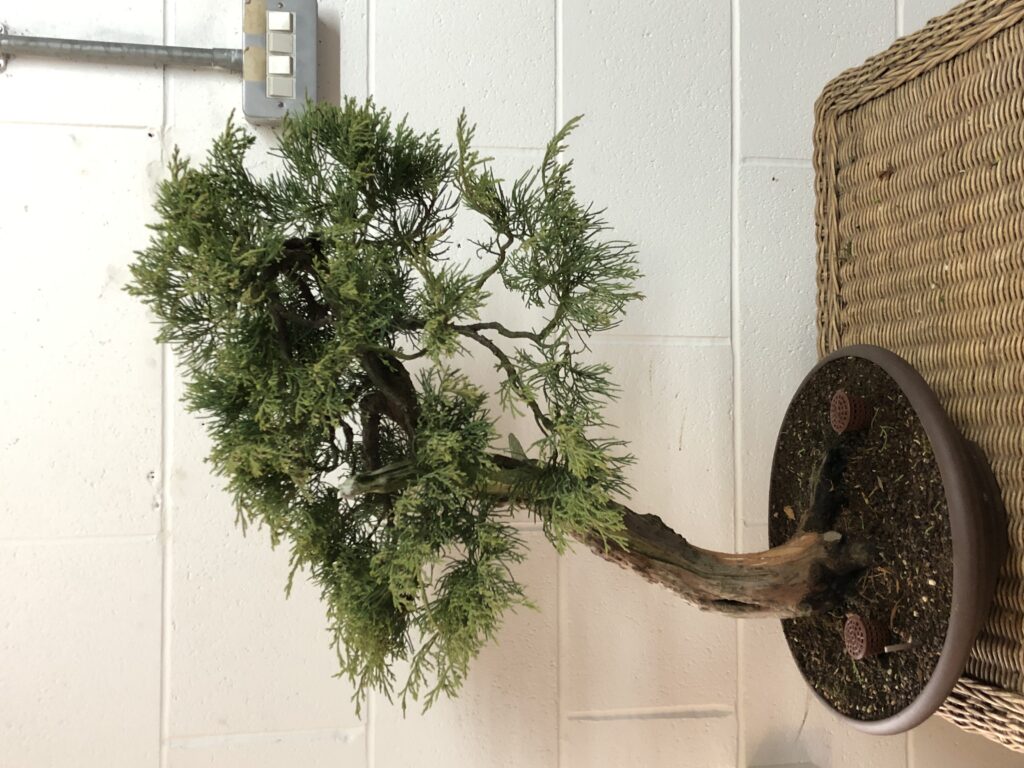
I was recently asked to visit a clients home to work on some of his junipers.

A half cascade juniper ittogawa wired and ready for styling.
The tree after positioning the branches.
Another wired juniper ready for styling. This appears to be juniper sergentii.
After styling and the removal of two large lower branches.
This juniper ittogawa has no wire on but just needed cleaning out and tidying up.
What a difference and what an amazing composition with such a natural looking rock formation.
Hard to believe that this is the same tree that was exhibited at my Newstead Bonsai Extravaganza in 2010.

More and more of my students are beginning to take advantage of private work sessions both at their homes and at my unit.

Paul’s Grey Owl Juniper

16 December 2023 at 11:01
March 2016 – A compact styling based on the branches available.
August 2017 – The tree has grown well and has lost its shape.
August 2017 – The wire has been removed and the dense foliage has been cleaned out.
November 2019 – The tree is in the process of being rewired.
November 2019 – Wiring completed the tree has been cleaned out and styled.
May 2022 – The tree has been allowed to grow freely and now looks much stronger and healthier. Much larger and more impressive now than in the original picture.
May 2022 – The tree after some pruning and cleaning out.
December 2023 – The tree after wiring and its recent styling with a change of front. A garden centre plant now looking more like an imported Japanese tree.

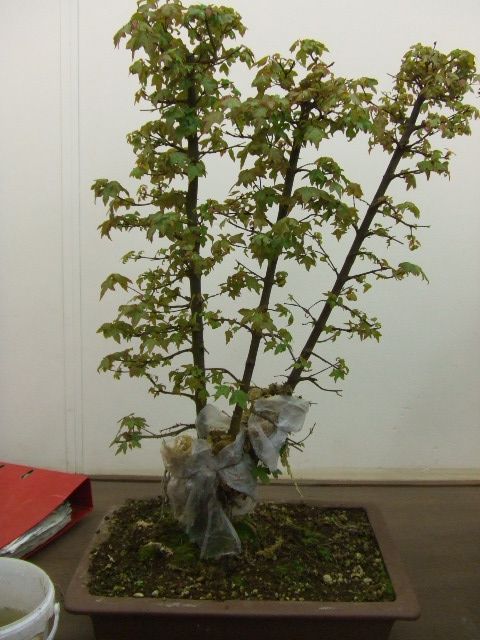
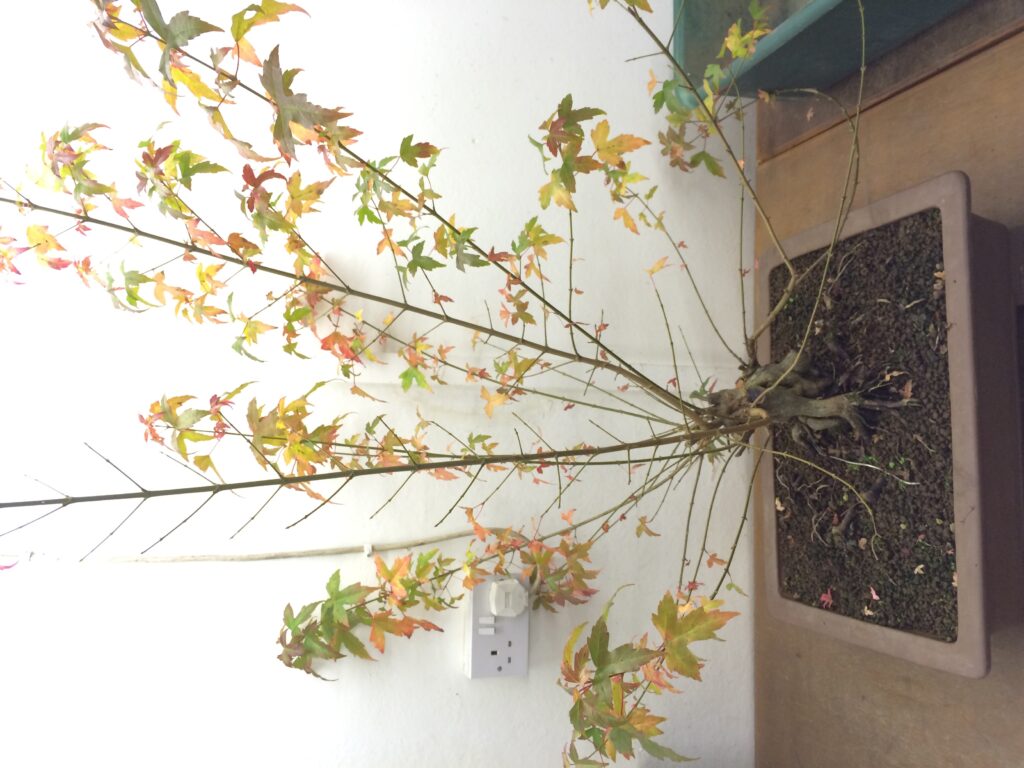
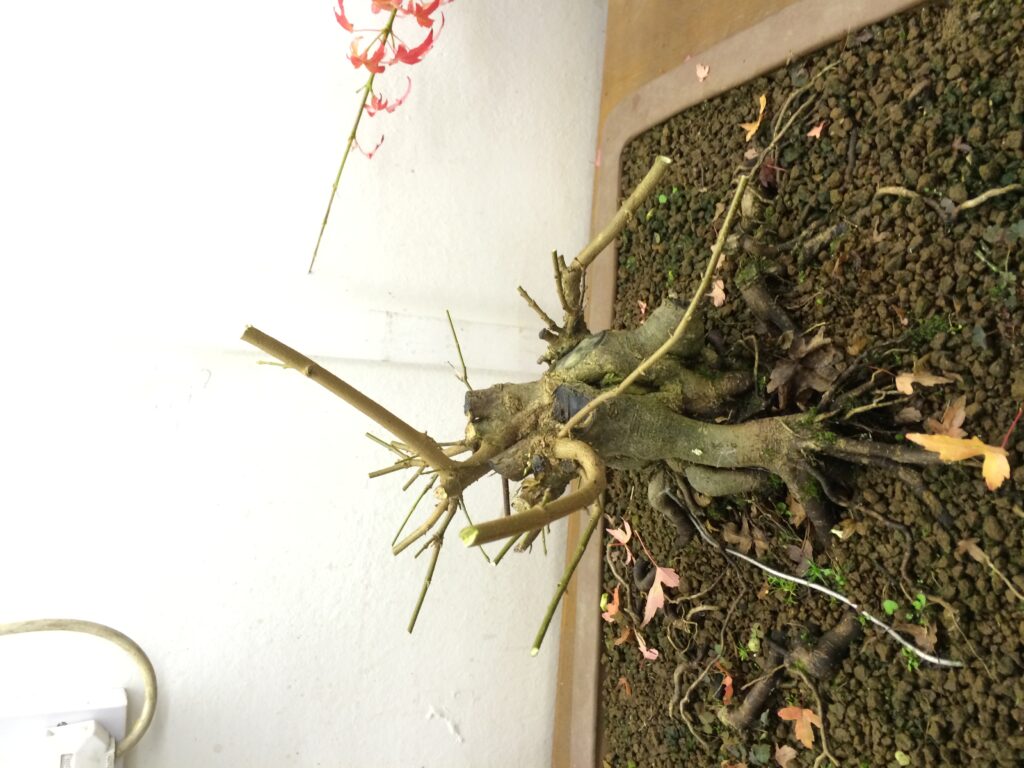
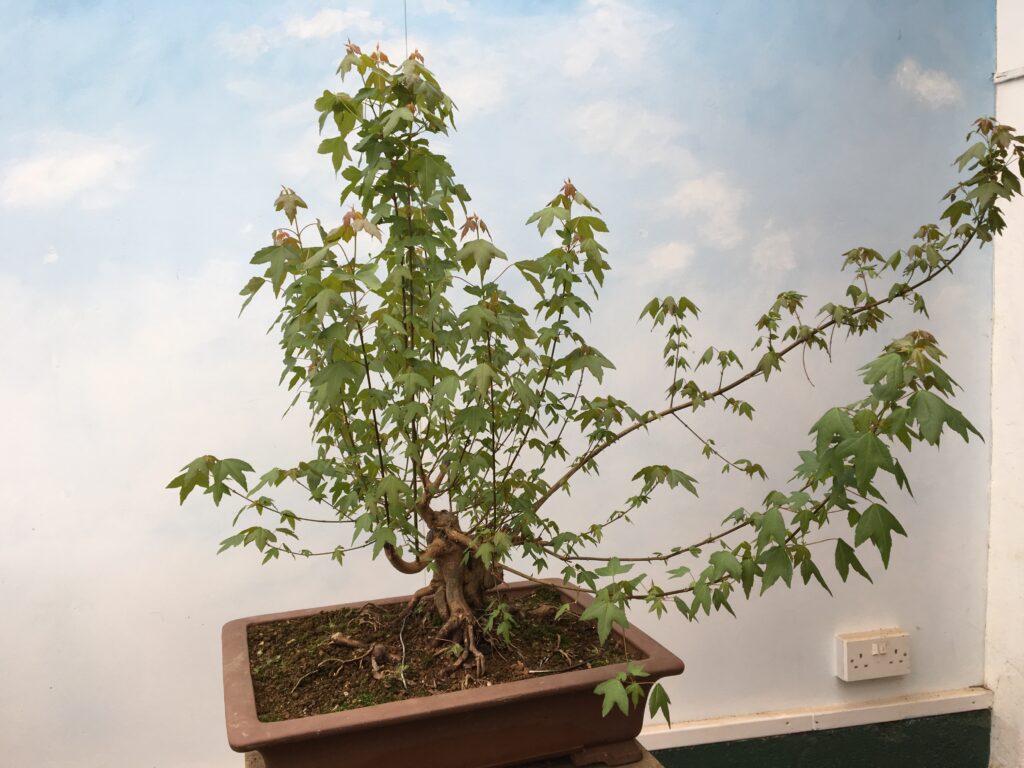
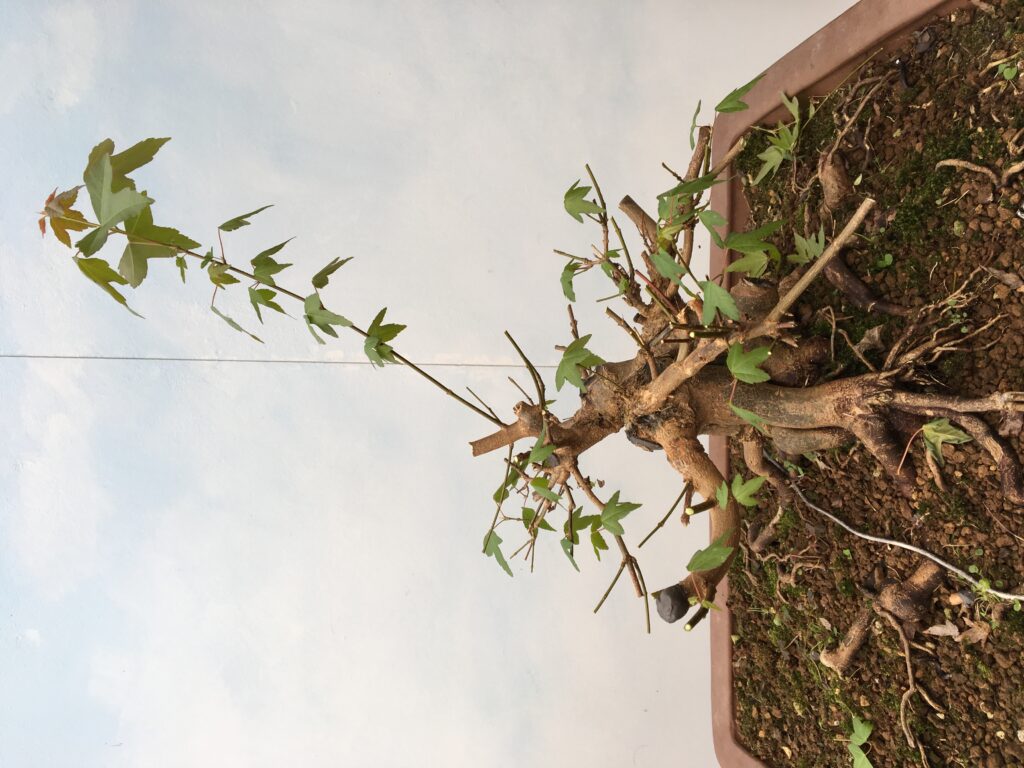
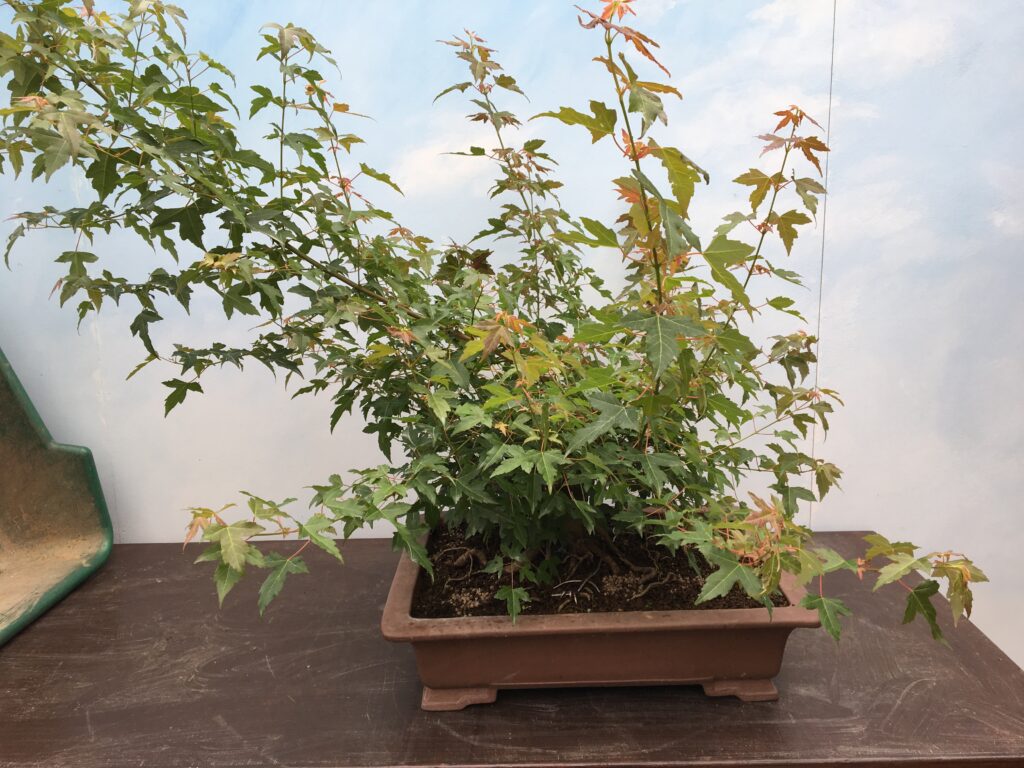
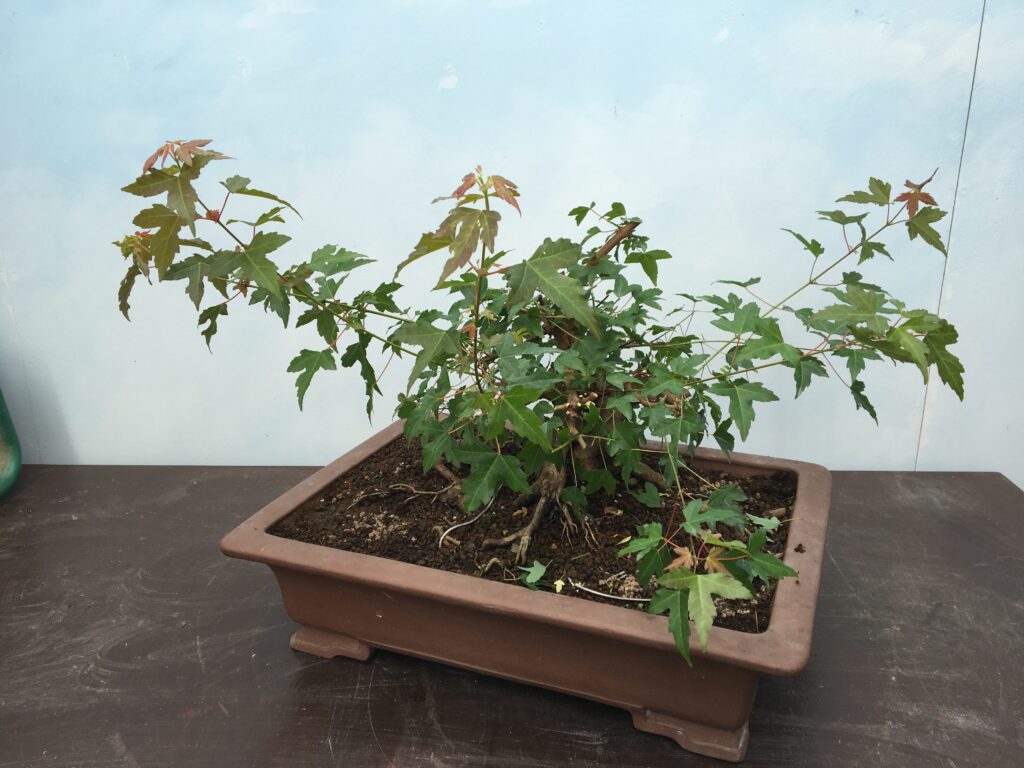
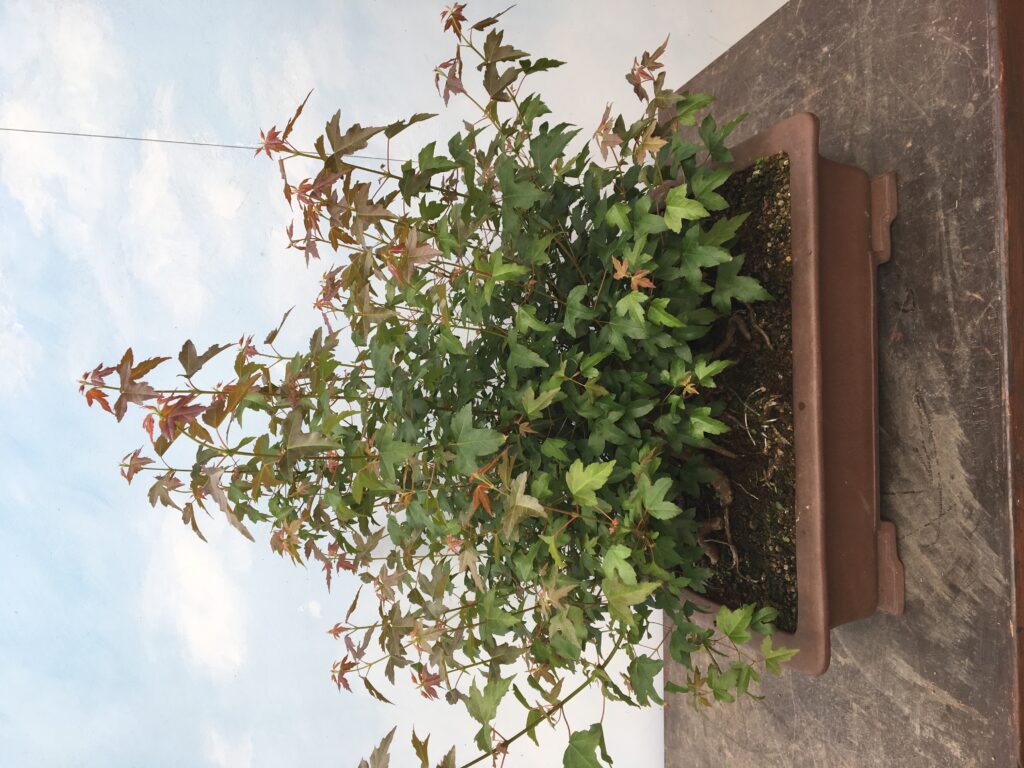
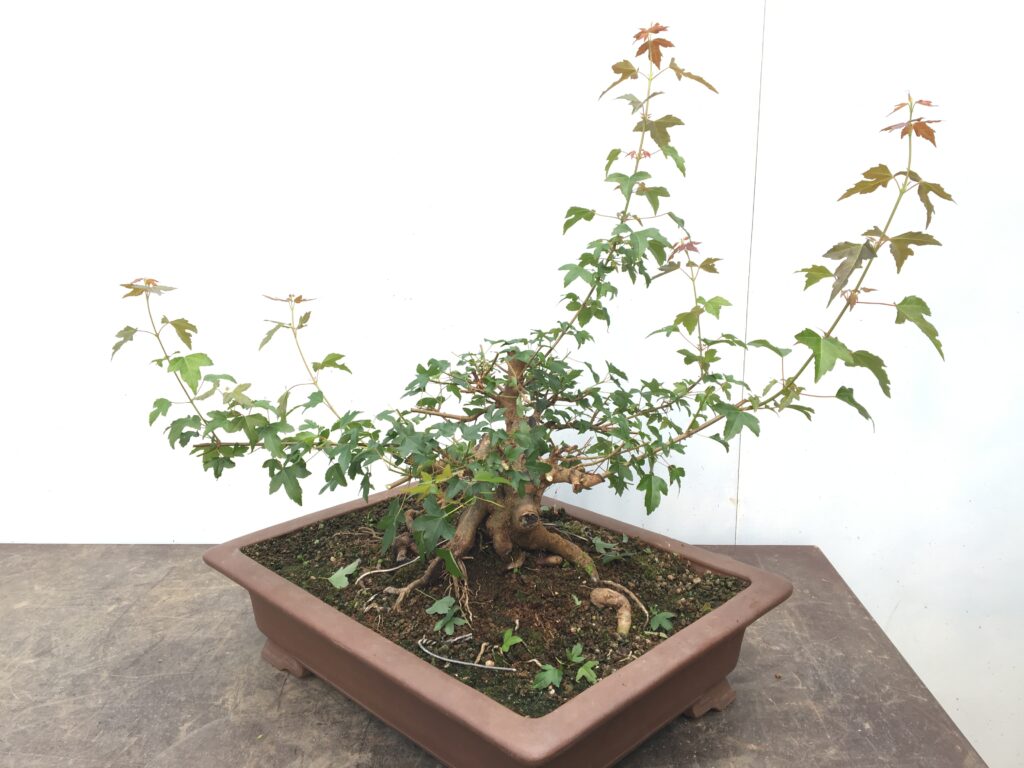
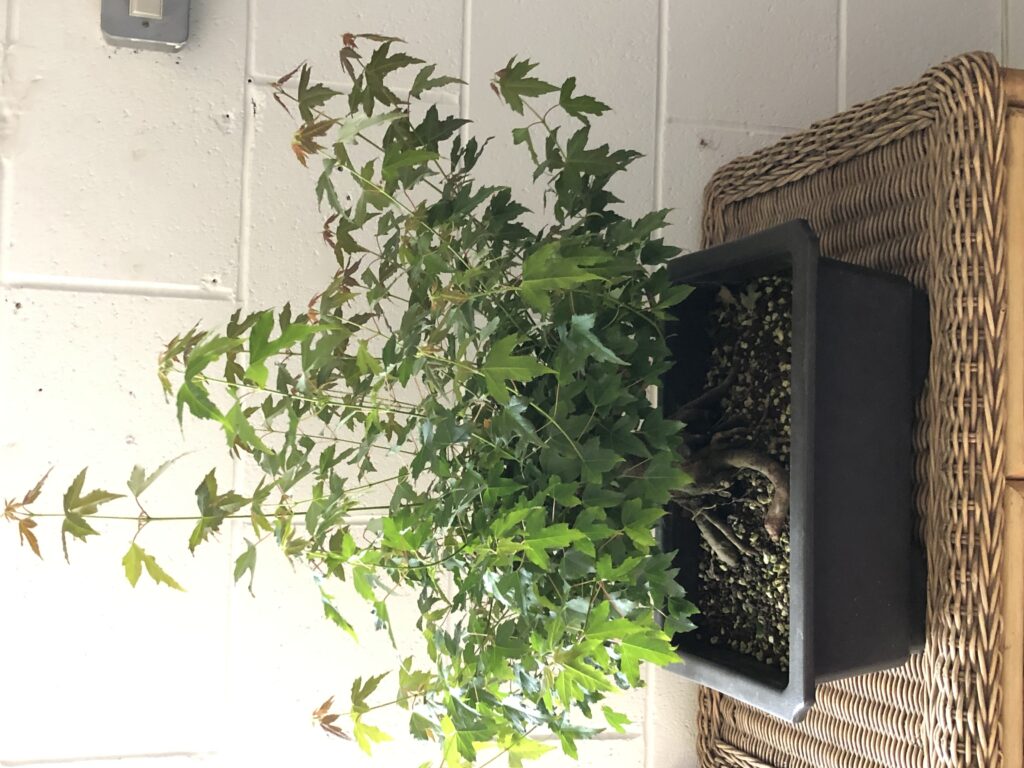
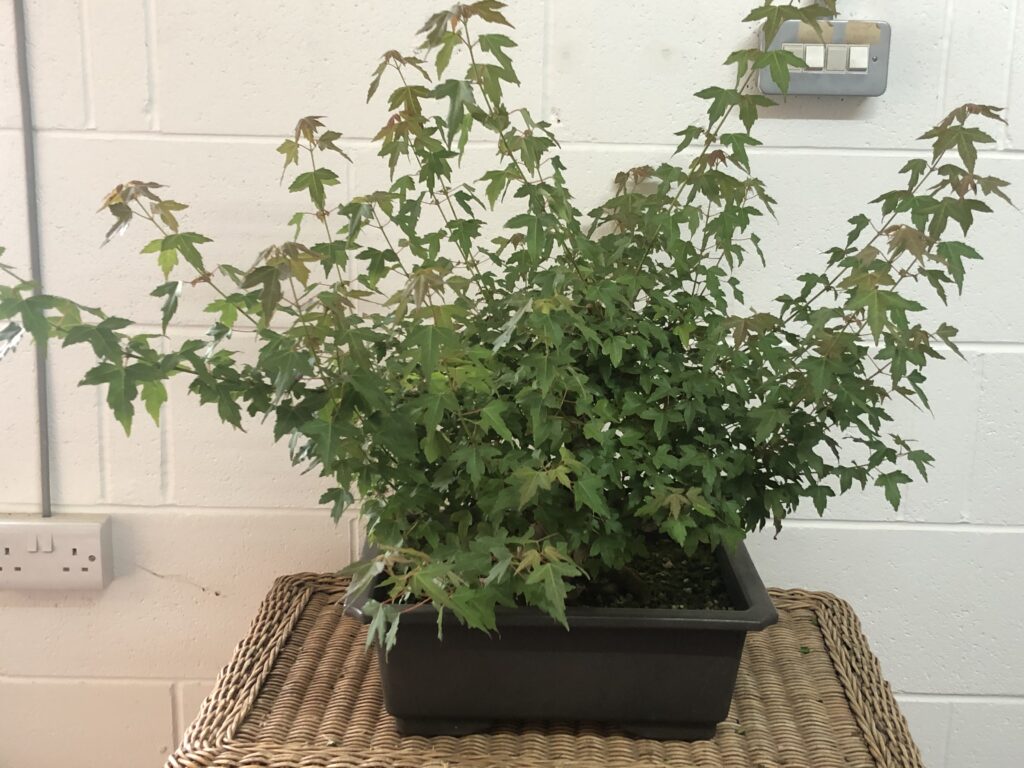
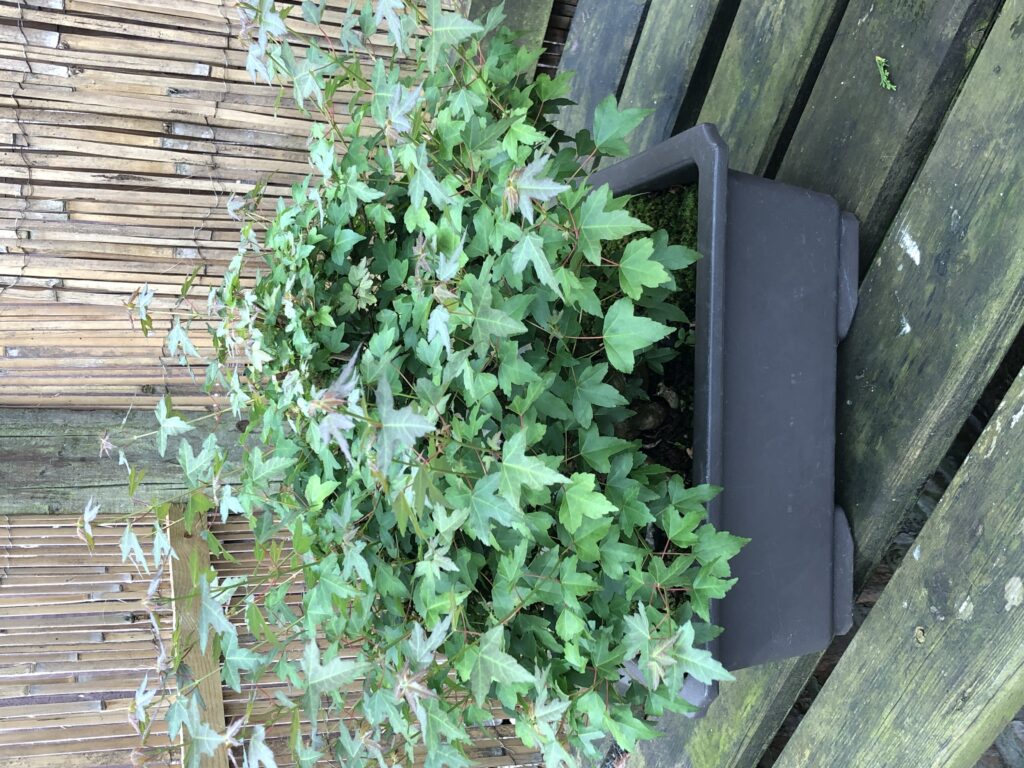
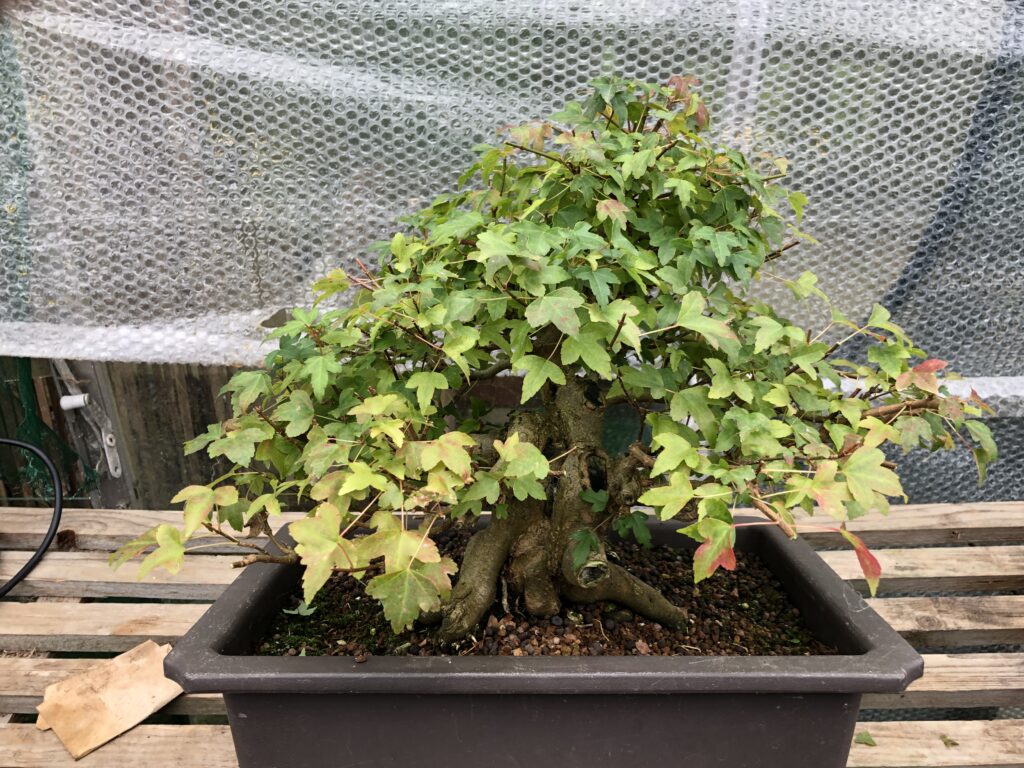
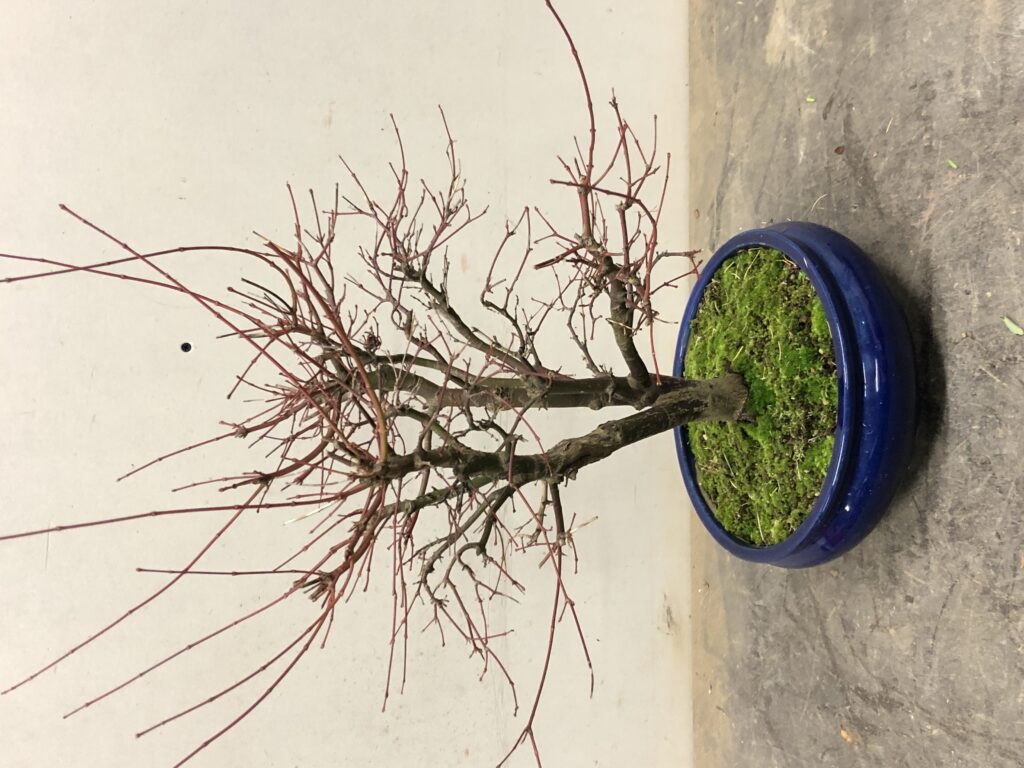
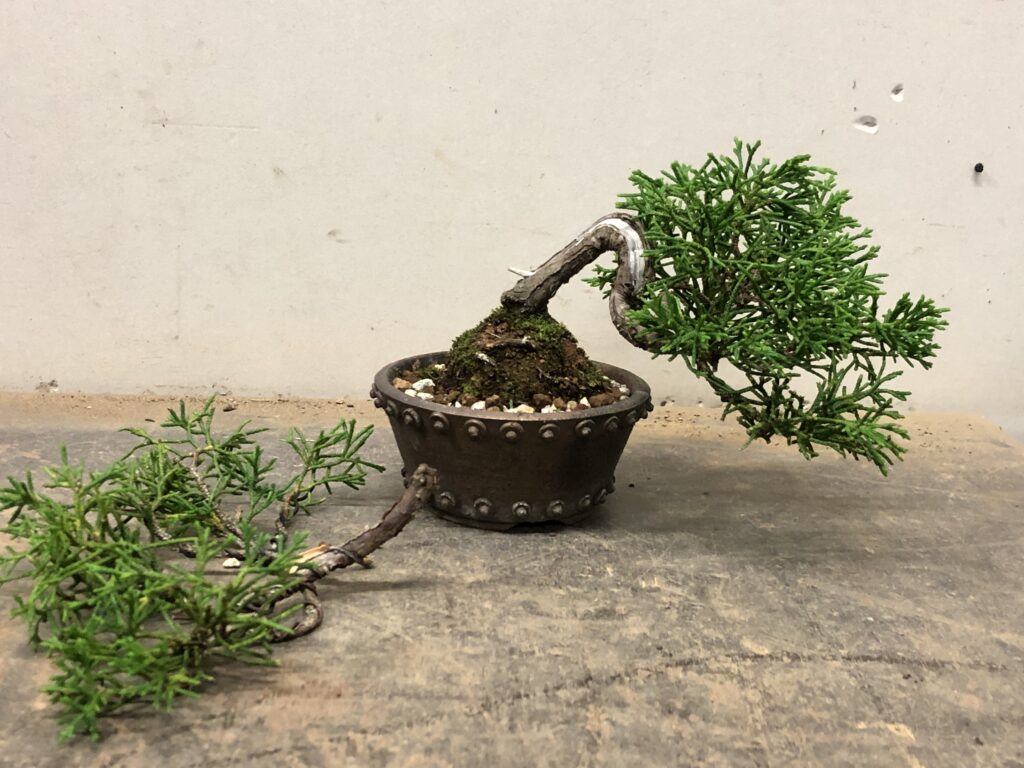
Sometimes it pays to just let your trees grow for a period. They not only become stronger and healthier but often provide you with a much better piece of raw material from which you can style a really good tree.

Richard’s Larch

9 February 2024 at 13:02

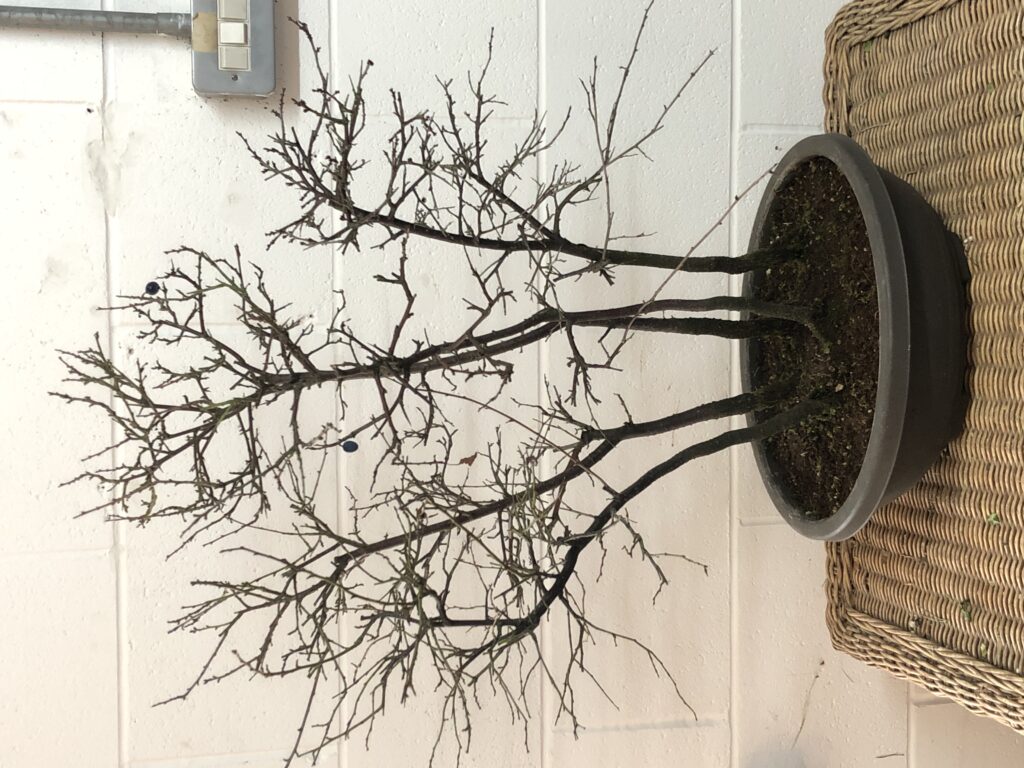
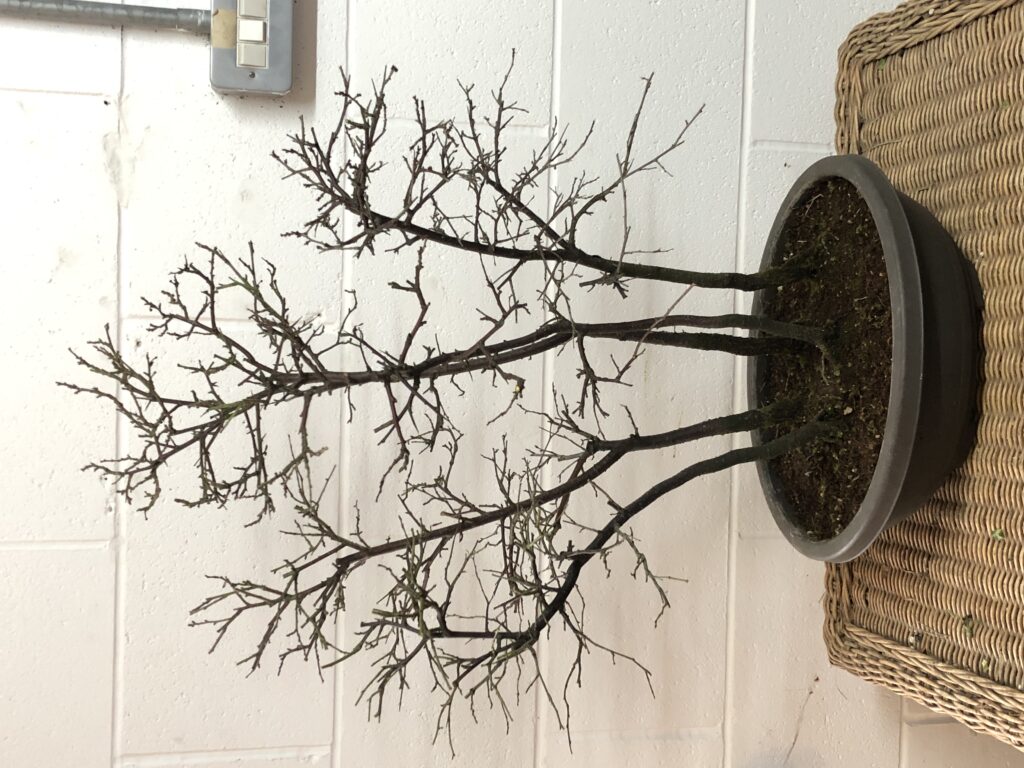
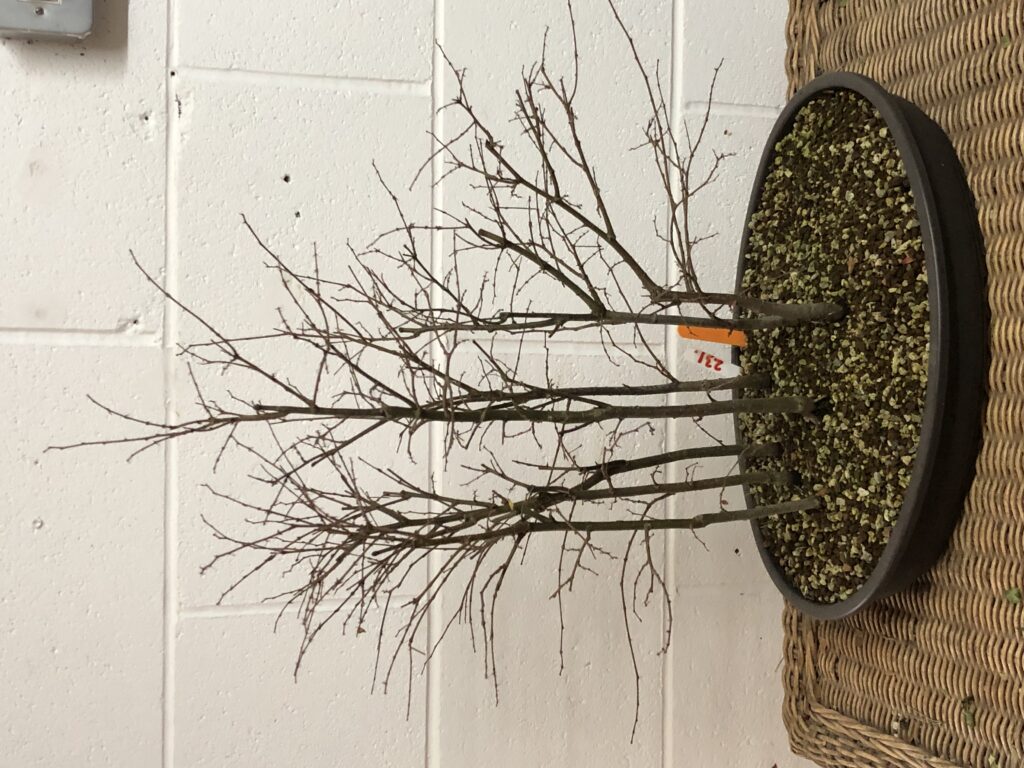
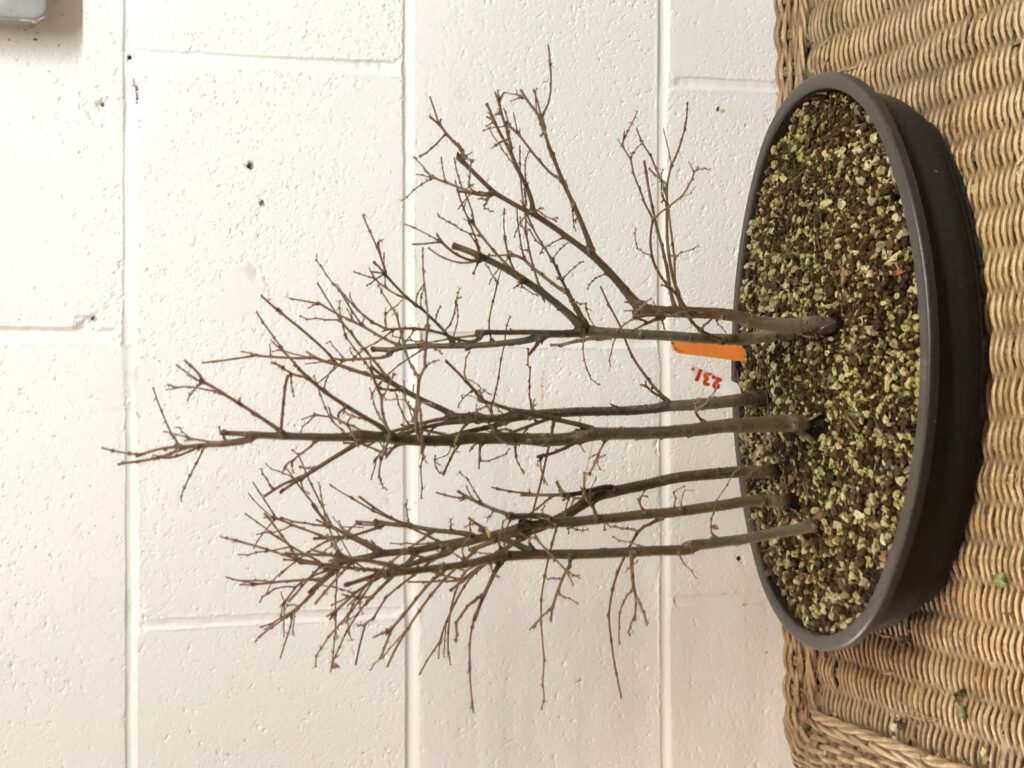
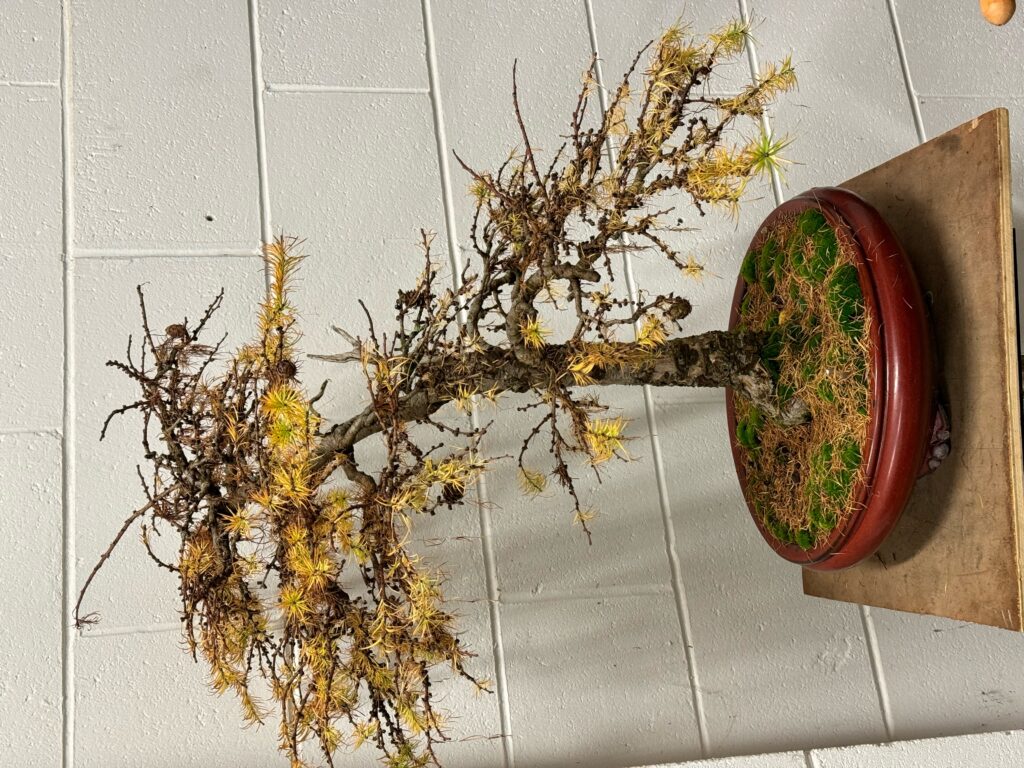
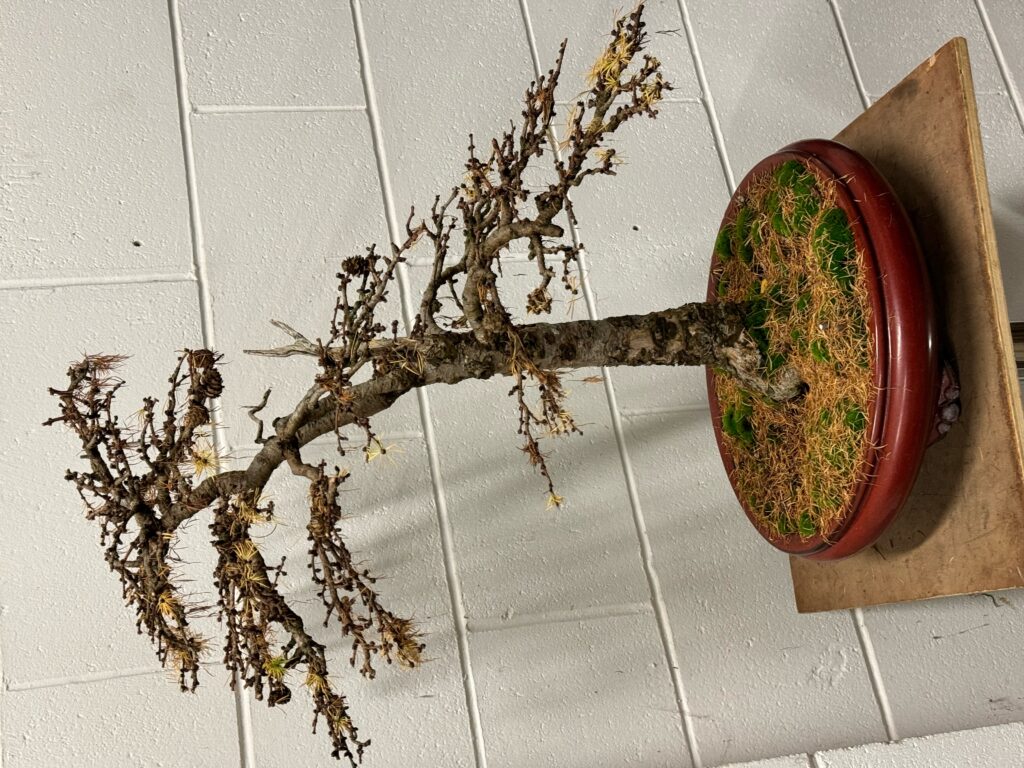
The transformation of a small Larch bonsai.

July 2023 – The tree had suffered in the past and lost some branches leaving a large gap between the lower branches and the apex.
Problem solved! ? – well to some degree yes. So now we can just let the tree grow freely for the remainder of the season
December 2023 – The needles have dropped and you can now see the growth the tree has put on in the past few months.
The tree was too flat so now we have to consider changing the angle to give a much more plausible dynamic design.
The tree after pruning and now ready for wiring.
January 2024 – The tree now wired and styled
Notice how the old jins have been broken and bent to create better lines in sympathy and harmony with the new design.

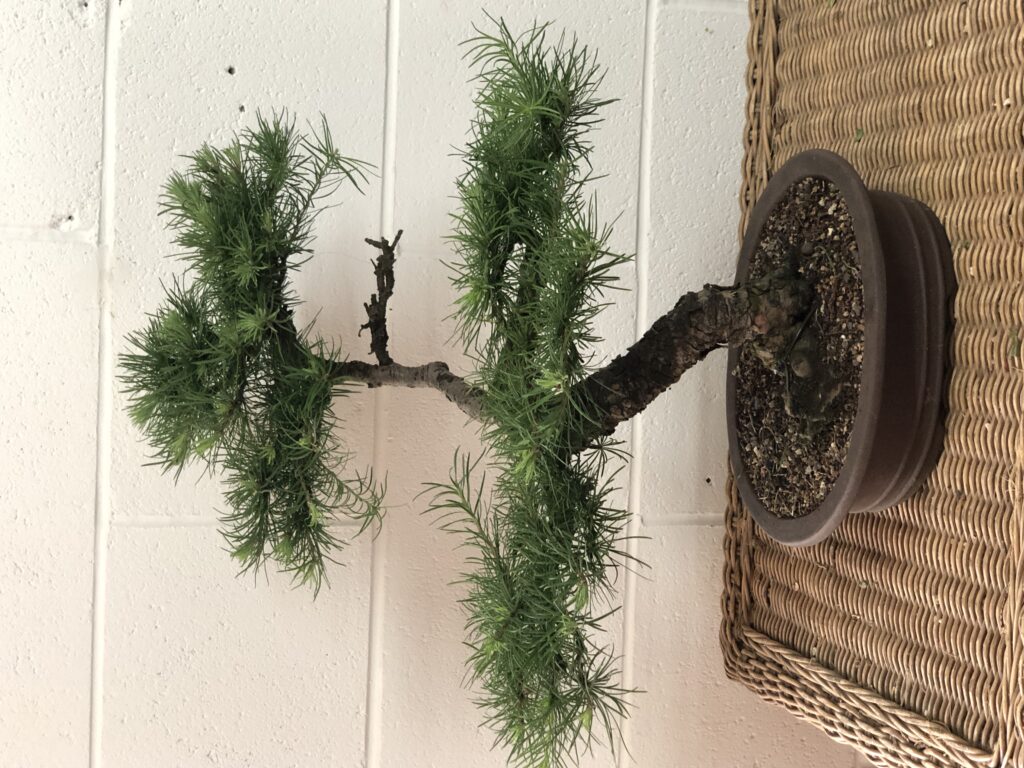
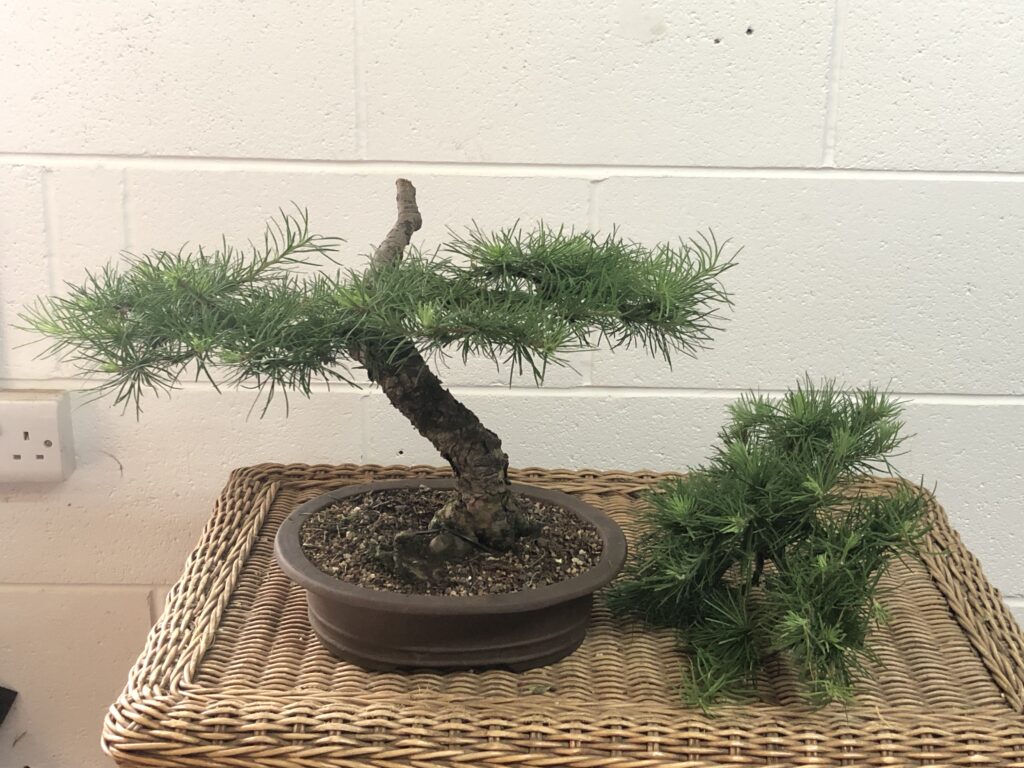
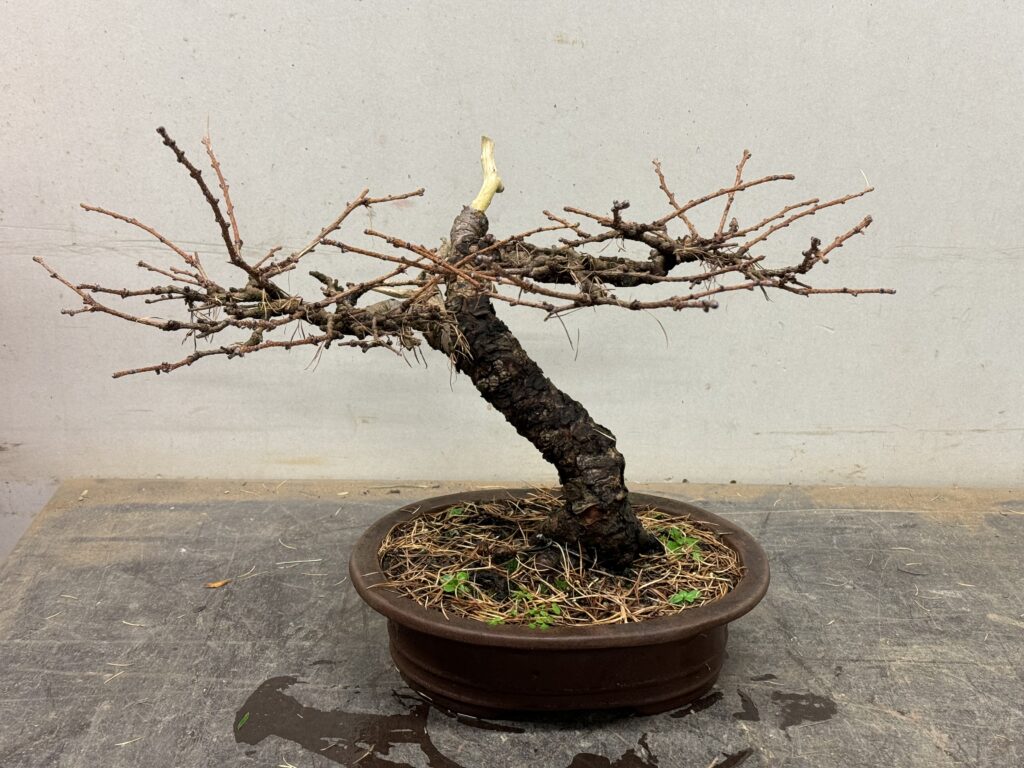
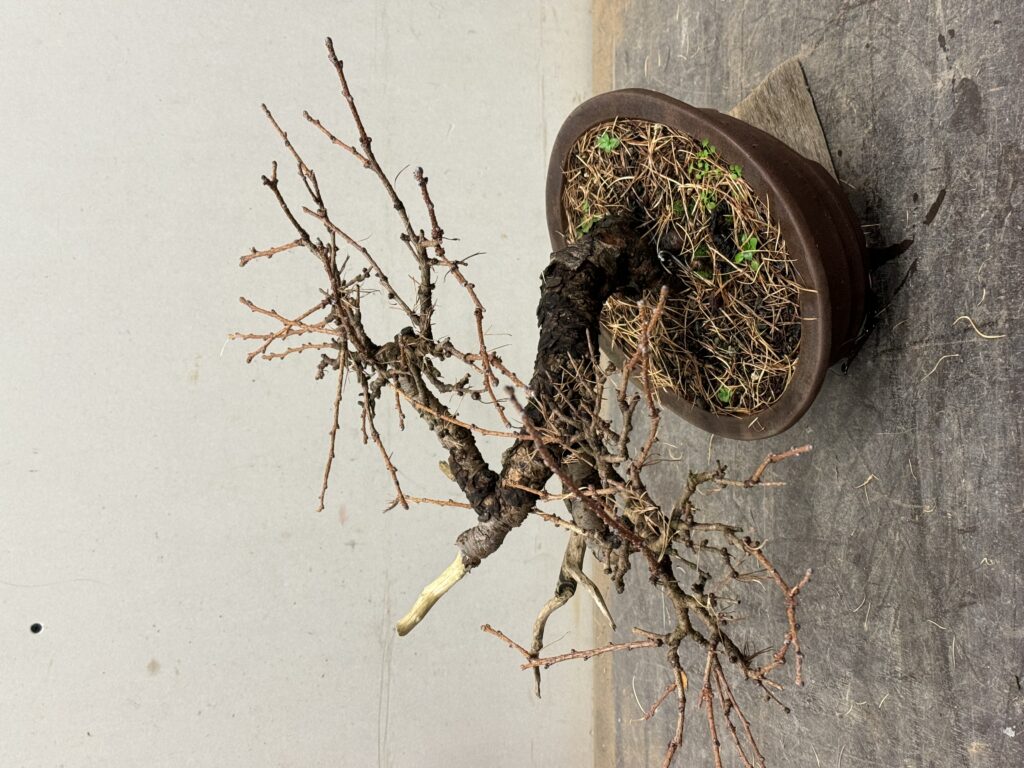
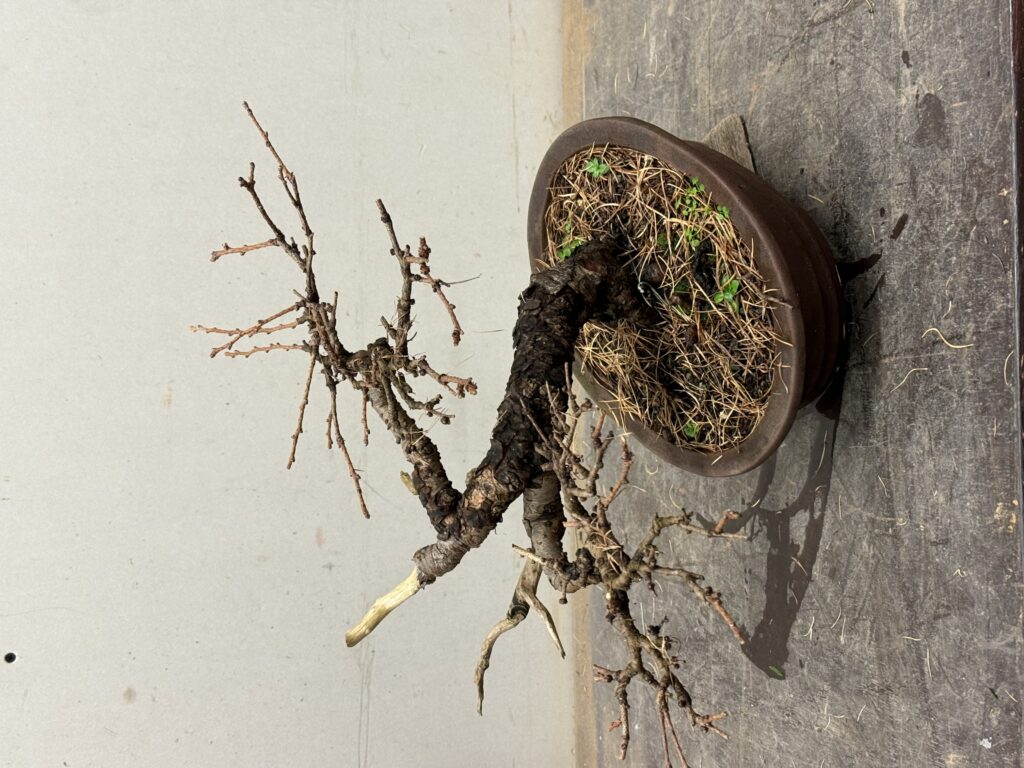
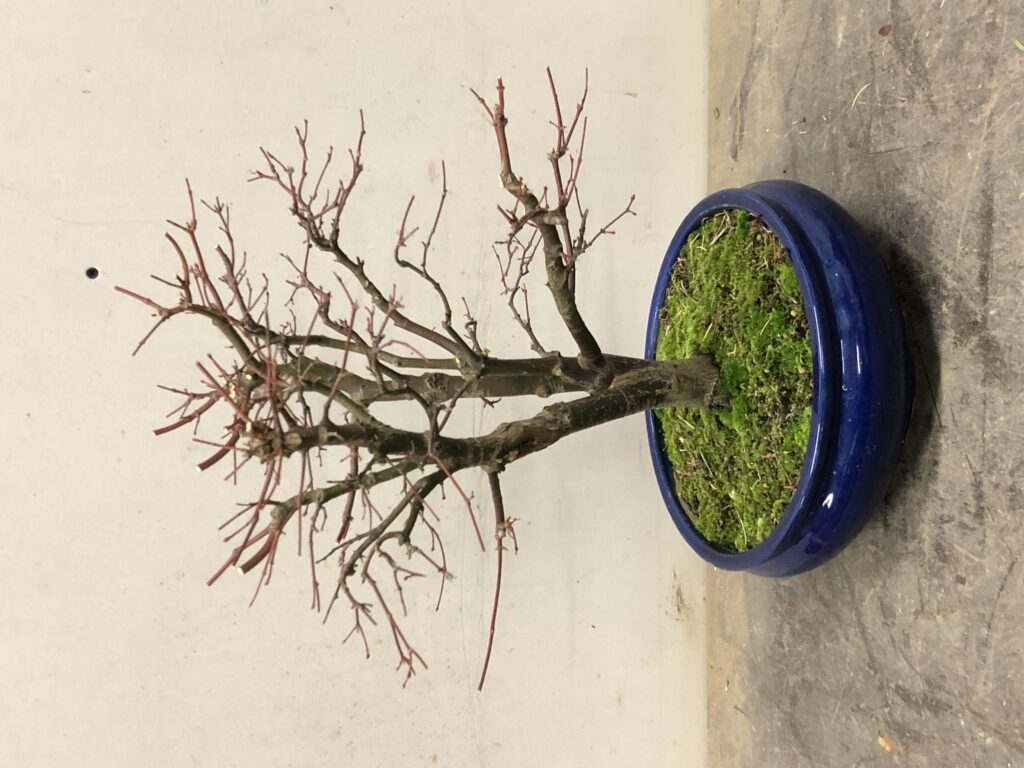
We had a tree that was uninspiring and looking as though it may have no future as a credible bonsai. With drastic pruning, a change of angle and some wiring we now have a dynamic shohin bonsai giving the appearance of a much older tree. The two trunks have taper, movement and character which work well together at this new angle.

A relatively simple change producing a substantial transformation and one that was well worth doing.

Michelle’s Lilac Tree – A New Base!

29 July 2024 at 18:12
April 2019 – A nice tree to have on your bench with its annual abundant showing of sweet scented flowers. Unfortunately this tree has a really poor base with multiple small roots extending several inches up the trunk and above soil level. It would need a very deep pot to hide these exposed roots which aesthetically would not look good.
November 2021 – In its winter image the problem with the base becomes more obvious.
July 2024 – Twelve months previously we made some small windows around the multiple trunks and treated them with rooting hormone powder. We then formed the shape of a pot around the base of the tree with plastic potting mesh and filled it with a mix of equal parts akadama and chopped sphagnum moss.
In the picture above having removed the mesh we have now taken the tree out of its pot. There is now a solid mass of roots and compost around the base of the tree covering the original offending multiple roots.
The original rootball is now “somewhat” carefully removed!
The deed is done.
The Lilac tree with its new root system.
The tree repotted into a training pot to allow the new roots to develop further so that in the future we can get the tree into a shallower pot. The foliage was trimmed back to take pressure off the roots following this work.

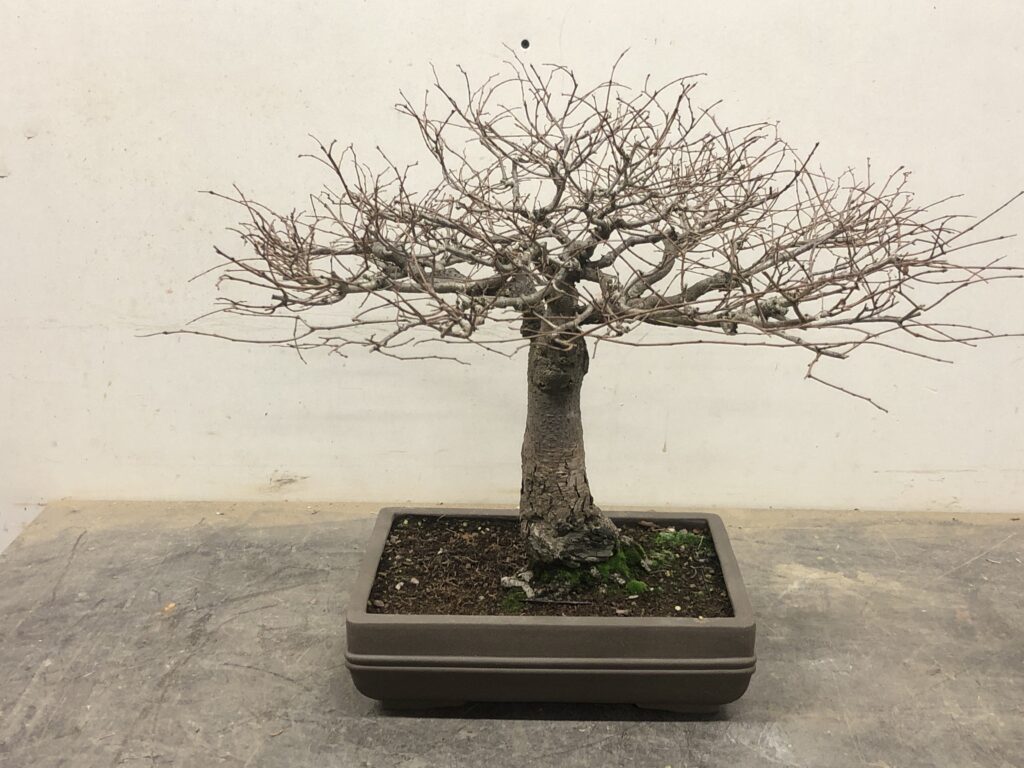
A simple technique but the change in the tree is quite dramatic. What was a major fault spoiling the appearance of the tree has now been replaced with a nice solid base which greatly improves its stature and credibility.

Some recent visitors to class for ongoing care work

15 August 2024 at 14:24
Before – This privet raft style bonsai will require a thoughtful landscape project when it is eventually transferred to its final pot.
After – For now it can benefit from a simple good pruning back.
Before – A buxus garden plant allowed to grow well.
After – Its actually beginning to shape up well after some thinning out.
Before – This Arrakawa or ‘Cork Bark” maple had already been extensively pruned back earlier in the season.
After – Some shoots have been deliberately left long to extend and thicken.
Before – An old cedar with amazing rough bark.
After – The tree will be wired, pruned again and repotted before it starts growing in the spring.
Before – An old juniper chinensis with excellent shari and twisting veins.
Pruning in progress! My students call this evidence or exhibit “A”!!
After – This lighter canopy will take a lot of pressure off the tree whilst at the same time preparing for an autumn wiring.
Before – Here the canopy is too big for the size and nature of the trunk.
After – Some initial preparation work ready for a wiring and styling over the winter.
Before – A juniper Sabina in the half cascade style.
After – A little pruning of the tree and the overall appearance of the canopy is restored.

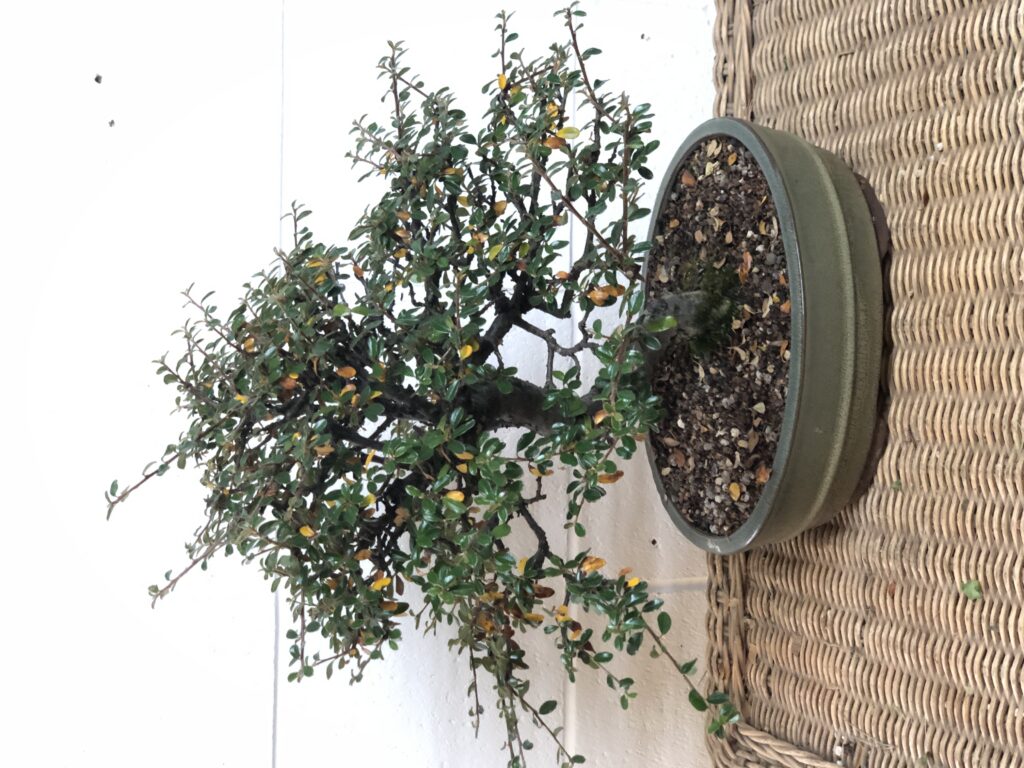
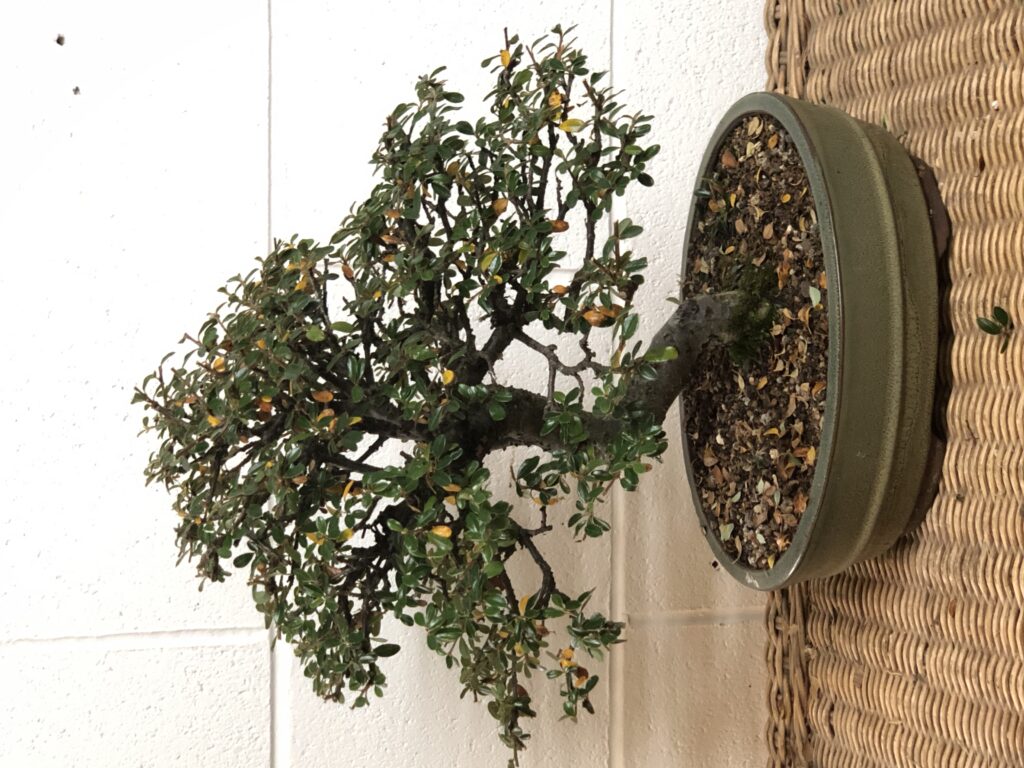
These trees were brought along to a couple of recent classes and clearly illustrate the diversity of material I am presented with on a regular basis. it certainly makes life interesting for both me and the other students.

Susan’s Hawthorn transformation

3 October 2024 at 13:14
September 2013 – Not exactly the most inspiring start! Basically a log with no taper and only a few branches.
We decided to work with one branch and alter the planting angle.
We induced taper by stripping back the bark and trunk. The root at the front has been weakened for removal at a later date.
June 2024 – Branches and twigs have been developed to create a pleasing mature looking canopy. The roots around the base have been improved and some carving work has been carried out to enhance the deadwood.

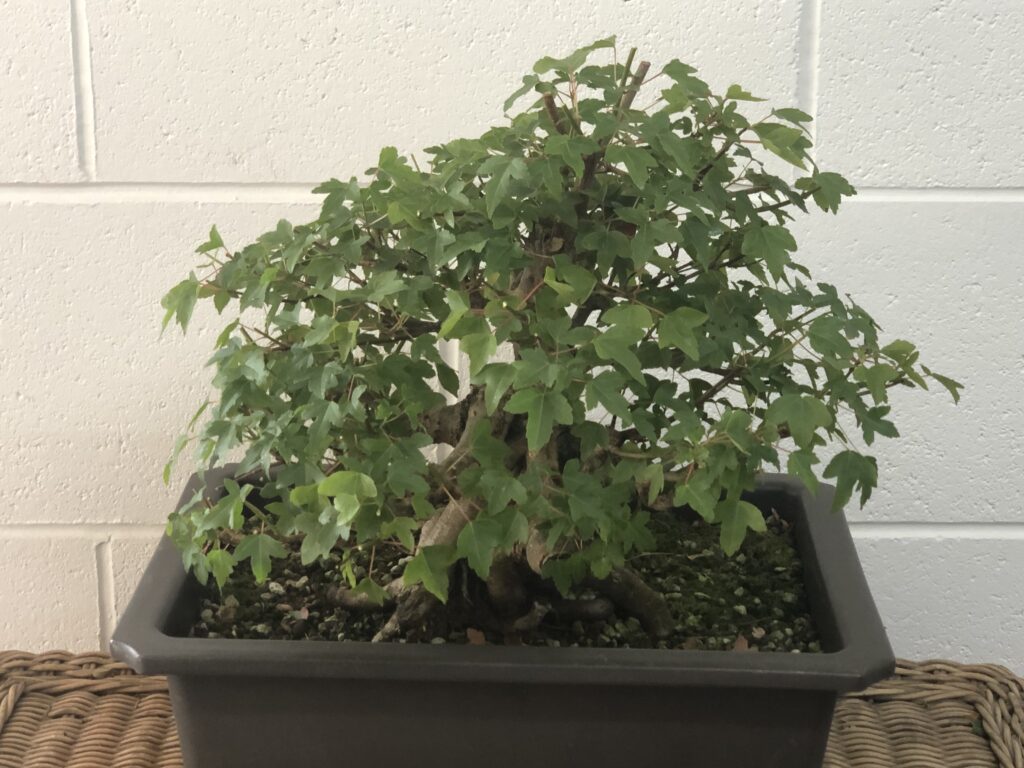
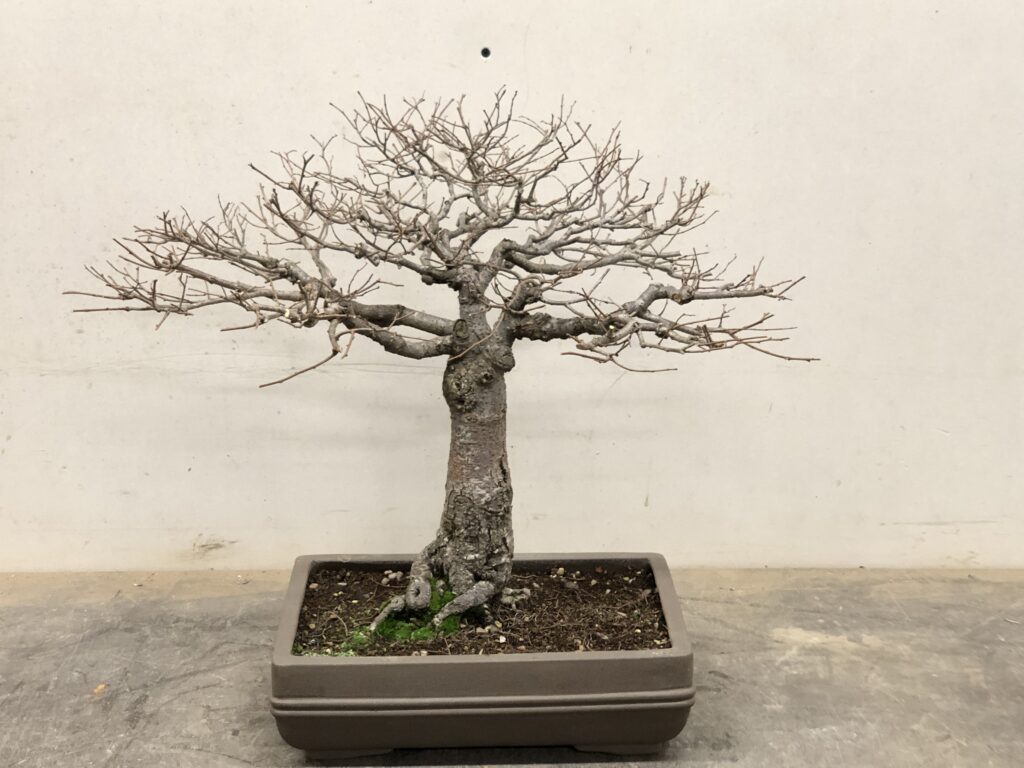
We have been working on this tree for just over 10 years but what a transformation….from impossible looking material to a very pleasing image.

The frustration comes when you have been working on a tree for 10 years and it looks basically the same as when you started. Bonsai need time to develop but you have to intervene when required to guide your tree in the right direction to the desired result.

Susan has done an amazing job with this hawthorn and should be very proud of her work.

Paul’s Juniper – An initial styling

16 October 2024 at 12:59
This Juniper Ittogawa turned up at a recent class ready for styling.
The tree has been growing strongly and was viewed from different angles.
The tree was thinned out and branches selected ready for wiring.
After wiring and styling the tree has made a pleasant traditional outline. The remaining growing tips have been left unpruned.

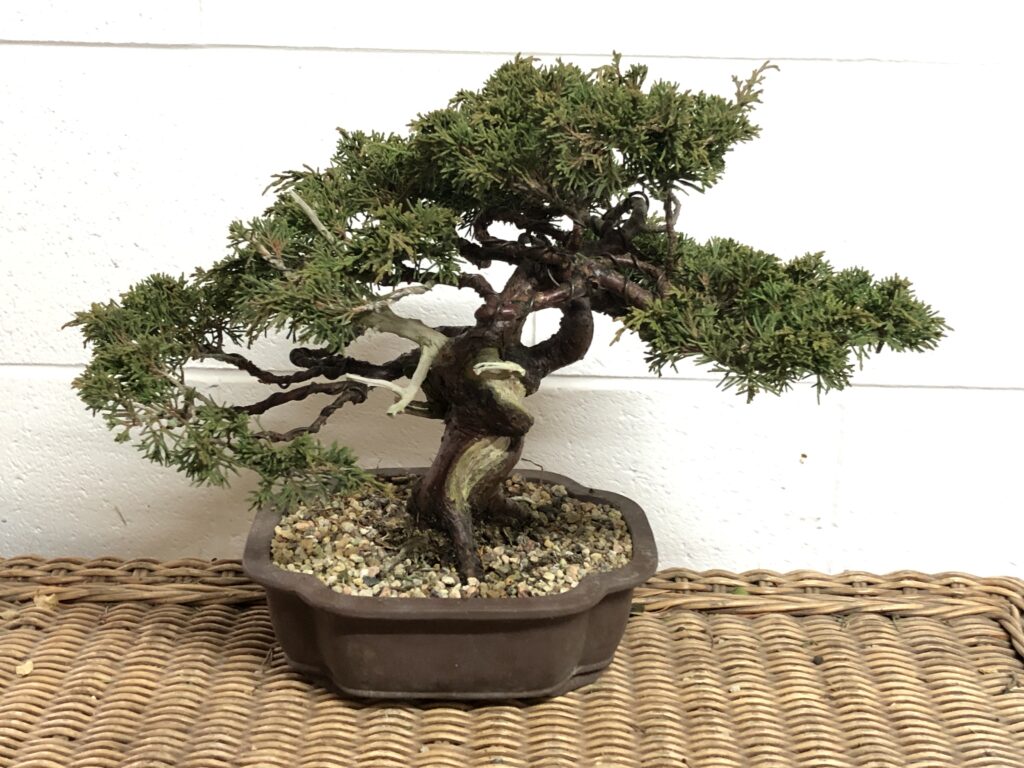
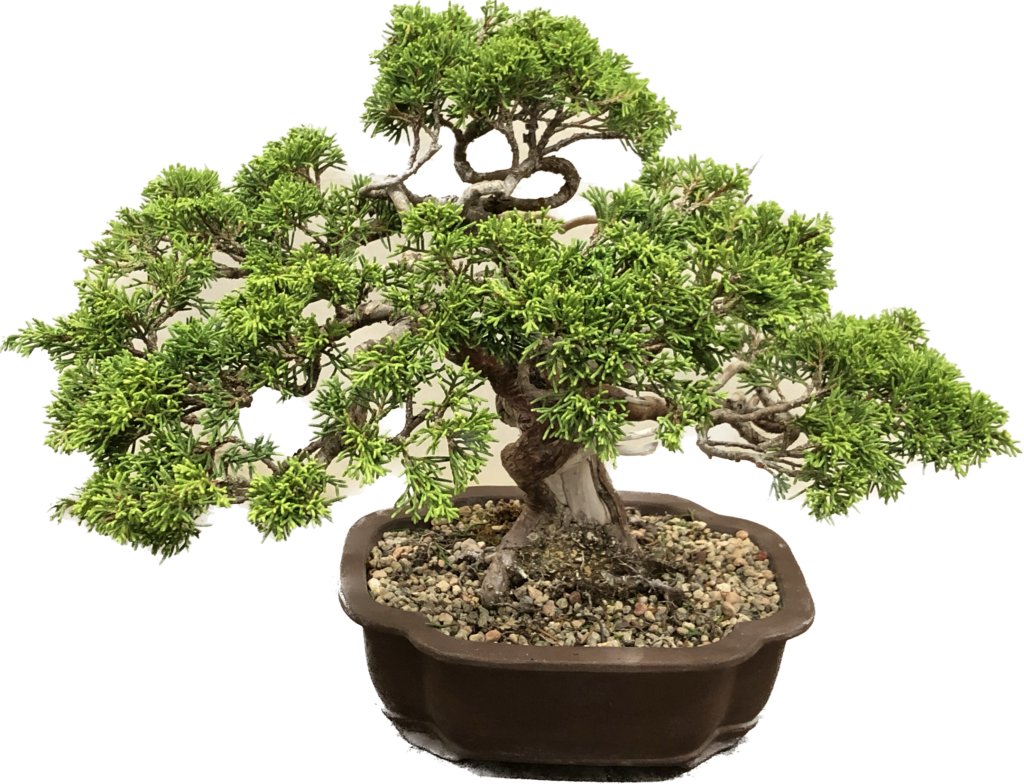
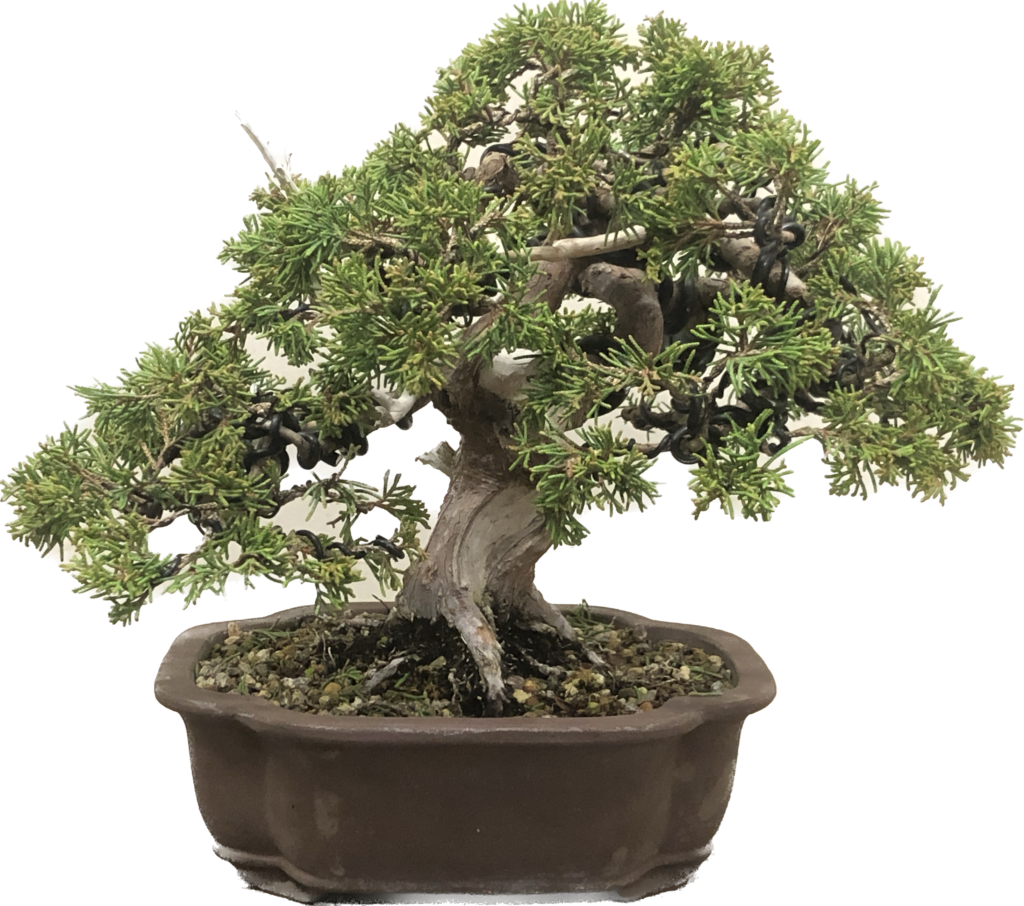
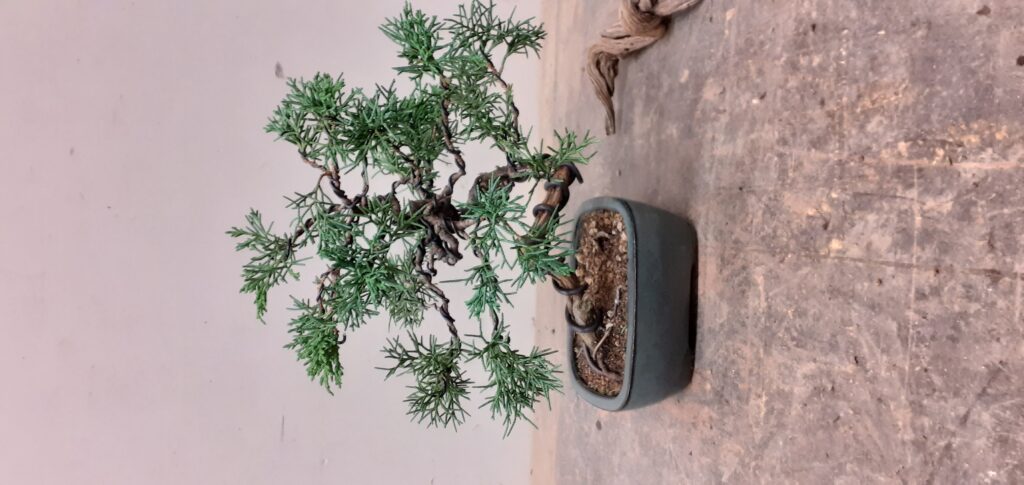
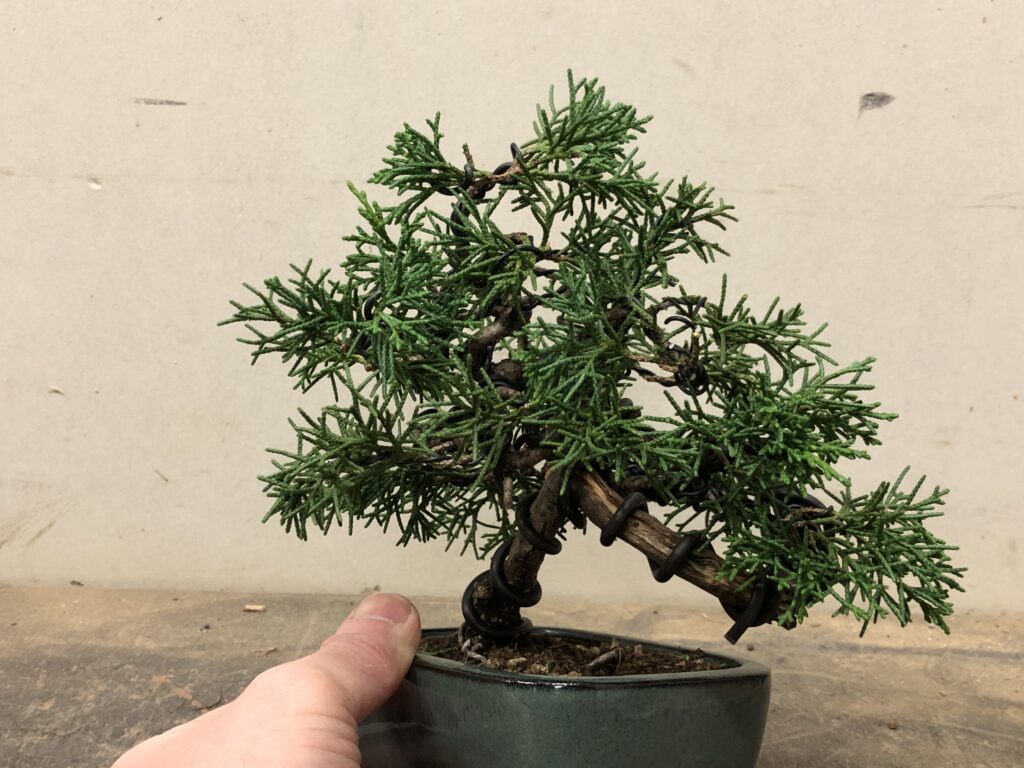
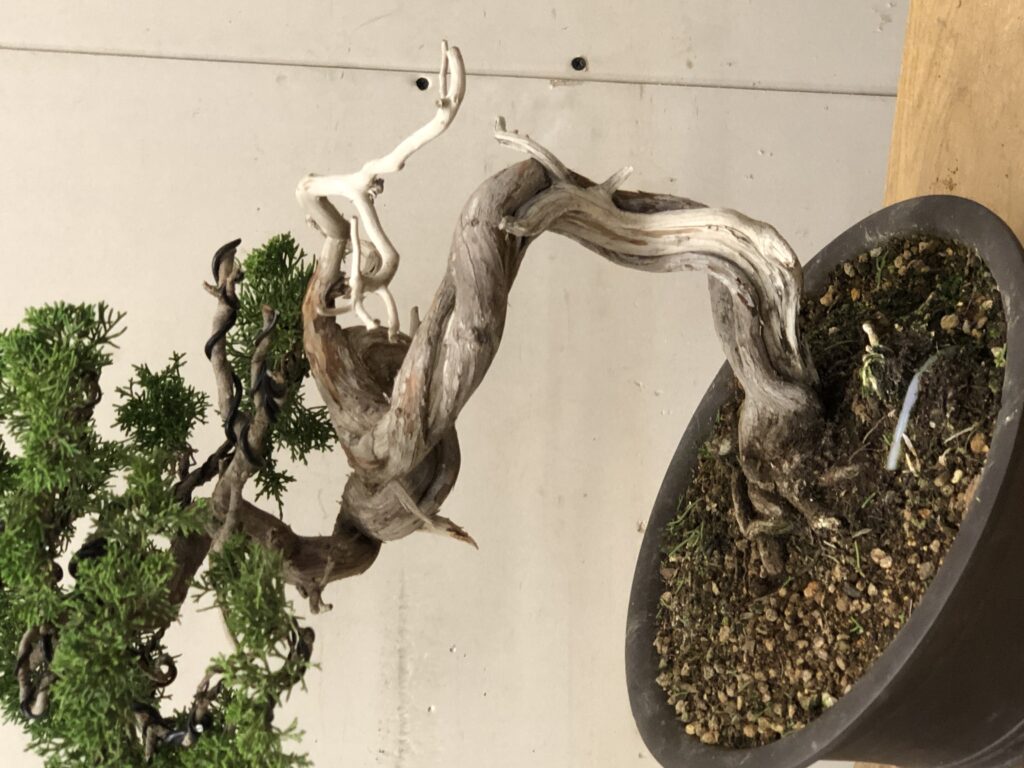
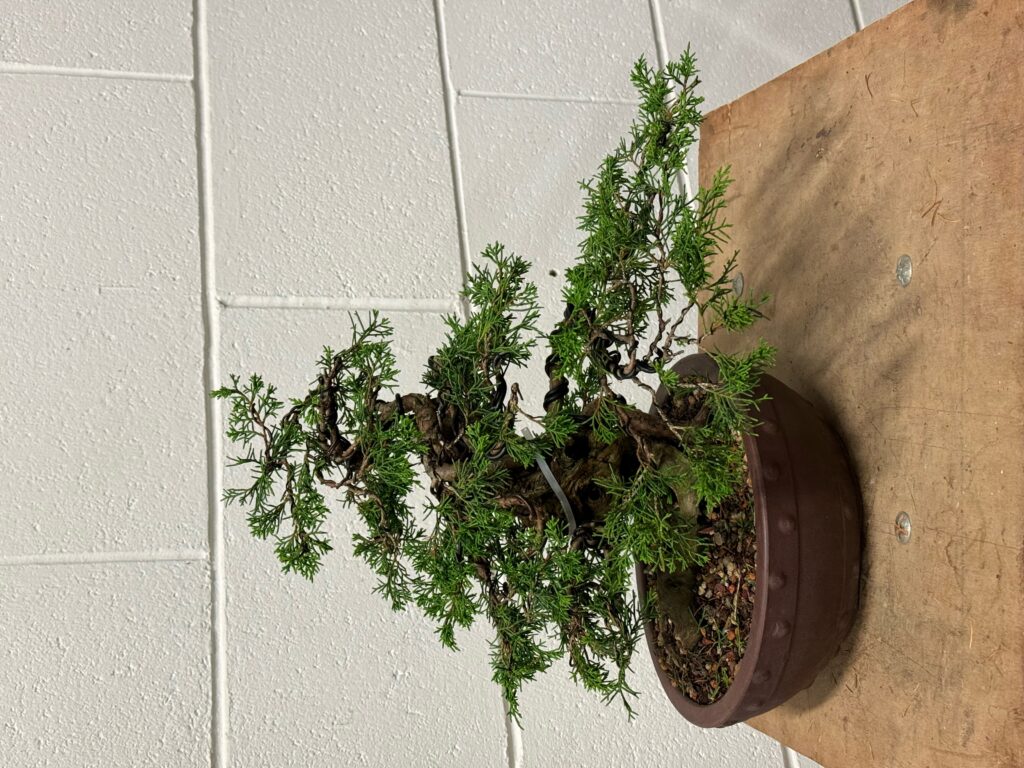
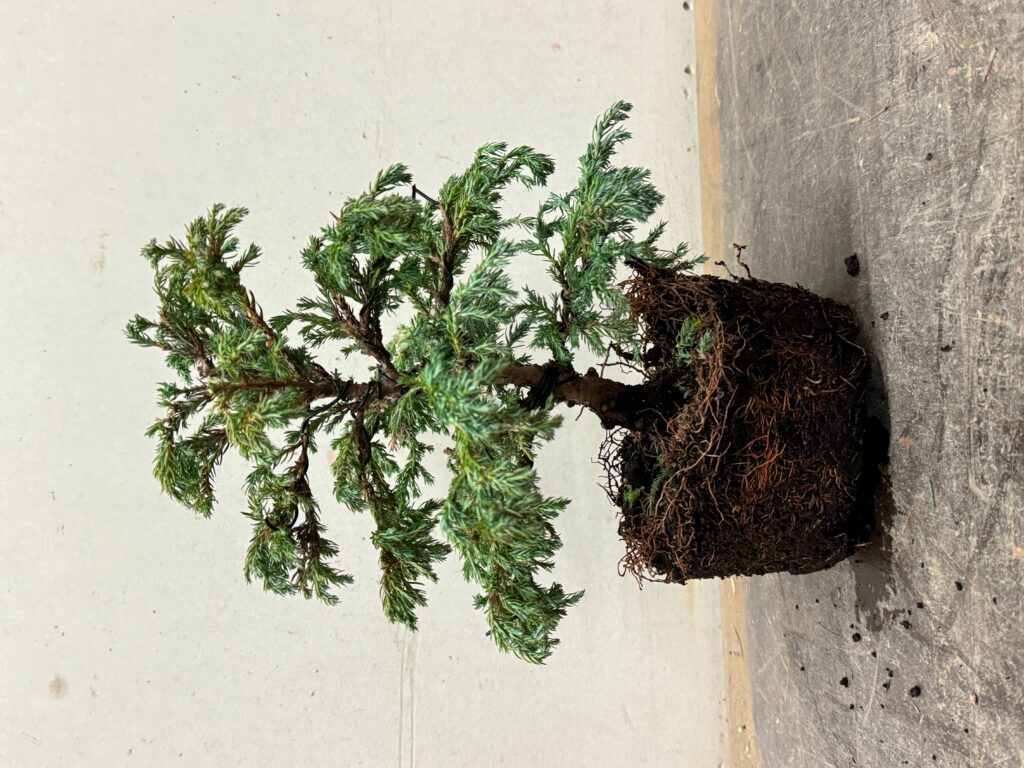
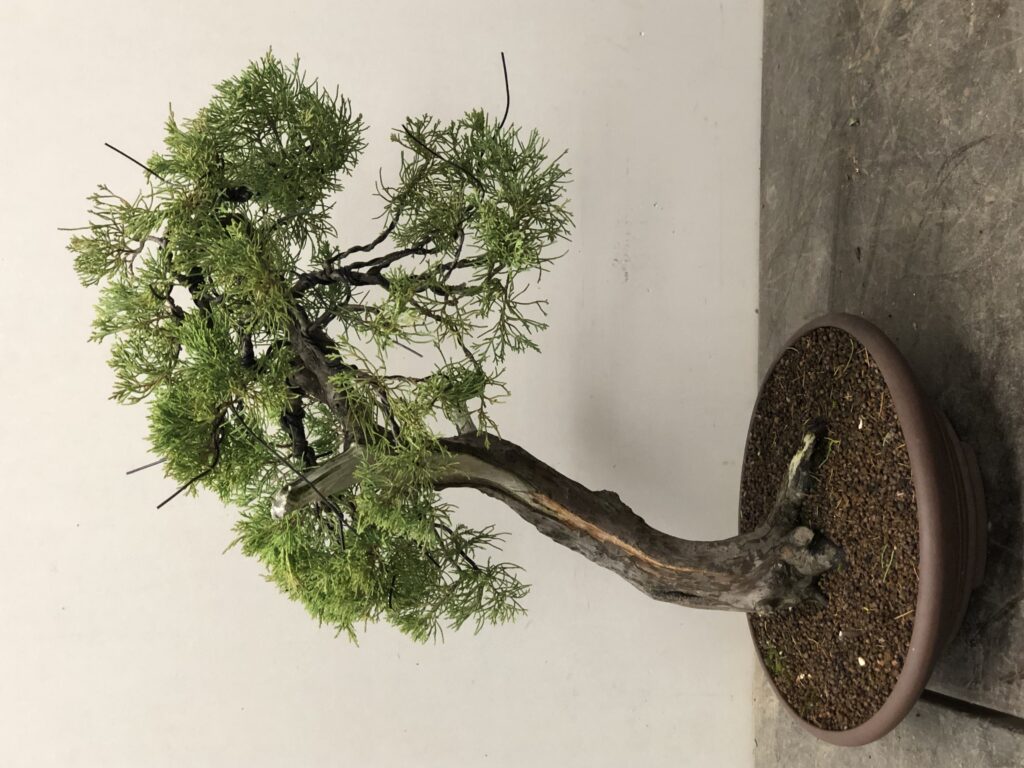
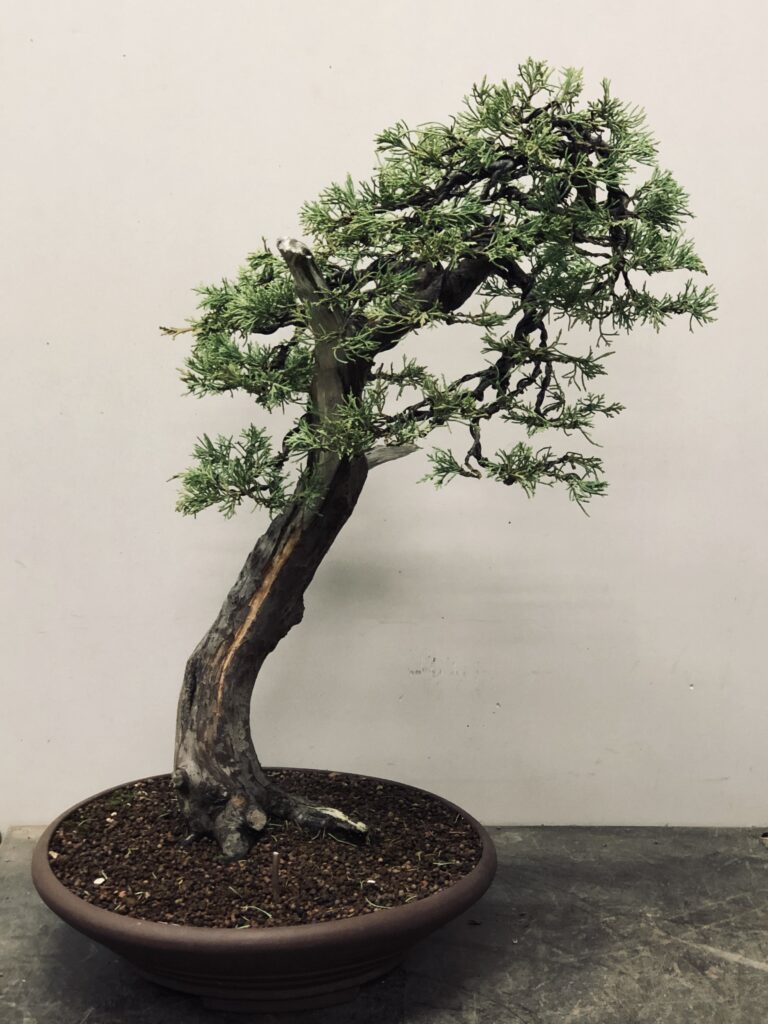
Potentially a really nice Juniper with a strong healthy framework from which we can develop and refine the image.

Derek Aspinall bonsai pots for sale (All sold)

31 October 2024 at 13:29

These pots are all 25-35 years old and were made by Derek for me for trees I had at the time. All measurements are in centimetres and external.

Large group dish
94 x 44 x 4
Slight damage to one of the feet
30 x 22.5 x 6
Large brown rectangle
64 x 46 x 12
Shallow blue oval
56 x 41 x 6.5
Round drum pot
39cm diameter x 11
Smaller brown rectangle
52 x 42 x 9
Deeper blue oval
39 x 32.5 x 8

If you are interested in any of the above pots please message me at [email protected]

My collection of bonsai books for sale!

25 November 2024 at 21:08

Here is the list of the books I have for sale. I can supply photographs of any front covers on request :-

Forest, rock planting & eco spruce bonsai – Saburo Kato
World bonsai convention Munich 2001 – Exhibition book
Penjing worlds of wonderment – Qingquan Zhao
British shohin association 2009 – Exhibition book
Bonsai Landscapes – Peter Adams
Bonsai design (Japanese maples) – Peter Adams
Bonsai design(deciduous and coniferous) – Peter Adams
Bonsai design(Scots pine, common juniper, larch) – Peter Adams
Art of flowering bonsai – Peter Adams
The art of bonsai – Peter Adams
Four seasons of bonsai – Kyuzo Murata
Museo bonsai de alcobendas – Spanish exhibition book
Japanese gardens – Brooklyn botanic garden
Bonsai art – Noelanders
Mountains in the sea – Lew Buller
Bonsai techniques 1 – John Naka
Bonsai techniques 2 – John Naka
Bonsai from the wild – Nick Lenz
Bonsai from the wild(revised/expanded 2nd edition) – Nick Lenz
A Japanese touch for your home – Koji Yagi
A Japanese touch for your garden – Seike/Kudo/Engel
The gardens of Japan – Teiji Itoh
Creating Japanese gardens – Ortho books
Unione Bonsaisti Italiana 2000 – Italian exhibition book
Unione Bonsaisti Italiana 2001 – Italian exhibition book
Unione Bonsaisti Italiana 2002 – Italian exhibition book
Unione Bonsaisti Italiana 2004 – Italian exhibition book
Japanese Maples – Vertrees
Japanese Maples pocket guide – Vertrees
Create your own bonsai from every day plants – Peter Chan
A life dedicated to trees – Pius Notter
Garden plants of Japan – Gerard Taaffe
Masters book of bonsai – Japan bonsai association
Japanese exhibition book – not Kokufu
Visions of my soul – Robert Steven
Floral treasures of Japan(Satsuki azaleas) – Alexander Kennedy
Classic bonsai of Japan – Nippon bonsai association
Japanese gardening in small places – Tsuboniwa
The art of Japanese gardens – Herb Gustafson
Miniature living bonsai landscapes – Herb Gustafson
Bonsai, kusamono, suiseki – Willi Benz
Bonsai complete guide(paperback) – Paul Lesniewicz
Bonsai complete guide(hard cover) – Paul Lesniewicz
Bonsai in your home – Paul Lesniewicz
Indoor bonsai – Paul Lesniewicz
Creating bonsai landscapes – Su Chin Ee
The secret techniques of bonsai – Masakuni Kawasumi
Kokufu exhibition book number 49
Wisely handbook – RHS
Bonsai – John Ainsworth
Bonsai potters – Giphart and Arzooyan
Bonsai gallery – Bonsai today
Best of bonsai in Europe 3 – Ginkgo exhibition book
Best of bonsai in Europe 4 – Ginkgo exhibition book
Best of bonsai in Europe 5 – Ginkgo exhibition book
Suiseki – Felix Rivera
Path through the Japanese garden – Albright and Tindale
Suiseki viewing stones – Melba L Tucker
Pines Masters series – Bonsai today
Living art of bonsai – Amy Liang
The art of living sculpture – Jack Douthitt
Growing and displaying bonsai – Colin Lewis
The art of bonsai – Yoshimura and Halford
Miniature trees and landscapes – Yoshimura and Halford
(Signed by Yoshimura)
The Japanese art of stone appreciation – Covello and Yoshimura
(Signed by Yoshimura)
The bonsai year book – Paul Goff
The needle juniper, Juniperus Rigida – Working bonsai
Satsuki azaleas – Robert Z Callaham
Bonsai – Susan M. Bachenheimer Resnick

The Resurrection…Part One…..

19 July 2025 at 15:37

At some point in your bonsai life you will lose a tree. If you have been doing bonsai seriously for any length of time then sadly you will have already experienced this, and more than likely, more than once.

Sometimes it’s down to you! You did too much work, you expected too much, you didn’t give the tree time to recover. Maybe you neglected the tree or got something wrong.

Because we are dealing with a living thing sometimes it’s down to circumstances beyond your control. Like any living entity unfortunately trees can just die! It could be attributable to pests and diseases or it could be extreme weather conditions.

Fortunately, the more experienced we become, the more diligent we are, the less likely we are to encounter this sad demise. When I look at my students and think of the large number of trees we actually have as a group it is very rare that we lose a tree.

This was a Taxus belonging to a client. This must have been a natural disaster because my client has an excellent collection of bonsai and takes great care of them.
A view from the rear where the former live section and vein are visible.
The deadwood is really spectacular and one feels the original live section did not really do the tree justice.
When I remove the tree from the pot I get a clue as to what probably caused the trees demise. A previous owner had used a full sheet of mesh to cover the full base of the pot. DON’T ever be tempted to do this! Fine particles and roots find it easy to fill the holes in the mesh and impair drainage which can then lead to roots rotting in a compost which is now almost permanently wet. Always cut small pieces of mesh just big enough to cover each drainage hole.
The tree removed from the pot.
The deadwood removed from the dead tree.
The rear of the deadwood showing the remains of what was the live section.

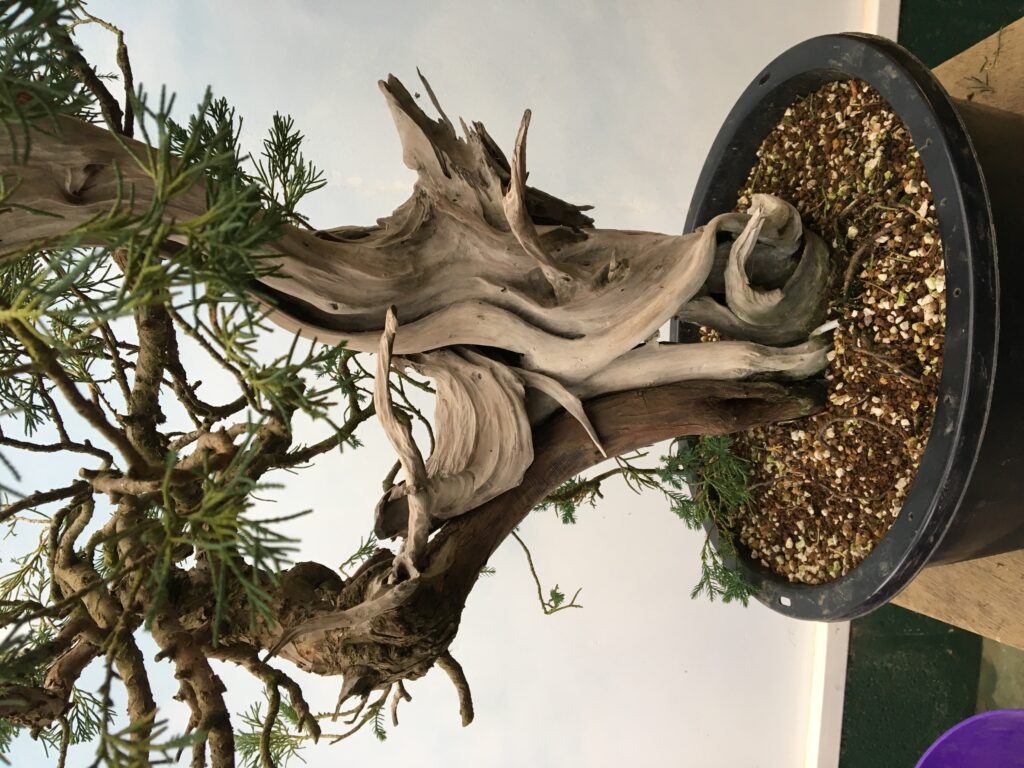
I had to do something with this amazing deadwood to try and salvage something for my client. I will show you what I did in Part Two.

The Resurrection…Part Two

24 July 2025 at 21:24
May 2022 – I had a quite substantial Ittogawa juniper which I thought I could introduce to the dead stump to make a convincing driftwood style bonsai. You may also find this style referred to as a Tanuki bonsai or Phoenix grafting.
I carved channels into the dead stump at points where I thought I would be able to place the Ittogawa juniper.
I treated the stump with lime sulphur to bleach it white and help preserve it.
I stripped the bark off the back of the juniper trunk that would be laid down inside the channels I had created earlier.
I used cable ties to fasten the juniper to the stump. I had prewired some of the branches in this area.
A substantial branch off the main trunk was also teased into a groove.
The pot is prepared correctly!
The tree and stump potted up. You can just see the live vein emerging from the soil to the left of the deadwood.
a branch selection can now be made and the remaining branches can then be wired.
After the initial styling and branch positioning. You can see the live vein emerging from the soil and visible higher up the deadwood.
Viewed from the side the green canopy is well balanced around the deadwood.
A nice snug fit in the groove. As the tree grows and the bark swells it will eventually fold over the edges of the groove and hug the deadwood to give that convincing live vein appearance admired on the old natural junipers you see in Japan.
March 2025 – The tree is growing well and filling out nicely.
After some thinning out and de-wiring.

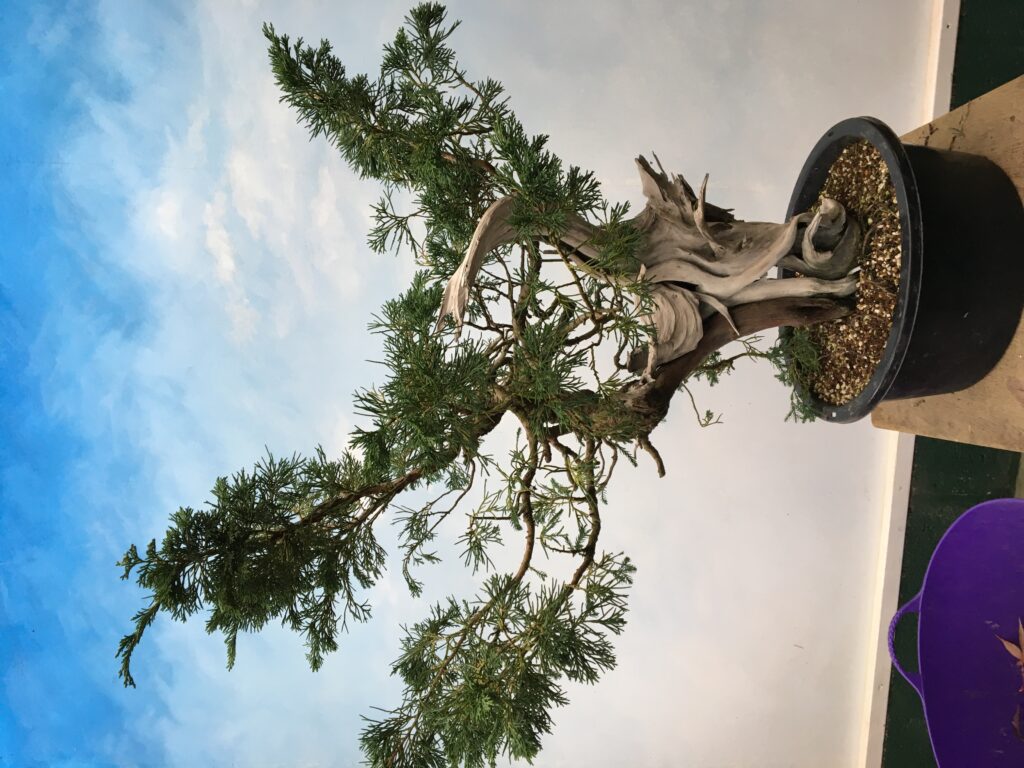
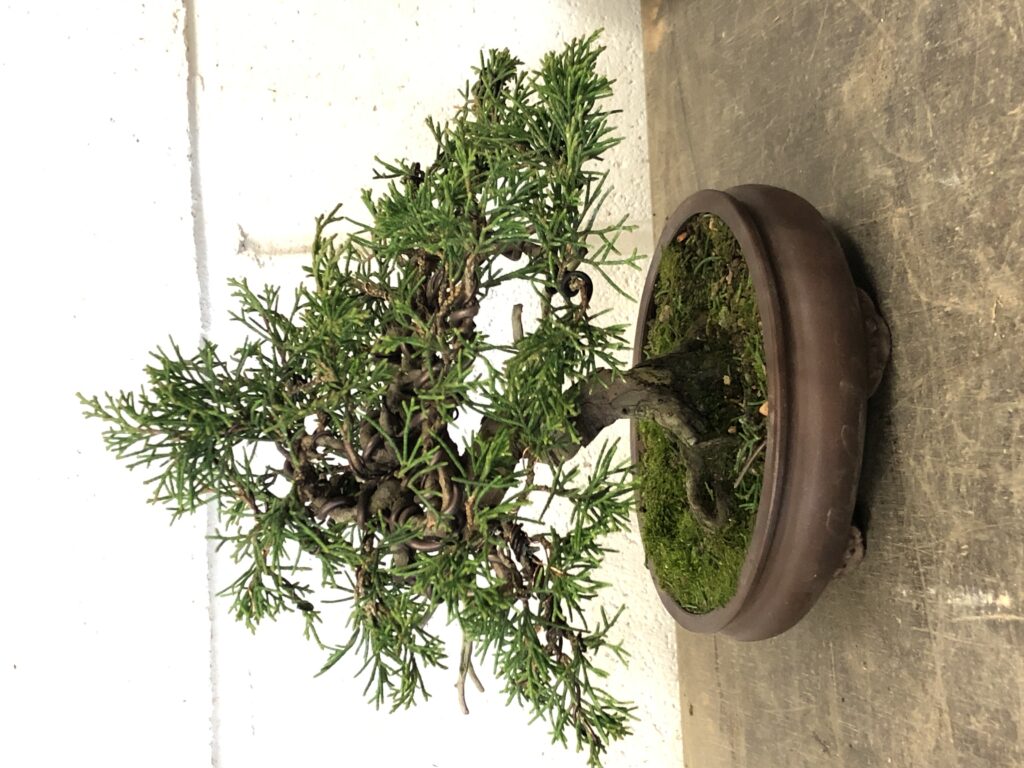
From the tragedy of the past comes hope for the future and the resurrection is well on its way. The tree now looks a much more cohesive unit than it did originally.

With the amazing deadwood and the desireable foliage of the Ittogawa juniper the hope is that this tree will eventually look better in its new state than it did originally……and then the resurrection will be truly complete!

Trees need time…..!!!

6 August 2025 at 11:50

I still get a buzz when I see the result of that initial styling whether it be a tree we have created in class or pictures on social media. To see the styled organised image appear out of a dense unkempt bush is still an exciting transformation for me.

This instant creation from seemingly nothing was what fired me up all those years ago and kept me coming back for more. I feel sure most bonsai enthusiasts will relate to this.

Once you start pursuing the hobby more seriously you soon begin to appreciate that this initial styling, as dramatic as it may be, is really just a start, a beginning! This has to be followed by the routines of watering, feeding and general care. When the time is right the necessary interventions have to be made to select, to prune, to create space, to guide the tree to his next level.

After that initial transformation of seemingly biblical proportions I am afraid the subsequent journey to anything approaching a reasonable specimen takes place at a much more sedate pace. Time is what you need to develop branches and twigs, create dense foliage clouds and allow the tree to put on a show of mature bark under a breathtaking canopy.

I suppose you can be sucked in to this sedate pace, maybe becoming a little despondent but the tree creeps up on you! One day carrying out your normal routines you may just catch the tree from a different angle or maybe you weren’t in such a hurry this time and actually looked over him. Suddenly it’s a WOW moment. You realise that after all this time the tree has finally started to arrive. The shape is good, branches are uniform and in the right place, you now have lots of twigs/leaves. You can see and appreciate the results of your work over the years.

This journey after the styling can be a source of frustration and disappointment for many enthusiasts. People can have a tree for 10 years or more and not see any significant change. You have to intervene at the right time and then do the right things. My intervention helps my students manage this precious time to achieve the desired result.

Most of my students are excellent bonsai technicians. They just need that intervention or guidance from me often only a couple of times a year just to keep them on the right path and to pull them back if they are going astray. Some students attend classes once a month, some come just a few times a year. Many students now have me go to their garden to go over more of their trees especially where these are larger and difficult to transport.

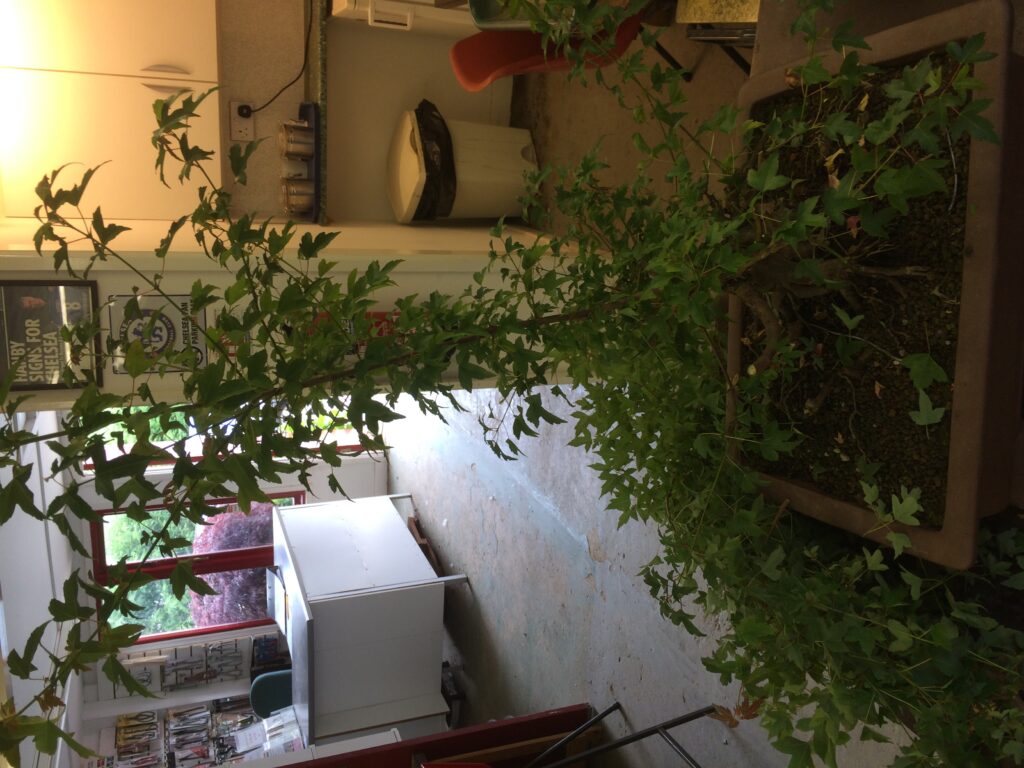
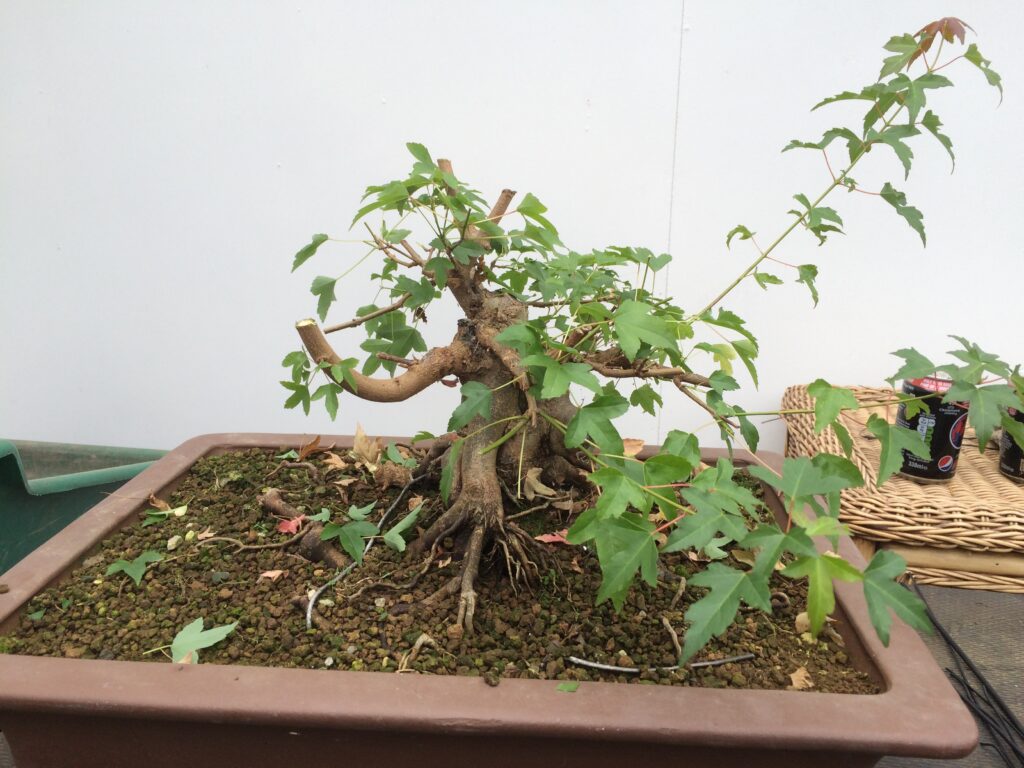
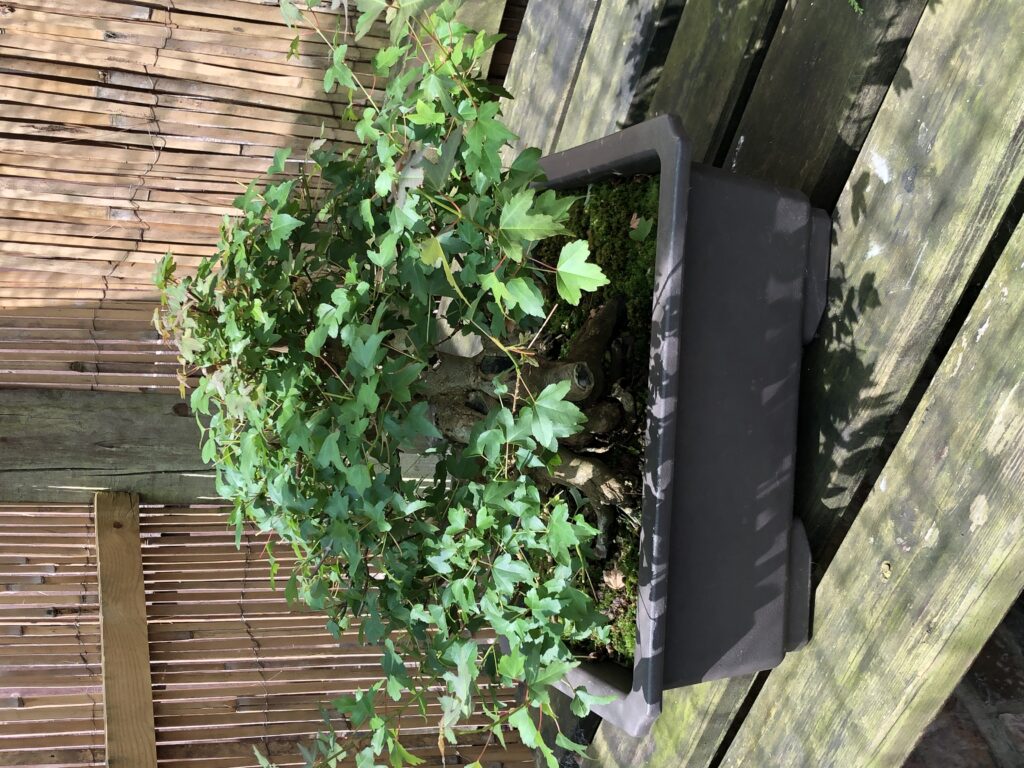
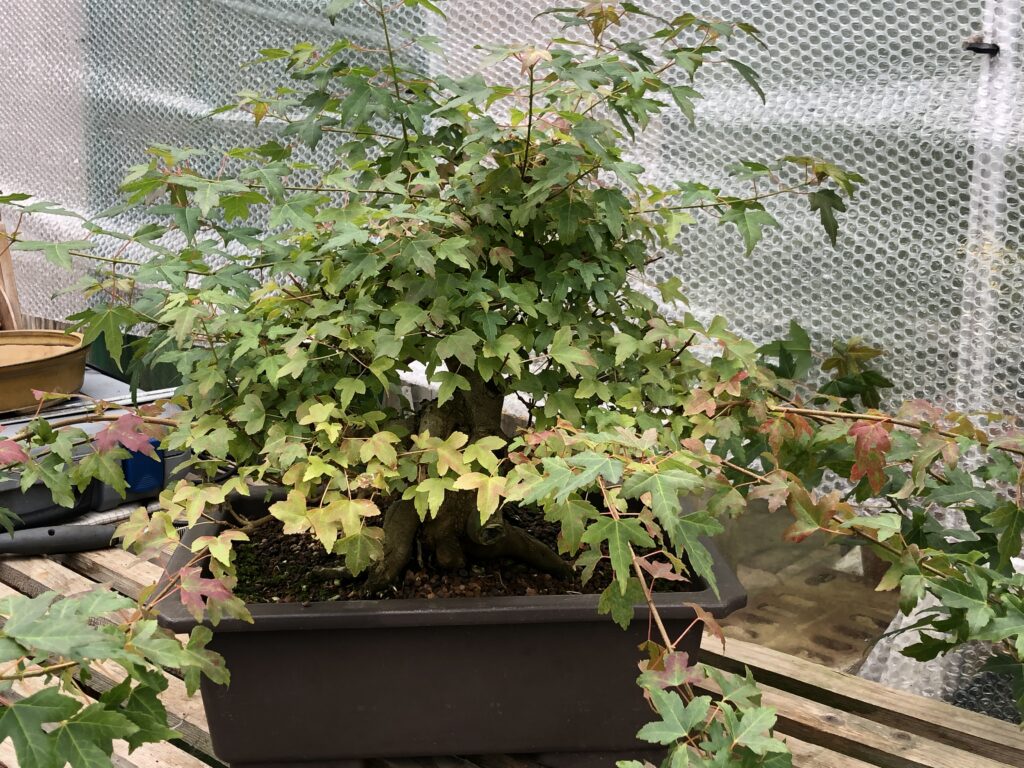
Below are pictures of some of my trees which have benefited from time…..years of care and attention but mostly just being left to grow. Leave them alone, let them grow, and then when the time is right you intervene….then you let them grow again. Some of these trees have left me now but hopefully the new owners can take them to their next level. After all the time I put in to them it was like parting with my children.

Enjoy the euphoria of the initial styling, marvel at the dramatic change, applaud the artist…….just like I did (and still do!)…..but then appreciate that this is just a start, a new beginning…….now the real work begins and its time to create your tree!


Enforced styling after severe frost damage.

A conifer with aspirations…..to be a bonsai…..

12 August 2025 at 12:40
November 2013 – At this point in time Alan was relatively new to bonsai and turned up to a styling class with this pyramid garden juniper. I explained why it was not a good subject for bonsai due to its natural growth habit but then it became a challenge…..what could I do with it?
I removed some foliage….in fact most of it! ???? I would not normally recommend removing so much foliage on a juniper in a single session like this. I suppose we were desperately trying to be creative.
The finished tree after our first styling session.I must admit I was amazed at the time how we managed to achieve this. The result was very plausible.
September 2016 – The tree had bounced back remarkably. It was really strong and vigorous.
So naturally we had to thin out again. It is gaining more stature but still wants to return to its pyramidal shape.
September 2022 – It is a real credit to Alan how well he looks after his trees and how well they grow as a result.
After another pruning session. The tree is looking really substantial since that first styling session and actually making a pleasing image.
August 2025 – Once again I have to go through the foliage and take out the strong upward growing tips to encourage him to make more horizontal outward growth on the branches and not revert to his original pyramid shape.
The resulting canopy is more open and the inner structure is visible which is good for both health and appearance. The two lower branches are now out of proportion and we have discussed their possible removal, leaving deadwood jins in the first instance. The tree would also now benefit from another wiring session to further open out some of the branches.

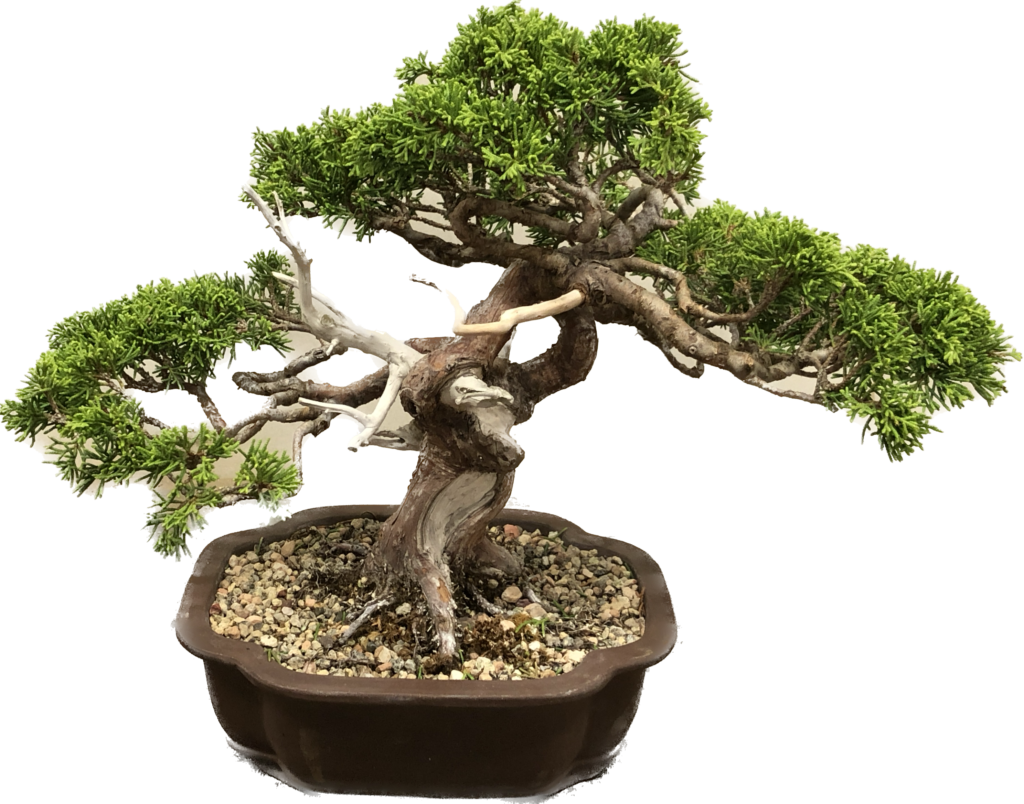
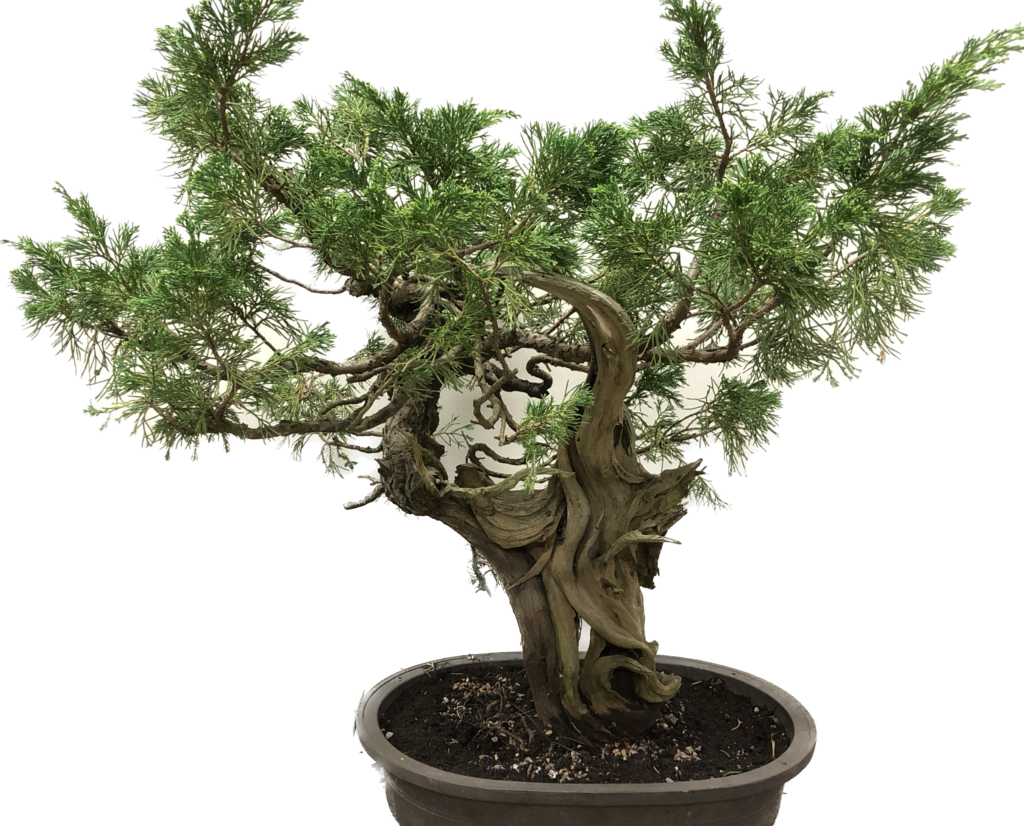
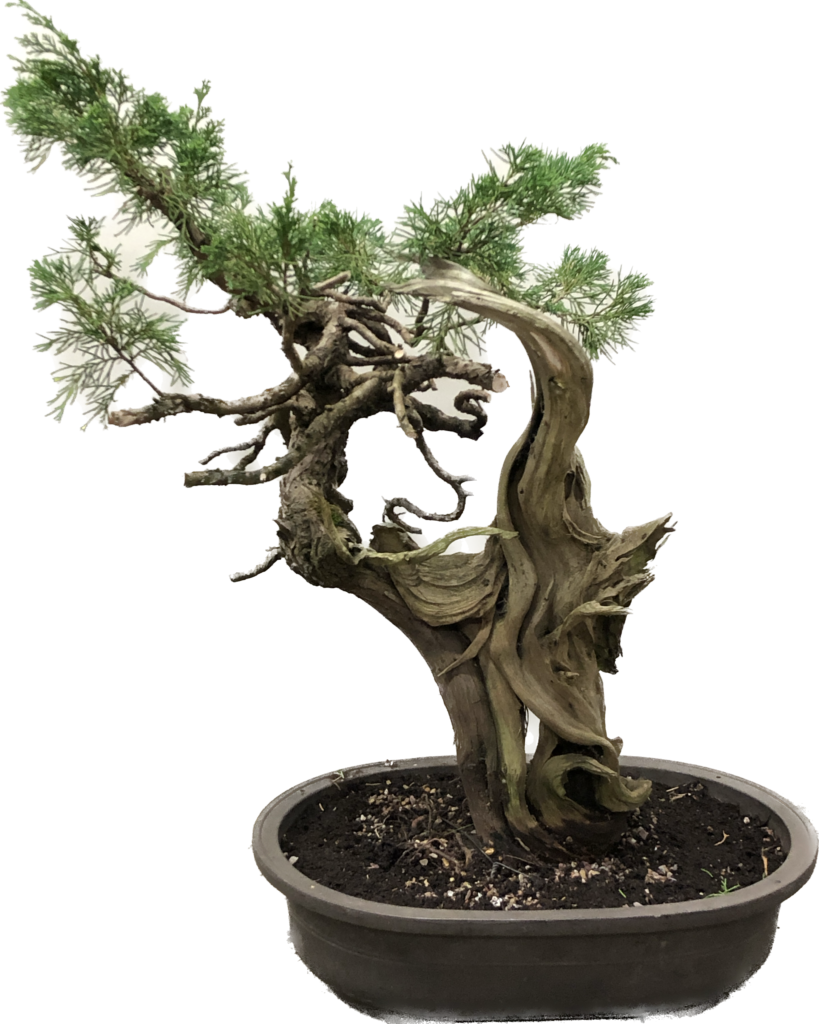
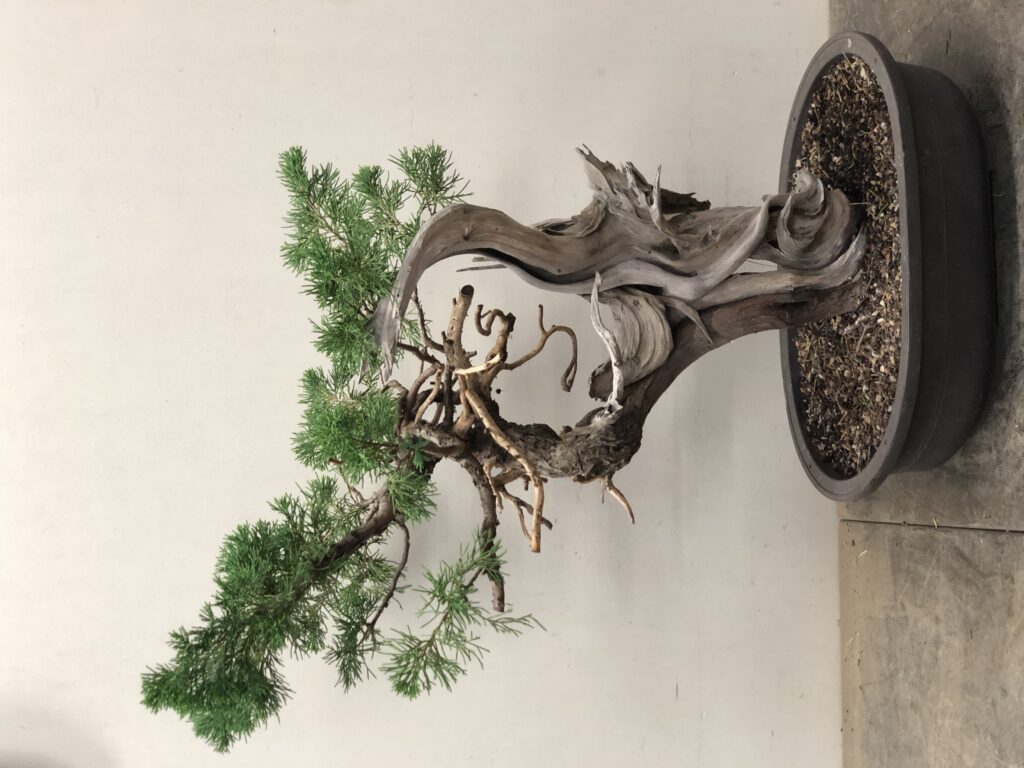
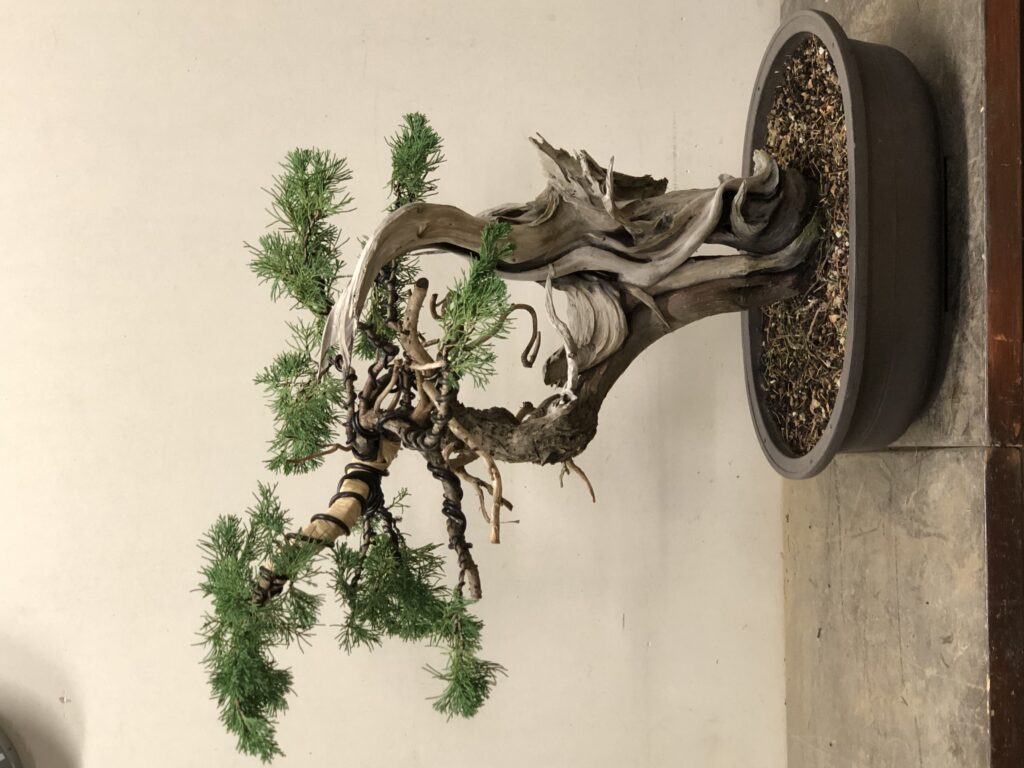
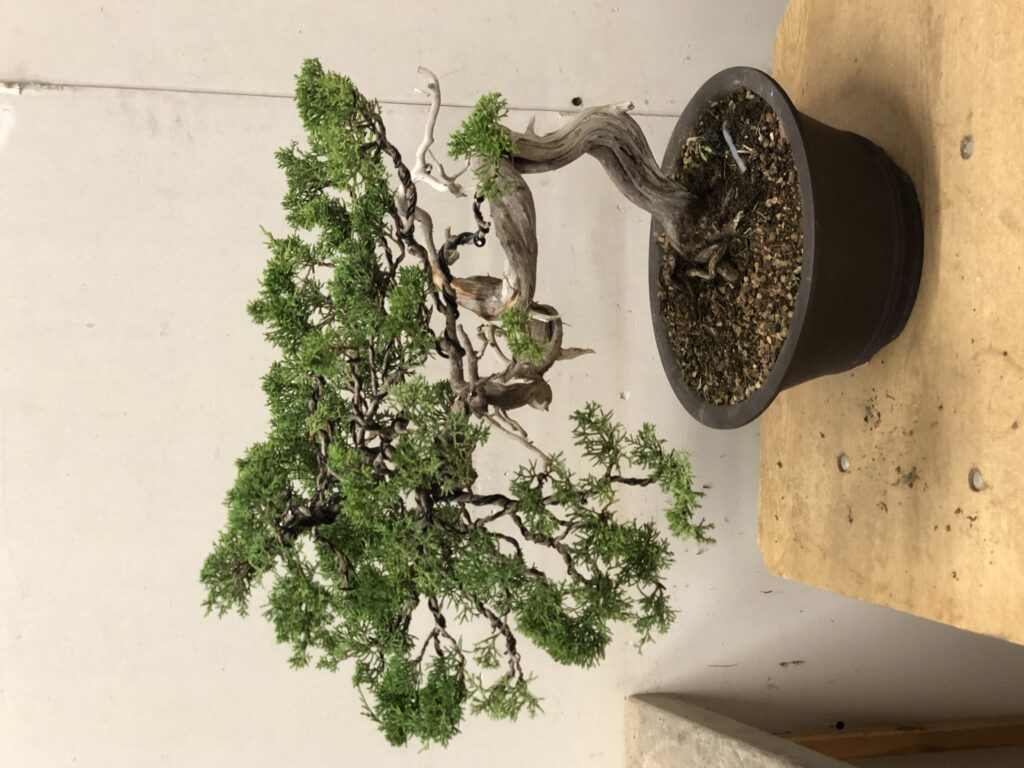
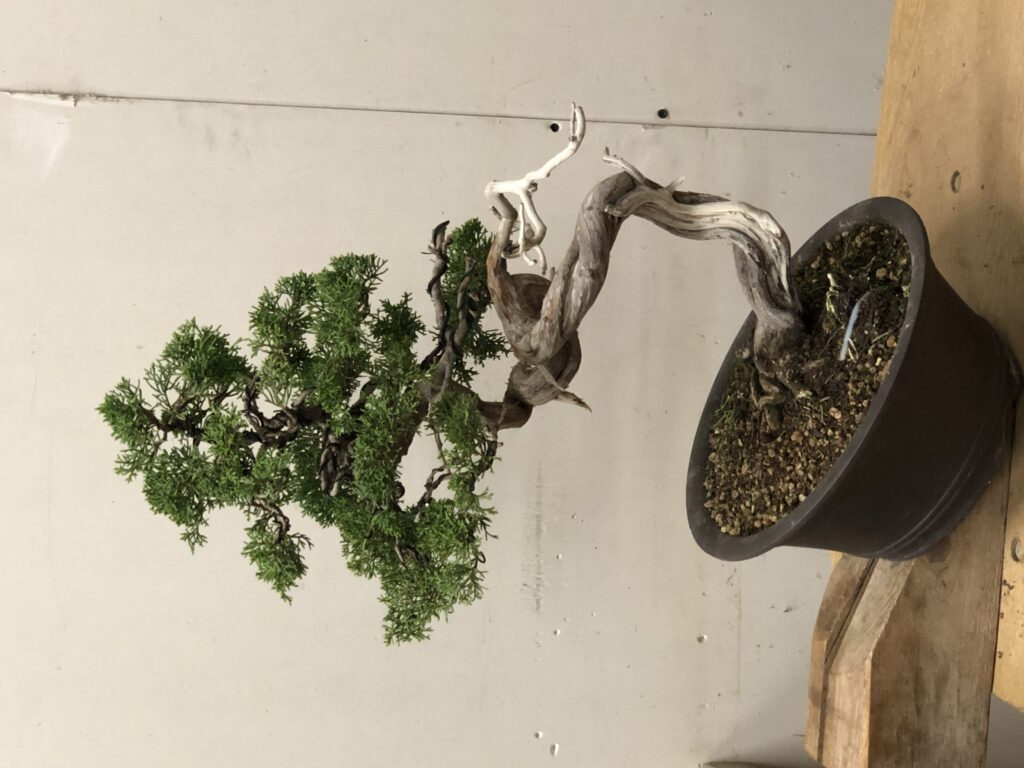
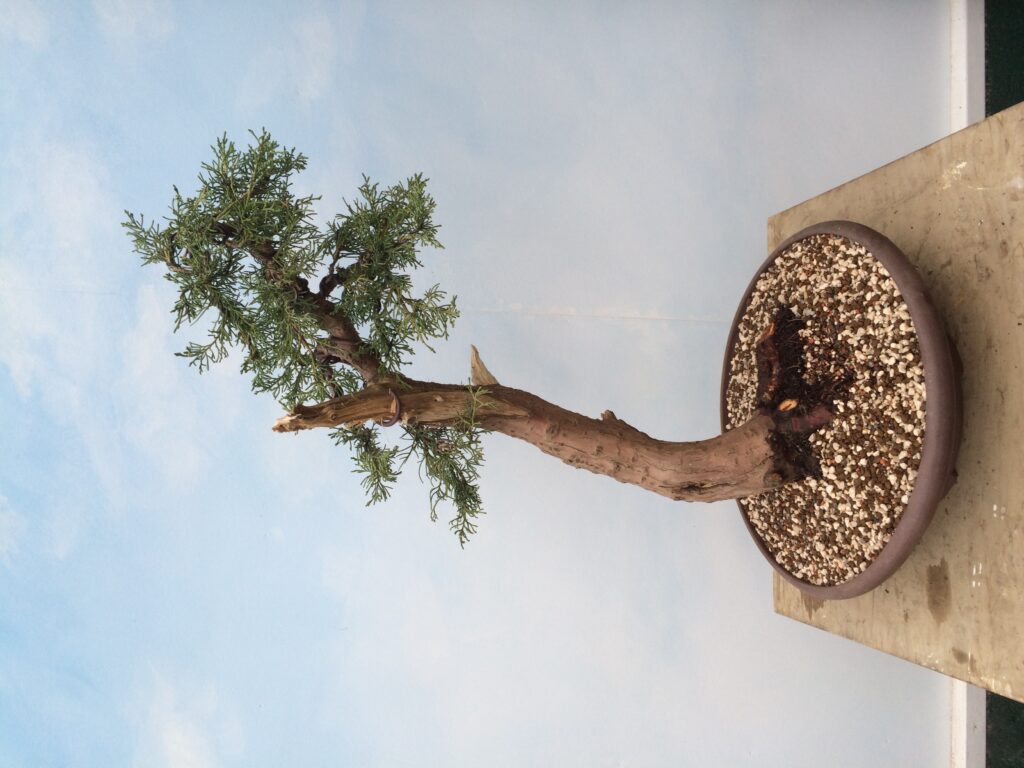
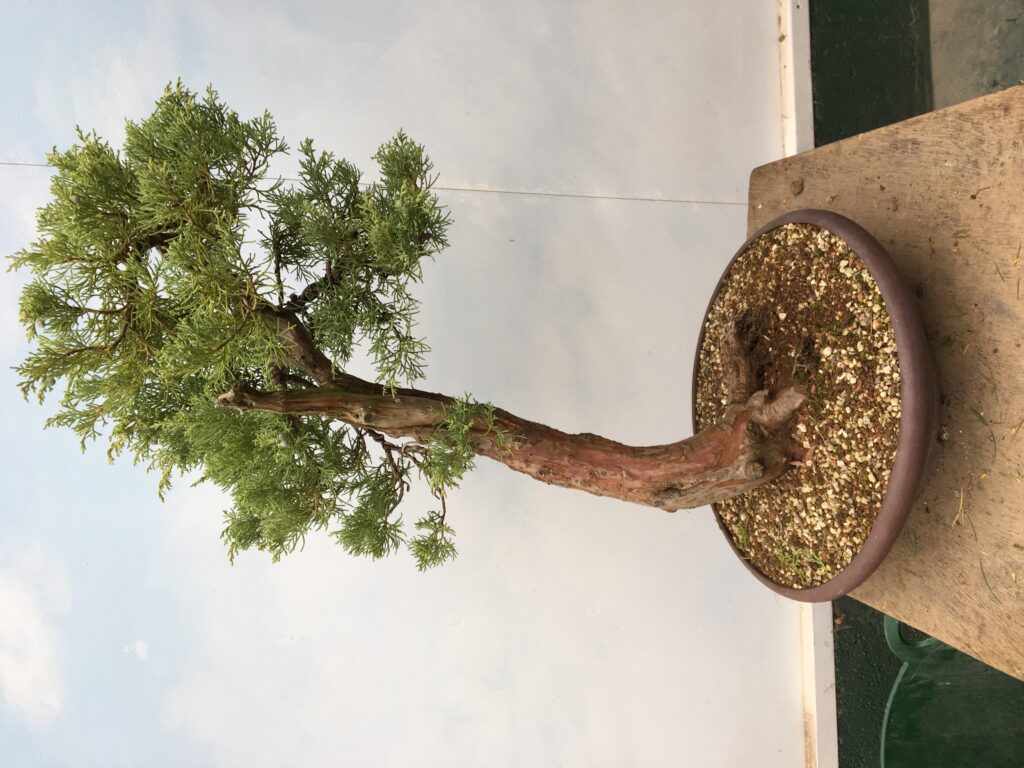
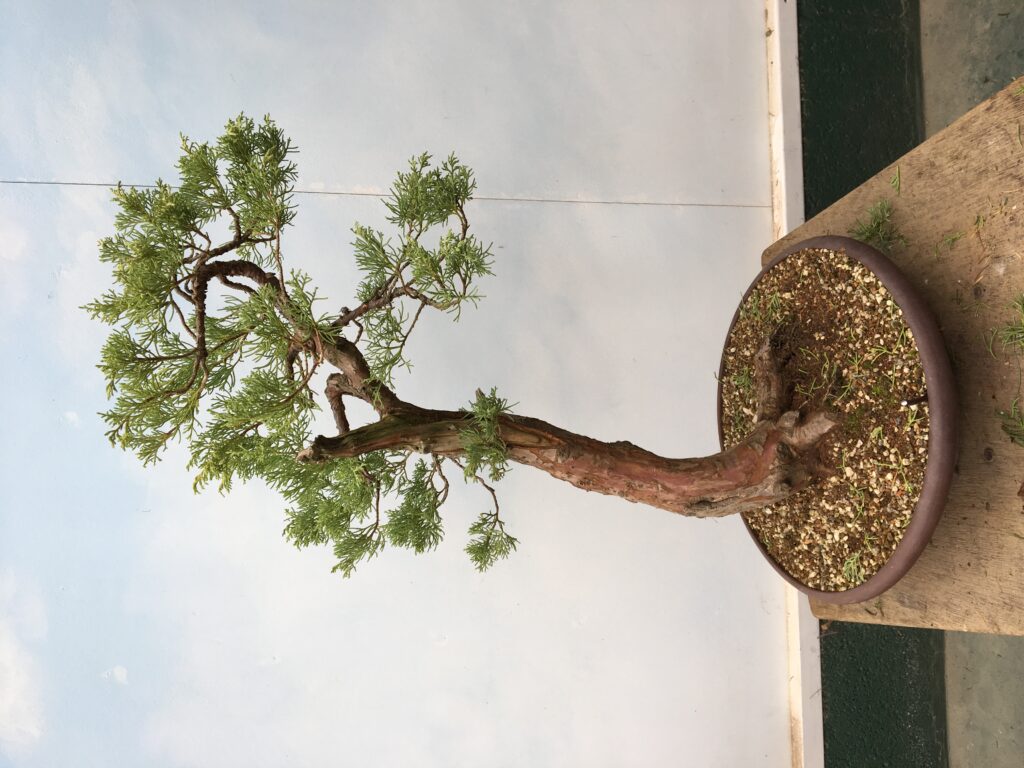
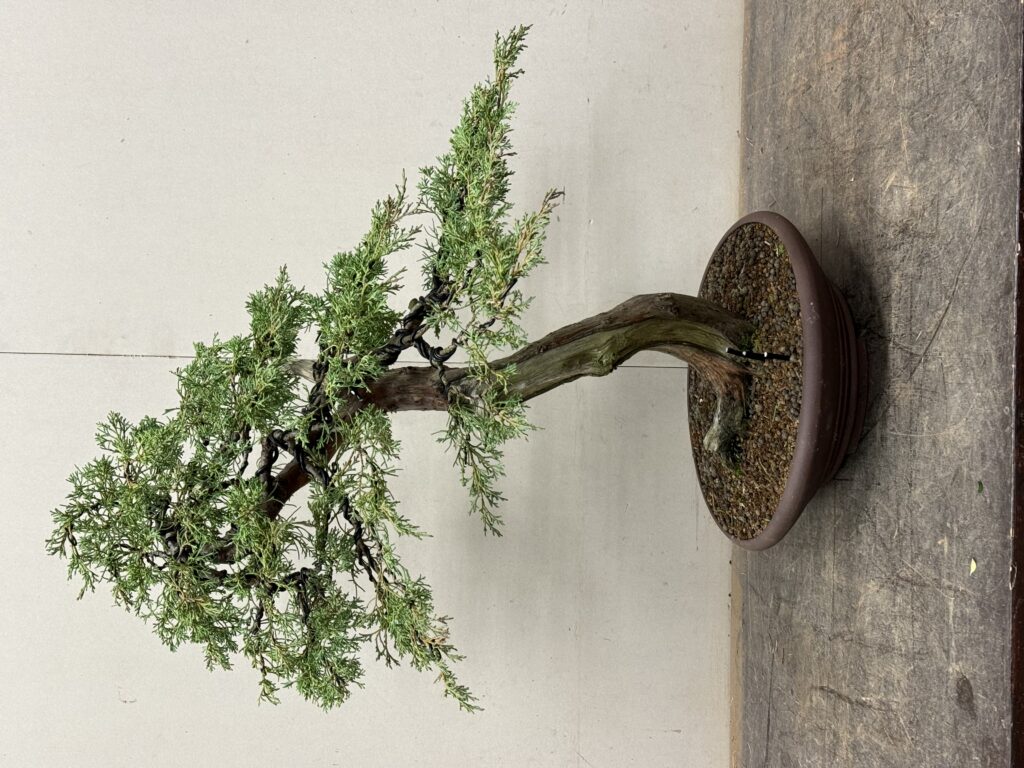
This has been and continues to be a really interesting project. We have created a tree like image out of seemingly impossible bonsai raw material. the tree has a strong resemblance to a lone Scots pine on a distant open landscape. It’s future may well be as a silhouette type bonsai without the detailed wire design normally associated with juniper bonsai.

Once again time has helped us to create a remarkable transformation. A conifer that nobody would ever consider as being suitable for creating a bonsai but maybe this tree has aspirations to prove us all wrong…..

“Time” for Diane’s Scots Pine forest…..

27 August 2025 at 15:14
2007 – This was when I first encountered both Diane and her forest. She confessed she had no idea what she was doing and yet she had managed to create this small forest from small seedlings.
This picture dates from around 2009/10. With positive signs of new growth.
October 2012 – Despite the confines of the shallow pot the group is beginning to show a nice more rounded image.
February 2013 – The roots are pruned and the tree is repotted.
The tree is now back in its pot with some fresh compost.
September 2014 – Eighteen months after the repot and the trees has responded well with new refined growth and a more mature image.
October 2016 – Many bonsai hobbyists struggle with pines in their early years. It is often one of the last trees they get to grips with and yet here Diane is producing a convincing dense Scots pine image in a very small scale.
October 2016 – The tree after pruning during one of my visits.
March 2017 – The tree is rewarded for its growth and development with a nice new larger pot. The shallow depth and planting to one side enhances the feeling of a natural landscape.
April 2019 – Candles are extending and how well this tree looks compared with what Diane started with.
March 2020 – The tree continues to go from strength to strength in terms of health, vigour and refinement. A complete wiring of the branches would produce an amazing image.

Often we use Juniper material to create the image of a pine forest we might have seen during a road trip. To recreate that image using genuine Scots pine trees and in this size is a quite remarkable achievement of which Diane can be truly proud. I am happy to have played my part in guiding her along the way but once again the biggest contributor is simply “time”!

❌